

Industrial Scientific MX4, 17153953-1 User Manual
MX4 External Battery Charger Adaptor User Guide
Part Number: 17153953-1
Warnings and Cautionary Statements
Hardware Overview
Failure to perform certain procedures or note certain conditions may
impair the performance of this product. For maximum safety and
optimal performance, please read and follow the procedures and
conditions listed below.
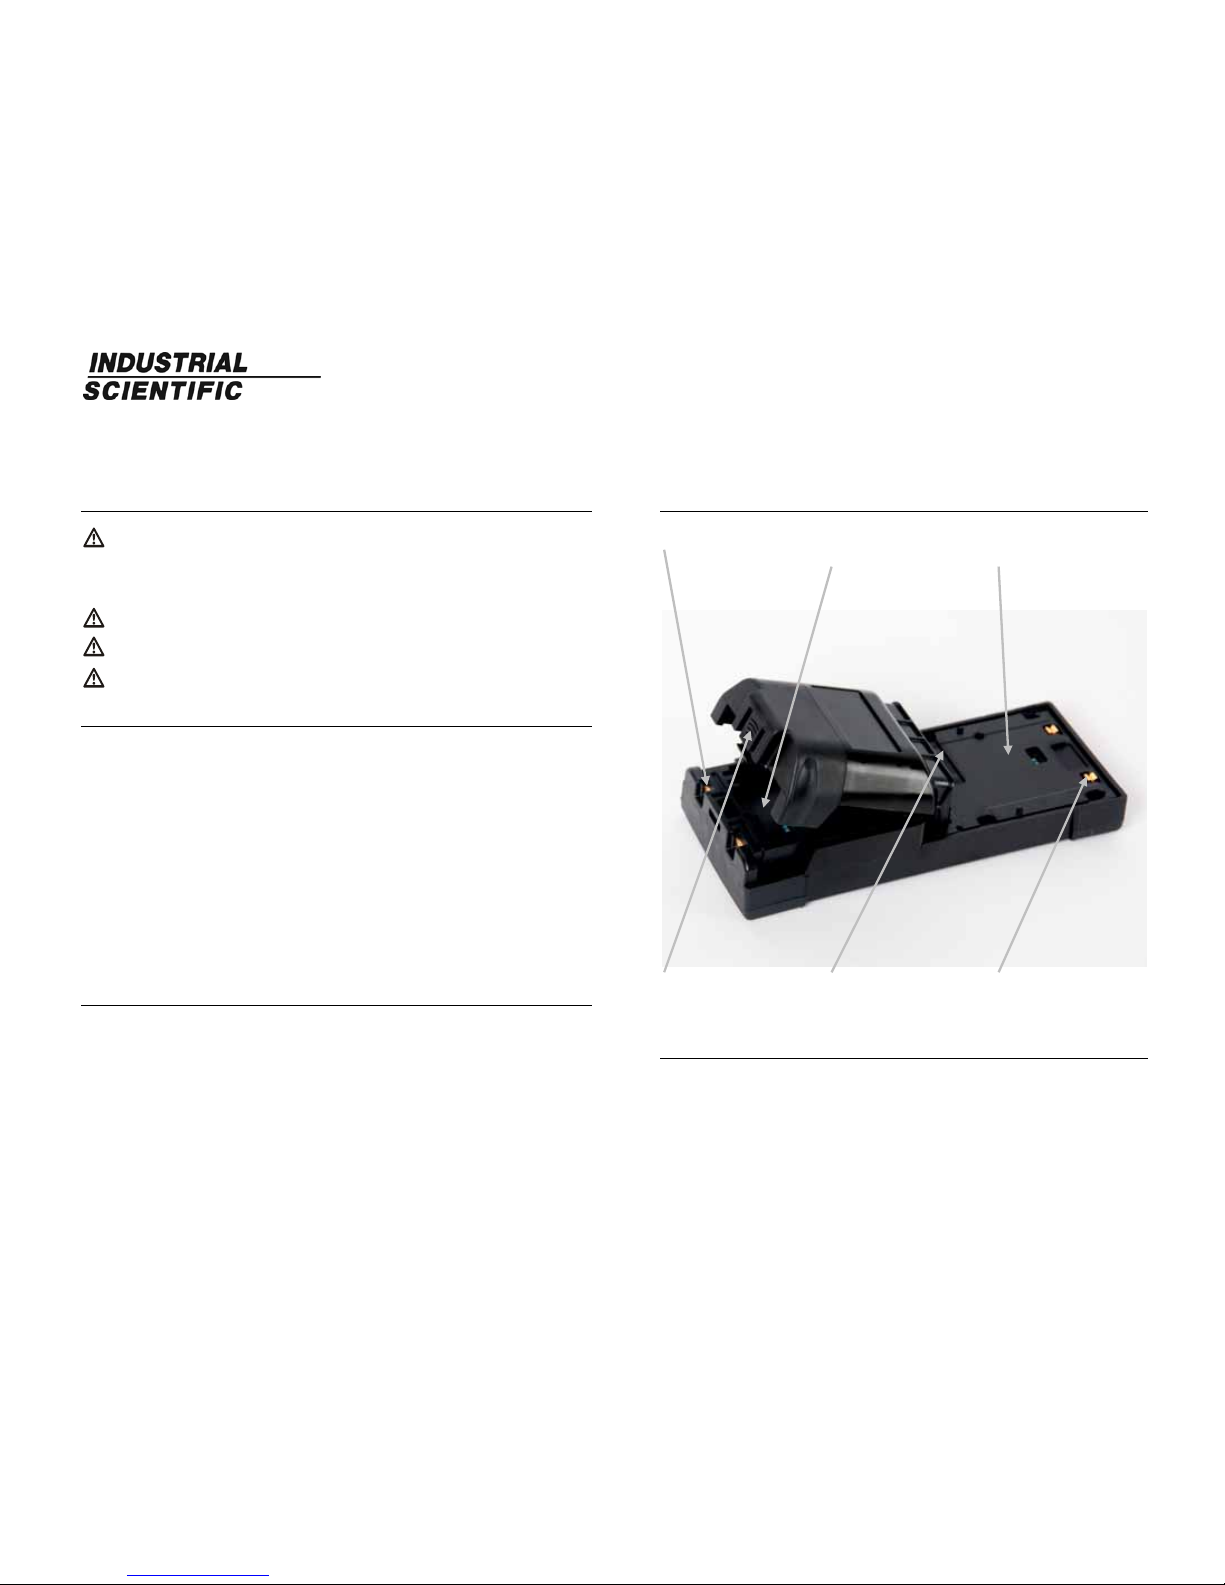
Charging contacts Extended range battery
cradle
Li-ion battery pack
charging surface
Read all instructions before using the product.
Do not touch battery contacts.
Use in an area known to be nonhazardous.
Capabilities and Compatibilities
The MX4 External Battery Charger Adaptor can charge the MX4 Li-ion battery
pack* or Li-ion extended range battery pack*.
The charger adaptor is compatible with the following MX4 charger products*;
Single-unit Charger
Single-unit Charger/Datalink
Single-unit Automotive Charger, 12VDC, with Plug
Single-unit Truck-mount Charger, 12VDC, with Plug
Single-unit Truck-Mount Charger, 12VDC, Hard Wired
6-Unit Charger
*Not included with the charger adaptor.
Supplies Checklist
Cradle latch Battery holder Charging contacts
MX4 Li-ion battery pack (not included) or MX4 Li-ion extended range battery pack
(not included)
Charger (not included; Single-unit Charger shown)
Charger adaptor
Instructions for Use
See next page.
MX4 External Battery Charger Adaptor User Guide (page 2 of 2)
Industrial Scientific Corporation
Corporate Headquarters
1001 Oakdale Road / Oakdale, PA 15071-1500 / USA / Phone: +1 412-788-4353 / 1-800-DETECTS (338-3287) / e-mail: info@indsci.com / w eb: www.indsci.com
(C) Copyright 2011, Indsturial Scientific Corporateion, All Rights Reserved.
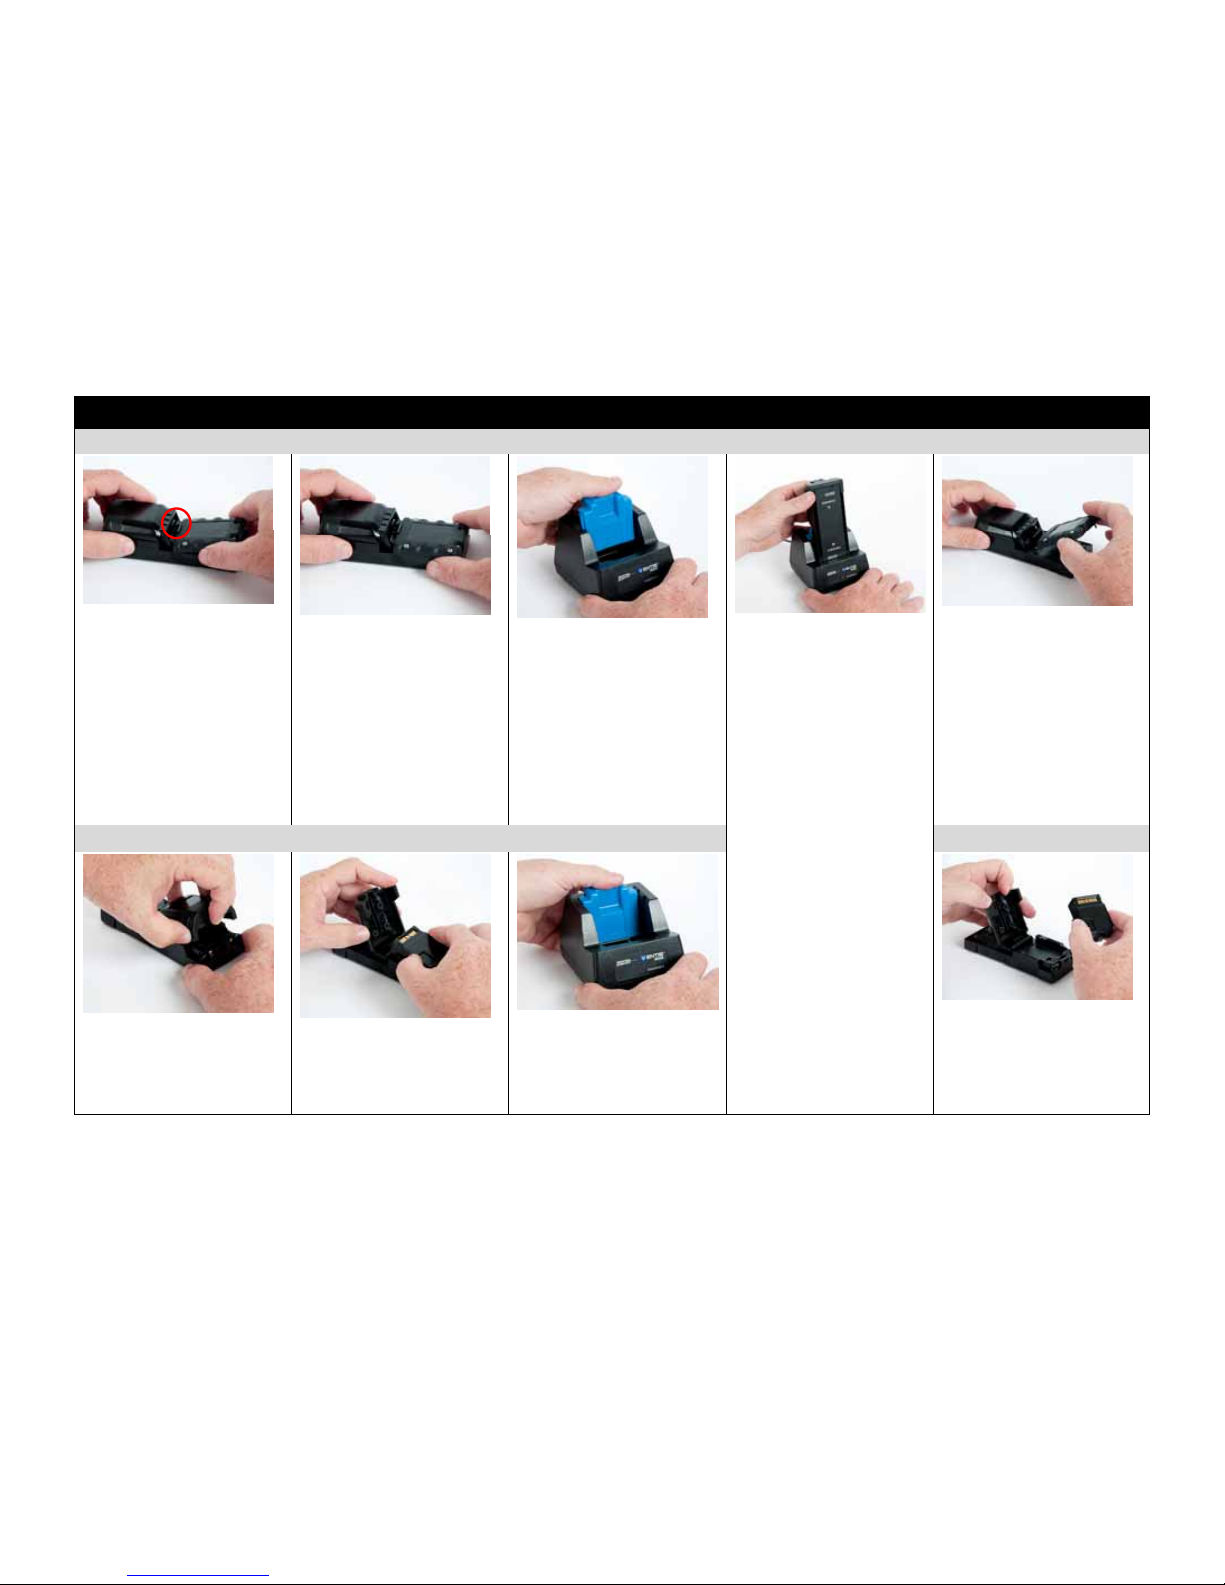
Install Charge Remove
Battery Pack
Step 1. Place the battery pack
onto the charging surface at the
angle shown (approximately 30
degrees).
Wedge the contactless edge
of the battery pack into the
adaptor's battery holder.
Align the charging contacts on the
battery pack with those on the
adaptor.
Step 2. Press down on the battery
pack to secure the battery to the
charging surface; a click will sound.
The battery pack's charging
contacts are visible at the
bottom of the adaptor.
Do NOT tighten the battery pack's
captive screws.
Step 3. Place the charger's insert
into the charger's front slot.
Step 5. Lift the battery bottom at
the angle shown (approximately 30
degrees); remove the battery from
the adaptor. Set aside the charger
adaptor for future use.
Step 4. & Step 4 (ER). Place the
charger adaptor into the charger
and ensure the following:
The adaptor's faceplate
faces the user.
The battery's contacts align
with the charger's contacts.
A blinking green LED on the
adaptor indicates the battery
is charging. NOTE: If the
green LED is solid, the
battery pack may not be
touching all of the contacts;
remove and reattach the
battery pack.
A solid green LED indicates the
battery is fully charged. Lift the
adaptor and remove it from the
charger.
Extended Range (ER) Battery Pack
Step 1 (ER). If a battery pack is
attached to the adaptor, remove it
(see step 5 above). Press the
cradle latch. Lift to open the
extended range battery cradle.
Step 2 (ER). Place the battery into
the charging cradle, circuitry side
facing down.
Close the cradle lid and latch it
shut; a click will sound.
Step 3 (ER). Place the charger's
insert into the charger's back slot.
Step 5 (ER). Unlatch and lift the
cradle lid; remove the battery.
Close the cradle lid; set aside the
charger adaptor for future use.
 Loading...