

Indus Technologies IDEX 400 Installation & Operation Manual

indus technologies
IDEX™ 400
Hard Drive Switch
Installation & Operation
For SATA Drives

IDEX 400 SATA - Installation & Operation
indus technologies
Table of ConTenTs
Kit Contents ........................................................................................................................................................................................................ 3
Operation
General ............................................................................................................................................................................................................... 4
Front Panel Indicators .....................................................................................................................................................................................4
System Planning
Compatibility ..................................................................................................................................................................................................... 5
Physical Layout .................................................................................................................................................................................................5
Drive Functions ................................................................................................................................................................................................ 5
Installation Instructions
1. Set IDEX 400 Jumpers ........................................................................................................................................................................ 6
2. Disconnect all Power to Computer ..............................................................................................................................................7
3. Disconnect Existing Hard Drive(s) ................................................................................................................................................... 7
4. Mark Cables ........................................................................................................................................................................................... 7
5. Install Second Hard Drive .................................................................................................................................................................. 7
6. – Optional – Install Master Selector Cable .................................................................................................................................... 7
7. Connect SATA Data Cables to Hard Drives ................................................................................................................................ 8
8. Connect Power Cables to Hard Drives ........................................................................................................................................ 8
9. Connect Power Cables to Drive Selector .................................................................................................................................... 8
10. Install Drive Selector ........................................................................................................................................................................... 9
11. Verify the Operation ............................................................................................................................................................................ 9
Terminology .......................................................................................................................................................................................................10
Warranty .............................................................................................................................................................................................................11
Copyright ............................................................................................................................................................................................................11
page 2
indus technologies
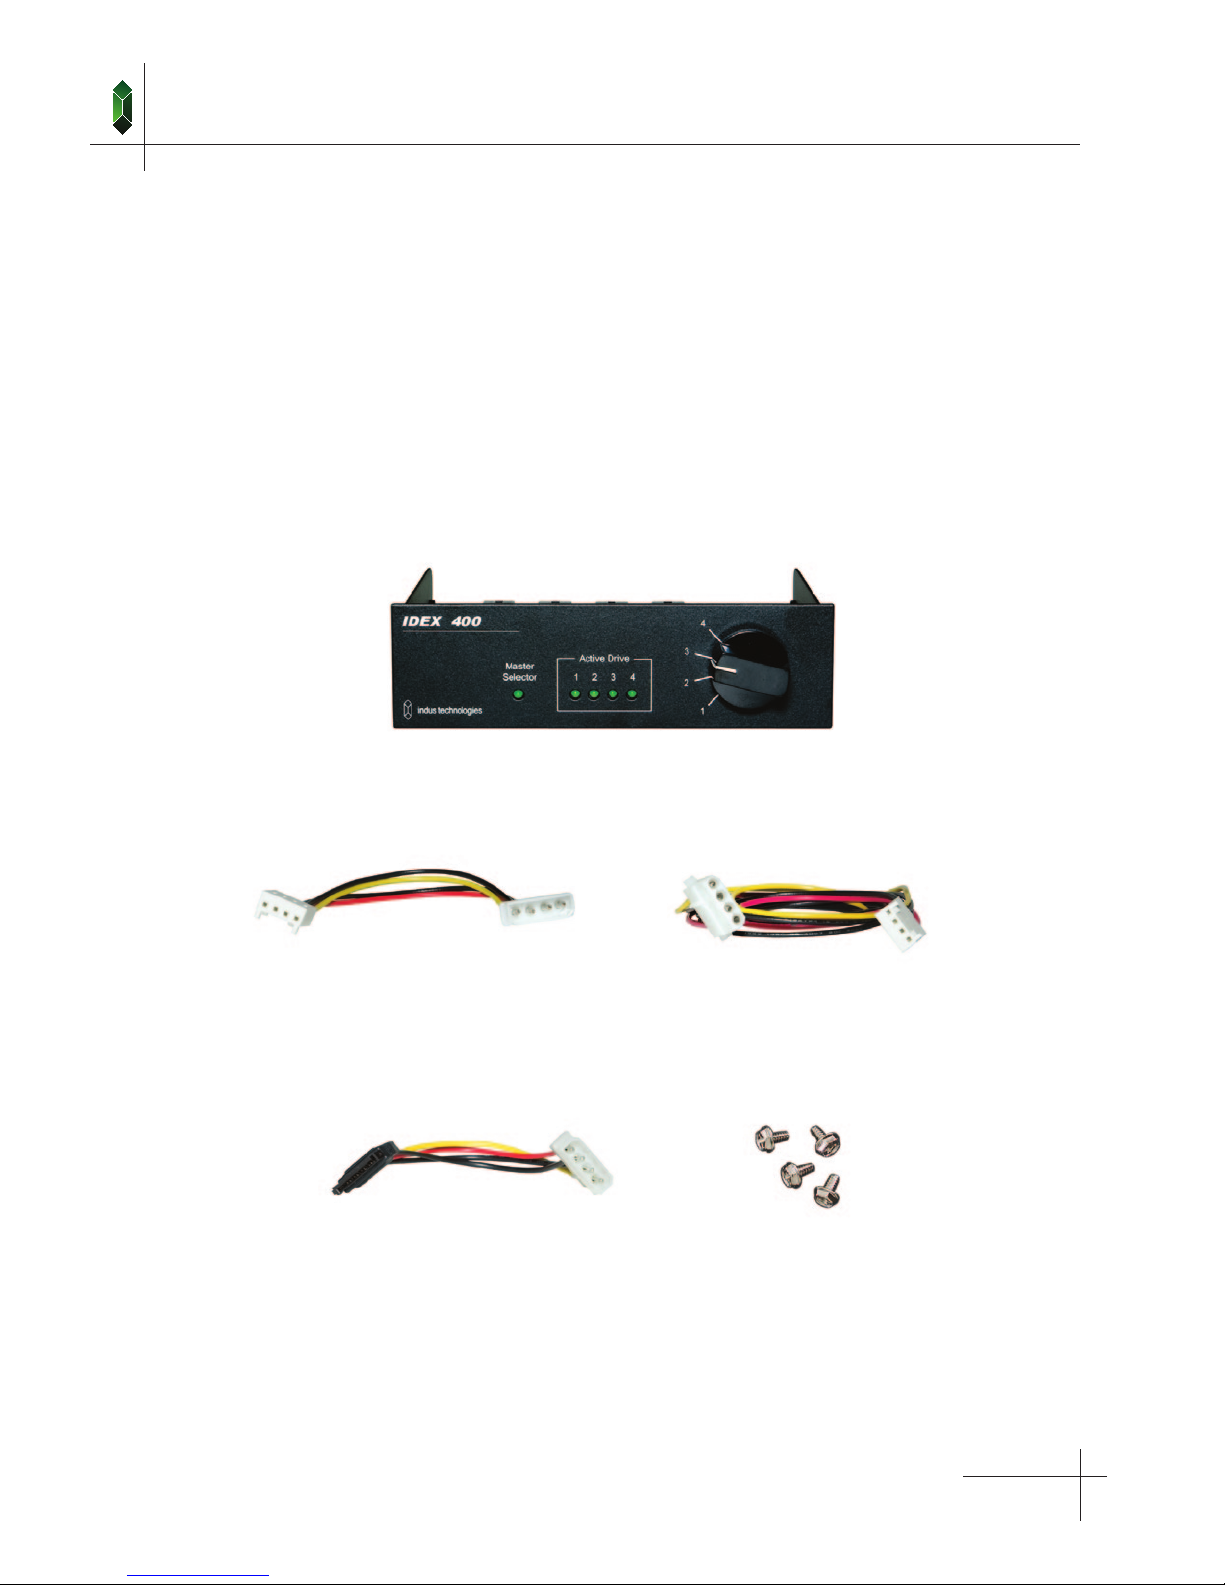
KiT ConTenTs
Qty. - Part
1 - IDEX 400 Hard Drive Selector
1 - IDEX 400 Power Cable
4 - Hard Drive Power Cables
4 - SATA Power Adaptor Cables
4 - Mounting Screws
IDEX 400 SATA - Installation & Operation
IDEX 400
IDEX Power Cable Hard Drive Power Cable
Mounting ScrewsSATA Power Adaptor Cable
page 3
IDEX 400 SATA - Installation & Operation
indus technologies
oPeraTion
General
The IDEX 400 drive selector activates the selected drive at the moment when the PC power is turned on. Once the power
is on any selection changes have no effect.
There are two modes of operation that determine how the active drive is selected:
Local: The local selector switch, on the front of the drive selector, selects the drive to activate
Master: A remote Master Selector switch sends a signal to one or more IDEX units and tells the electronics
which drive to select.
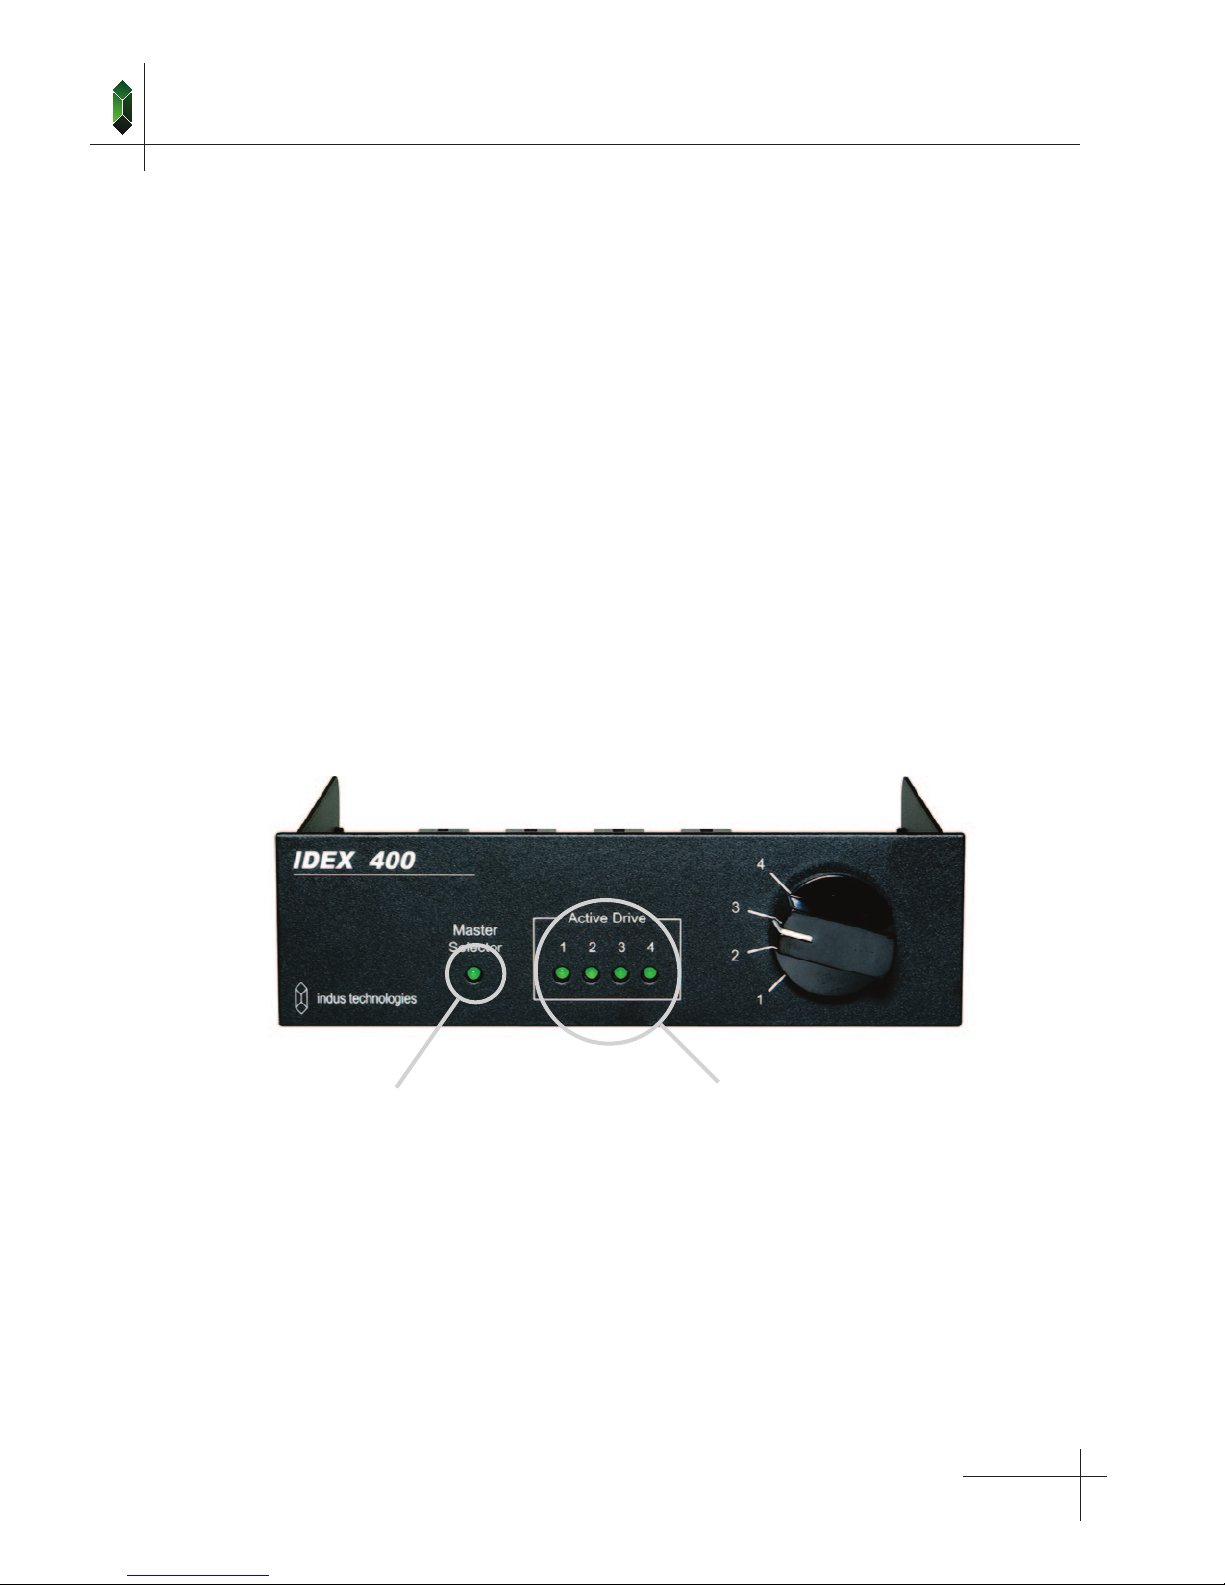
Front Panel Indicators
There are five LED lights on the face of the IDEX 400. One group of LED indicators on the front panel is labeled
“Active Drive”, and a separate LED indicator is called “Master”. Only one drive can be active at a time, so only one of
the four “Active Drive” indicators should be on.
The “Master” light will only be on when the IDEX unit is connected to a Master Selector.
Master Mode Indicator
Selected / Active Drive
page 4
 Loading...