

Individual Computers Indivision AGA MK2 4000D/CD32 Installation Manual
Indivision AGA MK2 4000D / CD32 installation
Dear customer,
thank you for purchasing a product from Individual Computers. We're sure that your new
flickerfixer will satisfy all your needs. However, we would like to emphasize that installing
the product in an Amiga 4000D or CD32 is not easy, and it requires some skills. Please
make sure that you have enough light at your desk!
Installing the flickerfixer should only be done by experienced persons. If you have never
opened your Amiga 4000D or CD32, you should get help from a technician.
Installation in an A4000 desktop:
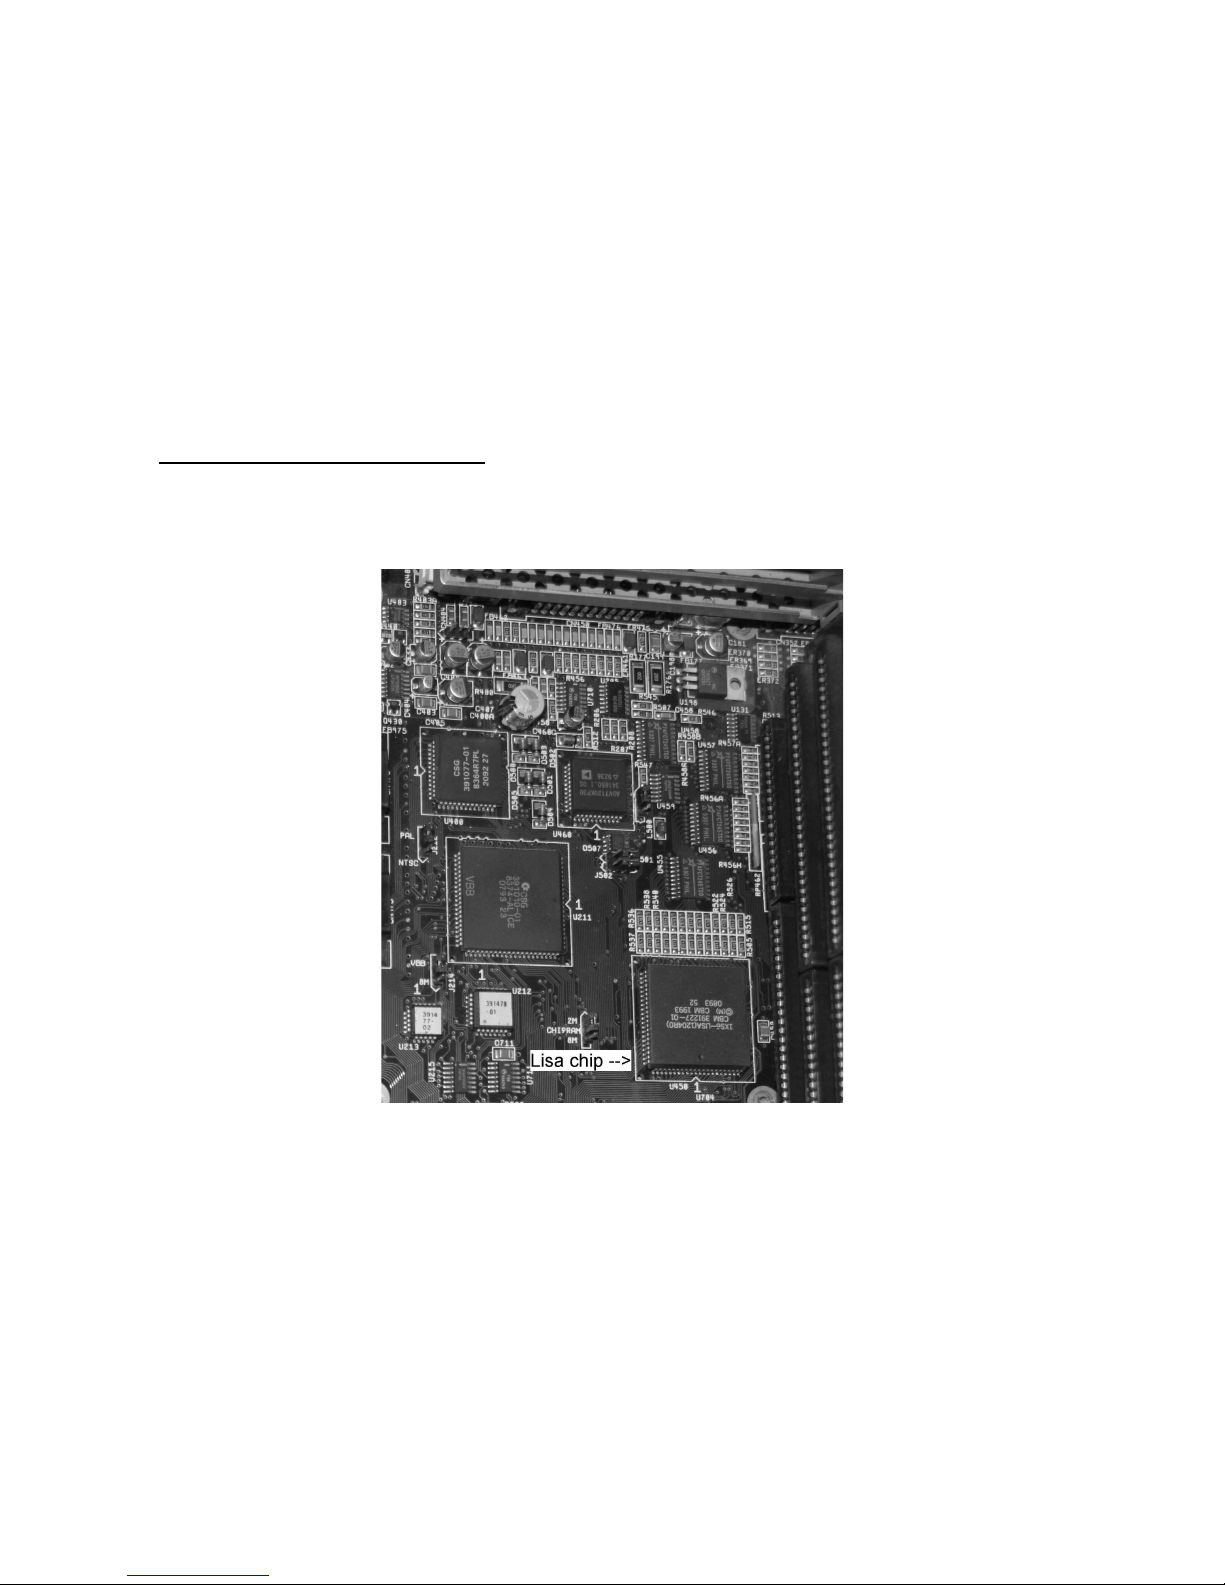
Open the computer and remove all Zorro cards to get access to the mainboard. The board
of your A4000D is now lying in front of you like this:
The picture above marks the Lisa chip, which is responsible for the video output of the
Amiga. The socket of Indivision AGA MK2 is placed over top of this chip. The connector for
the cable of Indivision AGA MK2 must face to the mouseports.
The computer must be placed on a stable, level surface. First, place the socket over the
Lisa chip, but do not push yet! Double-check that all pins line up properly. If the socket
should be tilted in any way, it might be destroyed by the pressure that must be applied.
The socket is in place if the board is level on the Lisa chip, but cannot be rotated any
more.
Your final step is to push the socket on the Lisa chip. You might need to push very hard,
but do not use any tools for this step! It is possible to apply the required pressure with
your thumbs.
You should feel the socket clicking on the chip. Now you can plug in the cable to the
connector of Indivision AGA MK2, and mount the DVI-adapter on the back of your
computer, for example to a metal bracket (not included).
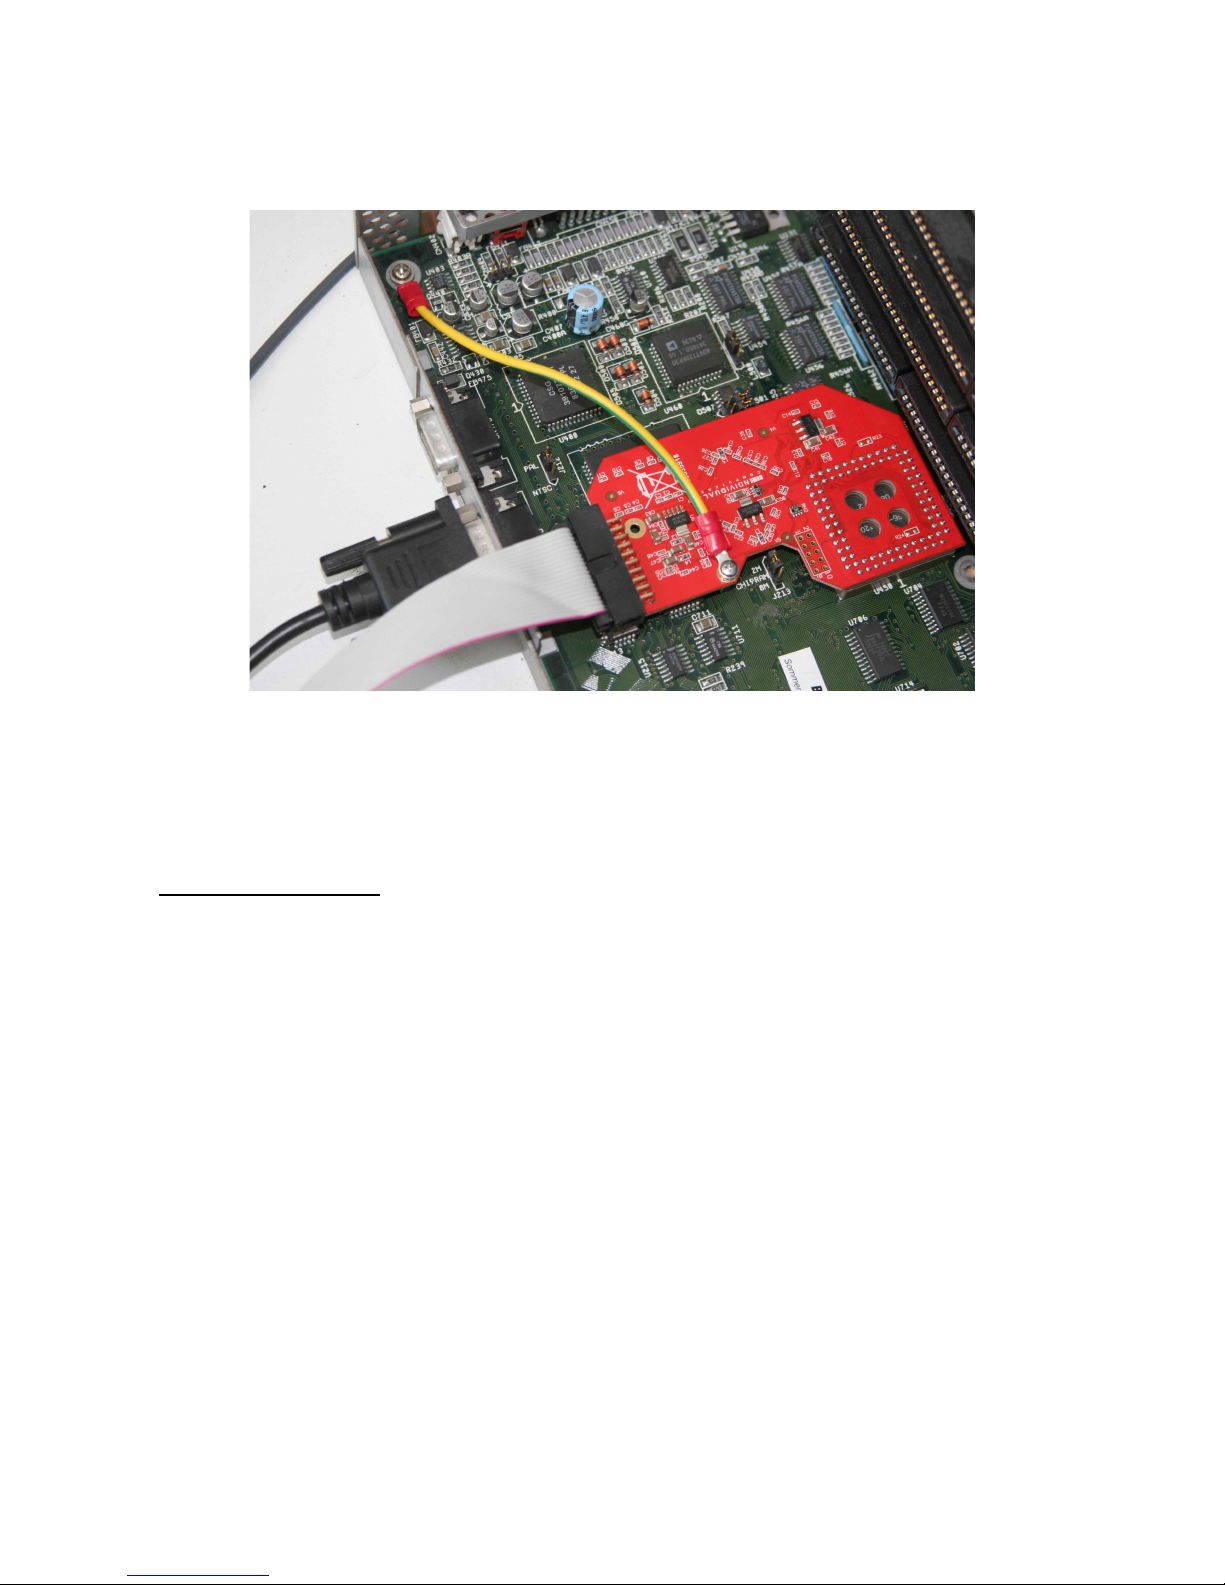
We recommend using the included grounding cable. If you connect the cable as shown in
the picture, please make sure that the washer has direct contact with the flickerfixer board.
Also, please make sure that the cable does not cause a short with nearby components.
Now you can put any Zorro cards back into the slots. For better ventilation, it's a good idea
to have a short board in the lower slot.
Installation in a CD32:
Open the CD32 and remove the two cable connections between the upper and the lower
half of the unit. Please pay special attention to the flat cable to the CD unit, don't just pull it
out of the connector, but loosen the connector first! The upper half of the white connector
where the cable is inserted must be pulled up, then the cable can be removed by using
minimal force. The following picture marks the Lisa chip, which is responsible for the video
output of the Amiga. The socket of Indivision AGA is placed over top of this chip. The
connector of Indivision AGA MK2 must face to the front of the unit, as shown in the picture.
The RF shield must be bent away in order to fit the cable, and the standoff must be moved
to a different location.
The CD32 must be placed on a stable, level surface. First, place the socket over the Lisa
chip, but do not push yet! Double-check that all pins line up properly. If the socket should
be tilted in any way, it might be destroyed by the pressure that must be applied. The
socket is in place if the board is level on the Lisa chip, but cannot be rotated any more.
Your final step is to push the socket on the Lisa chip. You might need to push very hard,
but do not use any tools for this step! It is possible to apply the required pressure with
your thumbs.
 Loading...