


I5ESHA U
Eesti
EE
Kasutusjuhised
PLIIT JA AHI
Sisukord
Kasutusjuhised,1
HOIATUSED,2
Seadme kirjeldus - ülevaade, 6
Seadme kirjeldus - kontrollpaneel, 5
Paigaldus, 16
Käivitamine ja kasutamine, 18
Toiduvalmistamise režiimid, 19
Keeduplaadi kasutamine, 20
Ettevaatusabinoud ja nouanded, 22
Hooldus ja korrashoid, 23
Lietuvių
LT
Valdymo instrukcijos
VIRYKLĖ IR ORKAITĖ
Turinys
Valdymo instrukcija, 1
ĮSPĖJIMAI, 2
Prietaiso aprašymas – apžvalga, 5
Prietaiso aprašymas – valdikliai, 6
Montavimas, 35
Pradžia ir naudojimas, 37
Gaminimo režimai, 39
Kaitlentės naudojimas, 42
Perspėjimai ir patarimai, 42
Priežiūra, 43
Pagalba, 43
Latviski
LV
Lietošanas instrukcija
PLĪTS UN CEPEŠKRĀSNS
Saturs
Lietošanas norādījumi, 1
BRĪDINĀJUMS, 2
Ierīces apraksts – vadības panelis, 5
Uzstādīšana, 25
Ieslēgšana un izmantošana, 27
Gatavošanas režīmi, 29
Plīts virsmas izmantošana, 28
Piesardzības pasākumi un padomi, 32
Tīrīšana un apkope, 33
Palīdzība, 33
Polski
PL
Instrukcje użytkowania
KUCHENKA I PIEKARNIK
Zawartość
Instrukcje użytkowania,1
UWAGA,2
Opis urządzenia - przegląd ogólny,6
Opis urządzenia - panel kontrolny,5
Instalacja,45
Uruchamianie i użytkowanie,47
Tryby gotowania,48
Korzystanie z płyty grzejnej,50
Uwagi dotyczące bezpieczeństwa i porady,51
Czyszczenie i konserwacja,52
Pomoc,52
LV
English
GB
Operating Instructions
COOKER AND OVEN
Contents
Operating Instructions,1
Description of the appliance-Overall view,6
Description of the appliance-Control Panel,5
Installation,7
Start-up and use,9
Cooking modes,10
Precautions and tips,13
Care and maintenance,14
Assistance,14
English
WARNING
,2
Ierīces apraksts – vispārējs pārskats, 6

WARNING: The appliance and its
accessible parts become hot during
use.
Care should be taken to avoid
touching heating elements.
Children less than 8 years of
age shall be kept away unless
continuously supervised.
This appliance can be used by
children aged from 8 years and
above and persons with reduced
physical, sensory or mental
capabilities or lack of experience
and knowledge if they have been
given supervision or instruction
concerning use of the appliance
in a safe way and understand the
hazards involved. Children shall not
play with the appliance. Cleaning
and user maintenance shall not
be made by children without
supervision.
WARNING: Unattended cooking on a
hob with fat or oil can be dangerous
and may result in fire.
NEVER try to extinguish a fire with
water, but switch off the appliance
and then cover flame e.g. with a lid
or a fire blanket.
WARNING: Danger of fire: do not
store items on the cooking surfaces.
Do not use harsh abrasive cleaners
or sharp metal scrapers to clean
the oven door glass since they can
scratch the surface, which may
result in shattering of the glass.
The internal surfaces of the
compartment (where present) may
become hot.
Never use steam cleaners or pressure
cleaners on the appliance.
Remove any liquid from
the lid before opening it.
Do not close the glass
cover (if present) when the gas burners or
electric hotplates are still hot.
WARNING: Ensure that the appliance is
switched off before replacing the lamp to
avoid the possibility of electric shock.
! When you place the rack inside,
make sure that the stop is directed
upwards and in the back of the cavity.
GB
WARNING
2

EE
HOIATUS: Seade ja selle ligipääsetavad
pinnad muutuvad kasutamise käigus
kuumaks.
Kü ekehade puudutamist tuleb väl da.
Alla 8 aastased lapsed peavad
olema pideva järelevalve all või
tuleb nad hoida pliidist eemal.
Seaded võivad kasutada üle 8 aastased
lapsed ja füüsilise, sensoorse või vaimse
puudega või puuduvate kogemuste ja
teadmistega isikud ainult siis, kui neid
juhendatakse või kui nad on mõistnud
seadme ohutu kasutamise põhimõ eid
ning võimalikke kaasnevaid ohte.
Lapsed ei tohi seadmega mängida.
Lapsed ei tohi ilma järelevalvete seadet
puhastada ja hooldada.
HOIATUS: Una ended cooking on a hob
with fat or oil can be dangerous and
may result in fi re.
ÄRGE püüdke tuld kustutada veega,
lülitage seade välja ja seejärel katke
leek kaane või tulekustutustekiga.
HOIATUS: Tulekahju oht: ärge hoidke
esemeid keeduplaa del.
HOIATUS: Kui klaaskeraamiline pind
on kajustatud, lülitage seade välja, et
väl da elektrilöögi ohtu.
Ärge kasutage tugevaid abrasiivseid
puhastusaineid või teravaid
metallkraabitsaid ahjuukse klaasi
puhastamiseks, kuna need võivad
pindu kriimustada, mis võib viia klaasi
purunemiseni.
Ahju sisemised pinnad (kui võimalik)
võivad minna kuumaks.
Ärge kasutage seadme puhastamiseks
auru- või suruõu puhastajaid.
Enne avamist eemaldage
kaanelt igasugune vedelik.
Ärge sulgege klaaskaant (kui see on
olemas) kui gaasipõle d või elektrilised
keeduplaadid on ikka veel soojad.
HOIATUS: Elektrilöögi väl miseks,
veenduge, et enne lambi asendamist
oleks seade välja lülitatud.
! Res sisestamisel veenduge, et
stopper oleks suunatud ülesse ja et see
oleks õõnsuse lõpus.
HOIATUS
BRĪDINĀJUMS: Ierīce un tās pieejamās
detaļas sakarst izmantošanas laikā.
Jāuzmanās, lai nepieskartos
sildelemen em.
Bērni, kas jaunāki par 8 gadiem,
nedrīkst atras es ierīces tuvumā, ja
vien ne ek nepārtrauk uzmanī .
Šo ierīci var izmantot bērni, kas vecāki
par 8 gadiem, un cilvēki ar fi ziskiem,
kus bu vai garīgiem traucējumiem vai
pieredzes un zināšanu trūkumu, ja viņi
ek uzraudzī vai arī viņi ir apmācī
izmantot ierīci drošā veidā un apzinās
iespējamos riskus. Bērni nedrīkst
spēlē es ar ierīci. Tīrīšanu un apkopi
nedrīkst veikt bērni bez uzraudzības.
BRĪDINĀJUMS: Atstāt gatavo es
ēdienu bez uzmanības uz sildvirsmas ar
taukvielām vai eļļu, var būt bīstami un
var izraisīt liesmu rašanos.
NEKAD nemēģiniet nodzēst liesmas ar
ūdeni, bet gan izslēdziet ierīci un tad
nosedziet liesmas, piemēram, ar vāku
vai ugunsdrošu segu.
BRĪDINĀJUMS: Liesmu rašanās risks:
neglabājiet produktus uz sildriņķiem.
BRĪDINĀJUMS: Ja s kla keramikas
virsma ir ieplaisājusi, izslēdziet ierīci, lai
izvairītos no strāvas trieciena riska.
Neizmantojiet raupjus, abrazīvus
rīšanas līdzekļus vai met
āla skrāpjus
cepeškrāsns dur ņu s kla vai citu
virsmu rīšanai, jo e var saskrāpēt
virsmu, kas var izraisīt s kla saplīšanu
vai virsmas sabojāšanu.
Cepeškrāsns iekšpuses virsma var
sakarst.
Nekad neizmantojiet ierīces rīšanai
tvaika rītājus vai mazgāšanu ar
spiediena strūklu.
Noslaukiet šķidrumu no
vāka pirms tā noņemšanas.
Neaizveriet s kla vāku (ja tāds ir), kad
gāzes degļi vai elektriskie sildriņķi ir vēl
kars .
BRĪDINĀJUMS: Pārliecinie es, ka ierīce
ir izslēgta pirms lampiņ
as nomaiņas, lai
izvairītos no strāvas trieciena riska.
! Ievietojot režģi, pārliecinie es, ka
atduris ir vērsts uz augšu un virzienā uz
cepeškrāsns aizmuguri.
LV
BRĪDINĀJUMS!
3

4
LT
ĮSPĖJIMAS: naudojant prietaisas ir
pasiekiamos jo dalys įkaista.
Reikia elg s atsargiai ir nelies
kai nimo elementų.
Jaunesniems nei 8 metų vaikams
negalima leis prisiar n ,
jei jie nėra nuolat prižiūrimi.
Šį prietaisą gali naudo 8 metų ir
vyresni vaikai bei mažesnių fi zinių,
ju minių ar pro nių gebėjimų,
nepatyrę ar neturintys reikiamų žinių
žmonėms, jei jie prižiūrimi arba jiems
pateik nurodymai, kaip saugiai
naudo prietaisą, be to, jie supranta
susijusius pavojus. Vaikams negalima
žais su prietaisu. Negalima leis
neprižiūrimiems vaikams valy prietaiso
ar atlik jo techninės priežiūros.
ĮSPĖ
JIMAS: neprižiūrimas maisto
gaminimas ant riebaluotos ar aliejuotos
kaitvietės gali bū pavojingas ir sukel
gaisrą.
NIEKADA nebandykite gesin ugnies
vandeniu, vietoje to išjunkite prietaisą
ir uždenkite liepsną, pvz., dangčiu arba
nedegiu audeklu.
ĮSPĖJIMAS: gaisro pavojus. Nelaikykite
daiktų ant kaitviečių.
ĮSPĖJIMAS: jei s klo keramikos paviršius
suskilinėjęs, išjunkite prietaisą, kad
išvengtumėte elektros smūgio pavojaus.
Nenaudokite grubių abrazyvinių
valiklių ar aštrių metalinių grandiklių
orkaitės durelių s klui valy , nes jie
gali subraižy paviršių, dėl to s klas gali
suduž .
Vidiniai skyriaus paviršiai (jei yra) gali
įkais .
Nevalykite prietaiso gariniais ar
slėginiais valymo įrenginiais.
Pašalinkite bet kokį skys
nuo
dangčio prieš jį a d a r a n t .
Neuždenkite s klinio gaubto (jei yra),
kai dujų degikliai ir elektrinės kaitvietės
vis dar karštos.
ĮSPĖJIMAS: prieš keisdami lemputę
pa krinkite, ar prietaisas išjungtas, kad
išvengtumėte elektros smūgio.
! Įdėję groteles į vidų įsi kinkite, kad
stabdis yra nukreiptas į viršų ir į ertmės
vidų.
ĮSPĖJIMAS
PL
OSTRZEŻENIE: Podczas pracy zarówno
urządzenie, jak i dostępne części
nagrzewają się.
Powinno się zachować ostrożność i unikać
dotykania elementów grzejnych.
Dzieci poniżej 8 roku życia, o ile
nie są nieustannie pilnowane, nie
powinny się zbliżać do urządzenia.
Urządzenie to może być używane
przez dzieci w wieku lat 8 lub starsze,
osoby z obniżoną sprawnością fi zyczną,
zmysłową lub umysłową, osoby z brakiem
doświadczenia i wiedzy, jeśli są one
nadzorowane lub gdy je poinstruowano jak
korzystać z tego urządzenia w bezpieczny
sposób, i gdy zdają sobie sprawę z
istniejących niebezpieczeństw. Dzieci
nie powinny bawić się tym urz
ądzeniem.
Czyszczenie i konserwacja nie powinny być
wykonywane przez dzieci bez nadzoru.
OSTRZEŻENIE: Nienadzorowane gotowanie
na kuchence z użyciem tłuszczu lub oleju
może być niebezpieczne i spowodować
pożar.
NIGDY nie gaś ognia wodą lecz wyłącz
urządzenie i przykryj płomienie, np.:
pokrywką lub kocem przeciwpożarowym.
OSTRZEŻENIE: Ryzyko pożaru: nie
przechowuj materiałów na powierzchni
gotującej.
OSTRZEŻENIE: Jeśli powierzchnia
szklano-ceramiczna jest pęknięta, wyłącz
urządzenie, aby uniknąć ryzyka porażenia
prądem.
Do czyszczenia szklanych drzwi piekarnika
nie należy używać materiałów ściernych
i metalowych skrobaczek, ponieważ
mogą one porysować powierzchnię i
doprowadzić do pęknięcia szk
ła.
Wewnętrzne powierzchnie komory (jeśli
obecne) mogą się bardzo rozgrzać.
Nigdy nie używaj urządzeń do czyszczenia
wykorzystującymi parę lub wysokie
ciśnienie do mycia urządzenia.
Usuń wszelki płyn z pokrywy
przed jej otwarciem.
Nie zamykaj szklane osłony (jeśli obecna),
gdy palniki gazowe lub płytygrzejne są
nadal gorące.
OSTRZEŻENIE: Aby uniknąć porażenia
prądem, wyłącz urządzenie przed wymianą
żarówki.
! Umieszczając kratkę wewnątrz piekarnika,
upewnij się, że ogranicznik skierowany jest
do tyłu i do tyłu.
UWAGA

5
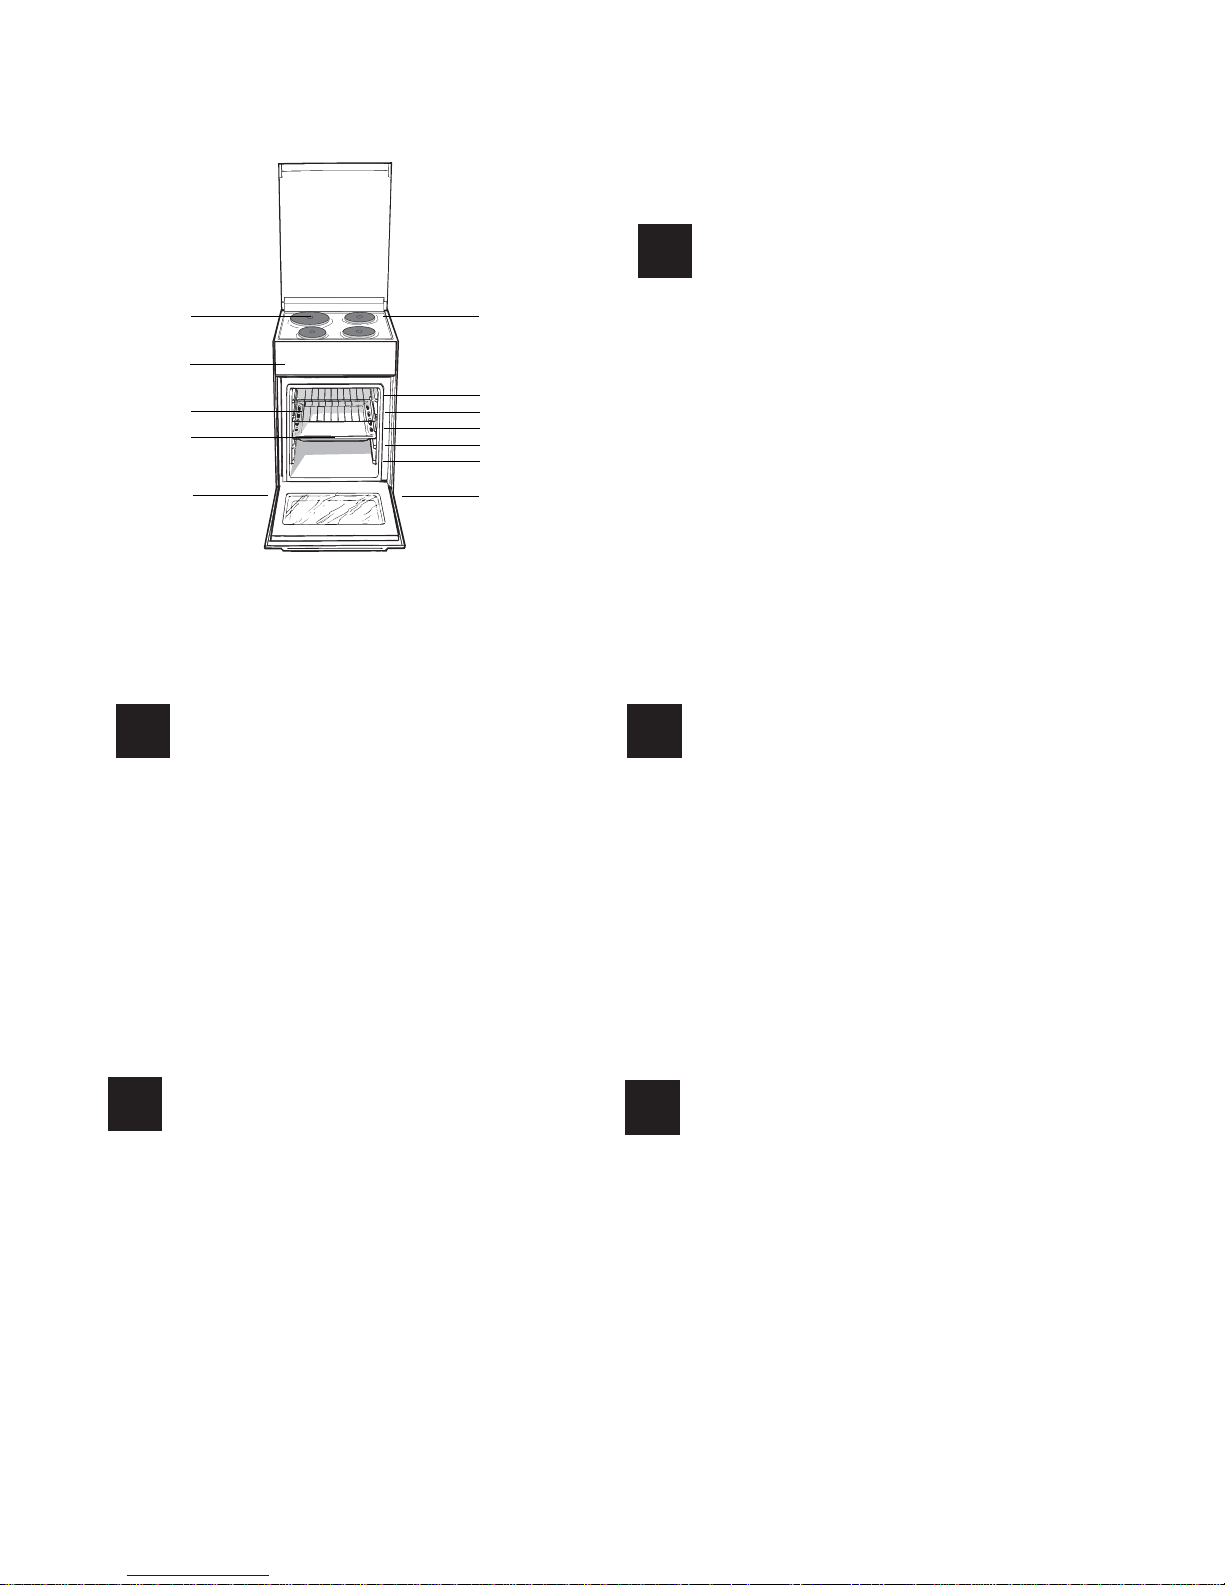
Description of the appliance
Control panel
GB
7+(50267$7LQGLFDWRUOLJKW
7+(50267$7NQRE
6(/(&725NQRE
(/(&75,&+273/$7(LQGLFDWRUOLJKW
(OHFWULF+273/$7(FRQWURONQRE
2
3
5
1
4
Seadme kirjeldus
Juhtpaneel
EE
1.TERMOSTAADI nupp
2.Ahju tuli
3.VALIKUlüliti
4.AKTIIVSE KEEDUPLAADI näidikutuli
5.ELEKTRILISE KEEDUPLAADI reguleernupp
Ierîces apraksts
Vispariga informacija
LV
1.TERMOSTATA slēdzis
2.indikatora gaisma cepeškrsns
3.SELEKTORA slēdzis
4. Індикатор РСБЦЮЮЧOЇ КОHФOPКИ
5.Peґyлятоpи ЕЛЕKTPИЧHИX КОHФOPOК
Prietaiso aprađymas
Valdymo pultas
LT
1.TERMOSTATO rankenčlč
2.K ontrole orkaite
3.PARINKIMO rankenčlč
4.Indikacinč KAITINIMO ELEMENTŘ lemputč
5.KAITINIMO ELEMENTŘ rankenčlčs
Opis urządzenia
Panel kontrolny
PL
3.Pokrętło FUNKCJI
1.Lampka kontrolna TERMOSTATU
2.Pokrętło TERMOSTATU
5.Pokrętło kontrolne elektrycznej PŁYTY GRZEJNEJ
4.Lampka kontrolna ELEKTRYCZNEJ PŁYTY
GRZEJNEJ
1
2
3
4
5
2.Ahju tuli2.Ahju tuli
2.K ontrole orkaite2.K ontrole orkaite
GB
2. Kontrollpaneel
3. Liikuv grillrest
4. Tilgapann
5. Reguleeritav jalg
6. Liugrestide juhtrelsid
7. asend 5
8. asend 4
9. asend 3
10. asend 2
11. asend 1
Seadme kirjeldus
Ülevaade
EE
2. Valdymo skydelis
3. Slankiojantis grilio iešmas
4. Kepimo skarda
5. Reguliuojamos kojelės
6. KREIPIAMIEJI BĖGELIAI slankiojančioms grotelėms
7. 5 padėtis
8. 4 padėtis
9. 3 padėtis
10. 2 padėtis
11. 1 padėtis
Prietaiso aprašymas
Bendras vaizdas
LT
1.
Elektriline pliit
1.
kaitlent
Elektrinos
1.1.
2. Vadības panelis
3. Slīdošs grila režģis
4. TAUKU PILIENU SAVĀKŠANAS panna
5. Regulējama kājiņa
6. VADOTNES slīdošajiem režģiem
7. 5. plaukts
8. 4. plaukts
9. 3. plaukts
10. 2. plaukts
11. 1. plaukts
Ierīces apraksts
Vispārējs pārskats
LV
2.Panel kontrolny
3.Przesuwany ruszt grilla
4.Głęboka blacha na ŚCIEKAJĄCY TŁUSZCZ
5.Regulowana stopka
6.SZYNY do wsuwania rusztów
7.pozycja 5
8.pozycja 4
9.pozycja 3
10.pozycja 2
11.pozycja 1
Opis urządzenia
Przegląd ogólny
PL
1. virsma
1.Płyta elektryczna
Elektriskā
(/(&75,&+273/$7(
&RQWUROSDQHO
6OLGLQJJULOOUDFN
'5,33,1*SDQ
$GMXVWDEOHIRRW
&RQWDLQPHQWVXUIDFHIRUVSLOOV
*8,'(5$,/6IRUWKHVOLGLQJUDFNV
SRVLWLRQ
SRVLWLRQ
SRVLWLRQ
SRVLWLRQ
SRVLWLRQ
Description of the appliance
Overall view
GB
1
2
3
4
5
5
6
7
8
9
10
11
12
6

GB
7
! Before operating your new appliance please read
this instruction booklet carefully. It contains important
information concerning the safe installation and
operation of the appliance.
! Please keep these operating instructions for future
reference. Make sure that the instructions are kept with
the appliance if it is sold, given away or moved.
! The appliance must be installed by a qualified
professional according to the instructions provided.
! Any necessary adjustment or maintenance must be
performed after the appliance has been disconnected
from the electricity supply.
Positioning and levelling
! It is possible to install the appliance alongside
cupboards whose height does not exceed that of the
hob surface.
! Make sure that the wall in contact with the back of
the appliance is made from a non-flammable, heatresistant material (T 90°C).
To install the appliance correctly:
• Place it in the kitchen, dining room or the bed-sit
(not in the bathroom).
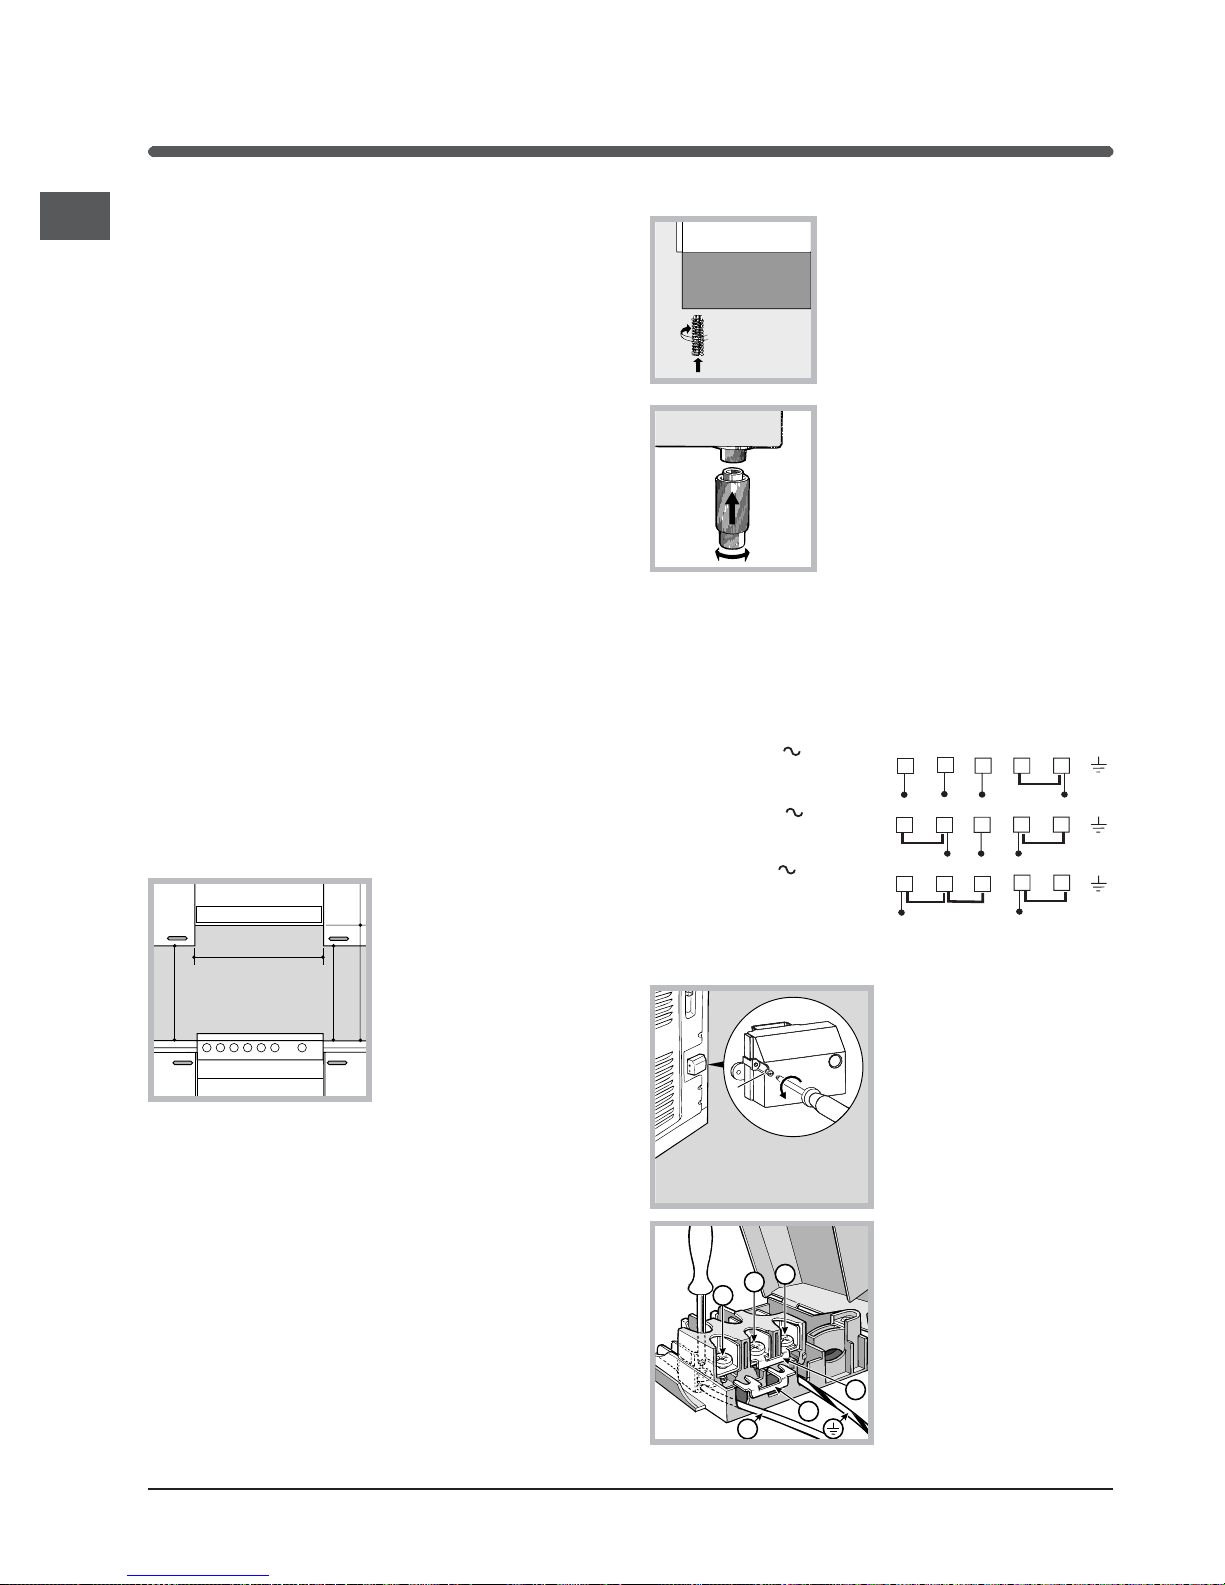
• If the top of the hob is higher than the cupboards,
the appliance must be installed at least 200 mm
away from them.
• If the cooker is
installed underneath a wall
cabinet, there must be a
minimum distance of 420
mm between this cabinet
and the top of the hob.
This distance should be
increased to 700 mm if
the wall cabinets are
flammable (
see figure
).
• Do not position blinds behind the cooker or less
than 200 mm away from its sides.
• Any hoods must be installed according to the
instructions listed in the relevant operating manual.
Levelling
If it is necessary to level the
appliance, screw the adjustable
feet* into the places provided on
each corner of the base of the
cooker (
see figure
).
The legs* provided with the
appliance fit into the slots on the
underside of the base of the
cooker.
Electrical connection
Fitting the power supply cable
The cable should be suited to the type of electrical
connection used, according to the following
connection diagram:
To install the power supply cable correctly:
1. Loosen the screw V in
the terminal board and
pull the cover to open it
(
see figure
).
2. Position the
connection support A
(
see figure
) according
to the connection
diagram shown above.
The terminal board is
designed for singlephase 230 V
connection: terminals 1,
2 and 3 are connected
to each other; jumper 4-5 is located in the lower area
of the terminal board.
3. Position wires N and
66
66
6
according to the diagram
(
see figure
) and perform the connection by tightening
the terminal board screws as much as possible.
4. Position the remaining wires on terminals 1-2-3 and
tighten the screws.
5. Fix the power supply cable in place by fastening
the cable clamp screw.
HOOD
420
Min.
min.
650
mm. with hood
min.
700
mm. without hood
mm.
600
Min. mm.
420
Min. mm.
V
1
2
3
N
A
B
Installation
We recommend cleaning the oven before
using it for the first time, following the
instructions provided in the "Care and
maintenance" section.
*Available only on certain models
1 2
3
4
5
12345
1
2
3
4
5
R
S
T
N
R
S
N
R
N
400 3N
H05RR-F 5x2.5 CEI-UNEL 35363
400V 2N
H05RR-F 4x4 CEI-UNEL 35363
230V
H05RR-F 3x4 CEI-UNEL 35363
H05VV-F 3x4 CEI-UNEL 35746
H05VV-F 4x4 CEI-UNEL 35746
H05VV-F 5x2.5 CEI-UNEL 35746

8
GB
TECHNICAL DATA
Oven dimensions
(WxDxH)
Volume
61 l
Useful
measurements
relating to the oven
compartment
width 42 cm
depth 44 cm
height 18 cm
Power supply
voltage and
frequency
see data plate
Electric hob
Front left
Back left
Back right
Front right
Maximum absorption
of the electric hob
1500 W
2000 W
1500 W
2000 W
7000 W
Declared energy consumption
for Natural convection Class –
heating mode:
Static
EC Directives: 2006/95/EC
dated 12/12/06 (Low Voltage)
and subsequent amendments 2004/108/EC dated 15/12/04
(Electromagnetic Compatibility)
and subsequent amendments 93/68/EEC dated 22/07/93 and
subsequent amendments 2002/96/EC.
1275/2008 (Stand-by/ Off mode)
6. Close the terminal board cover by tightening the
screws V.
Connecting the supply cable to the mains
Install a standardised plug corresponding to the
load indicated on the data plate located on the
appliance.
The appliance must be directly connected to the
mains using an omnipolar circuit-breaker with a
minimum contact opening of 3 mm installed between
the appliance and the mains. The circuit-breaker
must be suitable for the charge indicated and must
comply with current electrical regulations (the
earthing wire must not be interrupted by the circuitbreaker). The supply cable must be positioned so
that it does not come into contact with temperatures
higher than 50°C at any point.
Before connecting the appliance to the power
supply, make sure that:
• The appliance is earthed and the plug is compliant
with the law.
• The socket can withstand the maximum power of
the appliance, which is indicated by the data
plate.
• The voltage is in the range between the values
indicated on the data plate.
• The socket is compatible with the plug of the
appliance. If the socket is incompatible with the
plug, ask an authorised technician to replace it.
Do not use extension cords or multiple sockets.
! Once the appliance has been installed, the power
supply cable and the electrical socket must be
easily accessible.
! The cable must not be bent or compressed.
! The cable must be checked regularly and replaced
by authorised technicians only.
! The manufacturer declines any liability should
these safety measures not be observed.
Data plate, is located inside the flap or, after the
ovencompartment has been opened, on the left-hand
wall inside the oven.
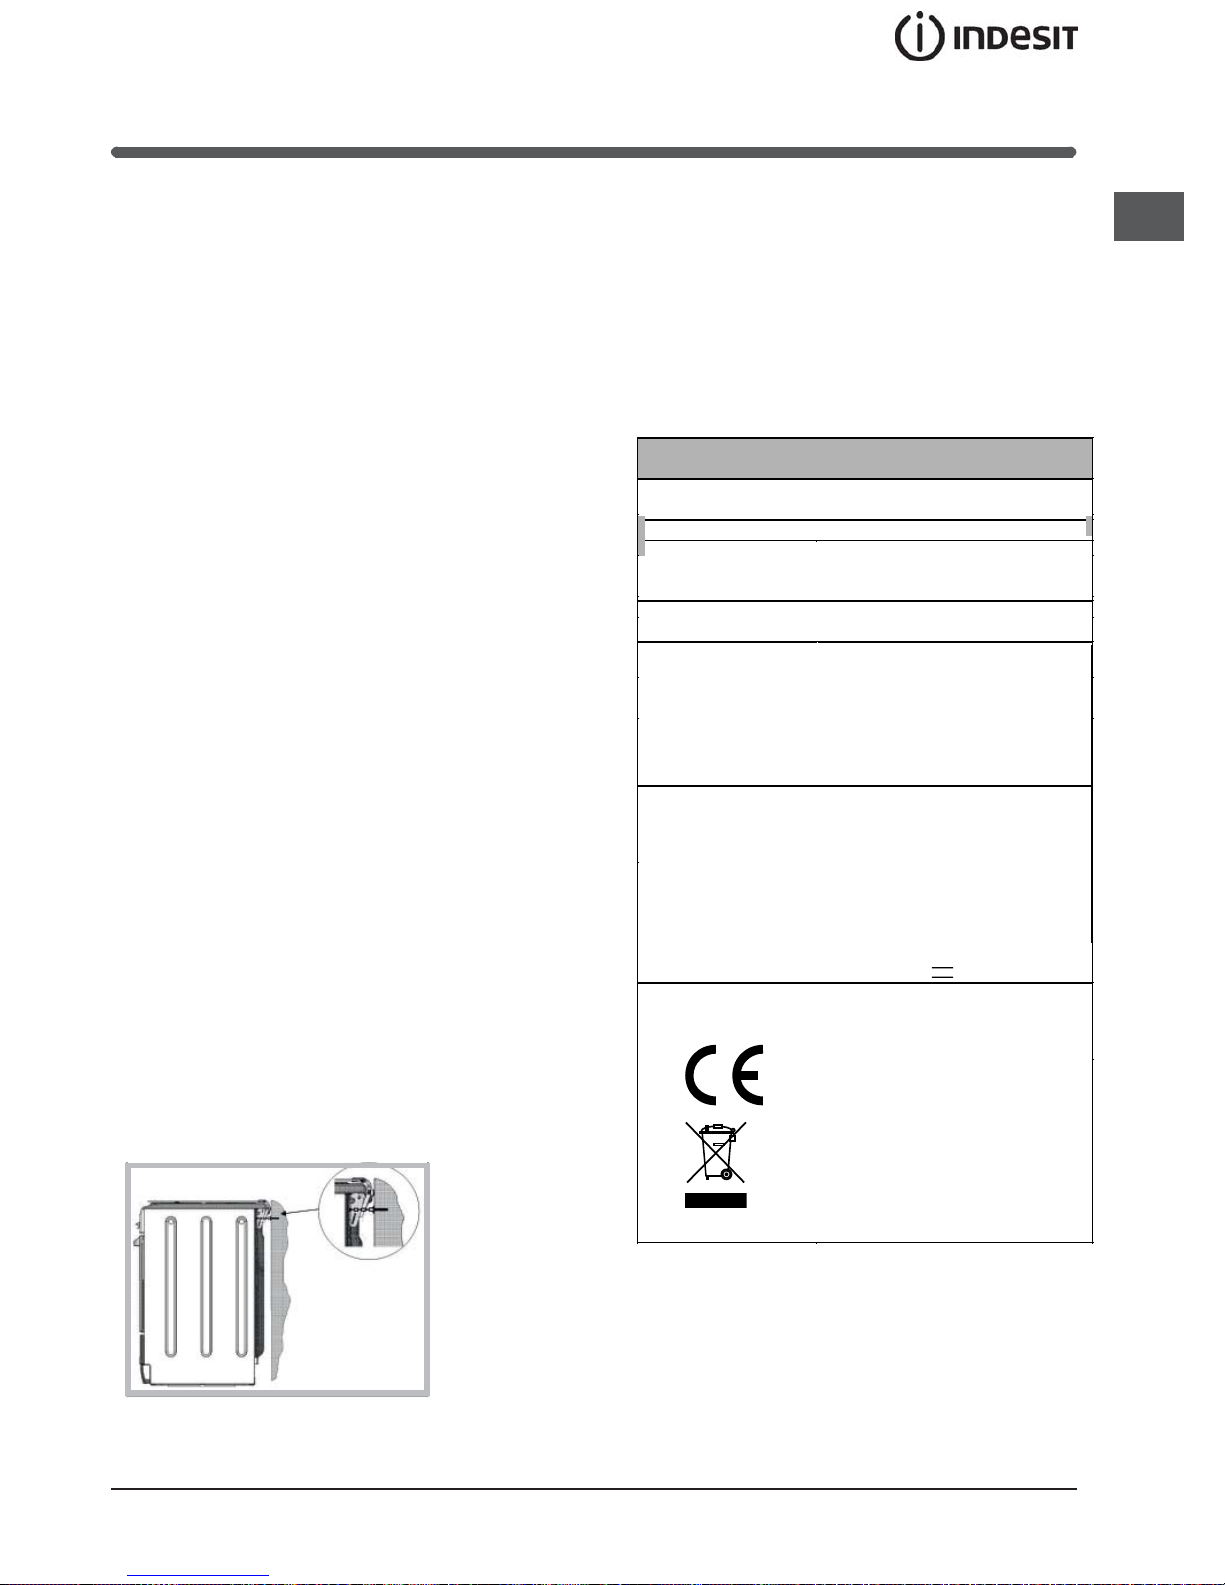
Safety Chain
! In order
to prevent
accidental
tipping of the
appliance, for
example by
a child climbing onto the
oven door, the
supplied safety
chain MUST be
installed!
The cooker is fitted with a safety chain to be fixed by
means of a screw (not supplied with the cooker) to
the wall behind the appliance, at the same height as
the chain is attached to the appliance.
Choose the screw and the screw anchor according
to the type of material of the wall behind the appliance. If the head of the screw has a diameter smaller
than 9mm, a washer should be used. Concrete wall
requires the screw of at least 8mm of diameter, and
60mm of length.
Ensure that the chain is fixed to the rear wall of the
cooker and to the wall, as shown in figure, so that
after installation it is tensioned and parallel to the
ground level.
340x391x455 mm
Regulation (EU) No 65/2014 supplementing Directive 2010/30/EU.
Regulation (EU) No 66/2014 implementing
Directive 2009/125/EC.
Standard EN 60350-1
Standard EN 50564.
ENERGY LABEL
and ECODESIGN
Standard EN 60350-2.
9
GB
Start-up and use
! The first time you use your appliance, heat the
empty oven with its door closed at its maximum
temperature for at least half an hour. Ensure that the
room is well ventilated before switching the oven off
and opening the oven door. The appliance may emit
a slightly unpleasant odour caused by protective
substances used during the manufacturing process
burning away.
Starting the oven
1. Select the desired cooking mode by turning the
SELECTOR knob.
2. Select the recommended temperature for the
cooking mode or the desired temperature by turning
the THERMOSTAT knob.
A list detailing cooking modes and suggested
cooking temperatures can be found in the relevant
table (
see Oven cooking advice table
).
During cooking it is always possible to:
• Change the cooking mode by turning the
SELECTOR knob.
• Change the temperature by turning the
THERMOSTAT knob.
• Set the total cooking time and the cooking end
time (
see below
).
• Stop cooking by turning the SELECTOR knob to
the “0” position.
! Never put objects directly on the bottom of the
oven; this will avoid the enamel coating being
damaged. Only use position 1 in the oven when
cooking with the rotisserie spit.
! Always place cookware on the rack(s) provided.
! Before operating the product, remove all plastic
film from the sides of the appliance.
THERMOSTAT indicator light
When this is illuminated, the oven is generating
heat. It switches off when the inside of the oven
reaches the selected temperature. At this point the
light illuminates and switches off alternately,
indicating that the thermostat is working and is
maintaining the temperature at a constant level.
Oven light
This is switched on by turning the SELECTOR knob to
any position other than “0”. It remains lit as long as the
oven is operating. By selecting
88
88
8
with the knob, the
light is switched on without any of the heating
elements being activated.
Timer
To activate the Timer proceed as follows:
1. Turn the TIMER knob in a clockwise direction 4
for almost one complete revolution to set the buzzer.
2. Turn the TIMER knob in an anticlockwise direction
5 to set the desired length of time.
*Available only on certain models
*
WARNING! The oven is
provided with a stop system to extract the racks
and prevent them from
coming out of the oven.(1)
As shown in the drawing,
to extract them completely, simply lift the racks,
holding them on the front
part, and pull (2).

GB
10
Cooking modes
! A temperature value can be set for all cooking
modes between 50°C and MAX, except for the
GRILL programme, for which only the MAX power
level is recommended.
! The first time you use your appliance, we
recommend that you set the thermostat to the
highest setting and leave the oven on for about half
an hour with nothing in it, with the oven door shut.
Then, open the oven door and let the room air. The
odour that is often detected during this initial use is
due to the evaporation of substances used to
protect the oven during storage and until it is
installed.
The different cooking functions are set up by
operating the two knobs: the selection knob and the
thermostat knob. For any selection-knob setting
different from idle, identified by the “
00
00
0”, the oven
light turns on; the knob setting marked
88
88
8
permits
turning on the oven light without any heating element
being switched on. When the oven light is on, it
means that the oven is in use, and it will remain on
for the entire time the oven is being used.
Static oven:
Thermostat setting: anywhere between
5050
5050
50°C and
MaxMax
MaxMax
Max
The oven light turns on and the top and bottom
heating elements (resistors) switch on. The
temperature, fixed by the thermostat knob, is
reached automatically and kept constant by the
thermostat control. This function permits cooking
and type of food thanks to excellent temperature
distribution.
The bottom heating element
Thermostat setting: anywhere between
5050
5050
50°C and
MaxMax
MaxMax
Max
The oven light turns on and so does the bottom
heating element. The temperature, fixed by the
thermostat knob, is reached automatically and kept
constant. This setting is recommended for finishing
the cooking of foods (placed in pans) that are well
done on the outside but still not done inside or for
desserts covered with fruit or jam which require a
light browning on top. Note that this function does
not permit reaching the maximum (250°C)
temperature inside for cooking foods always on this
oven setting unless the foods are cakes which only
require temperatures below or equal to 180°C.
The Top heating element
Thermostat setting: anywhere between
5050
5050
50°C and
MaxMax
MaxMax
Max
The oven light turns on and so does the infra-red ray
grill. The rather high and direct temperature of the
grill permits browning the outside of meats
immediately thus keeping in the juices and assuring
tenderness.
The grill
Thermostat setting: anywhere between
5050
5050
50°C and
MaxMax
MaxMax
Max
The oven light turns on and so does the double
heating element of the grill. This grill is larger than
the average and has a completely new design:
cooking performance is increased 50%. The double
grill makes sure that even the corners are touched
by heat.
! !
! !
! When using the grill, keep the oven door closed to
obtain the best results and
save energy (aboutsave energy (about
save energy (aboutsave energy (about
save energy (about
10%).10%).
10%).10%).
10%).
When utilizing the grill, place the rack at the lower
levels (see cooking table). To catch grease or fat
and prevent smoke, place a dripping-pan at the
bottom rack level
! When using the grill, the oven door must be left
partly open by positioning the deflector between
door and panel to prevent the cooker knobs from
overheating.
The oven-operating pilot lamp
Signals when the oven is heating. It switches off
when the temperature inside the oven reached the
temperature selected by the knob. At this point the
alternate turning on and turning off of this light
indicates that the thermostat is operating correctly to
keep the oven temperature constant.
The hotplate pilot lamp
This lights up when an electric plate is turned on.
11
GB
Oven cooking advice table
! Avoid the children touch the oven door because it is
very hot during the cooking.
Practical cooking advice
! In the GRILL cooking mode, place the dripping
pan in position 1 to collect cooking residues (fat
and/or grease).
GRILL
• Insert the rack in position 3 or 4. Place the food in
the centre of the rack.
• We recommend that the power level is set to
maximum. The top heating element is regulated
by a thermostat and may not always operate
constantly.
H
!
"#
$
!
%&'
%&'
%&(
)&*
)&'
)&+
%
%&)
)&+
)&)
)&'
)
)
(&'
)&)
)
(&'
)
%
,
,
%
,
,
,
,
,
%
%
%
%
,
,
,
,
,
'
'
'
)(
)(
)(
)(
)(
)(
'
'
'
)'
)(
)(
)(
)(
)(
%((
%((
%((
)+(
%((
)+(
)+(
)+(
)+(
)+(
)+(
)+(
%%(
)+(
)+(
)+(
)-(
)*(
/'0'(
,(0,'
,(0,'
-(0*(
+(01(
1(0)((
*(0+(
*(0+(
*(0+(
,(0/(
,(0,'
%'0,(
)'0%(
)(0)'
%'0,(
,(0,'
%'0,(
%'0,(
"#
!
$"#
"2
"3
2
4#
)
)
)
)
/
/
/
,5/
'
'
'
'
6
6
6
6
+
/
)(
+0)(
%&
7
8
)
)&'
)
)
9:/
/
/
,
/
/
'
'
'
'
'
6
6
6
6
6
)'0%(
%(
*
)'0%(
'
'()6#9;
&08)#29
GB
12
Using the electric hob
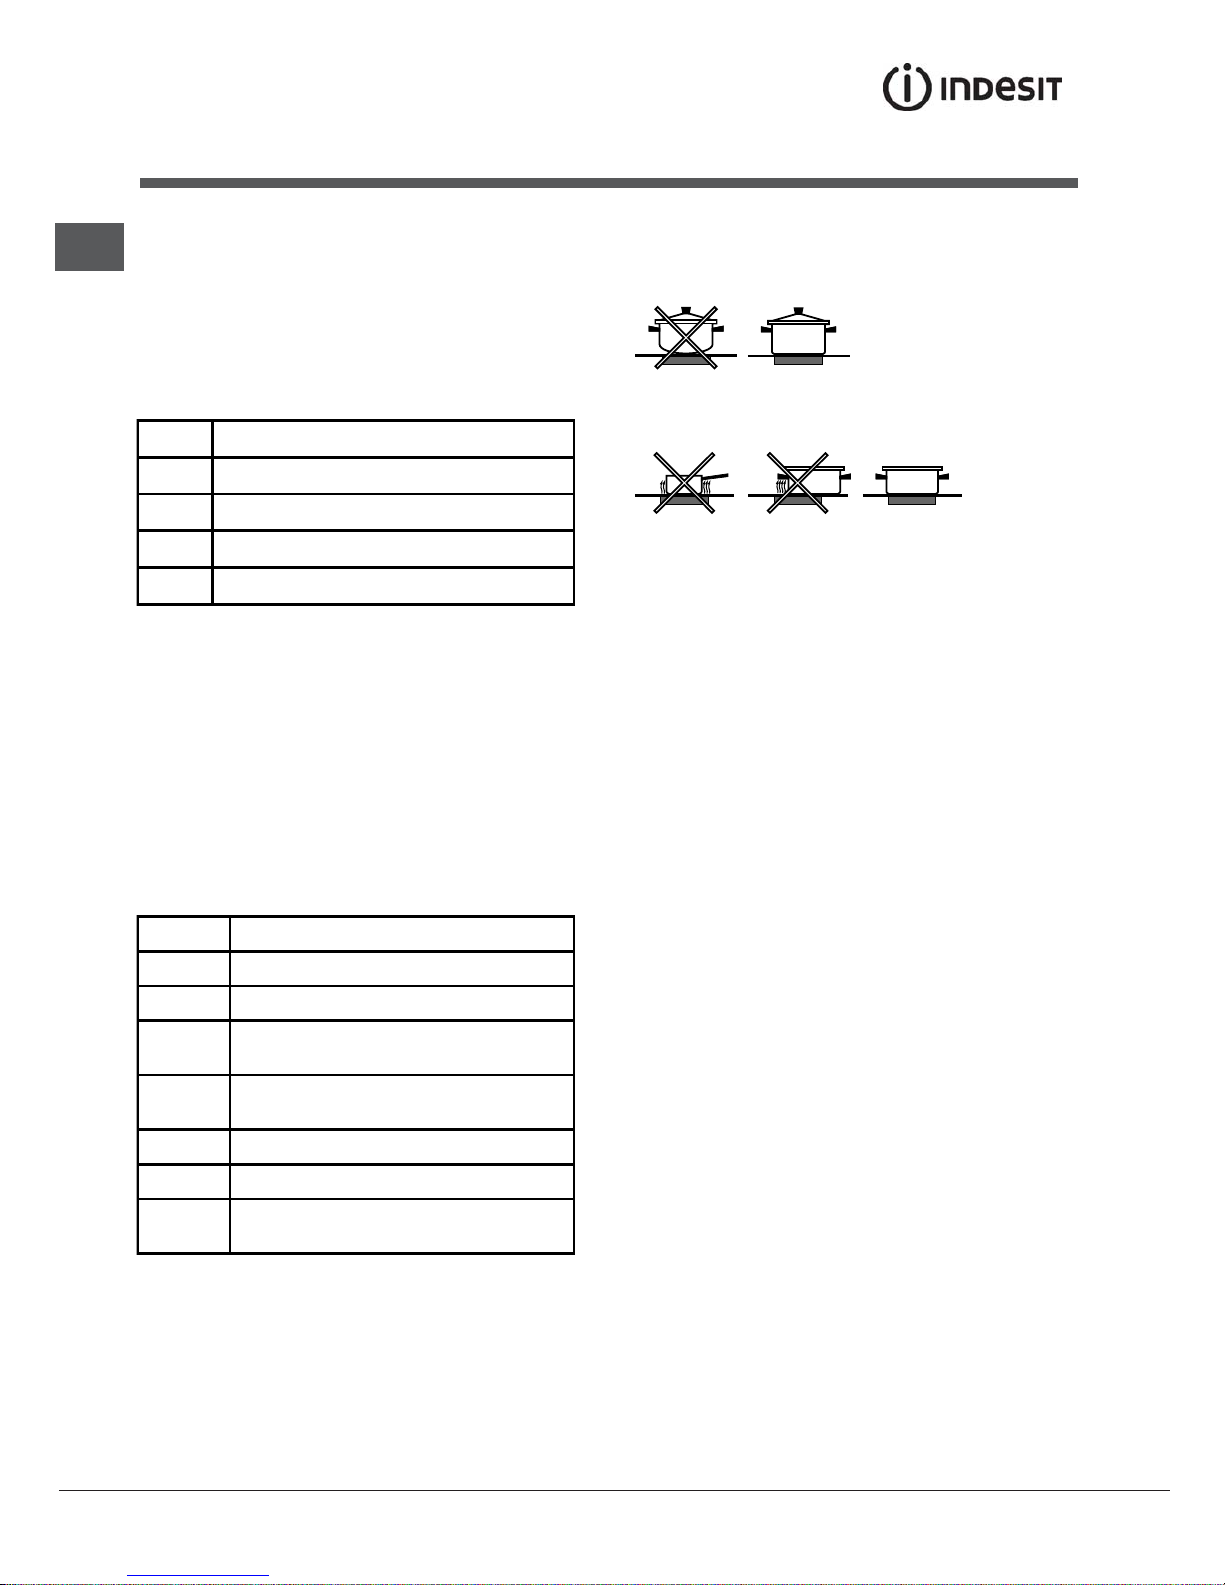
!The position of the corresponding electric hotplate
is shown on every knob.
Electric hotplates
The corresponding knob may be turned clockwise or
anti-clockwise and set to any of the six different
positions:
Setting NormalorFast*late
+ <ff
1 Low
2,- Medium
.
High
When the selector knob is in any position other than
the off position, the ‘on’ light is illuminated.
Practical advice on using the electric
hotplates
To avoid heat loss and damage to the hotplates use
pans with a flat base, whose diameter is no less
than that of the hotplate itself.
Setting NormalorFast*late
+ Off
1 Cookingvegetables,fish
2
Cookingpotatoes=usingsteam>soups,
chickpeas,beans.
3
Continuingthecookingoflargequantities
offood,minestrone
4
Forroasting=average>
- Forroasting=aboveaverage>
.
Forbrowningandreachingaboilina
shorttime.
! Before using the hotplates for the first time, you
should heat them at maximum temperature for
approximately 4 minutes, without placing any pans
on them. During this initial stage, their protective
coating hardens and reaches its maximum
resistance.
Practical advice on using the hob
• Use pans with a thick, flat base to ensure that
they adhere perfectly to the cooking zone.
• Always use pans with a diameter that is large
enough to cover the hotplate fully, in order to use
all the heat produced.
• Always make sure that the base of the pan is
completely clean and dry: this ensures that the
pans adhere perfectly to the cooking zones and
that both the pans and the hob remain effective
for a longer period of time.
• Avoid using the same cookware that is used on
gas burners: the heat concentration on gas
burners may have warped the base of the pan,
causing it not to adhere to the surface correctly.
• Never leave a cooking zone switched on without a
pan on top of it, as doing so may cause the zone
to become damaged.

13
GB
Precautions and tips
! This appliance has been designed and
manufactured in compliance with international safety
standards.
The following warnings are provided for safety
reasons and must be read carefully.
General safety
• These instructions are only valid for the
countries whose symbols appear in the manual
and on the serial number plate.
• The appliance was designed for domestic use
inside the home and is not intended for
commercial or industrial use.
• The appliance must not be installed outdoors,
even in covered areas. It is extremely dangerous
to leave the appliance exposed to rain and
storms.
• Do not touch the appliance with bare feet or with
wet or damp hands and feet.
• The appliance must be used by adults only for
the preparation of food, in accordance with the
instructions outlined in this booklet. Any other
use of the appliance (e.g. for heating the room)
constitutes improper use and is dangerous.
The manufacturer may not be held liable for
any damage resulting from improper, incorrect
and unreasonable use of the appliance.
• The instruction booklet accompanies a class 1
(insulated) or class 2 - subclass 1 (recessed
between 2 cupboards) appliance.
• Keep children away from the oven.
• Make sure that the power supply cables of other
electrical appliances do not come into contact
with the hot parts of the oven.
• The openings used for the ventilation and
dispersion of heat must never be covered.
• Do not place unstable or misshapen pans on the
electric hotplates; this will help to avoid spills.
Position them on the hob with the handles turned
towards the centre of the appliance.
• Always use oven gloves when placing cookware
in the oven or when removing it.
• Do not use flammable liquids (alcohol, petrol,
etc...) near the appliance while it is in use.
• Do not place flammable material in the lower
storage compartment or in the oven itself. If the
appliance is switched on accidentally, it could
catch fire.
• Always make sure the knobs are in the ‘0’ position
when the appliance is not in use.
• When unplugging the appliance, always pull the
plug from the mains socket; do not pull on the
cable.
• Never perform any cleaning or maintenance work
without having disconnected the appliance from
the electricity mains.
• If the appliance breaks down, under no
circumstances should you attempt to repair the
appliance yourself. Repairs carried out by
inexperienced persons may cause injury or further
malfunctioning of the appliance. Contact
Assistance.
• Do not rest heavy objects on the open oven door.
• Do not let children play with the appliance.
• The appliance should not be operated by people
(including children) with reduced physical,
sensory or mental capacities, by inexperienced
individuals or by anyone who is not familiar with
the product. These individuals should, at the very
least, be supervised by someone who assumes
responsibility for their safety or receive
preliminary instructions relating to the operation of
the appliance.
Disposal
• When disposing of packaging material: observe
local legislation so that the packaging may be
reused.
• The European Directive 2002/96/EC relating to
Waste Electrical and Electronic Equipment
(WEEE) states that household appliances should
not be disposed of using the normal solid urban
waste cycle. Exhausted appliances should be
collected separately in order to optimise the cost
of re-using and recycling the materials inside the
machine, while preventing potential damage to
the atmosphere and to public health. The
crossed-out dustbin is marked on all products to
remind the owner of their obligations regarding
separated waste collection.
Exhausted appliances may be collected by the
public waste collection service, taken to suitable
collection areas in the area or, if permitted by
current national legislation, they may be returned
to the dealers as part of an exchange deal for a
new equivalent product.
All major manufacturers of household appliances
participate in the creation and organisation of
systems for the collection and disposal of old and
disused appliances.
If the cooker is placed on a pedestal, take the necessary precautions to prevent the cooker from sliding
off the pedestal itself.
•

GB
14
Respecting and conserving the
environment
• Always keep the oven door closed when using the
GRILL and DOUBLE GRILL modes. This will
achieve better results while saving energy
(approximately 10%).
Switching the appliance off
Disconnect your appliance from the electricity
supply before carrying out any work on it.
Cleaning the appliance
! Do not use abrasive or corrosive detergents such
as stain removers, anti-rust products, powder
detergents or sponges with abrasive surfaces: these
may scratch the surface beyond repair.
! Never use steam cleaners or pressure cleaners on
the appliance.
• The stainless steel or enamel-coated external
parts and the rubber seals may be cleaned using
a sponge that has been soaked in lukewarm water
and neutral soap. Use specialised products for
the removal of stubborn stains. After cleaning,
rinse and dry thoroughly. Do not use abrasive
powders or corrosive substances.
• The inside of the oven should ideally be cleaned
after each use, while it is still lukewarm. Use hot
water and detergent, then rinse well and dry with
a soft cloth. Do not use abrasive products.
•
Clean the glass part of the oven door using a
sponge and a non-abrasive cleaning product,
then dry thoroughly with a soft cloth. Do not use
rough abrasive material or sharp metal scrapers
as these could scratch the surface and cause the
glass to crack.
• The accessories can be washed like everyday
crockery, and are even dishwasher safe.
• Dirt and grease should be removed from the
control panel using a non-abrasive sponge or a
soft cloth.
• Stainless steel can be marked by hard water that
has been left on the surface for a long time, or by
aggressive detergents containing phosphorus.
After cleaning, rinse well and dry thoroughly. Any
remaining drops of water should also be dried.
The cover
If the cooker is fitted with a cover, this
cover should be cleaned using
lukewarm water. Do not use abrasive
products.
It is possible to remove the cover in
order to make cleaning the area behind
the hob easier. Open the cover fully
and pull it upwards (
see figure
).
! Do not close the cover when the burners are alight or
when they are still hot.
Inspecting the oven seals
Check the door seals around the oven regularly. If
the seals are damaged, please contact your nearest
After-sales Service Centre. We recommend that the
oven is not used until the seals have been replaced.
Replacing the oven light bulb
1. After disconnecting the oven
from the electricity mains,
remove the glass lid covering
the lamp socket (
see figure
).
2. Remove the light bulb and
replace it with a similar one:
voltage 230 V, wattage 25 W,
cap E 14.
3. Replace the lid and reconnect
the oven to the electricity supply.
Assistance
Please have the following information to hand:
• The appliance model (Mod.).
• The serial number (S/N).
This information can be found on the data plate
located on the appliance and/or on the packaging.
Care and maintenance
! Do not use the oven lamp as/for ambient lighting.
• Whenever possible, avoid pre-heating the oven
and always try to fill it. Open the oven door as little
as possible because heat is lost every time it is
opened. To save a substantial amount of energy,
simply switch off the oven 5 to 10 minutes before the
end of your planned cooking time and use the heat
the oven continues to generate.
• Keep gaskets clean and tidy to prevent any door
energy losses
• If you have a timed tariff electricity contract, the “delay
cooking” option will make it easier to save money by
moving operation to cheaper time periods.
• Make the most of your hot plate's residual heat by
switching off cast iron hot plates 10 minutes before the
end of your cooking time and glass ceramic hot plates
5 minutes before the end of cooking time.
• The base of your pot or pan should cover the hot plate.
If it is smaller, precious energy will be wasted and
pots that boil over leave encrusted remains that can
be difficult to remove.
• Cook your food in closed pots or pans with well-fitting
lids and use as little water as possible. Cooking with
the lid off will greatly increase energy consumption
• Use purely flat pots and pans
• If you are cooking something that takes a long time,
it's worth using a pressure cooker, which is twice as
fast and saves a third of the energy.

15
GB
40°
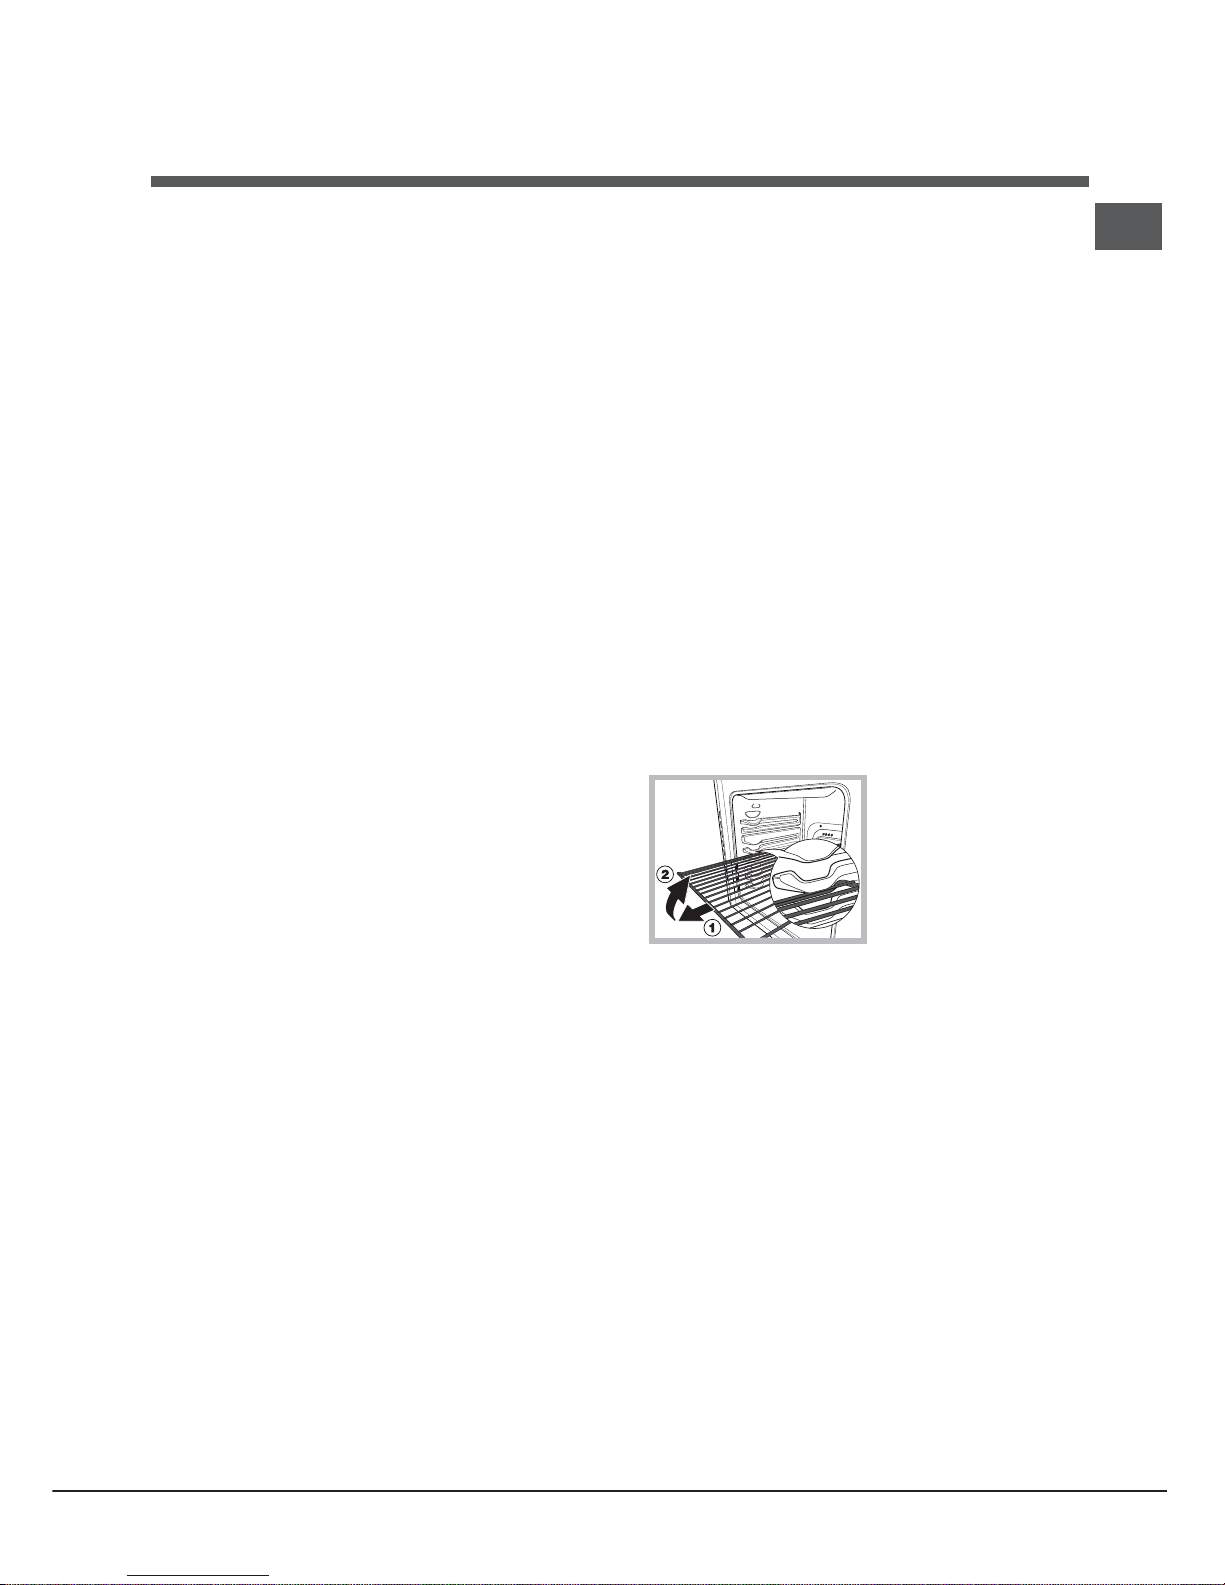
Removing and fitting the oven door:
1.Open the door
2.Make the hinge clamps of the oven door rotate
backwards completely (see photo)
3.Close the door until the clamps stop (the door will
remain open for 40° approx.) (see photo)
4.Press the two buttons on the upper profile and
extract the profile (see photo)
5.Remove the glass sheet and do the cleaning as
indicated in chapter: “Care and maintenance”.
6.Replace the glass.
WARNING! Oven must not be operated
with inner door glass removed!
WARNING! When reassembling the inner
door glass insert the glass panel correctly
so that the text written on the panel is
not reversed and
can be easily legible.
7.Replace the profile, a click will indicate that the
part is positioned correctly.
8.Open the door completely.
9.Close the supports (see photo).
10.Now the door can be completely closed and the
oven can be started for normal use.
Steam-Assisted Oven Cleaning
This method of cleaning is recommended especially after
cooking very fatty (roasted)meats.
This cleaning process allows to facilitate the removal of
dirt of the walls of the oven by the generation of steam
that is created inside the oven cavity for easier cleaning.
! Important! Before you start steam -cleaning:
-Remove any food residue and grease from the bottom
of the oven.
- Remove any oven accessories (grids and drip pans).
Perform the above operations according to the following
procedure:
1. pour 300ml of water into the baking tray in the oven,
placing it in the bottom shelf. In the models where the
drip pan is not present, use a baking sheet and place it
on the grill at the bottom shelf;
2. select the function of the oven
and set the temperature to 100 ° C;
3. keep it in the oven for 15min;
4. turn off the oven;
5. Once cooled the oven, you can open the door to
complete the cleaning with water and a damp cloth;
6. eliminate any residual water from the cavity after
finishing cleaning
When the steam –cleaning is done, after cooking
especially fatty foods, or when grease is difficult to
remove, you may need to complete the cleaning with the
traditional method, described in the previous paragraph.
! Perform cleaning only in the cold oven!
BOTTOM
16
ET
! Enne uue seadme kasutama hakkamist lugege
kasutusjuhend pőhjalikult läbi. See sisaldab olulist
teavet seadme ohutu paigaldamise ja kasutamise
kohta.
! Hoidke kasutusjuhend alles. Seadme edasi
müümisel, ära andmisel vői ümber paigutamisel
veenduge, et seadmega on kaasas ka käesolev
kasutusjuhend.
! Seadet vőib paigaldada ainult kvalifitseeritud
personal vastavalt käesolevatele juhistele.
! Enne seadme reguleerimist vői hooldamist tuleb see
vooluvőrgust lahti ühendada.
Paigutamine ja loodimine
! Seadme vőib paigaldada selliste köögikappide
kőrvale, mis ei ole pliidiplaadist kőrgemal.
! Veenduge, et seina ja seadme pealispinna vaheline
puutepind on mittesüttivast kuumakindlast materjalist
(T 90 C).
Seadme őige paigaldamine:
• Paigutage seade kööki, söögituppa vői voodiga
elutuppa (mitte vannituppa).
• Kui pliidiplaat on kappidestkőrgemal, paigaldage
pliit nendest vähemalt 200 mmkaugusele.
• Kui paigaldate pliidi
seinakapi alla, peab
pliidiplaadi ja kapi vahele
jääma vähemalt 420 mm.
Vahekaugust tuleb
suurendada kuni
vähemalt 700 mm, kui
seinakapid on
kergestisüttivast
materjalist (vt joonist).
• Ärge pange kardinaid pliidi taha. Kardinad peavad
jääma vähemalt 200 mm kaugusele pliidi külgedest.
• Őhupuhastite paigaldamisel järgige tootja
kasutusjuhendit.
Loodimine
Pliidi loodimiseks kuuluvad
komplekti reguleeritavad jalad.
Need saab kruvida pliidi pőhja
nurkades asuvatesse
pesadesse (vt joonist).
Pliidi pőhja nurkades
asuvatesse pesadesse
paigaldatud jalad*.
Elektriühendused
Toitekaabli paigaldamine
Toitekaabli suurus sőltub elektriühendusest (vt järgnevat
ühendusskeemi):
Toitejuhtme őige paigaldamine:
1. Keerake lahti
klemmikarbi kruvi “V” ja
tőmmake klemmikarbi
kaas lahti (vt joonist).
2. Seadke ühendusliited
A (vt joonist) vastavalt
ülal toodud
ühendusskeemile.
Klemmikarp on mőeldud
230 V ühefaasilise
ühenduse jaoks:
ühendage klemmid 1, 2
ja 3 omavahel; sild 4-5
asub klemmikarbi
alumises osas.
3. Seadke kaablid N ja
6 6
6 6
6
nii, nagu skeemil
näidatud (vt joonist) ja
keerake klemmikarbi
kruvid tugevalt kinni.
Paigaldamine
HOOD
420
Min.
min.
650
mm. with hood
min.
700
mm. without hood
mm.
600
Min. mm.
420
Min. mm.
V
1
2
3
N
A
B
*
Ainult mőnedel mudelitel.
1 2
3
4
5
12345
1
2
3
4
5
R
S
T
N
R
S
N
R
N
400 3N
H05RR-F 5x2.5 CEI-UNEL 35363
400V 2N
H05RR-F 4x4 CEI-UNEL 35363
230V
H05RR-F 3x4 CEI-UNEL 35363
H05VV-F 3x4 CEI-UNEL 35746
H05VV-F 4x4 CEI-UNEL 35746
H05VV-F 5x2.5 CEI-UNEL 35746
*
Ainult mőnedel mudelitel.
4. Fikseerige ülejäänud kaablid klemmidele 1-2-3 ja
keerake need kruvidega kinni.
5. Fikseerige toitekaabel spetsiaalse kaablitőkestiga.
6. Klemmikarbi kaane sulgemiseks keerake kinni kruvid “V”.
Toitekaabli ühendamine vooluvőrku
Monteerige andmesildil näidatud koormust taluv pistik
toitekaabli külge (vt tehniliste andmete tabelist).
Otse vooluvőrku ühendades tuleb paigaldada seadme ja
vooluvőrgu vahele mitmepooluseline lüliti, mille kontaktide
vahe on vähemalt 3 mm. See lüliti peab taluma nőutud
koormust ning vastama NFC 15-100 eeskirjadele (lüliti ei
tohi katkestada maandusjuhet). Paigaldage toitekaabel
nii, et see puutu üheski punktis kokku temperatuuriga
üle 50 C.
Enne seadme ühendamist toitevőrku kontrollige, kas
• seade on maandatud ja pistik vastab kehtivatele
nőuetele;
• pistik talub seadme andmeplaadile märgitud
maksimumkoormust;
• pinge vastab seadme andmeplaadile märgitud
väärtustevahemikule;
• pisikupesa vastab seadme pistikule. Kui pistikupesa
ei vasta pistikule, pöörduge kvalifitseeritud elektriku
poole, kes selle välja vahetab. Ärge kasutage
pikendusjuhet ega mitmikpesasid.
! Pärast pliidi paigaldamist peavad toitekaabel ja
pistikupesa olema kergesti juurdepääsetavad.
! Kaabel ei tohi olla keerdus ega muljutud.
! Laske kvalifitseeritud elektrikul kaabel regulaarselt
üle kontrollida ja vajadusel välja vahetada. Ärge tehke
seda ise.
! Nende ohutusnõuete eiramisel ei võta tootja
endale mingit vastutust.
Ohutusahela
! Et pliit ei
kukuks ümber,
kui näiteks laps
peaks ronima
ahju uksele,
TULEB paigaldada turvakett!
Pliit on varustatud turvaketiga,
mis kinnitatakse kruviga (ei
kuulu komplek-
ti) pliidi taga olevale seinale ja
samal kõrgusel ka pliidi tagapaneelile. Kruvi ja tüübli
valimisel lähtuge seadme taga oleva seina materjalist. Kui kruvi läbimõõt on alla 9 mm, tuleb paigaldada
ka seib. Betoonseina puhul tuleb kasutada kruvi,
mille läbimõõt on vähemalt 8 mm ja pikkus 60 mm.
Veenduge, et kett on kinnitatud pliidi tagapaneelile ja
seina külge, nagu joonisel näidatud. Kett peab olema
pingul ja maapinnaga paralleelselt.
ET
17
TEHNILISED
ANDMED
Ahju mõõdud
(KxLxS)
Mahutavus
61 l
Ahju maksimaalsed
kasulikud mõõdud
laius 42 cm
sügavus 44 cm
kõrgus 17 cm
Toitepinge ja sagedus
vt andmeplaadilt
Energiakulu sundkonvektsiooni
puhul Klass
kütterežiim: Staatiline
ELi direktiivid: 2006/95/EÜ
12.12.06 (Madalpingedirektiiv) ja
järgnevad muudatused -
2004/108/EÜ 15.12.04
(Elektromagnetiline ühilduvus) ja
järgnevad muudatused -
2009/142/EÜ 30.11.09 (Gaas) ja
järgnevad muudatused -
93/68/EMÜ 22.07.93 ja järgnevad
muudatused - 2002/96/EÜ.
1275/2008
(Ooterežiimis/väljalülitatud
olekus)
Andmeplaadil, paikneb klapp või pärast termokapis on
avatud, on vasakul seina sees ahju.
340x391x455 mm
1500 W
1500 W
2000 W
7000 W
elektriline pliidiplaat
ees vasakul
Tagasi vasakule
Tagasi oigus
Ees paremal
Guanüülhappelahusel
2000 W
ENERGIAMÄRGIS
JA ECO-DISAIN
EL direktiiv nr. 65/2014 täiendus direktiivi-
le 2010/30/EL.
EL määrus nr. 66/2014 täiendus direktiivile
2009/125/EÜ.
EN 60350-1 määrus,
EN 50564 määrus
EN 60350-2 määrus,