

INDESIT FIM 53 K.A (BK) EE User Manual
FIM 53 K.A (BK) EE
Polski
Instrukcja obsługi
PIEKARNIK
Spis treści
Instrukcja obsługi,1
Ostrzezenia,4
Serwis Techniczny,7
Opis urządzenia,8
Opis urządzenia,10
Instalacja,25
Uruchomienie i użytkowanie,27
Programy,27
Programator elektroniczny,29
Zalecenia i środki ostrożności,30
Konserwacja i utrzymanie,31
English
Operating Instructions
OVEN
Contents
Operating Instructions,1
Warnings,3
Assistance,7
Description of the appliance,8
Description of the appliance,10
Installation,11
Start-up and use,13
Cooking modes,13
The electronic programmer,15
Precautions and tips,16
Maintenance and care,17
Ελληνικά
Οδηγίες χρήσης
ΦΟΎΡΝΟΣ
Περιεχόμενα
Română
Instrucţiuni de folosire
CUPTOR
Sumar
Instrucţiuni de folosire,1
Avertizări,4
Asistenţă,7
Descrierea aparatului,8
Descrierea aparatului,10
Instalare,32
Pornire şi utilizare,34
Programe,34
Programator de coacere electronic,36
Măsuri de precauţie şi recomandări,37
Întreţinerea şi îngrijirea aparatului,38
Magyar
Használati útmutató
SÜTÕ
Tartalomjegyzék
Οδηγίες χρήσης,1
Προειδοποίηση,3
Τεχνική υποστήριξη,7
Περιγραφή της συσκευής,8
Περιγραφή της συσκευής,10
Εγκατάσταση,18
Εκκίνηση και χρήση,20
ΠΡΟΓΡΑΜΜΑΤΑ,20
Ο ηλεκτρονικός προγραμματιστής,22
Προφυλάξεις και συμβουλές,23
Συντήρηση και φροντίδα,24
Használati útmutató,1
Figyelmeztetések,5
Szerviz,7
A készülék leírása,9
A készülék leírása,10
Üzembe helyezés,39
Bekapcsolás és használat,41
Program,41
Elektronikus programozó*,43
Óvintézkedések és tanácsok,44
Karbantartás és ápolás,45
Česky
Pokyny pro použití
TROUBA
Pokyny pro použití,2
Upozornění,5
Servisní služba,7
Popis zařízení,9
Popis zařízení,10
Instalace,46
Spuštění a použití,48
Programy,48
Elektronické zařízení pro nastavení pečení,50
Opatření a rady,51
Údržba a péče,52
Български
Obsah
Инструкции за употреба
ФУРНА
Съдържание
Инструкции за употреба,2
Препоръки,6
Техни еско обслужване,7
Описание на уреда,9
Описание на уреда,10
Монтиране,53
Пуск и експлоатация,55
Програми,55
Електронен програматор,57
Предпазни мерки и препоръки,58
Поддръжка и почистване,59

Warnings
Προειδοποίηση
WARNING: The appliance and its accessible parts
become hot during use. Care should be taken to
avoid touching heating elements. Children less than 8
years of age shall be kept away unless continuously
supervised. This appliance can be used by children
aged from 8 years and above and persons with
reduced physical, sensory or mental capabilities or
lack of experience and knowledge if they have been
given supervision or instruction concerning use of the
appliance in a safe way and understand the hazards
involved. Children shall not play with the appliance.
Cleaning and user maintenance shall not be made
by children without supervision.
Do not use harsh abrasive cleaners or sharp metal
scrapers to clean the oven door glass since they can
scratch the surface, which may result in shattering
of the glass.
Never use steam cleaners or pressure cleaners on
the appliance.
WARNING: Ensure that the appliance is switched
off before replacing the lamp to avoid the possibility
of electric shock.
! When you place the rack inside, make sure that the
stop is directed upwards and in the back of the cavity.
ΠΡΟΣΟΧΉ: Η συσκευή αυτή και τα προσβάσιμα
μέρη της καθίστανται πολύ θερμά κατά τη χρήση. Θα
πρέπει να προσέχετε και να αποφεύγετε να αγγίζετε
τα θερμαντικά στοιχεία. Κρατάτε μακριά τα παιδιά
ηλικίας μικρότερης των 8 ετών ή να τα επιτηρείτε
συνεχώς.
Η παρούσα συσκευή μπορεί να χρησιμοποιηθεί
από παιδιά μεγαλύτερα των 8 ετών και από άτομα
με μειωμένες φυσικές, αισθητηριακές ή νοητικές
ικανότητες ή χωρίς εμπειρία και γνώση αν βρίσκονται
υπό κατάλληλη επιτήρηση ή αν έχουν εκπαιδευτεί
στη χρήση της συσκευής με τρόπο ασφαλή και
αν αντιλαμβάνονται τους σχετικούς κινδύνους. Τα
παιδιά δεν πρέπει να παίζουν με τη συσκευή. Οι
ενέργειες καθαρισμού και συντήρησης δεν πρέπει
να διενεργούνται από τα παιδιά χωρίς επιτήρηση.
Μη χρησιμοποιείτε προϊόντα αποξυστικά κι ούτε
σπάτουλες μεταλλικές κοφτερές για να καθαρίσετε
τη γυάλινη πόρτα του φούρνου επειδή μπορεί
να προξενηθούν ξυσίματα στην επιφάνεια,
προκαλώντας, έτσι, τη θραύση του γυαλιού.
Μη χρησιμοποιείτε ποτέ ατμοκαθαριστές ή
μηχανήματα καθαρισμού σε υψηλή πίεση για τον
καθαρισμό της συσκευής.
ΠΡΟΣΟΧΉ: Βεβαιωθείτε ότι η συσκευή είναι σβηστή
πριν αντικαταστήστε τη λυχνία για να αποφευχθεί
ενδεχόμενο ηλεκτροπληξίας.
! Όταν εισάγεται το πλέγμα βεβαιωθείτε ότι το στοπ
είναι στραμμένο προς τα πάνω και στο πίσω μέρος
της κοιλότητας
3
Ostrzezenia
Avertizări
UWAGA: To urządzenie oraz jego dostępne części
silnie się rozgrzewają podczas użytkowania. Należy
uważać, aby nie dotknąć elementów grzejnych.
Nie pozwalać, aby dzieci poniżej 8 roku życia zbliżały
się do urządzenia, jeśli nie są pod stałym nadzorem
dorosłych.
Z niniejszego urządzenia mogą korzystać dzieci
powyżej 8 roku życia i osoby o ograniczonych
zdolnościach fizycznych, zmysłowych bądź
umysłowych, jak również osoby nieposiadające
doświadczenia lub znajomości urządzenia, jeśli
znajdują się one pod nadzorem innych osób lub jeśli
zostały pouczone na temat bezpiecznego sposobu
użycia urządzenia oraz zdają sobie sprawę ze
związanych z nim zagrożeń. Dzieci nie powinny bawić
się urządzeniem. Prace związane z czyszczeniem i
konserwacją nie mogą być wykonywane przez dzieci,
jeśli nie są one nadzorowane.
Nie stosować środków ściernych ani ostrych
łopatek metalowych do czyszczenia szklanych
drzwiczek piekarnika, ponieważ mogłyby porysować
powierzchnię i spowodować pęknięcie szyby.
ATENŢIE: Acest aparat şi părţile sale accesibile devin
foarte calde în timpul folosirii.
Trebuie să ţi atenţi şi să nu atingeţi elementele de
încălzire.
Îndepărtaţi copiii sub 8 ani dacă nu sunt supravegheaţi
continuu.
Acest aparat poate utilizat de copiii de peste 8 ani
şi de persoane cu capacităţi zice, senzoriale sau
mentale reduse sau fără experienţă şi cunoştinţe
dacă se aă sub o supraveghere corespunzătoare
sau dacă au fost instruiţi cu privire la folosirea
aparatului în mod sigur şi dacă îşi dau seama de
pericolele corelate. Copiii nu trebuie să se joace cu
aparatul. Operaţiunile de curăţare şi de întreţinere nu
trebuie să e efectuate de copii fără supraveghere.
Nu folosiţi produse abrazive, nici perii de metal
tăioase pentru a curăţa uşa de sticlă a cuptorului,
deoarece ar putea zgâria suprafaţa, provocând astfel
spargerea geamului.
Nu folosiţi niciodată aparate cu aburi sau sub
presiune pentru a curăţa aparatul.
Nie stosować nigdy oczyszczaczy parowych lub
ciśnieniowych do czyszczenia urządzenia.
UWAGA: Przed wymianą żarówki, należy się
upewnić, że urządzenie jest wyłączone, aby uniknąć
ryzyka porażenia prądem.
! Wsuwając ruszt, należy się upewnić, że ogranicznik
jest skierowany ku górze i znajduje się on w tylnej
części komory.
ATENŢIE: Asiguraţi-vă că aparatul este stins înainte
de a înlocui lampa pentru a evita posibilitatea
electrocutărilor.
! Când introduceţi grătarul, asiguraţi-vă că opritorul
este îndreptat în sus şi în partea din spate a cavităţii.
4
Figyelmeztetések
Upozornění
FIGYELEM: A készülék és annak hozzáférhető
részei a használat közben rendkívüli módon
felmelegedhetnek.
Vigyázzon, hogy nehogy hozzáérjen a fűtőelemekhez.
Ha a gyermekek nincsenek folyamatos felügyelet
alatt, tartsa távol a 8 éven aluli gyermekeket.
Ezt a készüléket a 8 éves kort betöltött gyermekek,
valamint a testileg, érzékszervileg vagy szellemileg
korlátozott, nem hozzáértő, illetve a terméket
nem ismerő személyek csak megfelelő felügyelet
mellett, vagy a készülék biztonságos használatával
kapcsolatos alapvető utasítások és a kapcsolódó
veszélyek ismeretében használhatják. Vigyázzon,
hogy a gyermekek ne játsszanak a készülékkel. A
tisztítási és karbantartási műveleteket gyermekek
felügyelet nélkül nem végezhetik.
Az üveg sütőajtó tisztításához ne használjon
súrolószereket vagy vágóéllel rendelkező fémspatulát,
mivel azok összekaristolhatják az ajtó felületét, ami
pedig az üveg összetöréséhez vezethet.
A készülék tisztításához soha ne használjon
gőztisztítót vagy nagynyomású tisztítót.
FIGYELEM: Az esetleges áramütések elkerülése
érdekében a lámpa kicserélése előtt győződjön meg
arról, hogy a készülék ki van kapcsolva.
! A rács behelyezésekor győződjön meg arról, hogy
a kallantyú felfele néz és a sütőtér hátsó részén van.
UPOZORNĚNÍ: Toto zařízení a jeho přístupné části
dosahují během použití velmi vysoké teploty. Je
třeba dávat pozor a zabránit styku s topnými články.
Udržujte děti mladší 8 let v dostatečné vzdálenosti,
pokud nejsou pod neustálým dohledem. Toto
zařízení mohou používat děti od 8 let a osoby se
sníženými fyzickými, senzorickými nebo duševními
schopnostmi nebo osoby bez zkušeností a znalostí,
které se nacházejí pod náležitým dohledem
nebo které byly poučeny ohledně použití zařízení
bezpečným způsobem a které si uvědomují
související nebezpečí. Děti si nesmí hrát se
zařízením. Děti nesmí provádět operace čištění a
údržby bez dohledu.
K čištění skleněných dvířek trouby nepoužívejte
abrazivní výrobky ani ostré kovové špachtle, protože
by mohly poškrábat povrch a způsobit tak prasknutí
skla.
Nikdy nepoužívejte k čištění zařízení vysokotlaký
parní čistič.
UPOZORNĚNÍ: Před výměnou žárovky se ujistěte,
že je zařízení vypnuté, aby se zabránilo možnosti
zásahu elektrickým proudem.
! Při vložení mřížky se ujistěte, že se doraz nachází
v zadní části prohloubeniny a je obrácen směrem
nahoru.
5
Препоръки
ВНИМАНИЕ: Уредът и неговите открити части се
нагряват много при употреба.
Бъдете особено внимателни и не докосвайте
нагревателните елементи.
Не допускайте деца под 8 години близо до уреда,
освен ако не са под постоянно наблюдение.
Този уред може да се ползва от деца, навършили
8 години, и от лица с намалени физически,
сетивни или умствени възможности, както и
при липса на опит и познания, ако въпросните
лица са под подходящо наблюдение или са
инструктирани за безопасното боравене с уреда
и осъзнават свързаните с това опасности. Децата
не трябва да си играят с уреда. Почистването и
поддръжката не трябва да се извършват от деца
без наблюдение.
Не използвайте абразивни продукти и остри
метални шпатули за почистване на стъклената
вратичка на фурната, защото може да надраскат
повърхността, което да доведе до счупване на
стъклото.
В никакъв случай не използвайте парочистачки
или машини под високо налягане за почистване
на уреда.
ВНИМАНИЕ: Уверете се, че уредът е изключен,
преди да смените лампата, за да избегнете
опасността от токов удар.
! При поставяне на решетката внимавайте
фиксаторът да е на задната страна на гнездото
и да е обърнат нагоре.
6
Assistance
! Never use the services of an unauthorised technician.
Please have the following information to hand:
• The type of problem encountered.
• The appliance model (Mod.).
• The serial number (S/N).
The latter two pieces of information can be found on the data plate located
on the appliance.
Szerviz
! Sohase hívjon engedéllyel nem rendelkező szakembert!
Adja meg az alábbiakat:
• az anomália típusa;
• a készülék modellje (Mod.)
• a készülék szériaszáma (S/N)
Az utóbbi információk a készüléken elhelyezett adattáblán találhatók.
Τεχνική υποστήριξη
! Μην προσφεύγετε ποτέ σε τεχνικούς μη εξουσιοδοτημένους.
Γνωστοποιήστε:
• Τον τύπο της ανωμαλίας
• Το μοντέλο της μηχανής (Mod.)
• Τον αριθμό σειράς (S/N)
Αυτές οι τελευταίες πληροφορίες βρίσκονται στην ταμπελίτσα χαρακτηριστικών
που βρίσκεται στη συσκευή
Serwis Techniczny
! Nigdy nie korzystać z usług nieautoryzowanych techników.
Podać:
• Rodzaj usterki;
• Model urządzenia (Mod.)
• Numer seryjny (S/N)
Te ostatnie informacje można znaleźć na tabliczce znamionowej umieszczonej
na urządzeniu.
Servisní služba
! Nikdy se neobracejte na neautorizované techniky.
Uveďte:
• Druh poruchy;
• Model zařízení (Mod.);
• Výrobní číslo (S/N).
Tyto informace se nacházejí na štítku s jmenovitými údaji, umístěném na
zařízení.
Техни еско обслужване
! Никога не се обръщайте към неоторизирани технически лица.
Съобщете:
• Вида на неизправността;
• Модела на машината (Mod.)
• Серийния номер (S/N)
Тези последни сведения се намират в табелката с характеристиките,
поставена върху уреда и/или върху опаковката.
Asistenţă
! Nu apelaţi niciodată la personal tehnic neautorizat.
Comunicaţi:
• tipul de anomalie;
• modelul aparatului (Mod.)
• numărul de serie (S/N)
Aceste informaţii se găsesc pe tăbliţa cu caracteristici lipită de aparat.
7
Description of the appliance
7
12345
Descrierea aparatului
Overall view
1 POSITION 1
2 POSITION 2
3 POSITION 3
4 POSITION 4
5 POSITION 5
6 GUIDES for the sliding racks
7 DRIPPING PAN
8 GRILL
9 Control panel
Περιγραφή της συσκευής
Συνολική άποψη
1 ΘΕΣΗ 1
2 ΘΕΣΗ 2
3 ΘΕΣΗ 3
4 ΘΕΣΗ 4
5 ΘΕΣΗ 5
6 ΟΔΗΓΟΙ ολίσθησης των επιπέδων
7 Επίπεδο ΛΙΠΟΣΥΛΛΈΚΤΗ
8 Επίπεδο ΓΚΡΙΛ
9 Πίνακας ελέγχου
Vedere de ansamblu
1 POZITIA 1
2 POZITIA 2
3 POZITIA 3
4 POZITIA 4
5 POZITIA 5
6 GHIDAJE culisare rafturi
7 Raft TAVĂ
8 Raft GRĂTAR
9 Panou de control
Opis urządzenia
Widok ogólny
1 POZIOM 1
2 POZIOM 2
3 POZIOM 3
4 POZIOM 4
5 POZIOM 5
6 PROWADNICE boczne
7 Poziom BLACHA UNIWERSALNA
8 Poziom RUSZT
9 Panel sterowania
8
9 6
8
7
12345
A készülék leírása
A készülék áttekintése
1 SZINT 1
2 SZINT 2
3 SZINT 3
4 SZINT 4
5 SZINT 5
6 TÁLCASÍNEK
7 ZSÍRFELFOGÓ tálca
8 GRILLRÁCS
9 Kezelőpanel
Popis zařízení
Celkový pohled
1 POLOHA 1
2 POLOHA 2
3 POLOHA 3
4 POLOHA 4
5 POLOHA 5
6 VODICÍ LIŠTY pro posuv na jednotlivých úrovních
7 Úroveň SBĚRNÉ NÁDOBY
8 Úroveň ROŠTU
9 Ovládací panel
Описание на уреда
Общ преглед
1 ПОЛОЖЕНИЕ 1
2 ПОЛОЖЕНИЕ 2
3 ПОЛОЖЕНИЕ 3
4 ПОЛОЖЕНИЕ 4
5 ПОЛОЖЕНИЕ 5
6 ВОДАЧИ за движение на нивата
7 Ниво ТАВИЧКА ЗА СЪБИРАНЕ НА СОКОВЕТЕ, ОТДЕЛЕНИ ПРИ
ПЕЧЕНЕТО
8 Ниво РЕШЕТКА
9 Управляващ панел
9 6
8
9
Description of the appliance
A készülék leírása
Control panel
1 SELECTOR knob
2 ELECTRONIC programmer
3 THERMOSTAT knob
4 THERMOSTAT indicator light
Περιγραφή της συσκευής
Πίνακας ελέγχου
1 Επιλογέας ΠΡΟΓΡΑΜΜΑΤΩΝ
2 Επιλογέας ΘΕΡΜΟΣΤΑΤΗ
3 Ενδεικτικό φωτάκι ΘΕΡΜΟΣΤΑΤΗ
4 Προγραμματιστής ΗΛΕΚΤΡΟΝΙΚΟΣ
Kezelőpanel
1 PROGRAMVÁLASZTÓ tekerőgomb
2 ELEKTRONIKUS programozó
3 HŐMÉRSÉKLET-SZABÁLYZÓ tekerőgomb
4 HŐMÉRSÉKLET-SZABÁLYZÓ lámpa
Popis zařízení
Ovládací panel
1 Otočný knoík VOLBY PROGRAMŮ
2 Otočný ovladač TERMOSTAT
3 Kontrolka TERMOSTAT
4 ELEKTRONICKÉ programovací zarízení
Opis urządzenia
Panel sterowania
1 Pokrętło PROGRAMY
2 Programator ELEKTRONICZNY
3 Pokrętło TERMOSTATU
4 Kontrolka TERMOSTATU
Descrierea aparatului
Panoul de control
1 Selector PROGRAME
2 Programator ELECTRONIC
3 Selector TERMOSTAT
4 Indicator TERMOSTAT
Описание на уреда
Управляващ панел
1 Превключвател ПРОГРАМИ
2 Превключвател ТЕРМОСТАТ
3 Светлинен индикатор ТЕРМОСТАТ
4 ЕЛЕКТРОНЕН програматор
2
3 41
10
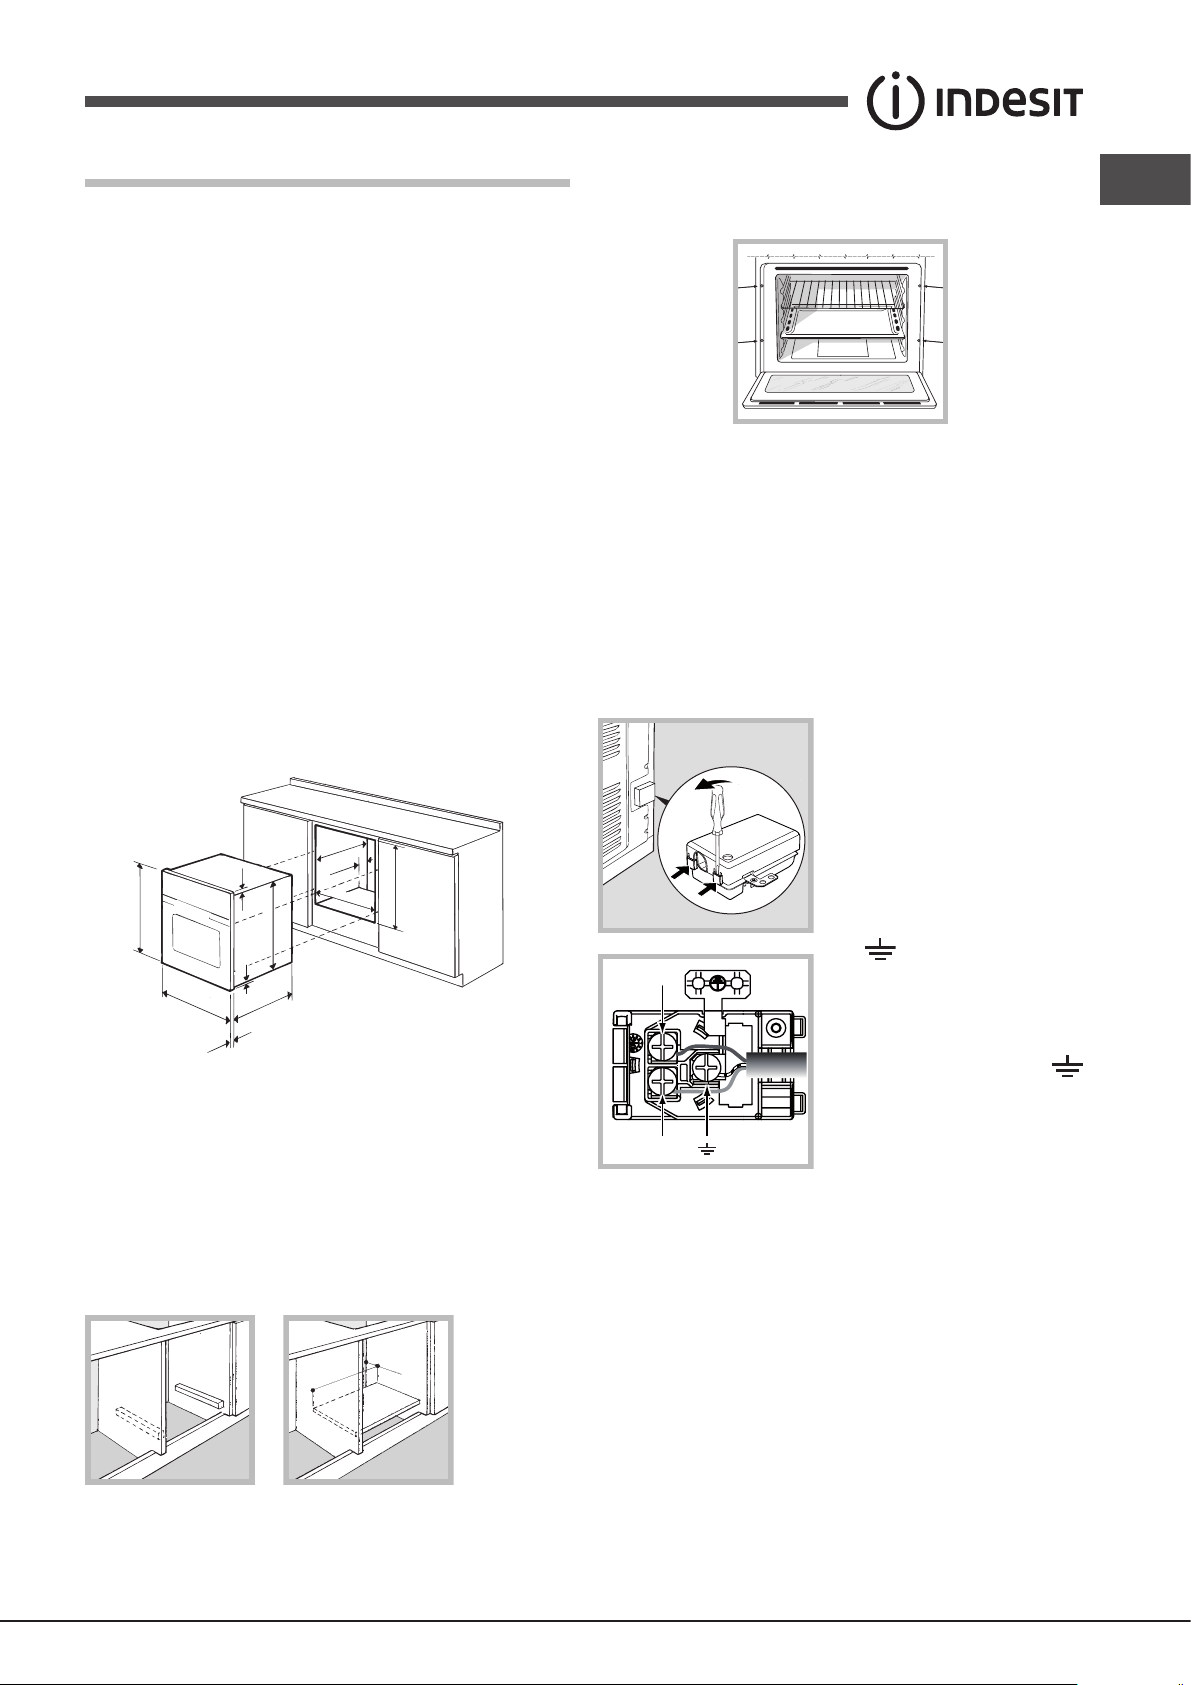
Installation
595 mm.
25 mm.
! Please keep this instruction booklet in a safe place for future reference. If
Centring and xing
Secure the appliance to the cabinet by opening the oven door and inserting
4 screws into the 4 holes on the outer frame.
the appliance is sold, given away or moved, please make sure the booklet is
also passed on to the new owners so that they may benet from the advice
contained within it.
! Please read this instruction manual carefully: it contains important information
concerning the safe operation, installation and maintenance of the appliance.
Positioning
! Do not let children play with the packaging material; it should be disposed
of in accordance with local separated waste collection standards (see
Precautions and tips).
! All parts which ensure the safe operation of the appliance must not be
! The appliance must be installed by a qualied professional in accordance
with the instructions provided. Incorrect installation may damage property or
cause harm to people or animals.
Built-in appliances
Use an appropriate cabinet to ensure that the appliance operates properly:
• The panels adjacent to the oven must be made of heat-resistant material.
• Cabinets with a veneer exterior must be assembled with glues which can
withstand temperatures of up to 100°C.
• To install the oven under the counter (see diagram) or in a kitchen unit,
the cabinet must have the following dimensions:
removable without the aid of a tool.
Electrical connection
Ovens equipped with a three-pole power supply cable are designed to operate
with alternating current at the voltage and frequency indicated on the data
plate located on the appliance (see below).
Fitting the power supply cable
GB
1. Open the terminal board by inserting
a screwdriver into the side tabs of the
cover. Use the screwdriver as a lever
by pushing it down to open the cover
(see diagram).
547 mm. min.
23 mm.
5 mm.
595 mm.
545 mm.
45 mm.
560 mm.
575-585 mm.
567 mm.
! The appliance must not come into contact with electrical parts once it has
been installed. The indications for consumption given on the data plate have
been calculated for this type of installation.
Ventilation
To ensure adequate ventilation, the back panel of the cabinet must be
removed. It is advisable to install the oven so that it rests on two strips of
wood, or on a completely at surface with an opening of at least 45 x 560
mm (see diagrams).
45 mm.
560 mm.
2. Install the power supply cable by
loosening the cable clamp screw
and the three wire contact screws
L-N- .
N
Connect the wires to the corresponding
terminals: the Blue wire to the terminal
N
marked (N), the Brown wire to the
terminal marked (L) and the Yellow/
Green wire to the terminal marked
L
L
(see diagram).
3. Secure the cable by fastening the
clamp screw.
4. Close the cover of the terminal board.
Connecting the supply cable to the mains
Install a standardised plug corresponding to the load indicated on the data
plate (see table).
The appliance must be directly connected to the mains using an omnipolar
switch with a minimum contact opening of 3 mm installed between the
appliance and the mains. The switch must be suitable for the charge indicated
and must comply with current electrical regulations (the earthing wire must not
be interrupted by the switch). The supply cable must be positioned so that it
does not come into contact with temperatures higher than 50°C at any point
(the back panel of the oven, for example).
! The installer must ensure that the correct electrical connection has been
performed and that it is fully compliant with safety regulations.
11
Before connecting the appliance to the power supply, make sure that
APPLIANCE SPECIFICATIONS
Dimensions*
width 43.5 cm
height 32,4 cm
depth 40.6 cm
Volume*
58 l
Dimensions**
width 45.5 cm
height 32,4 cm
depth 40.6 cm
Volume**
60 l
Electrical
connections
Voltage: 220 - 240 V~ 50/60 Hz
(see data plate) maximum power
absorbed 2250 W
* Only for models with drawn rails.
** Only for models with wire rails.
Energy
Label e
Ecodesign
EU Directive no 65/2014
supplementing Directive 2010/30/EU.
EU Regulation no 66/2014
implementing Directive 2009/125/EC.
Standard EN 60350-1
Standard EN 50564
Energy consumption for Natural
convection – heating mode:
Convection
Declared energy consumption for
Forced convection Class –
heating mode: Multi-Cooking.
This appliance conforms to the
following European Economic
Community directives:
- 2006/95/EC dated 12/12/06
(Low Voltage) and subsequent
amendments
- 2004/108/EC dated 03/05/89
(Electromagnetic Compatibility)
and subsequent amendments
- 93/68/EEC dated 22/07/93 and
subsequent amendments.
- 2012/19/EU and subsequent
amendments.
1275/2008 standby/off mode.
GB
• The appliance is earthed and the plug is compliant with the law.
• The socket can withstand the maximum power of the appliance, which is
indicated on the data plate.
• The voltage is in the range between the values indicated on the data plate.
• The socket is compatible with the plug of the appliance. If the socket is
incompatible with the plug, ask an authorised technician to replace it. Do
not use extension cords or multiple sockets.
! Once the appliance has been installed, the power supply cable and the
electrical socket must be easily accessible.
! The cable must not be bent or compressed.
! The cable must be checked regularly and replaced by authorised technicians
only (see Assistance).
! The manufacturer declines any liability should these safety measures
not be observed.
12
Start-up and use
Cooking modes
GB
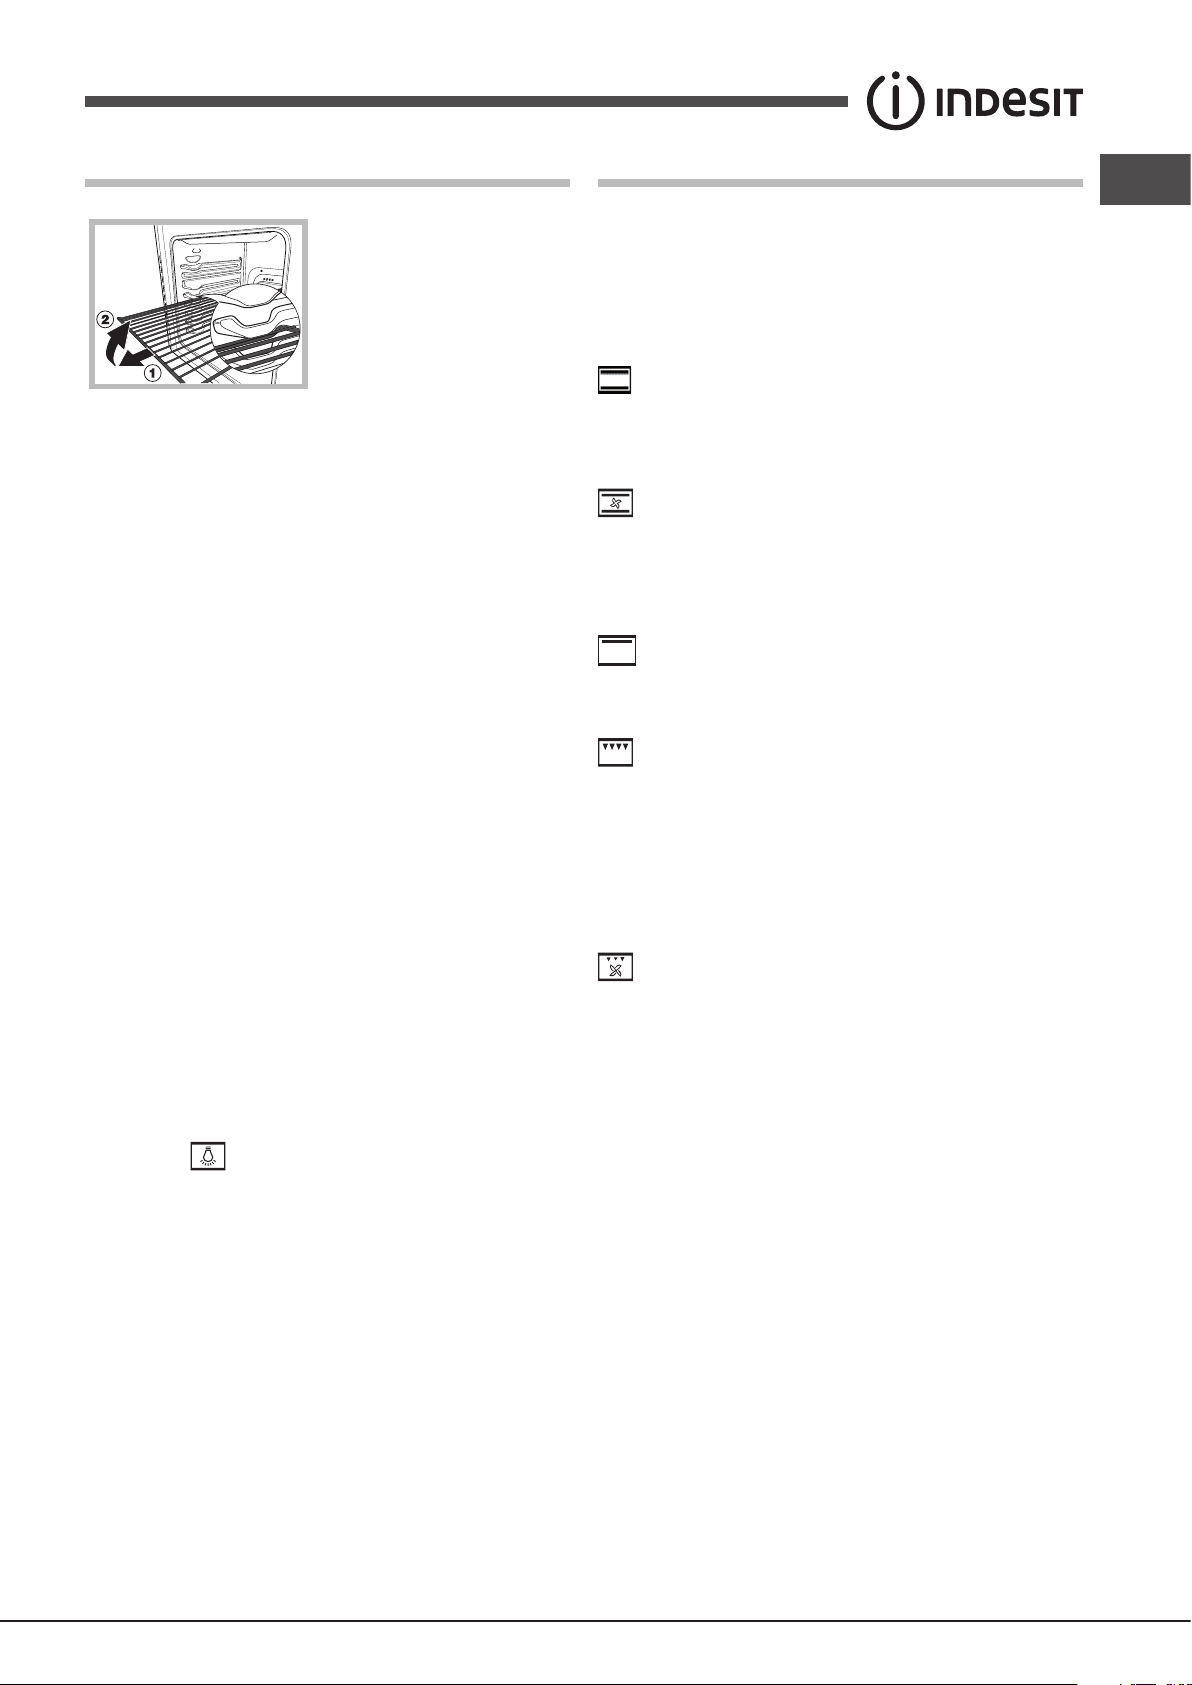
WARNING ! The oven is provided with
a stop system to extract the racks and
prevent them from coming out of the
oven (1).
As shown in the drawing, to extract
them completely, simply lift the racks,
holding them on the front part, and
pull (2).
! The rst time you use your appliance, heat the empty oven with its door
closed at its maximum temperature for at least half an hour. Ensure that the
room is well ventilated before switching the oven off and opening the oven
door. The appliance may emit a slightly unpleasant odour caused by protective
substances used during the manufacturing process burning away.
Setting the clock
1. Select the desired cooking mode by turning the SELECTOR knob.
2. Select the desired temperature using the THERMOSTAT knob. A list
detailing cooking modes and suggested cooking temperatures can be found
in the Cooking advice table (see Cooking modes).
3. The THERMOSTAT indicator light indicates that the oven is heating up to
the temperature set.
4. During cooking it is always possible to:
- change the cooking mode by turning the SELECTOR knob;
- adjust the temperature by turning the THERMOSTAT knob;
- stop cooking by turning the SELECTOR knob to the “0” position.
! Never put objects directly on the bottom of the oven; this will prevent the
enamel coating from being damaged.
! Always place cookware on the rack(s) provided.
Cooling ventilation
In order to cool down the external temperature of the oven, a cooling fan
blows a stream of air between the control panel and the oven door, as well
as towards the bottom of the oven door.
! Once cooking has been completed, the cooling fan continues to operate
until the oven has cooled down sufciently.
Oven light
When selecting with the SELECTOR knob the oven light goes on. It
remains lit when a cooking mode is selected.
Cooking modes
! A temperature value between 60°C and MAX can be set for all cooking
modes except the following:
• GRILL (recommended: set only to MAX power level)
• GRATIN (recommended: do not exceed 200°C).
TRADITIONAL OVEN mode
Both the top and bottom heating elements will come on. When using this
traditional cooking mode, it is best to use one cooking rack only. If more than
one rack is used, the heat will be distributed unevenly.
MULTILEVEL mode
All the heating elements (top, bottom and circular) switch on and the fan
begins to operate. Since the heat remains constant throughout the oven, the
air cooks and browns food in a uniform manner. A maximum of two racks may
be used at the same time.
TOP OVEN mode
The top heating element comes on. This mode can be used to brown food
at the end of cooking.
GRILL mode
The top heating element comes on. The extremely high and direct temperature
of the grill makes it possible to brown the surface of meats and roasts while
locking in the juices to keep them tender. The grill is also highly recommended
for dishes that require a high temperature on the surface: such as beef steaks,
veal, rib steak, lets, hamburgers etc...
Some grilling examples are included in the “Practical Cooking Advice”
paragraph. Always cook in this mode with the oven door closed.
GRATIN mode
The top heating element, as well as the fan, will come on. This combination
of features increases the effectiveness of the unidirectional thermal radiation
provided by the heating elements through forced circulation of the air
throughout the oven. This helps prevent food from burning on the surface
and allows the heat to penetrate right into the food. Always cook in this mode
with the oven door closed.
13
Cooking
modes
Foods
Weight
(in kg)
Rack
position
Pre-heating
time (min)
Recommended
temperature
Cooking
time
(minutes)
Convection
Oven
Duck
Roast veal or beef
Pork roast
Biscuits (short pastry)
Tarts
1
1
1
-
1
3
3
3
3
3
15
15
15
15
15
200
200
200
180
180
65-75
70-75
70-80
15-20
30-35
Multi-cooking
Pizza (on 2 racks)
Lasagne
Lamb
Roast chicken + potatoes
Mackerel
Plum cake
Cream puffs (on 2 racks)
Biscuits (on 2 racks)
Sponge cake (on 1 rack)
Sponge cake (on 2 racks)
Savoury pies
1
1
1
1+1
1
1
0.5
0.5
0.5
1
1.5
2 and 4
3
2
2 and 4
2
2
2 and 4
2 and 4
2
2 and 4
3
15
10
10
15
10
10
10
10
10
10
15
230
180
180
200
180
170
190
180
170
170
200
15-20
30-35
40-45
60-70
30-35
40-50
20-25
10-15
15-20
20-25
25-30
Top oven
Browning food to perfect cooking - 3/4 15 220 -
Grill
Soles and cuttlefish
Squid and prawn kebabs
Cod filet
Grilled vegetables
Veal steak
Cutlets
Hamburgers
Mackerels
Toasts
1
1
1
1
1
1
1
1
4
4
4
4
3 or 4
4
4
4
4
4
5
5
5
5
5
5
5
5
5
Max
Max
Max
Max
Max
Max
Max
Max
Max
8-10
6-8
10
10-15
15-20
15-20
7-10
15-20
2-3
Gratin
Grilled chicken
Cuttlefish
1.5
1.5 2 2 5 5
200
200
55-60
30-35
Cooking advice table
Practical cooking advice
GB
! Do not place racks in position 1 and 5 during fan-assisted cooking. This is
because excessive direct heat can burn temperature sensitive foods.
! In the GRILL and GRATIN cooking modes, particularly when using the
rotisserie spit, place the dripping pan in position 1 to collect cooking residues
(fat and/or grease).
MULTI-COOKING
• Use positions 2 and 4, placing the food which requires more heat on 2.
• Place the dripping pan on the bottom and the rack on top.
GRILL
• Place the rack in position 3 or 4. Position the food in the centre of the rack.
• We recommend that the power level is set to maximum. The top heating
element is regulated by a thermostat and may not always operate
constantly.
PIZZA
• For best results when cooking pizza, use the MULTI-COOKING mode.
• Use a light aluminium pizza pan. Place it on the rack provided.
For a crispy crust, do not use the dripping pan (prevents crust from forming
by extending cooking time).
• If the pizza has a lot of toppings, we recommend adding the mozzarella
cheese on top of the pizza halfway through the cooking process.
14
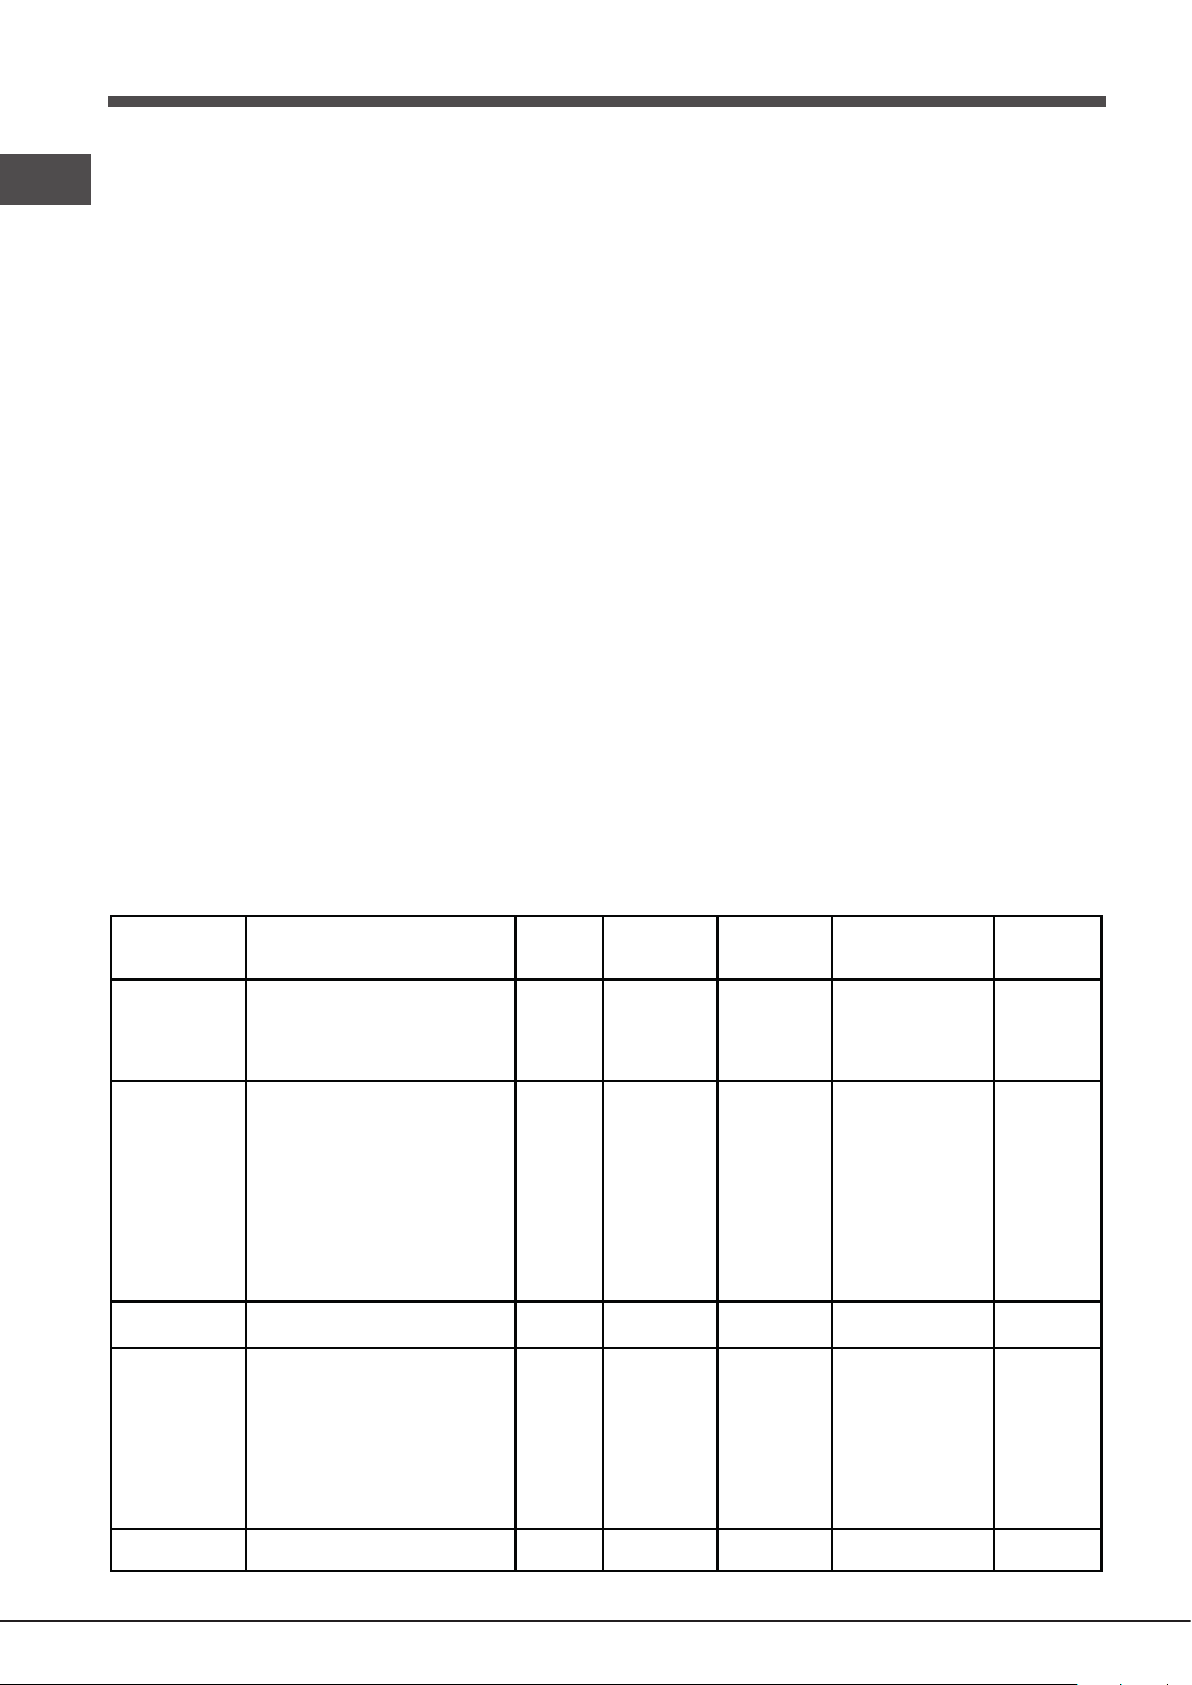
The electronic programmer
DISPLAY
SET TIME
button
END OF
COOKING icon
CLOCK
icon
DURATION
icon
TIMER icon
DECREASE TIME
button
INCREASE TIME
button
Setting the end time for a cooking mode
! A cooking duration must be set before the cooking end time can be scheduled.
1. Follow steps 1 to 3 to set the duration as detailed above.
2. Next, press the button until the icon and the four digits on the
DISPLAY begin to ash.
3. Use the “ ” and “ ” buttons to adjust the cooking end time; if you press
and hold either button, the display will scroll through the values more quickly,
making it quicker and easier to set the desired value.
4. Wait for 10 seconds or press the button again to nalise the setting.
5. When the set time has elapsed, the text END appears on the DISPLAY,
the oven will stop cooking and a buzzer sounds.Press any button to stop it.
Programming has been set when the and buttons are illuminated. The
DISPLAY shows the cooking end time and the cooking duration alternately.
• For example: It is 9:00 a.m. and a duration of 1 hour has been programmed.
Setting the clock
! The clock may be set when the oven is switched off or when it is switched
on, provided that a the end time of a cooking cycle has not been programmed
previously.
After the appliance has been connected to the mains, or after a blackout, the
icon and the four numerical digits on the DISPLAY will begin to ash.
1. Press the button several times until the icon and the four digits on
the display begin to ash.
2. Use the “ ” and “ ” buttons to adjust the time; if you press and hold either
button, the display will scroll through the values more quickly, making it quicker
and easier to set the desired value.
3. Wait for 10 seconds or press the button again to nalise the setting.
Cancelling a programme
To cancel a programme:
• Press the button until the icon corresponding to the setting you wish
• Press and hold the “ ” and “ ” buttons; this will cancel all the settings
GB
12:30 is scheduled as the end time. The programme will start automatically
at 11:30 a.m.
to cancel and the digits on the display are no longer ashing. Press the “
” button until the digits 00:00 appear on the display.
selected previously, including timer settings.
Setting the timer
! This function does not interrupt cooking and does not affect the oven; it is
simply used to activate the buzzer when the set amount of time has elapsed.
1. Press the button several times until the icon and the three digits
on the display begin to ash.
2. Use the “ ” and “ ” buttons to set the desired time; if you press and hold
either button, the display will scroll through the values more quickly, making
it quicker and easier to set the value.
3. Wait for 10 seconds or press the button again to nalise the setting.
The display will then show the time as it counts down. When this period of
time has elapsed the buzzer will be activated.
Programming cooking
! A cooking mode must be selected before programming can take place.
Programming the cooking duration
1. Press the button several times until the icon and the three digits
on the DISPLAY begin to ash.
2. Use the “ ” and “ ” buttons to set the desired duration; if you press and
hold either button, the display will scroll through the values more quickly,
making it quicker and easier to set the value.
3. Wait for 10 seconds or press the button again to nalise the setting.
4. When the set time has elapsed, the text END appears on the DISPLAY,
the oven will stop cooking and a buzzer sounds. Press any button to stop it.
• For example: it is 9:00 a.m. and a time of 1 hour and 15 minutes is
programmed. The programme will stop automatically at 10:15 a.m.
15

Precautions and tips
GB
! This appliance has been designed and manufactured in compliance with
international safety standards. The following warnings are provided for safety
reasons and must be read carefully.
General safety
• The appliance was designed for domestic use inside the home and is
not intended for commercial or industrial use.
• The appliance must not be installed outdoors, even in covered areas. It is
extremely dangerous to leave the appliance exposed to rain and storms.
• When moving or positioning the appliance, always use the handles
provided on the sides of the oven.
• Do not touch the appliance while barefoot or with wet or damp hands and
feet.
• The appliance must be used by adults only for the preparation of
food, in accordance with the instructions provided in this booklet.
Any other use of the appliance (e.g. for heating the room) constitutes
improper use and is dangerous. The manufacturer may not be held
responsible for any damage caused as a result of improper, incorrect
and unreasonable use of the appliance.
• Do not touch the heating elements or certain parts of the oven door
when the appliance is in use; these parts become extremely hot.
Keep children well away from the appliance.
• Make sure that the power supply cables of other electrical appliances do
not come into contact with the hot parts of the oven.
• The ventilation and heat dispersal openings must never be obstructed.
• Always grip the oven door handle in the centre: the ends may be hot.
• Always use oven gloves when placing cookware in the oven or when
removing it.
• Do not use aluminium foil to line the bottom of the oven.
• Do not place ammable materials in the oven: if the appliance is switched
on accidentally, the materials could catch re.
• Always make sure the knobs are in the “●”/“○” position when the appliance
is not in use.
• When unplugging the appliance, always pull the plug from the mains
socket; do not pull on the cable.
• Do not perform any cleaning or maintenance work without having
disconnected the appliance from the electricity mains.
• If the event of malfunctions, under no circumstances should you attempt
to perform the repairs yourself. Contact an authorised Service Centre (see
Assistance).
• Do not rest objects on the open oven door.
• Do not let children play with the appliance.
• The appliance should not be operated by people (including children)
with reduced physical, sensory or mental capacities, by inexperienced
individuals or by anyone who is not familiar with the product. These
individuals should, at the very least, be supervised by someone who
assumes responsibility for their safety or receive preliminary instructions
relating to the operation of the appliance.
• The appliance is not intended to be operated by means of an external
timer or separate remote-control system.
The crossed out “wheeled bin” symbol on the product reminds you of your
obligation, that when you dispose of the appliance it must be separately
collected.
Consumers should contact their local authority or retailer for information
concerning the correct disposal of their old appliance.
Respecting and conserving the environment
• Whenever possible, avoid pre-heating the oven and always try to ll it.
Open the oven door as little as possible because heat is lost every time
it is opened. To save a substantial amount of energy, simply switch off
the oven 5 to 10 minutes before the end of your planned cooking time
and use the heat the oven continues to generate.
• Automatic programmes are based on standard food product.
• Keep gaskets clean and tidy to prevent any door energy losses
• If you have a timed tariff electricity contract, the “delay cooking” option
will make it easier to save money by moving operation to cheaper time
periods.
! This product complies with the requirements of the latest European Directive
on the limitation of power consumption of the standby mode.
Disposal
• When disposing of packaging material: observe local legislation so that
the packaging may be reused.
• The European Directive 2012/19/EU on Waste Electrical and
Electronic Equipment (WEEE), requires that old household electrical
appliances must not be disposed of in the normal unsorted municipal
waste stream. Old appliances must be collected separately in order
to optimise the recovery and recycling of the materials they contain
and reduce the impact on human health and the environment.
16
Maintenance and care
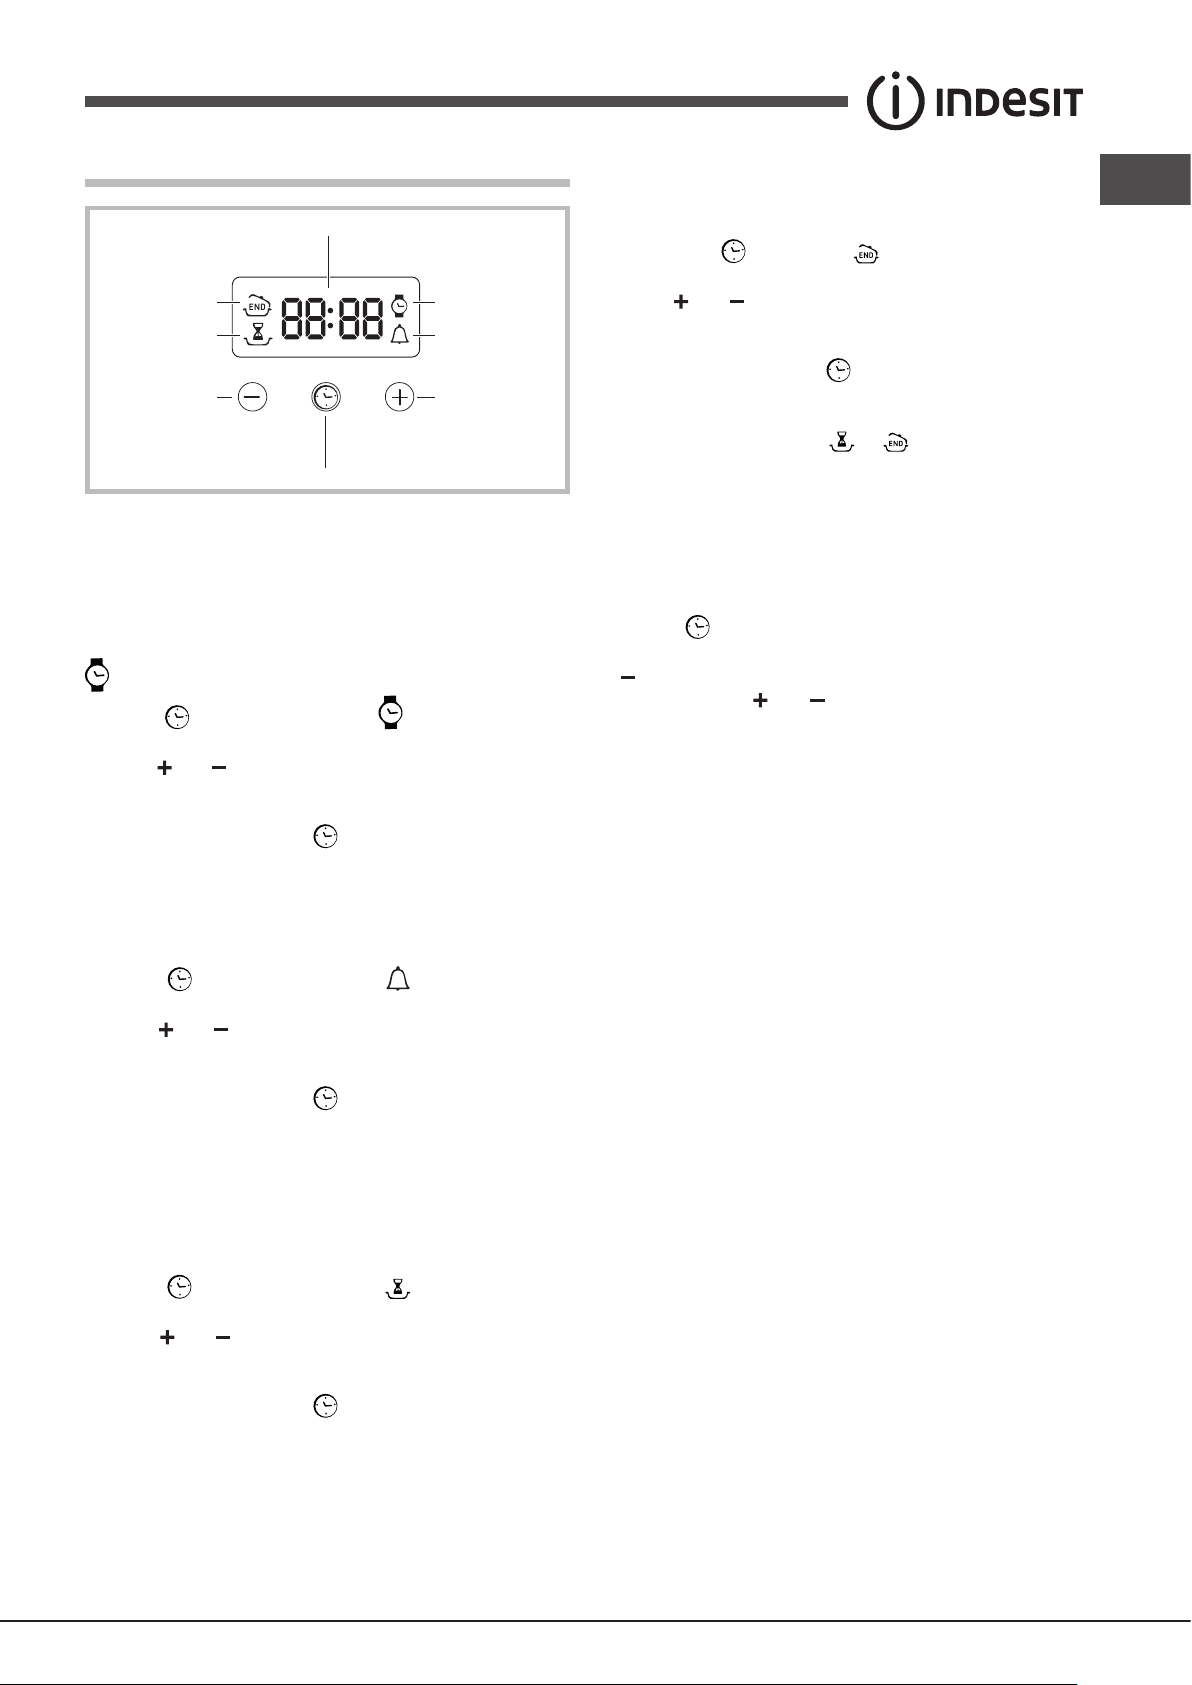
Replacing the light bulb
Switching the appliance off
Disconnect your appliance from the electricity supply before carrying out
any work on it.
Cleaning the appliance
• The stainless steel or enamel-coated external parts and the rubber seals
may be cleaned using a sponge that has been soaked in lukewarm water
and neutral soap. Use specialised products for the removal of stubborn
stains. After cleaning, rinse and dry thoroughly. Do not use abrasive
powders or corrosive substances.
• The inside of the oven should ideally be cleaned after each use, while it is
still lukewarm. Use hot water and detergent, then rinse well and dry with
a soft cloth. Do not use abrasive products.
• All accessories - with the exception of the sliding racks - can be washed
like everyday crockery, and are even dishwasher safe.
• We recommend that detergents are not sprayed directly onto the control
panel, but that a sponge is used instead.
! Never use steam cleaners or pressure cleaners on the appliance.
! Do not use the oven lamp as/for ambient lighting.
Cleaning the oven door
Clean the glass part of the oven door using a sponge and a non-abrasive
cleaning product, then dry thoroughly with a soft cloth. Do not use rough
abrasive material or sharp metal scrapers as these could scratch the surface
and cause the glass to crack. For more thorough cleaning purposes, the oven
door may be removed:
GB
To replace the oven light bulb:
1. Remove the glass cover of the
lamp-holder.
2. Remove the light bulb and replace
it with a similar one: Wattage 25 W,
cap E 14.
3. Replace the glass cover (see
diagram).
1. Open the oven door fully (see diagram);
2. Lift up and turn the small levers located on
the two hinges (see diagram);
3. Grip the door on the two external sides
and close it approximately half way. Pull the
door towards you, lifting it out of its slot (see
diagram).
To replace the door, reverse this sequence.
Inspecting the seals
Check the door seals around the oven regularly. If the seals are damaged,
please contact your nearest Service Centre (see Assistance). We recommend
that the oven is not used until the seals have been replaced.
17
Εγκατάσταση
595 mm.
595 mm.
24 mm.
545 mm.
5 mm.
576 mm.
23 mm.
593 mm.
45 mm.
558 mm.
547 mm. min.
GR
! Είναι σημαντικό να διατηρείτε το εγχειρίδιο αυτό για να μπορείτε να
το συμβουλεύεστε οποιαδήποτε στιγμή. Σε περίπτωση πώλησης,
παραχώρησης ή μετακόμισης, βεβαιωθείτε ότι παραμένει μαζί με τη συσκευή
για πληροφόρηση του νέου ιδιοκτήτη για τη λειτουργία και τις σχετικές
προειδοποιήσεις.
!Διαβάστε προσεκτικά τις οδηγίες: υπάρχουν σημαντικές πληροφορίες για
την εγκατάσταση, τη χρήση και την ασφάλεια.
Τοποθέτηση
! Οι συσκευασίες δεν είναι παιχνίδια για παιδιά και απομακρύνονται σύμφωνα
με τους κανόνες για τη διαφοροποιημένη συλλογή (βλέπε Προφυλάξεις και
συμβουλές).
! Η εγκατάσταση διενεργείται σύμφωνα με τις οδηγίες αυτές και από
προσωπικό επαγγελματικά ειδικευμένο. Μια εσφαλμένη εγκατάσταση μπορεί
να προκαλέσει ζημιές σε άτομα, ζώα ή αντικείμενα.
Εντοιχισμός
Για τη διασφάλιση μιας καλής λειτουργίας της συσκευής είναι απαραίτητο το
έπιπλο να έχει τα κατάλληλα χαρακτηριστικά:
• τα γειτονικά πάνελ του φούρνου πρέπει να είναι από υλικό ανθεκτικό στη
θερμότητα.
• στην περίπτωση επίπλων από μοριοσανίδα, οι κόλλες πρέπει να είναι
ανθεκτικές σε θερμοκρασία 100°C.
• για τον εντοιχισμό του φούρνου, τόσο στην περίπτωση εισαγωγής κάτω
από τον πάγκο (βλέπε εικόνα) όσο και σε στήλη, το έπιπλο πρέπει να
έχει τις ακόλουθες διαστάσεις:
Κεντράρισμα και στερέωση
Για να στερεώσετε τη συσκευή στο έπιπλο: ανοίξτε την πόρτα του φούρνου και
βιδώστε 4 ξύλινες βίδες στις 4 οπές που βρίσκονται στο περιμετρικό πλαίσιο.
! Όλα τα μέρη που εξασφαλίζουν την προστασία πρέπει να είναι στερεωμένα
με τέτοιο τρόπο που να μην μπορούν να αφαιρεθούν χωρίς τη βοήθεια
κάποιου εργαλείου.
Ηλεκτρική σύνδεση
! Οι φούρνοι που διαθέτουν τριπολικό καλώδιο τροφοδοσίας είναι έτοιμοι για τη
λειτουργία με εναλλασσόμενο ρεύμα, με τάση και συχνότητα που αναφέρονται
στην ταμπελίτσα χαρακτηριστικών που βρίσκεται επί της συσκευής (βλέπε
παρακάτω).
Συναρμολόγηση καλωδίου τροφοδοσίας
1. Ανοίξτε το κουτί ακροδεκτών
χρησιμοποιώντας ως μοχλό ένα
κατσαβίδι στις πλευρικές γλωσσίτσες
του καπακιού: τραβήξτε και ανοίξτε το
καπάκι (βλέπε εικόνα).
! Αφού εντοιχιστεί η συσκευή δεν πρέπει να υφίστανται επαφές με τα
ηλεκτρικά μέρη. Οι δηλώσεις κατανάλωσης που αναφέρονται στην ταμπελίτσα
χαρακτηριστικών μετρήθηκαν για αυτόν τον τύπο εγκατάστασης.
Αερισμός
Για τη διασφάλιση καλού αερισμού θα πρέπει να αφαιρέσετε το πίσω τοίχωμα
του διαμερίσματος. Είναι προτιμότερο να εγκαταστήσετε το φούρνο έτσι που
να στηρίζεται σε δύο ξύλα ή σε έναν συνεχή πάγκο που να έχει άνοιγμα
τουλάχιστον 45 x 560 mm (βλέπε εικόνες ).
45 mm.
560 mm.
2. Χρησιμοποιήστε το καλώδιο
τροφοδοσίας: ξεβιδώστε τη βίδα
ασφάλισης καλωδίου και τις τρεις
βίδες των επαφών L-N- και κατόπιν
N
στερεώστε τα καλώδια κάτω από
τις κεφαλές των βιδών με βάση τα
N
χρώματα Μπλε (N) Καφέ (L) Κιτρινοπράσινο (βλέπε εικόνα).
3. Στερεώστε το καλώδιο στο αντίστοιχο
L
στοπ.
4. Κλείστε το καπάκι του κουτιού
L
ακροδεκτών.
Σύνδεση του καλωδίου τροφοδοσίας στο δίκτυο
Μοντάρετε στο καλώδιο ένα κανονικοποιημένο βύσμα για το φορτίο που
αναφέρεται στην ταμπελίτσα χαρακτηριστικών (βλέπε δίπλα). Σε περίπτωση
άμεσης σύνδεσης στο δίκτυο πρέπει να παρεμβάλλετε μεταξύ της συσκευής
και του δικτύου έναν πολυπολικό διακόπτη με ελάχιστο άνοιγμα μεταξύ των
επαφών 3 mm κατάλληλο για το φορτίο και σύμφωνο με τους ισχύοντες
κανονισμούς (το σύρμα της γείωσης δεν πρέπει να διακόπτεται από τον
διακόπτη). Το καλώδιο τροφοδοσίας πρέπει να είναι τοποθετημένο έτσι
που σε κανένα σημείο να μην ξεπερνάει κατά 50°C τη θερμοκρασία του
περιβάλλοντος.
! Ο τεχνικός εγκατάστασης είναι υπεύθυνος για τη σωστή ηλεκτρική σύνδεση
και για την τήρηση των κανόνων ασφαλείας.
18
 Loading...