

INCRA ShopStop User Manual

First:
Loosen screw
Horizontal stop rod
Second:
Slide stop rod
2
INCRA Woodworking Tools & Precision Rules
Expandable two-piece
body to accommodate
wooden subfences
Micro
adjust
screw
INCRA saw
tooth rack
Vertical T-bar
slides up or
down to
accommodate
different fence
heights
Horizontal rod moves in and
out to extend stop surface
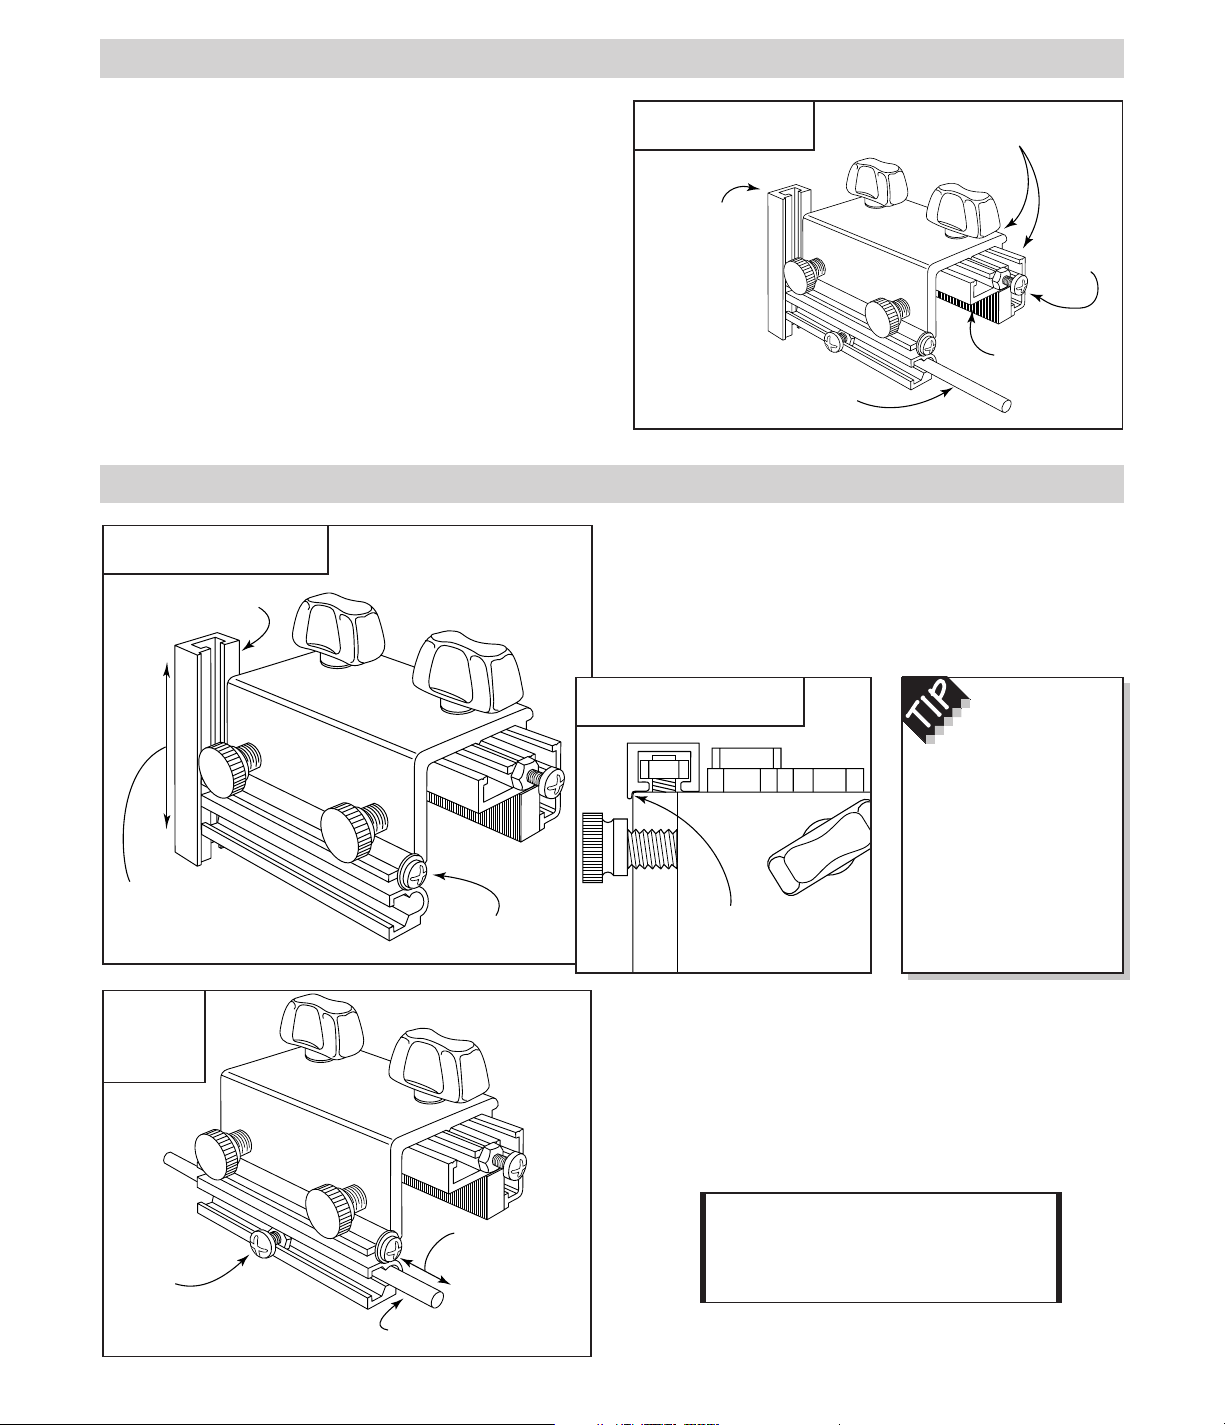
FEATURES
The INCRA Shop Stop comes equipped with two
interchangeable and reversible stop surfaces – a vertical stop
arm which can be adjusted up or down to accommodate
different fence heights, and a horizontal stop rod which can be
useful in extending the stop surface forward beyond the actual
body of the stop. Further, by removing the stop rod and stop
arm, user-made wooden stop pieces can be screwed into the
T-slot to provide the perfect stop surface for even the most
unusual wood profiles. The two-piece expandable Shop Stop
body design allows you to add 3⁄4" thick wooden sub-fences to
your INCRA fence for zero clearance applications without
compromising the use of the stop. The patented incremental
positioning of INCRA’s sawtoothed racks allows perfectly
repeatable stop locations at any multiple of 1⁄32", while the
micro adjust screw permits easy fine adjustments anywhere
between the 1⁄32" tooth spacing. (See Fig. 1)
ADJUSTMENTS
When adjusting
the vertical stop arm,
leave a small gap
between the end of the
stop arm and the router
table, drill press or table
saw top. This provides
clearance for sawdust.
Vertical stop arm
First:
Loosen screw
Second: Slide vertical
stop arm up or down to
desired position
Indexing lip
Horizontal Stop Rod:
The horizontal stop rod is held in place by a #10-32 x 3⁄8"
machine screw. To adjust the position of the stop rod, loosen
the screw and slide the rod as necessary, then retighten the
screw (Fig. 4)
Vertical Stop Arm:
To adjust the vertical stop ar m up or down, loosen the
machine screw as shown in Fig. 2 and slide the stop arm to
the desired position. As you tighten the screw, make sure
the indexing lip on the stop arm is pressed against the face
of the stop body. (Fig. 3)
CAUTION: Always unplug the
motor before zeroing your Shop
Stop to any power tool.
FIG. 1
Shop Stop features
FIG. 2
Adjusting vertical stop arm
FIG. 3
Top view of stop arm position
FIG. 4
Adjusting
horizontal
stop rod
 Loading...