

Page 1
www.incra.com
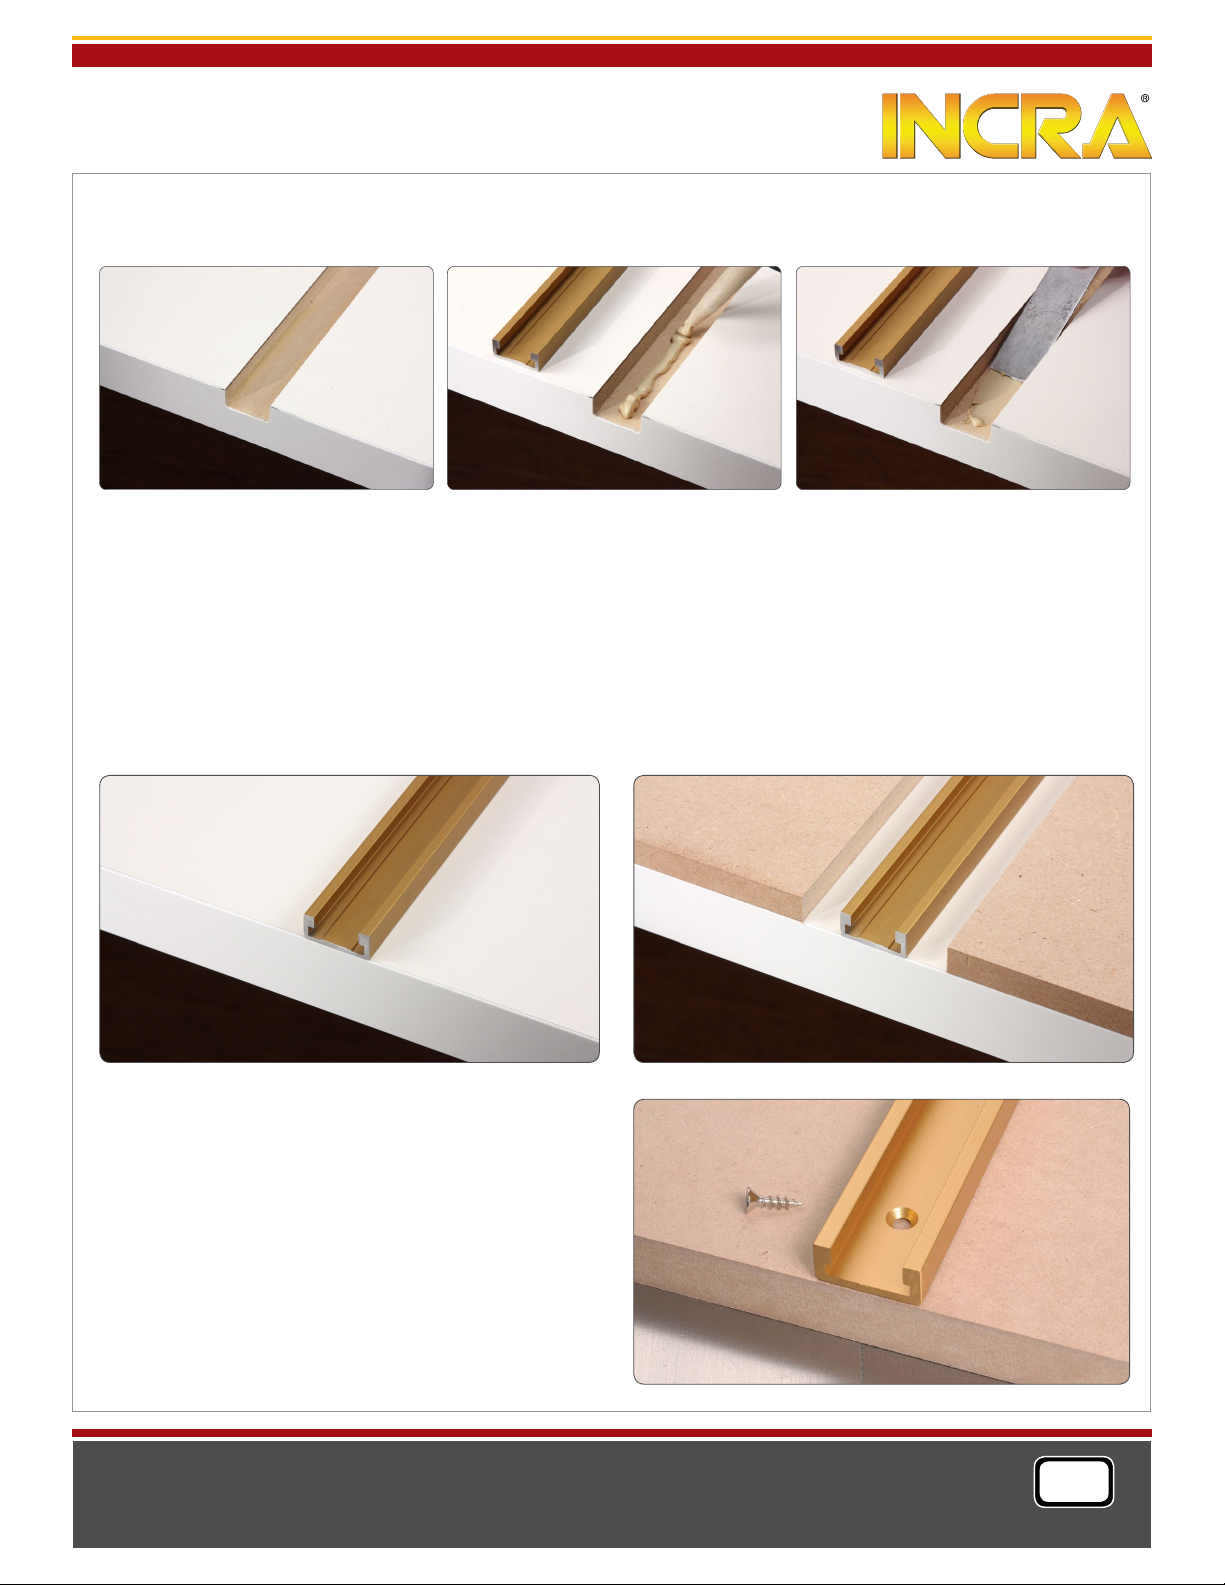
INCRA Miter Channel
Glue Down Instructions
Cut a 1-1/8” wide x 1/2” deep groove in
your application.
Apply a bead of heavy duty construction adhesive like Liquid Nails®.
Use a putty knife or chisel to atten the
bead.
You can also consider “Surface Mount” or “Build-up” options for mounting as shown below.
Surface Mount
Adhere INCRA Miter Channel directly to the application.
Build-up
Use a 1/2” thick material on either side of a surface
mounted INCRA Miter Channel.
As an alternative, you can drill and countersink mounting
holes in your INCRA Miter Channel and mount to your appli-
cation using #8 at head screws. Drill the holes with a .219”
diameter standard twist drill bit then countersink to a depth
that brings the top of the fastener head just below the surface
of the extrusion.
Manufactured by:
Taylor Design Group, Inc.
P.O. BOX 810262 Dallas, TX 75381
P: 972-242-9975 www.incra.com
INCR A is a Reg iste red Trad emar k of Taylor Design G roup
©2013 Taylor D esig n Group, I nc.
INCR A Tools a re prot ecte d by one or m ore of t he fol lowi ng US pa tents:
#4,793,604, #4,930,221, #5,195,730, #5,275,074, #5,423,360, #5,716,045, #6,237,457,
#6,557,601, #6,672,190. rev.04.17.13
MADE IN THE
USA
 Loading...