

Page 1
INCRA Build-It
Ta yl o r D e s i g n G ro u p, I nc .
STS M
Manual
w w w . i n c r a . c o m
Page 2
INC RA B uil d- It STS Mort iser M an ual
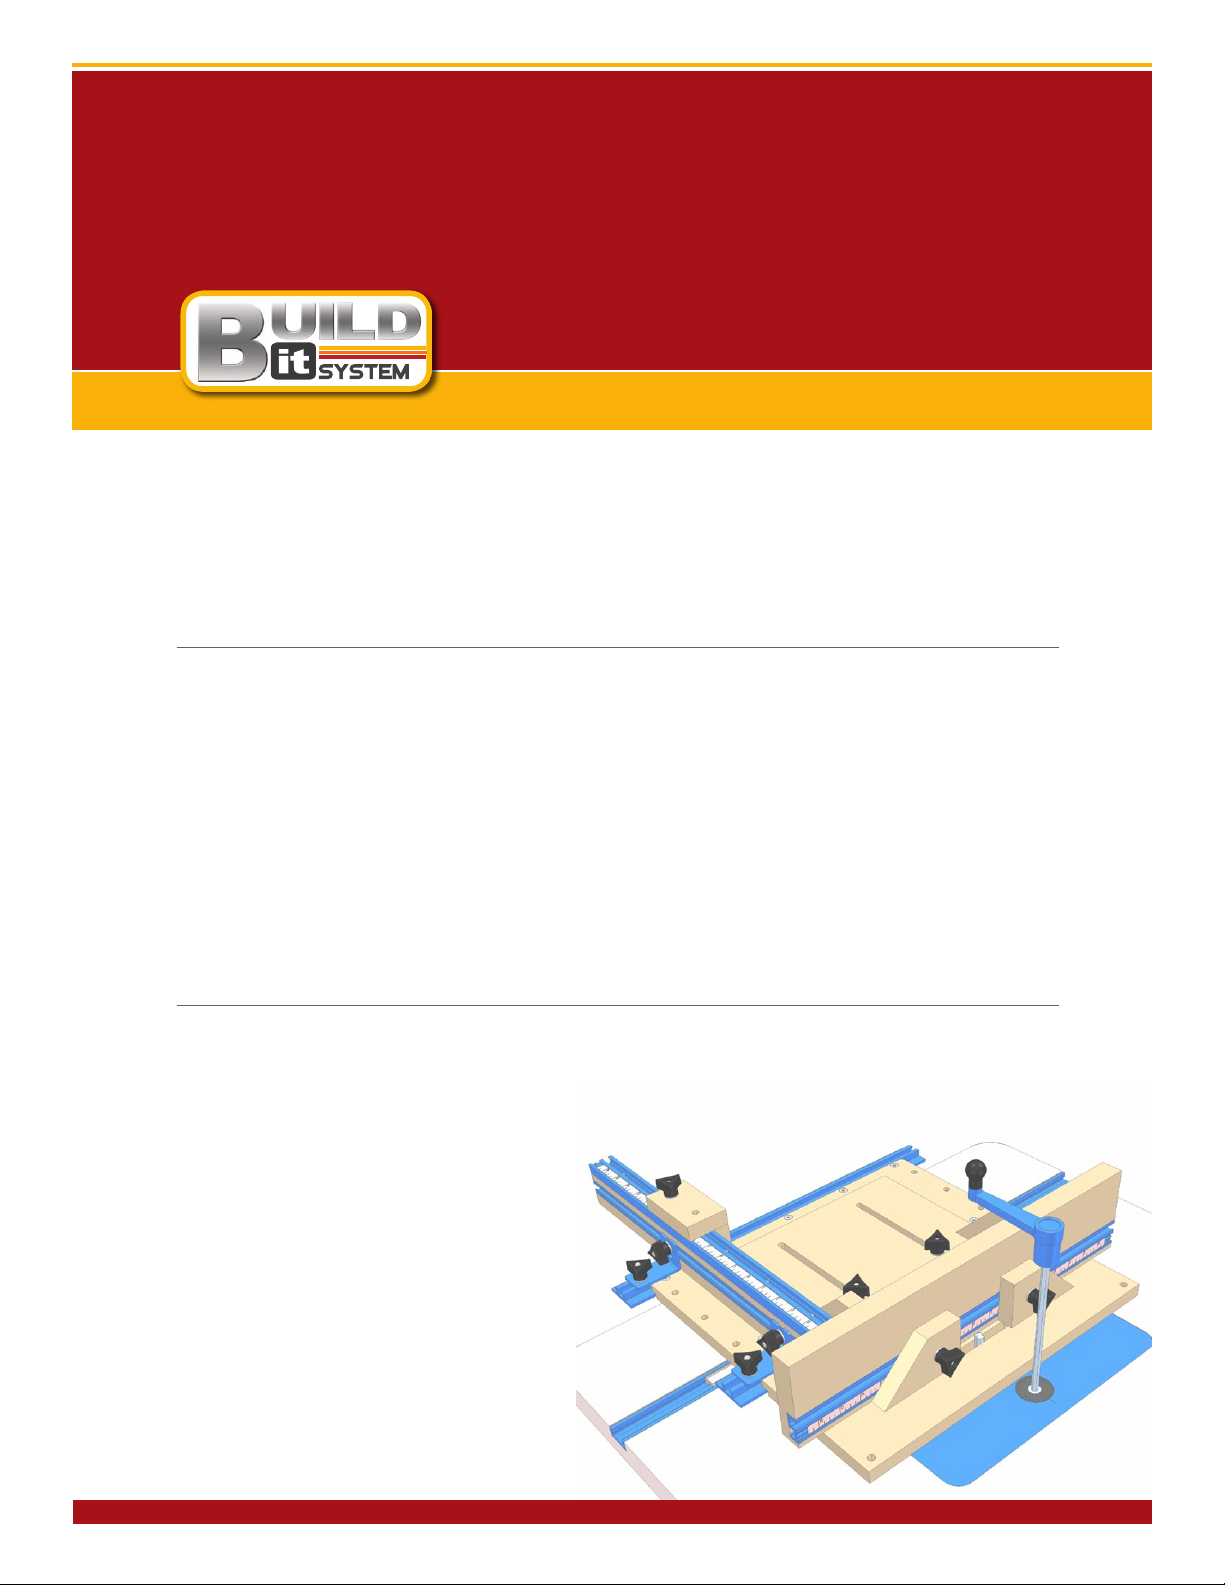
Loose Tenon Joinery
Mortise and tenon joinery as shown in Fig. 1 produces
some of the strongest connections between two pieces of
wood but the setups can be tedious. The mortises are difcult
to place accurately at the router table and the tenons, while
easy enough with the right jig, still require two sets of cuts
to produce. First the shoulders are cut using a miter gauge
followed by the cheeks, which are cut using a tenoning jig. And
all of this to produce what amounts to a square peg for a
round hole. The tenons need to be rounded or the mortises
squared for the nal assembly. We probably don’t need to
mention the additional challenge of making cuts at the table
saw that t well into cuts made at the router table.
Loose tenon joinery on the other hand provides all of the
strength benets without the tedious setups. In loose tenon
joinery all of the pieces to be joined receive an identical
mortise, while the tenon itself is simply a short cutoff from
a long piece of stock, thickness planed, ripped and rounded
over to t the mortise, Fig. 2. And, while locating the
mortises at a router table is still a problem using conventional
methods, you’ll nd perfectly located slots easy with this
new slot-mortising jig, Fig. 3. This jig takes advantage of
the ease of vertical router adjustment provided by the wave
Mortise and Tenon Joinery
Fig. 1
cheeks
mortise
shoulders
Fig. 3
of router lifts on the market today. If you own a router lift
and a router table with a miter slot, you’ll love the versatility
and ease of use of this great jig. Just clamp your material in
place and slide the jig back and forth between two stops as
you slowly raise the cutter using the lift’s crank handle. If
you do not already own these two pieces of equipment, read
on, since the acquisition of these tools is, in many cases,
considerably less than the cost of slot mor tising tools
currently available on the market.
STS Mortiser
Loose Tenon Joinery
Fig. 2
slot mortise
loose tenons
Page 1
Page 3
INC RA B uil d- It STS Mort iser M an ual
Making the STS (Slot-Tenon-Slot) Mortiser
Build-It Platform
Materials List:
1. In typical router table cutting operations,
router lifts are installed in the table with the
crank handle located so that it is between the
To assemble the STS Mortiser you’ll need:
(2) Small Build-It Panel
router bit and your router table’s miter slot.
In order to use your new STS Mortiser, you’ll
need to rotate the router lift in your table
(2) T-Slot Panel Connector
(1) 18” Miter Slider
opening so that the router bit is between the
miter slot and the crank handle, Fig. 4.
CAUTION:
ALWAYS RETURN THE LIFT TO THE ORIGINAL
SETUP AFTER USING THE STS MORTISER.
(1) Pair Build-It Brackets
(1) Pkg. Build-It Knobs
(1) Build-It Clamp
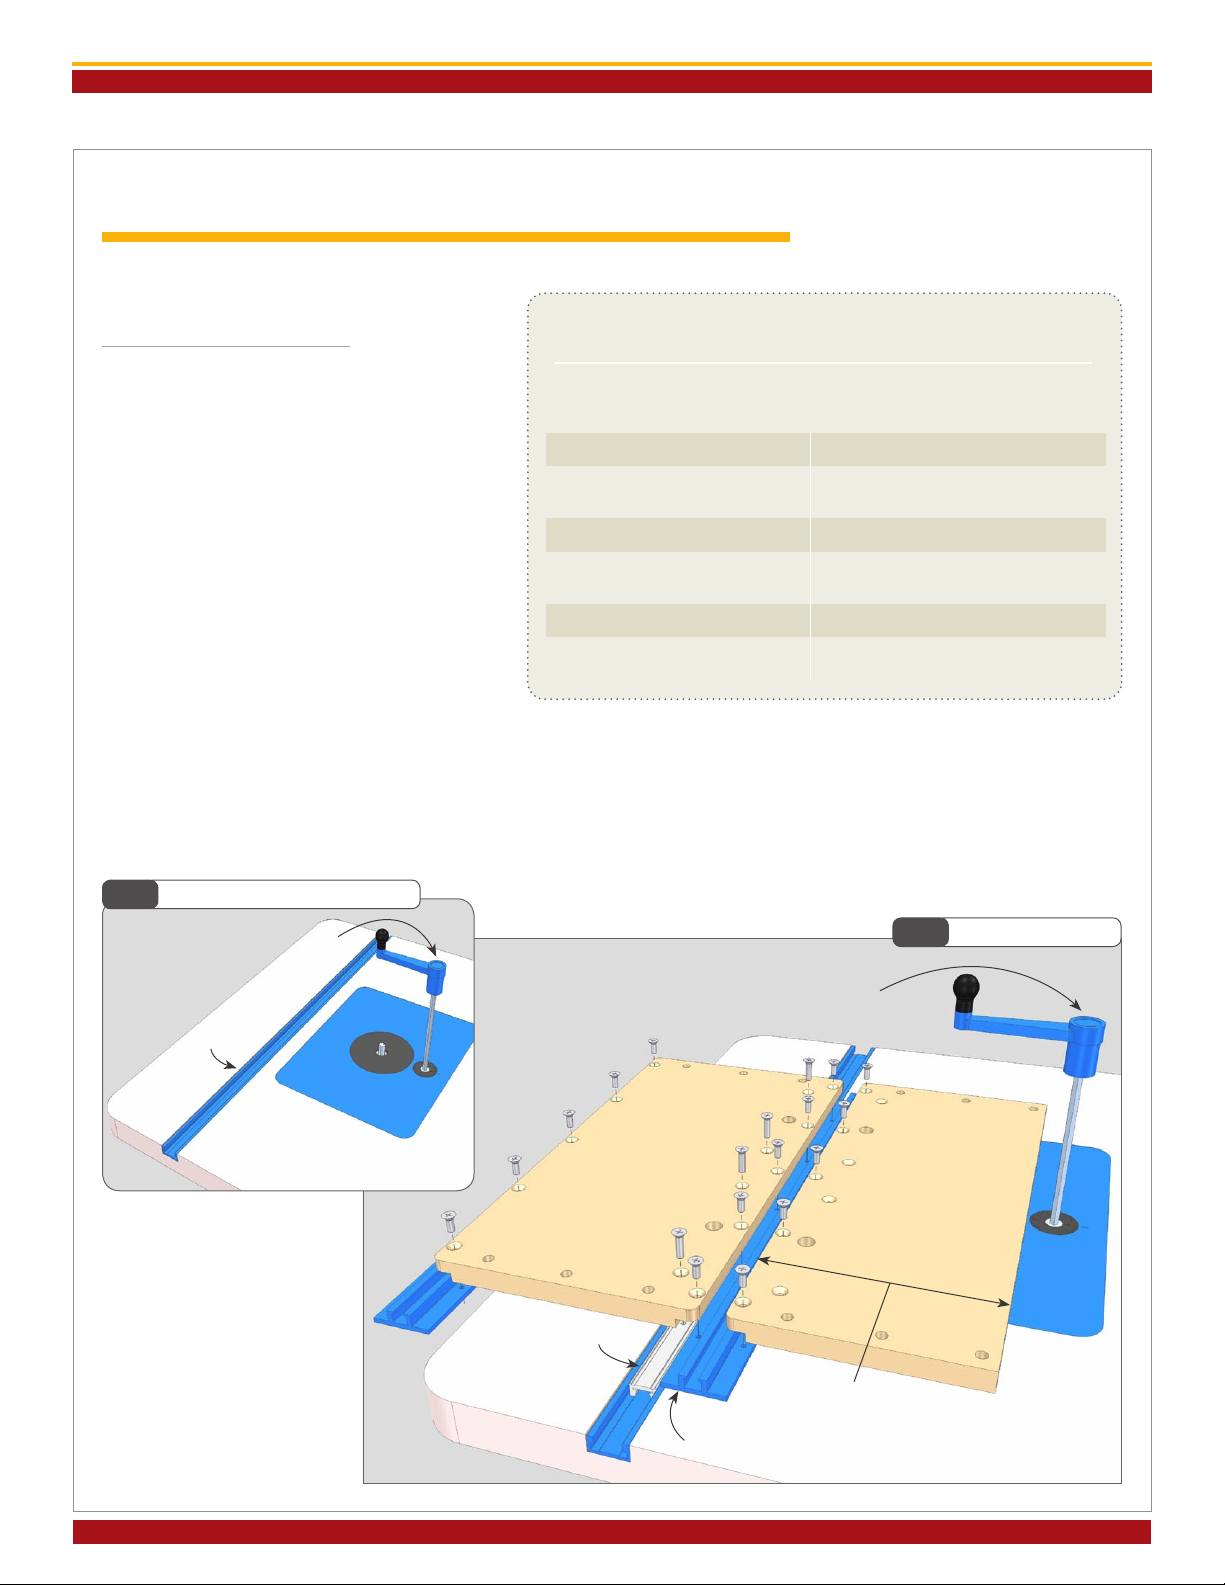
2. Attach the Miter Slider and (2) T-Slot Panel Connectors
to one of the Build-It Panels and place in your router table’s
miter slot as shown in, Fig. 5.
Router Table Conguration
Fig. 4
(2) 18” Incra T-Track Plus
(1) 18” Incra T-Track Regular
(1) 3/4” x 10” x 10” plywood
(1) 3/4” x 2-1/4” x 28” hardwood
(1) 1” x 4” x 18” hardwood
(1) 1-1/4” x 1-3/4” x 18” hardwood
Adjust the Miter Slider for a smooth glide in the miter slot.
Cut the remaining Build-It Panel at your table saw to fill
the gap between the panel connector and your router lift’s
crank handle. Attach the panel.
miter slot
crank handle
Install router lift with
cutter between crank handle
and miter slot
Miter Slider
crank handle
Cut Build-It Panel to t
between Panel Connector and crank handle
Panel Connector
Build-It Platform
Fig. 5
Page 2
Page 4

INC RA B uil d- It STS Mort iser M an ual
Fence and Stop Positioner
3. Prepare a straight, at piece of hardwood to the dimensions
shown in Fig. 6 and Detail 6A. Cut the groove shown and
install the T-Track and T-Track Plus. Build the stop positioner
as shown in Fig. 8 using 3/4” hardwood.
T-Track Fence
Fig. 6
18” T-Track Plus
18” T-Track
Regular
4. Attach the stop positioner to the fence using 1/4-20 x 1-1/2”
hex bolts with washers and clamping knobs, then attach the
fence to the Build-It Platform using (2) Build-It Brackets with
the included 1/4-20 x 1” hex bolts, washers and clamping knobs.
Square the fence to the “cut” edge of the Built-It Platform
and tighten the clamping knobs, Fig. 9.
Fence and Stop Positioner
Fig.7
Stop Positioner
Fig.8
3
/4”
11/8”
2”
21/16”
Add Fence and Stop to Build-It Platform
Fig.9
clamping knobs
1
/4”- 20 x 11/2”
hex bolts
18”
square fence to
this edge of platform
Detail 6A
3
/4” wide x 1/2” deep
groove
13/4”
11/4”
5
/8”
5
”
23/16”
1
/2”
3
/16
dia holes
Right Angle Faceplate Assembly
5. Starting with a 10” x 10” piece of 3/4” plywood, cut 5/16”
wide x 8” long slots through the material as shown in Fig. 11.
On a 4” x 18” piece of
1” thick hardwood, cut
Fig.10
Right Angle
Faceplate Assembly
the groove as shown
and inlay an 18” T-Track
Plus.
Fasten with the #8 x
1
/2” pan head Phillips
screws.
Page 3
Fig.11
1”
Faceplate and Base
10”
5
21/2”
/
1”
” wide
16
slots
21/2”
4”
1”
1
/4”-20 x 1”
hex bolts (4)
10”
18”
1
/4”
11/4” wide x 1/2” deep groove
18” T-Track Plus
Page 5

INC RA B uil d- It STS Mort iser M an ual
6. Cut the right angle supports and faceplate
stops to the dimensions shown in Fig. 12.
All (4) pieces have identical dimensions.
Drill a 5/16” diameter hole through (2) of the
pieces and set aside for later use as faceplate
stops.
Glue up the right angle faceplate assembly, placing
the right angle supports about 1/4” away from
the edge of the base, Fig 13.
Fig.14
Attach Faceplate Assembly to Build-It Platform
Fig.12
Right Angle Supports and Faceplate Stops
right angle supports
21/4”
90°
45°
4”
right
angle
support
4”
11/8”
11/8”
faceplate stops
5
/16” dia
hole (2)
faceplate
faceplate
assembly
1
/4”-20 x 11/2”
hex bolts
Build-It Platform
7. Secure the right angle faceplate assembly to your Build-It
Platform using (2) 1/4-20 x 1-1/2” hex bolts with washers and
clamping knobs as shown in Fig. 14.
Slide the slotted base of the faceplate assembly up to the TTrack Fence and tighten the clamping knobs. Attach the (2)
faceplate stops to the assembly using (2) 1/4-20 x 1-1/2” hex
bolts with washers and clamping knobs, Fig 15.
base
Fig.13
1
/4”-20 x 11/2”
hex bolts
1
/4” approx.
Glue Faceplate Assembly
Attach Faceplate Stops
Fig.15
4”
Page 4
Page 6

INC RA B uil d- It STS Mort iser M an ual
Operation
For your rst mortise, you’ll cut a slot about 4” long through the “throat plate” Build-It Panel that overlaps the cutter at
your router table. Since most loose tenon applications in 3/4” stock work well with a 3/8” tenon, we’ll cut the slot with
a 3/8” straight bit. (The longer the cutter
length, the deeper you’ll be able to cut your
Fig.16
slot mortises later on.) Install the cutter and
lower the bit below your tabletop. Place the
STS Mortiser on your router table and center
it on the length of your miter slot. Now
clamp a 3/4” x 3/4” x 3” block of wood into
the infeed and outfeed ends of the miter slot
2” from the ends of the Miter Slider, Fig. 16.
Slide the right angle faceplate assembly and
T-Track fence away from the area directly
above the cutter and turn the router on.
Use your router lift crank handle to raise
the cutter 1/16” per pass as you slide the jig
back and forth between the two stop blocks
clamped to the table.
CAUTION: ALWAYS START AND STOP ANY
SLOT CUTTING OPERATION WITH THE
JIG POSITIONED AGAINST THE OUTFEED
STOP BLOCK. When you have cut through the throat plate, turn off the router. The throat plate provides support for your
work piece and zero clearance for tear out control. If you choose to cut mortises with a larger or smaller diameter cutter,
additional throat plates can be produced. Your new STS Mortiser is now ready to use.
Cut Slot Through Throat Plate
Slide STS Jig between two stop
blocks as you slowly raise cutter
Miter Slider
2”
infeed
stop block
Build-It “throat plate”
2”
3
/8”
outfeed
stop block
straight bit
For typical slot mortising there are four steps to locating a slot on your work piece.
Step 1
Set Length of Slot
To set the length of your slot, raise the cutter through
Fig.18
Setting Slot Length
slide faceplate to cutter and clamp in place
the slotted hole in the throat plate panel and slide
the faceplate assembly up to (but not touching)
the cutter. Before tightening the faceplate assembly
clamping knobs, make sure that it is pressed securely
against the T-Track fence. Slide a faceplate stop into
each end of the T-Track on the faceplate. In setting
the stops, you will always use the 8” mark on the faceplate
scale to represent the “center” of your slot length. To
set up for a 2” long slot, set
Fig.17
Slot Length
the outfeed faceplate stop
to 7” and the infeed stop
to 9”. In other words, the
distance between the two
stops is equal to your slot
length, Fig. 18.
Page 5
set distance between stops equal
to desired slot length
(use 8” mark on scale as center)
Page 7

INC RA B uil d- It STS Mort iser M an ual
Slide the STS Mortiser forward until the cutting wing on the cutter contacts the infeed faceplate stop. Now clamp a block of
3
/4” scrap wood into the miter slot against the outfeed end of the Miter Slider, Fig. 19. This will set the forward or outfeed
travel limit. Now pull the jig back until the cutter contacts the outfeed faceplate stop and clamp a block of 3/4” scrap into
the miter slot against the infeed end of the Miter Slider, Fig 20. This sets the rearward or infeed travel limit.
Fig.19
1st: slide jig
forward until cutter contacts
infeed faceplate stop
Now, we need to locate the slot on your workpiece. To
begin we’ll set the distance from the end of the slot to the
end of your board. Simply slide either the infeed or outfeed
faceplate stop away from its current position the distance
Set Forward Travel Limit
2nd: clamp stop block into
miter slot against end of
Step 2
Set Distance from End of Slot to End of Workpiece
Miter Slider
from the end of your workpiece (after setting a 2” length of
slot), slide the outfeed faceplate stop to read 6” and tighten
the clamping knob, Fig. 22.
Remove the remaining faceplate stop.
Fig.20
2nd: clamp
stop block into
miter slot against
end of Miter Slider
you choose. For instance if you wanted to start the slot 1”
Set Rearward Travel Limit
1st: slide jig back until cutter
contacts outfeed faceplate stop
Fig.21
Slot to Board
End Distance
Fig.22
Setting Slot to Board End Distance
workpiece to beginning of slot
Page 6
distance from end of
nal stop
position
original stop
position
Page 8

INC RA B uil d- It STS Mort iser M an ual
Step 3
Set Distance from Edge of Slot to
Edge of Workpiece
You’ll rst want to zero the faceplate to the edge of the cutter.
Loosen the clamping knobs that secure the faceplate assembly
and slide it forward to contact the cutting wing of the bit.
(You may need to rotate the cutter to nd the “high spot”
of the cutting wing.) Hold the faceplate assembly steady as
you slide the T-Track fence stop positioner up to contact the
back of the faceplate assembly’s base and tighten the clamping
knobs. Note the position of the stop on the scale in the top
Fig.24
Setting Slot to Board Edge Distance
T-Track
fence stop
1st: slide faceplate to contact
cutter, then slide T-Track
fence stop to contact back
of faceplate assembly
of the T-Track fence. (We suggest you slide the scale to read
at one of the whole inch numbers, or slide it to read at zero
if you don’t mind some of the scale hanging out of the end
of the fence.)
To set the cutter-to-faceplate distance, simply move the
T-Track stop positioner away from the back of the base
using the sc ale on the top of the T-Track fence as
a reference. Tighten the clamping knobs, then slide the
faceplate assembly back to contact the stop and tighten the
clamping knobs, Fig. 24. For example, if we start with the
stop positioner set at 8” and
then move it to 8 -1/2” along
wi t h the face pl ate assembly,
there should be 1/2” between
the faceplate and cutter.
2nd: using
scale as a reference,
slide stop away
by an amount equal
to desired slot-to-
edge distance
3rd: slide faceplate assembly
to stop and clamp in place
Step 4
Cutting the Slot
Now you can clamp your workpiece in
place and start the cutting process. Lower
the cutter until it is just ush with the top
of the Build-It throat plate. For horizontally
oriented material, place the board end
against the faceplate stop and clamp to
the faceplate. Always begin and end
each cut with the jig against the
outfeed travel limit block. Turn on
the router and, using your router lift’s crank
handle, raise the cutter 1/16” and slide the
jig between the two limit stops, Fig. 25.
After each cut cycle, raise the cutter 1/16”
until you reach the desired depth. You’ll
have to count the crank handle rotations
to keep up with how deep your cut is.
Fig.25
Cutting a Slot Mortise
Fig.23
ALWAYS begin and end each
cut with jig against the outfeed
travel limit stop block
Slot to Board
Edge Distance
clamp horizontal
material to
faceplate with
end against
faceplate stop
Page 7
Page 9

INC RA B uil d- It STS Mort iser M an ual
Vertically held stock will often interfere with full rotations of
the crank handle but your local hardware store has an easy
solution.
Fig.26A
Fig.26
A Hex Driver
for Ratchet
Just purchase a hex driver for your ratchet set as shown and
use half rotations of the crank mechanism, Figs. 26 & 26A.
In many cases, a T-handle hex key will work as well, Fig. 27
& 27A.
Fig.27
Fig.27A
T Handle
Hex Key
To avoid interference when cutting vertical boards,
use a ratchet along with a hex driver
Making Loose Tenon Stock
Of course, slot mortises can be fun to cut with your new jig,
but you’ll need loose tenons to put it all together. When
preparing loose tenon stock, it’s a good idea to make
several sizes of long stock all at once then cut to length later
as needed.
For instance, you can thickness plane material to match your
slot width then rip lengths of stock to 1”, 2” and 3” wide.
Roundover the edges with a bullnose bit that matches the slot
cutter’s diameter, Fig. 28.
Faceplate stops can be installed in a variety of ways to
support your workpiece
Fig.28
3” wide
Page 8
Loose Tenon Stock
roundover edges with
bull nose bit
1” wide
2” wide
Page 10

INC RA B uil d- It STS Mort iser M an ual
Tips
By removing the faceplate assembly and using the T-Track
fence along with one of the Build-It hold down clamps, you
can cut slot mortises and dados across the grain. And by
angling the fence across the Build-It platform you can angle
the mortises as well.
Fig.29
Cross Grain Mortises
Build-It Clamp
through mortise
A stop positioner should always be clamped to the T-Track
fence at the left end of your material and a Build-It Clamp
should be used to prevent slippage during the cut, Fig. 29.
And again, always start and stop each cut cycle with the jig
against the outfeed travel limit stop block.
Need to cut a mortise in the middle of a longer
board? Just use a square to place a mark all
the way up the faceplate and in line with the 8”
mark on the faceplate scale, Fig. 30.
(Remember the 8” mark will always be used as
the center of your slot length.) Now place a
mark on your board at the center of the desired
slot location.
The mark should be placed on the board edge
opposite where the mortise will be cut.
Align this mark with the faceplate mark when
clamping your material, Fig. 31.
Fig.30
vertical mark on faceplate at 8”
Fig.31
Cutting Mortise in the Middle of Long Stock
align marks when
clamping material
mark center of slot
location on edge opposite where
slot is to be placed
Page 9
Page 11

INC RA B uil d- It STS Mort iser M an ual
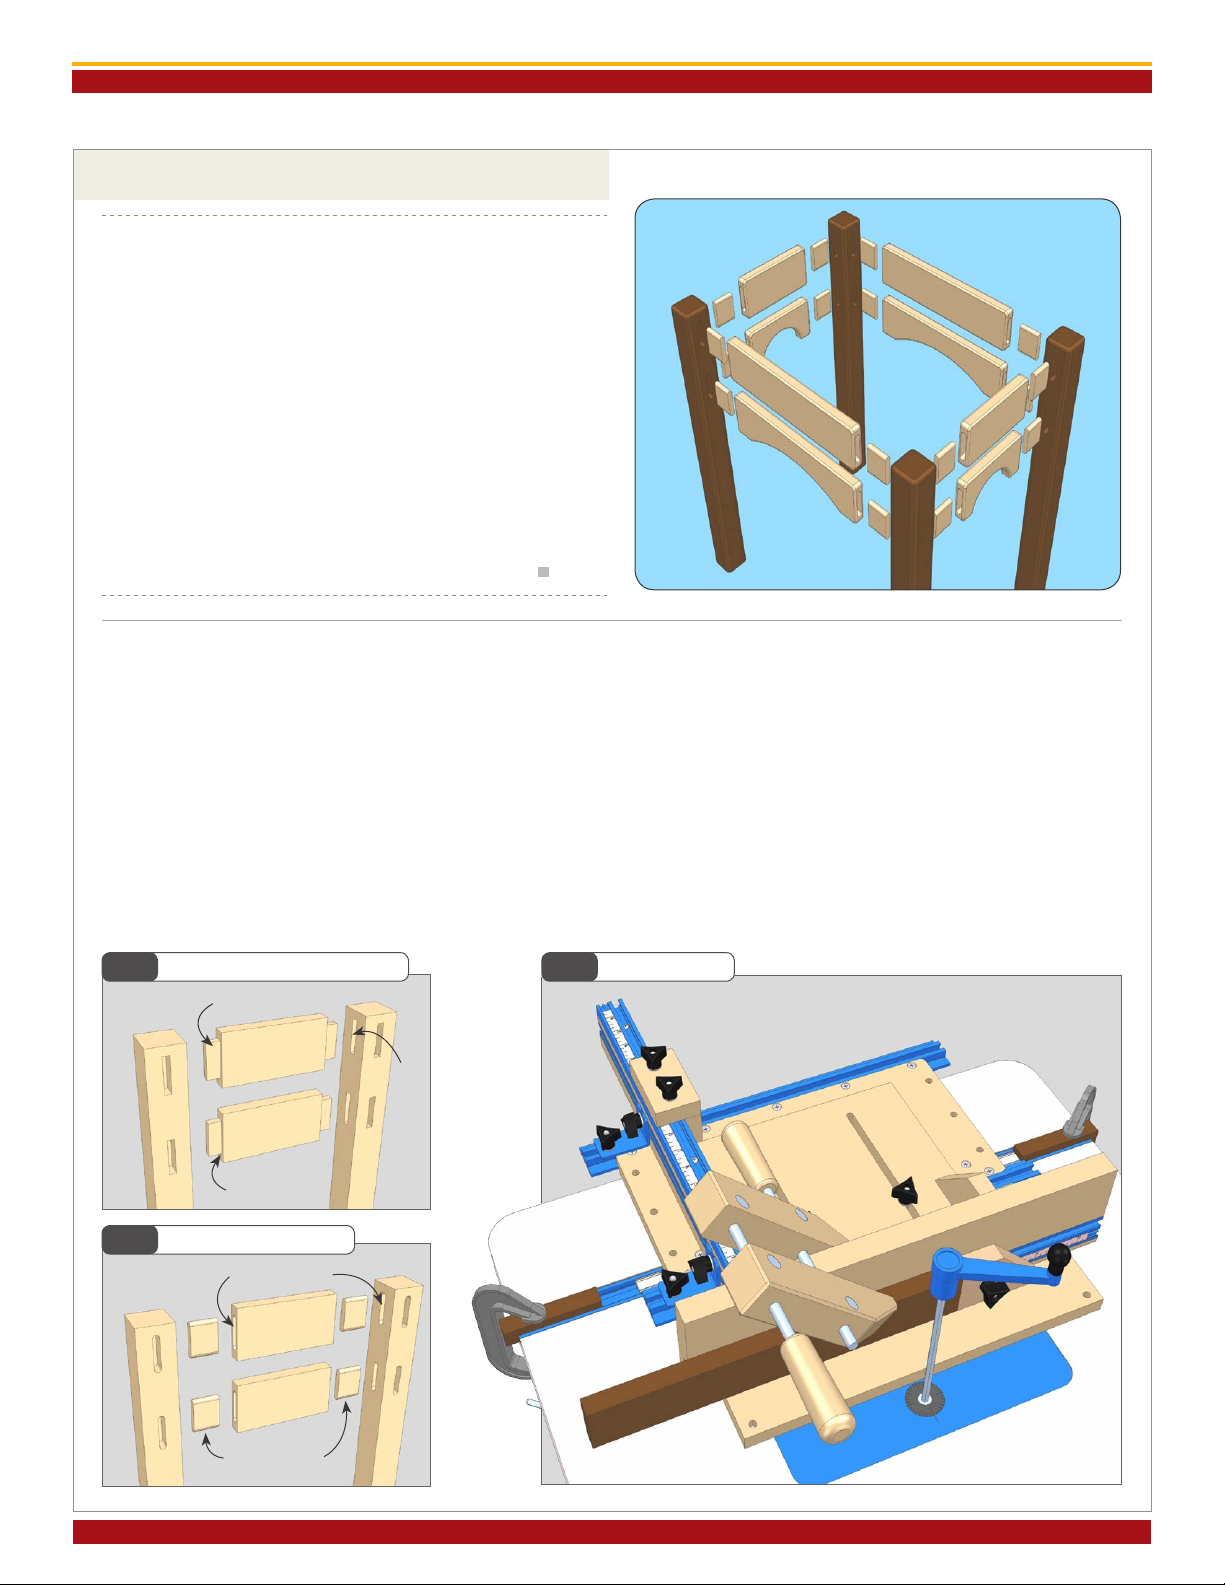
As in most woodworking projects, the alignment between
parts is an important part of the nished look of the
construction. Sometimes, you’ll want a ush alignment as
shown in Fig. 32, while other projects may require offset
alignments, Fig. 33. Either way, you’ll want to be able to
control and maintain the alignment selected. This is often
accomplished through the use of reference marks placed
on the individual parts. These marks are then used to
ensure the correct face or edge of the material is placed
against the fence when setting up for a cutting operation.
Work piece reference marks used with your STS Mortiser
will also help in determining whether you will need an infeed
or outfeed faceplate stop when setting the slot to end of
board distance.
For example, in order to keep the ush alignments shown
in Fig. 34, you’ll mark the surfaces that you want aligned
and the surfaces that will receive a cut. We have used
the letter “F” to designate the surface that will be placed
against the faceplate, and the letter “C” to represent the
surface that will receive the cut. The pieces are numbered
1, 2 & 3. When cutting the #1 piece, it would be necessary
to use an infeed faceplate stop in order to position surface
“F” against the faceplate, with surface “C” face down over
the cutter, Fig. 35.
When cutting the same mortise on the #3 piece, however,
the setup would require the use of an outfeed stop in
order to position the material with the “F” surface against
the faceplate and the “C” sur face f ace down, Fig. 36.
The procedure is the same for offset alignments, except
that the edge-to-cutter distance is changed when setting
up for the cuts on piece #2.
Fig.33
Fig.32
ush alignment
Fig.34
Reference Marks
1
F
C
offset
alignment
3
2
F
F
F
C
Fig.35
Using Infeed Faceplate Stop
“F” mark is against
the faceplate
infeed
faceplate stop
piece #1
“C” mark is face
down over cutter
Page 10
Fig.36
Using Outfeed Faceplate Stop
outfeed faceplate stop
piece #3
“F” mark is
against the faceplate
“C” mark is
face down
Page 12

w w w . i n c r a . c o m
INCR A Build-It
STS M M
Taylor Design Group, Inc.
P.O. BOX 810262
Dallas, TX 75381
www.incra.com
INCRA Tools a re protected by one o r more of the following U.S. patents:
#4,793,604, #4,93 0,2 21, #5,195,730, #5, 275,074, #5,423,360, #5,716,045, #6, 237,457,
#6,557,601, #6,672,190.
Othe r patents granted or pending. INCRA is a Registe red Tradema rk of
Taylo r Design Group, Inc.
©2 00 7 Ta yl or D es ig n Group, Inc. R ev. 0 6.0 8.07
 Loading...