

Page 1
IMPORTANT NOTICE:
• Place all wooden parts on a clean and smooth surface such as a rug or carpet to avoid scratching the parts.
• Check to be sure that you have all parts and hardware.
• Remove all wrapping materials, including staples & packing straps before you start to assemble.
• Keep all hardware parts and packaging out of reach of children.
You will need a Phillips Head Screw Driver and a Tape Measure to Assemble.
Hardware :
A: Screws(24)
A
Parts :
B: Legs(4)
Post Table Legs INSTRUCTIONS
You will need 2 people for this assembly.
C: Table Top (may vary)
B
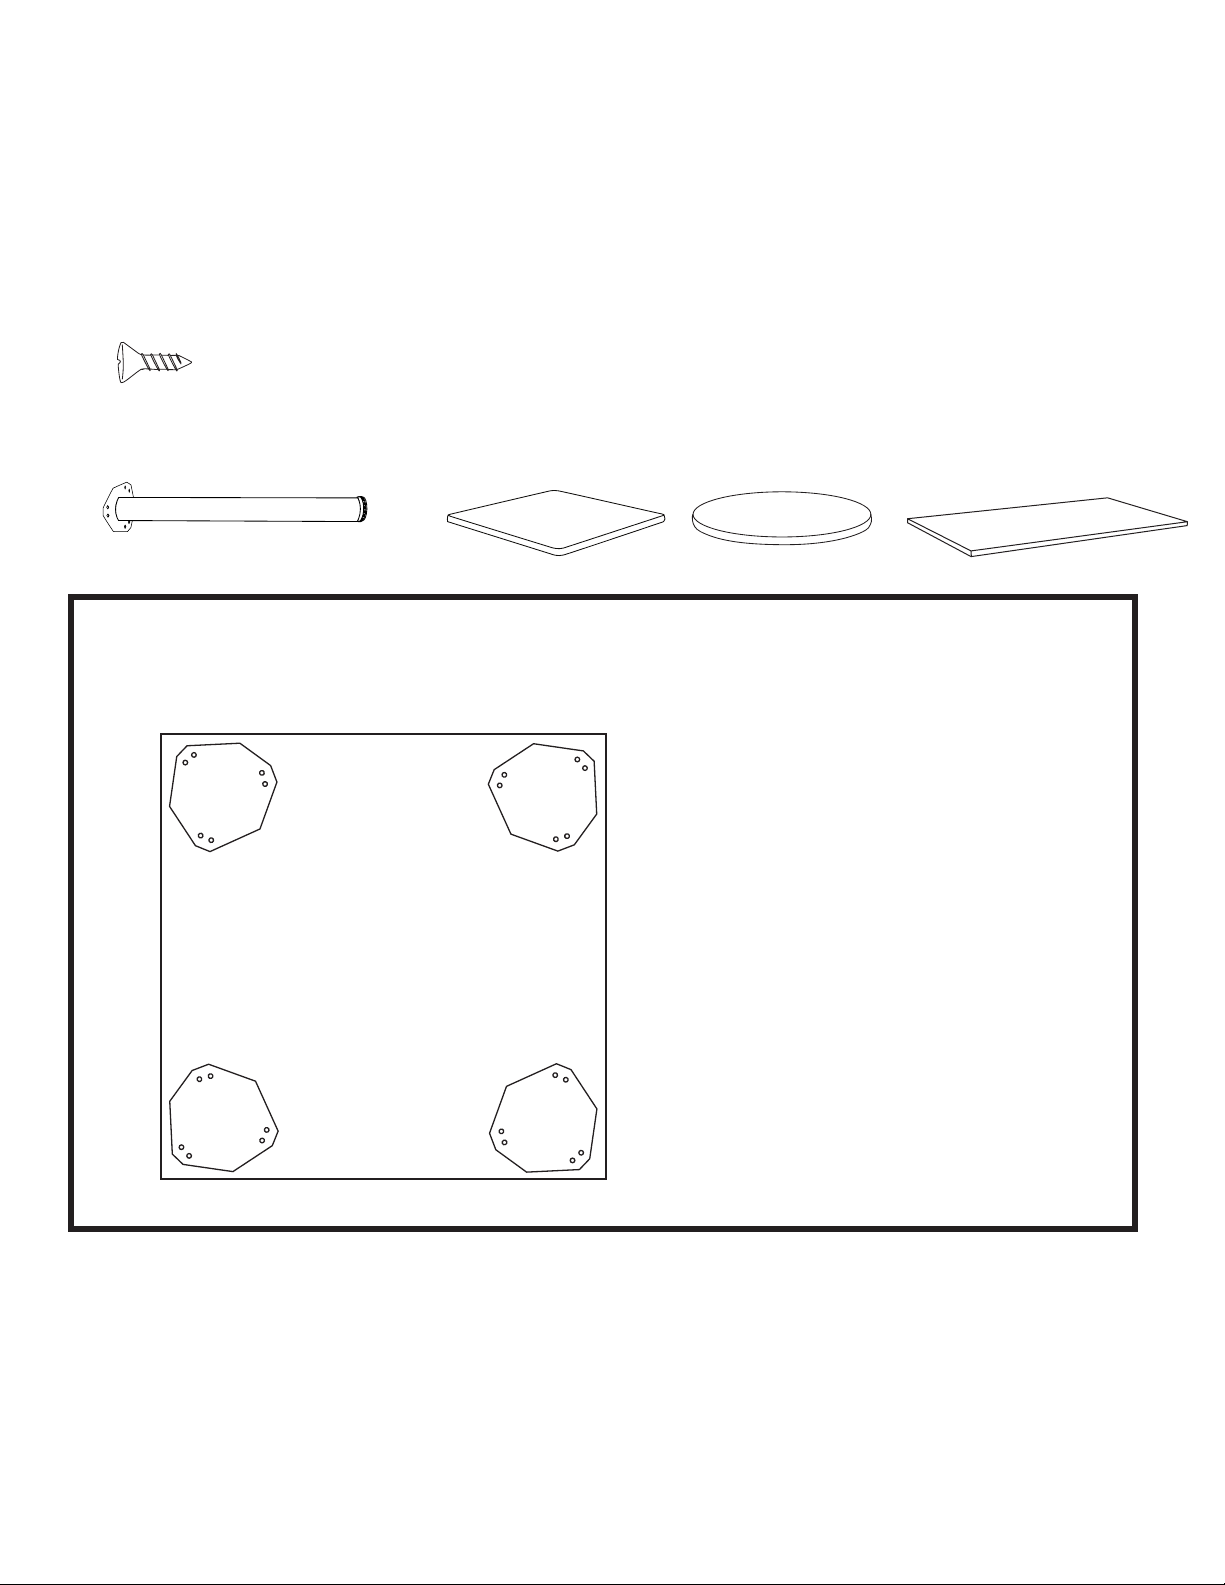
STEP 1 (Square Table Top): Place Table Top(C) on a clean at surface with desired table nish face down. Position
assembled legs as shown in Figure A.
Then, attach assembled Legs to Table Top using 6 Screws(A) per Leg.
C
C
Figure A
Page 2
Post Table Legs INSTRUCTIONS
You will need 2 person(s) for this assembly.
You will need a Phillips Head Screw Driver and a Tape Measure to Assemble.
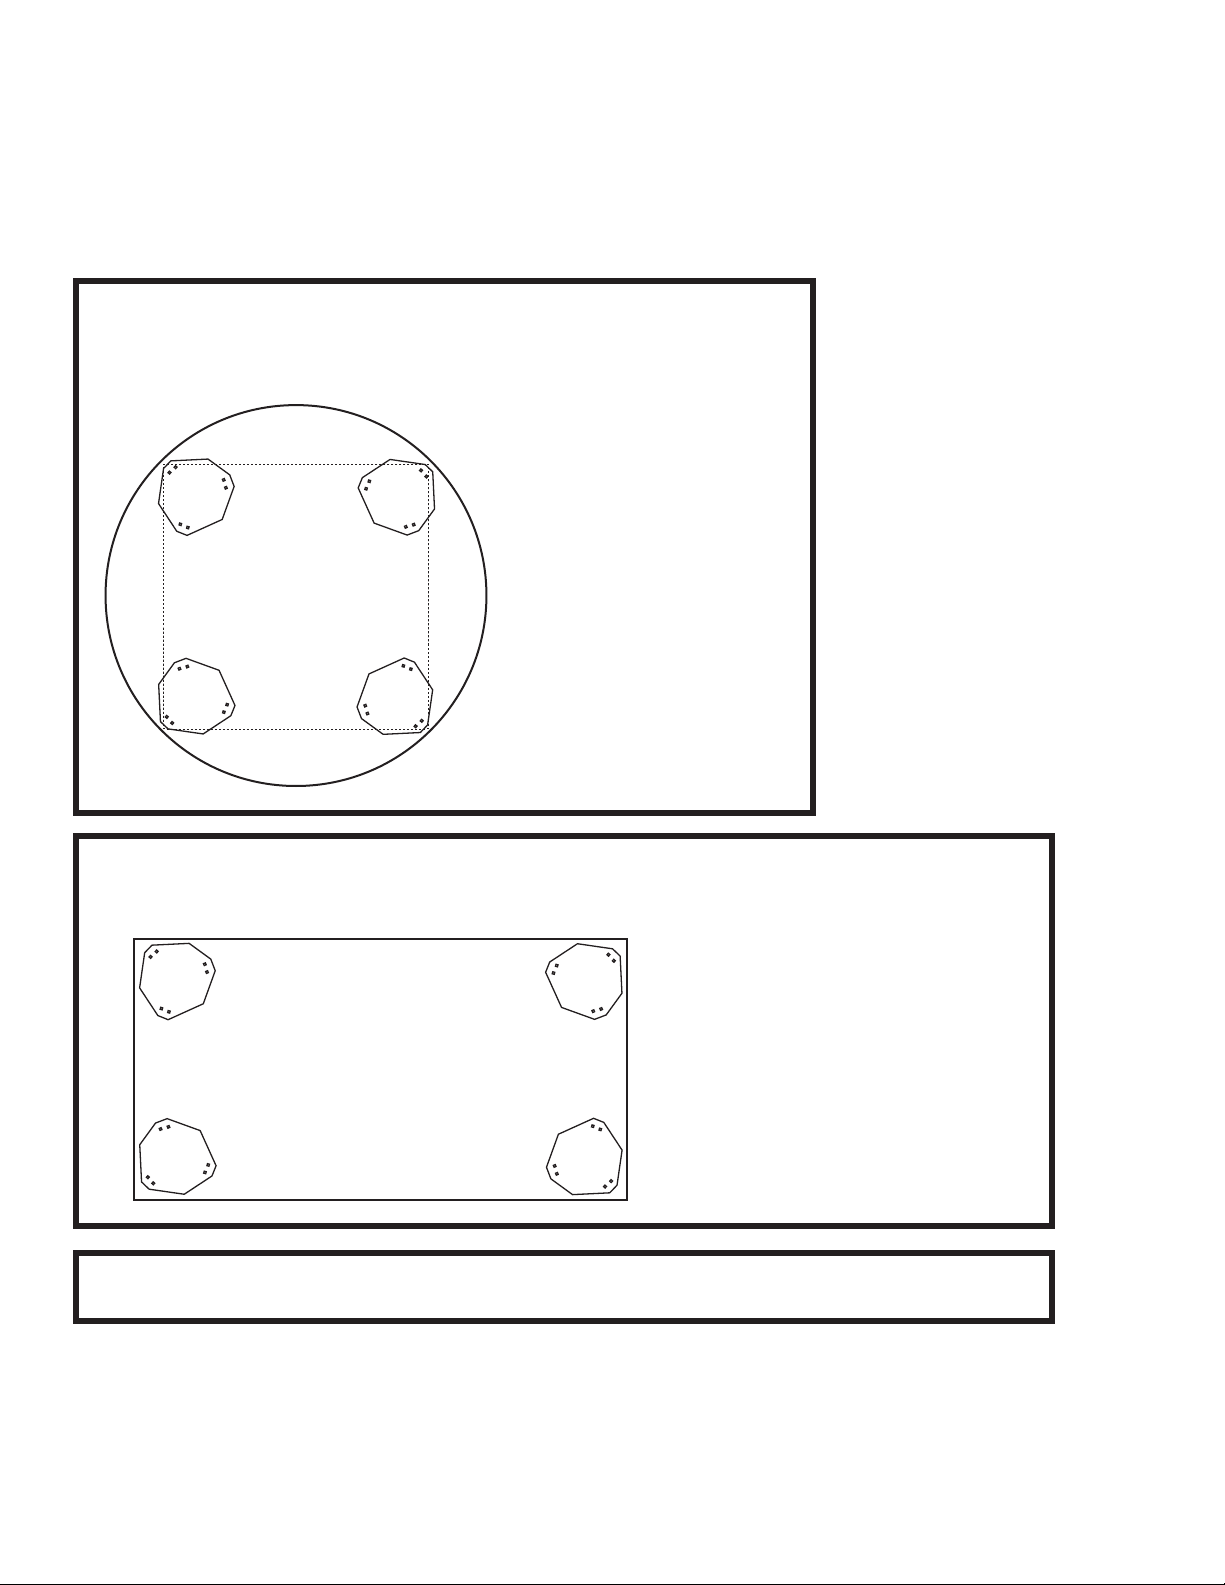
STEP 1 (Round Table Top): Place Table Top(C) on a clean at surface with
desired table nish face down. Using a tape measure, position assembled legs
at an equal distance from one another as shown in Figure B. Then, attach the
assembled Legs to Table Top using 6 Screws(A) per Leg.
EQUAL
EQUAL
STEP 1 (Rectangle Table Top): Place Table Top(C) on a clean at surface with desired table nish face
down. Position assembled legs as shown in Figure C. Then, attach assembled Legs to Table Top using 6
Screws(A) per Leg.
C
EQUAL
EQUAL
Figure B
C
Figure C
STEP 2: Using 2 people, ip the table over and adjust leveling glides accordingly.
 Loading...