

Page 1
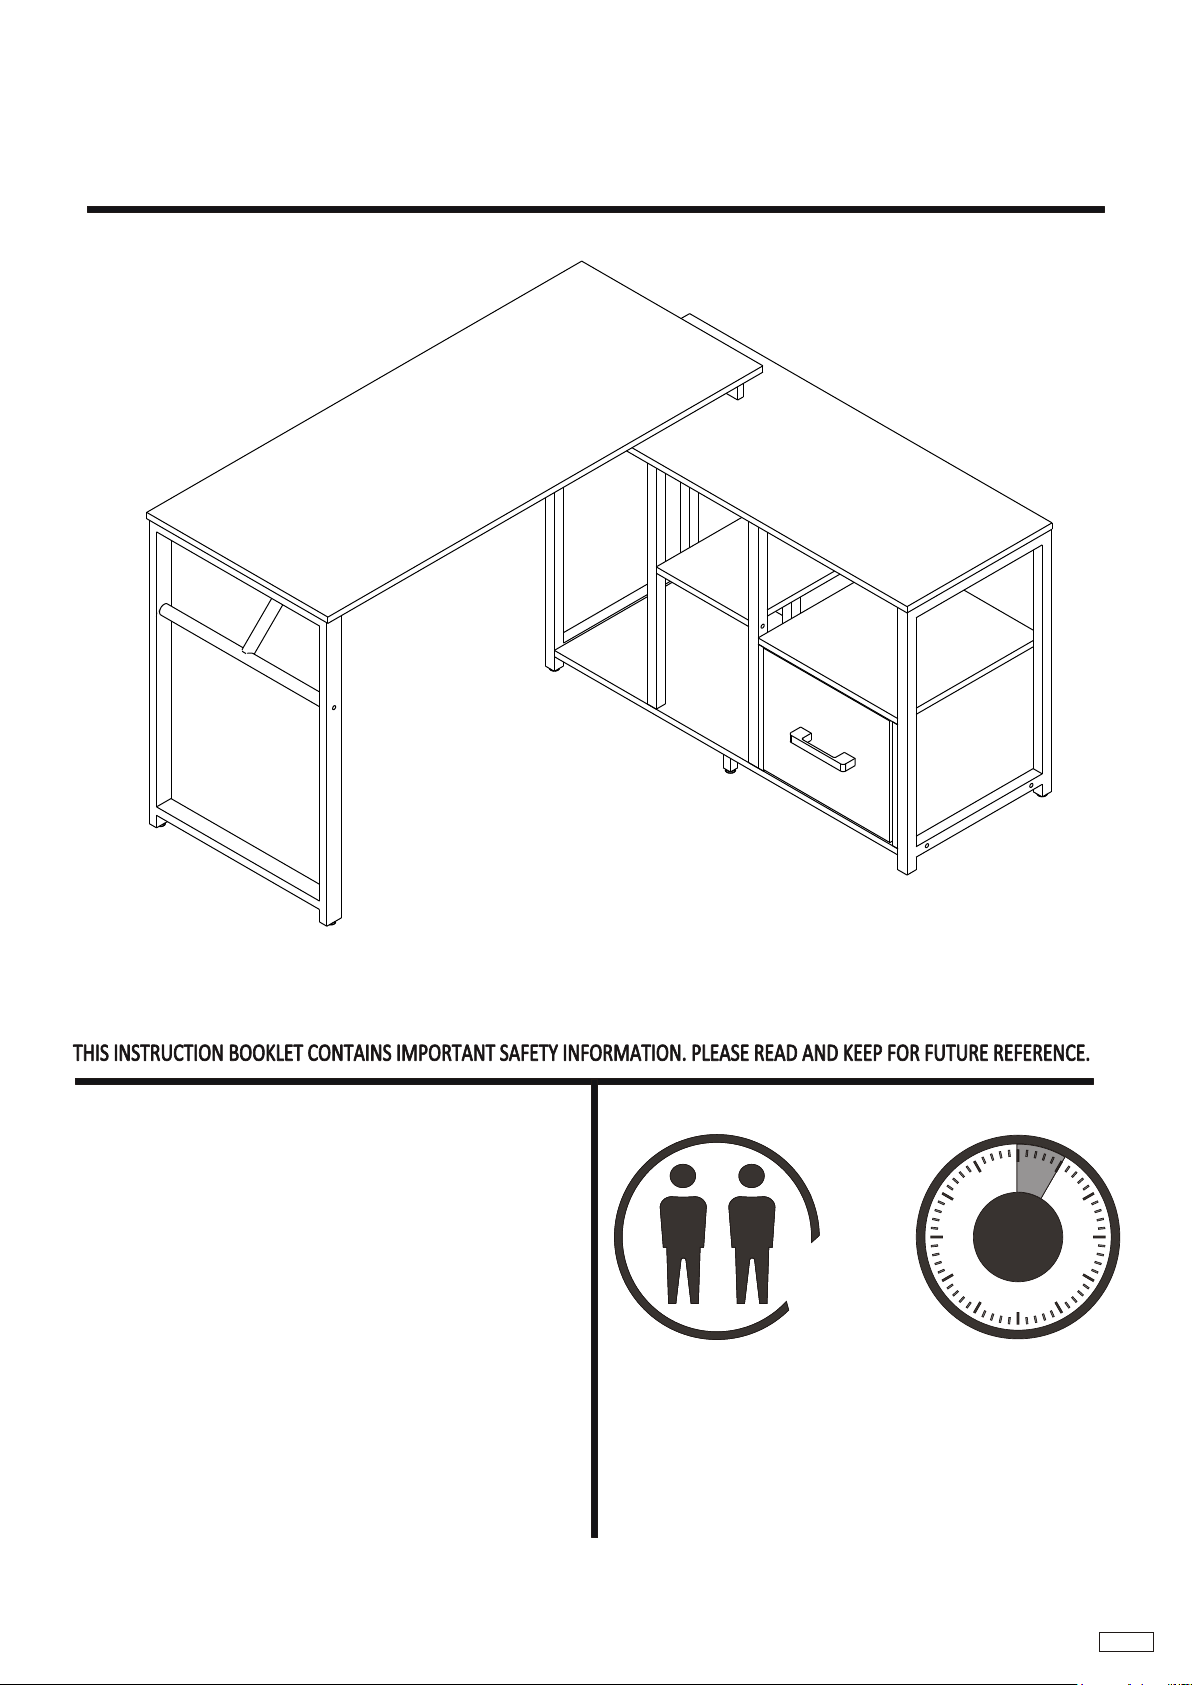
Multifunctional Computer Desk
Thanks for purchasing one of our products,please read carefully the assembly instructions before the installation(Attention:Do not tighten the screws before all screws are in place).Thanks for purchasing one of our products,please read carefully the assembly instructions before the installation(Attention:Do not tighten the screws before all screws are in place).
Do Not Return This Pro duct!Do Not Retu rn This Product!
Contact our cust omer ser vice teamContact our cust omer ser vice team
for help firstfor help first
60mn60mn
XX 22
If for an y rea so n there is an yt hing miss ingIf for an y rea so n there is an yt hing miss ing
damaged, incorrect or different from whatdamaged, incorrect or different from what
you expected.you expected.
PLEASE contact us for free replacementPLEASE contact us for free replacement
instead of hassle of return or other trouble.instead of hassle of return or other trouble.
TWO PEOPLE ARE NECESSARYTWO PEOPLE ARE NECESSARY
FOR THE ASSEMBLY OF THISFOR THE ASSEMBLY OF THIS
PRODUCT.PRODUCT.
P. 8 -1P. 8 -1
Page 2
PART NO. PART NO.
PARTS PARTS
PART NO. PART NO.
PARTS PARTS
11
22
33
44
55
77
88
99
66
X1X1
X1X1
X1X1
X1X1
X1X1
X1X1
X1X1
X1X1
X1X1
1414
1515
1616
1717
1818
1919
2020
2121
2222
X1X1
X1X1
X1X1
X2X2
X1X1
X1X1
X2X2
X1X1
X1X1
1010
1111
1212
1313
PART N O. PART N O.
GG
HHHH
22
88
44
22
88
1818
1414
22
M8X30mmM8X30mm
M6X50mmM6X50mm
M6X35mmM6X35mm
M6X30mmM6X30mm
M6X25mmM6X25mm
M6X12mmM6X12mm
M6X44mmM6X44mm
M4X18mmM4X18mm
PART S PART S
X1X1
X1X1
X1X1
X1X1
2323
2424
2525
2626
PART N O. PART N O.
IIIIIIII
JJ
KK
LL
MM
NN
12''12''
88
88
22
88
11
11
X1X1
X1X1
X2X2
X1X1
X1setX1set
PART S PART S
3.5x14mm3.5x14mm
M5X38mmM5X38mm
Ø8x30mmØ8x30mm
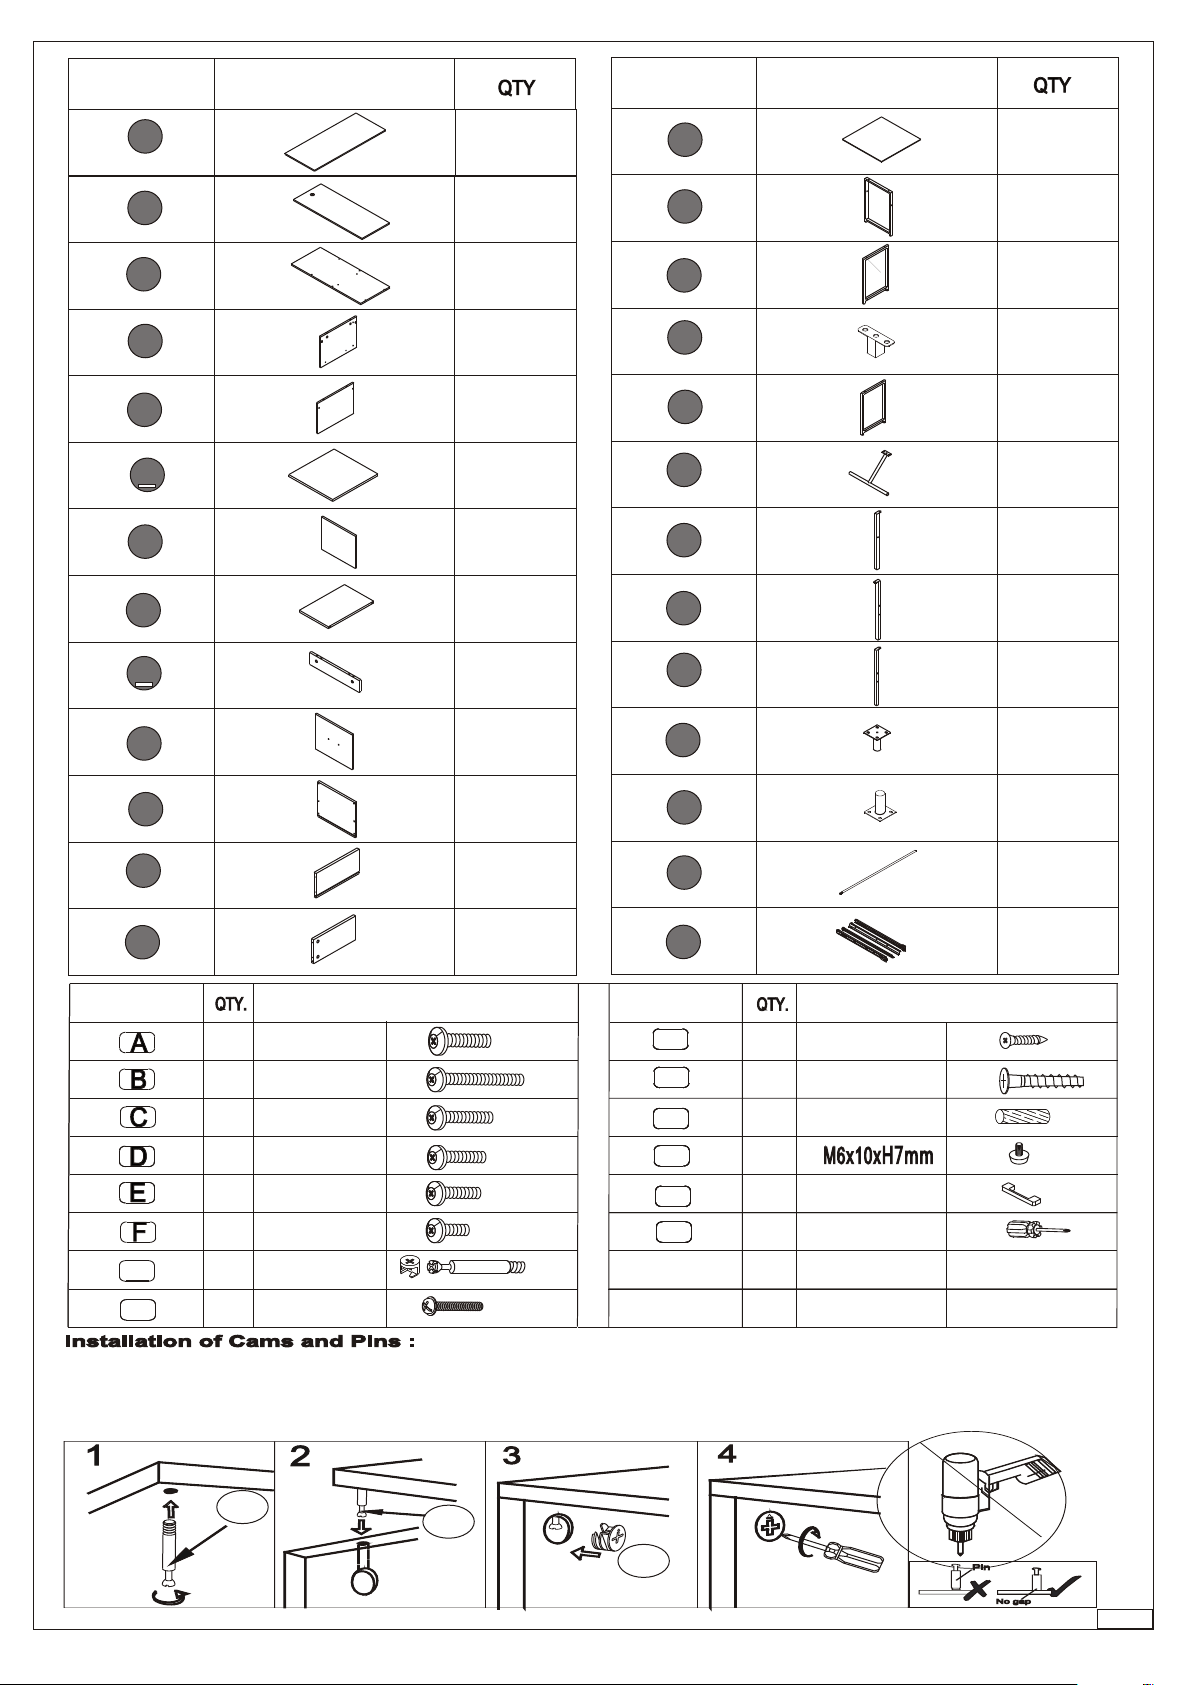
Screw the Pin into hole. To set Cams correctly, ensure the arrow on the Cam opening to the
Screw the Pin into hole. To set Cams correctly, ensure the arrow on the Cam opening to the
hole of the Pin it is locking. Lock Cam by turning Cam head with screwdriver to be tighten.
hole of the Pin it is locking. Lock Cam by turning Cam head with screwdriver to be tighten.
Please don't use an electric screwdriver to assemble the unit.
Please don't use an electric screwdriver to assemble the unit.
GG
GG
GG
P. 8 - 2P. 8 - 2
Page 3
11
GG
44
22
JJ
JJ
JJ
44
33
1212
GG
1010
2626
1414
1111
1313
GG
1212
GG
GG
GG
GG
II
2626
II
1313
1313
II
44
44
MM
1010
HH
22
HH
55
1313
2525
1111
1010
2525
66
1313
44
2626 2626
II
II
55
II
44
2626
44
II
2626
55
II
P. 8 - 3P .8 -3
Page 4
77
GG
22
88
GG
22
99
44
GG
GG
55
77
GG
GG
GG
GG
66
77
GG
44
1010
GG
GG
BB
44
2020
BB
1111
GG
GG
GG
GG
44
GG
GG
BB
2222
88
2020
2121
BB
BB
55
EE
44
1212
JJ
44
2020
2222
44
EE
EE
33
2121
33
55
JJ
P. 8 - 4P .8 -4
Page 5
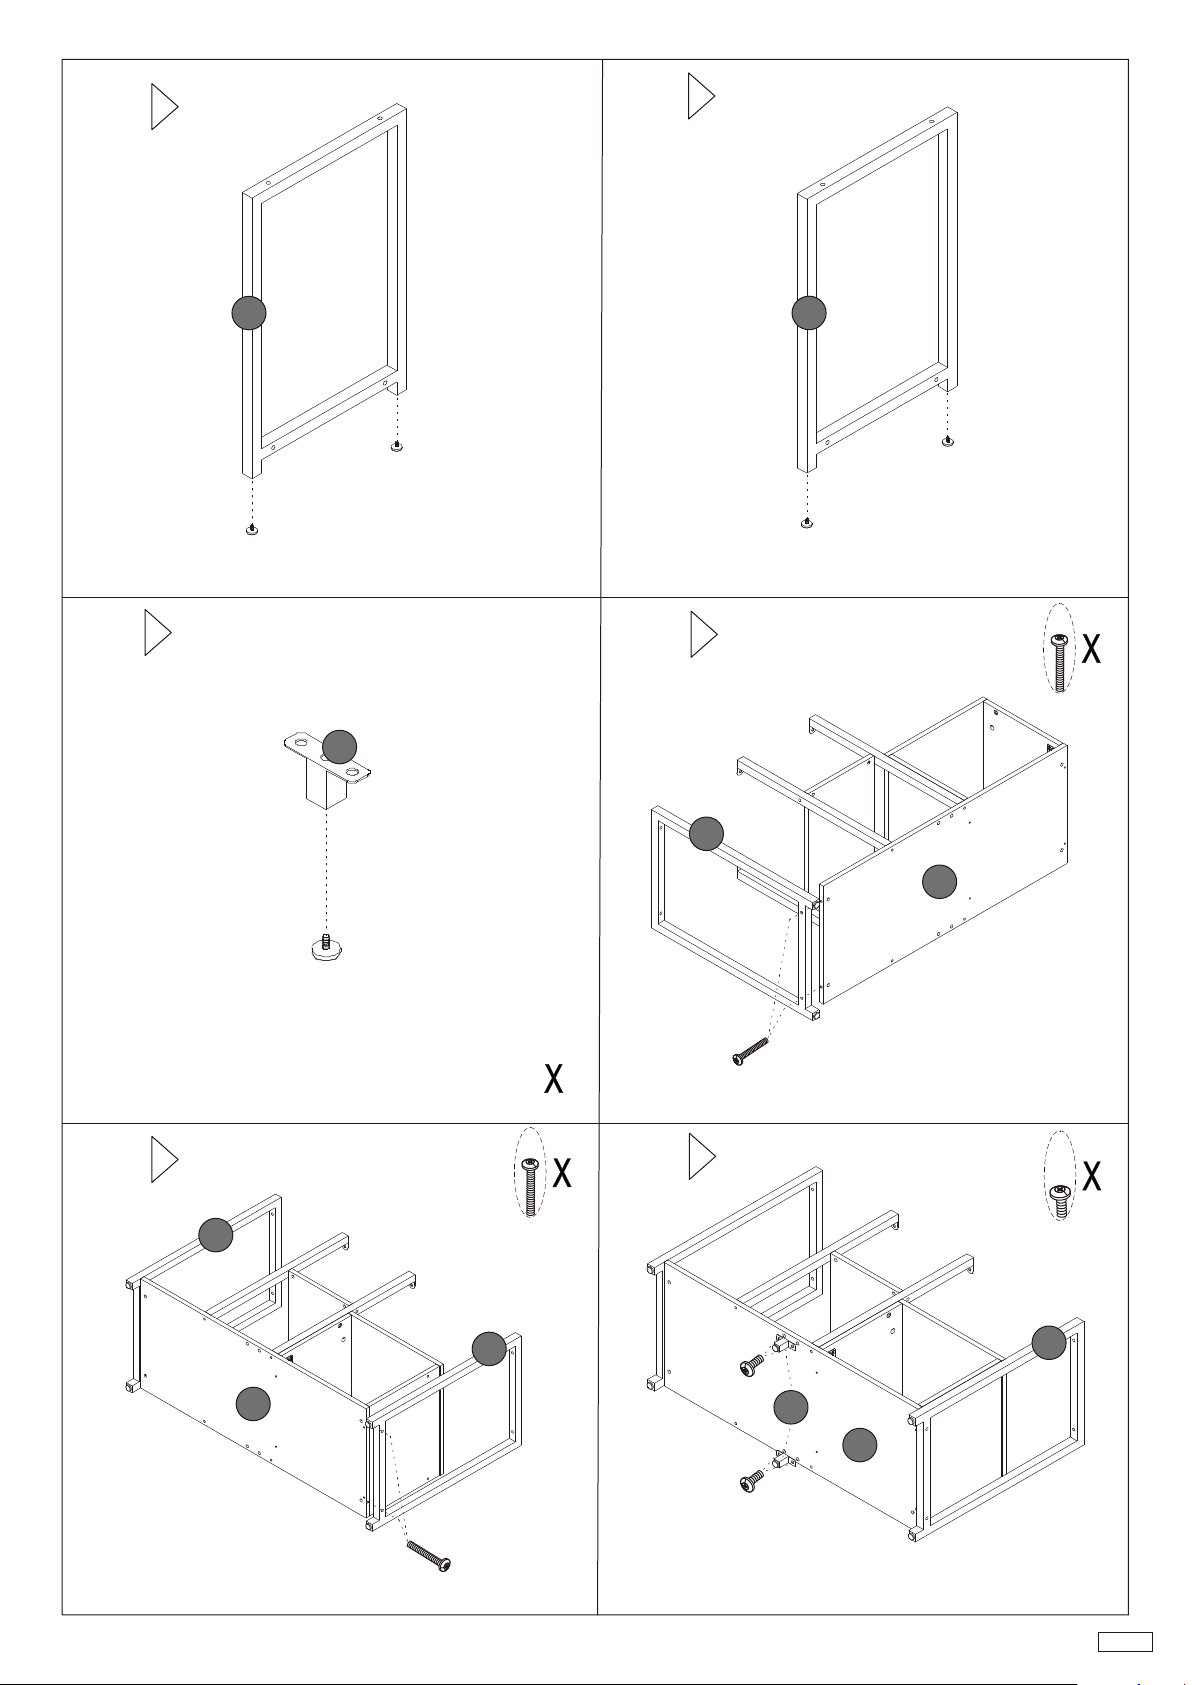
1313
1414
1515
1616
1818
LL
LL
LL
1616
1717
1616
LL
BB
22
33
1717
1616
33
LL
BB
FF
44
1818
FF
1717
33
FF
1818
BB
22
22
1818
BB
P. 8 - 5P .8 -5
Page 6
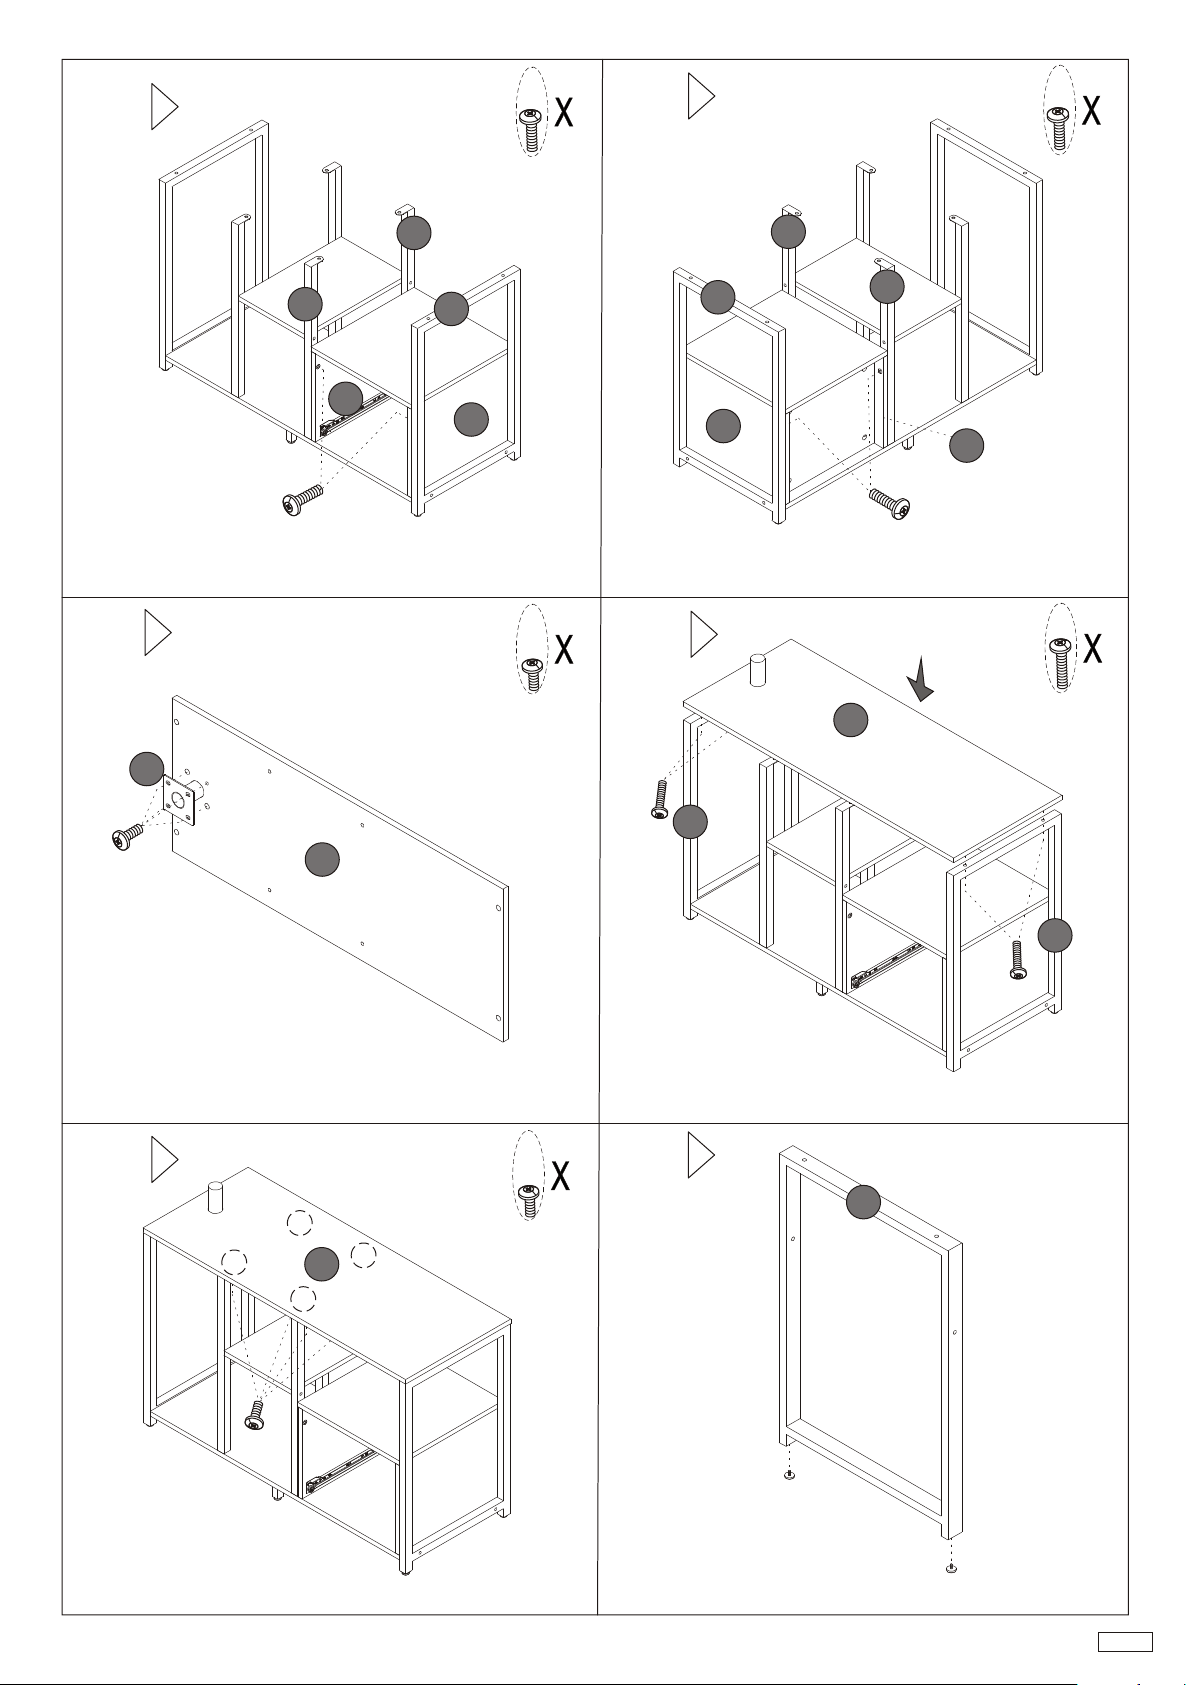
1919
EE
22
2020
EE
22
2121
2424
EE
2222
44
2121
1818
55
2222
1818
55
FF
2222
44
2121
44
EE
CC
44
22
FF
2323
22
22
1616
CC
1818
CC
FF
2424
44
1515
FF
LL
LL
P. 8 - 6P .8 -6
Page 7
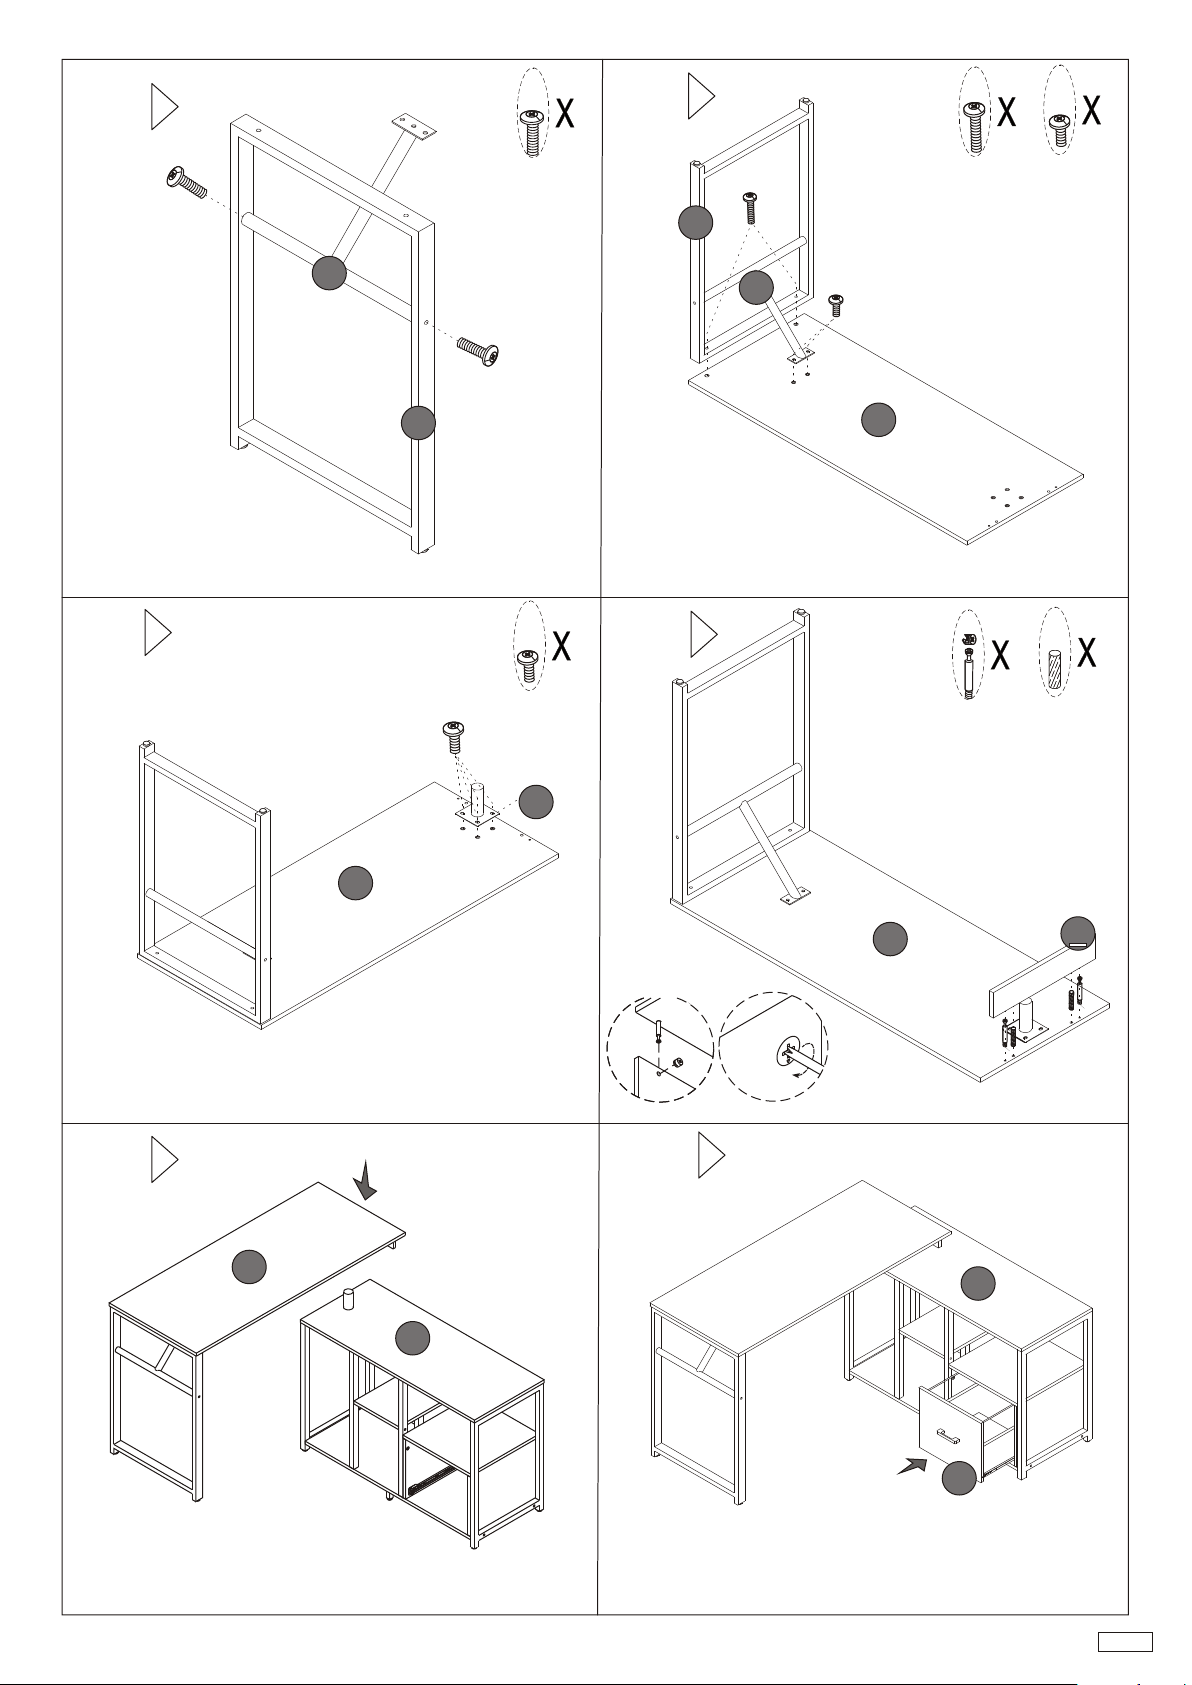
2525
AA
22
2626
DD
22
FF
22
2727
AA
1919
1515
DD
1515
1919
AA
FF
2828
44
FF
FF
11
22
KK
22
GG
2929
11
11
22
2323
GG
3030
11
GG
GG
22
99
GG
KK
KK
1010
P. 8 - 6P .8 -6
 Loading...