

Page 1

PRODUCT MANUAL
ATTENTION!
PLEASE READ THESE INSTRUCTIONS BEFORE USING THIS DEVICE
PRODUCT MANUAL
SAFETY
To reduce risk of injury when assembling & using the chair, follow these precautions:
• Read all of these instructions before assembling and using your salon chair.
• It is helpful to have 2 people assemble and turn the chair upright after assembling.
• Do not over-extend the chair(0~150kg), creating the risk of falls or tipping the
chair, and its occupant over, resulting in injury
Page 2
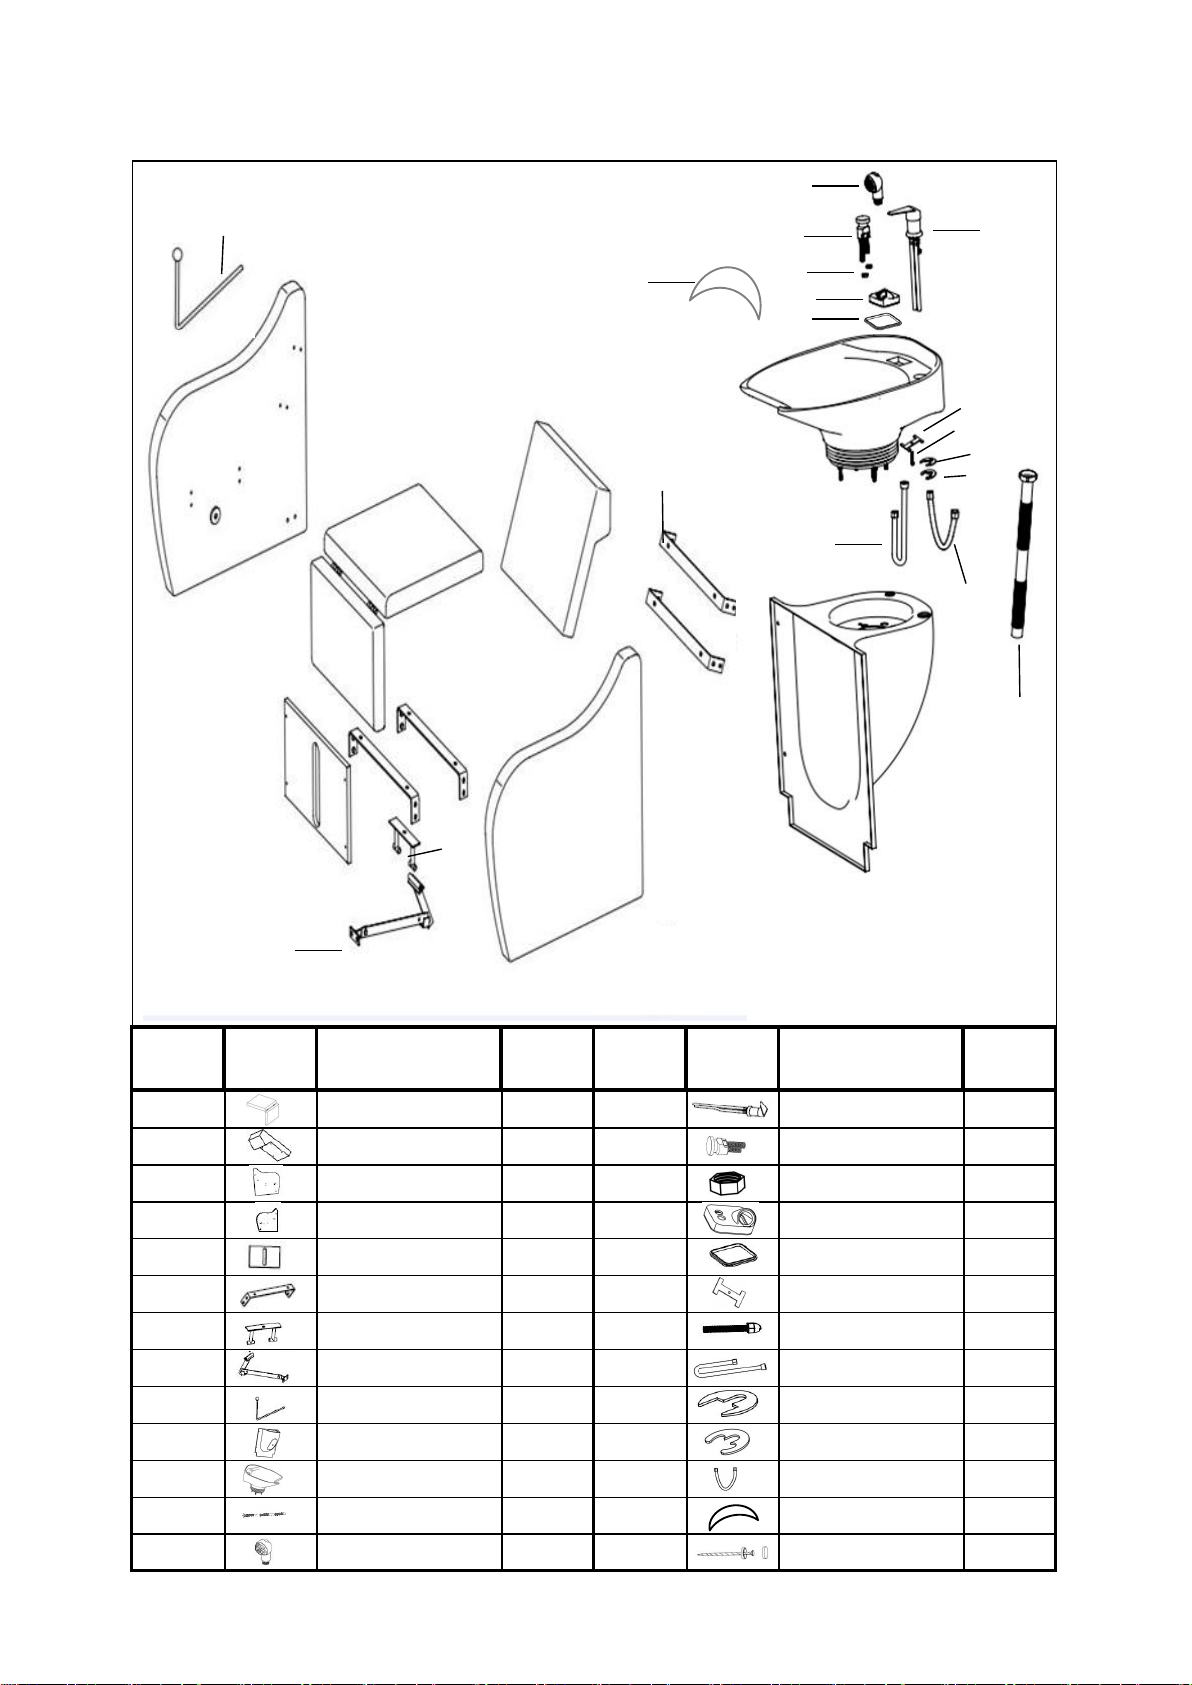
PARTS & FEATURES
number Picture Part Name Number number Picture Part Name Number
1
cushion&leg-
rest
1
14
Faucet 1
2 Backrest 1 15 Isolator 1
3 Left handrest 1
16
Locking nut 2
4 Right handrest 1 17 Isolator base 1
5 Isolation board 1
18
Plastic washer 1
6 Handrail connector 4 19
Fixing washer
1
7
Reclining Level Connector
1
20
Locking screws 1
8
Stabilizer Bar
1 21 Sprinkler pipe 1
9
Reclining Lever
1
22
Iron splint 1
10 Baisn support 1 23 Plastic mat 1
11 Basin 1
24
Faucet pipe 1
12
Sewer pipe 1 25
Neck-rest
1
13 Sprinkler 1
26
Screws 6
1
2
3
4
5
6
7
8
10
9
12
11
21
24
13
1514181716
25
201922
23
7
Page 3
INSTALLATION INSTRUCTION
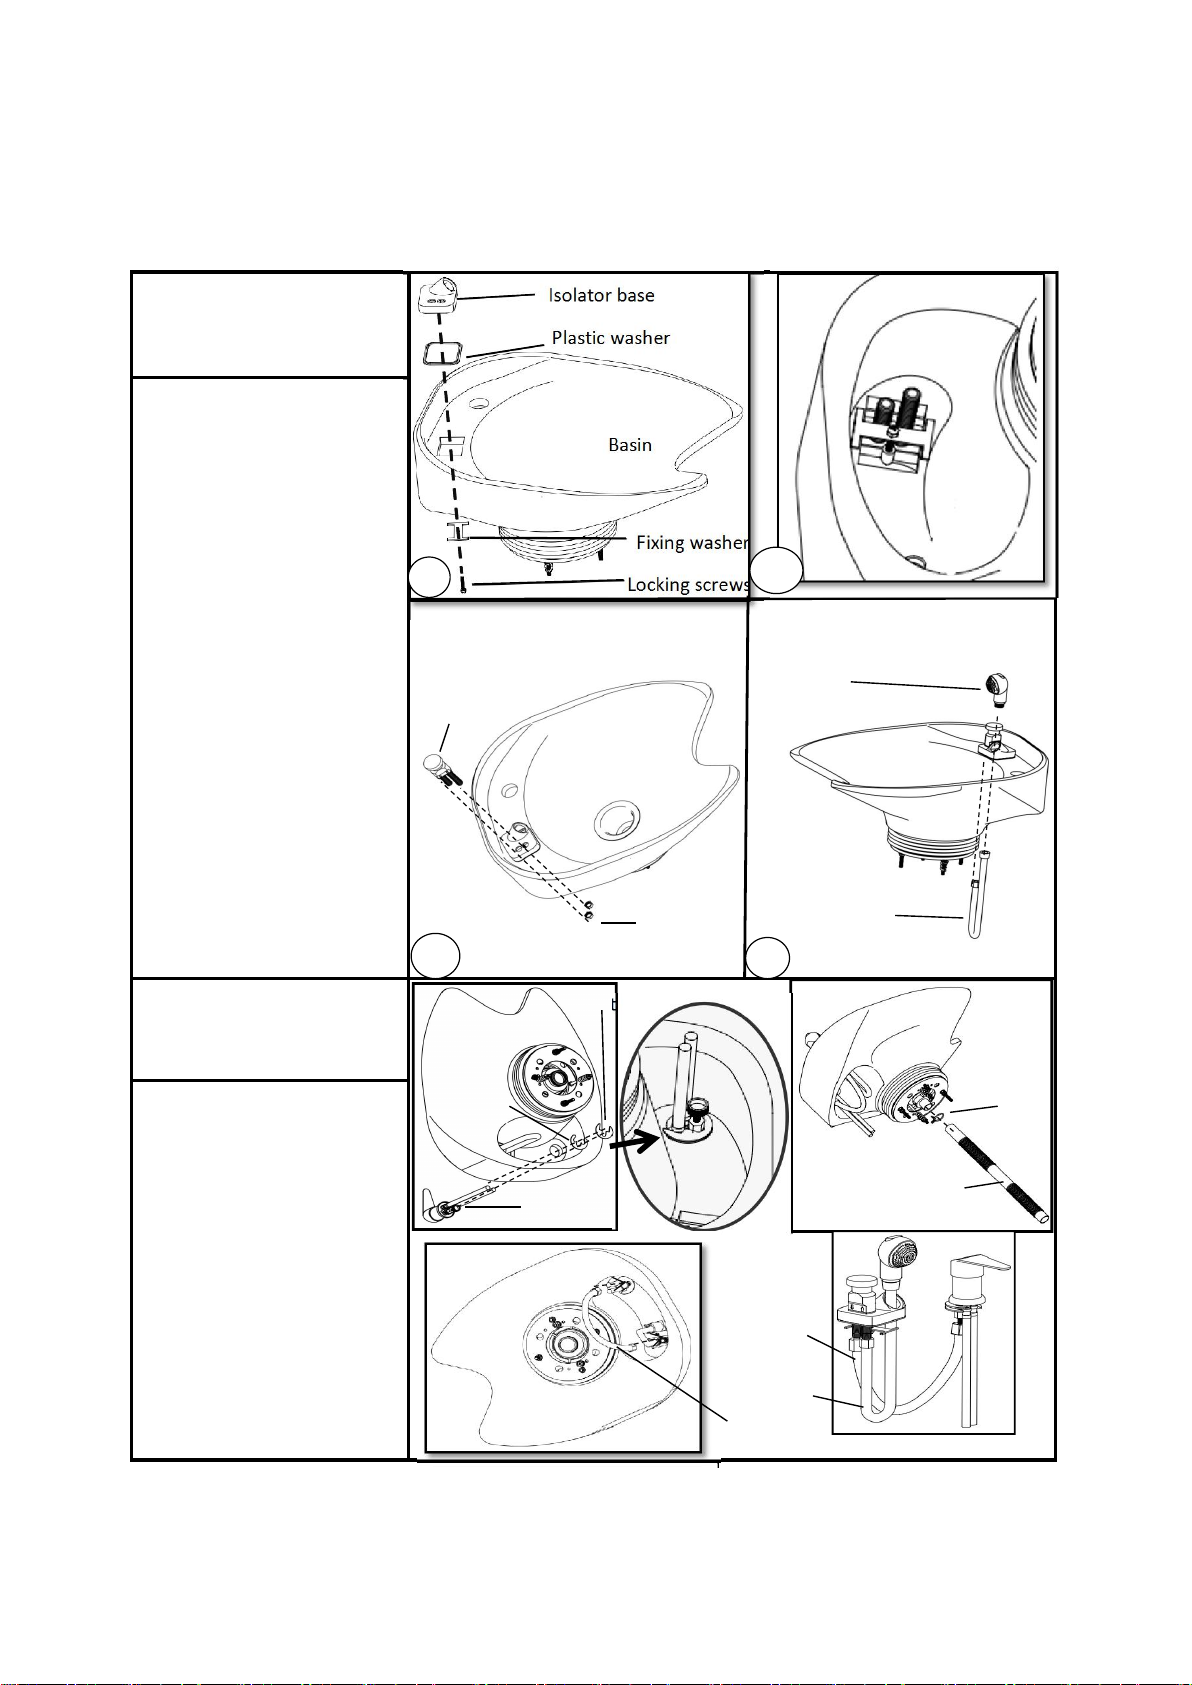
First:Install the basin (1)
Step 1 . Install Isolator base ,
Plastic washer , Fixing
washer and Sprinkler pipe to
the basin.
Step 2 . Install Isolator and
Locking nut to the basin.
Step 3 . Install Sprinkler and
Sprinkler pipe to the basin.
Please follow up the diagram
beside
Second : Install the
basin(2)
Step 1 . Install the faucet ,
plastic mat and iron splint to
the basin.
Step 2 . Install the faucet pipe
to the faucet and isolator.
Step 3 . Install the sewer pipe
on bottom of the basin , then
tighten it by circlip.
Please follow up the diagram
beside
Basin
Isolator base
Plastic washer
Fixing washer
Locking screws
Sprinkler
Sprinkler pipe
Isolator
Locking nut
Faucet
Plastic mat
Iron splint
Bottom
Bottom
Method of connecting pipe
Faucet pipe
Sprinkler pipe
Faucet pipe
Sewer pipe
circlip
1
2
4
3
8
Page 4

Third:Install handrests
,seat cushion&leg-rest ,
handrail connectors and
(Don't tighten all bolts)
Step 1 . Remove 4 bolts
which pre-fixed on the seat
cushion and Install 2 handrail
connectors to the seat
cushion&leg-rest by the 4
bolts .
Step 2 . Install 2 handrail
connectors to the backrest.
Step 3 . Install the backrest
which installed 2 handrail
connectors to the left
handrest .
Step 4 .Install the backrest
which installed 2 handrail
connectors to the left
handrest . Step 5 .Install the
seat cushion&leg-rest which
installed 2 handrail
connectors and the last
handrail connector to the left
handrest .
Step 5 . Install right handrest
.
Please follow up the diagram
beside.
Method of connecting pipe
Step 1
Step 2
Step 3
Step 4
Step 5
bolt
seat cushion&leg-rest
bolt
handrail
connectors
backrest
handrail
connectors
bolt
left handrest
backrest
left handrest
seat cushion
Right handrest
9
Page 5
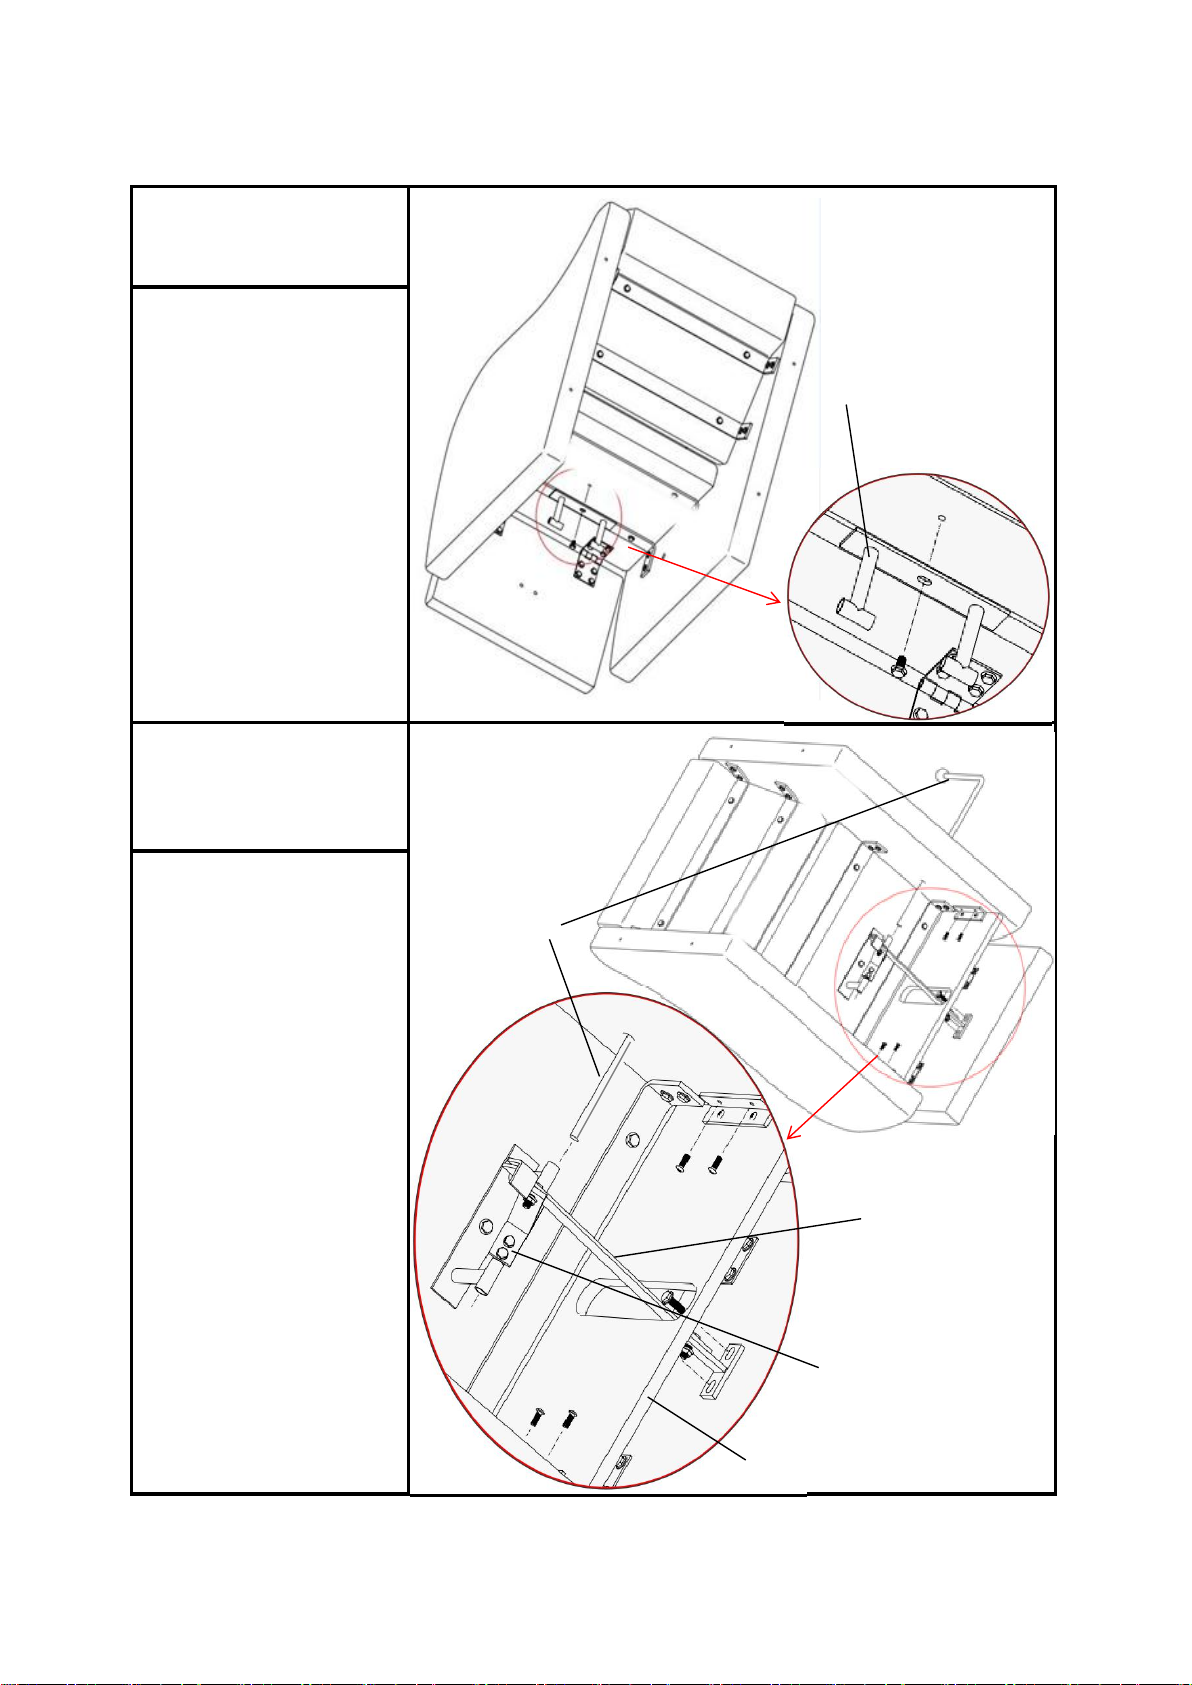
Fourth:Install Reclining
Leve Connector
Step 1 . Remove the bolt
which pre-fixed on the bottom
of the seat cushion and Install
Reclining Leve Connector to
the bottom of seat cushion by
the bolt .
Please follow up the diagram
beside.
Fifth:Install Stabilizer Bar
,Isolation board and
Reclining Lever
Step 1 . Remove the 4 bolts
which pre-fixed on the
handrests and loosen the 2
bolts which pre-fixed on the
side of Stabilizer Bar and
remove the 2bolts which pre-
fixed on the leg-rest. Step
2 . Insert Stabilizer Bar
through the hole of Isolation
board.
Step 3 . Insert the
Reclining Lever through the
hole of right handrest into
Reclining Leve Connector
and Stabilizer Bar,then
tighten the 2 loosened bolts.
Step 4 . Please follow up the
diagram beside , tighten All
bolts .
Adjusting and make sure all
parts of the seat are OK and
Reclining Leve Connector
Stabilizer Bar
Isolation board
Reclining Lever
2 needed loosening bolts
10
Page 6
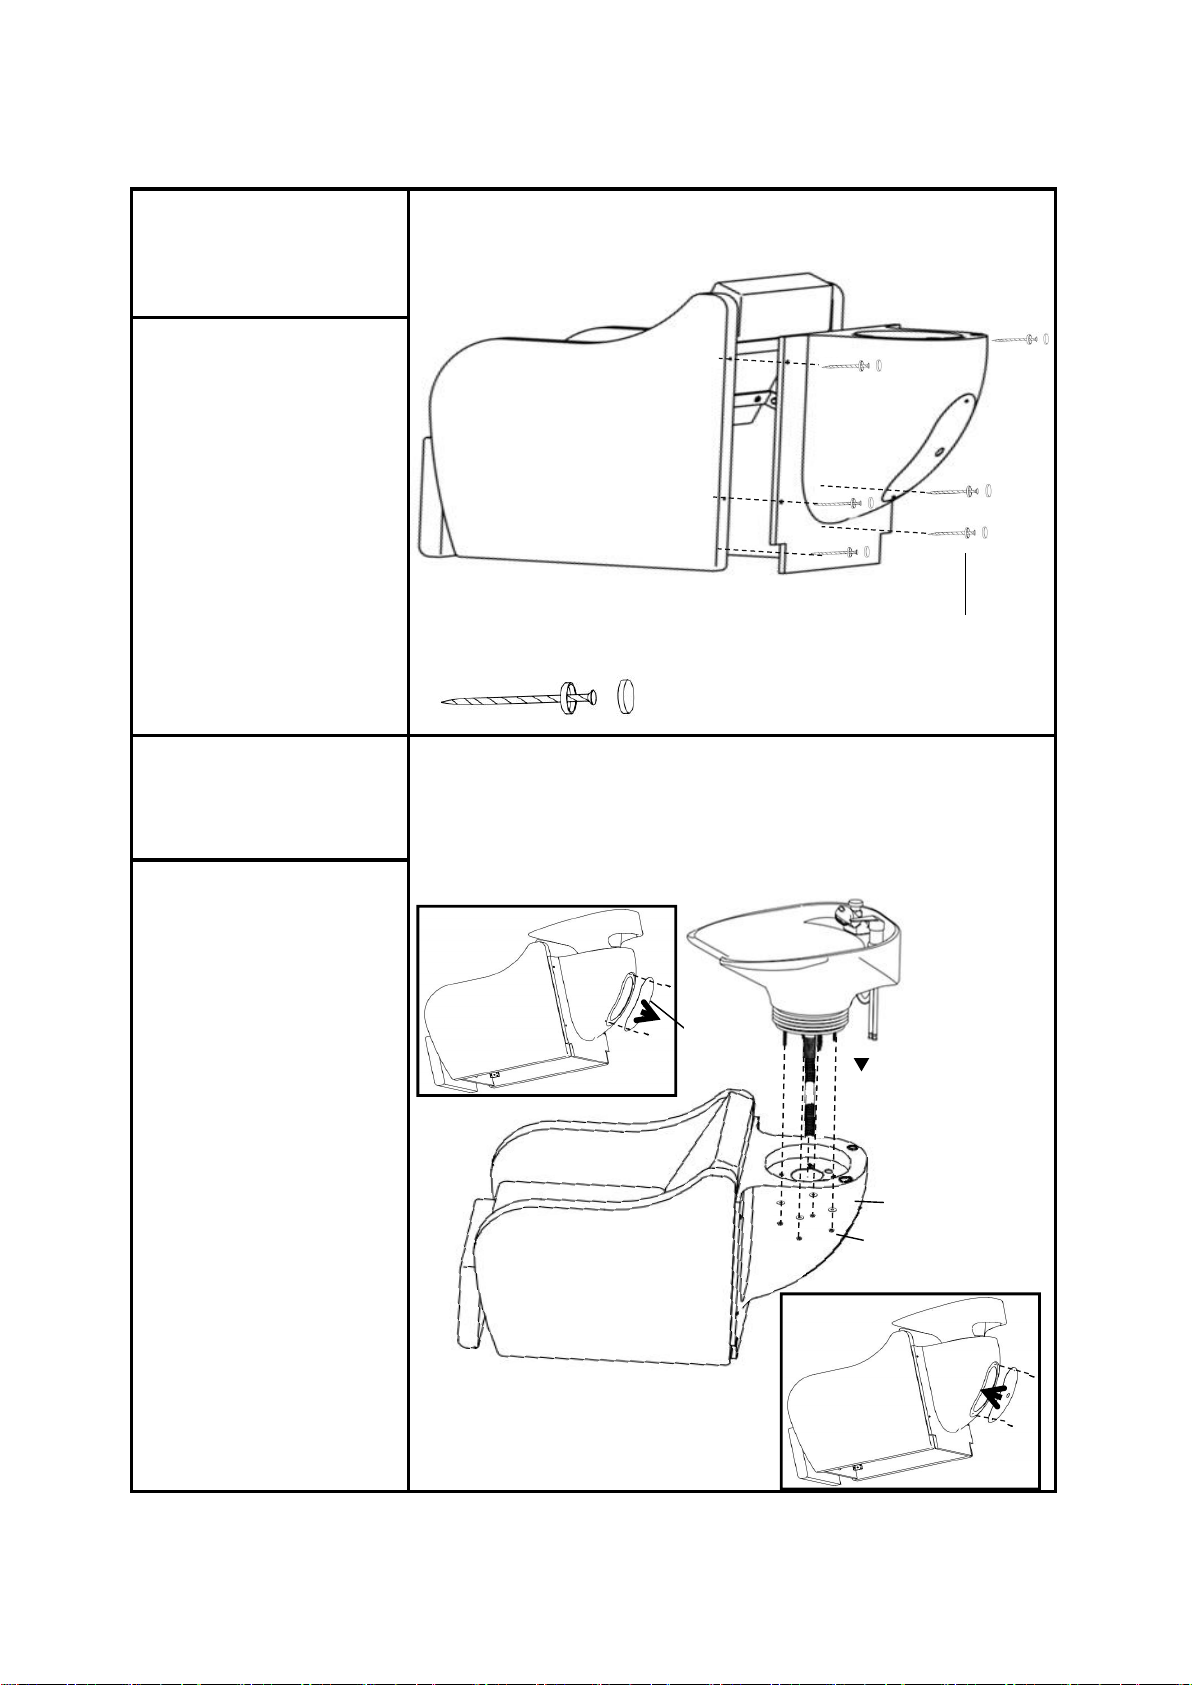
Sixth : Install basin support
to the seat
Step 1 . Install the basin
support to the seat by the 6
screws.
Please follow up the diagram
beside.
Fourth : Install the installed
basin to the installed seat &
basin support
Step 1 . Remove the cover of
the basin support and remove
the screws which pre-fixed on
bottom of the basin
Step 2 . Install the basin to
the basin support by the
given screws.
Step 3 . Install the removed
cover of basin support .
Please follow up the diagram
beside.
Seat
Baisn support
screws (6)
Installed basin
basin support
Screws
Cover
screws
11
Page 7
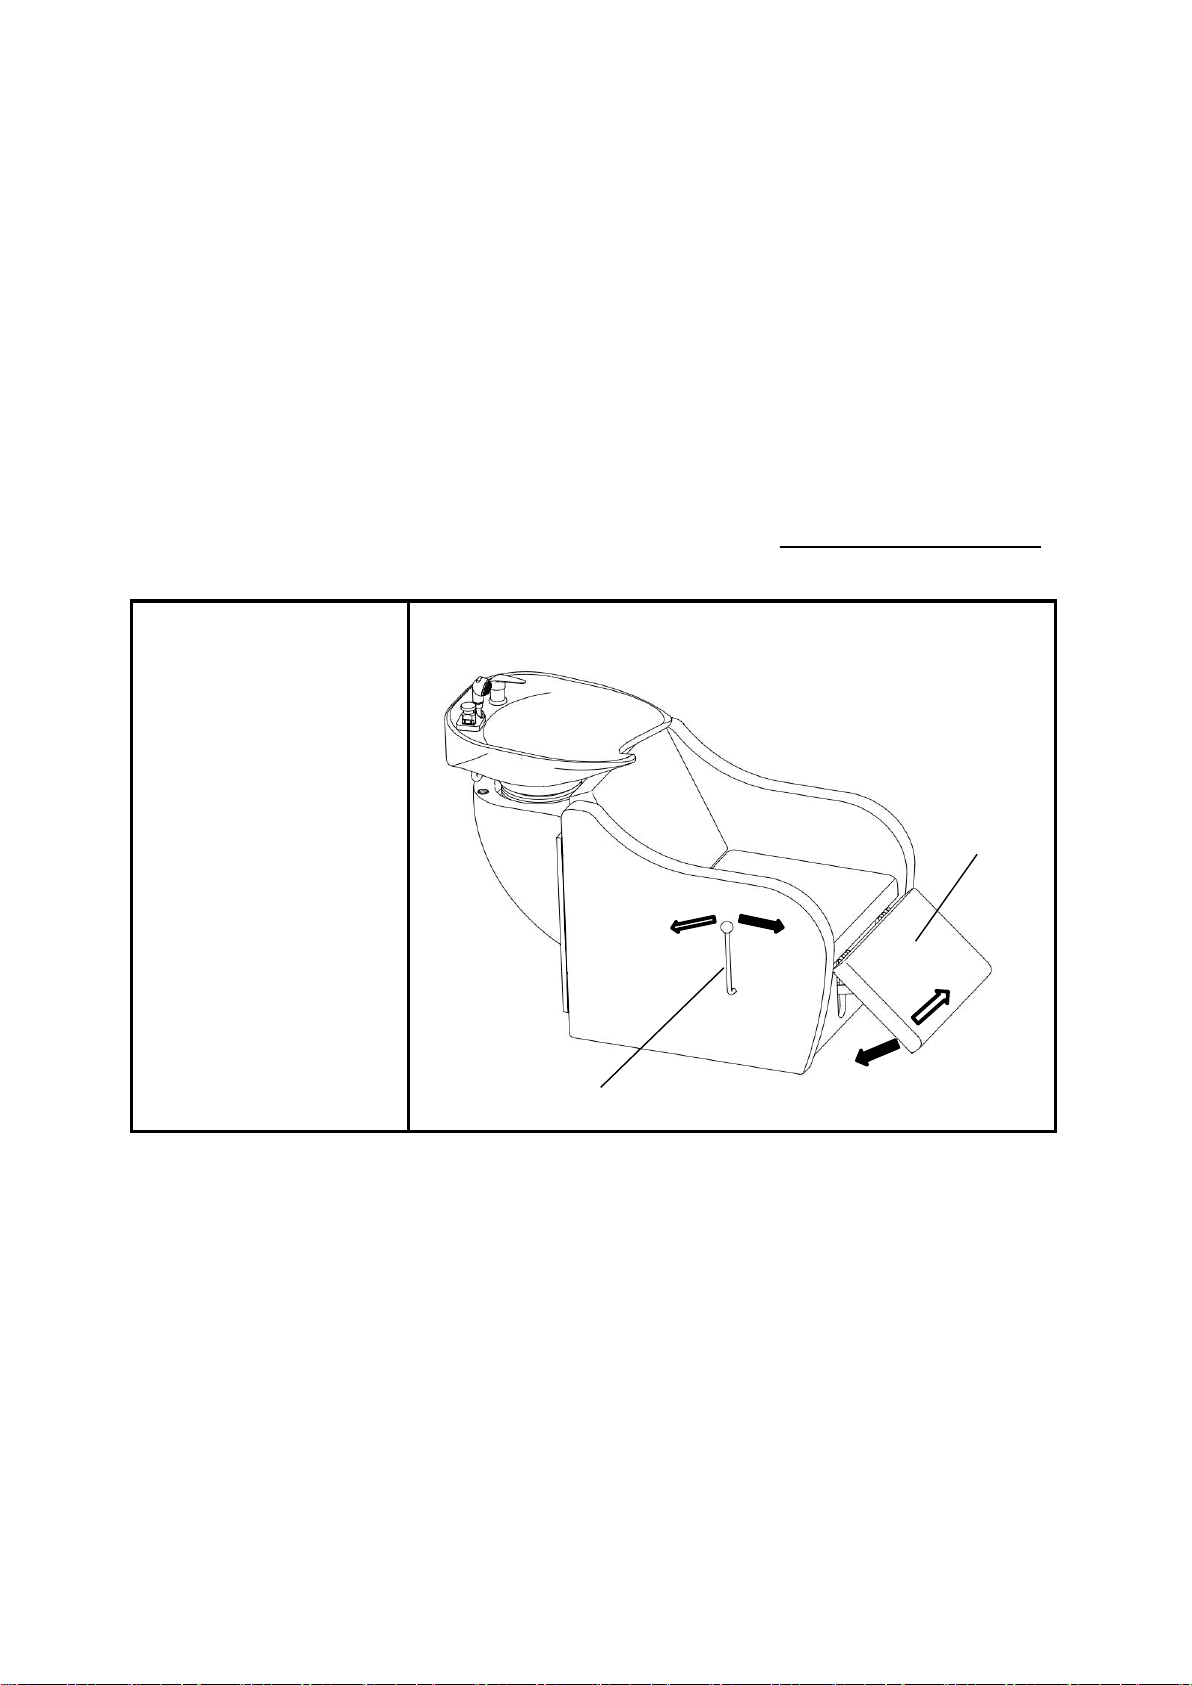
OPERATING THE CHAIR
Recline the Legrest
• Push Lever on side of chair
back to allow the legrest of
the seat to raise up.
• Pull lever forward to allow
the legrest to lower down.
legrest
lever
12
 Loading...