

Page 1
Page 2
GENERAL GUIDELINES
Please read the following instruction carefully and use the product accordingly. Please keep
this manual and hand it over when you transfer the product.
This summary may not include every detail of all variations and considered steps. Please
contact us when further information and help are needed.
NOTES
Please follow the assembly instructions precisely and only use the product as intended.
Prior to assembly, please check the product for defects or missing accessories. If any
defects are found or accessories are missing, do not use product as damage or injury may
occur; contact us for assistance and replacement.
In order to assemble more smoothly, please don't screw the screws too tight at first. It is
highly suggested that tighten all the screws AFTER all the parts are installed. It is suggested
you regularly check the products bolts and connections to ensure safe use. Assemble the
item on a soft flat and clean surface to avoid scratches and damage. It is recommended that
two people assemble this product.
WARNINGS
During assembly, keep parts and packaging materials away from children and pets as there
could cause injury and are a potential choking hazard.open the item slowly and cautiously
Please ensure you have the name of the item hardware part required and quantity.Please decide
the direction of the shelf first, left or right, It requires the differen
Pleade don't screw the screws too tight at first, It is highly suggested that tighten the screws after
all the parts are installed.
t installation order.
page
1
Page 3
扩
3
6
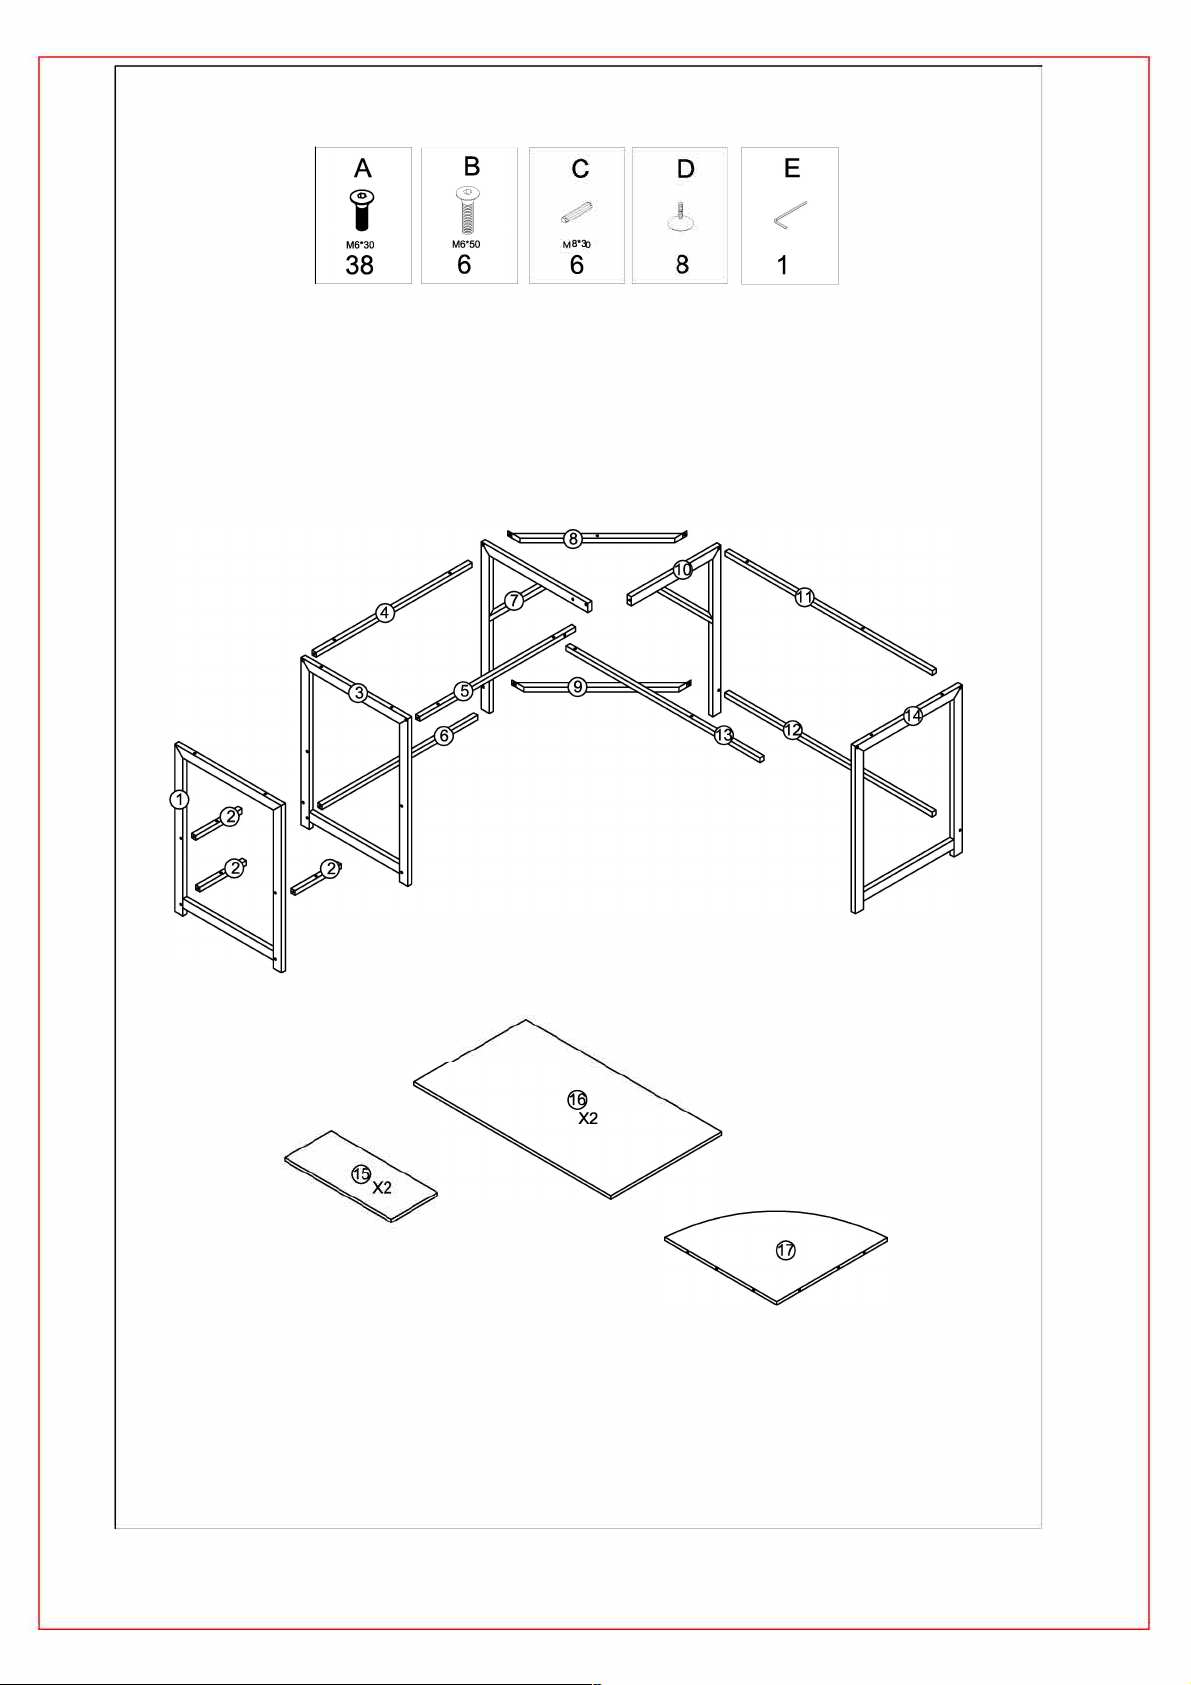
EXPLODED DRA卅ING
/
@
x
2
2
e
g
a
p
Page 4
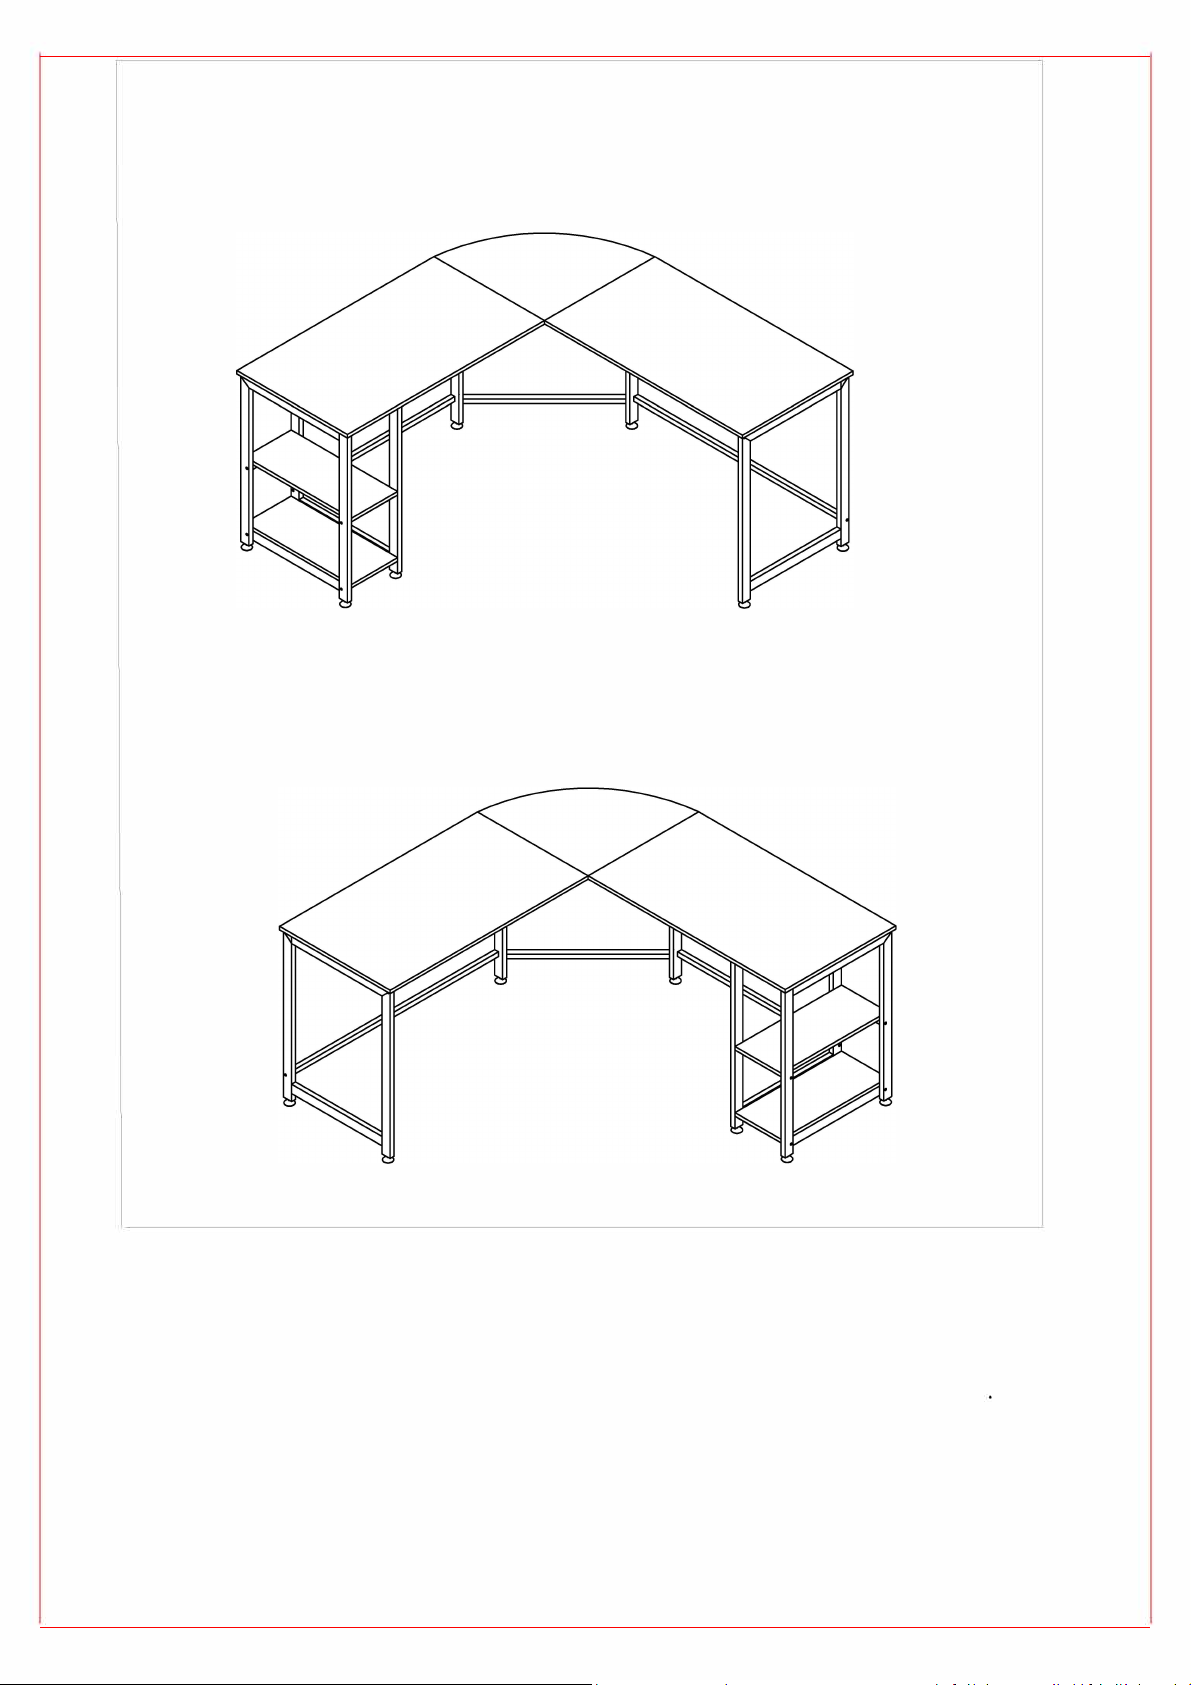
Direction 1
The shelf is on the left
:
Direction 2:
T
helf is on the right
he s
NOTE:
1.
If you determine to assemble the shelf on the left like the picture shown in
direction 1, then go for Page 4.
2.
If you determine to assemble the shelf on the right like the picture shown
rn direction 2, then go for Page 8.
page
3
Page 5
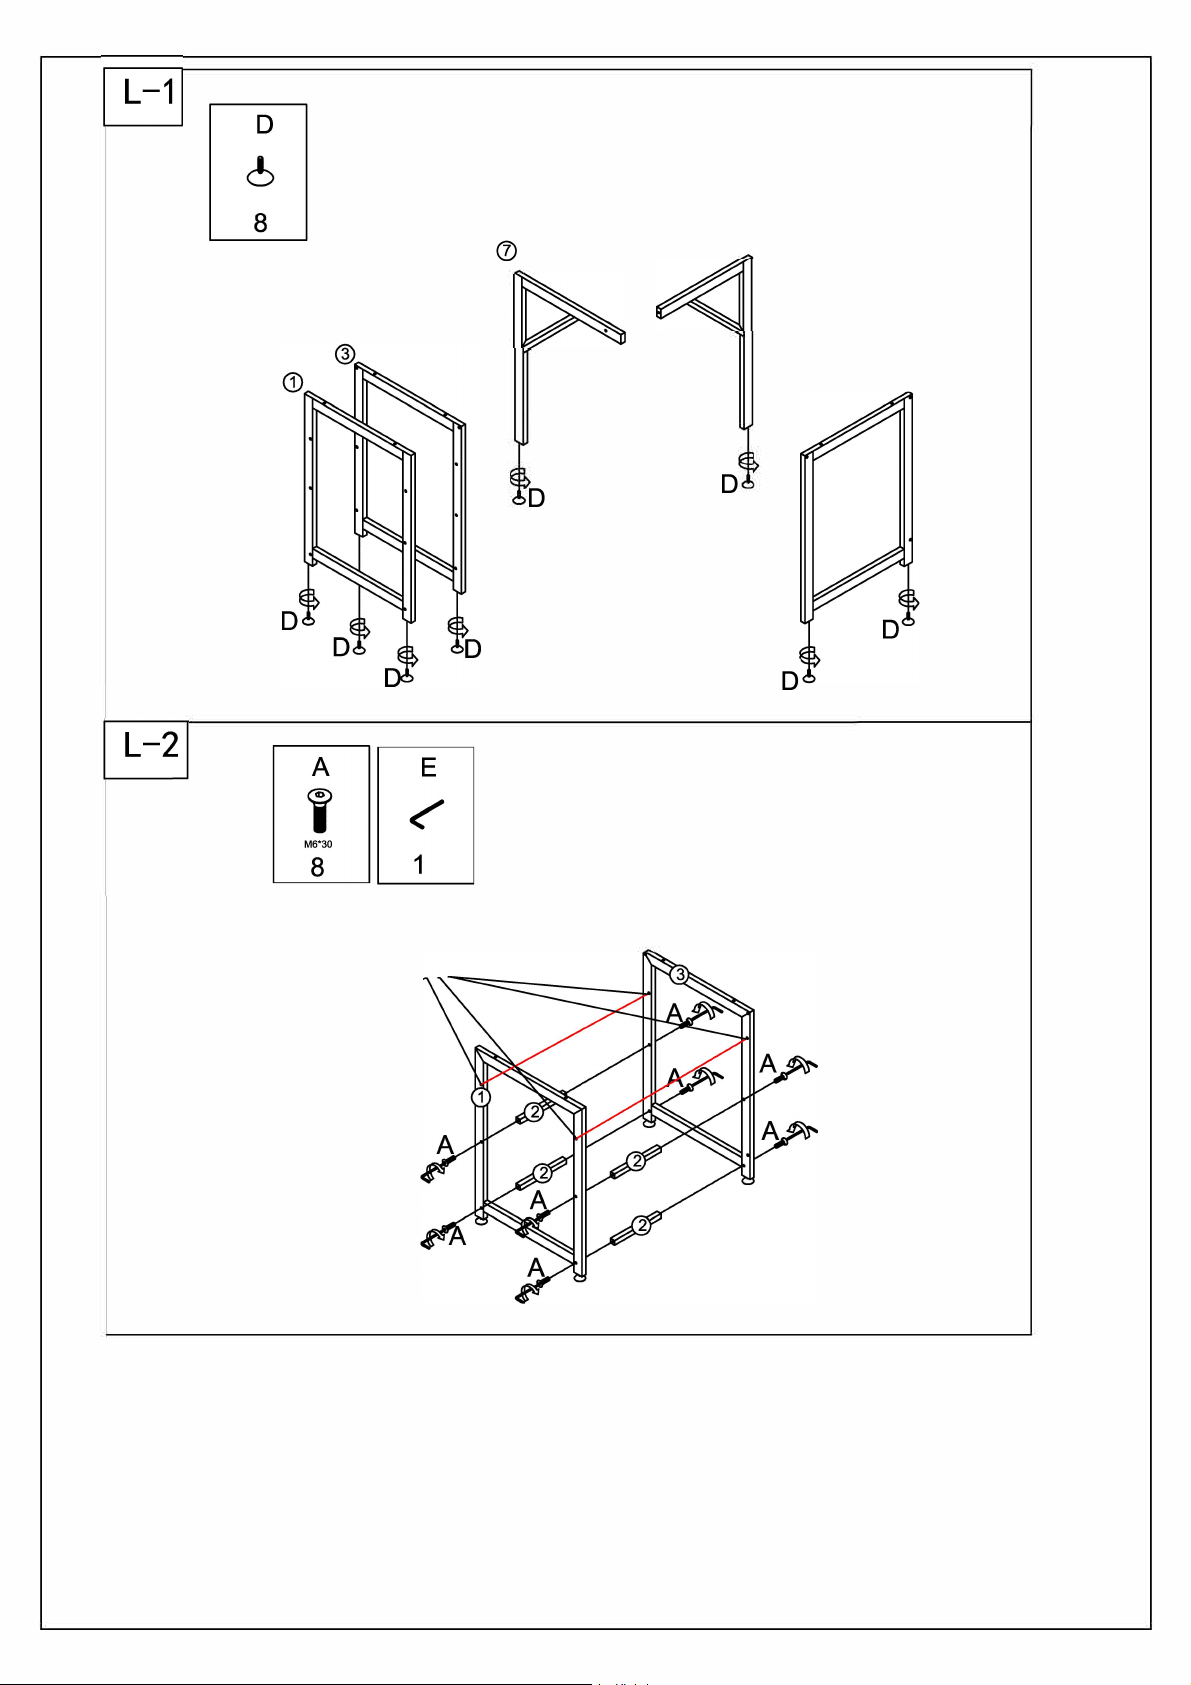
@
The holes are reserved to
adjust the bottom plate
if necessary
D
D
D
NOTE:
There are three rows of parallel holes inside PART I and PART 3, The role of the extra
row of holes is to adjust the space between the upper and lower two plates according to
the user needs when installing the plate on the PAGE 6, PART 2 can be installed between
any two row of holes.
page 4
Page 6
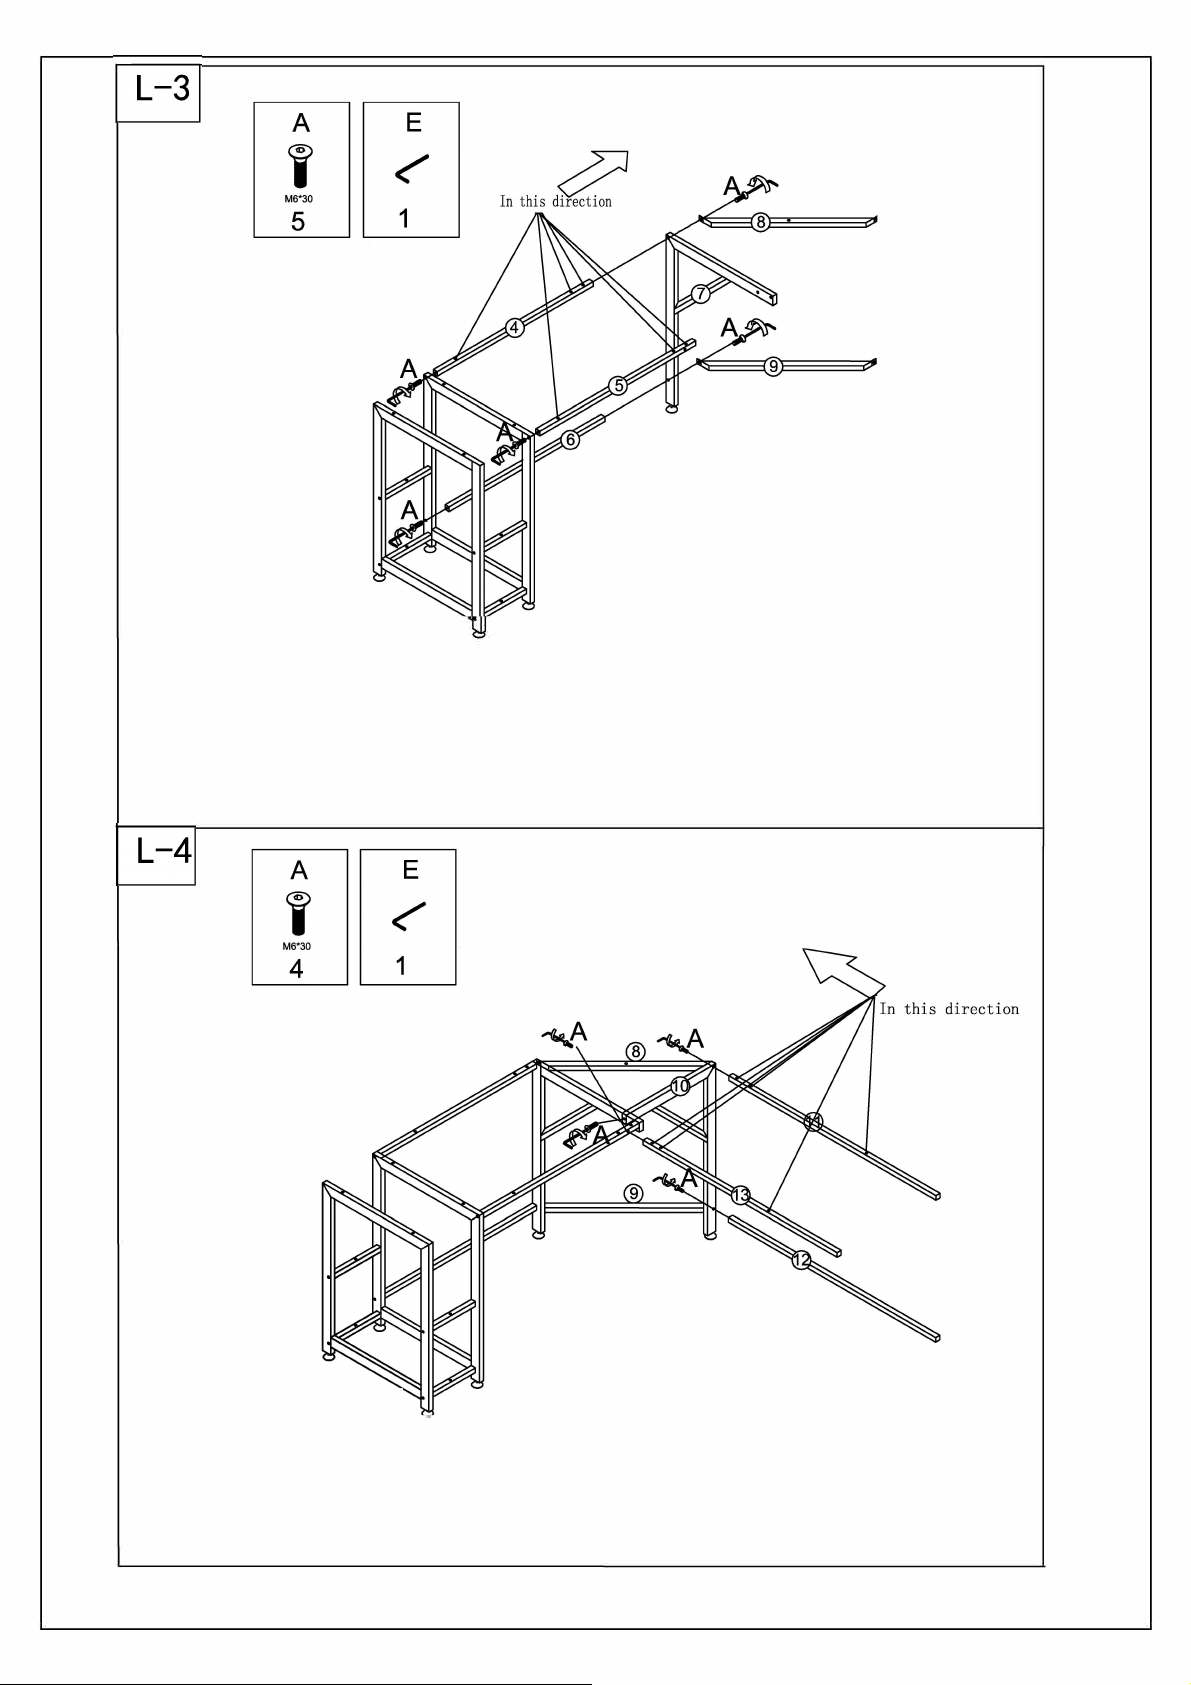
NOTE:
1.
Pay attention to the direction of PART4 and PART
2.
Please connect PART4, PART7 and PARTS all together with one screw at a time.
3.
Please connect PART6, PART7 and PART9 all together with one screw at a time.
5
NOTE
1.
2.
3.
:
Pay attention to the direction of PARTll and PART13
Please connect PARTS, PARTlO and PARTll all together with one screw at a time.
Please connect PART9, PARTlO and PART12 all together with one screw at a time.
age
p
5
Page 7
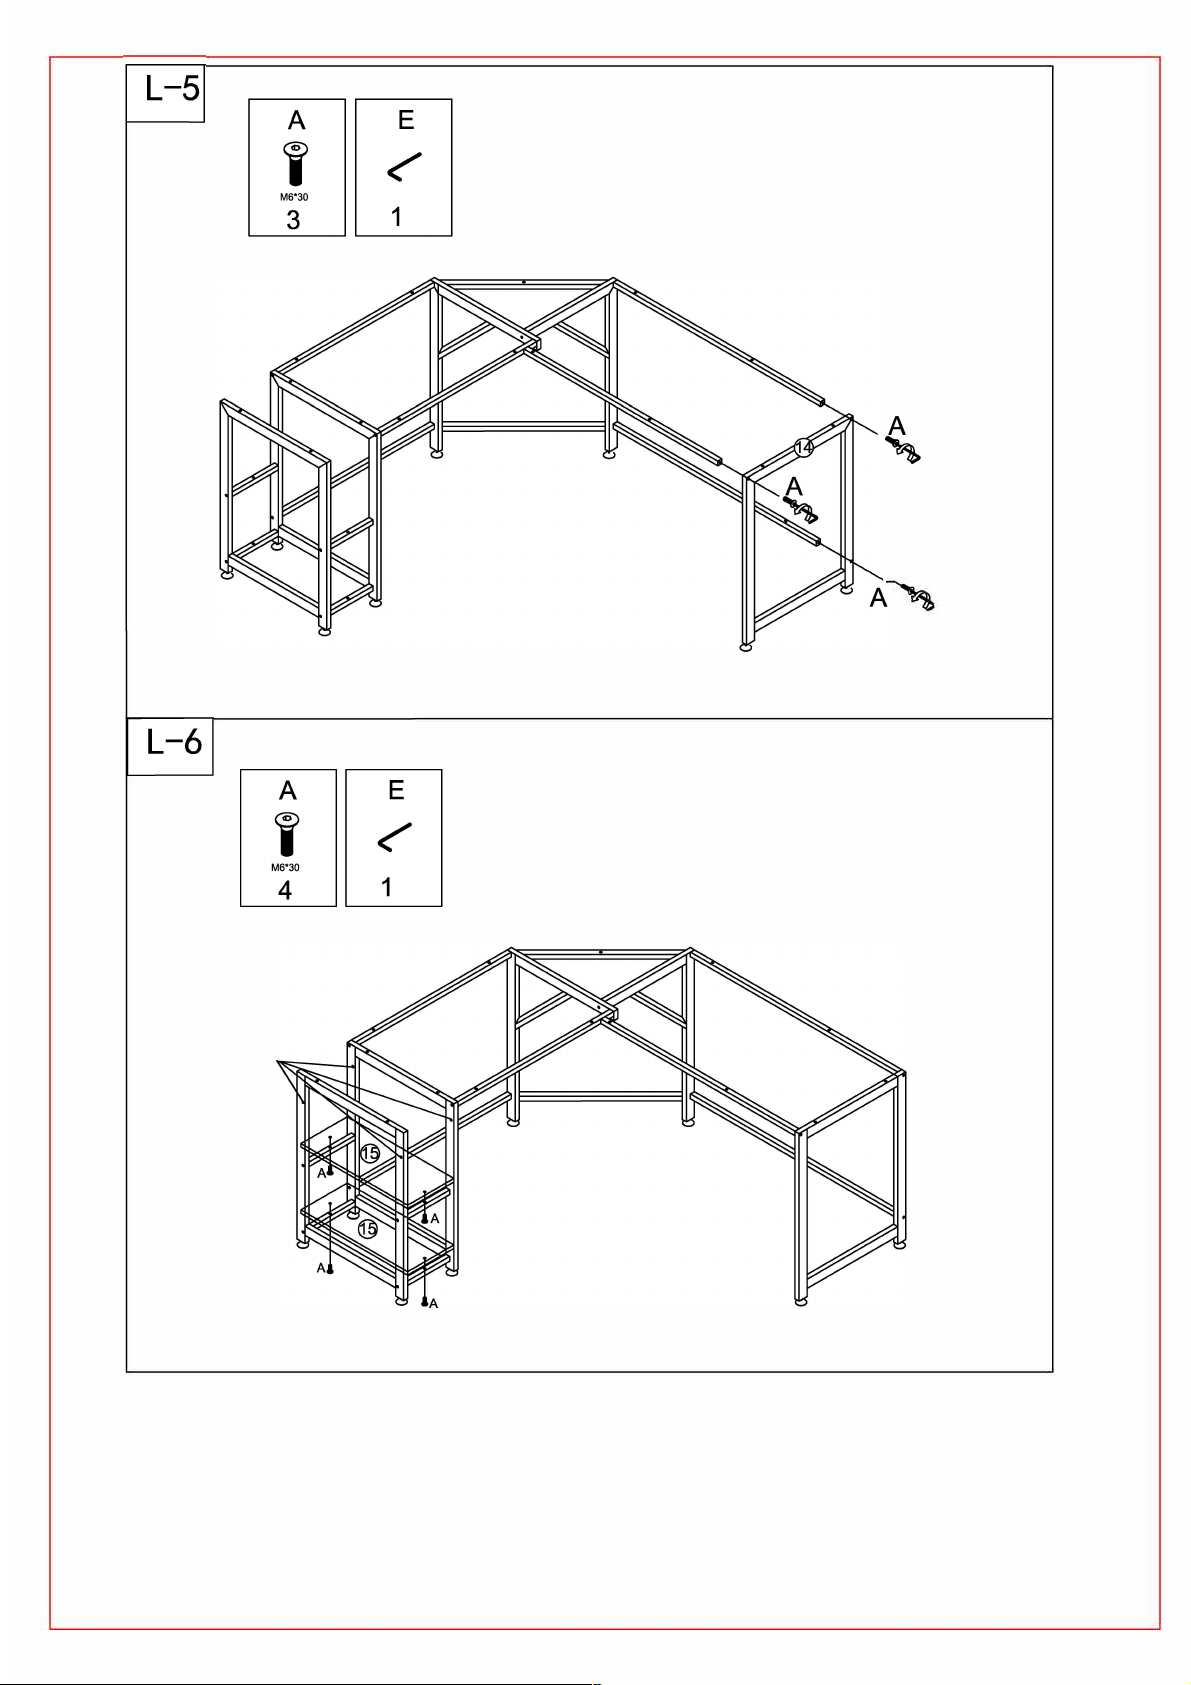
A
、
Adjust if necessary
pa
ge
6
Page 8
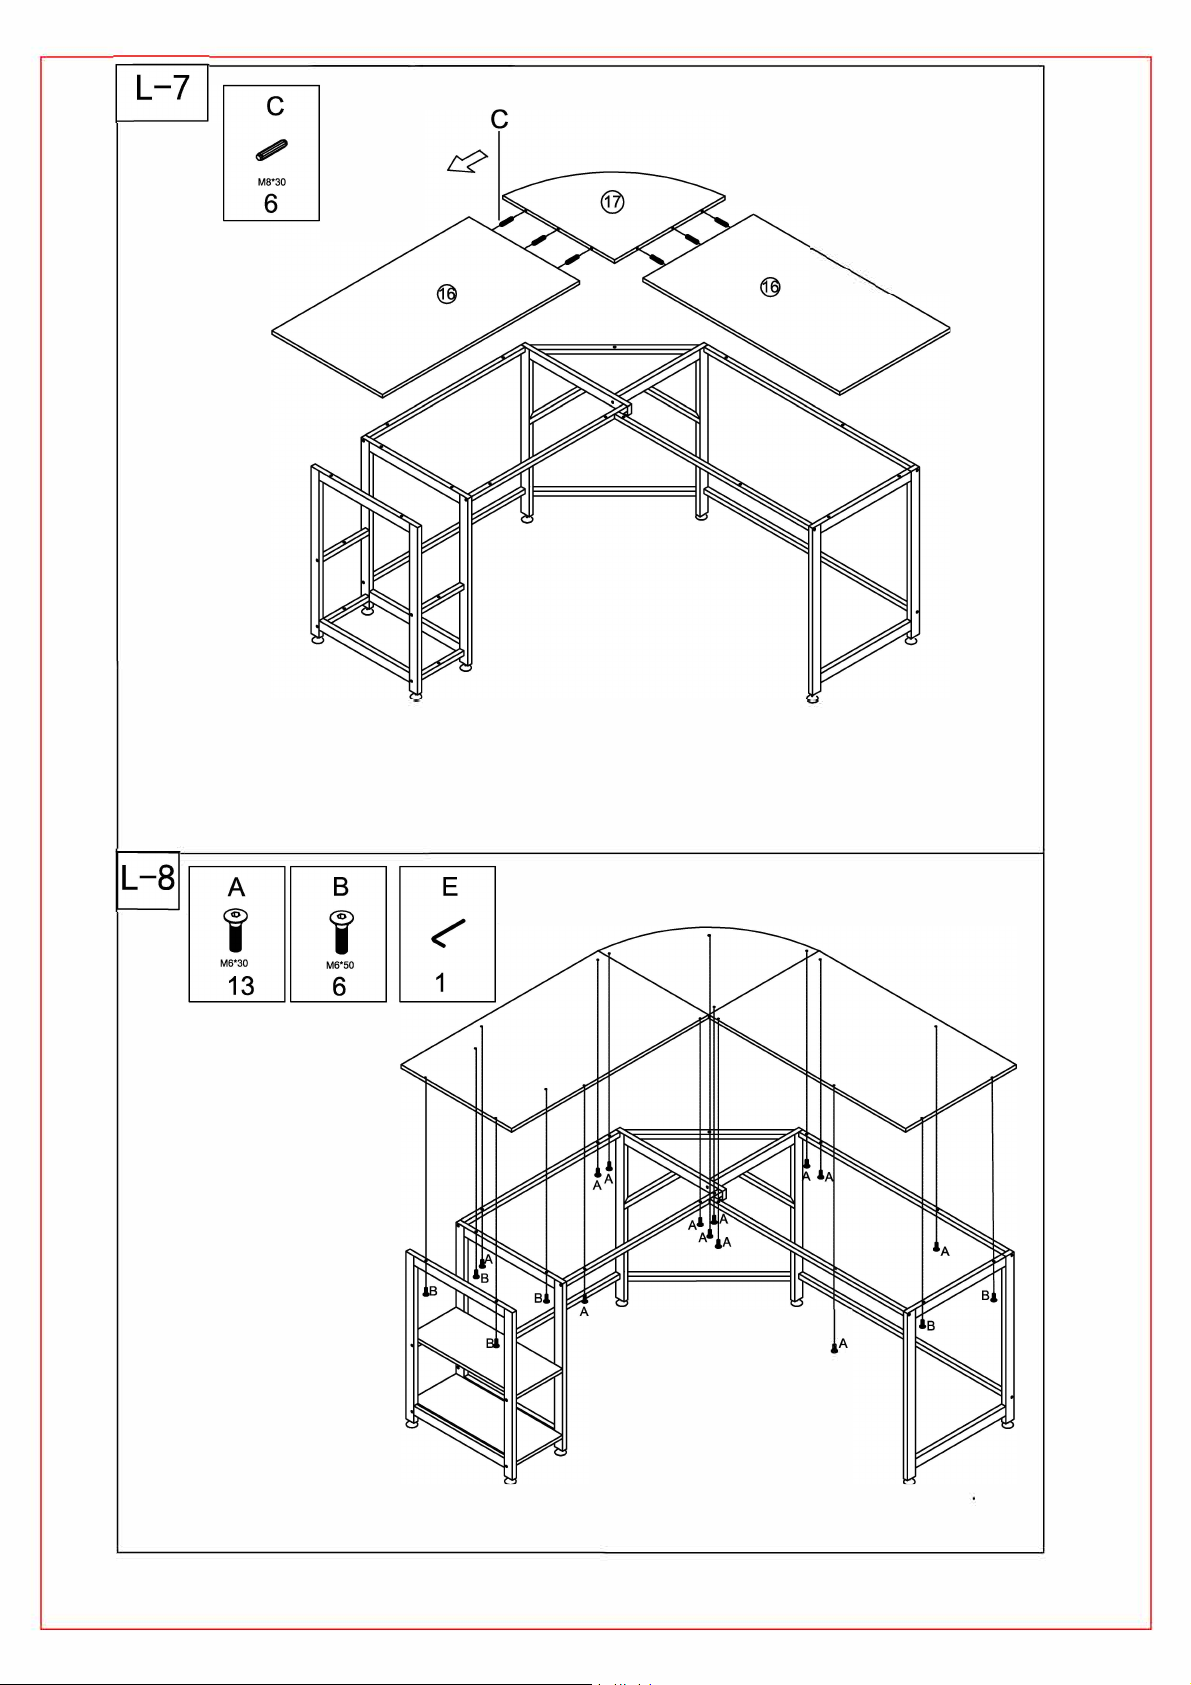
言
多
良
NOTE:
If you find that the gap between the PART 16 and the PART 17 is too large when
installing, Please push the PART 16 and the PTAT 17 tightly strengthy, If you find that
the plate is too tight to push, Please loose the screw between the plate and the iron
rod a little, Tighten the screw after pushing tight.
A
NOTE:
After installation , Please shake the table. If it is not strong enough and serious
shaking ,Please tighten all screws again to ensure the table firm enough.
page 7
Page 9
©
D
D
D
D
The holes are reserved
to adjust the bottom
plate if necessary
NOTE:
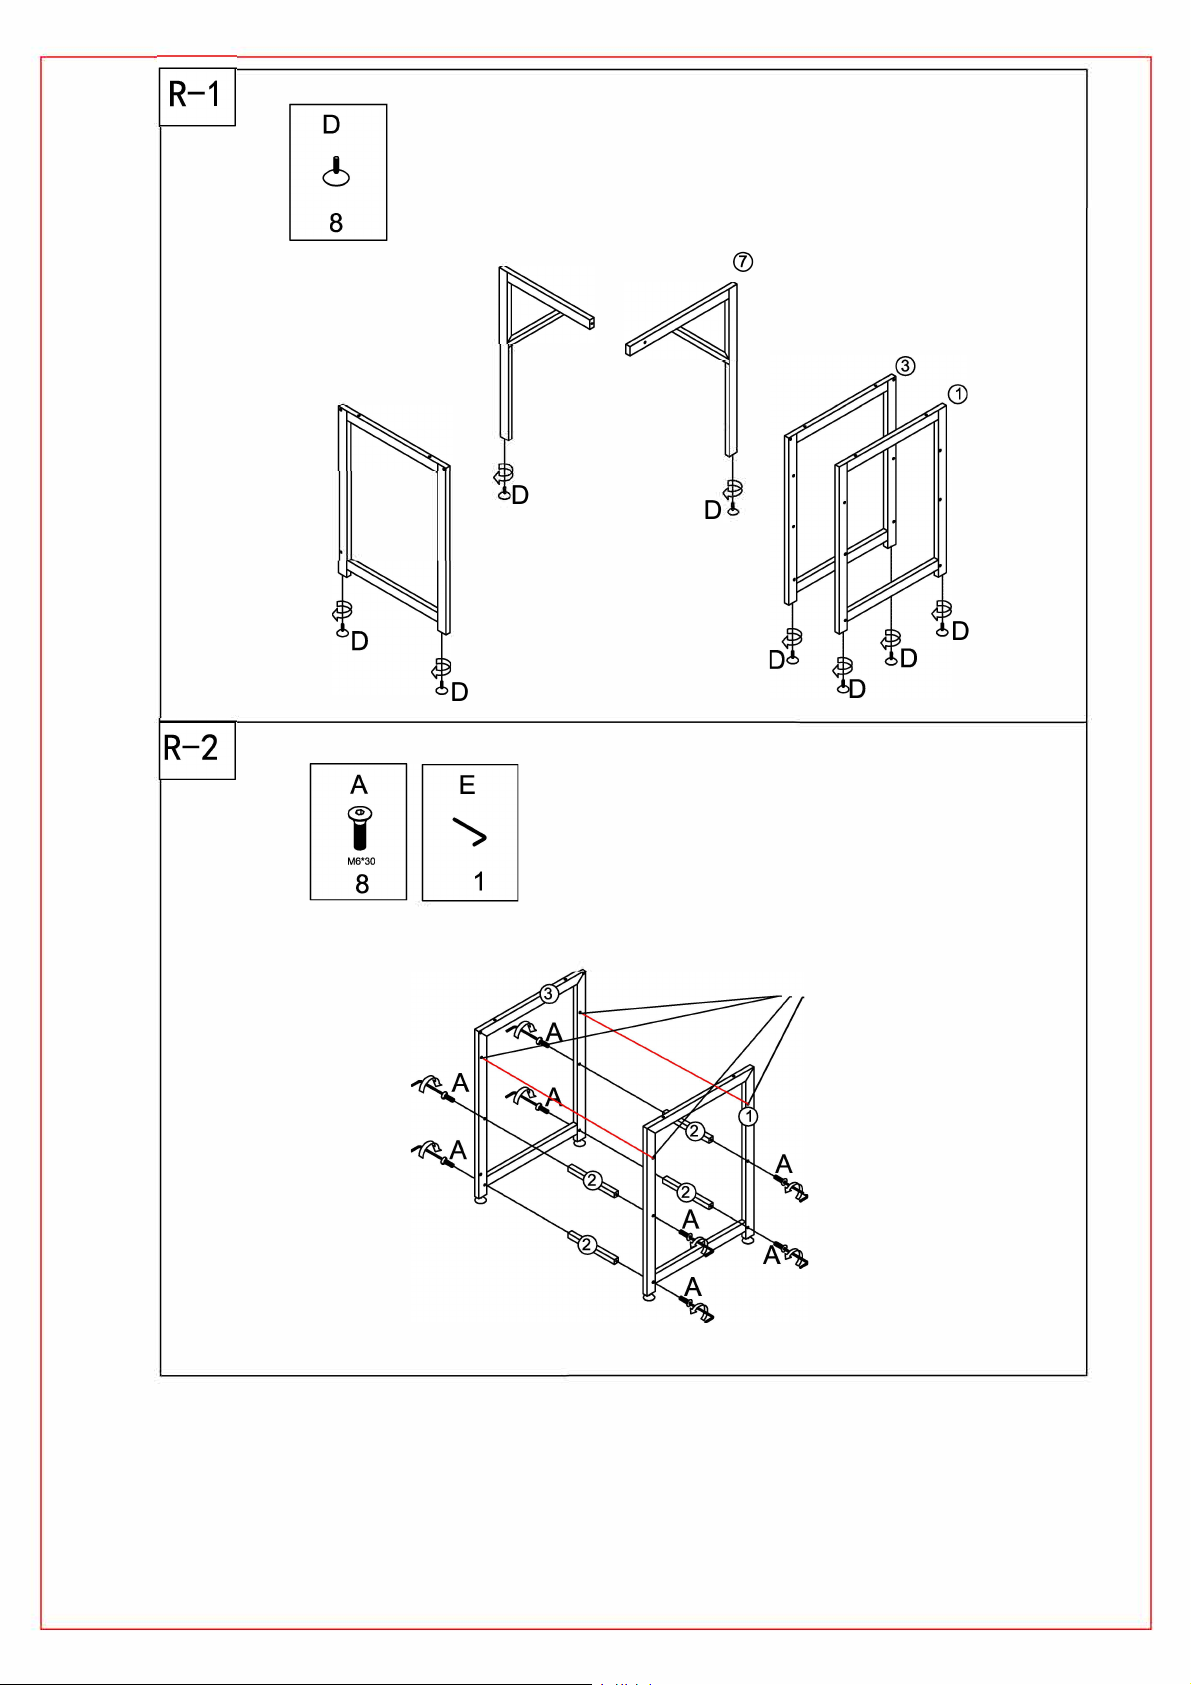
There are three rows of parallel holes inside PART 1 and PART 3, The role of the extra
row of holes is to adjust the space between the upper and lower two plates according to the
user needs when installing the plate on the PAGE 6, PART 2 can be installed between any
two row of holes.
page 8
Page 10
In this direction
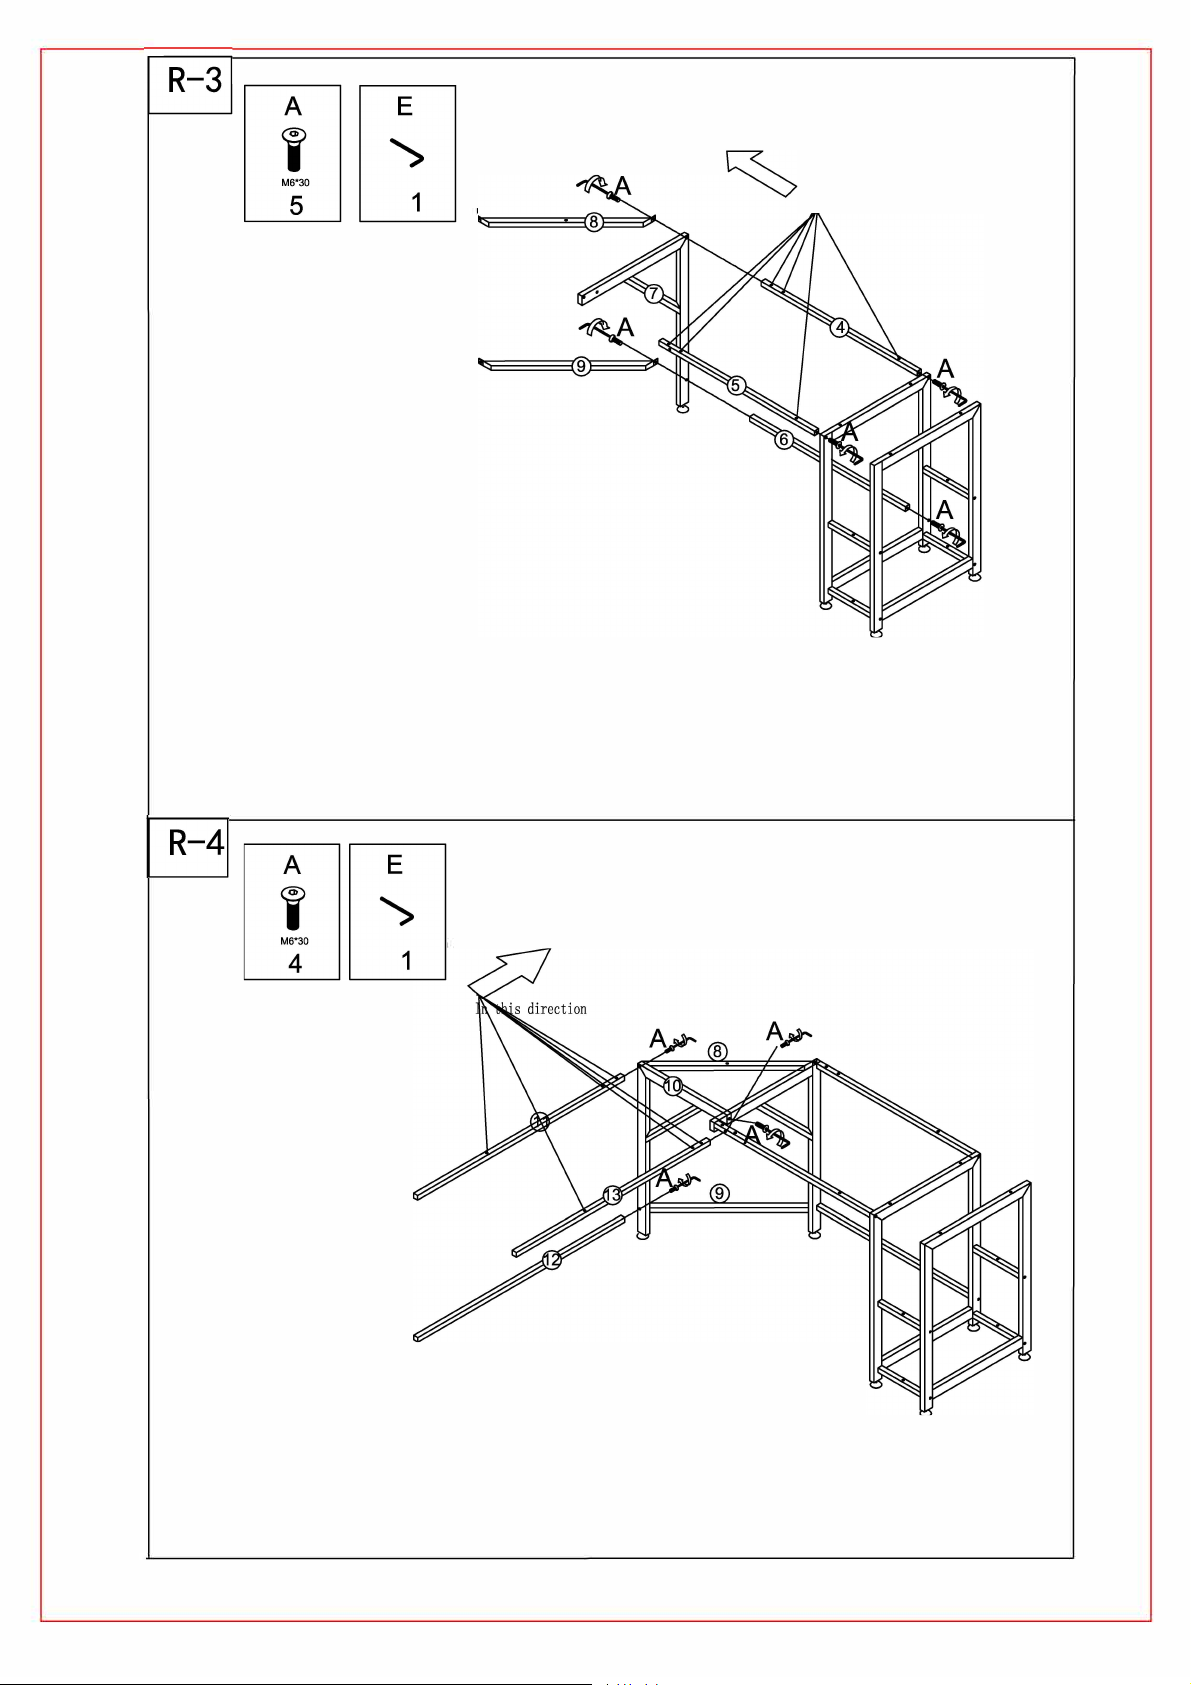
NOTE:
1)
Pay attention to the direction of PART4 and PART5
2)
Please connect PART4, PART7 and PARTS all together with one screw at a time.
3)
Please connect PART6, PART7 and PART9 all together with one screw at a time.
NOTE:
1.
Pay attention to the direction of PARTll and PARTll
2.
Please connect PARTS, PARTlO and PARTll all together with one screw at a time.
3.
Please connect PART9, PARTlO and PART12 all together with one screw at a time.
age 9
p
Page 11
Adjust if necessary
ge
a
p
0
1
Page 12
Push the two plates together
玄
乙
亨
NOTE:
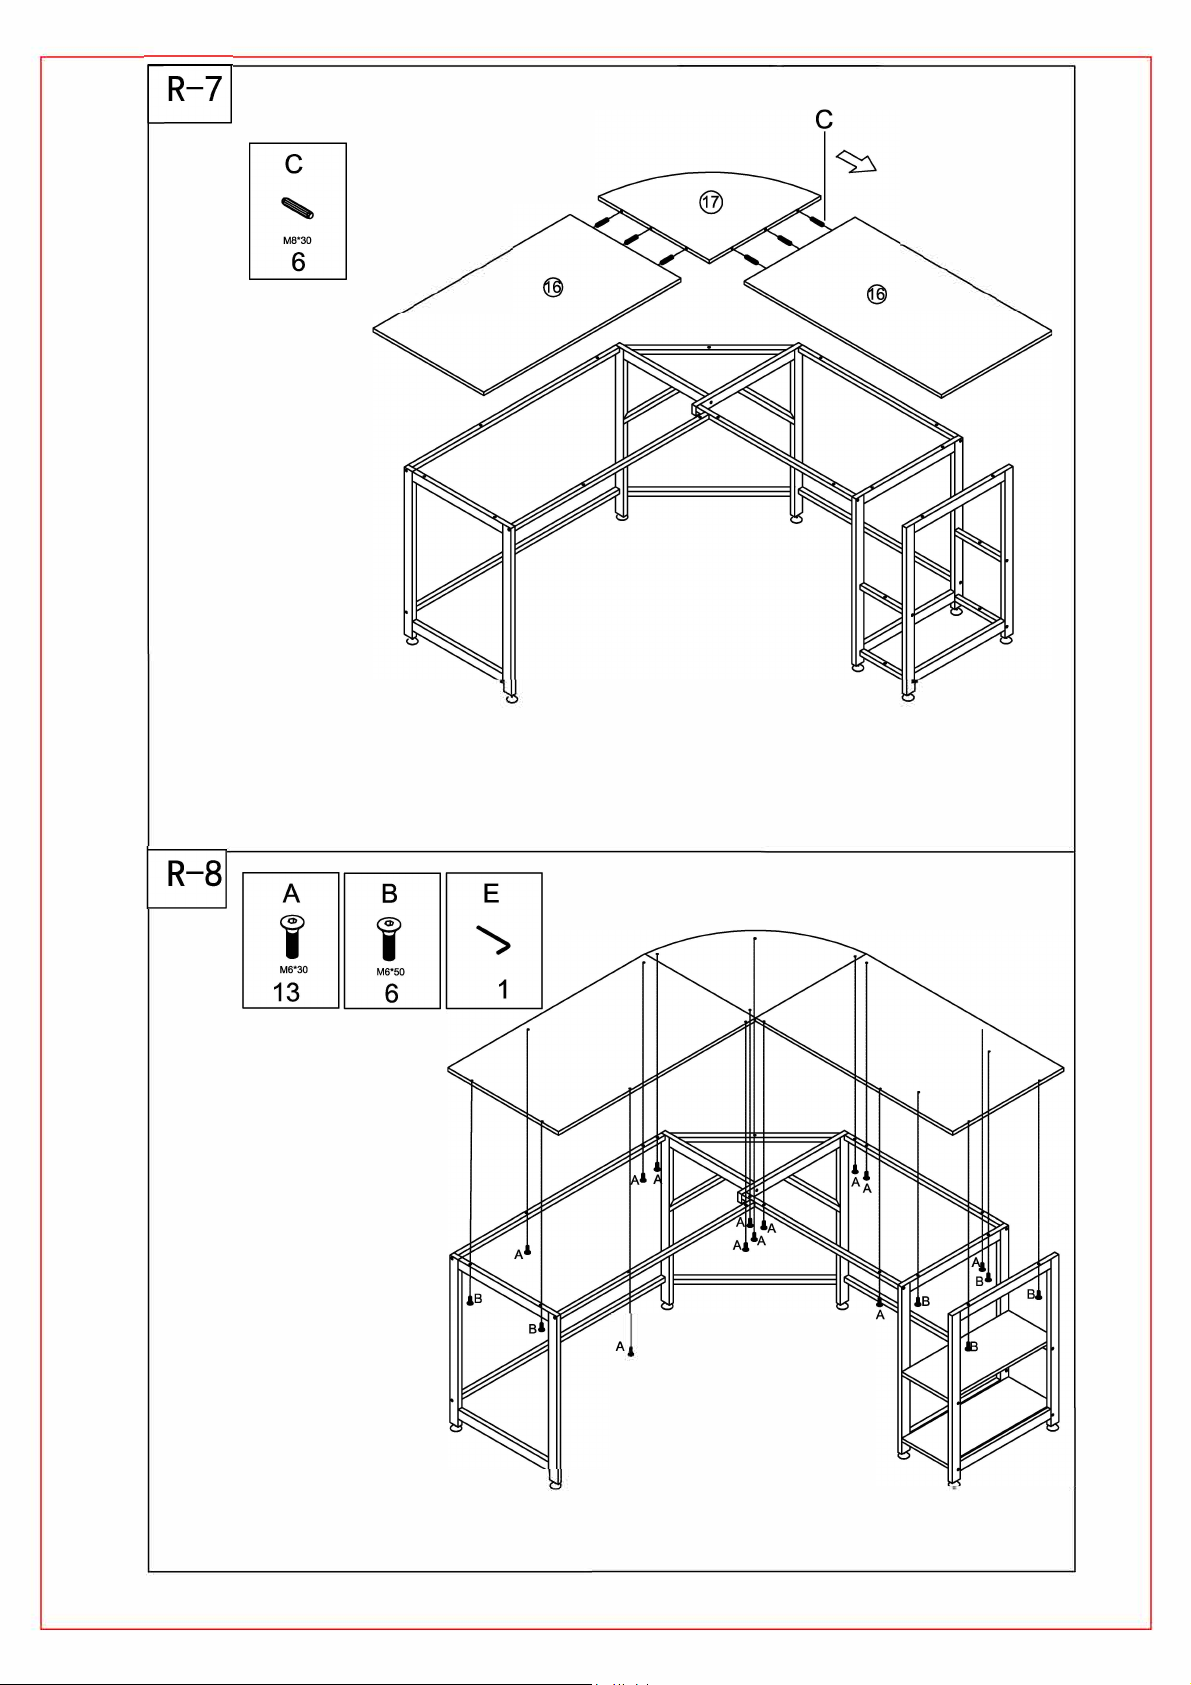
If you find that the gap between the PART 16 and the PART 17 is too large
when installing, Please push the PART 16 and the PTAT 17 tightly strengthy, If
you find that the plate is too tight to push, Please loose the screw between
the plate and the iron rod a little, Tighten the screw after pushing tight.
A
NOTE:
After installation , Please shake the table. If find it is not strong enough and serious
shaking , Please tighten all screws again to ensure the table firm enough.
page 11
 Loading...