

Page 1
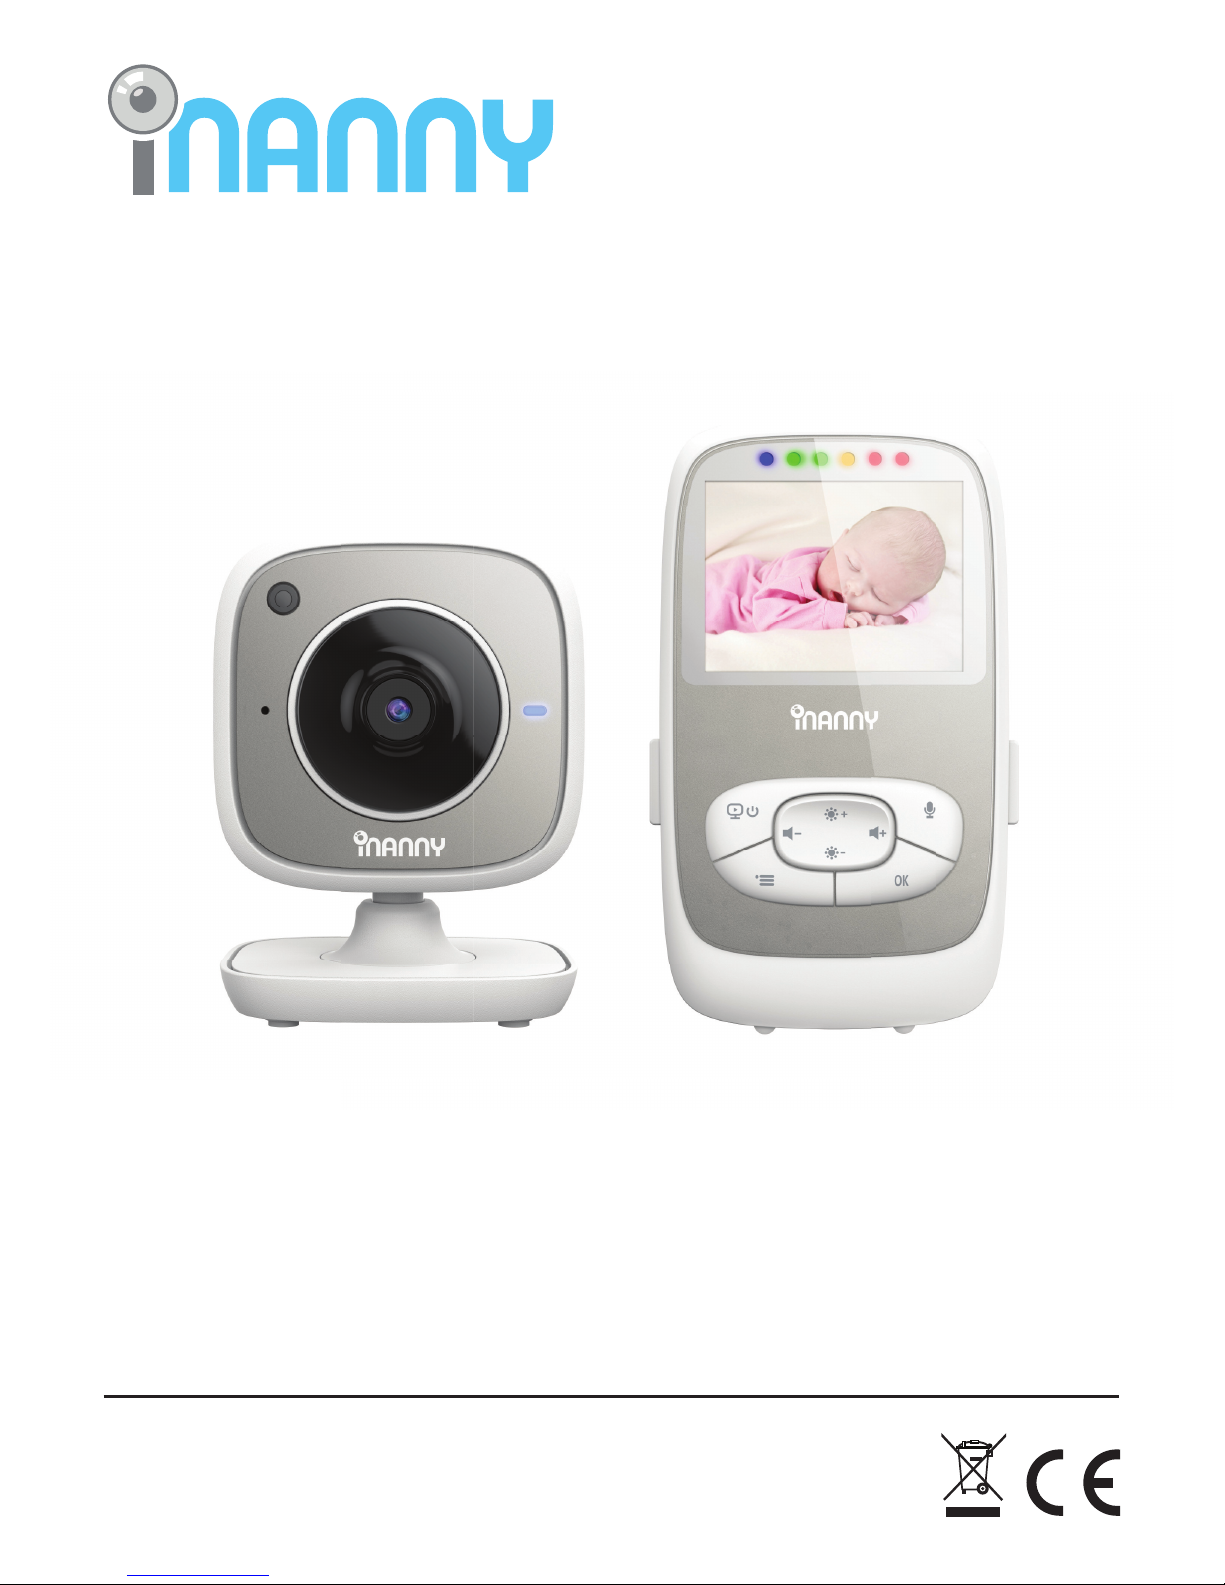
NM204
Video Baby Monitor
User Guide
Page 2

1
ENGLISH
1 x camera
2 x mains part plug
1 x parent unit
1 x lithium-ion battery for parent unit
1 x
Read these instructions for use carefully and
keep them for later use, be sure to make them
accessible to other users and observe the
information they contain.
Table of contents
1. Getting to know your instrument ................................ 2
2. Explanation of symbols ................................................ 2
3. Intented use .................................................................. 2
4. Notes .............................................................................. 3
5. Unit description ............................................................. 4
6. Initial use ........................................................................ 6
7. Operation ...................................................................... 7
7.1 Infrared night vision .................................................... 7
7.2 Set the volume ............................................................ 7
7.3 Set the brightness ....................................................... 7
7.4 Two-way communication ......................................... 7
7.5 Settings menu ............................................................. 7
8. Useful information about the baby monitor ............. 10
9. Maintenance and cleaning ....................................... 10
10. What if there are problems? ..................................... 11
11. Disposal ........................................................................ 12
12. Technical data ............................................................ 12
Included in delivery
set of instuctions for use
Page 3

2
Infrared night vision function
The following symbols appear in these instructions for use:
WARNING
Warning instruction indicating a risk of inju ry or damage to health
IMPORTANT
Safety note indicating possible damage to the device/accessory
Note
Note on important information
WARNING
t
t
1. Getting know the intructment
Function of the device
This video baby monitor enable you to see your baby at all times whilst you pursue
activities in other rooms or in the garden. The 23 channels ensure a connection that
is secure and as free of interference as possible.
The device has the following functions:
Video monitoring
ECO mode / energy-saving mode
Range control with acoustic signal
Range of up to 300m with a clear view
2. Explanation of symbols
3. Intended use
Only use the device to monitor your baby when you cannot mind your baby directly.
It is not a substitute for your own personal, responsible supervision !
Any improper use can be dangerous.
Page 4

3
WARNING
Safety notes
t
t
t
t
t
t
t
t
t
t
t
t
t
t
t
t
t
t
t
The video baby monitor is only intended for domestic / private use, not for
commercial use
4. Notes
Always position the camera and power cord out if the reach of children. The
power cord may cause strangulation or injury to children.
Keep small parts out of reach of children.
Keep packaging material away from children (risk of suffocation).
Never place the camera in the cot ot within reach of your child.
Place the camera 2m away from your baby, in order to minimise the possibility of
electrosmog pollution and noise pollution
Make sure that cables are not accessible to your child.
Always make sure that the video baby monitor is fully functioning before use and
check that the battery in the parent unit is sufficiently charged when operating the
device with the battery.
Never submerge the camera and the parent unit in water. Never rinse it in running
water.
Never use the camera and the parent unit in proximity to moisture.
Do not cover the camera and the parent unit with a towel or cover.
Only use the mains part plugs included in delivery.
Do not use the cable to pull the mains part plug out of the socket.
This device may be used by children over the age of eight and by people with
reduced physical, sensory or mental skills or a lack of experience or knowledge,
provided that they are supervised or have been instructed on how to use the
device safely and are fully aware of the consequent risks of use.
Children must not play with the device.
Cleaning and user maintenance must not be performed by children unless
supervised.
Do not pull, twist or bend the mains cable.
Pull the mains part plug out in the case of operational faults, before the cleaning
process, after charging and when the device is not in use.
The camera, the parent unit and the mains part plugs should not come into
contact with hot surfaces or sharp-edged objects.
Do not use any additional parts that are not recommended by the manufacturer
or offered as accessories.
Page 5

4
Note
t
t
t
WARNING
Safety notes on handling batteries
t
t
t
t
t
Camera “Baby”
1
2
3
8
6
7
5
4
1. 5.
.6 .2
.7.3
.8 .4
Before making a claim, please check the battery in the parent unit and replace
it if necessary.
Repairs must only be carred out by Customer Services or authorized suppliers.
Under no circumstances should you open or repair the camera or parent unit
yourself, as fault less functionality could no longer be guaranteed thereafter.
Failure to comply will result invoiding of the warranty.
If you should have any questions about using the video baby monitor, please
contact either your retailer or Customers Services.
If a battery has leaked, put on protective gloves and clean the battery
compartment with a dry cloth.
If your skin or eyes come into contact with fluid from the battery cell, flash out
the affected areas with plenty of water and seek medical assistance.
Risk of explosion! Never throw batteries into a fire.
Do not disassemble, split or crush the batteries.
Batteries must be charged correctly prior to use. The instructions from the
manufacturer and the specifications in these instructions for use regarding
correct charging must be observed at all times.
5. Unit description
Brightness sensor (night vision function)
Camera lens
Function light
Microphone
ON/OFF switch
Pair button
Connection for mains part plug
Temperature sensor
Page 6
5
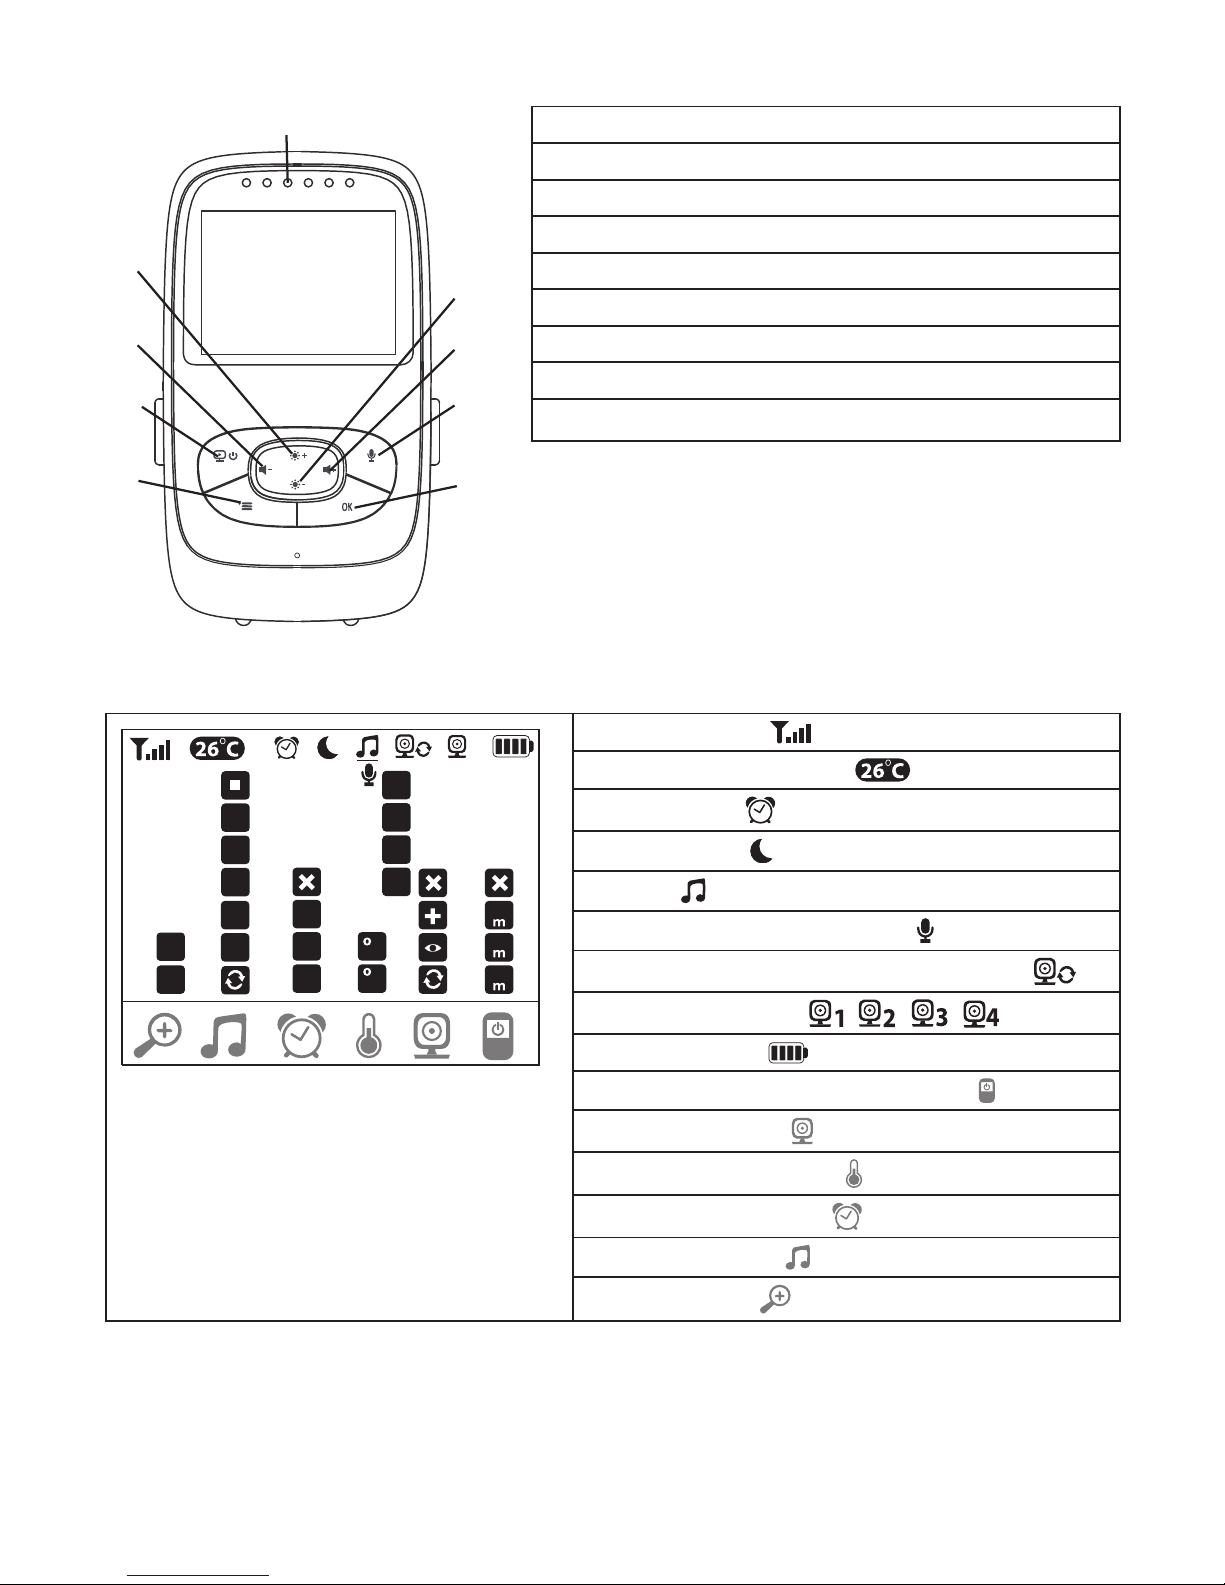
Parent unit “Monitor”
1
2
9
3
8
4
7
5
6
Display description
1X
2X
3
2
1
6H
4H
2H
C
F
4
3
2
1
*
60
15
5
1
5
4
1. Noise LEDs
2. Lower arrow button / Reduce brightness
3. Right arrow button / Increase volume
4. Intercom function
5. OK button
6. Menu button
7. ON/OFF button
8. Left arrow button / Reducr volume
9. Top arrow button / Increase brightness
Signal strength
Temperature display
Alarm clock
Night vision
Lullaby
Two-way communication
Alternating camera images mode
Camera number
Battery status
Menu for power-saving mode
Camera menu
Temperature menu
Alarm clock menu
Lullabies menu
Zoom menu
Page 7
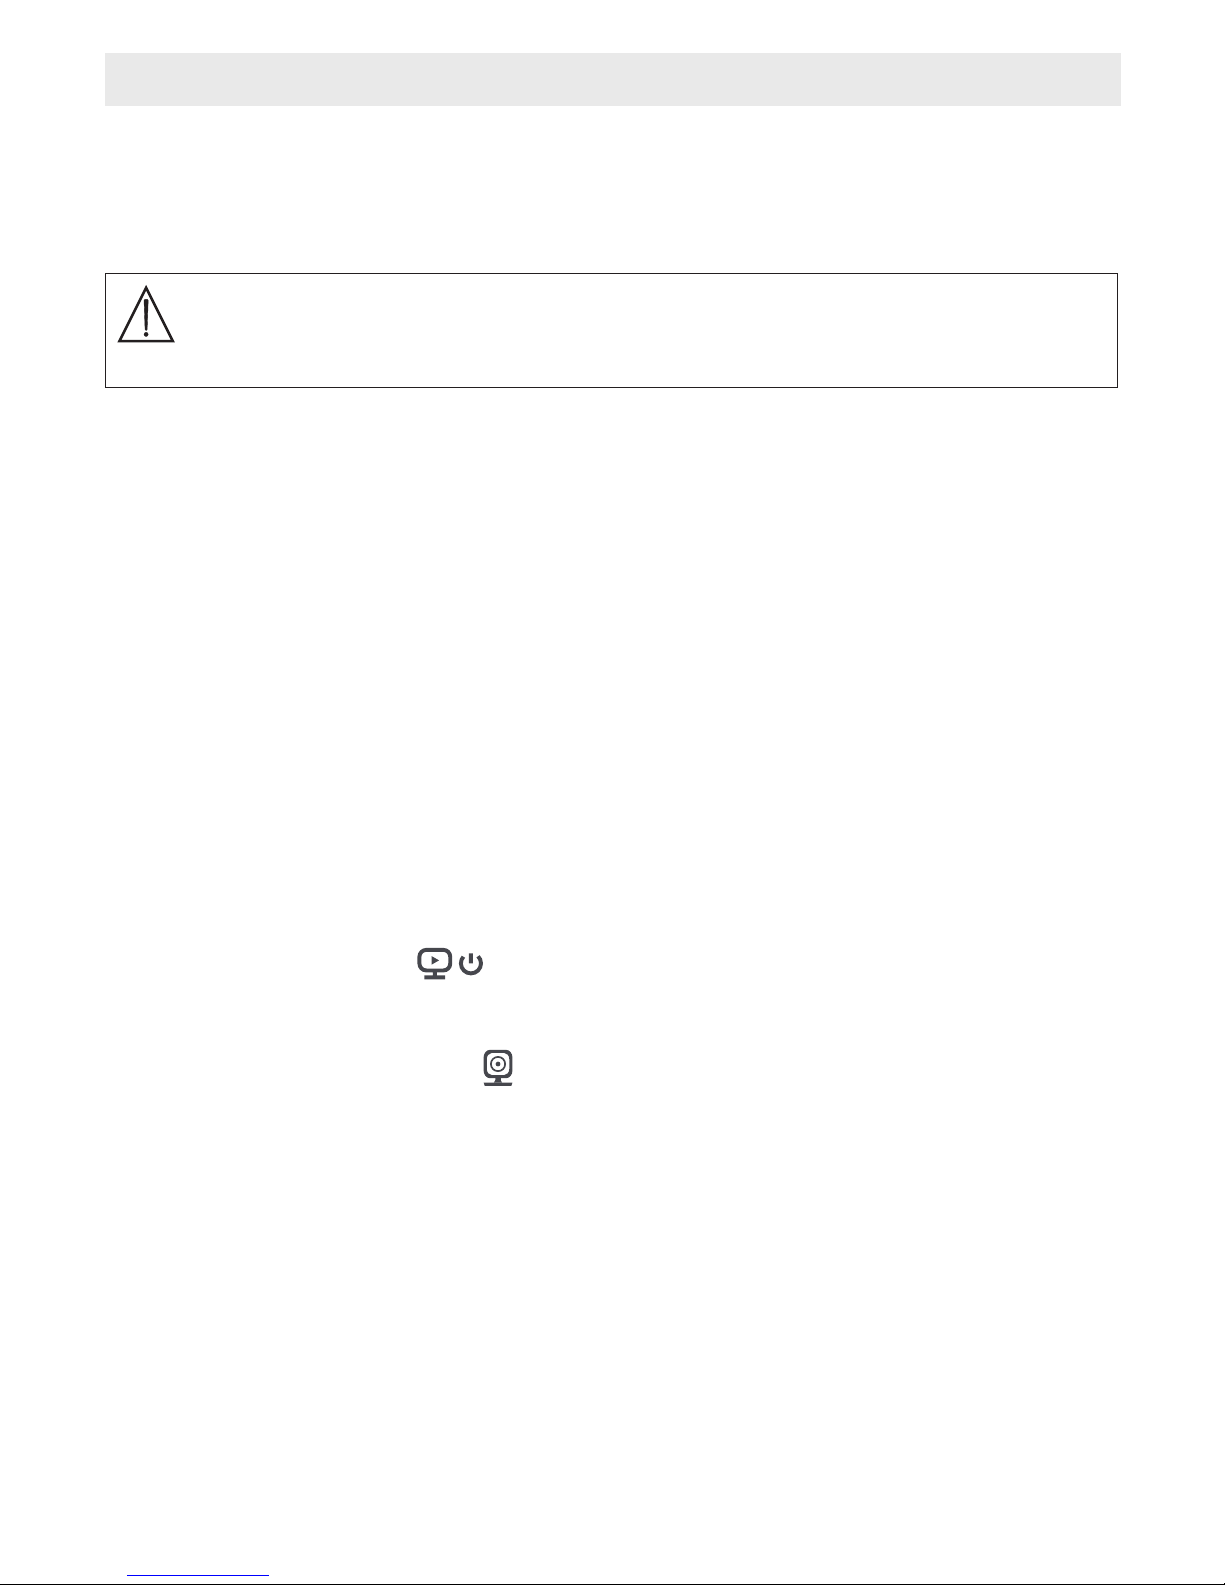
6. Press the ON/OFF button to switch on the parent unit. If the camera is already
switched on, the transmission image from the camera will automatically appear on the
screen. If the camera is still switched off, an acoustic signal is emitted and the following
symbol appears on the monitor: “ ”.
6
6. Initial use
Initial use of camera
WARNING
1. Place the camera on a level, firm surface and point the camera lens at the area that
you wish to monitor. Ensure that there are no other electrical devices in the proximity of
the camera.
Do NOT position the camera within reach of the baby!
2. Connect the small end of the camera mains part plug to the camera.
3. Connect the other end of the mains part plug to the socket.
4. Move the ON/OFF switch to “ON” to switch on the camera. The function light on the
camera begins to glow blue.
5. Push the ON/OFF switch downwards to switch off the camera.
Initial use of parent unit with battery
1. Remove the assembly clip.
2. Open the cover on the rear of the parent unit by sliding it downwards.
3. Insert the battery included in delivery as shown.
4. Slide the cover on the rear of the parent unit back up again, until you can hear and
feel it slot into place.
5. Attach the assembly clip again.
Initial use of parent unit with mains part plug
1. Connect the small end of the parent mains part plug with the parent unit.
2. Connect the other end of the mains part plug to the socket.
3. The parent unit switches on automatically, Press the ON/OFF button to switch off the
unit. If the parent unit and camera are both already switched on, the transmission
image from the camera will automatically appear on the screen of the parent unit.
Page 8
Use the up/down direction arrwos ( / ) to select the zoom function you
require (1x or 2x).
You can navigate through the menu using the ( ) and ( ) buttons.
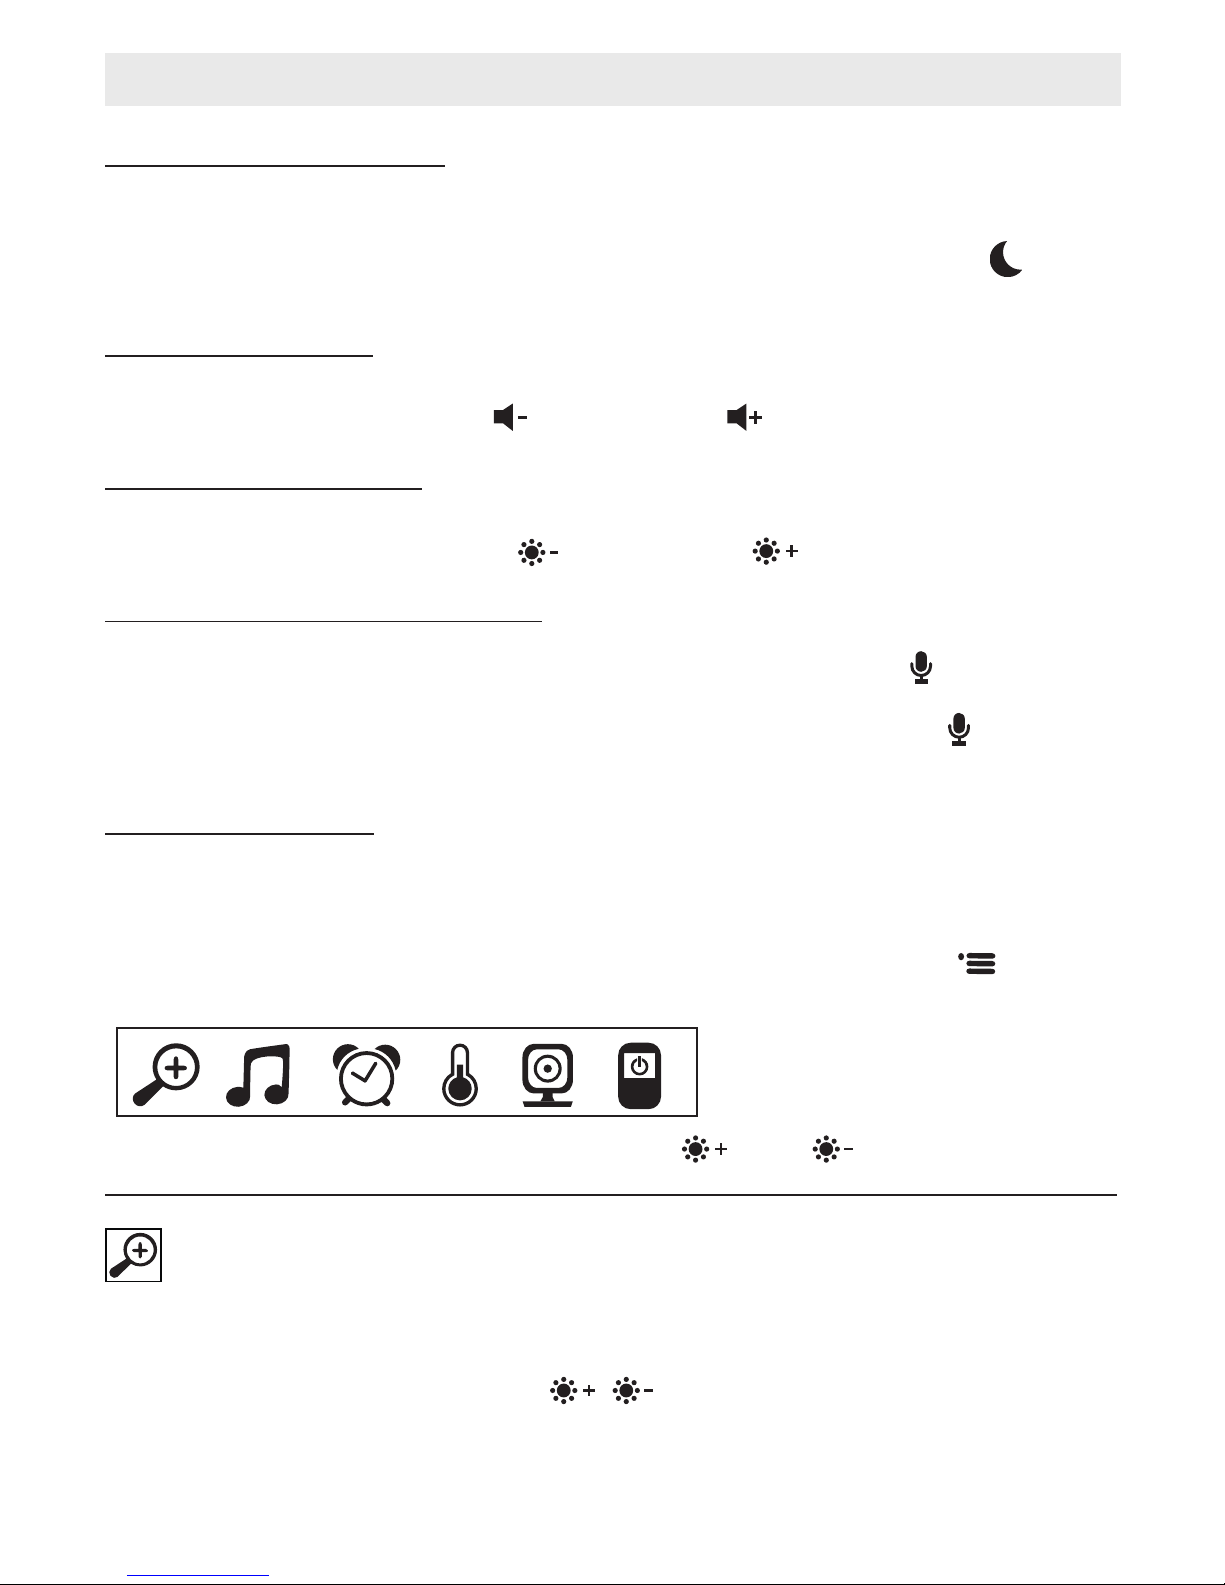
To access the settings menu, switch the parent unit on and press the ( ) button
The following settings menu appears at the bottom of the camera screen:
To activate the two-way communication function, hold down the ( ) button on
the parent unit and speak into the unit. The words you have spoken can now be
head on the camera. To deactive the intercom function, release the ( ) button
again.
The parent unit has 5 brightness levels.
To adjust the brightness, press the ( ) button or the ( ) button,
The parent unit has 5 volume levels.
To adjust the volume, press the ( ) button or the ( ) button,
In order to ensure that clear transmission images can be seen on the screen even
when it is dark, the video baby monitor automatically activates the infrared night
vision in the dark. When the infrared night vision is active, a moon symbol ( ) is
shown on the screen.
7
7.1 Infrared night vision
t
t
7. Operation
7.2 Set the volume
7.3 Set the brightness
7.4 Two-way communication
7.5 Settings menu
The parent unit has an two-way communication function.
You can adjust the following settings in the menu of the parent unit: zoom function,
lullabies, alarm, temperature unit, add/delete/ view camera, alternating camera
image and power-saving mode.
Zoom function
The parent unit has a zoom function to increase the size of the transmission image.
To activate the zoom function, proceed as follows:
Confirm using the (OK) button.
Page 9
Use the up/down direction arrows ( / ) to select a number and confirm with
the (OK) button. appears on the screen and the unit searches for a camera.
Use the left/right direction arrows ( / ) to select the menu item .
Use the up/down direction arrows ( / ) to select the time period after which
you wish the alarm to sound.
Use the left/right direction arrows ( / ) to select the menu item .
Use the up/down direction arrows ( / ) to select the lullaby of your choice
(1,2,3,4 or 5).
Use the left/right direction arrows ( / ) to select the menu item .
8
Lullabies
t
t
t
Alarm
t
.
t
t
Temperature unit
t
t
t
Add camera
t
t
t
t
t
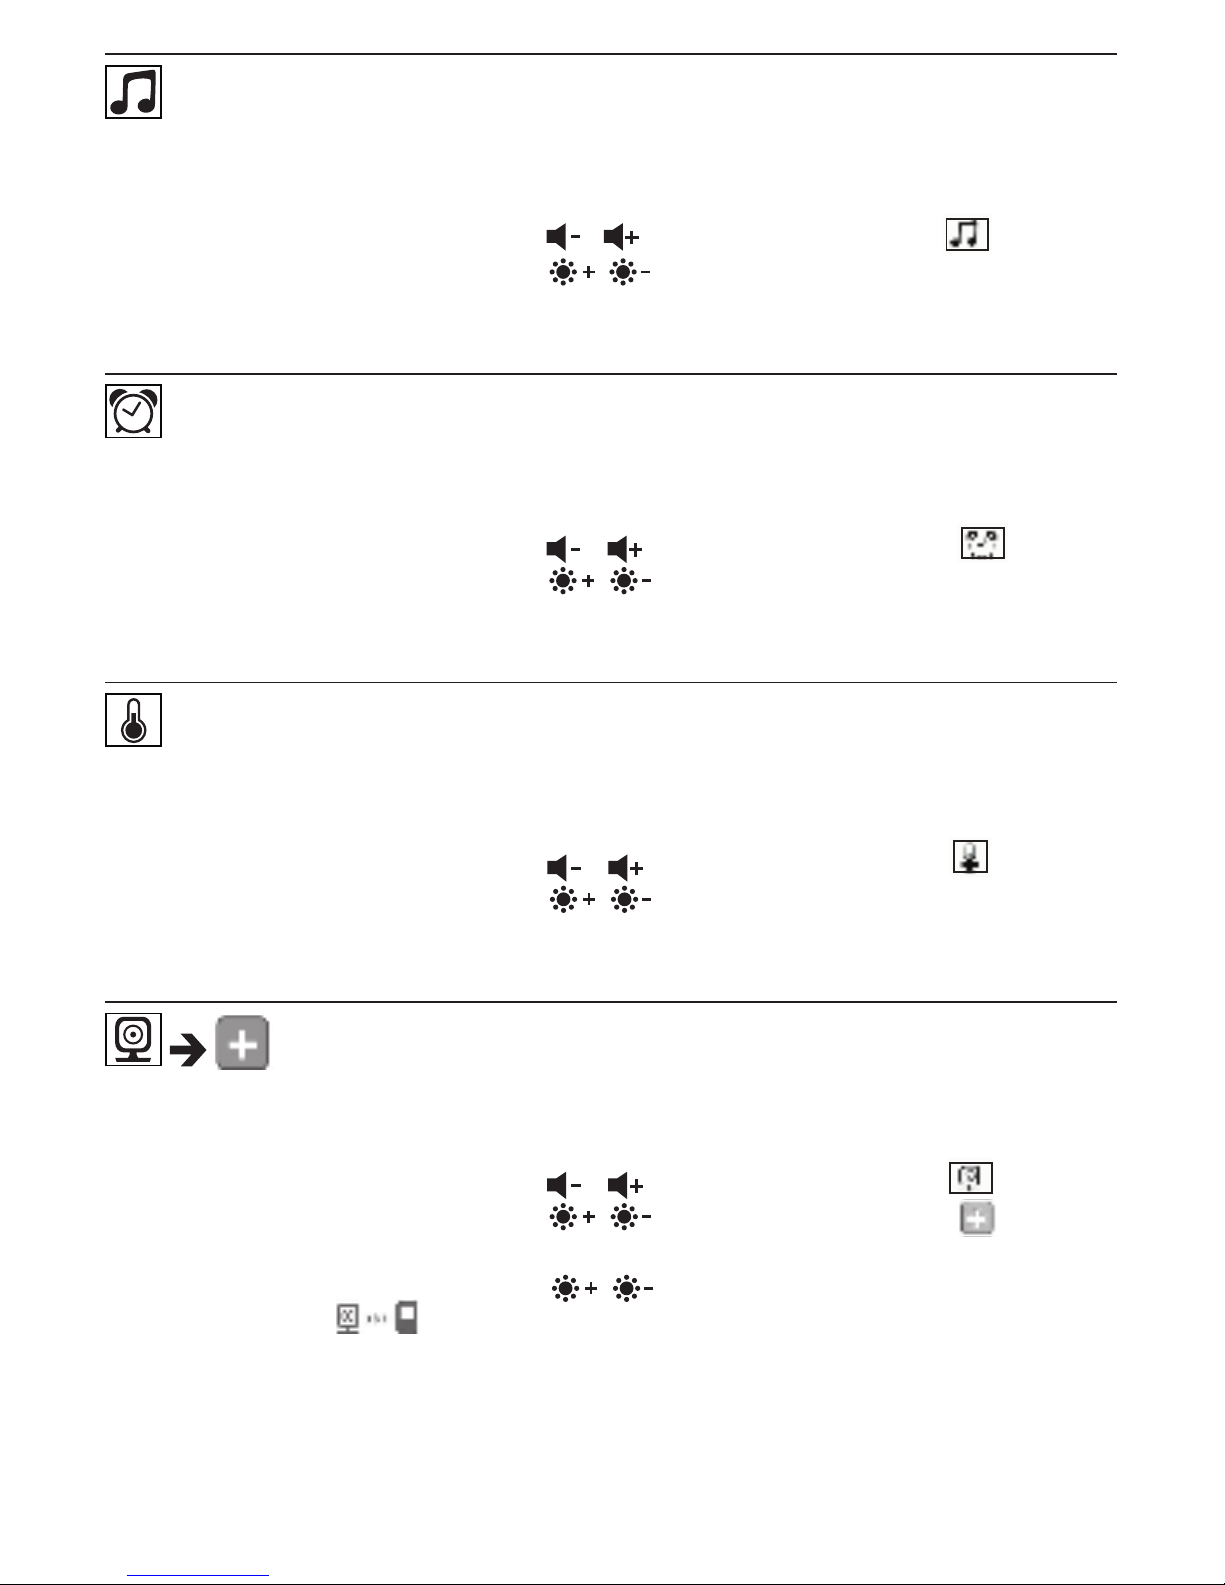
Via the parent unit, you can activate one of five lullabies that will then be played over
the camera. To activate one of the lullabies, proceed as follows:
Confirm using the ( OK ) button.
You can set an alarm on the parent unit - this will sound on the parent unit after 2,4
or 6 hours, as you choose. To activate an alarm, proceed as follows:
Confirm using the ( OK ) button.
You can set the device to display the temperature in degrees Celsius (°C) or degrees
Fahrenheit (°F) .
Use the up/down direction arrows ( / ) to select the required unit of
temperature.
Confirm using the ( OK ) button.
You can connect one parent unit with up to four camera.
To add a camera to the parent unit, proceed as follows:
Use the left/right direction arrows ( / ) to select the menu item .
Use the up/down direction arrows ( / ) to select the menu item .
Confirm using the (OK) button. 1,2,3,4 appears on the screen.
Now hold down the PAIR button on the rear of the camera until an acoustic signal
is heard and the transmission image from the camera that has been added appears
on the screen.
Page 10
Use the up/down direction arrows ( / ) to select the menu item .
Use the up/down direction arrows ( / ) to select the menu item .
Use the left/right direction arrows ( / ) to select the menu item .
9
Delete camera
t
.
t
t
t
t
t
t
t
t
t
t
t
t
t
.
t
t
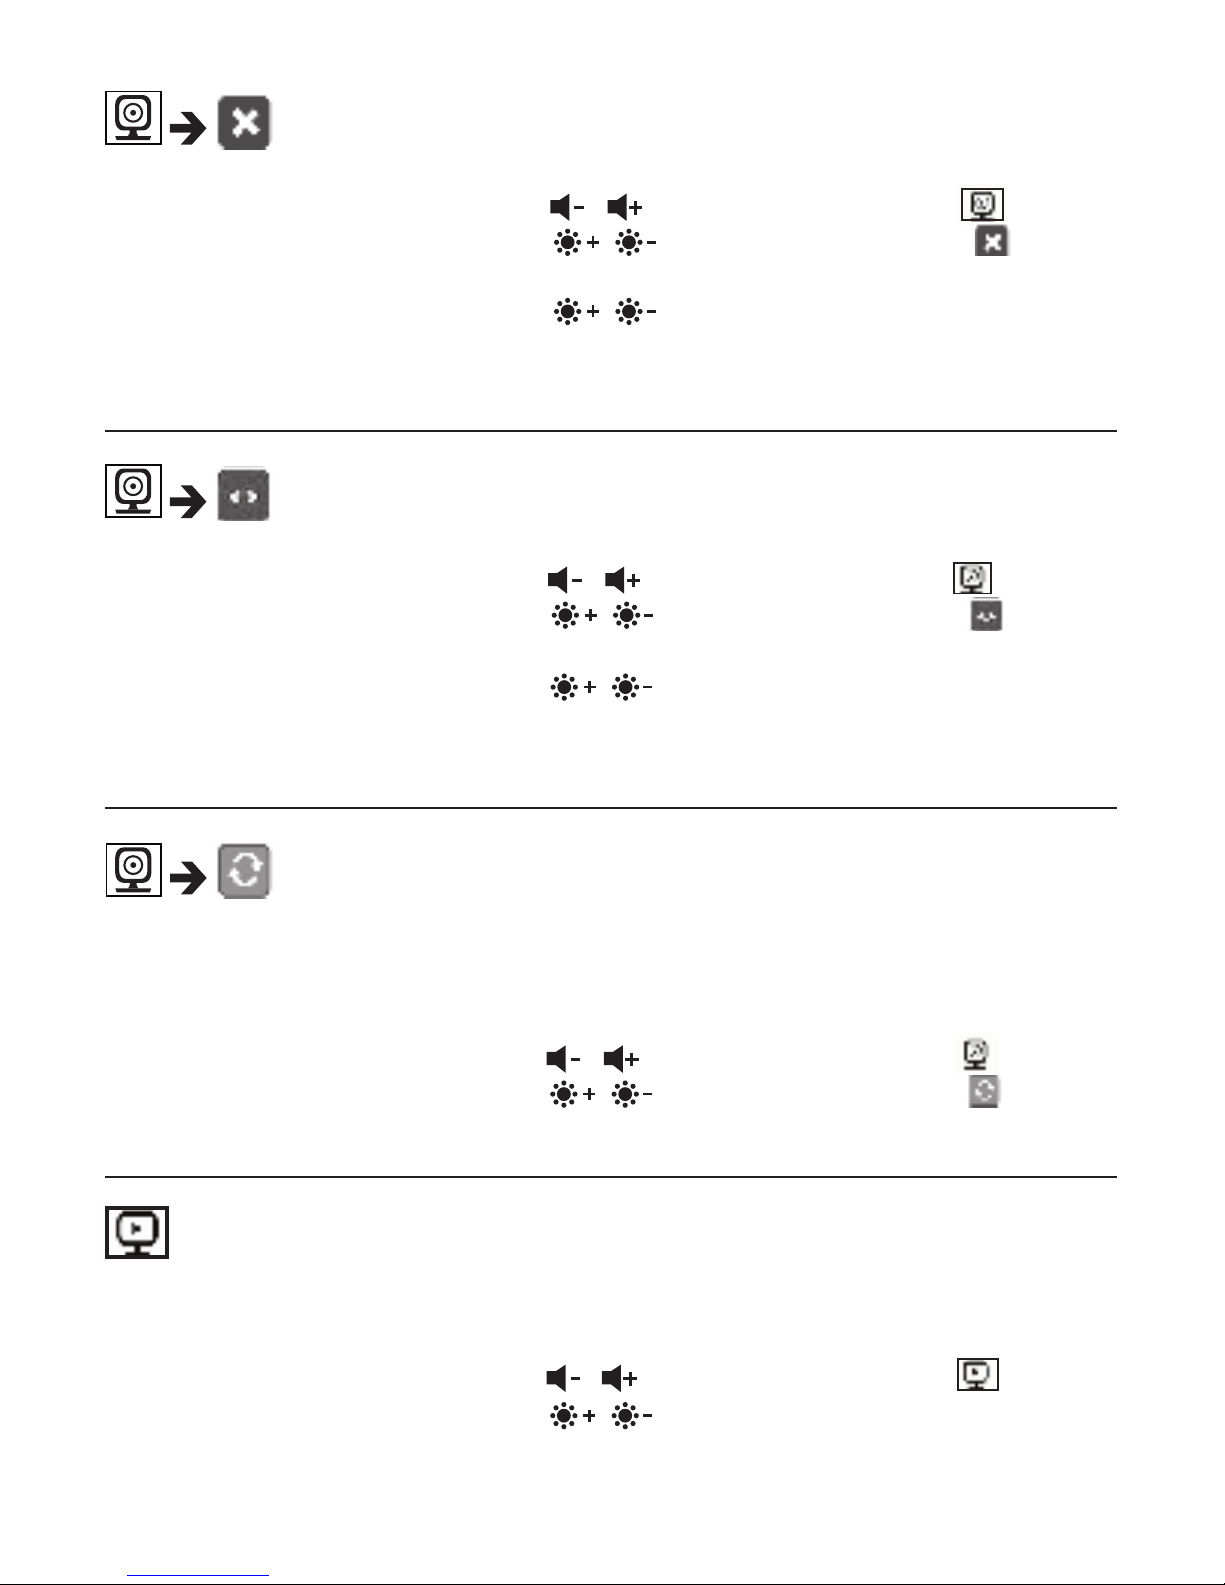
If you wish to delete the connection to a camera, proceed as follows:
Confirm using the ( OK ) button. 1,2,3,4 appears on the screen.
Use the up/down direction arrows ( / ) to select the number of the camera
that you wish to delete.
Confirm using the ( OK ) button.
View camera
Use the left/right direction arrows ( / ) to select the menu item .
Confirm using the ( OK ) button. 1,2,3,4 appears on the screen.
Use the up/down direction arrows ( / ) to select the number of the camera
that you wish to view.
Confirm using the ( OK ) button.
If you wish to select the transmission image from a camera, proceed as follows:
Alternating camera image
If you have multiple cameras registered, the “Alternating camera image” function is
available. When this function is activated, the transmission images from the registered
cameras appear on the screen in the form of a loop that changes every 12 seconds.
To activate this function, proceed as follows:
Use the up/down direction arrows ( / ) to select the menu item .
Use the left/right direction arrows ( / ) to select the menu item .
Confirm using the ( OK ) button.
The parent unit has a energy-saving mode. When you activate the energy-saving
mode, the screen switches off automatically after 5, 15 or 60 minutes, as you choose.
Use the up/down direction arrows ( / ) to select the time period after which
the screen should switch off automatically (5 mins, 15 mins or 60 mins).
Use the left/right direction arrows ( / ) to select the menu item .
Confirm using the ( OK ) button.
Energu-saving mode
Page 11
10
t
t
t
t
IMPORTANT
t
t
t
t
t
8. Useful information about the baby monitor
9. Maintenance and cleaning
If you operate the parent unit with the battery, this minimises electrosmog from
electrical and magnetic alternating fields.
You can increase the range of the baby monitor by positioning the camera
as high up as possible near a door or window and by ensuring that the battery
is not too weak.
Other radia waves may possibly interfere with the transmission of the baby
monitor. Therefore, fo not position the baby monitor near devices such as
microwaves, WLAN, etc.
The following other factors can interfere with the baby monitor’s transmission or
shorten its range: furniture, walls, houses, trees, environmental factors ( such as
fog, rain).
The service life of the camera and the parent unit depend on careful handling.
Remove the battery from the parent unit if the video baby monitor is not in use
for an extended period.
You will get the maximum capacity from your battery if you run down the battery
at least once every six months. To do this, disconnect the parent unit from the
mains and run the battery down through normal use. Then fully charge the battery
up again.
The maximum battery capacity can only be reached after it has been charged
several times and is dependent on many factors (battery state, ambient temperature, and frequency of charging, etc.).
Protect the camera and the parent unit from knocks, damp, dust, chemicals,
drastic changes in temperature, electromagnetic fields and nearby sources of
heat (ovens, heaters).
Clean the camera/parent unit with a soft, dry cloth. Do not use any abrasive
cleaning products.
Page 12

11
t
t
t
t
t
t
t
t
t
t
t
t
t
10. What if there are problems?
“Monitor” parent unit will not
switch on.
Check whether
the mains part plug is correctly connected,
the battery is correctly inserted,
the battery is full, needs charging or is damaged.
An acoustic signal sounds
from the “monitor” parent unit.
Check whether
the maximum range has been exceeded,
the main part plug for the camera is correctly
connected,
the camera is switched on,
the parent unit’s battery needs charging.
The parent unit is switched on,
but is not making any noise.
To set your desired volume on the parent unit, press
the right or left arrow buttos during operation.
The “monitor” parent unit
switches itself off.
Recharge the parent unit’s battery,
It could be that the parent unit is in energy-saving
mode. Check whether the power-saving mode has
been selected in the menu and deactivate it where
necessary.
The signal is weak, the
connection keeps breaking
up ot there is interference.
If another techical device such as a microwave
is in the area between the camera and the parent
unit, remove the technical device or switch it off.
Check whether other factors, such as trees or anything else are in the area between the camera and
the parent unit, and change the position of the devices until the parent unit signals a connection.
Check whether the camera and parent unit are inside the maximum receiving range.
If no transmission is possible,
you have the option to retune
the device signals digitally =
pairing.
1. Switch on the camera and parent unit.
2. Delete the camera in the menu of the parent unit
and the set up the camera again as described in
the “Add camera” section.
Page 13
12
t
t
t
t
t
t
t
t
t
Use only the power supply listed in the user instructions.
CAUTION
RISK OF EXPLOSION IF BATTERY IS REPLACED BY AN INCORRECT TYPE.
DISPOSE OF USED BATTERIES ACCORDING TO THE INSTRUCTIONS
11. Disposal
12. Technical data
Batteries must be disposed of through specially designated collection boxes,
recycling points or electronics retailers. You are legally required to dispose of
the batteries.
For the environmental reasons, do not dispose of the device in the
household waste at the end of its useful life.
Dispose of the unit at a suitable local collection or recycling point. Dispose
of the device in accordance with EC Directive - WEEE (Waste Electrical
and Electronic Equipment).
If you have any questions, please contact the local authorities responsible
for waste disposal.
23 channels
Frequency 2.4 - 2.483 GHz
Digital receiver
2.4” TFT display
Infrared technology
ECO mode
Camera dimensions: 9 x 6.5 x 5.8 cm
Parent unit dimensions: 11.5 x 6.9 x 2.4 cm
Weight: Camera 91g ; parent unit 80g ; battery 38g
Range up to 300m with a clear view
Operation
Rechargeable battery life
(dependent on battery state,
ambient temperature, means
and frequency of charging, etc.)
Parent unit: 12 hours
Mains part included (5v DC/600mA)
By Ten Pao International Ltd.
S003GB0500060 (For UK)
S003GV0500060 (For EU)
Input: 100-240VAC, 50/60 Hz, 300mA
Output: 5V DC 600mA
Li-Ion battery (2100mA)
We hereby guarantee that this product complies with the European R&TTE Directive 1999/5/
EC. Please contact the specified service address to obtain further information, such as the CE
Declaration of Conformity.
Page 14

FCC and IC regulations
FCC Part l5
NOTE: This equipment has been tested and found to comply with the limits for
a Class B digital device, pursuant to Part 15 of the Federal Communications
Commission (FCC) rules. These limits are designed to provide reasonable
protection against harmful interference in a residential installation. This
equipment generates, uses and can radiate radio frequency energy and, if not
installed and used in accordance with the instructions, may cause harmful
interference to radio communications.H owever, there is no guarantee that
interference will not occur in a particula r installation. If this equipment does
cause harmful interference to radio or television reception, which can be
determined by turning the equipment and on, the user is encouraged to try
to correct the interference by one or more of the following measures:
5HRULHQWRUUHORFDWHWKHUHFHLYLQJDQWHQQD
,QFUHDVHWKHVHSDUDWLRQEHWZHHQWKHHTXLSPHQWDQGUHFHLYHU
&RQQHFWWKHHTXLSPHQWLQWRDQRXWOHWRQDFLUFXLWGLHUHQWIURPWKDWWR
which the receiver is connected.
&RQVXOWWKHGHDOHURUDQH[SHULHQFHGUDGLR79WHFKQLFLDQIRUKHOS
&KDQJHVRUPRGLFDWLRQVWRWKLVHTXLSPHQWQRWH[SUHVVO\DSSURYHGE\WKH
party responsible for compliance could void the user’s authority to operate the
equipment.
This device complies with Part 15 of the FCC rules. Operation is subject to the
following two conditions: (1) this devicemay not cause harmful interference,
and (2) this device must accept any interference received, including
interference that may cause undesired operation. Privacy of communications
may not be ensured when using this device.
To ensure safety of users, the FCC has established criteria for the amount of radio
frequency energy that can be safely absorbed by a user or bystander according to
the intended usage of the product. This product has been tested and found to
comply with the FCC criteria.
This Class B digital apparatus complies with Canadian ICES-003.
&$1,&(6%10%%
Page 15

WARNING
Changes or mod cations, to this equipment not expressively approved by the
party responsible for compliance could avoid the user’s authority to operate the
equipment.
The socket-outlet shall be installed near the equipment and shall be easily
accessible.
Industry Canada
This device complies with Industry Canada licence-exempt RSS standard(s):
Operation is subject to the following Two conditions:(1) this device may not
cause interference, and (2) this device must accept any interference, including
interference that may cause undesired operation of the device.
The term "IC: " before the certi ation/ registration number only signi es that
the Industry Canada technical speci cations were met. This product meets the
applicable Industry Canada technical spec cations.
Le présent appareil est conforme aux CNR d’Industrie Canada applicables aux
appareils radio exempts de licence. L’exploitation est autorisée aux deux
conditions suivantes : (1) l’appareil ne doit pas produire de brouillage, et (2)
l’utilisateur de l’appareil doit accepter tout brouillage radioélectrique subi,
même si le brouillage est susceptible d’en compromettre le fonctionnement.
 Loading...