

INSTRUCTION MANUAL
DRY IRON
RUBY
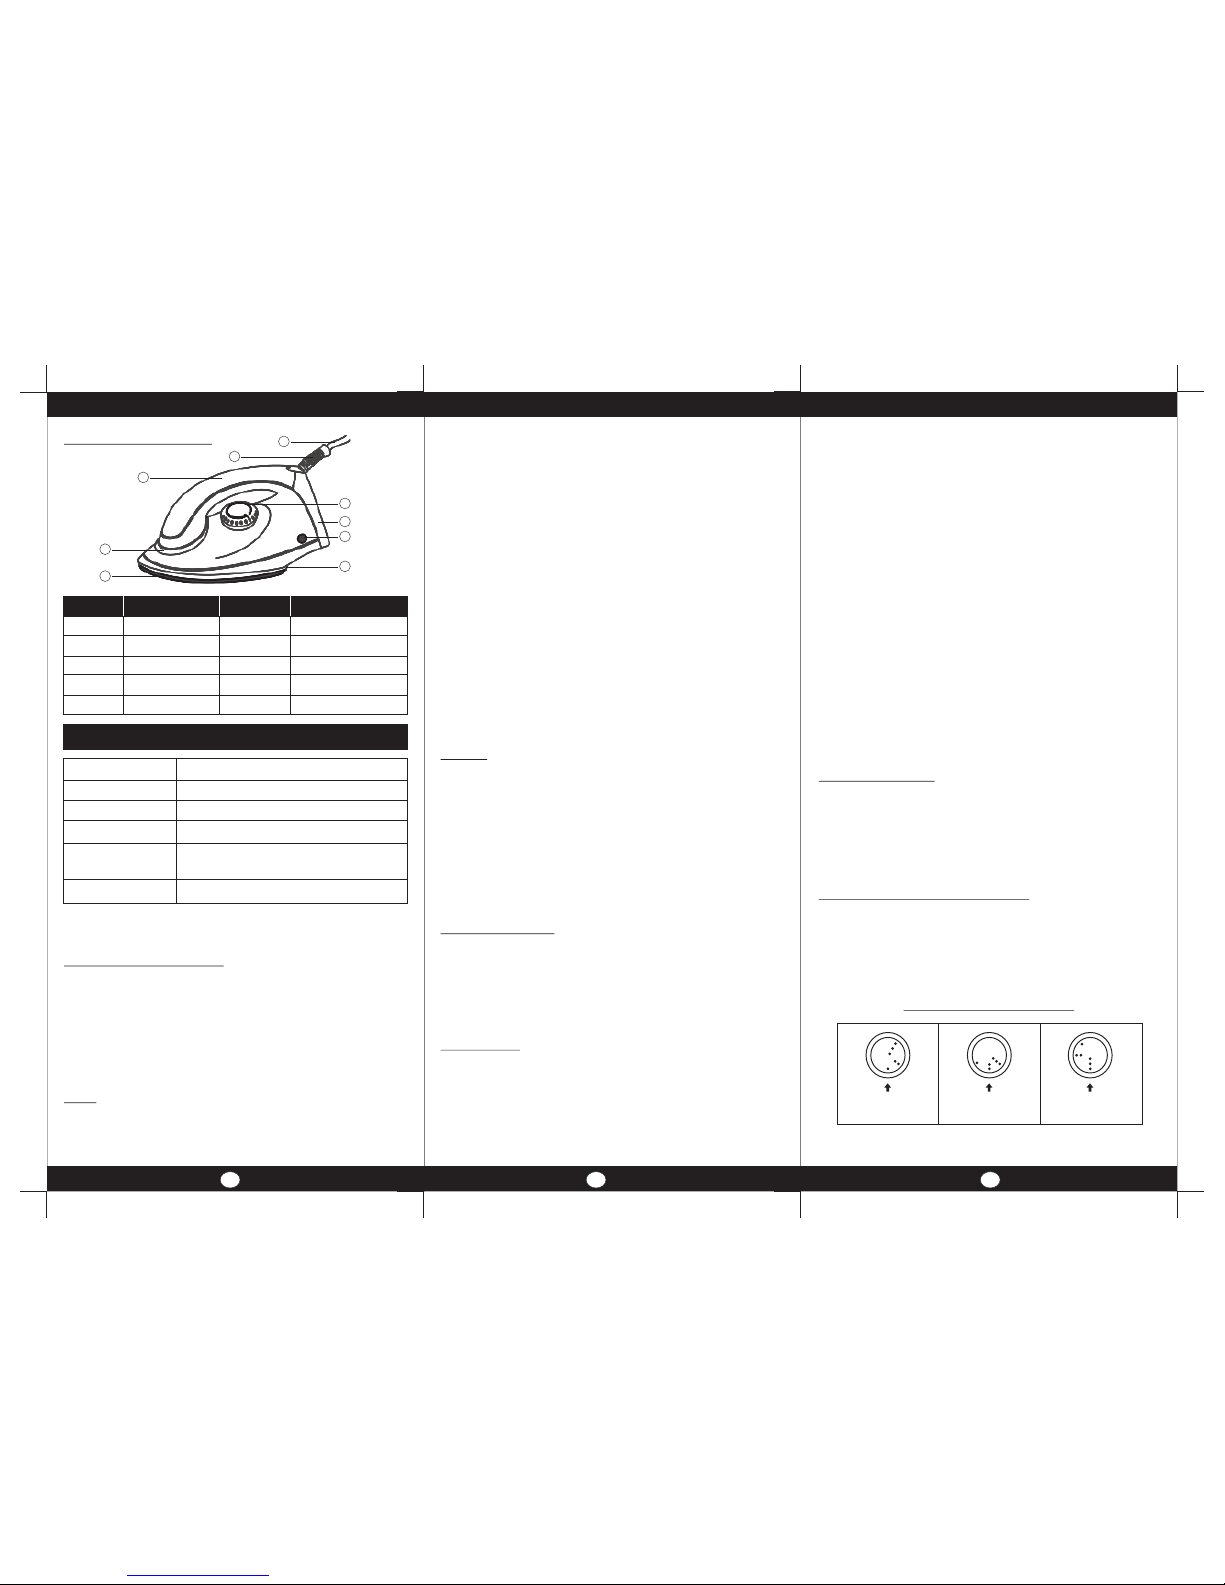
Part’s Identifications
1. Cord plug 6. Skirt
2. Cord holder 7. Indicator cover
3. Handle strip 8. Back rest
4. Main body 9. Thermostat knob
5. Sole plate
Product Dry Iron
Model Ruby
Voltage 240V, 50Hz, AC
Wattage 1000 W ± 10%
Cord plug Cotton braided with 3 Pin, 6A 250V
moulded plug
Sole plate coating PTFE coated
*Due to continuous improvements in product, specifications
are subject to change without prior notice.
Important Instructions
1. Please read operating instructions before using the
appliance.
2. Some parts of the electric iron have been slightly
greased and as a result, the ele ctric iron might
slightly smoke when used for the first time. After the
short while however this will cease.
Do's
1 The fabrics which are more sensitive to heat should be
ironed at low temperature setting.
Part No. Part Name Part No. Part Name
Technical Specification
2. Always use correct temperature setting for different
types of fabric as indicated on the thermostat knob.
3. Before starting ironing let the sole plate to heat
sufficiently.
4. Keep the iron on its back rest during idle periods.
5. Always keep the iron moving during ironing operation.
6. Before storing let the iron cool down sufficiently
(standing on its back rest).
7. Wind the cord around the handle, when it is completely
cooled down.
8. After each use clean with a damp cloth when the iron is
still warm. For stubborn marks, clean with vinegar.
9. Keep the iron away from the children.
10. Always unplug the iron before leaving.
11. In case of any defect, contact the nearest authorized
dealer/ service centre.
Don'ts
1. Do not leave the iron unattended during use.
2. Do not place the sole plate on a rough or abrasive
surface.
3. Do not use the iron on metallic fittings to avoid scratches.
4. Never immerse the iron in water.
5. Cord should not touch the sole plate when it is hot.
6. Do not touch the sole plate when it is hot.
Before First Use
1. After unpacking the unit and before any use, make sure
the mechanical parts of the iron and all its attachments
are not damaged.
2. Carefully go through the instruction manual before
starting the ironing operation.
How to Use
1. Make sure that the supply voltage is in compliance with
the rated one.
2. Set the thermostat knob at the desired setting. Plug in
the iron. The neon indicator will glow ON which means
that the sole plate is heating up. Once the desired
temperature is reached, the indicator light will go OFF.
1 2
Now start ironing your fabric. The indicator light will
switch ON / OFF from time to time in order to regulate
the temperature of the sole plate.
3. If the cloth consist of various kinds of fibers, you must
select the lowest ironing temperature of the composition
e.g. an article consisting of 40% of cotton and 60% of
polyester, should be ironed at a temperature setting
marked as polyester on the thermostat knob.
4. Velvet and other textiles, which rapidly acquire shiny
spots, should be ironed in one direction only, and by
light pressure.
5. Sort out clothes; taking into account the nature of the
fabric and first start ironing those clothes which are
more sensitive to heat (require a cooler t e mp e r at u r e
setting).
6. Always keep the iron moving.
7. After the ironing operation is over, unplug the iron and
let it be cooled down. Wind the cord around the handle
and store in a dry place.
Practical Advice
1. Sprinkle some water over the fabric during ironing to
remove the stubborn wrinkles.
2. Never select higher temperature for the article to be
ironed otherwise you run the risk of scorching the fabric
and damaging the sole plate of your iron.
Ironing temperature selection
One must select the appropriate ironing temperature for
different types of fabrics. To select the temperature
rotate the thermostat knob in such a manner so that the
type of fabric marked on the knob is in line with the
pointer.
TEMPERATURE TABLE
Nylon / Synthetic
Orion / Terylene
Dacron / Silk
Thick wool / Wool
Cotton / Linen
Thick Cotton
3
1
2
3
4
5
6
7
8
9
 Loading...