

IMSA FeneGuard Installation Manual

FeneGuard® - Installation Guide
© 2019 IMSA Group GmbH
INSTALLATION GUIDE
www.feneguard.com
1
IM-001-1218
FeneGuard® - Installation Guide
© 2019 IMSA Group GmbH
INTRODUCTION
Read this guide carefully before installing the FeneGuard® safety cable. It gives instructions for
the installation of the cable, what to pay attention to and how to install it in more complex cases.
N.B. The descriptions and drawings in this guide must not be considered strictly binding. We
reserve the right to make modifications without being obliged to update the guide every time.
IMPORTANT!
Different materials and types of windows profiles require different types of mounting
accessories. Consult the window profile manufacturer or supplier for information about the
most suitable screws to use.
In any case, the FeneGuard® safety cable must be installed by a professional installer who
knows how the various types of windows work.
The installer is responsible for the correct mounting of the system, the secure tightening of the
screws and the correct opening/closing of the window.
The warranty covers solely the FeneGuard® safety cable and not its installation and/or improper
use.
If an accident has occurred, the FeneGuard® safety cable must always be replaced!
2
IM-001-1218

FeneGuard® - Installation Guide
© 2019 IMSA Group GmbH
SAFETY WARNINGS
1. Read these instructions before installing the FeneGuard® safety cable.
2. Wear a safety helmet and protective goggles
3. Wear safety gloves
4. Take care not to trap your hands and fingers in the window
5. Use fall protection devices
3
IM-001-1218
FeneGuard® - Installation Guide
© 2019 IMSA Group GmbH
4 1 2 3 4 5
5
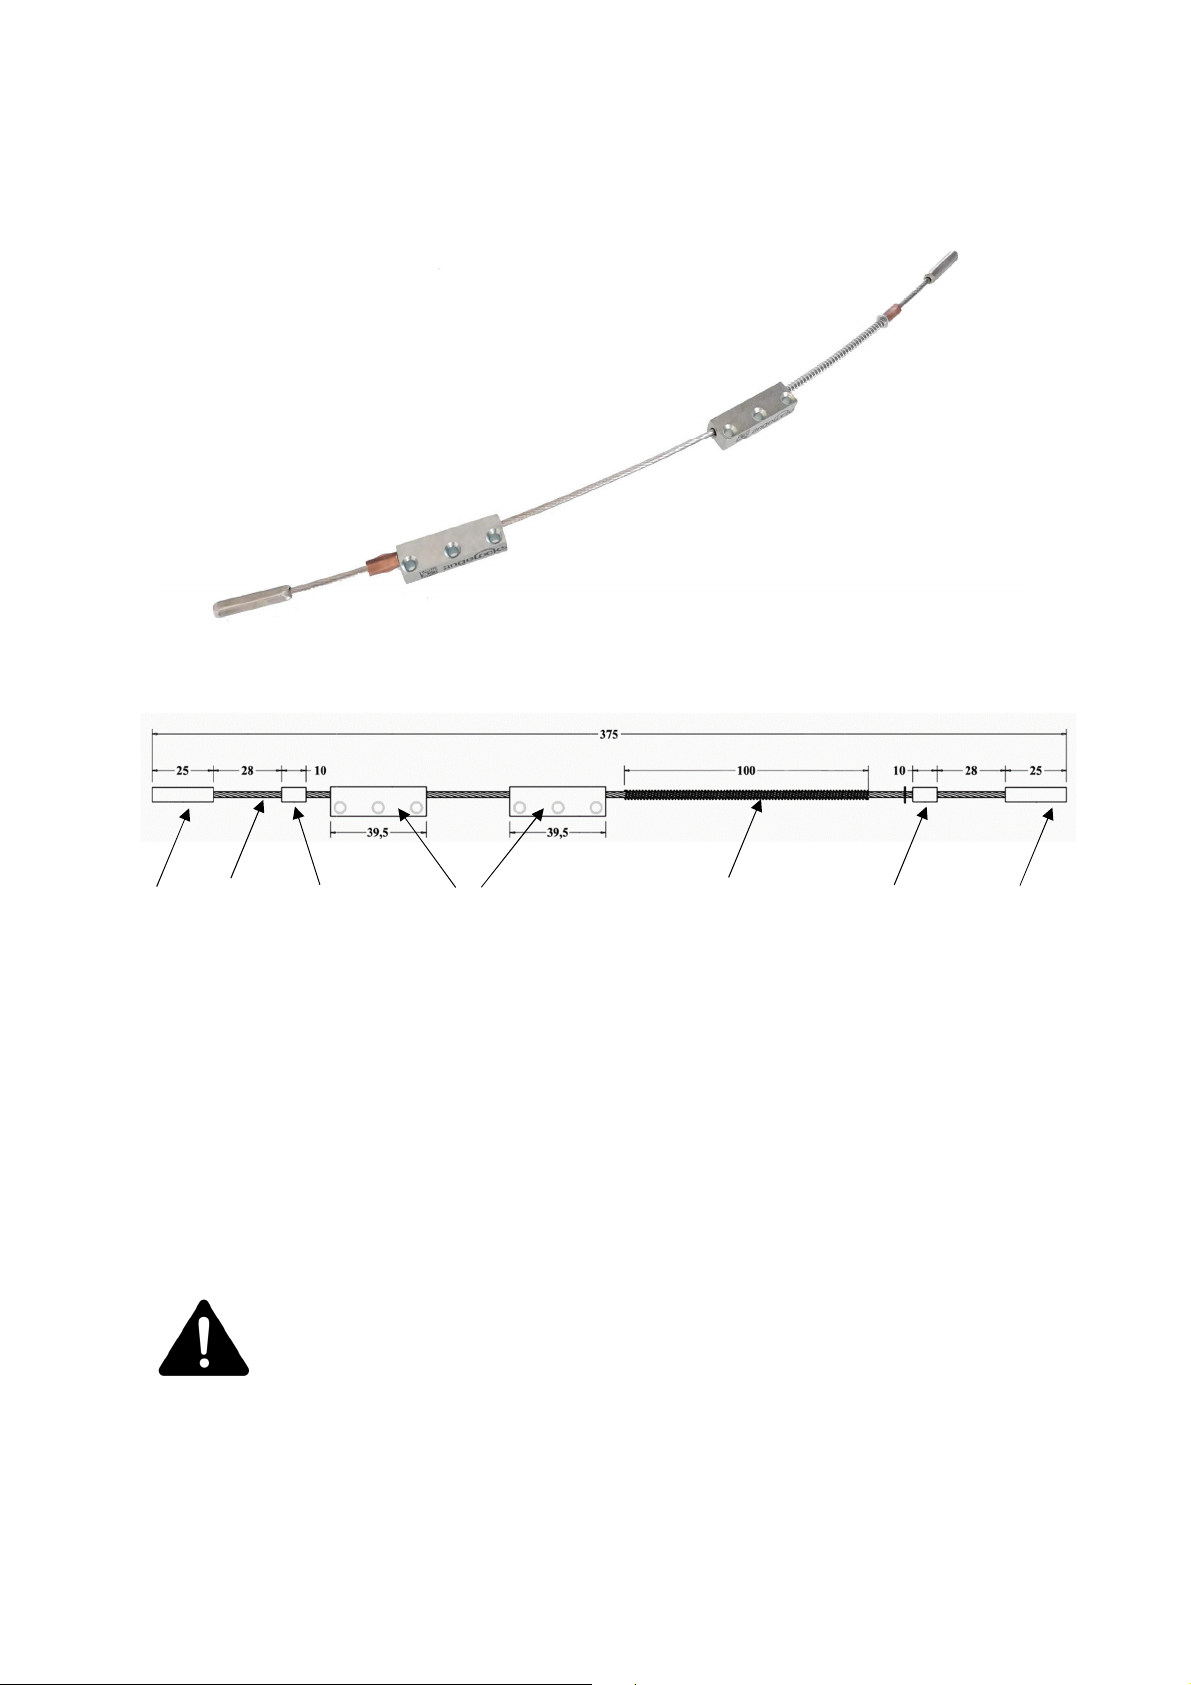
PARTS OF THE FENEGUARD® SAFETY CABLE
1. Aluminium perforated fixing plate dim. 39.5x10x12mm
2. 7x19 AISI 316 steel wire, length 375mm, diameter 2.5mm
3. Spring, length 100mm
4. AISI 304 stainless steel pressed tube, length 25mm
5. Copper pressed tube, length 10mm
FeneGuard® is also available in size XL, steel wire length 500mm. This "non standard" size is used
for awning windows with wide opening of the leaf casement.
4
IM-001-1218
 Loading...