

IMPETUS IV 8000A User Manual

3
5
5
6
10
11
11
12
13
14
15
15
16
17
18
20
21
21
TABLE OF CONTENTS
INTRODUCTION / IMPORTANT INFORMATION
PACKING LIST
HARDWARE PACK PACKING LIST
ASSEMBLY INSTRUCTIONS
SEAT ADJUSTMENT
HOW TO MOVE THE TRAINER
HOW TO ADJUST THE BALANCE OF THE TRAINER
CONSOLE DESCRIPTION
DISPLAY
USING THE INTERVAL PROGRAMS
USING THE TARGET GOAL PROGRAMS
TARGET HEART RATE PROGRAM
TELEMETRIC HEART RATE CHEST STRAP
EXPLODED VIEW
PART LIST
WARM UP / COOL DOWN
CLEANING & MAINTENANCE
RECYCLING INFORMATION
CONSOLE
GENERAL
2

3
A. Introduction
This user manual contains assembly, operation, maintenance and safety
information.
Please read and retain this manual for future reference.
B. Safety guidelines
a. Read the user manual and all accompanying literature. Follow it carefully
before using your machine.
b. This machine is intended for indoor home or commercial location use only.
c. Inspect your exercise machine prior to exercising to ensure that all parts are
tightened.
d. Make sure the trainer is stable on the floor. Avoid uneven surfaces.
e. Keep children under age of 14 and pets away from the exercise trainer at all
times.
f. Exercise equipment has moving parts. Keep others, especially children, at a
safe distance while exercise.
g. Make sure all devices are fully adjusted before use to avoid injury.
h. Remove all jewelry, including rings, chains and pins before exercising.
i. Always wear suitable clothing and footwear during exercise. Do not wear
loose fitting clothing that could become caught in the moving parts of your
exercise machine.
j. Warm up 5 to 10 minutes before each workout and cool down 5 to 10 minutes
afterward. This allows your heart rate to gradually increase and decrease and
will help prevent muscle strain.
k. Never hold your breath while exercising. You should breathe at a normal rate
in conjunction with the level of exercise being performed.
l. Rest adequately between workouts. Muscles tone and develop during these
rest periods.

4
IMPORTANT:
THE MAXIMUM RECOMMENDED WEIGHT CAPACITY FOR YOUR
EQUIPMENT IS KGS.
WARNING:
Before commencing with any exercise program, please consult your
family physician. If at any time during exercise you feel faint, dizzy or
experience pain, stop and consult your family physician.
The safety level of the equipment can be maintained only if it is examined
regularly for damaged and wear.
The appliances are not for children under age of 14.
IMPORTANT:
Read all instructions carefully. Assemble the unit in accordance with the
steps in the manual. Lay out all parts on the floor and check if you have all
the parts included completely before beginning assembly. In case of a
discrepancy, please contact the customer service department
150

Console Tube
Console
Wrench
5
Front Stabilizer
Rear Stabilizer
Main Frame
(G1) Foot Support (G2) End Cap
Swing Handlebar (L & R)
Metal Fixing Plate
Pedals
J3(2)
Spacer Ring
J4(2)
Nut
M8
J2(2)
Screw
M8*30
J5(6)
Screw
M6*16
J6(4)
Screw
M10*20
#17
#13
#15
4mm
5mm 6mm
USE TOOL
1
USE TOOL
6mm
J6
C
J6
B
A
J6
A
PAPER
TUBE
J6
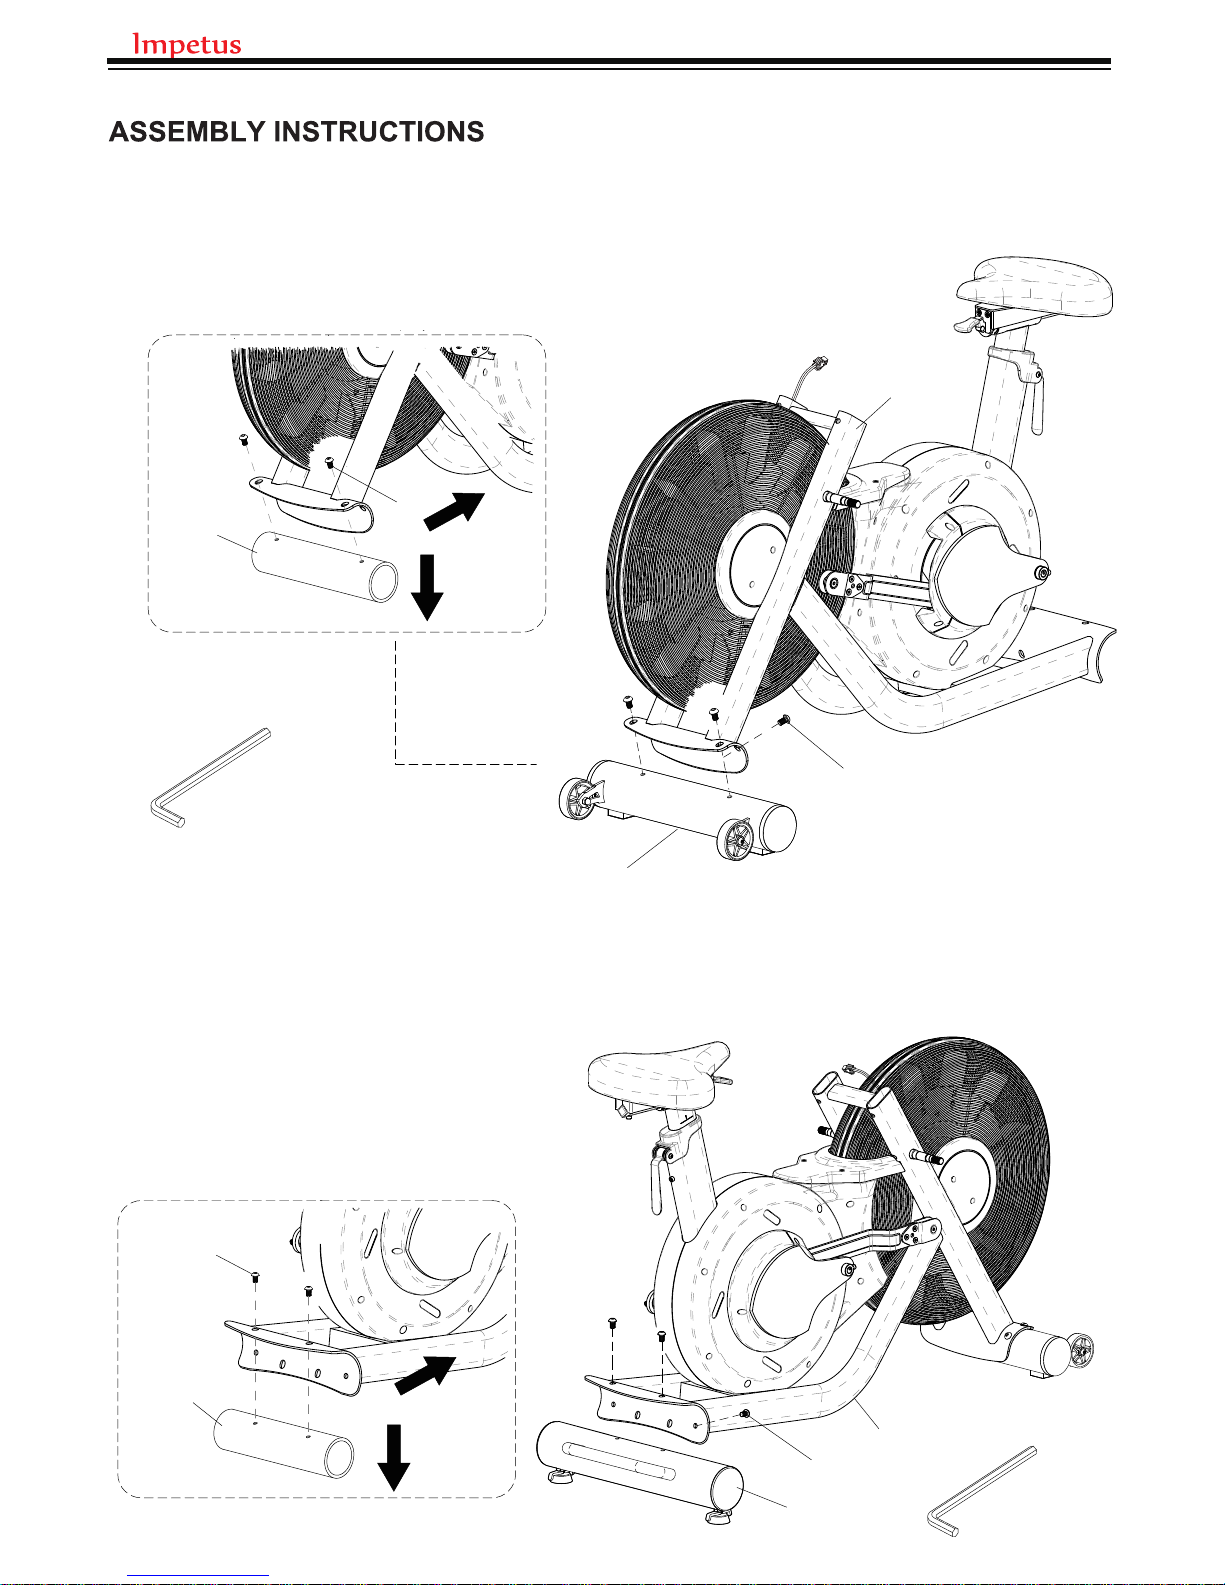
STEP 1
1. Remove the 2 SCREWS (J6) from the paper strap. The paper strap is used
for package protection that won't be used again after/during the assembly.
2. Attach the FRONT STABILIZER (B) to the MAIN FRAME (A) using 2
SCREWS (J6).
STEP 2
1. Remove the 2 SCREWS (J6) from the paper strap. The paper strap is used for
package protection that won't be used again after/during the assembly.
2. Attach the REAR STABILIZER (C) to the
MAIN FRAME (A) using 2 SCREWS (J6).
6
PAPER
TUBE
J4
J3
U S E TOOL
5mm 4mm
#13 #17
D2
D2
I
J2
J5
A17
G1
G2
A
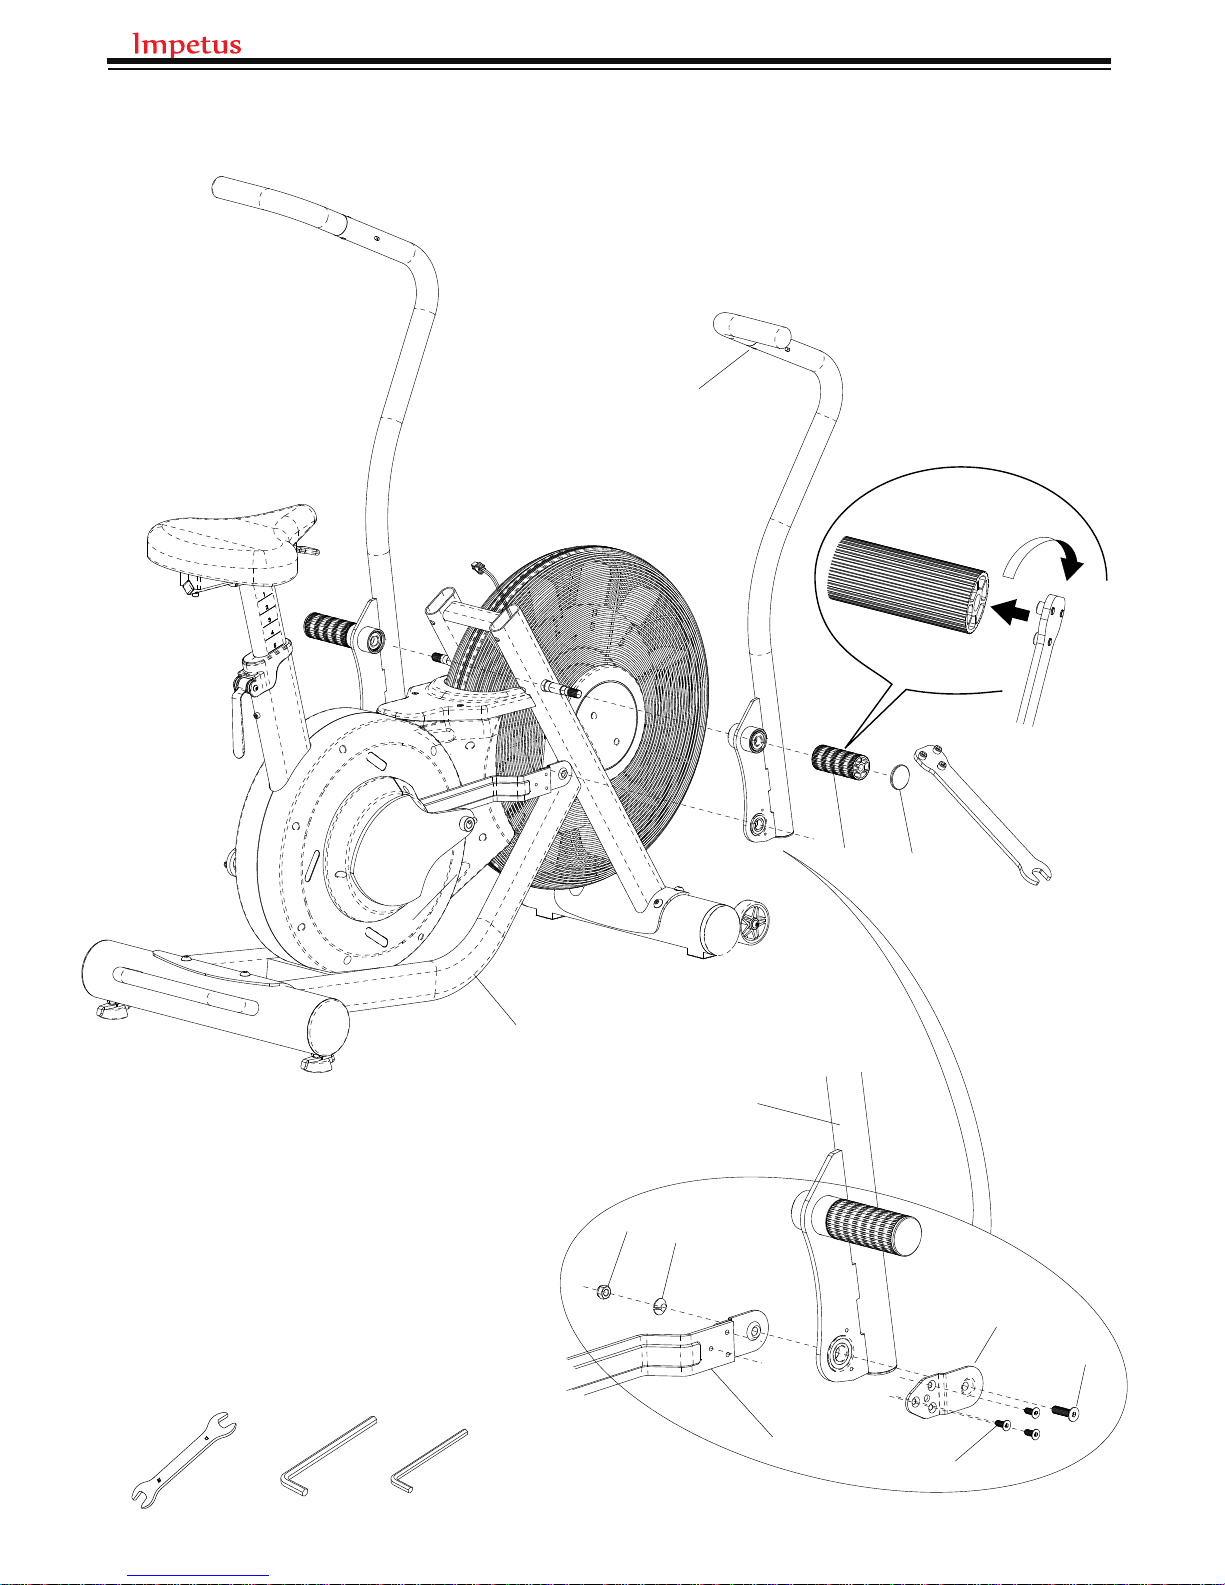
STEP 3
1. Attach the RIGHT HANDLEBAR (D2) to the MAIN
FRAME (A) using a FOOT SUPPORT (G1) and a
customized wrench.
2. Plug an END CAP (G2) onto the FOOT SUPPORT
(G1).
customized wrench
3. Attach the RIGHT HANDLEBAR (D2) to the METAL
FIXING PLATE (I) and the CONNECTING TUBE (A17)
using a SCREW (J2), SPACER RING (J3), and a NUT
(J4).
4. Then, use 3 SCREWS (J5) to secure
the assembly.
5. Repeat the above steps on the other
side.
7
 Loading...