

Imperial UPRIGHT FREEZER Use & Care Manual
UPRIGHT FREEZER
Use & Care Guide
For questions about features, operation/performance,
parts or service, call: 1-800-853-3508,
or visit our website at
www.imperialfreezers.biz
CONGÉLATEUR
VERTICAL
Guide d’utilisation
et d’entretien
Au Canada, pour assistance,
composez le 1-800-853-3508,
ou visitez notre site web
www.imperialfreezers.biz
Table of Contents/Table des matières.................. 2
W10454004A
TABLE OF CONTENTS
FREEZER SAFETY.......................................................................................2
Proper Disposal of Your Old Freezer or Refrigerator ............................... 3
INSTALLATION INSTRUCTIONS ...............................................................3
Unpacking.................................................................................................3
Location Requirements.............................................................................4
Electrical Requirements............................................................................4
Door Handle.............................................................................................. 4
Adjust the Door .........................................................................................5
FREEZER USE .............................................................................................5
Ensuring Proper Air Circulation ................................................................5
Using the Control......................................................................................5
Key Eject Lock ..........................................................................................6
TABLE DES MATIÈRES
SÉCURITÉ DU CONGÉLATEUR...............................................................11
Mise au rebut appropriée de votre
vieux congélateur ou réfrigérateur..........................................................11
INSTRUCTIONS D'INSTALLATION .........................................................12
Déballage ................................................................................................12
Emplacement d’installation ....................................................................12
Spécifications électriques.......................................................................13
Poignée de porte ....................................................................................13
Ajustement de porte ...............................................................................13
UTILISATION DU CONGÉLATEUR ..........................................................14
Pour s’assurer d’une circulation d’air appropriée..................................14
Utilisation de la commande ....................................................................14
Serrure à éjection de clé.........................................................................14
FREEZER FEATURES .................................................................................6
Refrigerated Shelves ................................................................................ 6
Door Bin.................................................................................................... 6
Storage Basket ......................................................................................... 6
FREEZER CARE .......................................................................................... 6
Base Grille................................................................................................. 6
Defrosting and Cleaning Your Manual Defrost Freezer ........................... 6
Changing the Light Bulb...........................................................................7
Power Interruptions .................................................................................. 7
Moving Care ............................................................................................. 7
TROUBLESHOOTING ................................................................................. 8
ASSISTANCE OR SERVICE........................................................................ 9
In the U.S.A............................................................................................... 9
In Canada.................................................................................................. 9
WARRANTY ............................................................................................... 10
CARACTÉRISTIQUES DU CONGÉLATEUR ........................................... 15
Clayettes de réfrigération ....................................................................... 15
Balconnet de porte................................................................................. 15
Panier d'entreposage ............................................................................. 15
ENTRETIEN DU CONGÉLATEUR ............................................................15
Grille de la base ...................................................................................... 15
Dégivrage et nettoyage du congélateur à dégivrage manuel................ 15
Remplacement de l'ampoule d’éclairage...............................................16
Pannes de courant électrique.................................................................16
Déménagement ......................................................................................16
DÉPANNAGE .............................................................................................17
ASSISTANCE OU SERVICE......................................................................18
GARANTIE.................................................................................................. 19
FREEZER SAFETY
Your safety and the safety of others are very important.
We have provided many important safety messages in this manual and on your appliance. Always read and obey all safety
messages.
This is the safety alert symbol.
This symbol alerts you to potential hazards that can kill or hurt you and others.
All safety messages will follow the safety alert symbol and either the word “DANGER” or “WARNING.”
These words mean:
You can be killed or seriously injured if you don't immediately
DANGER
WARNING
All safety messages will tell you what the potential hazard is, tell you how to reduce the chance of injury, and tell you what can
happen if the instructions are not followed.
follow instructions.
can be killed or seriously injured if you don't
You
instructions.
follow
2
IMPORTANT SAFETY INSTRUCTIONS
To reduce the risk of fire, electric shock, or injury when using your freezer, follow these basic precautions:
WARNING:
■
■
Plug into a grounded 3 prong outlet.
■
Do not remove ground prong.
■
Do not use an adapter.
■
Do not use an extension cord.
■
Disconnect power before servicing.
■
Replace all parts and panels before operating.
■
Use nonflammable cleaner.
Keep flammable materials and vapors, such as gasoline,
away from freezer.
■
Use two or more people to move and install freezer.
■
Keep key away from children.
■
Remove doors or lid from your old freezer or refrigerator.
■
Disconnect power before installing ice maker (on ice maker
kit ready models only).
SAVE THESE INSTRUCTIONS
State of California Proposition 65 Warnings:
WARNING: This product contains one or more chemicals known to the State of California to cause cancer.
WARNING: This product contains one or more chemicals known to the State of California to cause birth defects or other
reproductive harm.
Proper Disposal of
Your Old Freezer or Refrigerator
WARNING
Suffocation Hazard
Remove doors or lid from your old freezer or
refrigerator.
Failure to do so can result in death or brain damage.
IMPORTANT: Child entrapment and suffocation are not problems
of the past. Junked or abandoned freezers or refrigerators are still
dangerous... even if they will sit for “just a few days.” If you are
getting rid of your old refrigerator or freezer, please follow these
instructions to help prevent accidents.
INSTALLATION INSTRUCTIONS
Unpacking
WARNING
Excessive Weight Hazard
Use two or more people to move and install freezer.
Failure to do so can result in back or other injury.
Before You Throw Away Your Old Freezer or Refrigerator:
■ Take off the doors or lid.
■ Leave the shelves in place so that children may not easily
climb inside.
When Moving Your Freezer:
Your freezer is heavy. When moving the freezer for
cleaning or service, be sure to cover the floor with cardboard
or hardboard to avoid floor damage. Always pull the freezer
straight out when moving it. Do not wiggle or “walk” the
freezer when trying to move it, as floor damage could occur.
Remove Packaging Materials
■ Remove tape and glue residue from surfaces before turning
on the freezer. Rub a small amount of liquid dish soap over the
adhesive with your fingers. Wipe with warm water and dry.
■ Do not use sharp instruments, rubbing alcohol, flammable
fluids, or abrasive cleaners to remove tape or glue. These
products can damage the surface of your freezer. For more
information, see “Freezer Safety.”
3
Clean Before Using
A
After you remove all of the packaging materials, clean the inside of
your freezer before using it. See the cleaning instructions in
“Freezer Care.”
Important information to know about glass shelves
and covers:
Do not clean glass shelves or covers with warm water when
they are cold. Shelves and covers may break if exposed to
sudden temperature changes or impact, such as bumping.
Tempered glass is designed to shatter into many small,
pebble-size pieces. This is normal. Glass shelves and covers
are heavy. Use both hands when removing them to avoid
dropping.
Location Requirements
Electrical Requirements
WARNING
Electrical Shock Hazard
Plug into a grounded 3 prong outlet.
Do not remove ground prong.
Do not use an adapter.
Do not use an extension cord.
Failure to follow these instructions can result in death,
fire, or electrical shock.
WARNING
Explosion Hazard
Keep flammable materials and vapors, such as
gasoline, away from freezer.
Failure to do so can result in death, explosion, or fire.
IMPORTANT: Do not install the freezer near an oven, radiator, or
other heat source, nor in a location where the temperature will fall
below 40°F (5°C).
Check the strength of the floor before installing your freezer. It
should hold the weight of a freezer fully loaded with food.
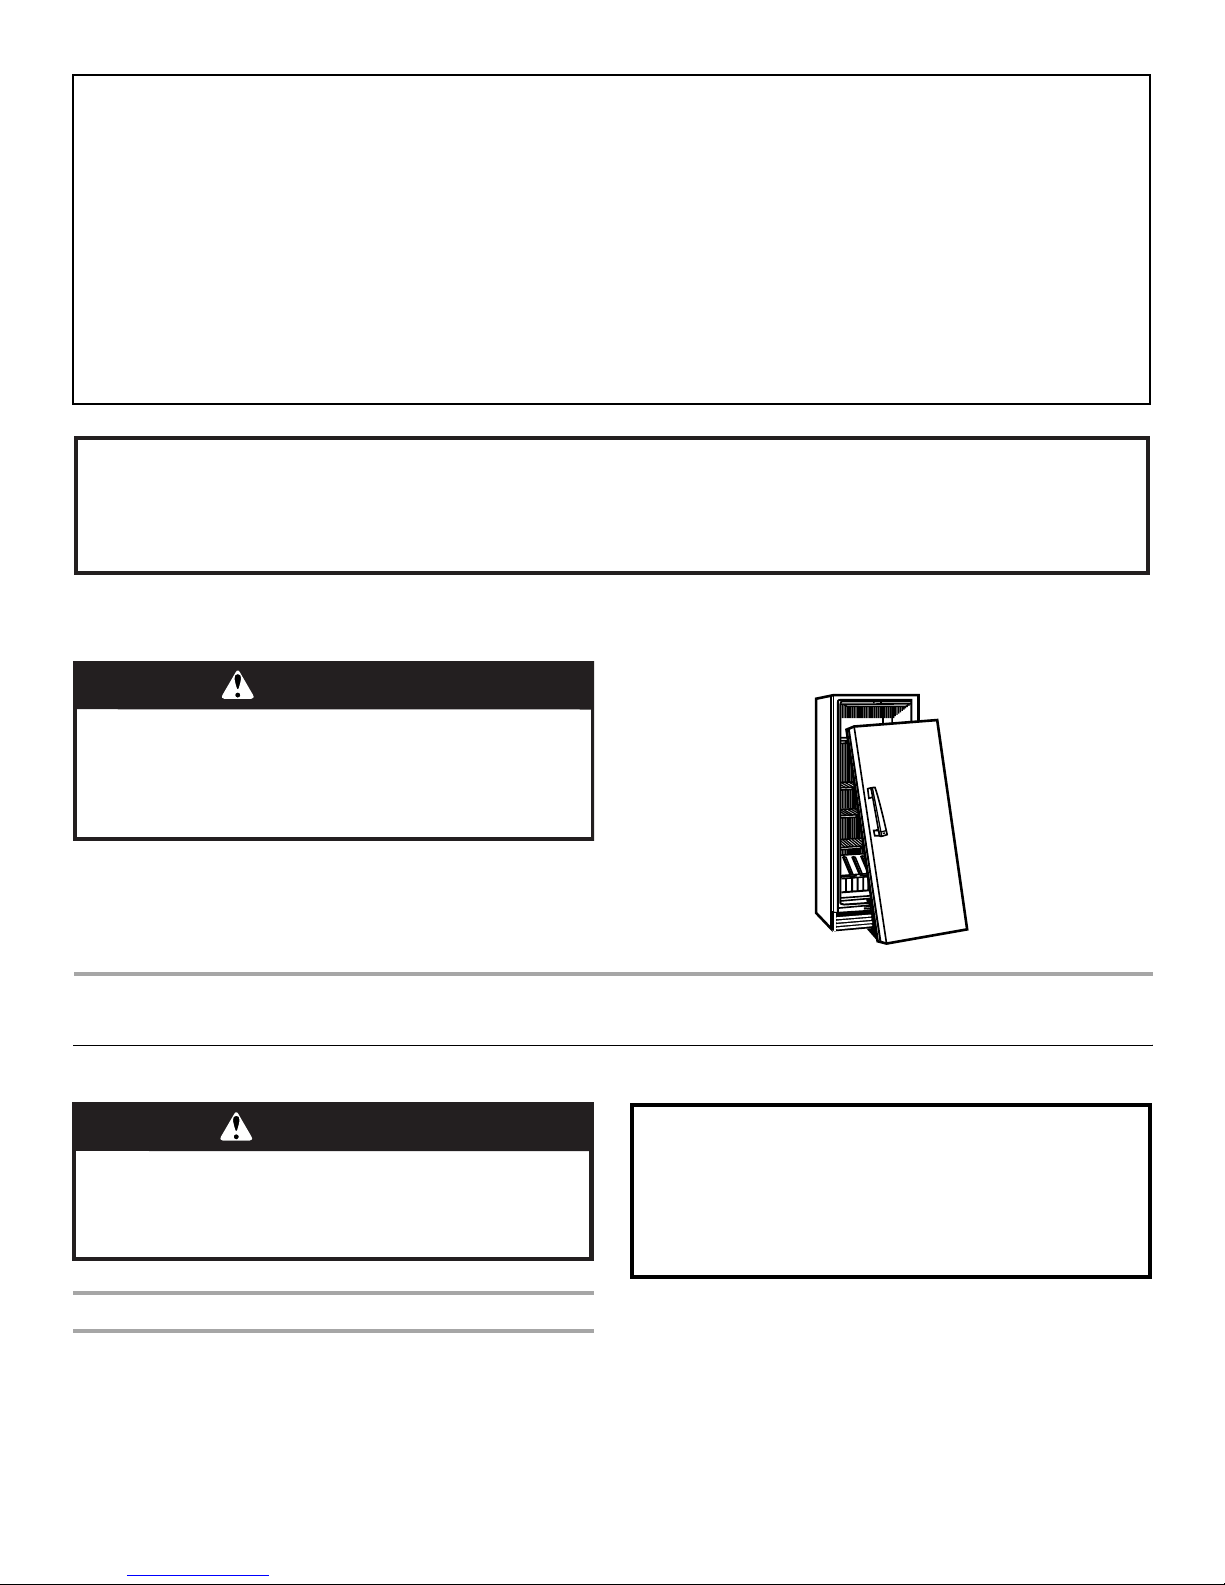
Allow at least 3" (7.5 cm) of air space at the top and on both sides
of the freezer and 1" (2.5 cm) between the back of the freezer and
the wall. If the freezer is to be against a wall, leave extra space on
the hinge side so the door can open wider.
Before you move your freezer into its final location, it is important
to make sure you have the proper electrical connection.
Recommended grounding method
A 115 volt, 60 Hz., AC only, 15- or 20-amp fused, grounded
electrical supply is required. It is recommended that a separate
circuit serving only your freezer be provided. Use an outlet that
cannot be turned off by a switch. Do not use an extension cord.
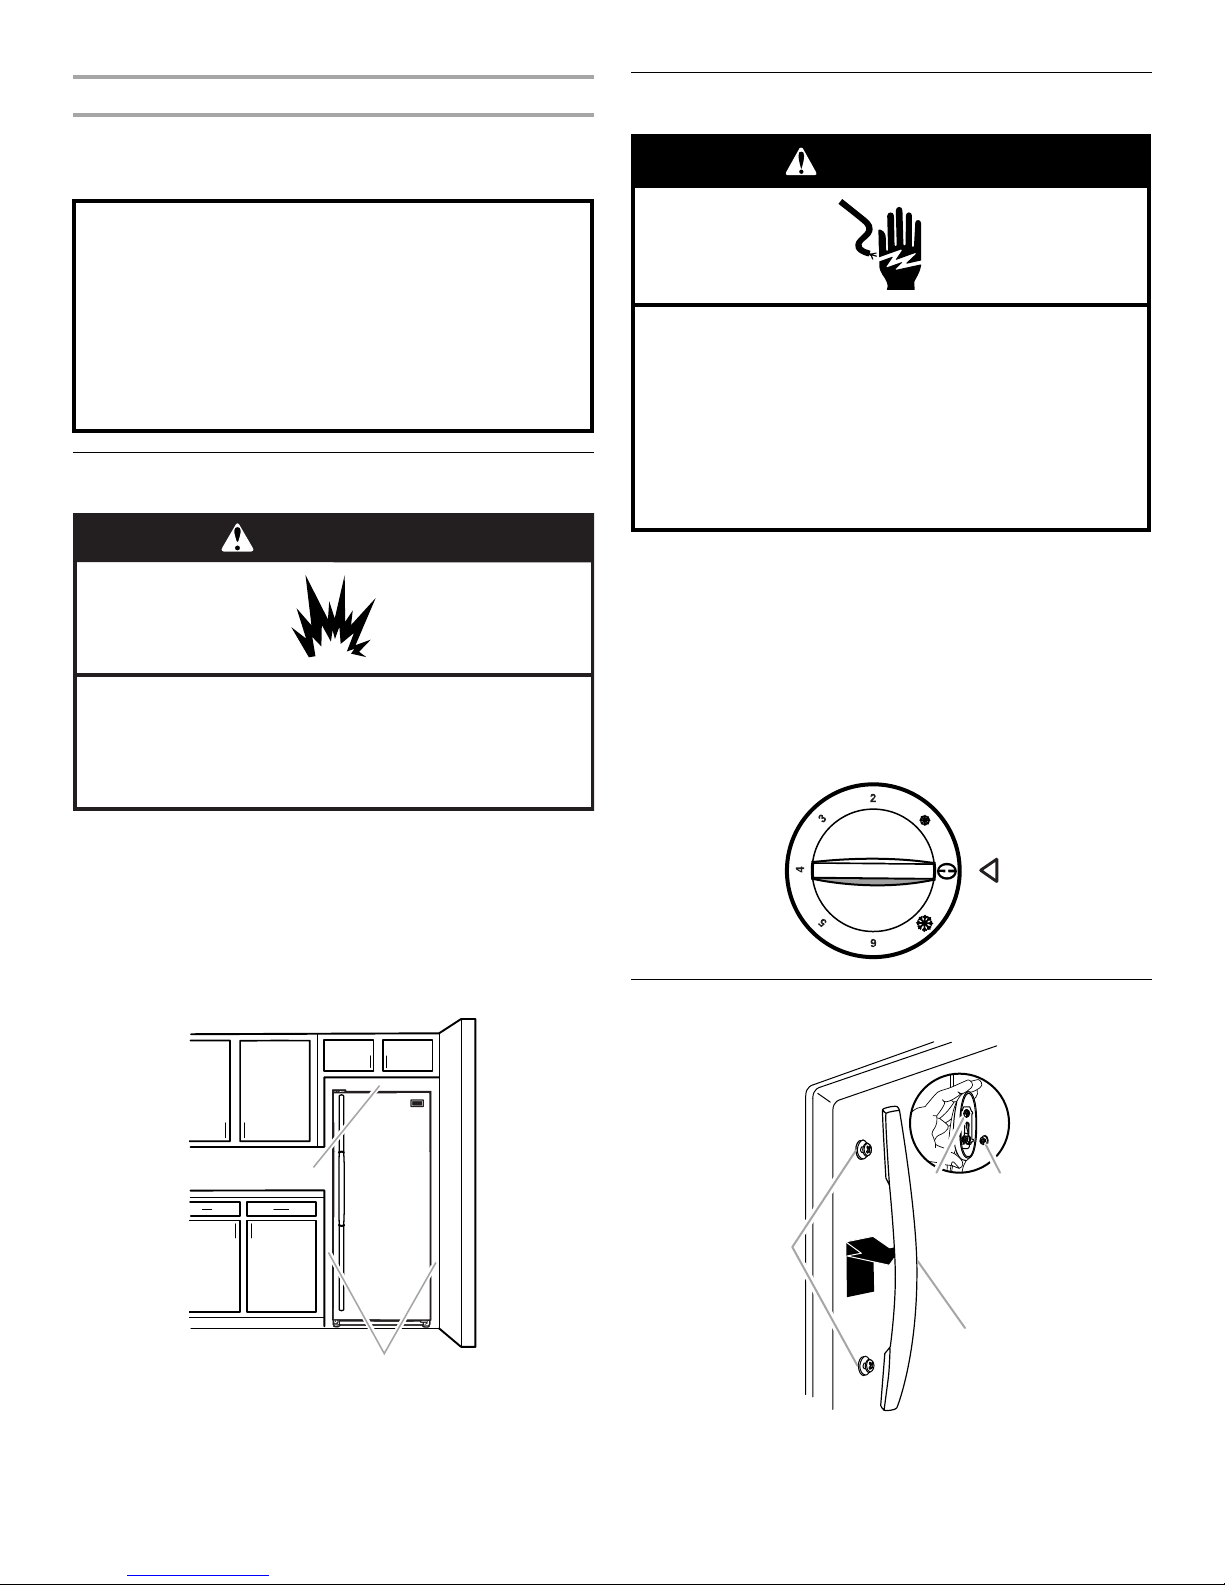
NOTE: Before performing any type of installation, cleaning, or
removing a light bulb, turn the Temperature Control to the OFF
position as shown and then disconnect the freezer from the
electrical source.
Door Handle
3" (7.5 cm)
3" (7.5 cm)
4
B
A
C
A. Grommet
B. Clip
C. Handle
To Install:
1. Position the handle so that the large holes in the mounting
clips are down, and align the holes with the grommets.
2. Rotate the handle so that the mounting clips are flat against
the door, and slide the handle down to engage.
To Remo ve :
■ Grasping the lower part of the handle firmly, slide it up and pull
the handle straight out from the door.
Adjust the Door
1. Locate the two front leveling legs taped among the packing
materials.
2. Screw these legs into the front holes on the bottom of the
freezer. The back of the freezer rests on two fixed supports.
3. Adjust the front legs enough to lift the cabinet up off of the
floor.
NOTE: If your model is equipped with rollers, the front legs
should be lowered enough to lift the rollers off of the floor to
ensure the freezer does not roll forward when the door is
opened.
4. Place a leveling tool on top of the freezer first side to side,
then front to back. Turn leg counterclockwise to raise a corner.
Turn leg clockwise to lower a corner.
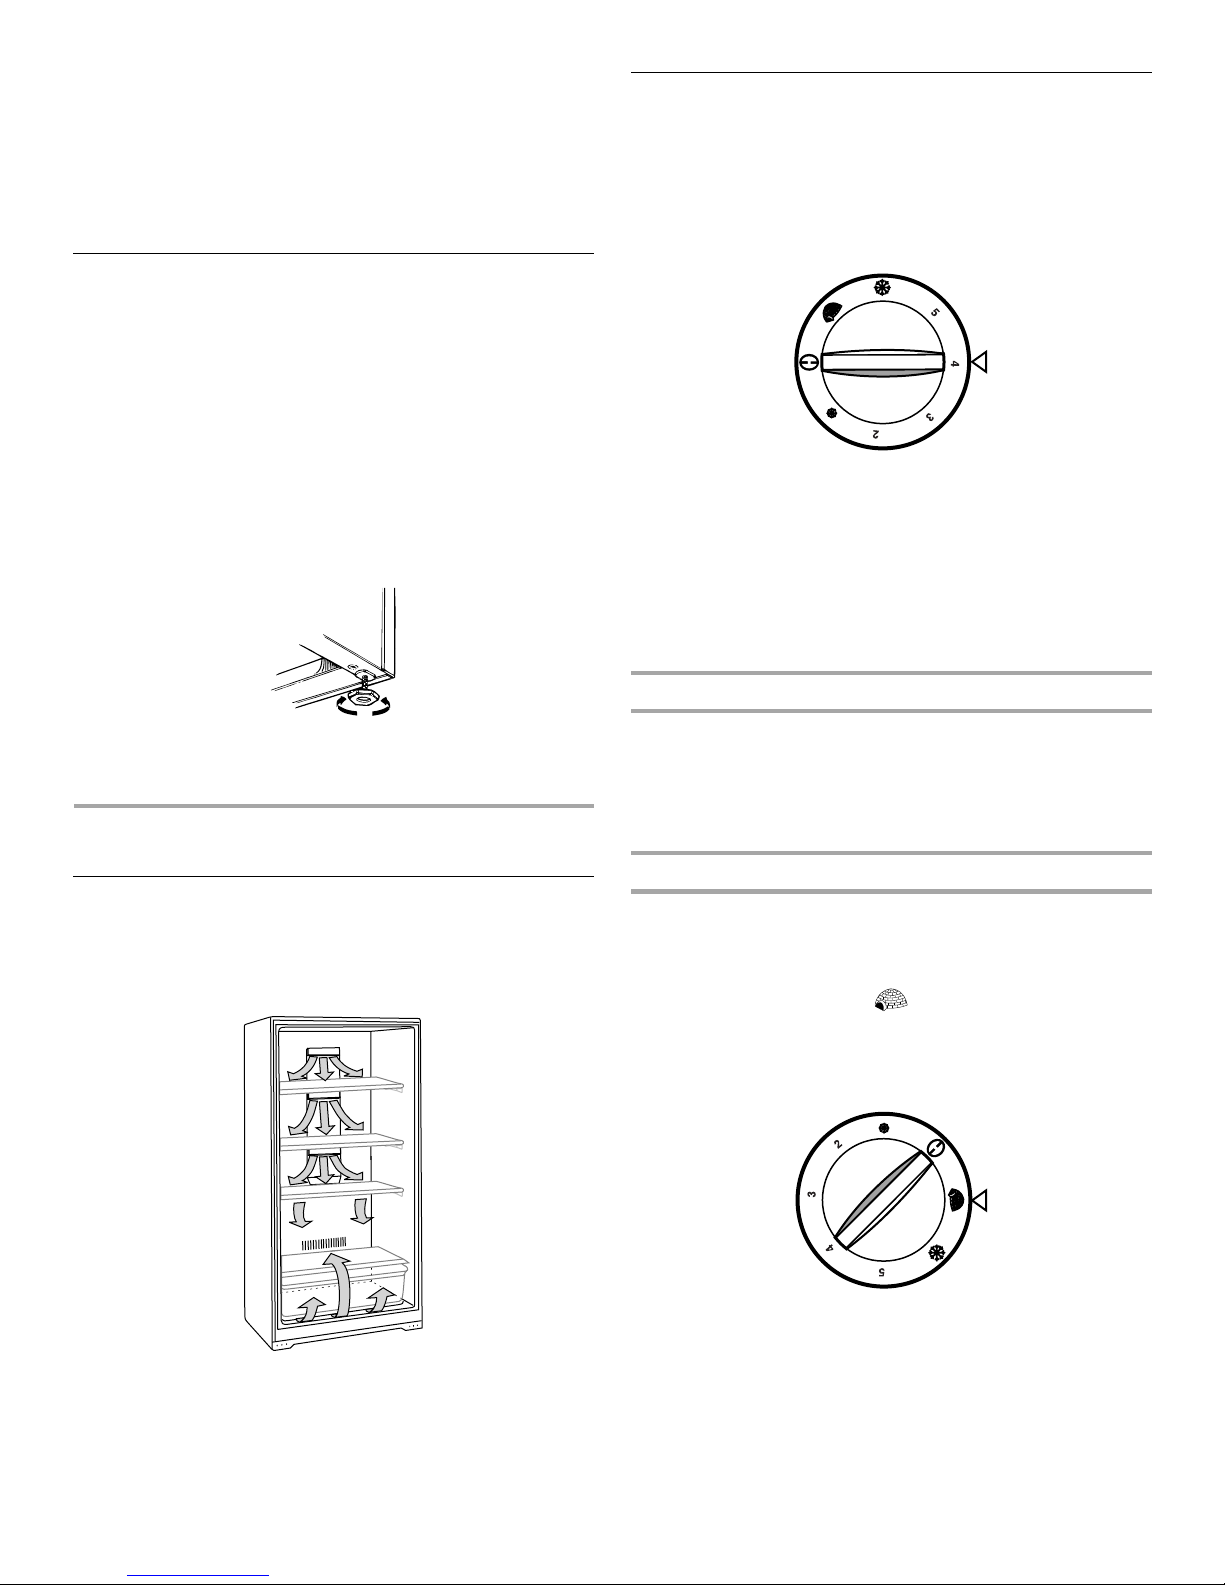
Using the Control
Turn the freezer temperature control to 4. This setting is designed
to maintain the temperature at or near 0°F (-17.8°C) under normal
operating conditions.
Allow the freezer to cool 6 to 8 hours before filling with frozen
food. Let the freezer cool overnight before adding large amounts
of unfrozen food. Do not add more than 2 to 3 lbs (907 to 1,350 g)
of unfrozen food per cubic foot (28.32 L) of freezer space.
NOTE: When the freezer is first started, the compressor will run
constantly until the freezer is cooled. It may take up to 6 or
8 hours (or longer), depending on room temperature and the
number of times the freezer door is opened. After the freezer is
cooled, the compressor will turn on and off as needed to keep the
freezer at the proper temperature.
The outside of your freezer may feel warm. This is normal. The
freezer’s design and main function is to remove heat from
packages and air space inside the freezer. The heat is transferred
to the room air, making the outside of the freezer feel warm.
5. Repeat Step 4 until freezer is level.
6. After freezer is fully loaded with food, recheck with level as in
Step 4.
FREEZER USE
Ensuring Proper Air Circulation
In order to ensure proper temperature, you need to permit proper
airflow in the freezer. As shown in the illustration, cool air enters
through the freezer wall and moves down. The air then
recirculates through the vent near the bottom.
Adjusting Control
■ Turn control to a higher number for colder temperatures.
■ Turn control to a lower number for less cold temperatures.
NOTE: The small snowflake icon represents the number 1 or
the least-cold setting. The large snowflake icon represents
6 or the coldest setting.
Fast Freeze
This setting causes the freezer to run continuously, driving the
freezer temperature to the coldest possible temperature. To
activate, adjust the control knob to the igloo icon, which
represents the fast freeze setting.
Use this feature just before adding large amounts of unfrozen
foods. For best food quality, do not exceed 3 lbs (1,350 g) per
cubic foot (28.32 L). Return to your normal setting after 24 to
48 hours.
Do not block any of these vents with food packages. If the vents
are blocked, airflow will be restricted, and temperature and
moisture problems may occur.
IMPORTANT: To avoid odor transfer and drying out of food, wrap
or cover foods tightly.
5
Key Eject Lock
To lock or unlock the freezer, you must hold the key in the lock
while turning. The lock is spring loaded, so the key cannot be left
in the lock.
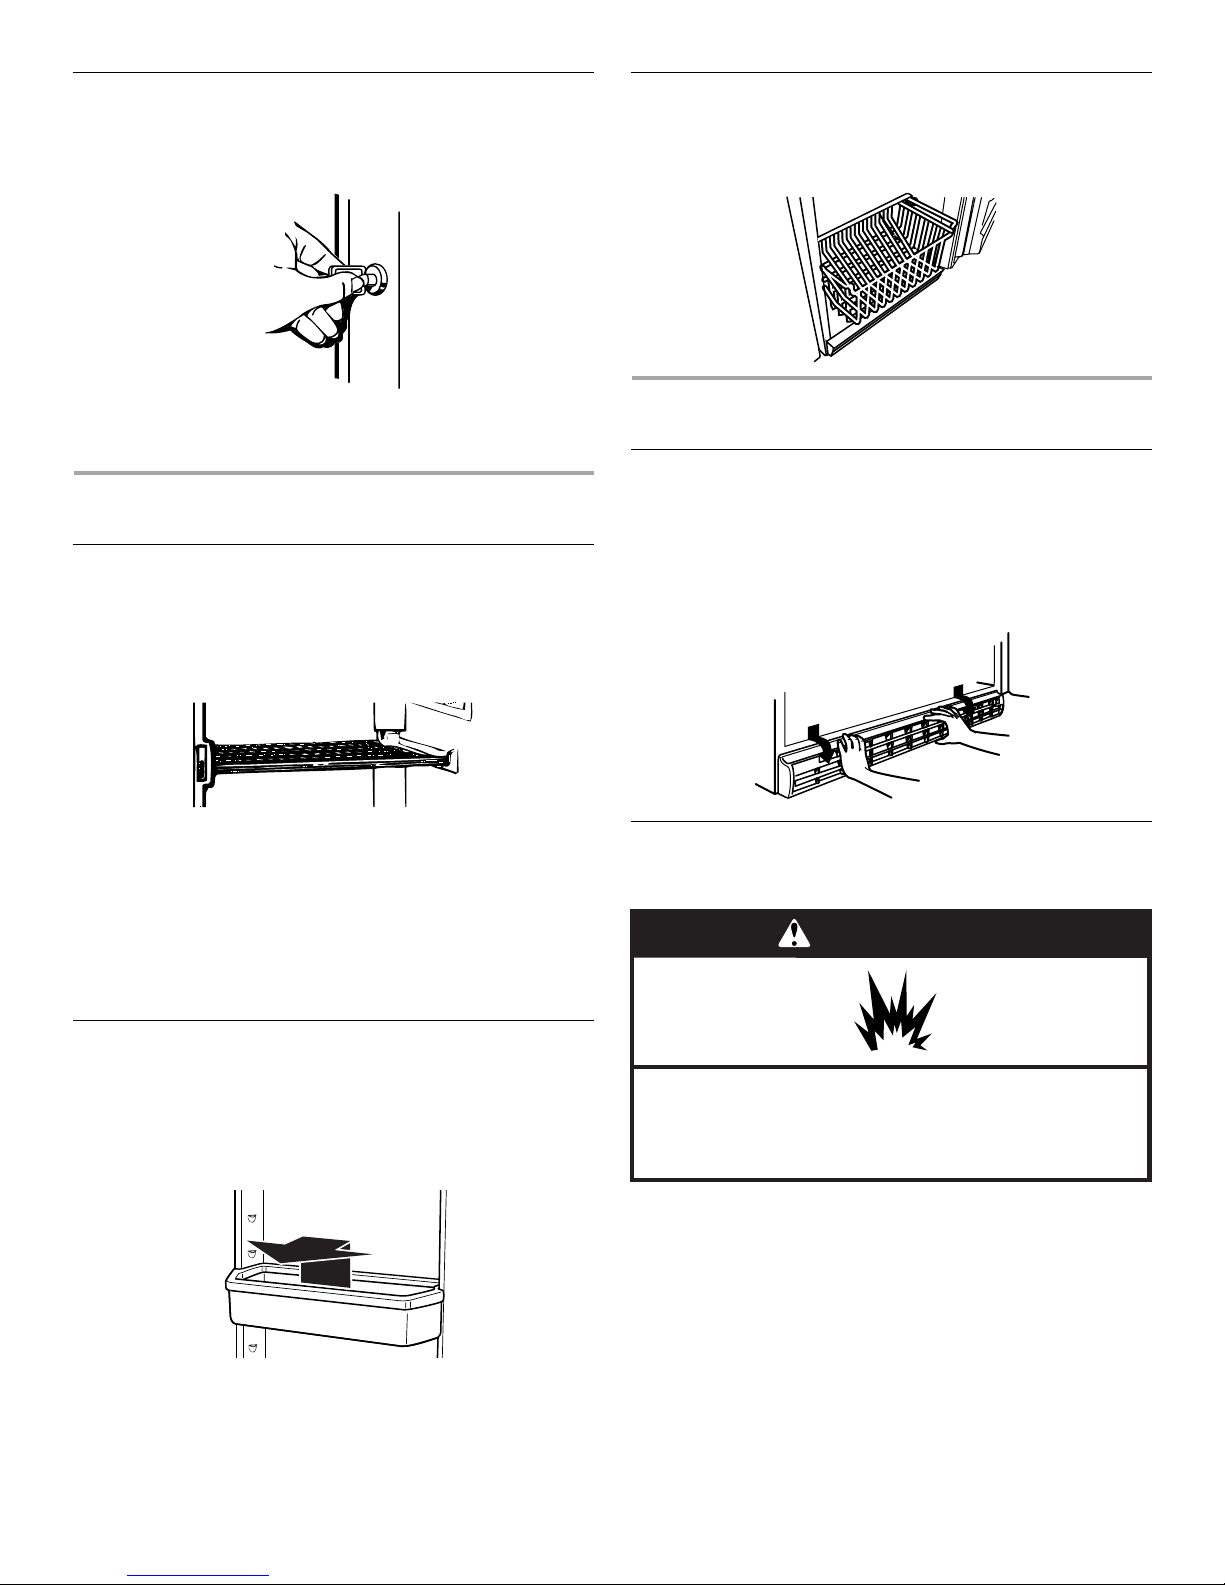
Storage Basket
The slide out basket provides separate storage space for items
that are difficult to store on freezer shelves. To remove the basket,
pull out and lift up.
If the key is lost, contact your dealer for a replacement. Always
give the model and serial number of your freezer when requesting
a replacement key.
FREEZER FEATURES
Refrigerated Shelves
Your freezer is equipped with refrigerated interior shelves.
Packages in direct contact with the shelves will have the best
refrigeration. Fresh, unfrozen food packages should be stored
directly on the shelves and not on top of already frozen food
packages.
When placing the food packages in your freezer, please
remember:
■ The cabinet shelves have the best freezing capability. The
door shelves and the bottom of the cabinet have a slightly less
cold temperature. Therefore, packages sensitive to
temperature (meat, poultry, etc.) should not be placed on the
door shelves or the freezer bottom.
■ Leave some space between the food packages so that cold
air can pass over and around them.
FREEZER CARE
Base Grille
To Remove and Replace the Base Grille:
1. Open the freezer door and remove the base grille by pulling
down and out from the top.
2. Replace the base grille by putting the clips in the openings in
the refrigerator panel. Push in until the base grille snaps into
place.
Defrosting and Cleaning
Your Manual Defrost Freezer
WARNING
Door Bin
To remove and replace the bin:
1. Remove the bin by tipping the front of the bin forward and
sliding out.
2. Replace the bin by sliding it in above the desired support
tilting it back into place.
6
Explosion Hazard
Use nonflammable cleaner.
Failure to do so can result in death, explosion, or fire.
Defrost and clean your freezer when frost has built up to about
¹⁄₄" (6 mm) thickness. Complete defrosting and cleaning should be
done at least once a year. In high humidity areas, a freezer may
need more frequent defrosting and cleaning.
Do not use abrasive cleaners on your freezer. Do not use cleaning
waxes, concentrated detergents, bleaches, or cleaners containing
petroleum on plastic parts. Damage can occur.
NOTE: The drain cap must be removed before defrosting the
freezer and replaced securely afterward.
1. Unplug freezer or disconnect power.
2. Remove all frozen food. Wrap frozen food in several layers of
newspaper and cover with a blanket. Food will stay frozen for
several hours. You may also store frozen food in a cooler, an
additional refrigerator or freezer, or a cool area.
 Loading...