

Page 1
INSTALLATION, OPERATION, & MAINTENANCE INSTRUCTIONS
WARNING: Improper installation, adjustment,
alteration, service or maintenance can cause property
damage, injury or death. Read the installation,
operating and maintenance instructions thoroughly
before installing or servicing this equipment.
FOR YOUR SAFETY
DO NOT STORE OR USE GASOLINE OR OTHER
FLAMMABLE VAPORS OR LIQUIDS IN THE
VICINITY OF THIS OR ANY OTHER
APPLIANCE.
SHIPPING DAMAGE CLAIM PROCEDURE
The equipment is inspected & crated carefully by skilled personnel before leaving factory. The transportation company
assumes full responsibility for safe delivery upon acceptance of this equipment. If shipment arrives damaged:
1. Visible loss or damage: Note on freight bill or express delivery and have signed by person making delivery.
2. File claim for damages immediately: Regardless of extent of damages.
3. Concealed loss or damage: If damage is noticed after unpacking, notify transportation company immediately and file
“Concealed Damage” claim with them. This should be done within fifteen (15) days from date delivery is made to
you. Retain container for inspection.
1128 Sherborn Street ▪ Corona, CA 92879-2089 ▪ (951) 281-1830 ▪ FAX (951) 281-1879
IMPORTANT
OWNERS MANUAL
®
ELECTRIC RESTERANT RANGES
PLEASE RETAIN THIS MANUAL FOR FUTURE REFERENCE
Electrical wiring from the electric meter, main control box or service outlet to appliance must be
electrically grounded in accordance with local codes, or in the absence of local codes, with the National Electrical
Code ANSI/NFPA 70-(latest edition). Canada, conform with Canadian Electrical Code CSA-C22.2.
IMPORTANT
Installing, Operating and Service Personnel:
Installation of the equipment should be performed by qualified, certified, licensed and/or authorized
personnel who are familiar with and experienced in state/local installation codes. Operation of the equipment should
be performed by qualified or authorized personnel who have read this manual and are familiar with the function of
the equipment. Service of the equipment should be performed by qualified personnel who are knowledgeable with
Imperial Ranges.
1
Page 2

RATING PLATE
The rating plate is located in front of the range below the oven section (7” from the floor). Information on
this plate includes the model and serial numbers. When communicating with factory about a unit or requesting
special parts or information, this data is essential for proper identification. The Salamander broiler or Cheesemelter
(if provided) is supplied with its own rating plate located on the unit.
IMPERIAL COOKING APPLIANCES MUST BE CONNECTED
ONLY TO THE TYPE OF GAS IDENTIFIED ON THE RATING PLATE
CLEARANCES
The appliance area must be kept free and clear of all combustibles. This unit is design-certified for the following
installations only:
The clearances from combustible and noncombustible construction for ranges and range mounted Salamander
broiler or Cheesemelter are as follows:
Combustible Noncombustible
Back 4” 0
Sides 10” 0
If legs or casters are not used, the unit must extend 2” beyond the front edge of a noncombustible curb or platform.
LEVELING
A carpenter’s level should be placed on the center across the range top and the unit leveled both front-toback and side-to-side. If it is not level, cakes, casseroles, and any other liquid or semi-liquid batter will not bake
evenly, burner combustion may be erratic and the unit will not function efficiently.
If the floor is relatively smooth and level, the unit may be further leveled with adjustment in the foot of the
leg. Adjust to the high corner and level the unit with metal shims if the adjustment required exceeds the 1 ¼”
adjustment available. Units with casters must be leveled with shims. A unit will probably not return to the same
position after being moved, requiring re-leveling after each move.
AIR SUPPLY & VENTILATION
The area in front of, around, and above the appliance must be kept clear. Adequate clearance must be
maintained at all times in front and at the sides of the appliances for servicing and proper operation.
Means must be provided for any commercial, heavy-duty cooking appliance to exhaust combustion waste
products to the outside of the building. Usual practice is to place the unit under an exhaust hood. Filters and drip
troughs should be part of any industrial hood, but consult local codes before construction and installing a hood.
CONVECTION OVEN – ELECTRICAL CONNECTION
Imperial ranges with CONVECTION OVEN the motor is internally wired. The electrical service in the
building must be in accordance with local codes, or in the absence of local codes, with the National Electrical Code,
ANSI/NFPA 70 or the Canadian Electrical Code, CSA C22.2, as applicable. Wiring diagram is located on the
backside of the unit. FOLLOW LOCKOUT-TAGOUT PROCEDURES.
2
Page 3
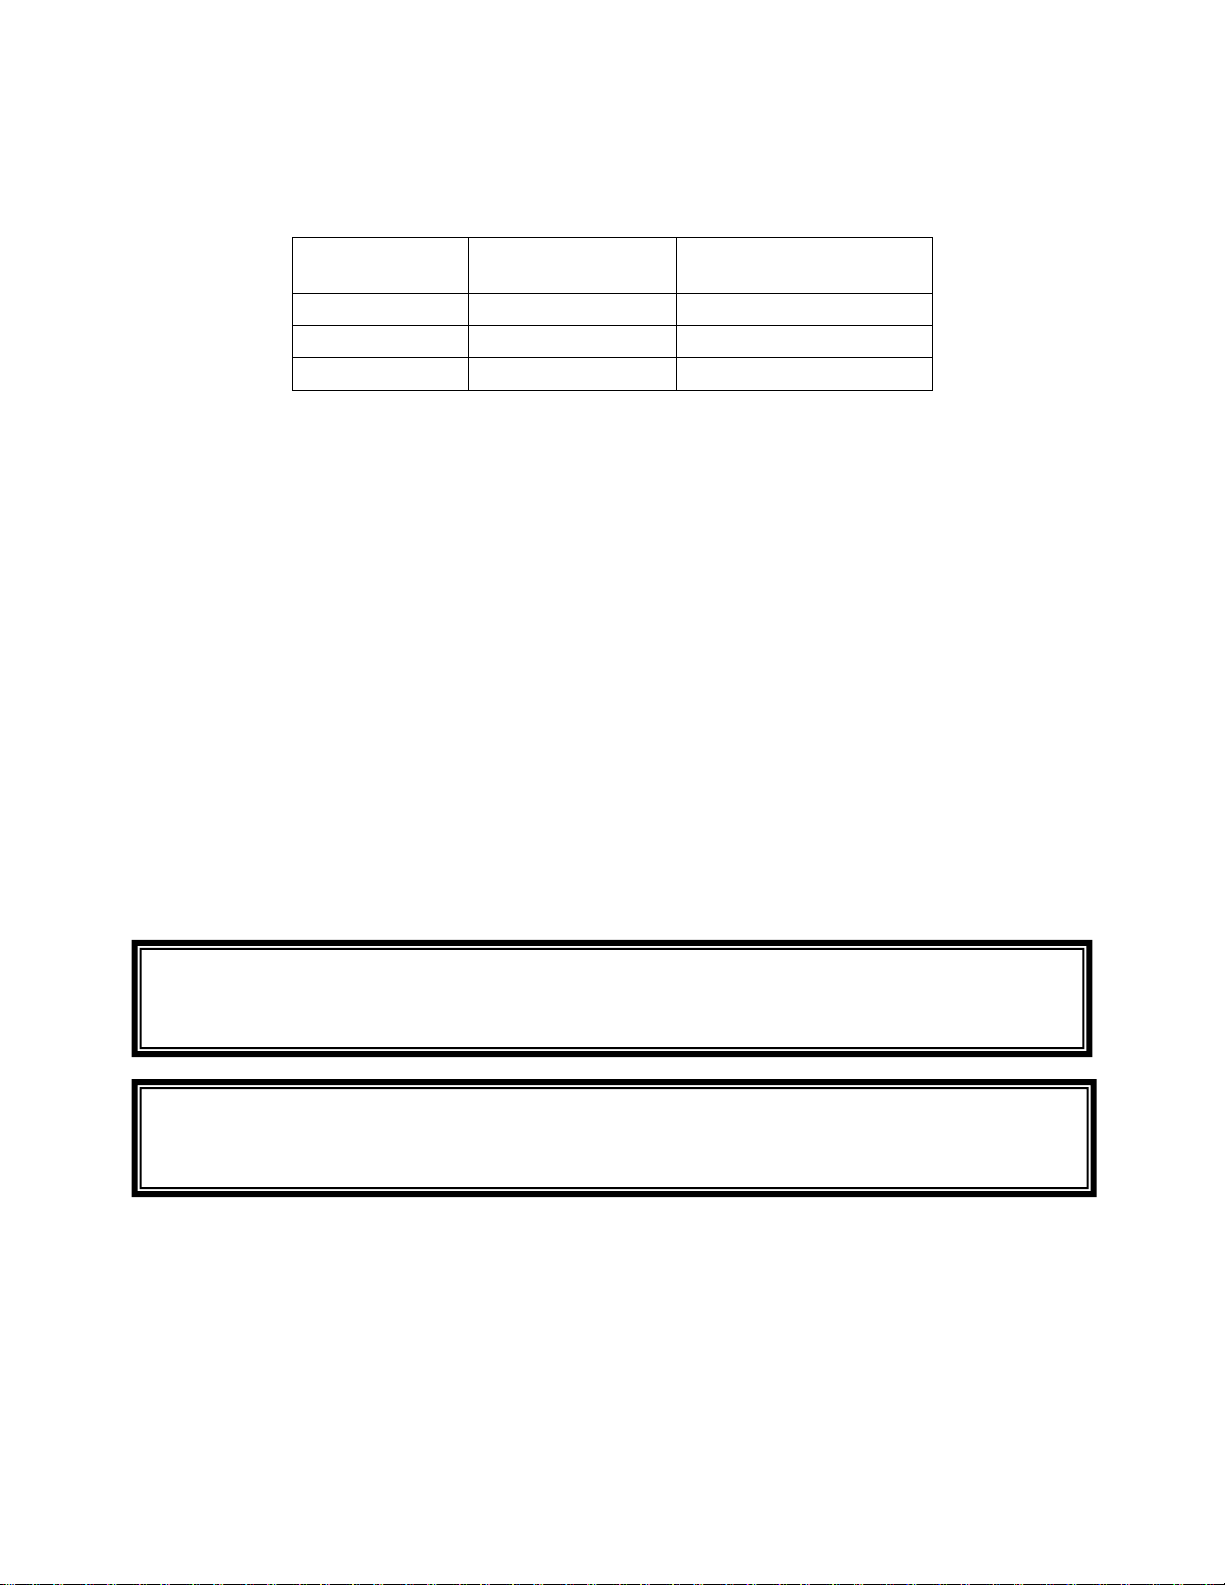
ASSEMBLY
RANGE
SERIES
LEGS TO
INSTALL
CASTERS TO
INSTALL
IR-4-E 4 4
IR-6-E 4 4
IR-10-E 4 4
WARNING
Electrical and grounding connections must comply with the applicable portions of the National Electrical
Code and/or other local electrical codes.
WARNING
Disconnect electrical power supply and place a tag at the disconnect switch to indicate that you are working
on the circuit.
The range is shipped fully assembled, except for the legs, high back and shelf. The range is provided with
6” (152mm) adjustable stainless steel legs (hardware included), packaged in a box located inside the oven. A set of
6” (152mm) casters are available as an optional field installable accessory.
INSTALLATION OF LEGS/CASTERS
1. Carefully lift range to access the bottom for leg or casters installation
2. For leg installation thread leg directly into base insuring leg is tight up against unit base.
3. Align holes in caster mounting plate with pre-drilled holes in bottom of range located in each of the four
corners
4. Attach mounting plate to bottom of range using four ¼” x 5/8” self tapping screw (provided).
NOTE: The locking casters should be mounted on the front.
A permanently connected appliance mounted on casters and intended to be secured to the building structure should
adhere to the flowing:
a. Adequate means must be provided to limit the movement of the appliance without depending on or
transmitting stress to the electrical conduit
b. The appliance shall be installed using a flexible conduit.
If the range is installed on casters and is moved for any reason, it is recommended that the range be re-leveled front
to back and side to side for even baking.
ELECTRICAL CONNECTIONS
Position the range in its final location. Bring conduit containing the proper supply wire to the range through the
knockout located on the J box. Select the size and type of field wire in accordance with the National Electrical code
suitable for carrying the equipment’s rated amps and voltage. Use field wires suitable for 75°C on units carrying
more than 80 amps.
Note: if you have purchased a 60” or 72” model, it will have two (2) electrical connections. The left and the right
portions of the range are supplied with individual branch circuits, the connection points are found in 2 J boxes.
3
Page 4

CAUTION
The 60” & 72” unit has more than one source of electrical supply. Each source MUST be connected in
accordance with the National Electric Code (latest edition) or other local codes.
WARNING
The range and its parts are hot. Be very careful when operating, cleaning or servicing the range.
Connect supply leads to field terminal block and green grounding lead to the labeled ground lug. The
supply wire should be anchored through the access hole with bulkhead fitting. Ranges are shipped wired for 3-phase
or 1-phase service but may be changed in the field. Refer to wiring diagram and schematic decal attached to the
range for necessary alterations.
OPERATION
ELEMENT CONTROLS
Infinite load switches that control and maintain heat to the surface plates. The controls are arranged in
pairs; the left knob controls the front plate and the right knob controls the rear plate. NOTE: On 480 v, units cast
iron plates are controlled by a selector switch allowing settings from high to low.
HOT TOP SWITCH
A thermostat (1-10) controls and maintains heat to the top section. Select desired heat level, (1 is
minimum, 10 is maximum).
GRIDDLE THERMOSTAT
Regulates the amount of heat needed to maintain the set temperature. Each 12” (305 mm) section of the
griddle has its own thermostat with a temperature range of 200°F (93°C) to 550°F (288°C).
OVEN THERMOSTAT
Regulates the amount of heat needed to control and maintain oven temperature around the desired set
temperature. The temperature range is from 200°F (93°C) to 550°F (288°C). Turn dial counterclockwise to
increase temperature and clockwise to decrease temperature.
ELEMENTS
Element plates are most efficient when used with utensils having a maximum inside diameter of 10” (254)
or a minimum inside diameter of 9” (229). Stock pots of 9, 12 and 16 qt. capacities are recommended for bulk
cooking.
NOTE: It is important that the utensil used has a flat bottom that sits uniformly on the surface of the plate. Utensils
with curved bottoms (either through design or warped from use) will have poor contact and therefore poor heat
transfer. This will result in poor cooking performance.
The solid surface plates are rated for 2000 watts and are controlled by an infinite heat switch. A solid
surface plate will reach cooking temperature from room temperature in 5 to 7 minutes at a HI switch setting. Each
control knob is marked HI and LO. The Hi setting is full heat. Use the Hi setting to start cooking quickly and to
bring water to a boil.
4
Page 5

STANDARD VOLTAGES - 208 VOLTS OR 240 VOLTS 50/60 Hz - SINGLE OR THREE PHASE
480 VOLTS 50/60 Hz - THREE PHASE ONLY
3 PHASE
TOTAL TOTAL LOADING NOMINAL AMPS PER LINE WIRE CONN.
MODEL CONN. KW KW PER PHASE 3 PHASE 1 PHASE
NO. KW PER PER CONN. 208 VOLT 240 VOLT 480VOLT 208 240
CONN. L1-L2 L2-L3 L1-L3 L1 L2 L3 L1 L2 L3 L1 L2 L3 VOLT VOLT
IR-G24-XB 6 6 3 0 3 16.6 16.6 16.6 14.5 14.5 14.5 7.2 7.2 7.2 28.8 25
IR-G36-XB 9 9 3 3 3 25 25 25 21.6 21.6 21.6 10.8 10.8 10.8 43.2 37.5
IR-G48-XB 12 12 3 6 3 33.4 33.4 33.4 29 29 29 14.4 14.4 14.4 51.6 50
** IR-G60-XB 15 6 3 0 3 16.6 16.6 16.6 14.5 14.5 14.5 7.2 7.2 7.2 28.8 25
9 3 3 3 25 25 25 21.6 21.6 21.6 10.8 10.8 10.8 43.2 37.5
* IR-G72-XB 18 9 3 3 3 25 25 25 21.6 21.6 21.6 10.8 10.8 10.8 43.2 37.5
9 3 3 3 25 25 25 21.6 21.6 21.6 10.8 10.8 10.8 43.2 37.5
*** STD. OVEN 5.3 5.3 0 0 5.3 14.7 12.7
CON. OVEN 5.3 5.3 0 0 5.3 18.4 17.2
* NOTE: Two separate conduit connections must be made: each connection carries one-half of the rated load.
** NOTE: Two separate conduit connections must be made: each connection carries 6 KW, the other cnnection carries 9 KW.
*** NOTE: Use chart per (1) oven. Add Amp draw to cooktop for total unit Amps.
CAUTION
This griddle plate is steel, but, the surface is relatively soft and can be scored or dented by the carless use
of a spatula or scraper. Be careful not to dent, scratch or gouge the plate surface. Do not try to knock off
loose food that may be on the spatula by tapping the corner edge of the spatula on the griddle surface.
Some DO’s and DON’T’s of surface cooking.
1. Do use utensils to fit the tops (9” to 10” [229 to 254 mm] inside diameter.
2. Do use flat-bottom, straight-sided pots and pans.
3. Do use covers for stock pot work. Water will boil much sooner and much less heat is required for cooking
in a covered container. Less water may be used thereby retaining vitamins and minerals in the food.
4. Do turn off plates a few minutes before cooking is completed to use the heat stored in the plate.
5. Do not allow surface plates to idle unloaded. The surface plates will reach very high temperatures and this
can cause the casting to warp or dome. Plates idled at a setting of MED-LO with a pot of water on them
and turned to HI when loaded will perform bulk cooking jobs just as rapidly, without damage to the plates.
GRIDDLE
Griddles are supplied with an 3000 watt heating element per 12” of griddle surface. Each heating element
is individually controlled by a thermostat with a range of 200°F to 550°F (93°C to 288°C).
The griddle will preheat to 400°F (204°C) in approximately 10 minutes or will come up to 400°F (204°C)
from a 300°F (149°C) setting in 3 minutes. During breakfast, you may set one control at 300°F (149°C) for eggs
and the other at 375°C (191°C) for pancakes, bacon, etc. During lunch, you might use the whole area at 350°F
(177°C) for hamburgers or set one side for hamburgers and the other at 400°F (204°C) for minute steaks and grilled
cheese sandwiches.
Between serving periods, foods that take longer to cook, such as soup or stew, may be simmered in a large
container set on the griddle surface. If no grilled items are to be served, pans of food may be kepts hot on the
griddle at a setting of 200°F to 250°F (93°C to 121°C).
5
Page 6

OVEN
CAUTION
Never cover the oven deck or rack with aluminum foil. The oven will not operate properly and the range
may be damaged.
Preheating
Thoroughly preheat the oven by setting the switch and the thermostat to the desired temperature. For full
loads and delicate baked products, it may be desirable to allow the oven to cycle a second time before loading.
Roasting
Place meat on a rack in an open pan with sides sufficiently high to retain the drippings. For best results,
roast at the low temperatures of 200°F (93°C) to 325°F (163°C) recommended by the Department of Agriculture and
the American Meat Institute. Most meats may be roasted with the infinite heat switch set at HI. If heavy browning
on poultry is not desired, the switch should be set between MED-LO and VERY-LO.
POWER OUTAGE
If a power outage occurs, the range will automatically shut down. When power is restored, the range will
automatically resume normal functions. If the range is left unattended during the power outage, turn all control
knobs/switches OFF. When power is restored, turn desired control knobs/switches back ON. The unit will be
preheated in 5 minutes and normal cooking operations can be resumed.
FINAL PREPARATION
A. TOP SECTION
New units are wiped clean with solvents at the factory to remove any visible signs of dirt, oil, or
grease remaining form thin film or nontoxic rust protectant. Food preparation surface should be washed
thoroughly with hot, soapy water before being used.
B. GRIDDLE
New griddles should be seasoned following this sequence:
(1) Clean the griddle surface thoroughly with hot, soapy water to remove the protective oil coating wiped
on at the factory.
(2) Rinse with a mixture of ¼ cup vinegar to one quart water.
(3) Spread unsalted solid shortening or liquid frying compound evenly over the entire griddle surface.
(4) Turn all thermostats to 350 degrees and wait until the shortening begins to smoke, then turn the
thermostats “off”.
(5) Rub the now-melted shortening into the griddle surface with burlap, moving in the direction of the
surface’s polish marks and covering the entire surface.
(6) Let the griddle cool, then repeat steps 3,4, & 5.
(7) When the griddle is cool after the second seasoning, wipe it once again with a thin film of shortening
or cooking oil.
C. OVENS
On initial installation, turn the oven to 250 degrees and operate for about 1 hour, then reset the thermostat
to its maximum and operate for another hour. This will drive off any solvents remaining in the unit. At the
end of this second hour, turn the thermostat OFF, open the door and allow the unit to cool. Oven should
then be thoroughly washed using hot, soapy water before being used.
CLEANING AND MAINTENANCE
6
Page 7

Any piece of equipment works better and lasts longer when maintained properly. Cooking equipment is no
CAUTION
NEVER USE AMMONIA IN AN OVEN THAT IS WARMER THAN
ROOM TEMPERATURE AND ALWAYS HAVE DIRECT VENTILATION!
WARNING
DISCONNECT ELECTRICAL POWER SUPPLY BEFORE CLEANING
exception. Your Imperial range and oven must be kept clean during the working day and thoroughly cleaned at the
end of the day.
DAILY:
GRIDDLES:
1. Scrape with a nylon griddle scrapper to remove cooked on spills. Use a fine grained stone only when
absolutely necessary.
2. Wipe away any griddle stone dust and food particles with burlap.
3. Wash with hot, soapy water, then rinse with vinegar and water.
4. Rinse again with clear water.
5. Re-oil with shortening or liquid frying compound.
6. DO NOT FLOOD A HOT GRIDDLE WITH COLD WATER! This promotes griddle warping and can
cause the griddle to crack if continued over a long period of time.
ALL OVENS:
1. Remove the baking racks. Wash in hot soapy water and replace after the rest of the oven is cleaned.
2. Remove the oven element cover by lifting it out from the front then sliding forward, out of the oven.
3. Scrape off any food particles with a nylon griddle scraper. Be very careful about scratching the porcelain
finish on the oven liner panels.
4. Wash all the above with hot soapy water, then reassemble.
5. Baked on spills may be loosened and stubborn stains removed with ordinary household ammonia and
scrubbing with a nylon pad in a cold oven only.
6. Do not allow spray type oven cleaners to come into contact with the temperature probe or element in the
oven.
7. After cleaning the oven, rinse well with ¼ cup of vinegar to one quart of clear water solution to neutralize
any caustic residue of the cleaning compound. Wipe dry.
CONVECTION OVEN:
8. To increase the life of the motor follow these instructions:
a. Never run oven with motor off.
b. After you finish cooking and the oven is not to be used for more then ½ hour, place the toggle switch
to the “COOL DOWN” position and open the door. When oven temperature is equal to room
temperature turn unit off.
7
Page 8

PERIODIC CLEANING:
Check the ventilation system periodically to see that nothing has fallen down into the stub back, high riser
or high shelf exhaust vents.
Lubricate the pivot pins of the oven door hinge where the right and left arms connect to the door. Use a
multipurpose lubricating oil sparingly so as to not drip oil needlessly.
Your Imperial range should be checked for safe and efficient operation at least yearly by a qualified service
company.
STAINLESS STEEL:
All stainless steel body parts should be wiped regularly with hot soapy water during the day and with a
liquid cleaner designed for this material at the end of each day. DO NOT USE steel wool. Abrasive cloths, cleansers
or powders to clean stainless surface! If it is necessary to scrape stainless steel to remove encrusted materials, soak
in hot water to loosen the material, then use a wood or nylon scraper. DO NOT USE a metal knife, spatula, or any
other metal tool to scrape stainless steel! Scratches are almost impossible to remove.
TIPS ON USING IMPERIAL CONVECTION OVEN
1. In general, reduce temperature 50° from conventional recipe.
a. Bakery products, reduce temperature 50°. Time 25 to 33% less.
b. Casserole cookery, reduce temperature about 50° and time 25 to 50%
c. Meat roasting, reduce temperature to 275° - 300°. Use meat thermometer. Cooking time may be
reduced up to 50%.
2. Use fan for preheating and baking.
3. Check product at ½ stated time of regular recipe.
4. Level pans bake more evenly: warped pans will give uneven baking results.
8
 Loading...