

Page 1
Bedienungsanleitung
D
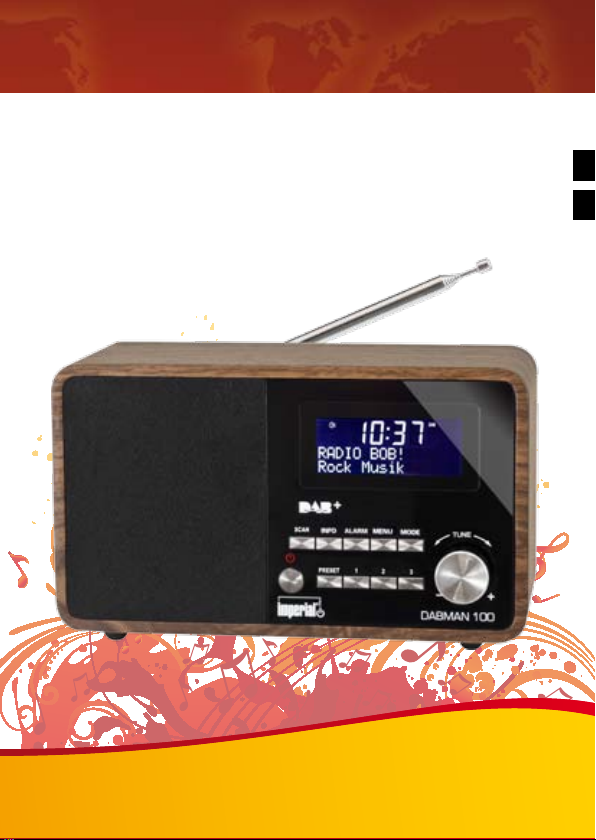
IMPERIAL DABMAN 100
IMPERIAL DABMAN 100
DAB+ & FM Radio
E
Page 2

Inhalt
1. EINLEITUNG ..............3
1. 1. Vorwort ................3
1.2. Service und Support ......4
2. Sicherheitshinweise .......4
2.1. Grundlegende
Sicherheitshinweise...........4
2.2. Erläuterung der
Sicherheitshinweise ......6
3. Lieferumfang .............6
4. Abbildungen und ...........
Beschreibung ...7
4.1. Fernbedienung ...........7
4.2. Front-/Rückansicht
DABMAN 100 ...............8
5. Installation ...............9
5.1. Stromanschluss..........9
5.2. Erstes Einschalten........9
6. Allgemeines .............10
6.1 Betriebsmodi ............10
6.2 Menü ...............10
6.2.1 Manuell Tunen (nur DAB+)
...............11
6.2.2 Sleep ...............11
6.2.3 Equaliser ..............12
6.2.4 Sprache...............12
6.2.5 Reset ...............12
6.2.6 Software . . . . . . . . . . . . . .13
7. DAB ...............13
7.1 Senderwahl .............13
7.2 Info ...............14
7.3 Sendersuche ............14
7.4 Lautstärkeregelung und
Stummschaltung ............15
8. FM ...............15
8.1 automatische Sendersuche.
...............15
8.2 manuelle Sendersuche und
Feintuning ...............16
8.3 Senderspeicher..........16
8.4 Info ...............17
8.5 Lautstärkeregelung und ...
Stummschaltung 17
9. AUX ...............17
10. Weckfunktion ..........18
11. Technische Daten.......19
12. Fehlersuchhilfe .........21
2
Page 3

1. EINLEITUNG
1. 1. Vorwort
Vielen Dank, dass Sie sich für unser DAB+/UKW-Radio IMPERIAL DABMAN 100
entschieden haben. Wenn Sie das Radio zum ersten Mal verwenden, lesen Sie
bitte diese Anweisungen sorgfältig durch, und bewahren Sie diese für zukünftige
Gelegenheiten zum Nachschlagen auf. Wenn Sie die Anweisungen befolgen, können Sie optimal die volle Funktionsvielfalt des Radios genießen.
Diese Bedienungsanleitung hilft Ihnen beim
• bestimmungsgemäßen
• sicheren
• vorteilhaften
Gebrauch des IMPERIAL DABMAN 100. Wir setzen voraus, dass der Bediener
des Radios allgemeine Kenntnisse im Umgang mit Geräten der Unterhaltungselektronik hat.
Jede Person, die dieses Radio
• montiert
• anschließt
• bedient
• reinigt
• entsorgt
muss den vollständigen Inhalt dieser Bedienungsanleitung zur Kenntnis genommen
haben. Bewahren Sie diese Bedienungsanleitung immer in der Nähe des Radios
auf.
DD
3
Page 4

1.2. Service und Support
Sollte ihr Radio nicht richtig funktionieren, muss nicht gleich ein Defekt vorliegen.
Bitte schicken Sie das Gerät nicht gleich ein, rufen Sie uns an!
Technische Hotline für Deutschland: 02676 / 9520101
Gerne können Sie auch eine E-mail an service@telestar.de oder ein Fax an 02676
/ 9520159 senden. Sollten wir das Problem auf diesem Wege nicht lösen können,
senden Sie das Gerät bitte an unser Servicecenter unter folgender Adresse ein:
Für Deutschland: TELESTAR Service Center, Am Weiher 14, 56766 Ulmen
Für Österreich: fsms GmbH, Welser Straße 79, A-4060 Leonding
2. Sicherheitshinweise
Lesen Sie die Sicherheitshinweise sorgfältig durch, bevor Sie das Radio in Betrieb
nehmen. Beachten Sie alle Warnungen und Hinweise auf dem Gerät und in der
Bedienungsanleitung.
2.1. Grundlegende Sicherheitshinweise
• Trennen Sie bei Betriebsstörungen das Radio von der Stromquelle.
• Um Feuergefahr und die Gefahr eines elektrischen Schlags zu vermeiden, setzen
Sie das Radio weder Regen noch sonstiger Feuchtigkeit aus.
• Önen Sie niemals das Gehäuse. Andernfalls besteht die Gefahr eines elektri-
schen Stromschlags.
• Schließen Sie das Radio nur an eine fachgerecht installierte Netz-Steckdose von
220– 240 V~, 50–60 Hz an.
• Ziehen Sie das externe Netzteil aus der Steckdose, falls Sie das Gerät über einen
längeren Zeitraum nicht benutzen. Ziehen Sie nur am Netzteil, nicht am Kabel.
• Ziehen Sie bei Gewitter das Netzteil des Radios aus der Steckdose.
• Sollten Fremdkörper oder Flüssigkeit in das Radio gelangen, ziehen Sie sofort
das Netzteil aus der Steckdose. Lassen Sie das Gerät von qualiziertem Fachper-
sonal überprüfen, bevor Sie es wieder in Betrieb nehmen. Andernfalls besteht
die Gefahr eines elektrischen Stromschlags.
4
Page 5

• Beachten Sie bitte, dass die Stromquelle (Steckdose) leicht zugänglich ist.
• Knicken oder quetschen Sie keine Kabelverbindungen.
• Wenn das Netzkabel beschädigt ist, müssen Sie das Radio von Fachpersonal
reparieren lassen bevor Sie es erneut verwenden. Es besteht sonst die Gefahr
eines Stromschlags.
• Lassen Sie Kinder niemals unbeaufsichtigt das Radio benutzen.
• Überlassen Sie Wartungsarbeiten stets qualiziertem Fachpersonal. Andernfalls
gefährden Sie sich und andere.
• Trennen Sie bei Betriebsstörungen das Radio von der Stromquelle.
• Bezug von Ersatzteilen nur beim Hersteller.
• Änderungen am Gerät führen zum Erlöschen der Verantwortung des Herstel-
lers.
• Schutzfolien entfernen.
Achtung!
Hinweis zur Netztrennung. Außerdem nimmt das Gerät im Standby-Betrieb
Strom auf. Um das Gerät vollständig vom Netz zu trennen, muss das Netzteil
aus der Steckdose gezogen werden.
Richtiger Standort
• Stellen Sie das Radio auf eine feste, ebene Unterlage.
• Vermeiden Sie die Nähe von: Wärmequellen, wie z.B. Heizkörpern, oenem Feu-
er, wie z.B. Kerzen, Geräten mit starken Magnetfeldern, wie z. B. Lautsprechern.
• Stellen Sie keine Gefäße mit Flüssigkeit (zum Beispiel Vasen) auf das Radio.
• Vermeiden Sie direkte Sonneneinstrahlungen und Orte mit außergewöhnlich viel
Staub.
• Decken Sie niemals die Lüftungsschlitze ab. Sorgen Sie für ausreichende Belüf-
tung des Radios.
• Stellen Sie keine schweren Gegenstände auf das Radio.
• Wenn Sie das Radio von einer kalten in eine warme Umgebung bringen, kann
sich im Inneren des Radios Feuchtigkeit niederschlagen. Warten Sie in diesem
Fall etwa eine Stunde, bevor Sie ihn in Betrieb nehmen.
• Verlegen Sie das Netzkabel so, dass niemand darauf treten oder darüber stol-
pern kann.
DD
5
Page 6

Der richtige Umgang mit Batterien
• Batterien können Giftstoe enthalten. Achten Sie darauf, dass Batterien nicht in
die Hände von Kindern gelangen. Kinder könnten Batterien in den Mund nehmen
und verschlucken. Sollte eine Batterie verschluckt werden, nehmen Sie bitte sofort ärztliche Hilfe in Anspruch.
• Auslaufende Batterien können Beschädigungen an der Fernbedienung verursa-
chen. Wenn das Radio längere Zeit nicht benutzt wird, nehmen Sie die Batterien
raus.
• Batterien können Giftstoe enthalten. Entsorgen Sie die Batterien deshalb unbe-
dingt entsprechend der geltenden gesetzlichen Bestimmungen/umweltgerecht.
Werfen Sie die Batterien niemals in den normalen Hausmüll.
• Setzen Sie die Batterien nie oenem Feuer oder starker Hitze aus, da sonst
Explosionsgefahr besteht.
• Ersetzen Sie die Batterien immer durch denselben Typ.
2.2. Erläuterung der Sicherheitshinweise
In der Bedienungsanleitung nden Sie folgende Kategorien von Sicherheitshinweisen:
Gefahr!
Hinweise mit dem Wort GEFAHR warnen vor möglichen Personenschäden.
Achtung!
Hinweise mit dem Wort ACHTUNG warnen vor möglichen Sach- oder Umweltschäden. Diese Hinweise enthalten besondere Angaben zum wirtschaftlichen Gebrauch
des Empfängers.
3. Lieferumfang
Im Lieferumfang dieses Produktes sind folgende Gegenstände enthalten:
- IMPERIAL DABMAN 100
- Externes Netzteil
- Fernbedienung inkl. Batterien
- Bedienungsanleitung
- Garantiekarte
6
Page 7
4. Abbildungen und Beschreibung
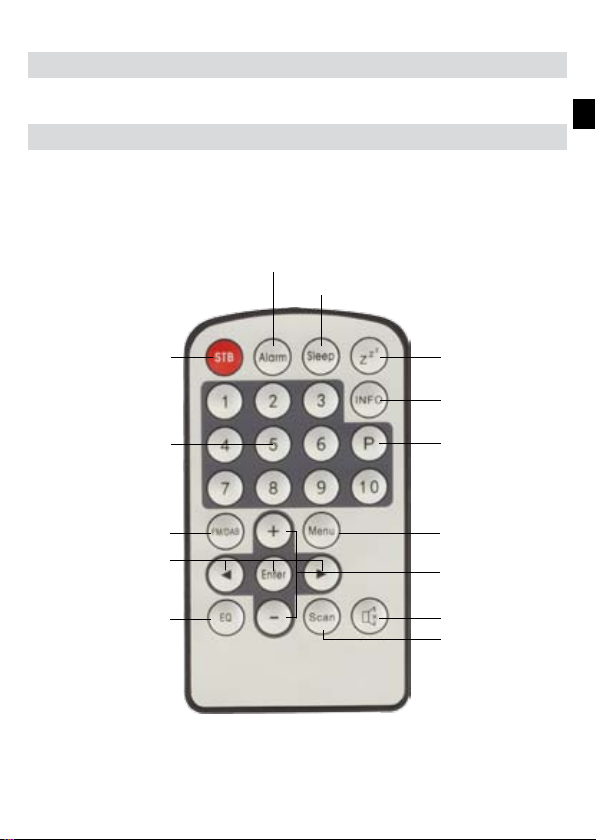
4.1. Fernbedienung
Weck-Assistent
Sleeptimer
DD
Standby-Taste
(Ein-/Ausschalten)
Zierntasten
Navigation (links/
rechts/Enter)
Zurück-Taste
Schlummer-Taste
(Wecker)
Infotaste
Preset-Menü
MenütasteModustaste
Lautstärke auf/ab
Stumm-Taste
Scan-Taste
7
Page 8

4.2. Front-/Rückansicht DABMAN 100
LCD Display
Teleskopantenne
(max. 70cm)
Preset 3
Power-Taste
Preset 2
Preset 1
Presetmenü
Anschluss für Netzteil
AUX In für externe
Audioquellen
USB Ladeanschluss
Scantaste
Infotaste
Alarmmenü
Menütaste
Modustaste
Lautstärke/
Entertaste
8
Page 9

5. Installation
Bitte entnehmen Sie die Teile vorsichtig der Verpackung. Prüfen Sie, ob alle Teile
vorhanden sind. Ziehen Sie nun den Plastiksicherungsstreifen an der Unterseite
der Fernbedienung vorsichtig aus dem Batteriefach, sodass die Stromversorgung
der Fernbedienung hergestellt ist.
Hinweis: Das Radio kann sowohl über die Gerätetasten als auch die Fernbedienung gesteuert werden. Die Steuerung über die Fernbedienung ist die komfortablere und einfachere Art, den DABMAN 100 zu bedienen. In dieser Bedienungsanleitung wird aus diesem Grund hauptsächlich das Einrichten und die
Bedienung des Radios mittels der im Lieferumfang enthaltenen Fernbedienung
erläutert.
5.1. Stromanschluss
Verbinden Sie zunächst das im Lieferumfang enthaltene Netzteil mit der entspre-
chenden Buchse auf der Rückseite des DABMAN 100 (siehe Abb. Rückseite in
Kapitel 4.2.). Nun stecken Sie das Netzteil in eine 220V Steckdose. Anschließend
ziehen Sie die Teleskopantenne auf der Radiorückseite auf volle Länge aus, dies
gewährleistet den bestmöglichen Empfang. Das Display des Radios blinkt nun, im
unteren Bereich steht der Hinweis "Time is not set" (Uhrzeit ist nicht eingestellt).
5.2. Erstes Einschalten
Betätigen Sie die rote Standby-Taste auf der Fernbedienung. Das Radio startet im
DAB+ Modus und schaltet sich automatisch auf die via DAB+ übermittelte Uhrzeit.
Gleichzeitig führt das Radio einen automatischen Sendersuchlauf aus. Sobald dieser abgeschlossen ist und der DABMAN 100 DAB+ Sender empfängt, beginnt das
Radio mit der Wiedergabe des zuerst gefundenen DAB+ Senders.
Das Radio ist nun betriebsbereit. Um den DABMAN 100 gemäß Ihren Gewohnhei-
ten anzupassen, können Sie das Radio über das Menü kongurieren.
Hinweis: sollten das Radio beim automatischen Sendersuchlauf keine Programme gefunden haben, wählen Sie bitte durch Drücken der Modus-Taste die
Betriebsart "FM" aus. Nun sind Sie im UKW Radiomodus. Durch Drücken der
Scan-Taste suchen Sie den Frequenzbereich (87,5 - 108 MHz) nach
Radiosendern ab.
9
DD
Page 10

6. Allgemeines
6.1 Betriebsmodi
Beim DABMAN 100 stehen verschiedene Betriebsmodi zur Verfügung, die wiederrum unterschiedliche Funktionen unterstützen. Über die Modus-Taste kann
zwischen folgenden Betriebsmodi ausgewählt werden:
• DAB (Digitalradio, Kapitel 7)
• FM (UKW-Radio, Kapitel 8)
• AUX (Wiedergabe von extern angeschlossenen Geräten, Kapitel 9)
6.2 Menü
In allen Betriebsmodi steht das Hauptmenü zur Verfügung. Um dieses aufzurufen,
gehen Sie wie folgt vor:
• Drücken Sie die Menü-Taste auf der Fernbedienung.
Das Menü gliedert sich in folgende Unterpunkte:
• Manuell Tunen (manuelles Einstellen des Empfangs, nur im DAB+ Modus)
• Sleep (Einstellungen Sleeptimer)
• Equaliser (Toneinstellungen)
• Sprache
• Reset (Werkseinstellungen)
• SW-Version
Die Navigation durch das Hauptmenü und der jeweiligen Untermenüs erfolgt über
die Menü-Taste, die ◄► Tasten und die Enter-Taste. Im folgenden werden die
Unterpunkte genauer erläutert.
10
Page 11

6.2.1 Manuell Tunen (nur DAB+)
In diesem Menüpunkt lassen sich im DAB+ Modus die Empfangsfrequenzen
individuell einstellen. Hierzu gehen Sie wie folgt vor:
• Schalten Sie zunächst den DABMAN 100 auf den DAB+ Modus.
• Wählen Sie nun über die Zifferntasten oder die ◄► Tasten den Sender aus,
den Sie manuell einstellen möchten.
• Drücken Sie die Menü-Taste auf der Fernbedienung.
• Navigieren Sie mit Hilfe der ◄► Tasten zum Punkt "Manuell Tunen".
• Drücken Sie zur Bestätigung die Enter-Taste.
6.2.2 Sleep
Über den Sleeptimer können Sie eine Zeit einstellen, nach der das Radio automatisch abschaltet. Zur Auswahl stehen die Optionen "aus" (keine automatische Abschaltung), 15 Minuten, 30 Minuten, 45 Minuten, 60 Minuten und 90 Minuten.
Zum Einstellen des Sleeptimers gehen Sie wie folgt vor:
• Drücken Sie die Menü-Taste auf der Fernbedienung.
• Navigieren Sie mit Hilfe der ◄► Tasten zum Punkt "Sleep".
• Drücken Sie zur Bestätigung die Enter-Taste.
• Wählen Sie mit Hilfe der ◄► Tasten die gewünschte Option und bestätigen
Sie die Auswahl mit der Enter-Taste.
Alternativ:
• Betätigen Sie die Sleep-Taste auf der Fernbedienung.
• Wählen Sie mit Hilfe der ◄► Tasten die gewünschte Option und bestätigen
Sie die Auswahl mit der Enter-Taste.
Der Sleeptimer ist nun eingestellt, im Display erscheint in der oberen linken Ecke
neben der Uhrzeit das Sleeptimer-Symbol ("Uhrsymbol"). Das Radio schaltet nun
automatisch nach dem eingestellten Zeitraum ab.
DD
11
Page 12

6.2.3 Equaliser
Über den Equaliser lässt sich der Klang des DABMAN 100 individuell anpassen.
Hier können Sie aus vordenierten Klangprolen wählen. Zum Aufrufen des
Equaliser-Menüs gehen Sie wie folgt vor:
• Drücken Sie die Menü-Taste auf der Fernbedienung.
• Navigieren Sie mit Hilfe der ◄► Tasten zum Punkt "Equaliser".
• Drücken Sie zur Bestätigung die Enter-Taste.
• Es stehen folgende Auswahlmöglichkeiten zur Verfügung: Normal, Flat, Pop,
Jazz, Rock, Classic.
• Die Auswahl erfolgt über die ◄► Tasten, die Bestätigung über die Enter-
Taste.
6.2.4 Sprache
Wählen Sie in diesem Punkt die Menüsprache des DABMAN 100 aus. Gehen Sie
hierzu wie folgt vor:
• Drücken Sie die Menü-Taste auf der Fernbedienung.
• Navigieren Sie mit Hilfe der ◄► Tasten zum Punkt "Sprache".
• Drücken Sie zur Bestätigung die Enter-Taste.
• Wählen Sie mit Hilfe der ◄► Tasten die gewünschte Sprache aus. Zur
Verfügung stehen Deutsch, Englisch und Französisch.
• Drücken Sie zur Bestätigung die Enter-Taste. Die Menüsprache wird nun
auf die ausgewählte Sprache geändert.
6.2.5 Reset
In diesem Menüpunkt können Sie den DABMAN 100 in die Werkseinstellungen
zurücksetzen. Dies kann dann notwendig sein, wenn individuelle Änderungen
vorgenommen wurden die zu einer nicht optimalen Funktionsweise des Radios
führen. Gehen Sie hierzu wie folgt vor:
• Drücken Sie die Menü-Taste auf der Fernbedienung.
• Navigieren Sie mit Hilfe der ◄► Tasten zum Punkt "Reset".
12
Page 13

• Drücken Sie zur Bestätigung die Enter-Taste.
• Betätigen Sie erneut die Enter-Taste, wenn Sie einen Werksreset durchfüh-
ren möchten.
• Nachdem der Reset durchgeführt wurde, erscheint im Display der Hinweis
"Werkseinstellungen OK", das Radio startet automatisch im DAB+ Modus
neu und beginnt mit einem Sendersuchlauf.
Hinweis: wenn Sie einen Reset durchführen, gehen alle individuell gespeicherten Daten (DAB+ und UKW Favoritenlisten, Weckzeiten) verloren und müssen
neu eingestellt werden.
6.2.6 Software
In diesem Menüpunkt können Sie sich die aktuelle Software-Version Ihres
DABMAN 100 anzeigen lassen. Hierzu gehen Sie wie folgt vor:
• Drücken Sie die Menü-Taste auf der Fernbedienung.
• Navigieren Sie mit Hilfe der ◄► Tasten zum Punkt "Software". Im Display
wird Ihnen nun der aktuelle Softwarestand (z.B. V. 1.03) angezeigt.
7. DAB
Im DAB Modus empfangen Sie Radiosender, die über den DAB+ Digitalradiostan-
dard ausgestrahlt werden. Zum Einstellen des DAB Modus gehen Sie wie folgt vor:
• Drücken Sie im Betrieb die Modus-Taste auf der Fernbedienung ggf. mehr-
mals, bis im Display unter der Uhrzeit die Einblendung "DAB" erscheint.
Die DAB+ Wiedergabe startet mit dem zuletzt gehörten Sender bzw. beim ersten
Einschalten mit dem zuerst gefundenen Sender aus der Bouquetliste.
DD
7.1 Senderwahl
• Navigieren Sie im DAB Modus mit Hilfe der ◄► Tasten durch die emp-
fangbaren DAB+ Sender.
• Zum Senderwechsel betätigen Sie die Enter-Taste.
Oder
13
Page 14

• Das Radio verfügt über einen Favoritenpeicher für 10 Radiosender. zum
Abspeichern eines Senders schalten Sie wie oben beschrieben auf den zu
speichernden Sender.
• Nun drücken und halten Sie die Zifferntaste (1 - 10, siehe Abb. 4.1), auf der
Sie den Sender speichern möchten, ca. 2 Sekunden gedrückt. Im Display er-
scheint die Meldung, dass der Sender unter dem gewählten Favoritenplatz
gespeichert wurde.
• Sind Sender im Favoritenspeicher hinterlegt, rufen Sie diese durch Drücken
der gewünschten Zifferntaste auf.
Oder
• Betätigen Sie im DAB Modus die Preset-Taste (siehe Abb. 4.2) zum Aufru-
fen der Favoritenliste.
• Navigieren Sie mit Hilfe der ◄► Tasten durch die Favoritenliste, mit der
Enter-Taste (Lautstärkeregler) bestätigen Sie Ihre Auswahl.
7.2 Info
Im DAB Modus können Sie Hintergrundinformationen zum empfangenen Pro-
gramm abrufen (z.B. Titelname, Interpret), aber auch weitere Informationen (z.B.
Signalstärke, Übertragungsqualität etc.) aufrufen, die dann im Display angezeigt
werden.
• Drücken Sie hierzu im Betrieb die Info-Taste am Gerät oder auf der Fern-
bedienung (siehe Abb. 4.1, 4.2) ggf. mehrmals, um sich die gewünschten In-
formationen auf dem Display anzeigen zu lassen. Die Informationen werden
als Laufschriftanzeige in der unteren Displayzeile (unter dem Sendernamen)
dargestellt.
7.3 Sendersuche
• Betätigen Sie im DAB Modus die Scan-Taste am Gerät oder auf der Fern-
bedienung (siehe Abb. 4.1, 4.2), führt der DABMAN 100 einen neuen Sen-
dersuchlauf durch. Dies kann dann notwendig sein, wenn Sie den Standort
des Radios verändern bzw. neue DAB+ Sender empfangen werden können.
Der Sendersuchlauf beginnt, im Display erscheint eine Fortschrittsanzeige. Sobald der Suchlauf abgeschlossen wurde, beginnt das Radio mit der
Wiedergabe des zuletzt eingestellten Senders. Der Favoritenspeicher wird
14
Page 15

durch den Sendersuchlauf nicht beeinträchtigt.
7.4 Lautstärkeregelung und Stummschaltung
• Mit Hilfe der +/- Tasten (siehe Abb. 4.1) bzw. dem Lautstärkeregler (siehe
Abb. 4.2) regeln Sie die Lautstärke der Wiedergabe (mit + erhöhen Sie die
Lautstärke, mit - verringern Sie die Lautstärke). Regeln Sie die Lautstärke,
erscheint im Display eine Lautstärkepegelanzeige.
• Über die Stumm-Taste (siehe Abb. 4.1) können Sie den Lautsprecher des
Radios aus- und durch erneutes Drücken wieder einschalten. Im Display
erscheint die Meldung "Stumm".
8. FM
Im FM Modus empfangen Sie mit dem IMPERIAL DABMAN 100 analoge UKW
Radiosignale des FM Bandes (zwischen 87,5 und 108 MHz) sowie RDS Signale,
sofern diese gesendet werden. Um einen bestmöglichen Empfang zu gewährleisten, ziehen Sie die Teleskopantenne auf maximale Länge aus, bevor Sie das Radio
einschalten.
• Drücken Sie im Betrieb die Modus-Taste auf der Fernbedienung ggf. mehr-
mals, bis im Display unter der Uhrzeit die Einblendung "UKW Radio" erscheint.
Die Wiedergabe startet mit dem zuletzt gehörten Sender. Schalten Sie zum ers-
ten Mal in den FM Modus, hören Sie ein Rauschen und im Display wird die empfangene Frequenz (87,5 MHz) angezeigt. Damit Sie entsprechende Radiosender
empfangen können, führen Sie bitte zunächst einen Suchlauf durch.
8.1 automatische Sendersuche
DD
Zum Durchführen einer Sendersuche gehen Sie wie folgt vor:
• Betätigen Sie im FM Modus die Scan-Taste (siehe Abb. 4.1). Der FM-Such-
lauf beginnt bei der niedrigsten FM-Frequenz (87,5 MHz) und läuft vorwärts.
Die Suche stoppt automatisch beim ersten FM-Sender der empfangen wird.
• Drücken Sie die Scan-Taste erneut, um den Suchlauf fortzusetzen. Verfah-
ren Sie nach diesem Prinzip, bis Sie den gewünschten FM-Sender empfangen.
15
Page 16

8.2 manuelle Sendersuche und Feintuning
Sie können auch manuell nach Sendern suchen. Hierzu gehen Sie wie folgt vor:
• Durchsuchen Sie im FM-Modus den Frequenzbereich durch Drücken der ◄►
Tasten nach Sendern. Mit der ◄ Taste durchsuchen Sie den Empfangsbe-
reich nach unten, mit der ► Taste durchsuchen Sie den Empfangsbereich
nach oben.
• Halten Sie hierzu die ◄ Taste bzw. die ► Taste gedrückt, der Suchlauf
beginnt und endet, sobald ein Radiosender empfangen wird.
• Durch kurzes Drücken der◄► Tasten können Sie zusätzlich eine Feinjustie-
rung der empfangenen Sender durchführen. Drücken Sie die jeweilige Taste,
um in Schritten von 0,05 MHz nach oben (►) oder unten (◄) zu justieren.
8.3 Senderspeicher
Im FM Modus verfügt der IMPERIAL DABMAN 100 über einen Favoritenpeicher
für 10 Radiosender. Zum Abspeichern eines Senders führen Sie zunächst, wie
unter 8.1 bzw. 8.2 beschrieben, einen Sendersuchlauf durch.
• Nun drücken und halten Sie die Zifferntaste (1 - 10, siehe Abb. 4.1), auf der
Sie den Sender speichern möchten, ca. 2 Sekunden gedrückt. Im Display er-
scheint die Meldung, dass der Sender unter dem gewählten Favoritenplatz
gespeichert wurde.
• Sind Sender im Favoritenspeicher hinterlegt, rufen Sie diese durch Drücken
der gewünschten Zifferntaste auf.
Oder
• Betätigen Sie im FM Modus die Preset-Taste (siehe Abb. 4.2) zum Aufrufen
der Favoritenliste.
• Navigieren Sie mit Hilfe der ◄► Tasten durch die Favoritenliste, mit der
Enter-Taste bestätigen Sie Ihre Auswahl.
16
Page 17

8.4 Info
• Im FM Modus können Sie Hintergrundinformationen zum empfangenen Pro-
gramm abrufen (z.B. Titelname, Interpret), aber auch weitere Informationen
(z.B. Signalstärke, Übertragungsqualität etc.) aufrufen, die dann im Display
angezeigt werden.
• Drücken Sie hierzu im Betrieb die Info-Taste (siehe Abb. 4.1) ggf. mehrmals,
um sich die gewünschten Informationen auf dem Display anzeigen zu lassen.
Die Informationen werden als Laufschriftanzeige in der unteren Displayzeile
(unter dem Sendernamen) dargestellt.
8.5 Lautstärkeregelung und Stummschaltung
• Mit Hilfe der +/- Tasten (siehe Abb. 4.1) regeln Sie die Lautstärke der
Wiedergabe (mit + erhöhen Sie die Lautstärke, mit - verringern Sie die
Lautstärke). Regeln Sie die Lautstärke, erscheint im Display eine Lautstärke-
pegelanzeige.
• Über die Stumm-Taste (siehe Abb. 4.1) können Sie den Lautsprecher des
Radios aus- und durch erneutes Drücken wieder einschalten. Im Display
erscheint die Meldung "Lautstärke stumm".
9. AUX
Sofern Sie ein externes Gerät (z.B. MP3 Player) per Kabel über den AUX In Eingang mit dem DABMAN 100 verbinden, kann dieser optional zur Wiedergabe von
Audiodaten genutzt werden. Hierzu gehen Sie wie folgt vor:
• Schließen Sie mit Hilfe eines passenden Kabels (3.5mm Klinke, separat
erhältlich, kann von Gerät zu Gerät variieren) ein externes Gerät an den
DABMAN 100 (AUX In) an und schalten Sie dieses Gerät ein.
• Drücken Sie im Betrieb die Modus-Taste auf der Fernbedienung ggf. mehr-
mals, bis im Display unter der Uhrzeit die Einblendung "AUX" erscheint.
DD
17
Page 18

• Nun können Sie Musik vom externen Gerät wiedergeben. Die Steuerung (Titel
vor, zurück, Stop, Play) erfolgt hierbei über das extern angeschlossene Gerät,
die Wiedergabe-Lautstärke kann über die +/- Tasten (siehe Abb. 4.1) bzw.
den Lautstärkeregler (siehe Abb. 4.2) des DABMAN 100 oder über das
externe Gerät geregelt werden.
10. Weckfunktion
Der DABMAN 100 verfügt über eine Weckfunktion, die bequem über die Fernbedienung gesteuert werden kann. Diese Option steht nur zur Verfügung, sofern die
Uhrzeit korrekt eingelesen wurde. Hierzu sollte der DABMAN 100 zumindest einmal im DAB+ Modus gelaufen sein, das Einlesen der Uhrzeit erfolgt automatisch.
Gehen Sie zum Einstellen des Weckers wie folgt vor:
• Es stehen 2 unabhängig voneinander schaltbare Wecker zur Verfügung. Drü-
cken Sie im Betrieb die Alarm-Taste auf der Fernbedienung oder am Gerät
1x bzw 2x. Sie gelangen in das jeweilige Weckmenü (Alarm 1, Alarm 2).
• Aktivieren Sie mit Hilfe der ◄► Tasten den Alarm (Einstellung "Ein"), mit der
Enter-Taste bestätigen Sie Ihre Auswahl.
• Legen Sie nun mit Hilfe der ◄► Tasten die Weckzeit fest, stellen Sie zunächst
die Stunden ein, drücken Sie die Enter-Taste und legen Sie nun die Minuten
fest, mit der Enter-Taste bestätigen Sie Ihre Auswahl.
• Im nächsten Schritt können Sie das Wecksignal festlegen (zur Verfügung ste-
hen: DAB (hier werden Sie mit dem zuletzt eingestellten DAB+ Radiosender
geweckt), FM (hier werden Sie mit dem zuletzt eingestellten UKW Radiosender geweckt), Summer 1, Summer 2. Treffen Sie Ihre Auswahl mit Hilfe der
◄► Tasten und bestätigen Sie mit der Enter-Taste.
• Abschließend können Sie noch die Wecklautstärke festlegen, hierzu wählen
Sie mit mit Hilfe der ◄► Tasten die gewünschte Lautstärke und bestätigen
Sie mit der Enter-Taste. Der Wecker ist nun eingestellt (links im Display ne-
ben der Uhrzeit erscheint ein Weckersymbol), Sie kehren in den ausgewählten Betriebsmodus zurück.
• Wird der Wecker aktiviert, können Sie über die Snooze-Taste (siehe Abb.
4.1) die Schlummerfunktion aktivieren.
18
Page 19

11. Technische Daten
FM (UKW)
Empfangsbereich 87,5 MHz - 108 MHz
Sensitivität maximal -106 dBm
DAB+
Empfangsbereich DAB Band III:
174,928 MHz - 239,200 MHz
Sensitivität maximal -97 dBm
Fernbdienung
Reichweite 5m bei 30°
LCD Display
Typ 4-zeilig, weißer Text auf schwarzem
Hintergrund
Diagonale 7 cm (2,75'')
Auflösung 128 x 48
Betrachtungswinkel +/- 30°
Lautsprecher
Durchmesser/Impedanz 3'' (7,62cm) / 4Ω
Frequenzbereich 120 Hz - 15 KHz -10dB
Leistung 5W
Stromversorgung /-verbrauch
Netzteil (extern) AC IN: 100V- 240V
DC OUT: 10V, 2 A
DD
19
Page 20

11. Technische Daten
Stromverbrauch 0,7W (Standby); 4W (Betrieb)
Maße und Gewicht
Maße (inkl. Bedienelement, Antenne
und Füßen)
Gewicht ca. 1.3kg
BxHxT:
225mm x 132mm x 120mm
20
Page 21

12. Fehlersuchhilfe
Problem mögl. Ursache Lösungsvorschlag
Keine Displayanzeige,
Radio reagiert nicht auf
Bedienung
Bedienung über Fernbedienung ist nicht möglich
DAB+ Empfang gestört Keine Sender vorhanden Führen Sie einen Such-
UKW Empfang gestört Antenne nicht vollstän-
Stromverbindung ist
nicht hergestellt
Sicherungsstreifen
bendet sich noch im
Batteriefach
Batterie der Fernbedienung ist leer
Antenne nicht vollständig ausgezogen
Schlechter Standort Verändern Sie den
dig ausgezogen
Stellen Sie die Stromverbindung über das im
Lieferumfang enthaltene
Netzteil her
Ziehen Sie den Plastiksicherungsstreifen
vorsichtig aus dem
Batteriefach
Ersetzen Sie die Batterie
der Fernbedienung (3V
Knopfzelle); bitte beach-
ten Sie beim Einlegen
das der Plus-Pol der
Batterierichtung Rückseite der Fernbedienung
zeigt)
lauf durch (siehe Kapitel
7.3)
Ziehen Sie die FM-
Antenne auf die volle
Länge aus
Standort des Radios
(ggf. näher ans Fenster),
führen Sie erneut einen
Suchlauf durch
Ziehen Sie die FM-Antenne auf die volle Länge
aus
DD
21
Page 22

12. Fehlersuchhilfe
Problem mögl. Ursache Lösungsvorschlag
AUX Wiedergabe funktioniert nicht
Wecker funktioniert
nicht richtig
Sender nicht sauber
eingestellt
Standort ungünstig Wechseln Sie den
DABMAN 100 ist im
falschen Modus
Kabelverbindung fehlerhaft
Wiedergabelautstärke
zu gering eingestellt
Uhrzeit nicht eingelesen Siehe Kapitel 10
Justieren Sie die Fre-
quenz manuell nach (siehe Kapitel 8.1.2)
Standort des Radios
Wechseln Sie zum
Modus "AUX" (siehe
Kapitel 9)
Überprüfen Sie die Ka-
belverbindung zwischen
DABMAN 100 und
externem Gerät
Erhöhen Sie die Lautstärke am DABMAN
100 und am externen
Gerät
22
Page 23

Ihr Gerät trägt das CE-Zeichen und erfüllt alle erforderlichen
EU-Normen.
Hiermit erklärt die TELESTAR DIGITAL GmbH, dass sich das Gerät
IMPERIAL DABMAN 100 in Übereinstimmung mit den grundlegenden
Anforderungen und den übrigen einschlägigen Bestimmungen
der Niedrigspannungsrichtlinie 2006/95/EG, der EMV Richtlinie
2004/108/EG, der RoHS Richtlinie 2011/65/EG, sowie der
ErP Richtlinie 1275/2008/EG befindet.
Die Konformitätserklärung für dieses Produkt erhalten Sie auf:
www.digitalbox.de/de_DE/Konformitaetserklaerung/490-
529/?productID=10610
oder
www.telestar.de/de_DE/Konformitaetserklaerung/352-
529/?productID=10610
Änderungen und Druckfehler vorbehalten. Stand 10/15
Abschrift und Vervielfältigung nur mit Genehmigung des
Herausgebers.
DD
© 2015
23
Page 24

Operating Manual
IMPERIAL DABMAN 100
24
Page 25

EE
25
Page 26

1. INTRODUCTION..........27
1.1. SERVICE and SUPPORT ..27
2. SAFETY NOTICES ........28
2.1. Basic Safety Instructions 28
2.1. Basic Safety Instructions 29
2.2. Explanation of safety notices
...............30
3. ITEMS SUPPLIED ........30
4. ILLUSTRATIONS AND
DESCRIPTIONS.............31
5. INSTALLATION ..........33
6. OPERATION .............34
6.2.7 Language .............40
7. DAB ...............42
7.1 Operation ...............42
7.1.1 Station selection .......42
7.1.2 Information............43
7.1.3 Scanning for stations...43
7.1.4 Volume control and Mute
setting .........43
7.1.5 Wake-up alarm and Snooze
key ............44
7.2 DAB Menu ..............44
7.2.1 Complete scan ........44
7.2.2 Manual settings .......45
7.2.3 DRC - Dynamic Range ...
Control.........46
7.2.4 Empty memory ........46
8. FM ...............47
9. OPERATION .............48
9.1 Operation ...............48
9.1.1 Automatic station scan 48
9.1.2 Manual station scan and .
fine tuning......48
9.1.3 Station memory........48
9.1.4 Info ...............49
9.1.5 Volume control and Mute
key ............49
9.1.6 Wake-up alarm and Snooze
key ............50
9.2 FM Menu ...............50
9.2.1 Scan settings..........50
9.2.2 Audio settings .........51
9. OPERATION...............51
10. AUX ...............52
11. TECHNICAL DATA ......53
12. TROUBLESHOOTING GUIDE
...............55
13. CE MARKING...........56
26
Page 27

1. INTRODUCTION
Thank you for choosing our DAB+/FM Radio IMPERIAL DABMAN 100. When operating the radio for the rst time, please read this operating manual carefully, and
keep it close to hand for future reference. If you follow the instructions, you will be
able to enjoy the many functions of your radio optimally.
This operating manual will assist you with the correct
safe
optimal
use of the IMPERIAL DABMAN 100.
We assume the user of the radio has general knowledge related to the operation
of consumer electronics products.
Any person
installing
connecting
operating
cleaning
disposing of
this radio must rst have taken notice of the entire contents of this operating manual. Always keep this operating manual close to the radio.
1.1. SERVICE and SUPPORT
Should your radio not work properly, this does not necessarily mean it is defective.
Please do not send in the unit for repairs, rather give us a call rst!
Technical Hotline for Germany: +49-(0)2676 / 9520101
You may also send an E-Mail to service@telestar.de or a fax to +49-(0)2676 /
9520159. Should we not be able to solve the problem in this manner, please send
the product to our service centre at the following address:
For Germany: TELESTAR Service Center, Am Weiher 14, D-56766 Ulmen
For Austria: fsms GmbH, Welser Straße 79, A-4060 Leonding
DD EE
27
Page 28

2. SAFETY NOTICES
Please read the safety notices carefully before operating the radio. Please note all
warnings and instructions both on the product and in the operating manual.
2.1. Basic Safety Instructions
In case of operating problems, disconnect the radio from the power source.
To avoid the risk of re or the danger of an electrical shock, do not expose the radio
to rain or to very humid, wet conditions.
Do not open the housing of the product, otherwise you are at risk of getting an
electrical shock.
Only connect the radio to the mains current via a correctly installed 220– 240 V~,
50–60 Hz mains outlet.
If you will not be using the radio for an extended period, disconnect the external
mains adapter from the mains outlet. Only pull out the adapter, do not pull on the
cable.
In case of an electrical storm, disconnect the mains adapter of the radio from the
mains outlet.
Should liquid or foreign objects fall into the radio, immediately disconnect the mains
adapter from the mains outlet. Have the product checked by qualied personnel
before resuming operation. Otherwise you are in danger of getting an electrical
shock.
Please ensure the electrical outlet (plug) is easily accessible.
Do not squeeze or sharply bend cable connections.
If the mains cable is damaged, you must have the radio repaired by an expert befo-
re using it again. Otherwise you are in danger of getting an electrical shock.
28
Page 29

2.1. Basic Safety Instructions
Never allow children to use the radio without supervision.
Always leave maintenance or repair work to qualied personnel. Ignoring this may
endanger yourself and others.
In case of operating problems, disconnect the radio from the power supply.
Oain spare parts exclusively from the manufacturer.
Changes to the product will result in a termination of liability by the manufacturer.
Remove protective foils/lms.
Note!
Note on disconnecting from mains supply. The product draws power even when in
standby mode. To completely disconnect the product from the mains supply, the
adapter must be disconnected from the mains outlet.
Correct positioning
Place the radio on a rm, even surface.
Avoid placing the radio close to sources of heat, e.g. radiators, open res, e.g. can-
dles, or devices with strong magnetic elds, e.g. loudspeakers.
Do not place any containers with liquids (e.g. vases) on the radio.
Avoid places subject to direct sunshine or with a very high level of dust.
Do not cover the ventilation slots. Ensure adequate circulation of air around the
radio.
Do not place any heavy objects on the radio.
When moving the radio from a cold to a warm environment, humidity may conden-
se inside the radio. In this case you should wait for an hour
before operating the radio again.
Place the mains cable in such a position that nobody will step on it or trip over it.
Correct handling of batteries
Batteries may contain poisonous substances. Ensure batteries are not handled by
children. Children could place the batteries in their mouth and swallow them. If a
battery is swallowed, please consult a doctor immediately.
Leaking batteries may damage the remote control. If the radio is not going to be
DD EE
29
Page 30

used for an extended period, remove the batteries.
Batteries may contain poisonous substances. Batteries must be disposed of in
accordance with current legal regulations and with consideration for the environ-
ment. Do not dispose of batteries in your domestic waste.
Do not expose batteries to open ames or extreme heat, as they may explode.
Always replace batteries by the same type.
2.2. Explanation of safety notices
You will nd the following categories of safety notices in the operating manual:
Danger!
Notes marked with the word DANGER will warn you of possible danger of injury to
persons.
Note!
Instructions with the word NOTE will warn you of possible material or environmen-
tal damage. These notes contain special advice related to the economic operation
of the receiver.
3. ITEMS SUPPLIED
The following items are supplied together with this product:
IMPERIAL DABMAN 100, External mains adapter, Remote control unit with
batteries, Operating manual, Guarantee card
30
Page 31

4. ILLUSTRATIONS AND DESCRIPTIONS
4.1 Remote Control /Side-/Front View
Wake-up assistent
Sleeptimer
Standby-key
(switch on/o)
Numeric keys
Mode key
Navigation (right/
left/ENTER)
Equilizer key
DD EE
Snooze key (Alarm)
Information Key
Preset-Menu
Menu key
Volume up/down
Mute key
Scan-Key
31
Page 32

telescopic antenna
Power-Key
LCD Display
Preset 2
Preset 1
Presetmenu
Preset 3
connection for mains adapter
AUX IN for external
audio devices
USB Charging Connection
Scan key
Info key
Alarm menu
Menu key
Mode key
Volume
32
Page 33

5. INSTALLATION
Please carefully remove the parts from the packaging. Check whether all parts are
present. Now carefully pull the plastic safety strip from the battery compartment
on the underside of the remote control, so that the power supply for the remote
control is established.
Note:
The radio can be controlled both via the keys on the unit and via the remote control.
Using the remote control is the more convenient and easier way of controlling the
DABMAN 100. For this reason, this operating manual focuses mainly on operating
the radio via the remote control supplied.
5.1. Power supply
First, connect the adapter cable supplied with the appropriate socket on the rear
side of the DABMAN 100 (see ill.)
Reverse side in Chapter 4.2.). Now connect the mains adapter with a 220V mains
outlet. Then extend the telescopic antenna at the back of the radio to its full length
to ensure the best possible reception.
The display of the radio will now be blinking, the lower section will display the message "Time is not set".
5.2. Switching on for the rst time
Press the red Standby key on the remote control unit. The radio will start playing
in DAB+ mode, and will switch automatically to the time transmitted via DAB+. At
the same time, the radio will perform an automatic station scan. As soon as this is
completed, and the DABMAN 100 is receiving stations, the radio will commence
playing the rst DAB+ station found.
The radio is now ready for use. To adjust the DABMAN 100 in accordance with
your preferences, you can make adjustments to the radio via the menu.
Note:
If the radio was unable to nd any programmes during the automatic station scan,
please press the Mode key to select the "FM" mode.
You are now in FM radio mode. Press the scan key to scan the frequency range
(87,5 – 108 MHz) for radio stations.
33
EE DD
Page 34

5. INSTALLATION
6. OPERATION
6.1 Operating modes
The DABMAN 100 provides various operating modes, which in turn support dif-
ferent functions. Use the Mode key to select from the following operating modes:
DAB (digital radio, Chapter 7)
FM (radio, Chapter 8)
6.2 System
The menu item „System“ is available in all operating modes. To call this up, pro-
ceed as follows:
Press the Menu key on the remote control.
Use the ◄► keys to navigate to the item "System".
Conrm by pressing the Enter key.
The system settings arre divided into the following sub-items:
Sleep (settings sleep timer)
Wake-up alarm (settings Alarm 1 and Alarm 2)
Equaliser (sound settings)
Time (time and date settings)
Illumination (display dimmer)
Passive standby (automatic switch-o)
Language
Default settings
Software upgrade
Software version
34
Page 35

6. OPERATION
You can navigate through the system settings and the respective sub-menus
using the Menu key, the ◄► keys, the Enter key as well as the Back key. The sub-
items are explained in more detail below.
6.2.1 Sleep
Use the sleep timer to set the time period after which you want the radio to
switch o automatically. The options available are "o" (no automatic switch-o),
15 minutes, 30 minutes, 45 minutes, 60 minutes and 90 minutes. Tos et the
sleep timer proceed as follows:
Press the Menu key on the remote control.
Use the ◄► keys to navigate to the item "System".
Conrm by pressing the Enter key.
Use the ◄► keys to navigate to the item "Sleep".
Conrm by pressing the Enter key.
Use the ◄► keys to select the desired option and conrm by pressing the Enter
key.
Alternatively:
Press the Sleep key on the remote control, if necessary repeatedly, to select the
desired option.
Conrm by pressing the Enter key.
The sleep timer has now been set, in the upper left corner of the display, next to
the time, the sleep timer symbol ("zzz") will be shown. The radio will now switch o
automatically after the set period of time.
EE DD
35
Page 36

6. OPERATION
6.2.2 Wake-up alarm
The wake-up option of the DABMAN 100 supports to independently programmable wake-up timers. Both wake-up timers are set in accordance with the same
procedure. Proceed as follows:
Press the Menu key on the remote control.
Use the ◄► keys to navigate to the item "System".
Conrm by pressing the Enter key.
Use the ◄► keys to navigate to the item "Wake-up alarm".
Conrm by pressing the Enter key.
Use the ◄► keys to select the alarm you wish to set (options: Alarm 1 & Alarm 2),
conrm by pressing the Enter key. The display will show the logo of the wake-up
setting assistant. Conrm again by pressing the Enter key.
The rst step is to set the wake-up time, use the ◄► keys to select the hours,
then press the Enter key to enter the minutes, which you can also select using
the ◄► keys.
Conrm the time setting by pressing the Enter key.
In the next step, you can select the duration of the alarm, using the ◄► keys, the
options available here are 15, 30, 60 or 90 minutes. Select the desired alarm
duration, and conrm by pressing the Enter key. You can now proceed to select
the alarm source.
Use the ◄► keys to select the mode in which the alarm should go o. The options
are buzzer (neutral sound), DAB (digital radio) or FM (FM radio). Conrm by pressing the Enter key.
If you have selected the option FM or DAB, proceed in the next step to select
which station you wish to hear when you are woken. The options are "last selected" (currently active station in the respective mode), resp. one of the favourite
stations saved under the respective operating modes (selection of favourites
36
Page 37

6. OPERATION
from 1 to 10), use the ◄► keys to select the desired station, conrm by pressing
the Enter key.
In the next step you can select the frequency of the alarm. Here, the following
options are available: Weekdays (alarm is activated for Monday to Friday, Once
(alarm is activated only once), Weekend (alarm is active only on Saturday and
Sunday). Use the ◄►keys to select the desired option, conrm by pressing the
Enter key.
In the next step you can determine the volume of the alarm, which you can select
by using the ◄► keys (◄ volume lower, ►volume higher), the setting can be made
by observing a volume bar on the display, conrm by pressing the Enter key.
In the last menu point you can activate or deactivate the alarm (option on or o)
using the ◄► keys. Conrm by pressing the Enter key.
Alternatively:
Press the Alarm key on the remote control, then proceed with the conguration
as described above.
The alarm has now been set, the display will show a stylized alarm logo in the upper left corner next to the time.
When the alarm switches on, you can use the Snooze key to interrupt the alarm.
This will then go o again after a specied period (approx. 10 minutes).
6.2.3 Equalizer
The equalizer allows you to adjust the sound of the DABMAN 100 individually.
Here you can either dene an own sound prole (select "My EQ") or you can select one of the pre-dened sound proles. To call up the equalizer menu proceed
as follows:
Press the Menu key on the remote control.
Use the ◄► keys to navigate to the item "Equalizer".
EE DD
37
Page 38

6. OPERATION
Conrm by pressing the Enter key.
The following options are available for selection: , Normal, Classic, Jazz, Pop,
Rock, Flat.
Make your selection using the ◄►keys, conrm by pressing the Enter key.
6.2.4 Time
This menu item allows you to individually set the time and date, and to adjust the
display in accordance with your preferences, generally it will not be necessary to
make a manual adjustment, as the radio automatically reads the time via DAB+
resp. FM. To set this manually, proceed as follows:
Press the Menu key on the remote control.
Use the ◄► keys to navigate to the item "Time".
Conrm by pressing the Enter key.
Various options are available, such as manual entry of time and date (not
recommended),display mode of time (12/24 hour display), display of the date as
well as switching the automatic time update on or o. The selection is made using
the ◄► keys, conrm by pressing the Enter key.
Note: if you set the date and time manually, this will not aect functions related
to date or time, e.g. the alarm function. To ensure the alarm works properly, we
specically recommend you retain the automatic time settings.
38
Page 39

6. OPERATION
6.2.5 Illumination
This option will set the background illumination of the display. The display can be
dimmed in 3 steps (high = full brightness, medium = medium brightness and low
= low brightness). Proceed as follows:
Press the Menu key on the remote control.
Use the ◄► keys to navigate to the item "System".
Conrm by pressing the Enter key.
Use the ◄► keys to navigate to the item „Illumination".
Conrm by pressing the Enter key.
Various options are available (timer switch o: display will switch from full to low
brightness after a preselected time interval, On setting: selecting display brightness when commands are input. Dim setting: display illumination
In standby mode resp. when no commands are input). Selection and setting are
made using the ◄► keys, conrm your selection by pressing the Enter key.
Note: the display of the DABMAN 100 will consume the most energy if the illumi-
nation is set to full brightness.
Changes to the lighting settings can therefore aect the power consumption of
the radio. The consumption values set out in Chapter 10 were measured using
the standard settings.
6.2.6 Passive standby
This menu item allows you to activate the passive standby mode of the DABMAN 100. Passive standby means that the radio will automatically switch to the
standby mode after a specied period of time (2, 3, 4, 5 or 6 hours) if during this
period no operating procedures are carried out (changing stations, adjusting
volume etc.). This function is deactivated in the default mode. To set this option,
proceed as follows:
EE DD
39
Page 40

6. OPERATION
Press the Menu key on the remote control.
Use the ◄► keys to navigate to the item "Passive standby".
Conrm by pressing the Enter key.
Use the ◄► keys to select the desired time interval.
Conrm by pressing the Enter key.
Note: the passive standby mode can be used to reduce the power consumption
of the radio, as it will switch automatically to standby mode if no operating procedures are carried out for a specied time.
6.2.7 Language
The IMPERIAL DABMAN 100 features an OSD menu available in various languages. In this menu item you can specify the menu language. Proceed as follows:
Press the Menu key on the remote control.
Use the ◄► keys to navigate to the item "System".
Conrm by pressing the Enter key.
Use the ◄► keys to navigate to the item "Language".
Conrm by pressing the Enter key.
Use the ◄► keys to select the desired language.
Conrm by pressing the Enter key.
40
Page 41

6. OPERATION
6.2.8 Works default setting
Use this menu item to return the radio to the default works settings set when you
purchased the radio. This may become necessary if manual settings made in the
menu result in the radio no longer working as it should.
Note: calling up the default setting will result in all individually made settings, e.g.
saved station lists, being lost!
To call up the factory default settings proceed as follows:
Press the Menu key on the remote control.
Use the ◄► keys to navigate to the item "Default setting".
Conrm by pressing the Enter key.
Use the ◄► keys to select the option "Yes".
Conrm by pressing the Enter key.
The display will show the message "New start", the radio will switch to DAB+
mode and will automatically start a programme scan.
EE DD
41
Page 42

7. DAB
In DAB mode you will receive radio stations broadcast using the DAB+ digital
radio standard To set the DAB mode, proceed as follows:
While in operating mode, press the Mode key on the remote control, repeatedly if
necessary, until the display shows the word „DAB“ below the time.
DAB+ reproduction will start with the station most recently selected, resp. when
switching on for the rst time it will start with the rst station found on the station
list.
7.1 Operation
7.1.1 Station selection
While in DAB mode, use the ◄►keys to navigate through the available DAB+
stations.
To change stations, press the Enter key. or
The radio comes equipped with the facility to store up to 10 favourite stations. To
save a station, switch to the station to be saved as described above.
Now press and hold down the numeric key (1 - 10, see Fig. 4.1), on which you
wish to save the station for around 2 seconds. The display will show a message
that the station has been saved at the selected favourite slot.
If stations have been saved in the favourites memory, you can call these up by
pressing the desired numeric key.
Or
While in DAB mode press the Preset key (see Fig.. 4.1) to call up the Favourites
list.
Use the ◄► keys to navigate through the Favourites list, press the Enter key to
conrm your selection.
42
Page 43

7. DAB
7.1.2 Information
While in DAB mode, you can call up background information on the programme
being received (e.g. title name, artist), as well as additional information (e.g. signal
strength, broadcast quality etc.) which will then be shown on the display.
To do this, press the Info key while in this operating mode (see Fig. 4.1), if necessary repeatedly, to show the desired information on the display. The information
will be shown as scrolling text in the bottom line of the display (below the station
name).
7.1.3 Scanning for stations
While in DAB mode press the Scan key (see Fig. 4.1), the DABMAN 100 will
perform a new station scan. This may become necessary if you change the loca-
tion of the radio, or if new DAB stations become available. The scan will begin, and
a progress bar will appear on the display. As soon as the scan is completed, the
radio will play the station most recently selected. The Favourites memory will not
be aected by the station scan.
7.1.4 Volume control and Mute setting
Use the +/- keys (see Fig. 4.1) to adjust the volume being played (use + to
increase the volume, or – to decrease the volume, If you adjust the volume, a
volume indicator bar will be shown on the display.
Use the Mute key (see Fig. 4.1) to switch o the loudspeaker of the radio, press
the key again to switch it back on. The display will show the message "Volume
mute".
EE DD
43
Page 44

7. DAB
7.1.5 Wake-up alarm and Snooze key
While in operating mode, press the Alarm key on the remote control. The wake-up
timer menu will open. To set the wake-up timer, proceed as described in Chapter
6.2.2.
If the wake-up alarm goes o, you can press the Snooze key to switch o temporarily. The alarm will go o again after approximately 10 minutes.
7.2 DAB Menu
Settings can also be made in the DAB Menu. This can involve general settings to
be made via the menu item "System" (see Chapter 6.2), the menu will also show
specic menu items relating to the DAB mode. The settings can be called up as
follows:
While in DAB mode press the Menu key (on the remote control or on the radio),
You will be taken to the DAB menu.
The DAB menu is divided into the following points::
Complete scan (Chapter 7.2.1)
Manual setting (Chapter 7.2.2)
DRC (Chapter 7.2.3)
Empty (Chapter7.2.4)
System (Chapter 6.2)
7.2.1 Complete scan
This menu item allows you to perform a new automatic station scan. In this case,
the entire DAB+ frequency range will be scanned for radio stations. This may become necessary if you move the location of the radio, or when new DAB+ stations
44
Page 45

7. DAB
become available Basically this menu item corresponds with the same function as
the station scan (see Chapter 7.1.3). To start the complete station scan,
proceed as follows:
While in DAB mode press the Menu key (on the remote control or on the radio),
you will be taken to the DAB menu.
Use the ◄► keys to navigate to the item "Complete scan".
To conrm press the Enter key, the station scan will begin, and a progress bar
will appear on the display. As soon as the scan is completed, the radio will begin
playing the most recently selected station. The favorites memory list will not be
aected by the station scan.
7.2.2 Manual settings
Here you have the option of calling up the individual DAB channels (5A - 13F)
sorted by frequency, and of seeing their signal quality. In digital radio, stations
are not transmitted directly via frequencies (unlike the case with FM reception),
instead the reception range is divided into channels, which in turn will transmit a
specic package of stations via a single xed frequency (e.g. for Rhineland-Palatinate Channel 5C, frequency178,352 MHz, all stations of German public radio as
well as private radio stations).
While in DAB mode press the Menu key (on the remote control or on the radio),
you will be taken to the DAB menu.
Use the ◄► keys to navigate to the item "Manual settings".
To conrm press the Enter key, You will be taken to the channel overview.
Use the ◄► keys to navigate through the DAB channels. Use the Enter key to
select the channel for which you would like to see the information (signal strength
etc.), then press the Enter key to conrm your selection.
Leave the menu by repeatedly pressing the Back key.
EE DD
45
Page 46

7. DAB
7.2.3 DRC - Dynamic Range Control
The DRC dynamic range control will reduce the dierence in volume between the
loudest and the least loud signal of a transmission – in practice this means that
quiet tones will be reproduced relatively more loudly, and loud notes will be played
relatively less loud. Switch the DRC on or o in accordance with your listening
preferences, as follows:
While in DAB mode press the Menu key (on the remote control or on the radio),
you will be taken to the DAB menu.
Use the ◄► keys to navigate to the item "DRC".
Conrm by pressing the Enter key. You will be taken to the DRC menu. Use the
◄►keys to select from the option "high", "low" and "o", conrm your selection by
pressing the Enter key, You will be taken back to the DAB mode.
Note: The default setting for DRC is o.
7.2.4 Empty memory
You can use the empty function to remove DAB stations from the station list. This
function may be useful, e.g. if you want to operate the radio at a dierent location
where previously received stations (e.g. local stations) can no longer be received,
or where DAB stations have ceased broadcasting, or have changed the channel.
To do this, proceed as follows:
While in DAB mode press the Menu key (on the remote control or on the radio),
you will be taken to the DAB menu.
Use the ◄► keys to navigate to the item "Empty".
To conrm, press the Enter key, you will be taken to the sub-menu. Use the ◄►
keys to select from the options "yes" and "no". Conrm your selection by pressing
the Enter key, you will be taken back to DAB mode.
46
Page 47

8. FM
In FM mode, the IMPERIAL DABMAN 100 will receive analogue radio signals
in the FM band (between 87.5 and 108 MHz) as well as RDS signals, where
these are broadcast. To ensure optimum reception, please extend the telescopic
antenna to its full extent before switching on the radio.
While operating the radio, press the Mode key on the remote control, if necessary repeatedly, until the message „FM“ appears on the
display below the time.
The radio will start playing the station most recently selected. If you are switching to FM mode for the rst time, you will hear noise, and the selected frequency
(87.5 MHz) will be indicated on the display. To ensure you can receive the radio
stations available, you must rst perform a station scan.
EE DD
47
Page 48

9. OPERATION
9.1 Operation
9.1.1 Automatic station scan
To perform a station scan proceed as follows:
While in FM mode, press the Scan key (see Fig. 4.1). The FM scan will
start with the highest FM frequency (108 MHz) and will run backward.
The scan will stop automatically at the rst FM station received.
Press the Scan key again to continue the scan. Continue tin this manner
until you receive the desired FM station.
9.1.2 Manual station scan and ne tuning
You can also scan for stations manually. Proceed as follows:
While in FM mode, scan for stations using the ◄► keys. Use the ◄ key to scan the
bandwidth downward, use the ► key to scan the available frequencies upward.
To do this, keep the ◄ key resp. the ►key pressed down, the scan will begin and
will stop as soon as a radio station is received.
Briey press the ◄► keys to additionally ne-tune the stations being received.
Press the appropriate key to move up (►) or down (◄) in stages of 0.05 MHz
9.1.3 Station memory
In FM mode the IMPERIAL DABMAN 100 features a favourites memory for
10 radio stations. To save a station, you must rst perform a station scan as
described under 8.1.1 resp. 8.1.2.
48
Page 49

9. OPERATION
Now press down the numeric key (1 - 10, see Fig. 4.1), on which you wish to save
the station, for approx. 2 seconds, the display will show the message that the sta-
tion has been saved under the favourites slot selected.
If stations have been stored in the favourites memory, you can call these up by
pressing the appropriate numeric key.
Or
While in FM mode press the Preset key (see Fig. 4.1) to call up the favourites list.
Use the ◄► keys to navigate through the favourites list, conrm your selection by
pressing the Enter key.
9.1.4 Info
While in FM mode, you can call up background information on the programme
being received (e.g. title name, artist), as well as additional information (e.g. signal
strength, transmission quality etc.), this will be shown on the display.
While in FM mode, pres the Info key (see Fig. 4.1), if necessary repeatedly, to
show the desired information on the display. The information will be shown as
scrolling text in the lower line of the display (below the station name).
9.1.5 Volume control and Mute key
Use the +/- keys (see Fig. 4.1) to adjust the volume of the music being played
(press + to increase the volume, press – to reduce the volume). When you adjust
the volume, a volume indicator bar will appear on the display.
Use the Mute key (see Fig. 4.1) to switch the loudspeaker of the radio o, press
the key again to switch the sound back on again. The display will show the mes-
sage "Volume mute".
EE DD
49
Page 50

9. OPERATION
9.1.6 Wake-up alarm and Snooze key
While in operating mode, press the Alarm key on the remote control. The alarm
timer menu will be opened. To set the wake-up timer, proceed as described in
Chapter 6.2.2.
When the alarm switches on, you can interrupt the alarm by pressing the Snooze
key. This will then go o again after a preset interval (approx. 10 minutes).
9.2 FM Menu
Settings can also be made in the FM menu. These include both general settings
via the item "System" (see Chapter 6.2) as well as menu items specically related
to the FM mode. The settings can be called up as follows:
While in FM mode press the Menu key on the remote control or on the radio, this
will take you to the FM menu.
The FM menu is divided into the following items:
Scan settings (Chapter 8.2.1)
Audio settings (Chapter 8.2.2)
System (Chapter 6.2)
9.2.1 Scan settings
The scan settings allow you to set the sensitivity of the station scan for FM stations. To do this, proceed as follows:
While in FM mode press the Menu key (on the remote control or on the radio),
You will be taken to the FM menu
Use the ◄► keys to navigate to the item "Scan settings".
50
Page 51

9. OPERATION
To conrm press the Enter key, you will be taken to the sub-menu. Use the ◄►
keys to select the option „only strong stations“ or „all stations“. Conrm your
selection by pressing the Enter key, you will be returned to the FM mode.
Note: the default option is „only strong stations“. This is the preferred option, as
only this guarantees the best possible reception quality.
9.2.2 Audio settings
The audio settings allow you to select whether you prefer to receive mainly stereo
broadcasts, or whether stations with mono broadcasts should be received. To call
up this option proceed as follows:
While in FM mode press the Menu key (on the remote control or on the radio),
you will be taken to the FM menu.
Use the ◄► keys to navigate to the item "Audio settings".
Conrm by pressing the Enter key, You will be taken to the sub-menu. Use the ◄►
keys to select the options "Stereo possible" or "Mono only“. Conrm your selection
by pressing the Enter key, You will be taken back to the FM mode.
Note:
the default option is "Stereo possible". This is the preferred option as stereo
provides a better sound than mono.
EE DD
•
51
Page 52

10. AUX
If you have connected an external device like MP3 Player via cable with the AUX
Input of DABMAN 100, you can use the DABMAN 100 for playing music from
this external device.
• Connect your external device with DABMAN 100, by using a 3,5 mm stereo
jack cable. (not included in delivery content)
• Press the MODE Key on the remote control, as teh circumstances require-
more than one time until the display shows "AUX".
• Now, you can start playing musik from the external device. The control for
next or previous titles must be done with the external connected device, from
which the music is played.
• You can change the volume over the external connected device as well as as
using the volume button on DABMAN 100.
52
Page 53

11. TECHNICAL DATA
FM (UKW)
Bandwidth 87,5 MHz - 108 MHz
Sensitivity maximum -106 dBm
DAB+
Bandwidth DAB Band III:
174,928 MHz - 239,200 MHz
Sensitivity maximum -97 dBm
Remote control
Range 5m at 30°
LCD Display
Type 4-lines, white text on black back-
ground
Diagonal size 7 cm (2,75'')
Resolution 128 x 48
Viewing angle +/- 30°
Loudspeaker
Diameter/impedance 3'' (7,62cm) / 4Ω
Frequency range 120 Hz - 15 KHz -10dB
Output 5W
Power supply/consumption
Mains adapter (external) AC IN: 100V- 240V
DC OUT: 10V, 2 A
Power consumption 0,7W (standby); 4W (operation)
EE DD
53
Page 54

11. TECHNICAL DATA
Size and weight
Dimensions (incl. controls, antenna
and stand
Weight approx. 1.3kg
WxHxD:
225mm x 132mm x 120mm
54
Page 55

12. TROUBLESHOOTING GUIDE
Problem Cause Solution
No message on display.
Radio does not react to
commands
No operation via remote
control
DAB+ reception faulty No stations available Perform a scan (see
FM reception faulty Antenna not fully exten-
Wake-up alarm not wor-
king properly
Power supply not con-
nected
Safety strip still in battery compartment
Batteriy of remote con-
trol is spent
Antenna not fully extended
Station not accurately
set
ded
Station not accurately
set
Poor reception at location
Clock time set incorrectly Check the clock settings
Establish mains connection via the adapter
cable supplied
Carefully remove plastic
safety strip from battery
compartment
Replace remote control
battery (3V button
type);when inserting
battery ensure plus pole
points toward back of
remote control)
Chapter 7.2.1)
Extend the FM antenna
fully
Change the location of
the radio (poss. closer
to window), perform
new scan
Extend the FM antenna
fully
Manually tune the frequency (see Chapter
8.1.2)
Change location of the
radio
(see Chapter 6.2.4)
EE DD
55
Page 56

13. CE Marking
Your radio bears the CE mark, and complies with all required EU standards.
The CE mark on the product IMPERIAL DABMAN 100 gives you the assuran-
ce that the product complies with the regulations of directive for low-voltage
equipment (2006/95/EC), with the electromagnetic compatibility directive
(2004/108/EC), with the RoHS directive (2011/65/EC) and with the directive
The conformity declaration for this product can be obtained at:
www.digitalbox.de/de_DE/Konformitaetserklaerung/490- 529/?produc-
www.telestar.de/de_DE/Konformitaetserklaerung/352- 529/?produc-
Copy and reproduction only with authorization of the publisher
CE mark for European markets
ErP (1275/2008/EC)
tID=10610
or
tID=10610
Subject to change without notice.
Not responsible for printing errors.
Correct as at: October 2015
TELESTAR - DIGITAL GmbH
Am Weiher 14
56766 Ulmen
56
 Loading...