

Page 1
USER MANUAL • MANUAL DE USUARIO
MODE D’EMPLOI
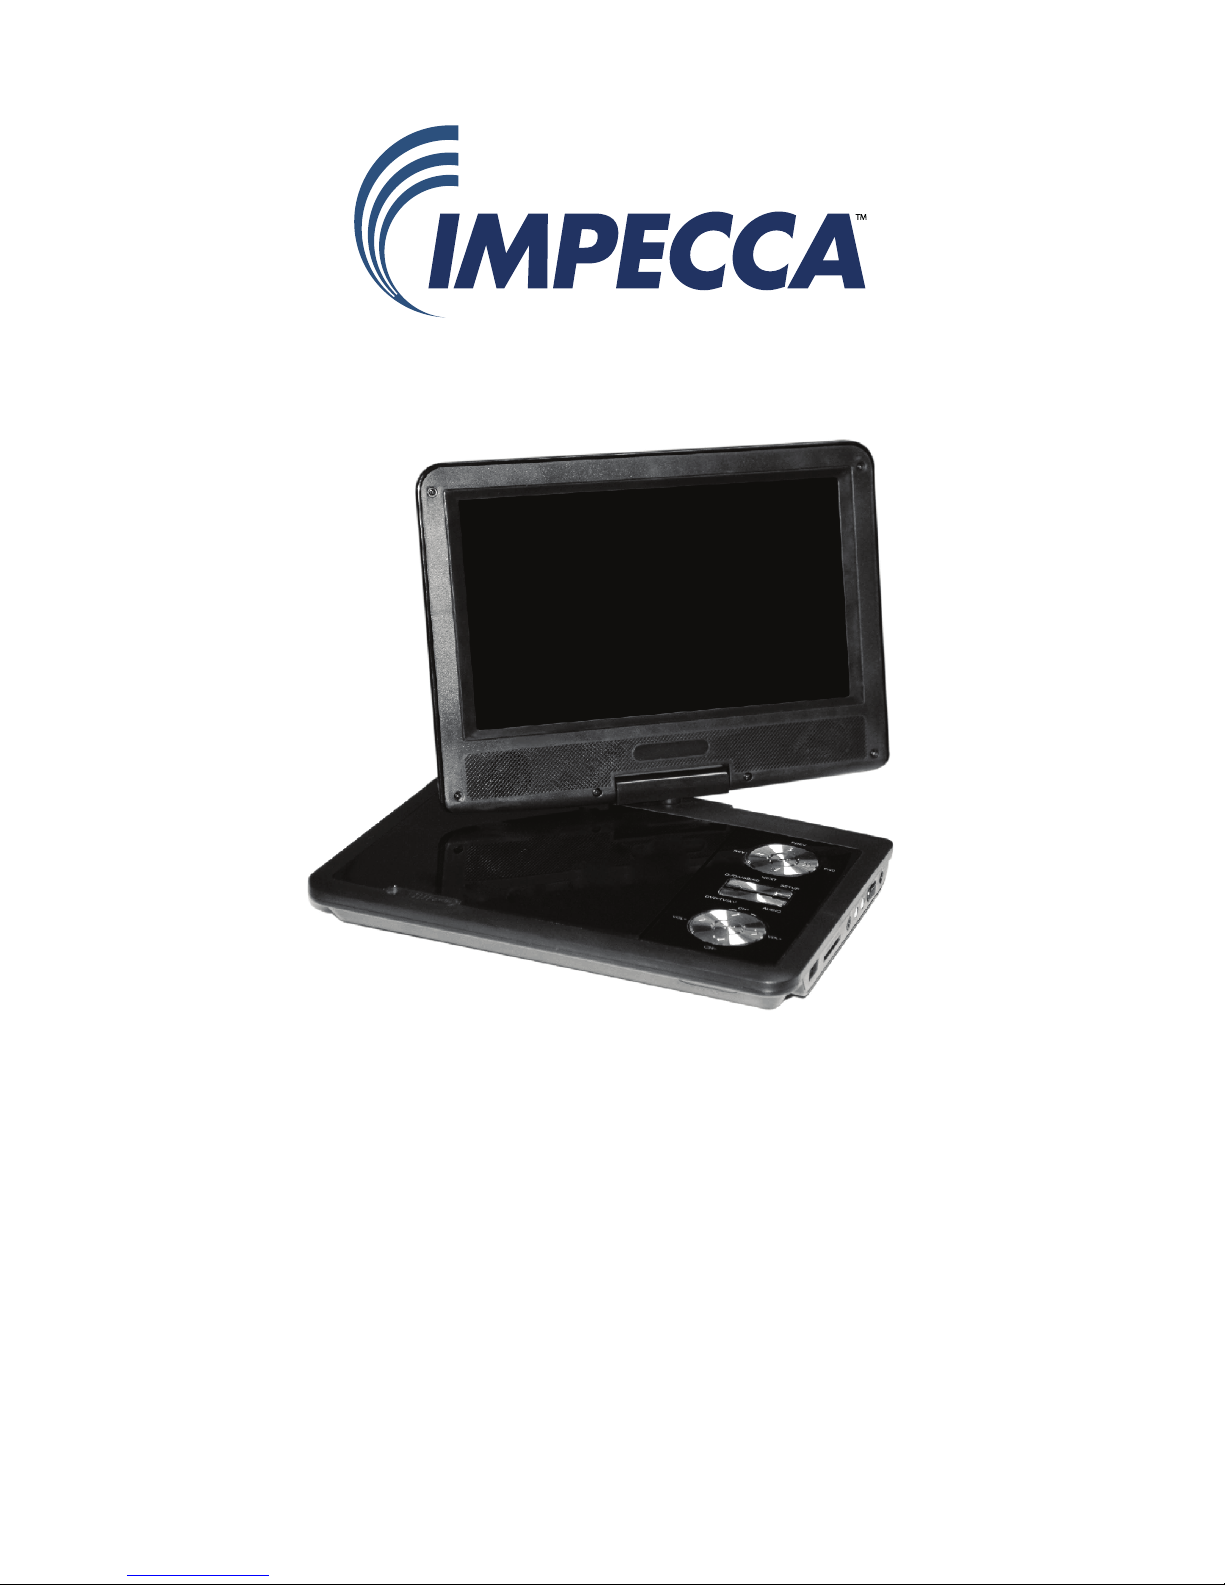
Portable DVD Player • Reproductor DVD Portátil
Lecteur DVD Portable
Model N° – DVP-775
Page 2

ENGLISHESPAÑOLFRANÇAIS
ii
TABLE OF CONTENTS
Important Safety Instructions 1
Package Contents 3
Product Features 3
Main Unit Controls 4
Operating Instructions 5
Using the Remote Control 6
System Setup 8
CD Ripping 12
Technical Specications 13
Troubleshooting 14
Contact Technical Support 14
Page 3

ENGLISHESPAÑOLFRANÇAIS
1
IMPORTANT SAFETY INSTRUCTIONS
For your safety, please read these instructions carefully.
1. WARNING: To reduce the risk of
electric shock, do not remove
the cover or back of the units.
There are no user-serviceable
parts inside. Contact technical
support for further assistance.
2. WARNING: To prevent re or
electric shock hazard, do not
expose the unit to rain or moisture.
3. Do not expose the adapter and
portable DVD to any water (including drips or splashes). Ob-
jects lled with liquids, such as
vases and water bottles, should
not be placed on the unit.
4. Keep the portable DVD away
from direct sunlight and heat
sources such as radiators or
stoves.
5. Do not block the ventilation
openings. Slots and openings
on the unit are provided for
ventilation. Placing your portable DVD on a cushion, sofa or
other similar surface, should
never block the openings.
6. Do not place the portable
DVD on an unstable table,
stand, tripod, bracket or cart.
The unit may fall, resulting in
possible damage or injury.
7. Never place heavy or sharp objects or pressure on the LCD
panel or frame.
8. Only use the AC adapter included with the portable DVD player. Using any other adapter will
void your warranty.
9. Unplug the power from the outlet when the unit is not in use.
10. Dispose of this unit properly
respecting your local laws for
electronics and battery disposal.
11. CAUTION: Danger of explosion
if battery is incorrectly replaced.
Replace only with the same or
equivalent type of battery.
12. WARNING: The battery (battery
or batteries or battery pack)
shall not be exposed to exces-
sive heat such as sunlight, re
or any other heat source.
13. WARNING: Excessive volume
and/or usage of earphones or
headphones can cause hearing
loss.
14. WARNING: Only use attach-
ments/accessories specied
provided by the manufacturer,
using the included AC adapter
and DC car adapter.
Page 4

ENGLISHESPAÑOLFRANÇAIS
2
1. Warning: This DVD player uses
a laser system. Use of controls,
adjustments, or the performance of procedures other
than those specied herein may
result in hazardous laser radiation.
2. Warning: To prevent direct exposure of laser beam, do not
open the unit. Laser radiation is
visible when the unit is opened.
3. Warning: Never stare directly
into the laser beam.
4. Caution: Do not install this prod-
uct in a conned space such as
a bookcase or similar unit.
5. Warning: When in use by children, parents must ensure that
the child understands all safety
instructions, especially those
regarding overheating, electri-
cal hazards, and laser radiation.
6. Warning: If the unit overheats
or has a deformed, damaged,
or destroyed battery, stop using the unit IMMEDIATELY and
contact technical support for a
replacement.
7. Warning: Do not charge the
battery when the unit is not sufciently ventilated. Such locations include: mattresses, sofas,
cushions, pillows, etc.
8. Warning: The manufacturer,
distributor, and retailers accept
no responsibility for battery
damage caused by improper
use and/or unit damage.
9. Warning: USB cables longer
than 10” (250mm) should not
be used with this unit.
Copyright Notice:
1. It is forbidden by law to copy, broadcast (via cable, wireless, or otherwise), show
in public performance, or rent copyrighted material without permission.
2. This product features the copy protection function developed by Macrovision. Copy protection signals are recorded on some discs. When recording and playing the pictures of these discs picture noise will appear. This
product incorporates copyright protection technology that is protected by
method claims of certain U.S. Patents and other intellectual property rights
owned by Macrovision Corporation and other rights owners. Use of this
copyright protection technology must be authorized by Macrovision Corporation, and is intended for home and other limited viewing uses only unless
otherwise authorized by macrovision Corporation. Reverse engineering or
disassembly is prohibited.
Disc Handling:
1. Do not leave discs near heat sourc-
es, in direct sunlight, or high humidity environments
2. Store discs in their cases when not
in use
3. Stacking discs or standing them on
end can cause them to warp.
4. Do not touch the disc surface while
handling the disc. Instead, hold the
edges.
5. Fingerprints, dust, dirt, and scratch-
es can distort the picture or reduce
the sound quality from your disc.
Clean discs before use.
6. Do not stick paper, tape, or adhesive
labels on your discs. Do not write
with a solvent marker on your disk.
7. Clean discs with a soft cloth wiping
from the center outwards
8. Do not use solvents on your disc
such as benzene, household cleaning products (except those designed
for CD/DVD use), or anti-static spray
for vinyl records as this can damage
your device and discs.
Page 5

ENGLISHESPAÑOLFRANÇAIS
3
PACKAGE CONTENTS
Your Impecca Portable DVD Player includes the following:
• 7” DVD Player
• Remote control with battery
• AC/DC Power Adapter
• Car Charger
• Audio/Video Cable
• Earbuds
• User Manual
PRODUCT FEATURES
• High contrast 7” widescreen LCD display
• Plays most audio, video, and photo formats
• Built in USB and SD memory card slots
• AV in/out ports
• 3.5mm headphone jack
• Built-in 3W RMS stereo speakers (1.5W x 2)
• CD to USB copying functionality
• Multilanguage menus and on-screen displays (English,
French, and Spanish)
• Built-in rechargeable lithium-polymer battery
• Dual-voltage power (100V~240V, 50/60Hz) for worldwide use
Page 6
ENGLISHESPAÑOLFRANÇAIS
4
MAIN UNIT CONTROLS
1. Up/Previous
2. Down/Next
3. Left
4. Right
5. Menu
6. Directional buttons
7. Select Source (DVD/USB/
SD Card)
8. Setup
9. Subtitles
10. Audio
11. Play/Pause
12. Volume (Up/Down)
13. Enter/Select
14. USB port
15. SD Card Slot
16. 3.5mm Headphone Jack
17. AV Output
18. AV Input
19. Power on/o
20. DC Input (9–12v)
21. Slide to open disc slot
MAIN UNIT CONTROLS
TIT LE
STOP
M
10
1
2
3
6
11
12
13
14
15
16
17
18
19
20
21
22
4
5
7
8
9
=
=
OPEN
23
Page 7

ENGLISHESPAÑOLFRANÇAIS
5
OPERATING INSTRUCTIONS
Plug in your DVD Player:
Plug in the AC adapter into the DVD player (DC IN) and then
plug the adapter into the AC wall outlet.
If using the car charger, plug in the DC adapter into the DVD
player (DC IN) and plug the adapter into the cigarette lighter
outlet.
Only use the Impecca authorized power adapter included with
your DVD player. Using any other power adapter can damage
the unit and/or cause electrical shock, re, or even death.
Connecting to a television or external speakers:
Connect the Audio Video Cable to the AV Out port. Connect
a standard RCA display cable to your speakers or television
set and select the correct input on your speakers or television set.
Playing a DVD:
Slide the ‘Open’ tab on main unit. The door will pop up,
exposing the disc reader. Place the DVD or CD inside the
player, close the door, and power the unit on. The DVD or
media menus will load.
Page 8
ENGLISHESPAÑOLFRANÇAIS
6
USING THE REMOTE CONTROL
The following guide will help you make the best use of your
remote control:
1. Display
2. Mute
3. Numeric keys
4. Subtitle/CD Rip
5. System
6. Up/Down/Left/Right
arrow keys
7. Enter
8. Setup
9. Previous
10. Time
11. Rewind
12. Play/Pause
13. Source
14. Stop
15. Standby
16. DVD/USB/SD Card Input
17. Volume +/–
18. Zoom
19. Audio
20. Angle
21. PBC Title/Exit
22. Prog
23. Next
24. Slow
25. Fast Forward
26. Repeat
Page 9

ENGLISHESPAÑOLFRANÇAIS
7
1. Press repeatedly to display disc information.
2. Turn the sound on/o temporarily
3. Input chapter numbers or select a track number
4. Enable subtitles (disc must support this function)
5. Change between PAL and NTSC video outputs
6. Highlight menu items using the directional arrows
7. Make a menu selection
8. Enter the DVD player setup menu
9. Skip to the previous chapter or track
10. Skip to a specic time in the lm or song
11. Press repeatedly to rewind playback in 2x, 4x, 8x, 16x and
32x increments. Press again to resume normal playback.
12. Begin or pause playback
13. Switch between DVD and AV input
14. Stop playback
15. Switch the unit on/o
16. Switch between the DVD/USB/SD Card sources
17. Increase and decrease volume
18. Zoom in on the scene at ratios of 2x, 3x, and 4x. Use the
directional arrows to pan across the screen.
19. Change audio language tracks (if supported by your disc)
20. Change camera angles (if supported by your disc)
21. Return to the menu when your disc has PBC functionality
22. Place a track on the program list
23. Skip to the next chapter or track
24. Scan the video track slower than normal playback speeds
25. Press repeatedly to fast forward playback in 2x, 4x, 8x,
16x and 32x increments. Press again to resume normal
playback.
26. Repeat tracks or video playback.
Battery insertion: Open the remote control door and insert two standard AAA batteries. Do not
install the battery backwards and do not mix used and fresh batteries. Do not place the remote
control near a heat source.
Page 10

ENGLISHESPAÑOLFRANÇAIS
8
SYSTEM SETUP
Press the SETUP button on the remote control unit to open
the setup menu. Use the directional buttons (up, down, left,
right) to select menu items. After changing the desired settings,
press the SETUP button again to return to the normal display.
General Settings
TV Display: sets the aspect ratio of the playback image when
using an external television display.
• 4:3 Panscan: a standard ‘square’ television (4:3 aspect
ratio) will trim the left and right sides o of a widescreen lm. Also known as fullscreen.
• 4:3 Letterbox: select this if you have a standard
‘square’ television (4:3 aspect ratio). In this case, the
full image will be shown on the screen with black
letterbox bars on the upper and lower portions of the
image.
• 16:9: Choose this display option on any widescreen
display (most HDTVs).
• Wide Squeeze: Squishes a widescreen image to t a
4:3 screen with no trimming.
Angle Mark:
Displays current camera viewing information on the right hand
corner of the TFT screen if available on the disc.
OSD Language
Change the DVD player system language
Closed Captions
Closed captions are data that are hidden in the video signal of
some discs for the hearing impaired. Closed captions are dierent from subtitles that can be selected by using the SUBTITLE
button or in your DVD menu. You can enable closed captions
with this option
Page 11

ENGLISHESPAÑOLFRANÇAIS
9
Screen Saver
Turn the screen saver on or o after a period of prolonged
DVD player inactivity.
Resume playback
The player will remember the last point read on your disc when
this option is enabled; the player will automatically resume
playback when the disc is re-inserted.
Audio Settings
Downmix:
This options allows you to set the analog stereo output of your
DVD Player.
• LT/RT: Select this option if your DVD Player is connected to a Dolby Pro Logic decoder.
• Stereo: Select this option when output delivers sound
from only the two front speakers.
Dolby Digital:
The options included in Dolby Digital Setup are: ‘Dual Mono’
and ‘Dynamic’.
Dual Mono:
• Stereo: Left mono sound will send output signals to
left speaker and right mono sound will send output
signals to right speaker.
• L-Mono: Left mono sound will send output signals to
both the left speaker and right speaker.
• R-Mono: Right mono sound will send output signals to
both the left speaker and right speaker.
• Mix-Mono: Left and right mixed mono sound will send
output signals to left and right speakers.
Dynamic:
Dynamic range compression.
Page 12

ENGLISHESPAÑOLFRANÇAIS
10
Video Settings
Adjust the video quality of the LCD display unit by modifying
the sharpness, brightness, contrast, hue, and saturation of the
image.
Playback Preferences
Audio: Selects a default DVD audio language (if available).
Subtitle:Selects a default DVD subtitle language (if available).
Disc Menu: Selects a default DVD menu language (if available).
Parental:
Some DVDs may have a parental levels assigned to the complete disc or to certain scenes on the disc. This feature lets you
set playback limitations. The rating levels range from 1 to 8 and
are country dependent. You can prohibit the playing of certain
discs that are not suitable for your children. Certain discs support the playback of alternate scenes.
Password Settings
Password:
Require a password to play back restricted ratings on DVDs. If
this setting is disabled, parental settings will not function.
Old Password:
Enter the old password using the remote control (factory setting is 136900), and the cursor will jump automatically to the
new password eld.
New Password:
Enter a new password using 4 digits from the remote control, and
the cursor will automatically jump to the conrm password eld.
Conrm Password:
Conrm the new password by entering it again using the
remote control. If the incorrect password is entered, the cur-
sor will stay in this eld and you will need to enter the correct
Page 13

ENGLISHESPAÑOLFRANÇAIS
11
password. After entering, the correct new password again, the
cursor will jump automatically to the OK button.
Conrm:
Once all elds are lled in, click the ENTER button on the remote control to save your new password.
Note: If the password has been changed, the parental and disc
lock code will also be changed.
Note that the default password (136900) remains permanently
active even if the system password has been changed.
Default:
Revert all player settings to factory defaults.
Page 14
ENGLISHESPAÑOLFRANÇAIS
12
CD RIPPING
Your DVD player can copy unprotected CDs and MP3 CDs to
a USB drive. Before beginning this process, ensure that your
USB drive has sucient free space.
Using the directional arrow keys, select the track(s) you
would like to copy to your USB drive. Conrm your selection
and wait for the copy process to complete. A dialog box will
conrm completion.
Note that it is normal for this process to take quite some time.
Page 15

ENGLISHESPAÑOLFRANÇAIS
13
TECHNICAL SPECIFICATIONS
Battery output: 7.4 volts
Storage environmental conditions:
1. When storing for up to 6 months:
a. Temperature between -4°F to 113°F (-20°C to 45°C)
b. Humidity at 65% ±20%
2. When storing for up to 1 week:
a. Temperature between -4°F to 149°F (-20°C to 65°C)
b. Humidity at 65% ±20%
Operating environmental conditions:
1. When charging the battery:
a. Temperature between 32°F to 113°F (0°C to 45°C)
b. Humidity at 65% ±20%
2. When running on battery:
a. Temperature between -4°F to 149°F (-20°C to 65°C)
b. Humidity at 65% ±20%
Electrical Specications:
Power requirements: AC 100-240 V, 50/60 Hz
Power consumption: < 15 watts
Operating humidity: 5% to 90%
Speakers: 2x 1.5 Watt, Headphone output
System specications:
Laser: Semiconductor laser, 650 nm wavelength
Video system signal: NTSC/PAL/AUTO
Note: Design and specications are subject to change prior notice.
Page 16

ENGLISHESPAÑOLFRANÇAIS ENGLISHESPAÑOLFRANÇAIS
14
TROUBLESHOOTING
PROBLEM SOLUTION
No sound or distorted sound
Make sure the DVD Player is connected properly. Ensure that all
cables are securely insured into
the correct jacks.
Can’t advance through a movie
You can’t advance through the
opening credits and warning information that appears at the
beginning of movies because the
disc is programmed to prohibit
that action.
The ∅ icon appears on screen
The feature or action cannot be
completed at this time because:
1. The disc’s software restricts or
doesn’t support the feature (e.g.,
angles)
2. The feature is not available at
the moment.
3. You’ve requested an inexistent
chapter, track, or title number
Picture is distorted
The disc might be damaged. Try
another disc; it is normal for some
distortion to appear during forward or reverse scan.
No forward or reverse scan
Some discs have sections that
prohibit rapid scanning or chapter
skip;
You can not skip through the
warning information and copyright notices at the beginning of a
DVD.
CONTACT TECHNICAL SUPPORT
Email: service@impeccausa.com
Website: www.impeccausa.com
Page 17

ENGLISHESPAÑOLFRANÇAIS
15
TABLA DE CONTENIDO
Instrucciones Importantes de Seguridad 16
Contenido del Paquete 18
Características del Producto 18
Controles de la Unidad Principal 19
Instrucciones de Operación 20
Utilizando el Control Remoto 21
Conguración del Sistema 23
Ripping del CD 27
Especicaciones Técnicas 28
Solución de Problemas 29
Contacte el soporte 29
Page 18

ENGLISHESPAÑOLFRANÇAIS
16
INSTRUCCIONES IMPORTANTES DE SEGURIDAD
Para su seguridad, por favor lea cuidadosamente estas instrucciones:
1. ADVERTENCIA: Para reducir el
riesgo de choque eléctrico no retire la cubierta o parte posterior
de las unidades. No hay partes
internas que requieran servicio.
Haga contacto con soporte técnico si requiere de ayuda.
2. ADVERDENTIA: Para evitar fuego
o choque eléctrico, no exponga la
unidad a la lluvia o humedad.
3. No exponga el adaptador y el
DVD portátil a ninguna clase de
agua (incluyendo goteos o salpicaduras). No deben colocarse
sobre la unidad objetos que se
llenan con líquidos como los o-
reros y botellas de agua.
4. Mantenga el DVD portátil lejos de
la luz directa del sol y fuentes de
calor como radiadores o estufas.
5. No bloquee las aberturas para
ventilación. Las ranuras y aberturas en la unidad son para su ventilación. Al colocar su DVD portátil
en un cojín, sofá u otra supercie
similar ninguna abertura debe
quedar bloqueada.
6. No coloque el DVD portátil en
una mesa, soporte, trípode, base
inestable o carrito. La unidad
puede caerse, resultando en posibles daños o lesiones.
7. No coloque objetos pesados o
losos o haga presión sobre el
panel o el marco LCD.
8. Utilice únicamente el adaptador
AC incluido con el reproductor
DVD portátil. El uso de cualquier
otro adaptador invalidará la garantía.
9. Cuando la unidad no esté en uso
desconecte el cable de suministro de energía de la toma de corriente.
10. Disponga de esta unidad adecuadamente respetando las leyes
locales para el deshecho de artí-
culos eléctricos y baterías.
11. PRECAUCIÓN. Si se reemplaza la
batería en forma incorrecta puede haber peligro de explosión.
Reemplace solamente con la misma clase de batería o su equivalente.
12. ADVERTENCIA: La batería (batería, baterías o paquete de baterías) no debe exponerse al calor
excesivo tal como la luz el sol, fuego o ninguna otra fuente de calor.
13. ADVERTENCIA: El volumen excesivo y/o el uso de audífonos o auri-
culares pueden causar la pérdida
de la audición.
14. ADVERTENCIA: Solo utilice acce-
sorios especicados y provistos
por el fabricante, utilice solamente el adaptador AC y el adaptador
DC para auto.
15. Este reproductor DVD utiliza un
sistema láser. El uso de los controles, ajustes, o el desempeño
de procedimientos diferentes a
aquellos que se especican en
este manual pueden causar radiaciones láser peligrosas.
16. Advertencia: Para evitar la exposición directa al rayo láser
no abra la unidad. La radiación
láser es visible cuando la unidad
es abierta.
17. Advertencia: No se quede mirando en forma directa al rayo
láser.
18. Peligro: No instale este producto
en un espacio connado como
un librero o unidad similar.
19. Advertencia: Cuando sea utilizado por niños, los padres deben
asegurarse de que los niños
comprendan todas las instrucciones de seguridad, especial-
mente aquellas relacionadas
con el sobrecalentamiento, el
choque eléctrico y la radiación
láser.
Page 19

ENGLISHESPAÑOLFRANÇAIS
17
20. Advertencia: Si la unidad se sobrecalienta o tiene una batería
deforme, dañada o destruida,
deje de utilizar la unidad INMEDIATAMENTE y haga contacto
con la unidad de soporte técnico
para un reemplazo.
21. Advertencia: No recargue la ba-
tería cuando la unidad no esté lo
sucientemente ventilada. Esas
ubicaciones incluyen colchones,
sofás, cojines, almohadas, etc.
22. Advertencia: El fabricante, distribuidor y vendedores minoristas
no aceptan ninguna responsabilidad por el daño a las baterías
causado por el uso inadecuado
y/o una unidad dañada.
23. Advertencia: No debe utilizarse
con esta unidad un cable USB
mayor a 10” (25cm).
Aviso acerca de los Derechos de Autor:
1. Por ley está prohibido copiar, transmitir (por cables, en forma similar o de cual-
quier otro modo), mostrar el desempeño en público, o rentar el material sujeto
a los derechos de autor sin autorización.
2. Este producto presenta la función de protección de copiado desarrollado por
Macrovision. Las señales de protección de copiado se graban en algunos discos. Al grabar o reproducir las imágenes de estos discos aparecerá ruido. Este
producto incorpora la tecnología de protección de derechos de autor que está
protegida por métodos de reclamo de algunas patentes de los EE.UU. y otros
derechos de propiedad intelectual propiedad de Macrovision Corporation
y otros dueños de los derechos. El uso de esta tecnología de protección de
derechos de autor debe estar autorizada por Macrovision Corporation y está
destinado para el uso doméstico y otros usos limitados a menos que sea autorizado por Macrovision Corporation. Están prohibidos la ingeniería inversa y
el desmontaje.
Manejo de los Discos:
1. No deje los discos cerca de fuentes
calor, en la luz directa del sol o en
ambientes altamente húmedos.
2. Almacene los discos en su estuche
cuando no los utilice.
3. Apilar los discos o pararse sobre de
ellos causará que se dañen.
4. No toque las supercies del disco
cuando lo esté manipulando. En lu-
gar de eso tómelo de las orillas.
5. Las huellas dactilares, el polvo, la
suciedad y los rayones pueden distorsionar la imagen o reducir la calidad de sonido de su disco. Limpie
los discos antes de utilizarlos.
6. No pegue papeles, cinta adhesiva
o etiquetas a los discos. No escriba
con marcador con solvente sobre el
disco.
7. Limpie los discos con un paño suave
limpiando del centro hacia afuera.
8. No utilice solventes tales como benceno o productos caseros de limpieza (excepto por aquellos especicados para CD o DVD), o con aerosol
anti estático para discos de vinilo, ya
que esto puede dañar sus discos y
su dispositivo.
Page 20

ENGLISHESPAÑOLFRANÇAIS
18
CONTENIDO DEL PAQUETE
Su Reproductor DVD Portátil de Doble Pantalla Impecca
incluye lo siguiente:
• Un reproductor DVD de 7”
• Control Remoto con Batería
• Adaptador de Energía AC/DC
• Adaptador de Energía para el Auto
• Cable de Audio/Video
• Auriculares
• Manual de Usuario
CARACTERÍSTICAS DEL PRODUCTO
• Amplia pantalla LCD de alto contraste de 7”
• Compatible con la mayoría de los formatos de audio,
video y fotografías
• Ranuras para USB y tarjeta de memoria SD integrados
• Puertos de entrada/salida de AV
• Conector para auriculares de 3.5mm
• Bocinas estéreo integradas 3W RMS (1.5W x 2)
• Funcionalidad de copiado de CD a USB
• Menús multilenguaje y despliegue en pantalla (Inglés,
Español, Francés)
• Batería recargable de litio-polímero
• Suministro de Voltaje Dual (100V~240V, 50/60Hz) para
uso en todo el mundo
Page 21

ENGLISHESPAÑOLFRANÇAIS
19
CONTROLES DE LA UNIDAD PRINCIPAL
1. Arriba/Previo
2. Abajo/Siguiente
3. Izquierda
4. Derecha
5. Menú
6. Botones direccionales
7. Selección de Fuente
(DVD/USB/Tarjeta SD)
8. Conguración
9. Subtítulos
10. Audio
11. Reproducir/Pausa
12. Volumen (Arroba/Abajo)
13. Ingresar/Seleccionar
14. Puerto USB
15. Ranura para Tarjeta SD
16. Conector de 3.5mm para
Auriculares
17. Salida AV
18. Entrada AV
19. Encendido/Apagado
20. Entrada DC (9–12v)
21. Deslizar para abrir la ranura de los discos
CONTROLES DE LA UNIDAD PRINCIPAL
TIT LE
STOP
M
10
1
2
3
6
11
12
13
14
15
16
17
18
19
20
21
22
4
5
7
8
9
=
=
OPEN
23
Page 22

ENGLISHESPAÑOLFRANÇAIS
20
INSTRUCCIONES DE OPERACIÓN
Conectando su Reproductor DVD:
Conecte el adaptador AC en el reproductor DVD (DC IN) y
después conecte el adaptador en la toma de corriente.
Si utiliza un cargador para auto, conecte el adaptador DC en
el reproductor DVD (DC IN) y después conecte el adaptador
en el enchufe del encendedor de cigarros.
Utilice solamente los adaptadores de corriente incluidos con
su reproductor DVD y autorizados por Impecca. Al utilizar otro
adaptador de corriente puede dañar la unidad y/o causar una
descarga eléctrica o inclusive la muerte.
Conectado a una Televisión o bocinas externas:
Conecte el Cable de Audio y Video al puerto de AV OUT.
Conecte un Cable RCA estándar a su equipo de bocinas o
televisión y seleccione la entrada correcta en su equipo de
bocinas o de televisión.
Reproduciendo un DVD:
Deslice la pestaña ’Open’ en la unidad principal. La pantalla
se abrirá exponiendo el reproductor de disco. Coloque el
DVD o CD dentro del reproductor, cierre la unidad y enciéndala. El menú del DVD o de cualquier otro medio se cargará.
Page 23

ENGLISHESPAÑOLFRANÇAIS
21
UTILIZANDO EL CONTROL REMOTO
La siguiente guía le ayudará a tener un mejor uso de su
control remoto:
1. Desplegar
2. Silencio
3. Teclas numéricas
4. Rip de Subtítulos/CD
5. Sistema
6. Teclas de eche Arriba/
Abajo/Izquierda/Derecha
7. Ingresar
8. Congurar
9. Previo
10. Hora
11. Retroceder
12. Reproducir/Pausa
13. Fuente
14. Detener
15. En espera
16. Entrada DVD/USB/
Tarjeta SD
17. Volumen +/–
18. Zoom (ampliar)
19. Audio
20. Ángulo
21. Título PBC/Salida
22. Prog
23. Siguiente
24. Despacio
25. Adelantar rápidamente
26. Repetir
Page 24

ENGLISHESPAÑOLFRANÇAIS
22
1. Presione repetidamente para desplegar la información del disco
2. Ponga el sonido encendido/apagado temporalmente
3. Ingrese los números de capítulos o seleccione el número de la pista
4. Habilite los subtítulos (el disco debe ser compatible con esta función)
5. Cambie entre las salidas de video PAL y NTSC
6. Resalte los elementos del menú utilizando las echas direccionales
7. Haga una selección del menú
8. Ingrese el menú de conguración del reproductor DVD
9. Salte a la pista o capítulo previo
10. Salte a un tiempo especíco de la canción o película
11. Para retroceder la reproducción presione repetidamente en los incrementos 2x, 4x, 8x, 16x y 32x. Presione nuevamente para continuar con la reproducción normal.
12. Comience o pause la reproducción.
13. Cambie entre las entradas DVD y AV
14. Detenga la reproducción
15. Prenda y apague la unidad
16. Cambie la fuente entre DVD/USB/Tarjeta SD
17. Suba y baje el volumen
18. Amplíe una escena en proporciones de 2x, 3x, y 4x. Utilice las echas
direccionales para desplazarse por la pantalla
19. Cambie el lenguaje del audio de las pistas (si su disco es compatible)
20. Cambie los ángulos de la cámara (si su disco es compatible)
21. Regrese al menú cuando su disco tenga la funcionalidad PBC
22. Coloque una pista en la lista de programas
23. Salte al siguiente capítulo o pista
24. Vea el video más despacio a comparación de la velocidad de reproducción normal
25. Para adelantar rápidamente la reproducción presione repetidamente en los incrementos 2x, 4x, 8x, 16x y 32x. Presione nuevamente para continuar con la reproducción normal.
26. Repita las pistas o reproducción del video
Colocación de las Baterías: Abra la tapa del compartimento para pilas del control remoto e
inserte dos baterías AAA estándar. No instale la bacteria al revés, no utilice una mezcla de pilas
nuevas y usadas. No deje el control remoto cerca de una fuente de calor.
Page 25

ENGLISHESPAÑOLFRANÇAIS
23
CONFIGURACIÓN DEL SISTEMA
Presione el botón SETUP (CONFIGURACION) en la unidad de
control remoto para abrir el menú de conguración. Utilice los
botones de dirección (arriba, abajo, izquierda, derecha) para
seleccionar los elementos del menú. Después de realizar los
ajustes deseados, presione nuevamente el botón SETUP para
regresar a la pantalla normal.
Ajustes Generales
Despliegue en TV: ajuste de la proporción de aspecto de la imagen reproducida cuando se utiliza una pantalla de televisión
externa.
• 4:3 Panscan: Una televisión estándar ‘cuadrada’ (una
proporción de aspecto 4:3) recortará los extremos
derechos e izquierdos de una película para pantalla
ancha. También conocida como pantalla completa.
• 4:3 Letterbox: seleccione esta si cuenta con una televisión estándar ‘cuadrada’ (una proporción de aspecto
4:3). En este caso la imagen completa se mostrará en
la pantalla con franjas negras en las porciones superior e inferior de la imagen.
• 16:9 Elija esta opción de despliegue en cualquier pan-
talla ancha (casi todas las HDTV).
• Compresión Amplia: Comprime una imagen de pantalla ancha para adaptarla a una pantalla de 4:3 sin
recor tar.
Angle Mark (Marca de Ángulo):
Despliega la información actual de la vista de la cámara en la
esquina superior derecha de la pantalla TFT si esta está disponible en el disco.
OSD Language (Lenguaje OSD)
Cambia el sistema de lenguaje del reproductor DVD
Page 26

ENGLISHESPAÑOLFRANÇAIS
24
Closed Captions (Subtítulos Ocultos)
Los subtítulos ocultos son información oculta en la señal de
video de algunos discos para las personas con dicultades
auditivas. Los subtítulos ocultos son diferentes de los subtítulos normales que pueden seleccionarse con el botón de SUBTÍTULOS de su menú DVD. Con esta opción puede habilitar los
subtítulos ocultos.
Screen Saver (Salvapantallas)
Activa o desactiva el salvapantallas después de un periodo
prolongado de inactividad del reproductor DVD.
Continuar con la reproducción
Cuando esta opción es habilitada, el reproductor recordará el
último punto leído del disco; el reproductor automáticamente
continuará la reproducción del disco cuando sea reinsertado.
Ajustes de Audio
Downmix:
Esta opción permite jar la salida estéreo análoga de su reproductor DVD.
• LT/RT: Seleccione esta opción si su reproductor DVD
está conectado a un decodicador Dolby Pro Logic
• Stereo (Estéreo): Seleccione esta opción cuando la
salida ofrezca el sonido únicamente de las dos bocinas
frontales
Dolby Digital:
Las opciones incluidas en los ajustes del Dolby Digital son:
‘Dual Mono’ y ‘Dynamic’.
Dual Mono:
• Stereo (Estéreo): El sonido mono izquierdo enviará
señales de salida a la bocina izquierda y el sonido mono
derecho enviará señales de salida a la bocina derecha.
• L-Mono: El sonido mono izquierdo enviará señales de
salida a ambas bocinas, izquierda y derecha.
Page 27

ENGLISHESPAÑOLFRANÇAIS
25
• R-Mono: El sonido mono derecho enviará señales de
salida a ambas bocinas, izquierda y derecha.
• Mix-Mono: el sonido mezclado derecho e izquierdo enviará
señales de salida a ambas bocinas, izquierda y derecha.
Dynamic:
Rango de compresión dinámico.
Ajustes de Video
Ajuste la calidad del video de la unidad de pantalla LCD al
modicar la nitidez, brillo, contraste, tonos y saturación de la
imagen.
Preferencias de Reproducción
Audio: Selecciona un lenguaje de audio del DVD por defecto (si
está disponible).
Subtitle: Selecciona un lenguaje de subtítulos del DVD por defecto (si está disponible).
Disc Menu: Selecciona un lenguaje de menú del DVD por defecto (si está disponible).
Parental (Padres):
Algunos DVD cuentan con niveles de control para padres asignado a todo el disco o a ciertas escenas del disco. Esta función
le permite jar limitaciones en la reproducción. Los niveles de
clasicación varían del 1 al 8 y dependen del país. Puede prohibir la reproducción de ciertos discos que no son adecuados
para sus hijos. Muchos discos son compatibles con la reproducción de escenas alternadas.
Ajuste de Contraseñas
Password (Contraseña):
Requiere de una contraseña para reproducir clasicaciones
restringidas en los DVD. Si este ajuste está deshabilitado, los
ajustes de control de padres no funcionarán.
Page 28

ENGLISHESPAÑOLFRANÇAIS
26
Old Password (Contraseña Anterior):
Ingrese la contraseña anterior usando el control remoto (el valor de fábrica es 136900), y el cursor brincará automáticamente
al campo de contraseña nueva.
New Password (Contraseña Nueva):
Ingrese la contraseña nueva utilizando 4 dígitos desde el control remoto y el cursor brincará automáticamente al campo de
conrmación de contraseña.
Conrm Password (Conrme Contraseña):
Conrme la nueva contraseña al ingresarla nuevamente con el
control remoto. Si se ingresa una contraseña incorrecta, el cur-
sor se quedará en este campo para que ingrese la contraseña
correcta. Después de ingresar la contraseña correcta el cursor
brincará automáticamente al botón OK.
OK: Una vez que todos los campos han sido llenados, presione
el botón ENTER en el control remoto para grabar su nueva
contraseña.
Nota: Si ha cambiado la contraseña, el código de control de
padres y el seguro del disco también serán cambiados.
Note que la contraseña por defecto (136900) permanecerá activa permanentemente inclusive si la contraseña del sistema ha cambiado.
Default (Por Defecto):
Revierte toda la conguración del reproductor a los valores
de fábrica.
Page 29

ENGLISHESPAÑOLFRANÇAIS
27
RIPPING DEL CD
Su reproductor DVD permite copiar CD y CD MP3 sin protección a un dispositivo USB. Antes de comenzar este proceso
asegúrese de tener espacio suciente en su USB.
Usando las echas direccionales, seleccione las pistas que
desea copiar a la USB. Conrme su selección y espere a que
el proceso de copia concluya. Una ventana de diálogo le
conrmará que ha concluido.
Es normal que este proceso se lleve algún tiempo.
Page 30

ENGLISHESPAÑOLFRANÇAIS
28
ESPECIFICACIONES TÉCNICAS
Salida de la batería: 7.4 volts
Condiciones ambientales de almacenamiento:
1. Cuando se almacena hasta por 6 meses
a. Temperaturas de -4°F a 113°F (-20°C a 45°C)
b. Humedad al 65% ±20%
2. Cuando se almacena hasta por 1 semana
a. Temperaturas de -4°F a 149°F (-20°C a 65°C)
b. Humedad al 65% ±20%
Condiciones ambientales de funcionamiento:
1. Al recargar la batería:
a. Temperaturas de 32°F a 113°F (0°C a 45°C)
b. Humedad al 65% ±20%
2. Al funcionar con batería
a. Temperaturas de 32°F a 149°F (0°C a 45°C)
b. Humedad al 65% ±20%
Especicaciones Eléctricas:
Requerimientos de Energía: AC 100-240 V, 50/60 Hz
Consumo de Energía: < 15 watts
Humedad en la Operación: 5% al 90%
Bocinas: 2x 1.5 Watt, salida para Audífonos
Especicaciones del Sistema:
Láser: Láser semiconductor, longitud de onda de 650 nm
Señal del Sistema de Video: NTSC/PAL
Nota: El diseño y las especicaciones están sujetas a cambio sin previo aviso.
Page 31

ENGLISHESPAÑOLFRANÇAIS
29
SOLUCIÓN DE PROBLEMAS
PROBLEMA SOLUCIÓN
Sin sonido o con sonido
distorsionado
Asegúrese que el equipo esté conectado adecuadamente. Asegúrese que
todos los cables estén conectados en
sus tomas correspondientes.
No puedo avanzar dentro de
una película
No puede avanzar por los créditos del
inicio o la información de advertencia
que aparece al inicio de las películas
porque el disco está programado
para prohibir esa acción.
El ícono ∅ aparece en la pantalla
La función o acción no puede reali-
zarse en ese momento ya que:
1. El software del disco lo prohíbe.
2. El software del disco no es compatible con esa función (por ejemplo: los
ángulos).
3. La función no está disponible en
ese momento.
4. Ha solicitado un número de título o
capítulo que está fuera de rango
La imágenes está distorsionada
El disco puede estar dañado. Pruebe
con otro disco. Es normal que aparezca cierta distorsión al momento de
retroceder o avanzar la película.
No puedo avanzar o retroceder
Algunos discos tienen secciones que
prohíben el escaneo rápido o el salto
de capítulos.
Si trata de saltarse la información de
advertencia y los créditos al inicio de
una película, no podrá lograrlo. Esta
parte de las películas usualmente
está programada para prohibir que
sea saltada.
CONTACTE EL SOPORTE
Por e-mail: service@impeccausa.com
En internet: www.impeccausa.com
Page 32

ENGLISHESPAÑOLFRANÇAIS
30
TABLE DES MATIÈRES
Consignes de sécurité 31
Contenu dans l’emballage 33
Caractéristiques du produit 33
Commandes du lecteur DVD 34
Mise en Route de votre lecteur 35
Utiliser votre télécommande 36
Conguration du système 38
Importation d’un CD 42
Spécications Techniques 43
Solutions de dépannage 44
Contactez le service technique 44
Page 33

ENGLISHESPAÑOLFRANÇAIS
31
CONSIGNES DE SÉCURITÉ
Pour votre sécurité, veuillez lire ces consignes attentivement.
1. ATTENTION: Pour réduire le
risque d’électrocution, n’enlevez
aucune pièce de l’appareil. Il n’y
a aucune pièce qui peut être réparé par le client. Contactez le
service technique.
2. ATTENTION: Pour éviter les
risques d’incendie ou de choc
électrique, ne pas exposer l’appareil à la pluie ou à l’humidité.
3. N’exposez pas l’adaptateur et
lecteur DVD à l’eau (y compris
des gouttes d’eau). Les objets
remplis de liquides, comme des
vases ainsi que des bouteilles
d’eau, ne devraient pas être placés sur l’appareil.
4. Gardez le DVD portable à l’abri
du soleil et des sources de cha-
leur telles que des radiateurs.
5. Ne pas bloquer les fentes de
ventilation. Les fentes sur l’appareil servent à sa ventilation.
Il ne faut pas poser votre DVD
portable sur un coussin, un ca-
napé ou toute autre surface qui
pourraient empêcher la ventila-
tion du lecteur.
6. Ne placez pas le lecteur DVD
sur une surface instable, même
si celle-ci s’agit d’une table, un
support, un trépied, un support
ou un chariot. L’appareil pourrait tomber et entraîner des
dommages ou des blessures.
7. Ne jamais mettre pression ni
des objets pointues sur l’écran
LCD ou le cadre.
8. Utilisez uniquement l’adaptateur secteur fourni avec le lecteur DVD portable. L’utilisation
de tout autre adaptateur annulera votre garantie.
9. Débranchez l’adaptateur sec-
teur lorsque l’appareil n’est pas
utilisé.
10. Ne jeter pas le lecteur DVD por-
table dans les ordures ménagers ; respectez toute loi locale
concernant le traitement des
déchets électroniques.
11. ATTENTION: Danger d’explosion
si la batterie est remplacée par
une batterie incompatible. Rem-
placez-la uniquement avec le
même type de batterie.
12. AVERTISSEMENT: La batterie ne
doit pas être exposée à une chaleur excessive comme le soleil,
le feu ou toute autre source de
chaleur.
13. AVERTISSEMENT: L’utilisation
prolongé des écouteurs rend
sourd. Veillez à ne pas monter
le son trop fort pour éviter toute
perte auditive.
14. AVERTISSEMENT: Utilisez uniquement des accessoires fournies par le fabricant, y compris
l’adaptateur secteur fourni et le
chargeur allume cigare.
15. Attention: Le lecteur DVD utilise
un laser. L’utilisation de l’ap-
pareil autre que les fonctions
expliquées dans cette notice
peuvent entraîner le rayonnement laser dangereux.
16. Attention: Pour éviter l’exposi-
tion directe du laser, n’ouvrez
pas l’appareil. Rayonnement la-
ser est visible lorsque l’appareil
est ouvert.
17. Attention: Ne jamais regarder
directement au faisceau laser.
18. Attention: Ne pas installer ce
produit dans un espace en-
combré comme sur une bibliothèque ou une étagère.
19. Attention: Lorsque des enfants
se servent du lecteur DVD,
les parents doivent s’assurer
que l’enfant comprend toutes
les consignes de sécurité, en
Page 34

ENGLISHESPAÑOLFRANÇAIS
32
particulier celles concernant
la surchaue, les risques électriques et le rayonnement laser.
20. Attention: Si l’appareil sur-
chaue ou a une batterie déformée, endommagée ou détruite,
arrêter d’utiliser l’appareil IM-
MÉDIATEMENT et contactez le
service technique pour un remplacement.
21. Attention: Ne pas charger la
batterie lorsque l’appareil n’est
pas susamment ventilé, surtout sur une surface exible.
Des endroits inconvenable au
chargement de la batterie comprennent : un matelas, un cana-
pé, des coussins, des oreillers,
etc.
22. Attention: Le fabricant, le distributeur et le revendeur n’ac-
ceptent aucune responsabilité
pour les dommages causés à la
batterie par une mauvaise utilisation et / ou l’endommager de
l’appareil.
23. Attention: des câbles USB de
plus de 10 po. (250mm) ne
doivent pas être utilisés avec
cet appareil.
Droits intellectuels d’auteur :
1. Il est interdit par la loi de copier, diuser (via le câble, sans l, ou autre), faire une performance publique, ou louer du matériel sous copyright sans autorisation.
2. Ce produit dispose de la fonction de protection contre la copie développée par Macrovision. Signaux de protection contre la copie sont enregistrés sur certains disques. Lors
de l’enregistrement et la lecture des images de ces disques, les images apparaîtront. Ce
produit intègre une technologie de protection de copyright qui est protégée par brevets
et autres droits de propriété intellectuelle détenus par Macrovision Corporation et ses
liales. L’utilisation de cette technologie est destinée aux particuliers et d’autres usages
limités sauf autorisation contraire de Macrovision Corporation. L’ingénierie inverse et le
désassemblage sont strictement interdits.
Manipulation des disques :
1. Ne pas laisser les disques à proxim-
ité de sources de chaleur, en plein
soleil ou dans des environnements
très humides
2. Rangez les disques dans leur boîtier
lorsqu’il n’est pas utilisé
3. Vos disques peuvent se déformer si
vous les entassez.
4. Ne touchez pas la surface du disque
lors de la manipulation du disque.
Tenir le disque aux bords.
5. Les empreintes, la poussière, la
saleté et les rayures peuvent déformer l’image ou réduire la qualité
sonore de votre disque. Nettoyer les
disques avant de les utiliser.
6. Ne collez pas de papier, ruban ou
des étiquettes autocollantes sur vos
disques. Ne pas écrire avec un marqueur solvant sur votre disque
7. Nettoyez les disques avec un chion
doux du centre vers les bords
8. Ne pas utiliser de solvants sur votre
disque, comme le benzène, les produits ménagers de nettoyage (à
l’exception de ceux conçus pour CD
/ DVD usage), ou spray anti-statique
pour disques vinyles car cela peut
endommager votre appareil et les
disques
Page 35

ENGLISHESPAÑOLFRANÇAIS
33
CONTENU DANS L’EMBALLAGE
Votre lecteur DVD Impecca à deux écrans inclut:
• Lecteur DVD Portable 7 pouces
• Télécommande avec batterie
• Adaptateur secteur Impecca
• Chargeur allume cigare
• Câble A/V
• Notice d’utilisation
CARACTÉRISTIQUES DU PRODUIT
• Écran 7” TFT LED (format cinéma 16:9)
avec résolution de 480 x 234 pixels
• Format modiable — 16:9 ou 4:3
• Compatible avec la plupart des formats de vidéo,
d’image, et d’audio
• Importation de CD
• Prise USB 2.0 et lecteur carte mémoire SD/MMC
• Haut-parleurs intégrés stéréo 2.0
• Protection anti-choc intégrée
• Écran congurable: couleur, contraste, et luminosité
• Adaptateur secteur mondial : A/C 100–240v, 50/60Hz,
D/C 9–12v
Page 36

ENGLISHESPAÑOLFRANÇAIS
34
COMMANDES DU LECTEUR DVD
1. Haut/précédant
2. Bas/suivant
3. Gauche
4. Droit
5. Menu
6. Touches directionnelles
7. Choisir Source (DVD/USB/
SD Card)
8. Conguration
9. Sous-titres
10. Audio
11. Lire/Pause
12. Volume (+/–)
13. Entrer/Selectionner
14. Prise USB
15. Lecteur carte SD
16. Prise 3.5mm audio
17. Sortie AV
18. Entrée AV
19. Allumer/éteindre
20. Alimentation DC (9–12v)
21. Glisser pour ouvrir.
COMMANDES DU LECTEUR DVD
TIT LE
STOP
M
10
1
2
3
6
11
12
13
14
15
16
17
18
19
20
21
22
4
5
7
8
9
=
=
OPEN
23
Page 37

ENGLISHESPAÑOLFRANÇAIS
35
MISE EN ROUTE DE VOTRE LECTEUR
Branchez votre lecteur DVD:
Branchez l’adaptateur secteur au lecteur DVD par l’alimentation DC (DC IN), puis branchez l’adaptateur à la prise de
courant.
Si vous utilisez le chargeur allume cigare, branchez l’adaptateur DC dans le lecteur DVD (DC IN) et de brancher l’adaptateur à la prise allume-cigare.
Utilisez uniquement l’adaptateur secteur ou chargeur allume
cigare autorisé par Impecca, fourni avec votre lecteur DVD. L’utilisation de tout autre adaptateur peut endommager l’appareil et /
ou entrainer un choc électrique, un incendie ou même la mort.
Raccorder un téléviseur ou des enceintes externes:
Branchez le câble audio vidéo à la sortie AV sur le lecteur
principal. Branchez un câble RCA standard (non inclus) à vos
haut parleurs ou téléviseur et sélectionnez l’entrée correcte
sur vos haut parleurs ou du téléviseur.
A noter que l’écran secondaire ne peut pas être raccordé à
l’unité principale en même temps qu’un téléviseur ou un haut
parleur externe.
Lecture d’un DVD:
Faites glisser l’onglet «Open» de l’unité principale. Le cadre
de l’écran s’ouvrira. Placez le DVD ou le CD dans le lecteur,
puis fermez le cadre et allumer le lecteur DVD. Votre lm va
se charger.
Page 38

ENGLISHESPAÑOLFRANÇAIS
36
UTILISER VOTRE TÉLÉCOMMANDE
Ce guide vous permettera de faire une meilleure utilisation
de votre télécommande:
1. Achage
2. Muet
3. Touches numériques
4. Sous-titres/CD Rip
5. Système
6. Haut/bas/gauche/droit
7. Entrer
8. Réglages
9. Précedant
10. Heure
11. Rebobiner
12. Lire/Pause
13. Source
14. Arrêt
15. Mode veille
16. Source DVD/USB/SD Card
17. Volume +/–
18. Zoom
19. Audio
20. Angle
21. PBC Titre/Sortie
22. Prog
23. Suivant
24. Ralenti
25. Avancer
26. Répéter
Page 39

ENGLISHESPAÑOLFRANÇAIS
37
1. Appuyer pour acher les informations du disque.
2. Couper le son
3. Entrer un numéro de piste ou de chapitre
4. Démarrer le sous-titrage (si votre disque est compatible)
5. Changer entre sortie vidéo PAL et NTSC
6. Sélectionner les objets sur l’écran avec ces touches
7. Valider une sélection
8. Accéder au menu de conguration
9. Revenir à la piste ou au chapitre précédant
10. Sauter à un temps choisi d’une piste ou d’un lm
11. Appuyez plusieurs fois pour rembobiner la lecture à 2x,
4x, 8x, 16x et 32x par incréments. Appuyez à nouveau
pour reprendre la lecture normale
12. Commencer ou mettre en pause la lecture
13. Basculer entre la lecture d’un DVD et l’entrée AV
14. Arrêter la lecture
15. Mettre l’appareil en veille
16. Basculer entre les sources de DVD / USB / carte SD
17. Augmenter et diminuer le volume
18. Zoom sur la scène de ratios de 2x, 3x, 4x et. Utilisez les
èches directionnelles pour vous déplacer sur l’image.
19. Changer pistes de langue audio (si votre disque est compatible)
20. Changer les angles de caméra (si votre disque est compatible)
21. Retour au menu lorsque votre disque dispose d’une
fonctionnalité PBC
22. Placez une piste sur une playlist
23. Passer au chapitre (ou à la piste) suivant
24. Lecteur ralenti de la vidéo
25. Appuyez plusieurs fois pour la lecture rapide par incré-
ments de 2X, 4X, 8X, 16X et 32x. Appuyez à nouveau pour
reprendre la lecture normale.
26. Répétez une vidéo ou une piste.
Insertion de la batterie: Ouvrez la porte de la télécommande et insérez deux piles AAA standard.
Ne pas installer la batterie à l’envers et ne mélangez pas piles usagées et frais. Ne placez pas la
télécommande à proximité d’une source de chaleur.
Page 40

ENGLISHESPAÑOLFRANÇAIS
38
CONFIGURATION DU SYSTÈME
Appuyez sur le bouton SETUP de la télécommande pour ouvrir
le menu de conguration. Utilisez les touches directionnelles
(haut, bas, gauche, droite) pour sélectionner des éléments du
menu. Après avoir changé les réglages souhaités, appuyez à
nouveau sur le bouton SETUP pour revenir à l’achage normal.
Paramètres généraux:
Format d’achage:
Dénir le ratio d’aspect de l’image de lecture lors de l’utilisation d’un écran de télévision externe.
• 4:3 panoramique: la télévision en forme de «carré»
(4:3) va couper les côtés gauche et droit hors d’un lm
grand écran. Aussi connu comme plein écran.
• 4:3 Letterbox: sélectionnez cette option si vous avez
la télévision en forme de «carré» (4:3). Dans ce cas,
l’image sera achée sur l’écran avec des bandes
noires sur les parties supérieure et inférieure de
l’image.
• 16:9: Choisissez cette option d’achage sur un écran
panoramique (16:9) (la plupart des téléviseurs HD).
• Large compression: écrase une image grand écran
pour s’adapter à un écran 4:3 sans rognage.
Angle Mark:
Ache des informations en cours de visualisation de la caméra sur le coin droit de l’écran TFT si disponible sur le disque.
Langue de menu:
Changer la langue des menus
Titres codés:
Les titres codés sont des données qui sont cachées dans le
signal vidéo de certains disques pour les personnes sourdes
et malentendantes. Les titres codés sont diérents des sous-
Page 41

ENGLISHESPAÑOLFRANÇAIS
39
titres qui peuvent être sélectionnés à l’aide de la touche SUBTITLE ou dans votre menu DVD.
Economiseur d’écran:
L’economiseur d’écran se met en route après une période
d’inactivité prolongée.
Réglages audio:
Mixage:
Cette option vous permet de régler la sortie analogique stéréo de votre lecteur DVD.
• LT / RT: Sélectionnez cette option si votre lecteur DVD
est connecté à un décodeur Dolby Pro Logic.
• Stéréo: Sélectionnez cette option lorsque la sortie
délivre un son à partir de seulement deux enceintes
avant.
Dolby Digital:
Choisissez entre : « Dual Mono » and « Dynamic ».
Dual Mono:
• Stéréo: Les signaux du son mono gauche sortent du
haut-parleur gauche et Les signaux du son mono droit
sortent du haut-parleur droite.
• L-Mono: Uniquement le son mono gauche sort des
deux enceintes.
• R-Mono: Uniquement le son mono droit sort des deux
enceintes.
• Mix-Mono: Les canaux gauche et droit sont mixtes et
sortent des deux haut-parleurs.
Dynamique:
Compression de gamme dynamique.
Page 42

ENGLISHESPAÑOLFRANÇAIS
40
Réglages vidéo:
Réglez la qualité vidéo de l’écran LCD en modiant la netteté, la luminosité, le contraste, la teinte et la saturation de
l’image.
Préférences de lecture:
Format de vidéo:
Ce lecteur DVD est compatible avec les formats NTSC et PAL.
Choisissez soit NTSC (É.-U. / Amériques / Japon) ou PAL (Europe / Asie) pour correspondre à votre téléviseur.
• NTSC: Sélectionnez ce signal lorsque le lecteur est
connecté à un téléviseur NTSC. La sortie de disques
PAL sera automatiquement converti au format NTSC.
• PAL: Sélectionnez ce signal lorsque le lecteur est
connecté à un téléviseur PAL. La sortie de disques
NTSC sera automatiquement converti au format PAL.
• Auto: Modie le signal vidéo en fonction du format du disque.
Audio:
Selectionner la langue audio du DVD par défaut (si disponible).
Sous-titres:
Selectionner la langue des sous-titres du DVD par défaut (si
disponible).
Menu de disque:
Selectionner la langue du menu du DVD par défaut (si disponible).
Parental:
Certains DVD peuvent avoir un niveau de contrôle parental
assigné au disque ou à certaines scènes du disque. Cette
fonctionnalité vous permet de dénir une limitation de la lec-
ture. Les niveaux de notation vont de 1 à 8 et varient selon
les pays. Vous pouvez interdire la lecture de certains disques
qui ne sont pas adaptés pour vos enfants. Certains disques
prennent la lecture des scènes alternatives.
Page 43

ENGLISHESPAÑOLFRANÇAIS
41
Conguration du mot de passe:
Mode du mot de passe:
Exiger un mot de passe pour lire les notes limité sur les DVD.
Si ce paramètre est désactivé, les réglages parentaux ne
fonctionnent pas.
Ancien Mot de Passe:
Entrez l’ancien mot de passe à l’aide de la télécommande (réglage par défaut est 136900), et le curseur se déplace automatiquement vers le nouveau champ de mot de passe.
Nouveau Mot de Passe:
Entrez un nouveau mot de passe en utilisant 4 chires à partir de la télécommande, et le curseur se place automatiquement dans le champ du mot de passe de conrmation.
Conrmer Mot de Passe:
Conrmez le nouveau mot de passe en entrant à nouveau
en utilisant la télécommande. Si le mot de passe incorrect
est entré, le curseur restera dans ce domaine et vous devrez
entrer le mot de passe correct. Après la saisie, le nouveau
mot de passe correct à nouveau, le curseur passe automati-
quement sur le bouton OK.
Conrmer: Une fois tous les champs sont remplis, cliquez sur
le bouton ENTRER sur la télécommande pour enregistrer
votre nouveau mot de passe.
Remarque: Si le mot de passe a été modié, le code de verrouillage parental et le disque sera également modié.
Notez que le mot de passe par défaut (136900) reste active en
permanence, même si le mot de passe du système a été changé.
Défaut:
Rétablir tous les réglages du lecteur aux paramètres d’usine.
Page 44

ENGLISHESPAÑOLFRANÇAIS
42
IMPORTATION D’UN CD
Votre lecteur DVD peut copier les chiers d’un CD nonprotégé à une clé USB. Avant de commencer ce processus,
vérier que vous avez assez de place libre sur votre clé USB.
À l’aide des touches directionnelles, choisissez les chiers
que vous aimeriez copier à votre clé USB. Conrmez votre
choix et attendre l’importation. Un message de conrmation
s’achera lorsque le processus a réussi.
Notez que ce processus peut prendre du temps.
Page 45

ENGLISHESPAÑOLFRANÇAIS
43
SPÉCIFICATIONS TECHNIQUES
Puissance de batterie: 7.4 volts
Conditions environnementales de stockage:
1. Pendant une période prolongée:
a. Temperature entre de -4°F à 113°F (-20°C à 45°C)
b. Humidité ambiante de 65% ±20%
2. Stockage de moins d’une semaine:
a. Temperature entre de -4°F à 149°F (-20°C à 65°C)
b. Humidité ambiante de 65% ±20%
Conditions environnementales d’opération:
1. Lorsque l’appareil est branché à l’adaptateur secteur:
a. Temperature de 32°F à 113°F (0°C – 45°C)
b. Humidité ambiante de 65% ±20%
2. Mode autonomie (utilisation de la batterie):
a. Temperature between -4°F to 149°F (-20°C à 65°C)
b. Humidité ambiante de 65% ±20%
Caractéristiques électriques:
Alimentation: AC 100-240 V, 50/60 Hz
Consommation: < 15 watts
Humidité ambiante: 5% to 90%
Haut-Parleurs: 2 x 1.5 Watts, prise écouteurs, sortie coaxiale
Caractéristiques système:
Laser: Laser semi-conducteur, 650 nm longueur d’ondes
Signaux vidéos: NTSC/PAL
À noter: La forme et les caractéristiques du lecteur DVD peuvent changer à tout moment.
Page 46

ENGLISHESPAÑOLFRANÇAIS
44
SOLUTIONS DE DÉPANNAGE
PROBLÈME SOLUTION
Pas de son ou son déformé
Assurez-vous que le lecteur DVD
est correctement connecté. Assurez-vous que tous les câbles sont
bien dans les bonnes prises.
Impossibilité d’avancer
dans un lm
Vous ne pouvez pas avancer dans
le générique d’ouverture ainsi
que des notices d’avertissement
qui apparaîssent au début du lm
parce que le disque est programmé pour interdire cette action.
Le symbole ∅ apparaît
La fonction ou l’action ne peuvent
pas être faites à l’instant car:
1. Le logiciel du disque l’interdit ou
ne supporte pas la fonction (par
exemple, les angles)
2. La fonctionnalité est désactivée
à l’instant par le disque.
3. Vous avez demandé un chapitre, une piste ou un numéro de
titre inexistant.
L’image est déformée
Le disque peut être endommagé. Essayez un autre disque, il est
normal pour une certaine défor-
mation d’apparaitre pendant le
délement en arrière ou en avant.
Pas de délement
(en avant ou en arrière)
Certains disques comportent des
sections qui interdisent le délement rapide ou saut de chapitre ;
Vous ne pouvez pas sauter les notices d’avertissement et les men-
tions de copyright au début d’un
DVD.
CONTACTEZ LE SERVICE TECHNIQUE
Par e-mail: service@impeccausa.com
Par internet: www.impeccausa.com
 Loading...