

Page 1
Mobile Verify
User & Setup Guide
Instructional Management Program
& Academic Communication Tool
1
Page 2

Mobile Verify
User & Setup Guide
Table of Contents
User Guide
Software Usage: General ................................................................................ 3
Software Usage: Breakfast in the Classroom................................................ 6
Data Sync ......................................................................................................... 9
Scanwedge Setup .......................................................................................... 11
Wifi Setup ....................................................................................................... 13
Mobile Printer Setup ...................................................................................... 15
2
Page 3

Mobile Verify
User Guide
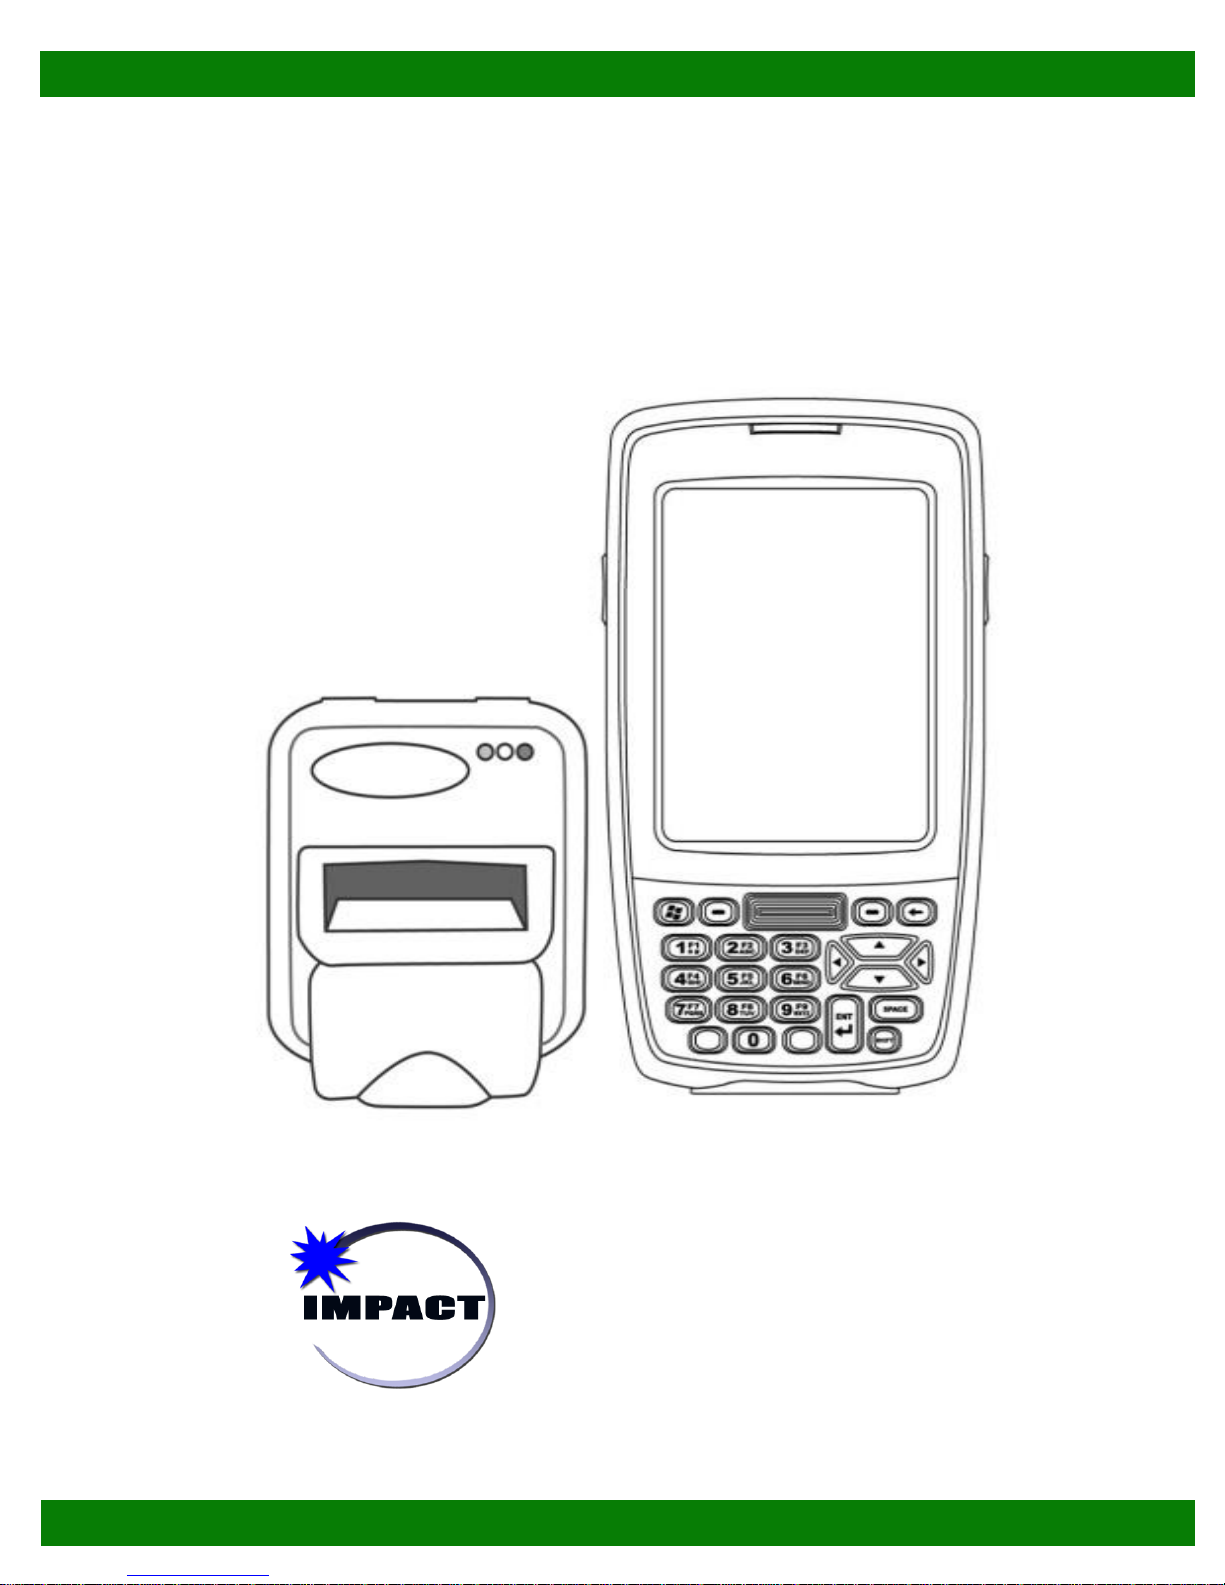
Verify.Net and Mobile Devices Overview
Verify.Net is an IMPACT application used to manage student behavior, student building
access, detentions, student debts and purchases, textbook distribution and truancy.
Student information from SIM and SSM is available in Verify to help facilitate these
activities. The vendor for Verify offers handheld scanners (mobile devices) to use in
conjunction with the building access module; schools have the option to use their
discretionary funds to purchase these devices directly from the vendor. The devices can
help facilitate the management of door swipes, hall sweeps and breakfast in the
classroom.
Software Usage: General
3
Page 4
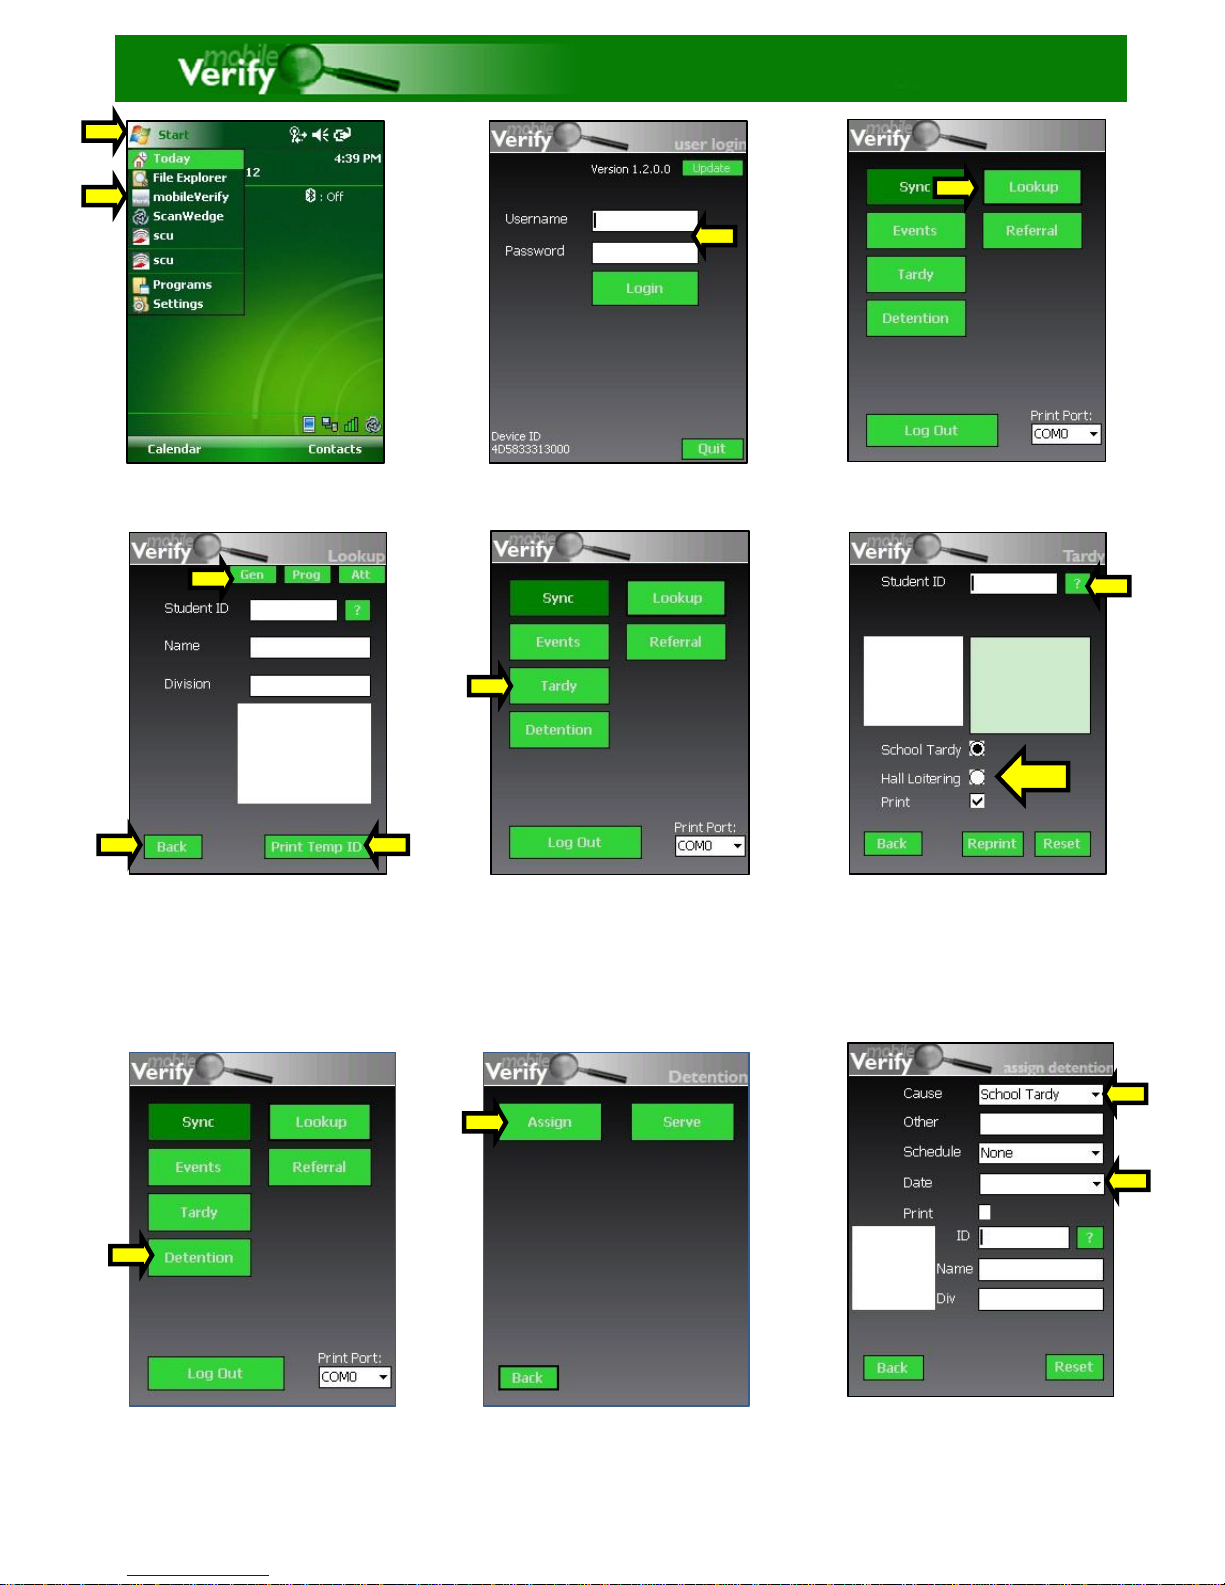
15. Select Cause from dropdown.
16. If using schedules, select Schedule
from dropdown.
17. Select an Assign Date.
18. Check the Print checkbox if you
wish to print a pass.
19. Scan ID Barcode, type in student ID
or click ”?” to search for a student.
1. Click Start.
2. Select mobileVerify.
3. Enter mobile username
and password.
4. Click Login.
5. If retrieving general info
click on Lookup.
6. Scan ID Barcode, type in ID number,
or click ”?” to search for a student.
Student data will populate. You can
click on Gen, Prog, or Att tabs to see
info. You can also print Temp ID if
mobile printer is available.
7. Click the back button when
finished.
Software Usage
8. To record Tardy/Hall Loitering,
click Tardy.
9. Select Tardy or Hall Loitering.
10. Check Print checkbox if you
wish to print a tardy, if
mobile printer is available.
11. Scan ID Barcode, type in
Student ID, or click ”?” to
search for a student
12. Click back when finished.
13. To assign/serve detentions,
click Detention.
Note: When using detention schedules
first create the schedule in Verify.net.
Sync the mobile device with the new
detention schedule by checking the
detention schedule checkbox in the
Sync module. (see Pg 10)
14. Select Assign to record a
Detention.
4
Page 5
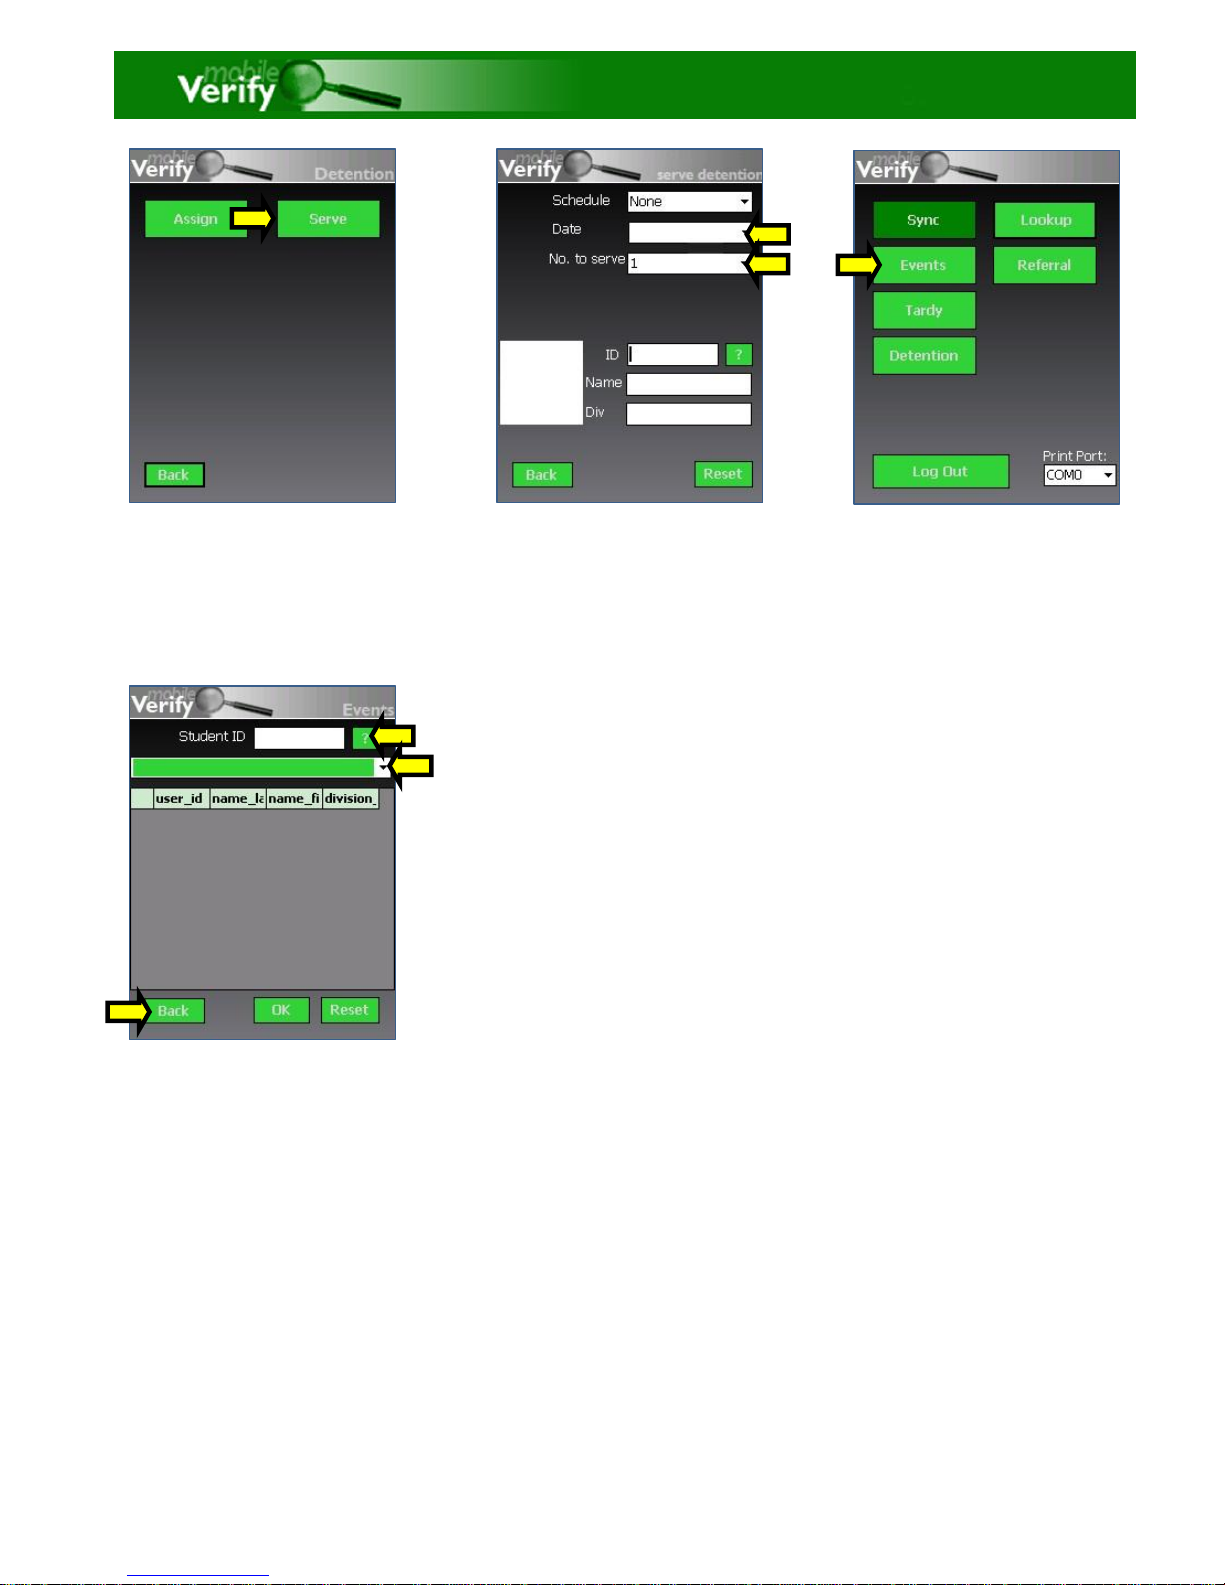
21. If using schedules, select a
schedule from dropdown.
22. Select a Serve Date.
23. Select the number of detentions to
set as Served from dropdown.
24. Scan ID Barcode or click ”?” to
search for a student or type in
student ID.
25. Click Back when finished.
Software Usage
20. Select Serve to serve a
Detention.
27. Select Events to record
student participation in a
stored event.
Note: When using events, first
create the event in Verify.net and
add desired students. Sync the
mobile device with the new event
by checking the Events checkbox
in the Sync module.
(See Pg 10)
28. Select an event from the
dropdown
29. Scan ID Barcode, type in
student ID or click ”?” to
search for a student
30. Click Back when finished.
5
Page 6

Mobile Verify
User Guide
Software Usage: Breakfast in
the Classroom
6
Page 7

1. Click on the Windows Logo.
2. Select mobileVerify.
3. Enter your mobile username
and password.
4. Select Breakfast
5. Start scanning student or staff
ID barcodes by clicking the side
buttons or the orange button on
the keypad. You can also enter
in the ID number manually.
7. To upload data that you have
collected press Perform Sync.
8. To download any new data that
has been added to your school,
check the desired checkboxes and
click Perform Sync.
6. When you are finished
scanning IDs, ensure you
are in a WIFI zone and click
Sync.
9. Wait for a successful sync
message upon completion.
7
Page 8

After a successful mobile sync, you can view your data in various ways using Verify.net. Log
into Verify.net using your CPS credentials and click on the Breakfast in the Classroom menu
item. Each of the grids displayed can be exported to Excel or PDF. You can also run a report of
Breakfast swipes by entering a date and time range and click submit. Once you have entered
the desired date range click Display Report. This will display a report of all Breakfast swipes
within your date range for all students and staff.
8
Page 9

Mobile Verify
User Guide
Data Sync
9
Page 10

1. Click Start.
2. Select mobileVerify.
3. Enter Username and Password
provided by Omicron.
4. Click Login.
5. Click on Sync.
Data Sync
6. To upload data that you have
collected press Perform Sync.
7. To download any new data that
has been added to your school,
check the desired checkboxes
and click Perform Sync.
10
Page 11

Mobile Verify
User Guide
ScanWedge Setup:
Configuring the Barcode Scanner
11
Page 12

1. Click Start.
2. Select ScanWedge.
3. Verify that all the settings are
correct as they appear on the
screen above
4. ScanWedge: Enable.
5. Beep Sound: Enable.
6. Light Mode: Ilium Aimer On.
7.Send barcode is Checked.
8.Send ENTER key after suffix is checked.
9. Click Apply.
10. Click the X in the top right corner of
the screen to exit
ScanWedge
11. Verify that the barcode scanner is working by squeezing the side buttons or the orange button on the
keypad.
(shown on the diagram below)
12
Page 13

Mobile Verify
Setup Guide
Wifi Setup
13
Page 14

1. Click Start.
2. Select SCU.
3. Click on Admin Login.
4. Enter SUMMIT all caps in
the password field and click
OK.
5. Click on Profile.
Wifi Setup
6. Enter SSID.
7. Select Encryption.
8. Select EAP Type if required.
9. Enter WEP keys/PSKs if required.
10. Enter Credentials.
11. When finished, click Commit.
12. Click OK in the top right corner of
the screen to exit.
14
Page 15

Mobile Verify
Setup Guide
Mobile Printer Setup
15
Page 16

1. Click Start.
2. Select Settings.
3. Make sure printer and Bluetooth
are turned on.
Click on Connections.
4. Click on Bluetooth.
5. Click on Add new device or
Add.
Mobile Printer Setup
6. Select Printer and click
Next.
7. Passcode window will
pop up.
8. Enter passcode 1234, then
click Next.
9. You will get a Device Added
message, then click Done.
10. Click on COM Ports.
16
Page 17

12. Highlight the Printer and
Click Next.
(By default Port COM0 and Secure
Connection are checked) DO NOT
CHANGE THESE SETTINGS.
13. Click on Finish.
11. Click on New Outgoing Port.
14. The Printer name and the
COM port assigned to it will
appear on the screen.
Mobile Printer Setup
17
Page 18

Mobile Printer Setup
18
Page 19

Mobile Printer Setup
Note: When connecting the printer to the handheld unit, press the Bluetooth
button until all 3 LEDs turn off and turn back on. You will see a blue light blinking;
that means that it is sending a signal to the handheld unit.
19
 Loading...