

imovr Lander Installation Manual

Adjustable - Height Desk System
INSTALLATION MANUAL
STEP 1
Congratulations on the purchase
of your new Lander Desk! Enjoy
the health and productivity
bene ts that come from using an
active workstation. The Lander’s
technological advancements allow it
to arrive 98% pre-assembled so you
can get standing in minutes—no tools
required.
BEFORE YOU BEGIN
Note: Lander w/ SteadyType
includes SteadyType
keyboard tray items.
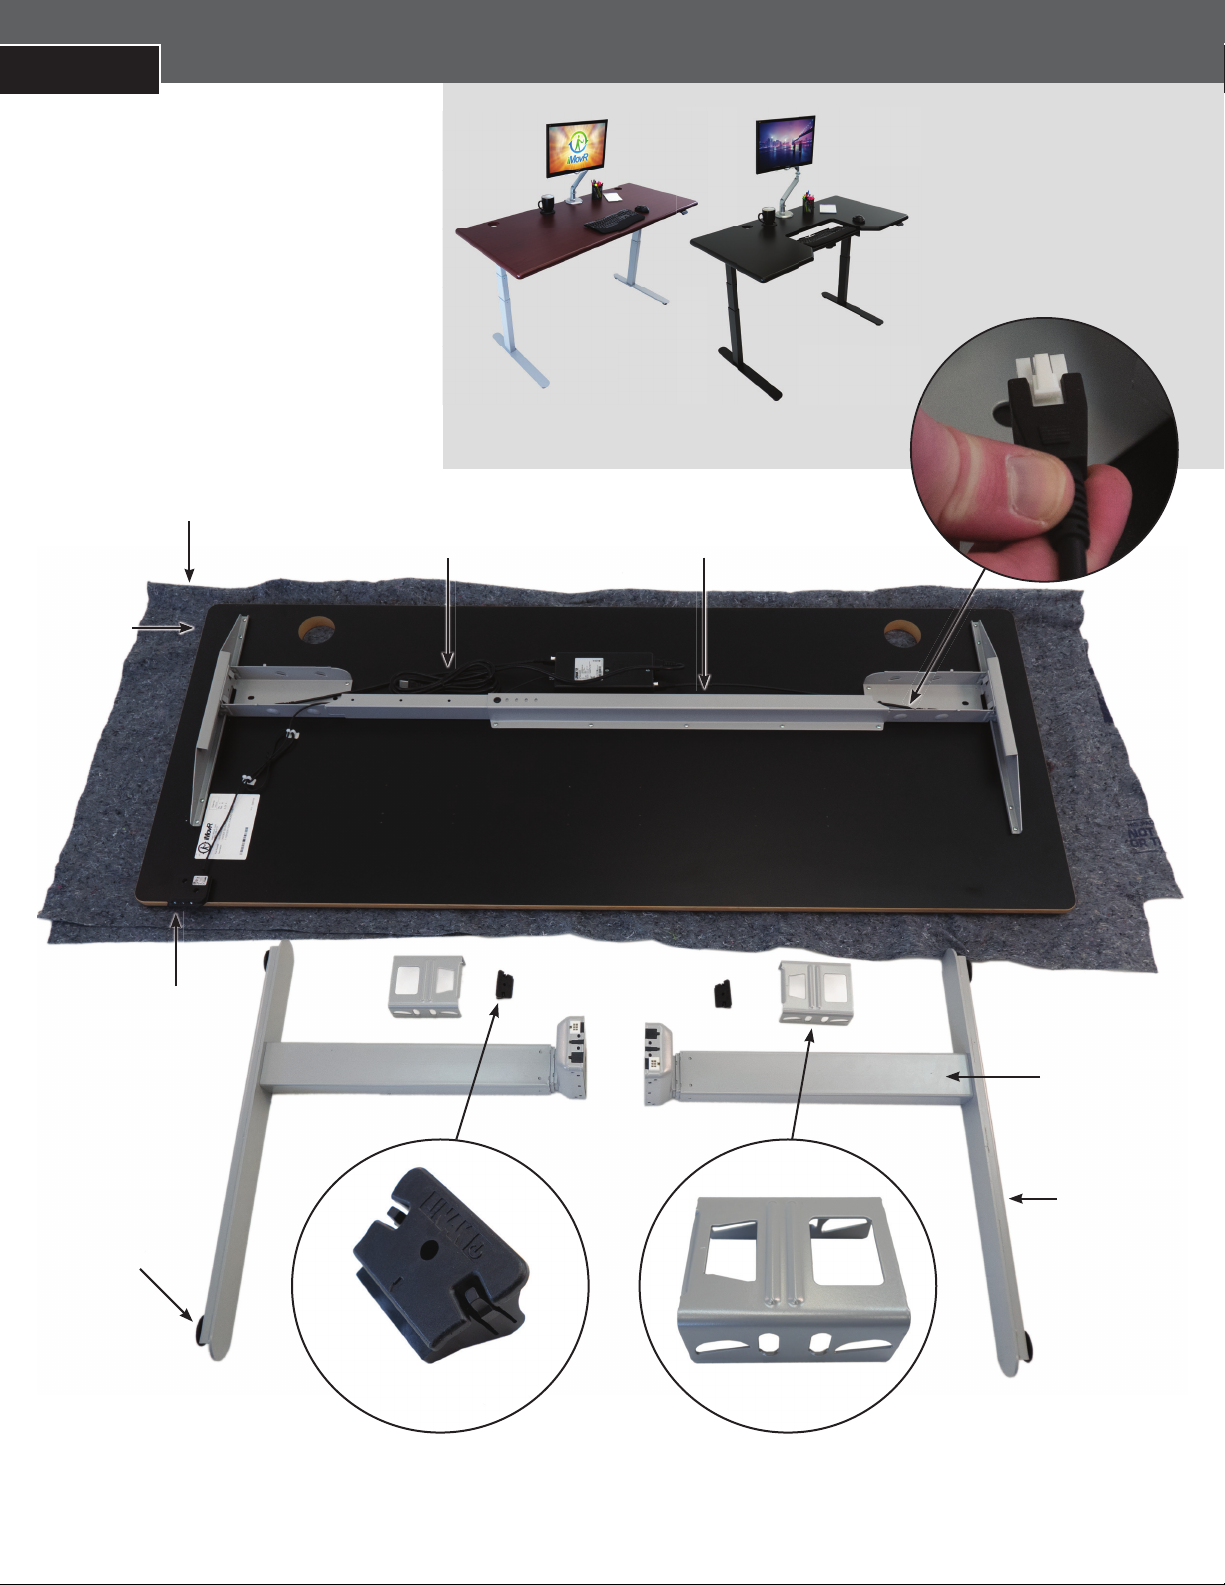
DESK ASSEMBLY PARTS
Place Tabletop upside-down on a soft surface.
BLANKET OR OTHER SOFT SURFACE
POWER SUPPLY
TABLE TOP
LANDER DESK
CROSSBAR
(Only comes with 59” tabletop and larger.)
LANDER DESK
with SteadyType
LEG MOTOR CABLES
LEVELING PAD
2
CONTROLLER
LEG
FOOT
LOCK CLAMP
NO TOOLS REQUIRED!
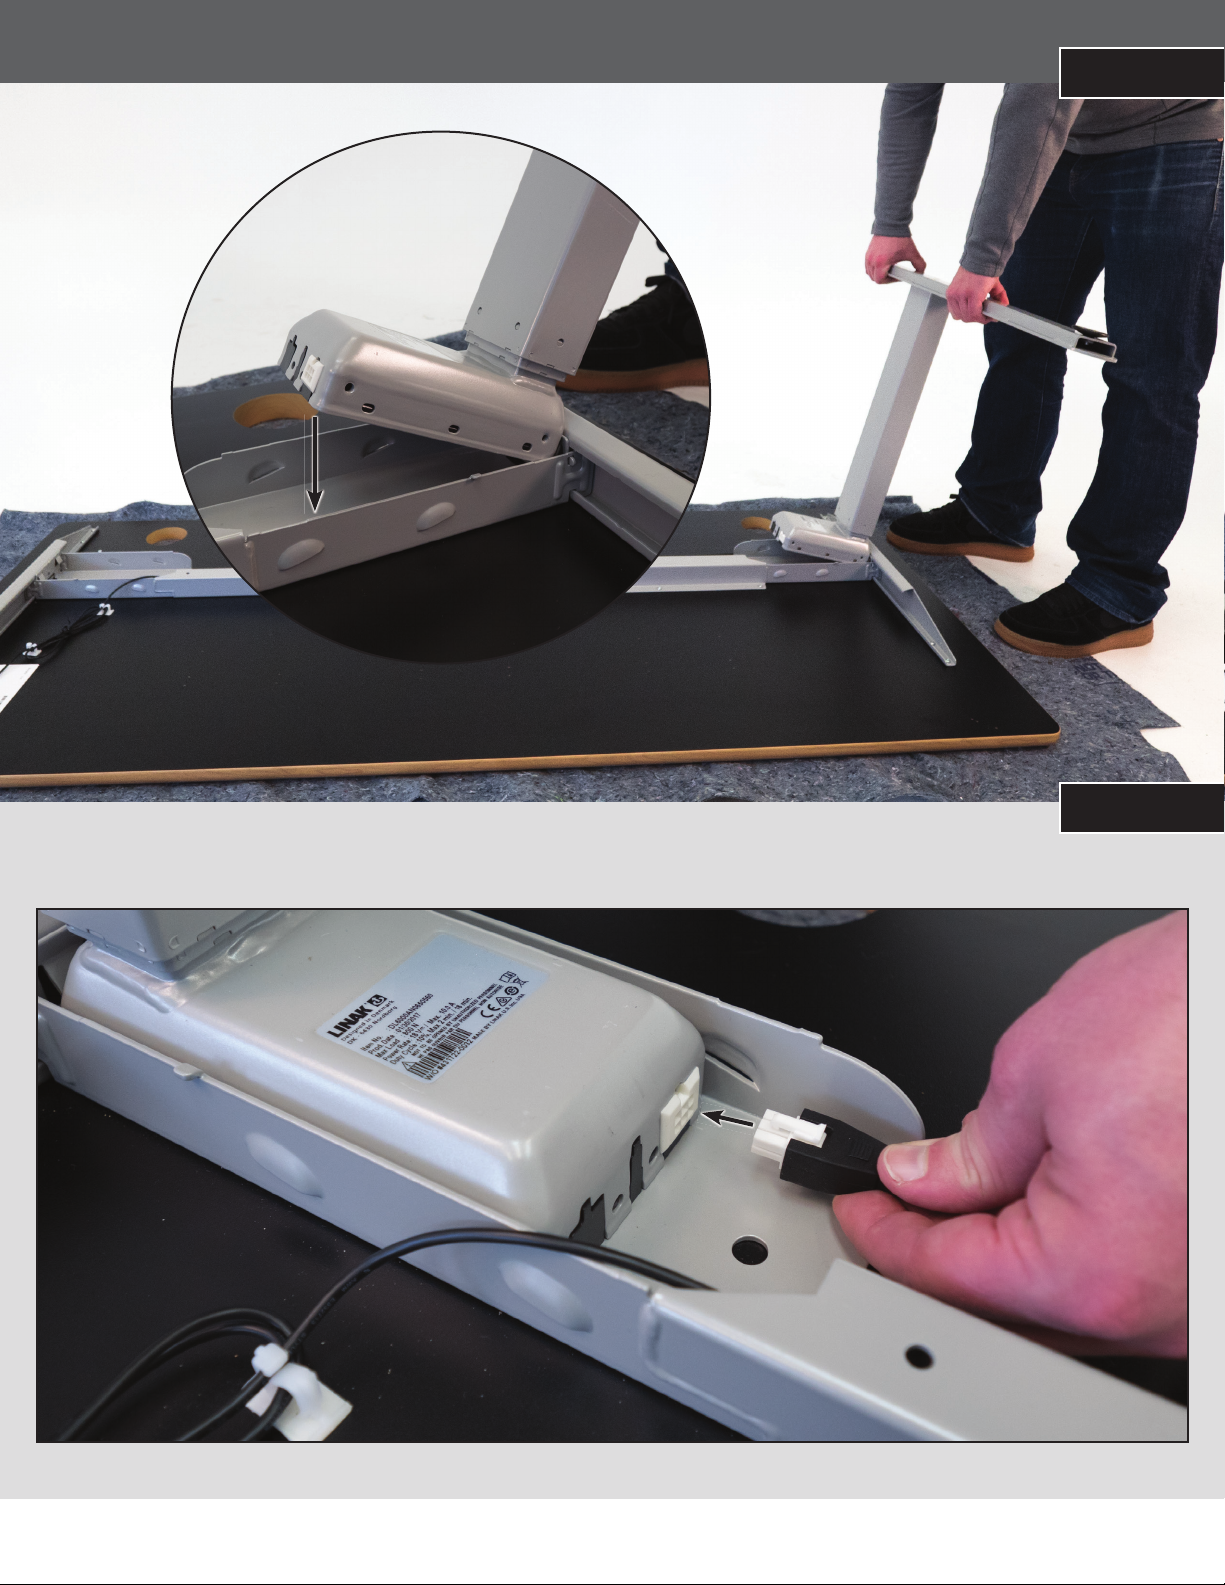
PLACE LEG INTO BASE
ASSEMBLY INSTRUCTIONS
STEP 2
STEP 3
ATTACH LEG MOTOR CABLES TO LEG
3
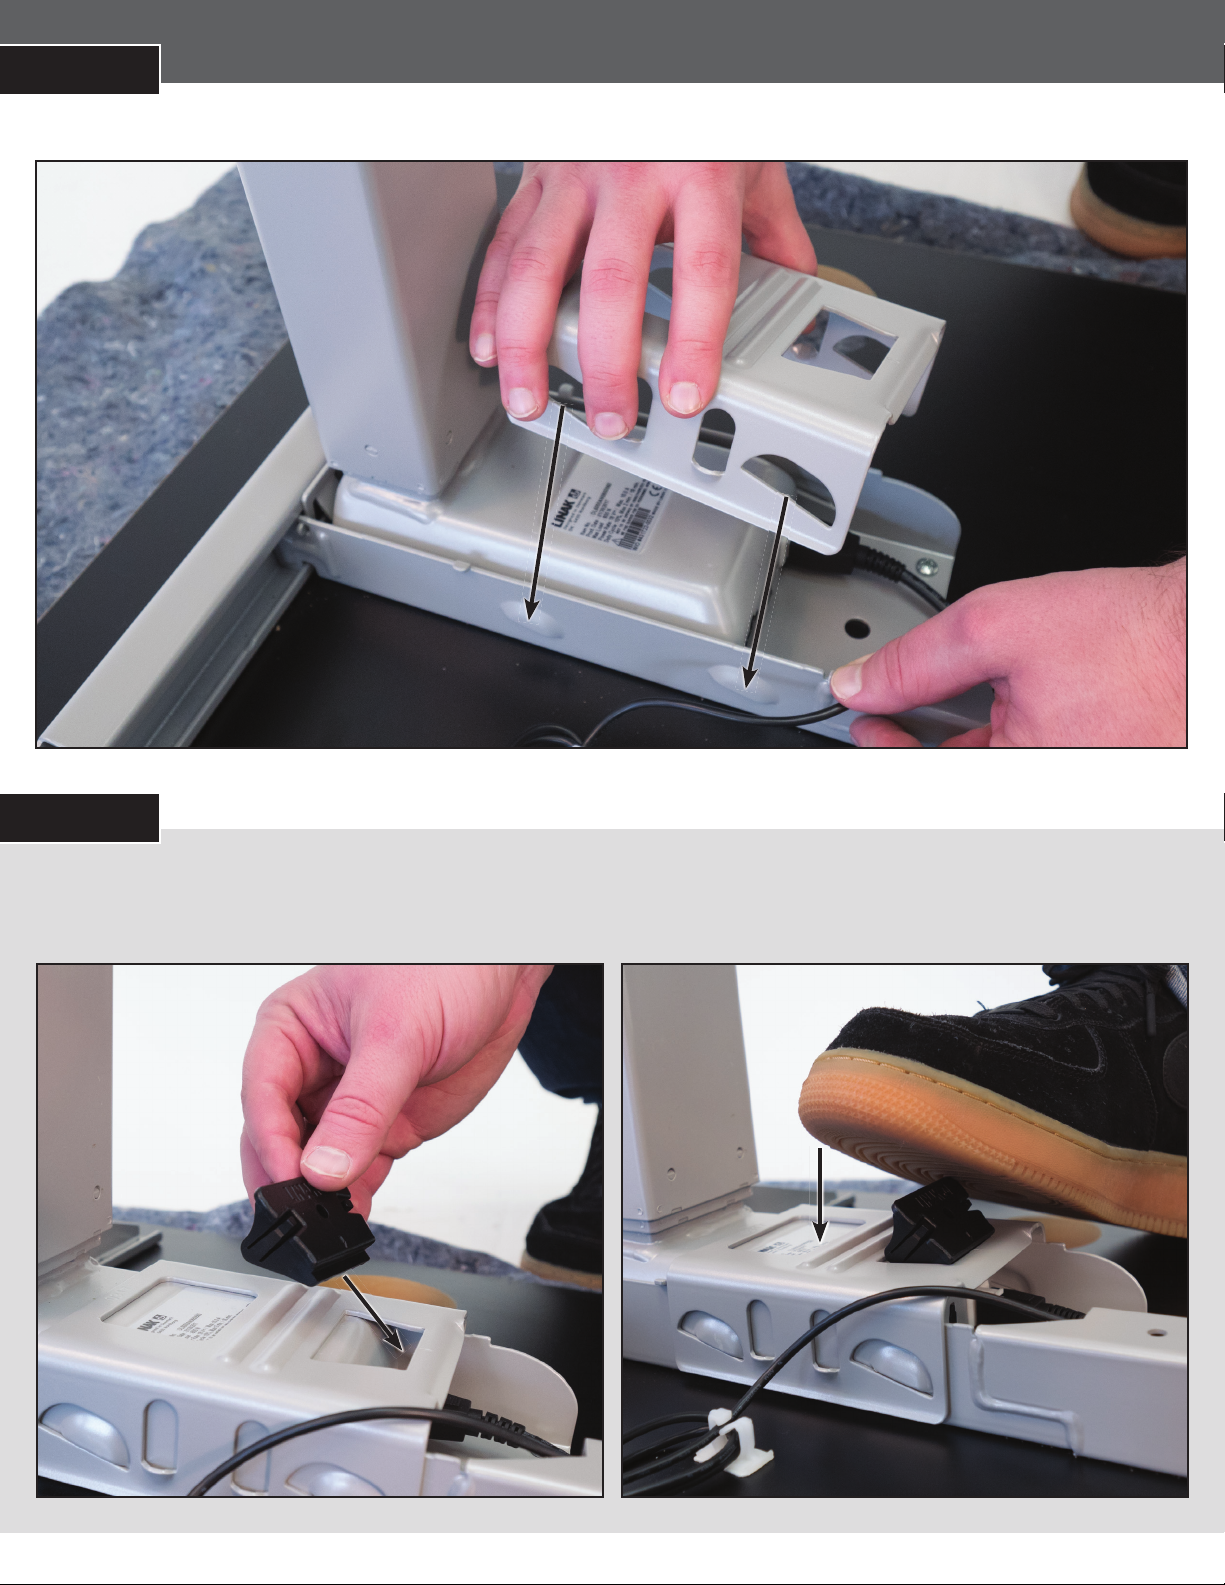
STEP 4
PLACE CLAMP ON LEG AND PRESS DOWN
STEP 5
PLACE LOCK IN CLAMP
Firmly press the Lock into place using your foot. When you hear a clicking sound, the Lock is secured.
Step Down
4
 Loading...