

ImOn HD DTA Self-install Instructions
Self Install Instructions - ImOn HD DTA
What does this mean to you?
ImOn Communications continues to move towards an all digital
cable TV platform by removing existing analog cable TV signals.
This change will require each TV in a customer's home to either be
equipped with an ImOn set-top box or utilize a digital tuner within
the TV in order to continue to receive programming that is no
longer available in analog format.
Channels that are moved from analog to digital format will have
improved picture and sound quality giving you a better
entertainment experience. Moving channels from analog to digital
format also frees up bandwidth on ImOn's network to improve
other services including more HD channels and additional Internet
service capacity.
See the included channel lineup for the most up-to-date channel
numbers and locations.
What do I need to do?
To continue to receive the channels changing from analog to digital
format, you will need to install a DTA on each TV that does not
currently have an ImOn set top or does not utilize a digital tuner
within the TV.
Follow the simple steps in this instruction guide to install your
DTA on or after October 21, 2015 in order to continue to access
the following channels moving to digital format -
Destination America – channel 27
ESPN Classic – channel 32
Discovery Family Channel – channel 35
RFD-TV – channel 51
Oxygen – channel 53
Comedy.TV – channel 54
MAVTV – channel 59
PixL – channel 64
TCM – channel 70
Science – channel 85
HLN – channel 102
MyImOn.com/Digital
298-6484
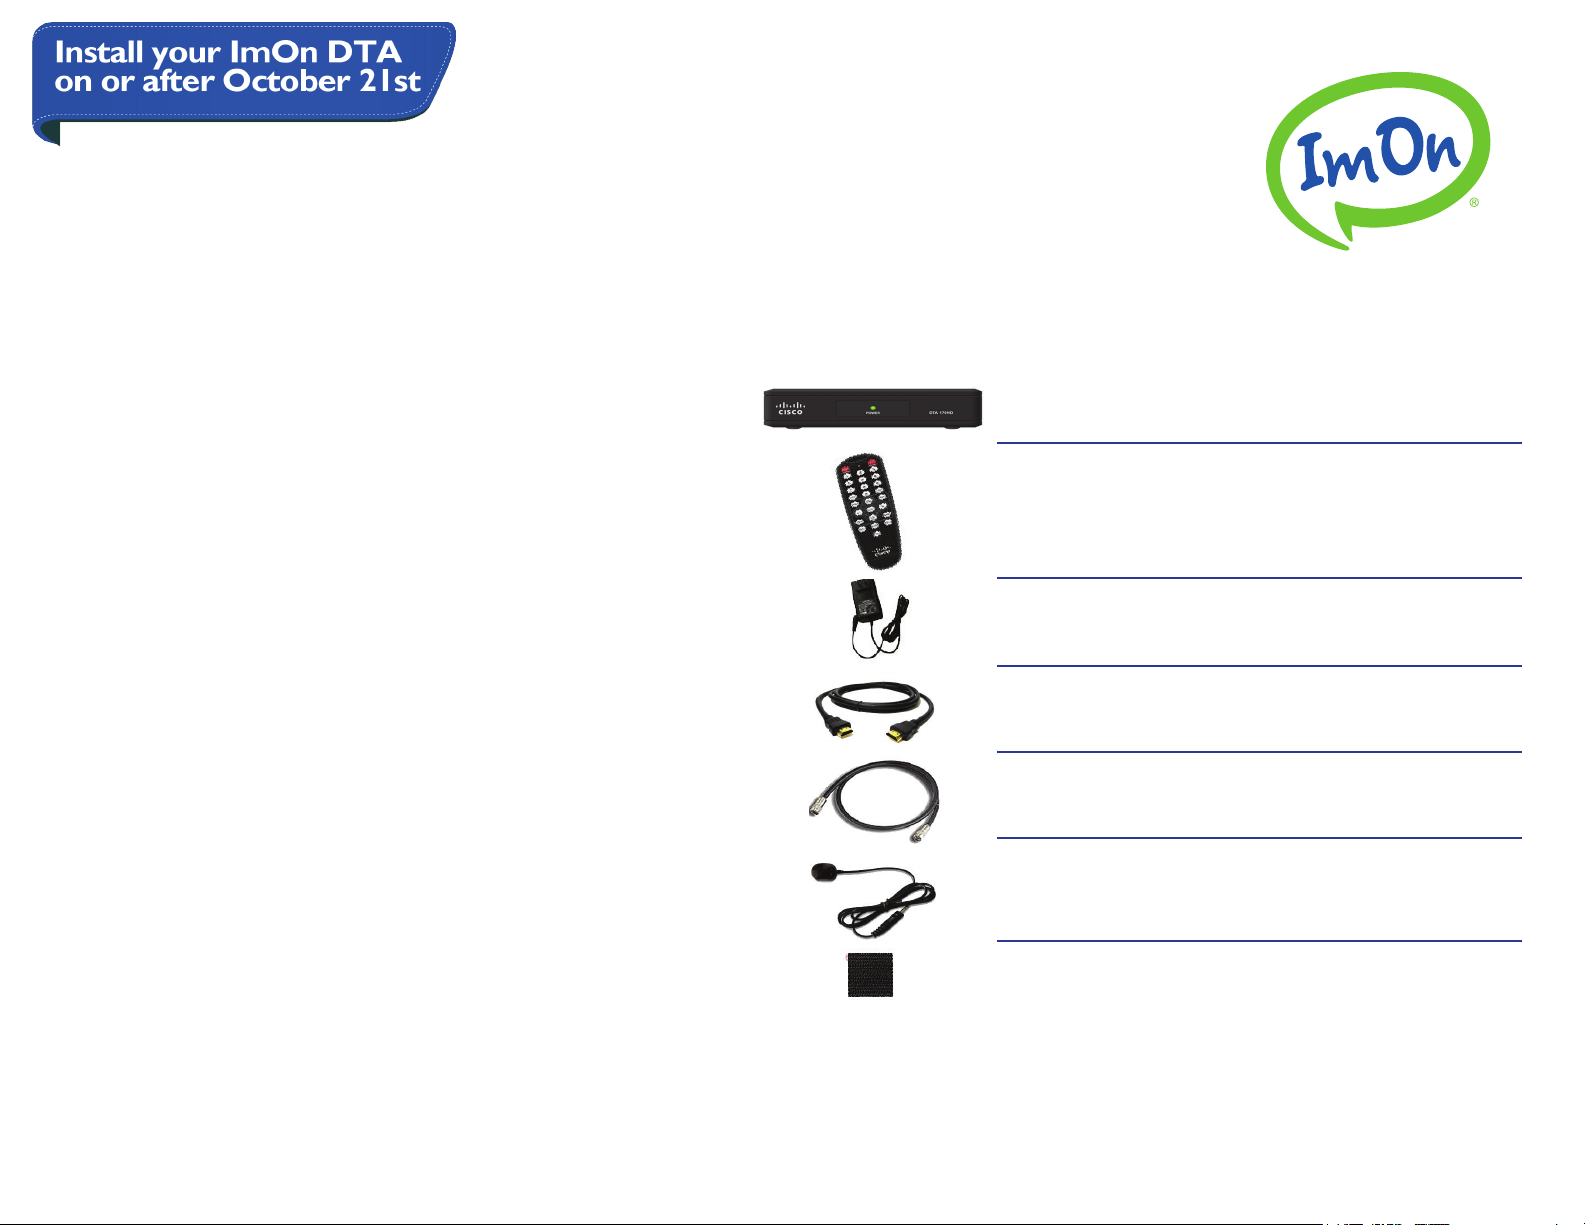
What’s Included in this Install Kit?
HD Digital Transport Adapter (DTA)
Remote Control -
In order to operate the DTA you must use the remote
control included with this kit. Programming instructions for
the remote control are included in the kit.
Power Cord
HDMI Cable
Coax Cable
Remote Control Signal Receiver (IR Extender)
IR Extender allows you to install your DTA in an unobtrusive
location and control your DTA with a remote control.
Adhesive Mounting Squares
Use to mount DTA to your TV
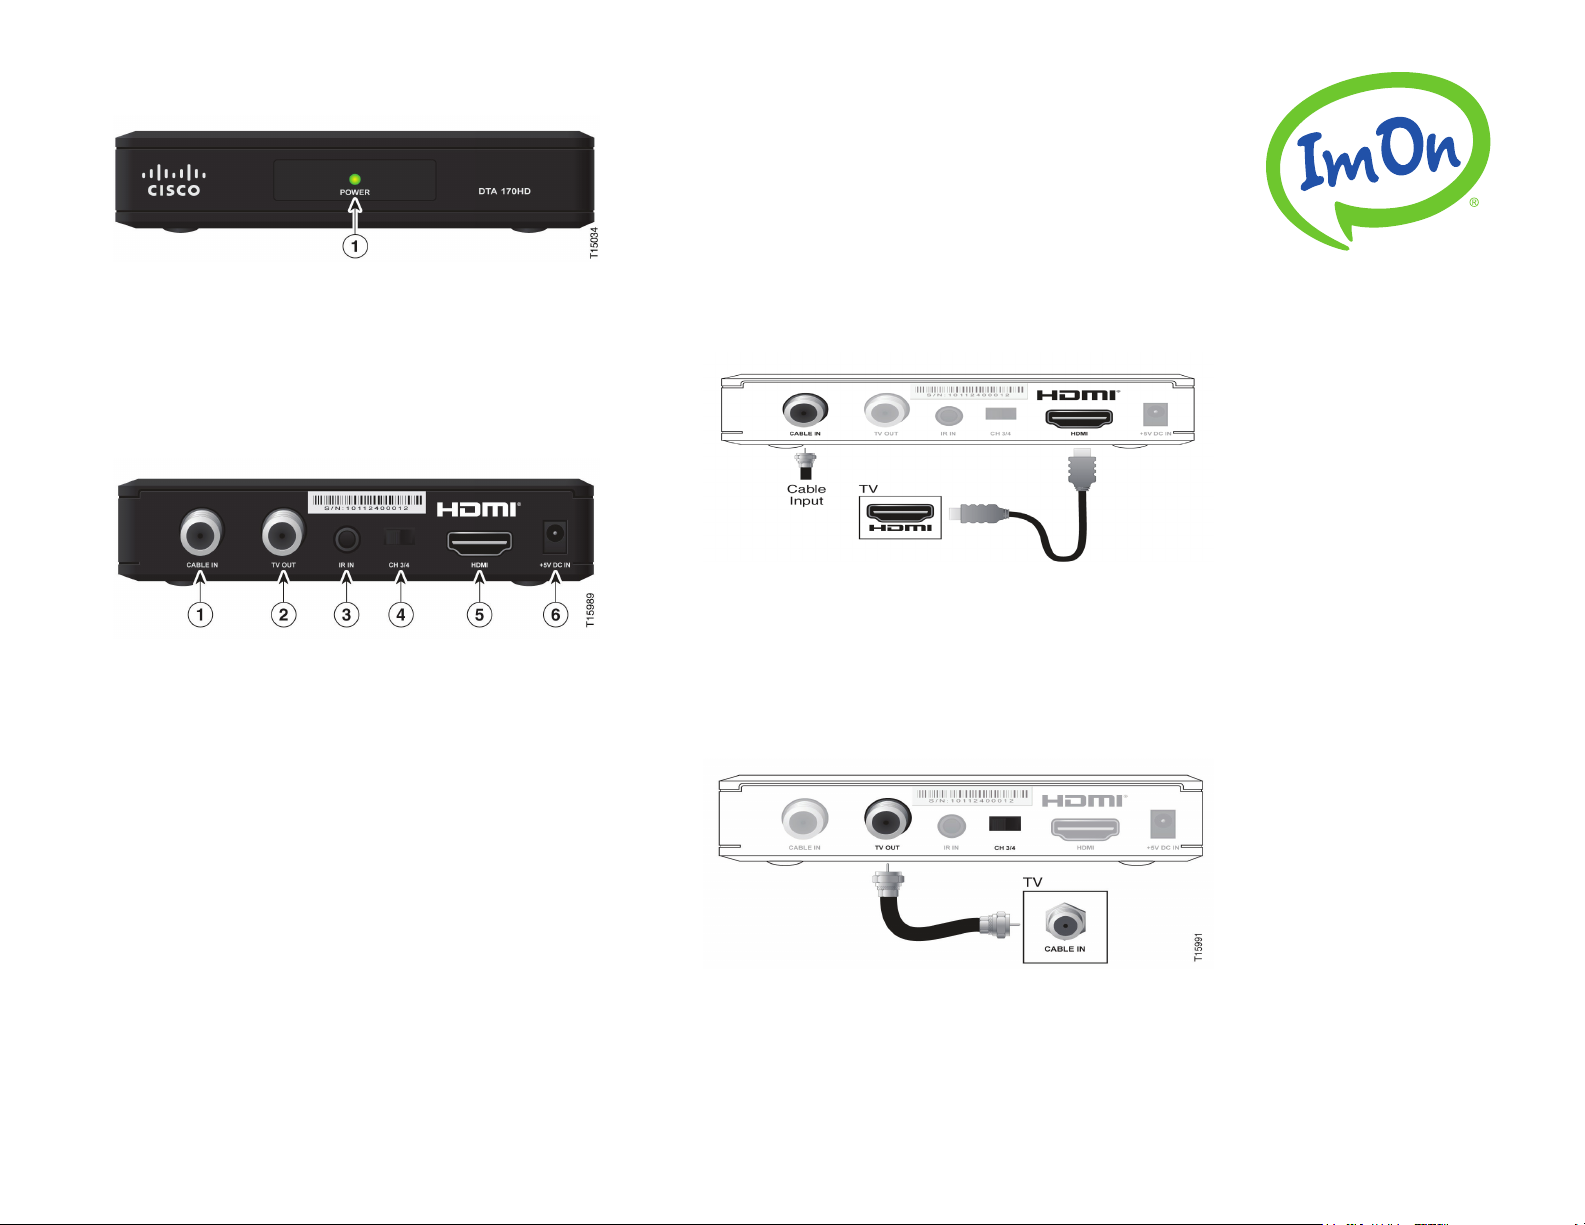
Front Panel - HD DTA
Installing the DTA
HDTV Install
1. Connect the coax cable coming from your wall
outlet to the CABLE IN connection on your DTA.
Make sure this connection is nger tight.
1. Power LED - Illuminates green when the DTA is
powered on. Illuminates red when the DTA is in
standby mode.
Back Panel - HD DTA
1. Cable In - Connects to the coax cable from the
wall that delivers the signal from ImOn.
2. TV Out - Connects to the coax cable from the
DTA to your TV.
3. IR In - Connects to the optional IR Remote
Control Signal Extender.
2. For the best HD picture quality, connect the HDMI
cable (included in the kit) from the HDMI connection
on your HDTV to the HDMI connection on your DTA.
-OR-
Other TVs Install
2. If you are not connecting the DTA to an HDTV,
connect the coax cable included in the kit from the Cable
In connection on your TV to the TV OUT connection on
your DTA. Make sure the connection is nger tight.
3. Slide the switch to channel 3.
MyImOn.com/Digital
298-6484
4. Slide Switch - Can be set to either channel 3 or
channel 4.
5. HDMI - Connects the HDMI cable from your
HDTV to the HDMI port.
6. DC Power Input - Connects to the external
power supply for the DTA.
3. After connecting your TV to the DTA, plug the
power cord into your DTA, then into an electrical outlet.
4. Press the POWER DTA and TV keys on the remote
control included.
5 Press the Menu key to format your TV screen.
For a HDTV select HDMI and 1080i, then select SCREEN
and Stretch.
 Loading...