

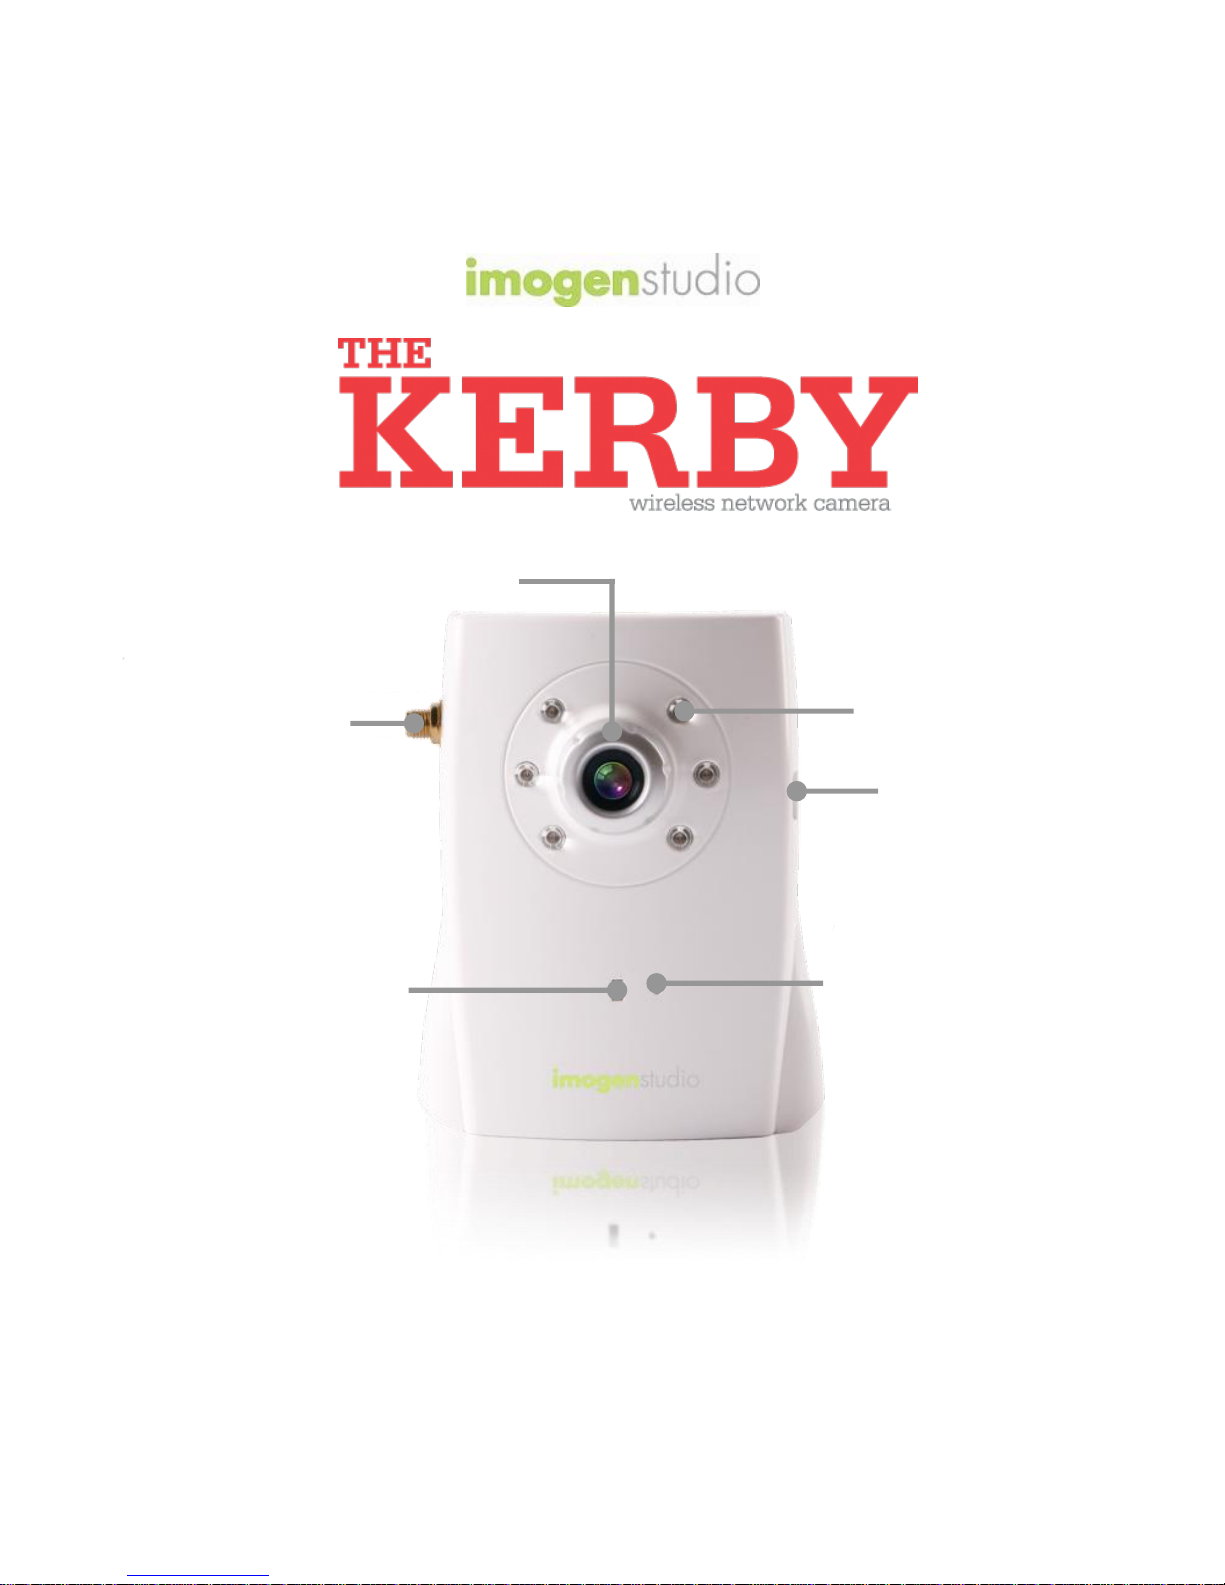
Focus Ring
Microphone
Network LED
USB Connector
IR LEDs
Wireless
Antenna
Connector

Rev. 20091223
CAUTION
RISK OF ELECTRIC SHOCK
DO NOT OPEN
CAUTION TO REDUCE THE RISK OF
ELECTRIC SHOCK,
DO NOT REMOVE COVER (OR BACK).
NO USER SERVICEABLE PARTS
INSIDE, REFER SERVICING TO
QUALIFIED SERVICE PERSONNEL.
This symbol is intended to alert the user
to the presence of uninsulated
“dangerous voltage” within the product’s
enclosure that may be of sufficient
magnitude to constitute a risk of electric
shock to persons.
The exclamation point within an
equilateral triangle is intended to alert
the user to the presence of important
operating and maintenance (servicing)
instructions in the literature
accompanying the product.
Warning
To prevent Fire or Shock Hazards, Do Not
Expose This PRODUCT to Rain or Moisture.
Apparatus shall not be exposed to dripping or
splashing and no object filled with liquids, such as
vases, shall be placed on the apparatus.
To avoid electrical shock, do not open the
cabinet. Refer servicing to qualified personnel
only.
Regulatory Notices for USA
This equipment has been tested and found to
comply with the limits for a digital device,
pursuant to Part 15 of the FCC Rules. These
limits are designed to provide reasonable
protection against harmful interference in a
residential installation. This equipment generates,
uses, and can radiate radio frequency energy
and, if not installed and used in accordance with
the instructions, may cause harmful interference
to radio communications. However, there is no
guarantee that interference will not occur in a
particular installation. If this equipment does
cause harmful interference to radio or television
reception, which can be determined by turning
the equipment off and on, the user is encouraged
to try to correct the interference by one or more of
the following measures:
- Reorient or relocate the receiving antenna.
- Increase the separation between the
equipment and receiver.
- Connect the equipment into an outlet on a
circuit different from that to which the
receiver is connected.
- Consult the dealer or an experienced
radio/TV technician for help.
You are cautioned that any changes or
modifications not expressly approved in this
manual could void your authority to operate this
equipment.
The shielded interface cable recommended in this
manual must be used with this equipment in order
to comply with the limits for a digital device
pursuant to Subpart B of Part 15 of FCC Rules.

Kerby
3
Package Contents
3. Kerby Wireless
Network Camera
1. Wireless
Antenna
5. Quick Start Guide
2. Kerby Stand w/
Mounting Screws
6. Installation CD
7. Power Adapter
4. USB Cable

Kerby
4
1. Install the Software
Please do not plug in the camera to your computer until the
software has been installed. Otherwise, the camera may not
function properly.
You can use the included CD-ROM to install all the necessary
software to make full use of the Kerby right away.
Insert the CD into your CD/DVD drive. The software
installation wizard will automatically start. If not, do the
following:
Click on Start, and then My Computer or Computer.
Right-click on the CD or DVD drive icon, then click on
Autoplay.
Follow the instructions in the software installation wizard.
If you are unable to use the CD-ROM, or if you wish to obtain
the latest version of the installation software, simply visit our
website at www.imogenstudio.com/downloads, select
Kerby Driver and follow the on-screen instructions.
Kerby
5
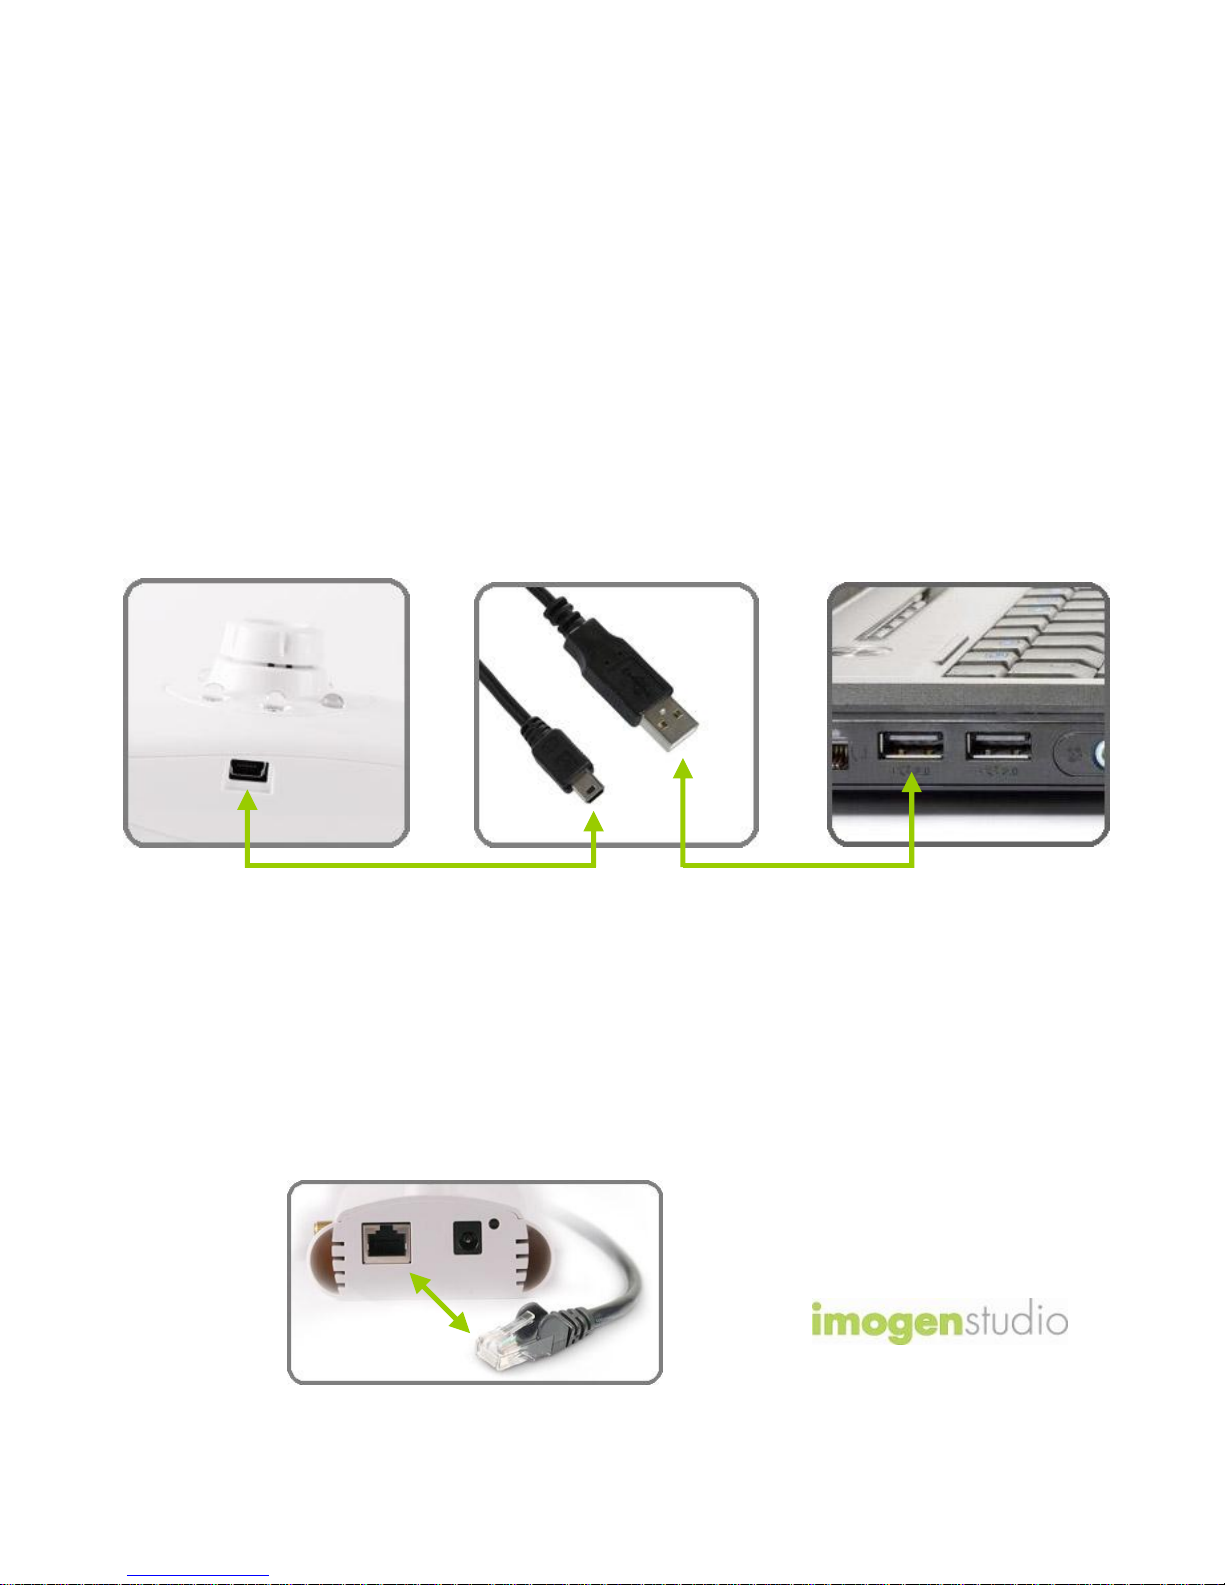
2. Connect the Camera
Make sure the Kerby is plugged in to AC power with the
supplied adapter before continuing. When prompted,
connect the camera via the included USB cable into an
available USB port on your computer.
3. Network Setup
The installation wizard will help you setup how you want Kerby
to connect to your home network. (wirelessly or by network
cable) Please follow the instructions in the installation wizard.

Kerby
6
4. Seedonk Setup
Seedonk is camera management software that enables you to
view and control your camera, manage its configurations, and
share it with people you trust from anywhere online.
To use Seedonk, you will need to register for a free account.
The installation wizard will guide you through the process of
setting up an account and registering the Kerby to your
account.
Once registration is completed, you can view, manage, and
share Kerby from anywhere online through Seedonk.

Kerby
7
5. Using Seedonk
If Seedonk is not already launched, you can launch Seedonk
by doing either one of the following:
Double click on the icon from your computer
desktop.
Click on Start, then Program, then Seedonk, then the
icon.
Please enter your user name and password, created during the
setup process, in the login window to access your cameras.

Kerby
8
6a. Seedonk Features – Main Window
Add Webcam
My Contacts
Pane
Camera Status
Friend Status
User Profile Info
Friend’s Camera
Status
My Current Status
My Cameras
Pane
Take webcam
into Autodonk*
mode
Autodonk mode does not apply to Kerby; it works only with a pc-based
webcam. It allows you to leave your webcam online while you the user
signs out. This is useful for remote viewing from a different computer.

Kerby
9
6b. Seedonk Features – Viewing Window
Lens Focus
If the video image is blurry, it can be manually focused by
twisting the lens counter- or clockwise until desired clarity is
achieved.
Record a Video
Take a Snapshot

Kerby
10
Infrared Light
The camera has six high-intensity infrared (IR) lights for
picking up clear images in dim locations. Right-clicking the
Kerby camera name brings up a list of options; selecting
“Configure” will give the user the choice of turning the IR lights
on or off.
Please note:
When the infrared lights are turned on, colors and shadows in
the video typically may appear muted or not as distinct as
usual. This is a normal occurrence.

Kerby
11
Inviting Friends & Family
Invite your friends and family to sign up with Seedonk® so
that you may share your cameras with them.
Via any web browser, visit the Seedonk® homepage at
www.seedonk.com, select “Account” from the top row of
buttons and login with your username and password.
Near the bottom of the Account Management page is a “Share
the Love” invitation option where you can enter email
addresses along with selecting which cameras you’d like to
share.
To share your camera with
other registered Seedonk®
users, right-click on your
camera name, select
Share/Unshare… You can
then add people from your
Seedonk® contacts to your
camera’s share list as well
as remove people from the
share list.

Kerby
12
Safety Information
Do not point the camera directly at the sun, else it will damage
the image sensor.
Keep the camera away from heat to avoid electric shocks.
To prevent the chance of overheating and ruining the camera,
do not cover/obstruct the ventilation holes at the top of the
unit.
Keep the camera away from rain or moisture.
Do not attempt to open, dismantle, repair, or service the
camera. Doing so may cause electric shocks and other
hazards.
Any evidence of misuse, abuse, or tampering will void the
Limited Warranty.
For More Information
To get the latest camera driver updates or to learn more about
Imogen Studio products, please visit:
www.imogenstudio.com
To get software updates or to learn more about Seedonk,
please visit: www.seedonk.com

Kerby
13
This page has been
left blank intentionally.

© ImogenStudio, printed in Taiwan, January 2010
 Loading...