


+CAM Robot-o HD Quick Start Guide
CAUTION
RISK OF ELECTRIC SHOCK
DO NOT OPEN
CAUTION TO REDUCE THE RISK OF
QUALIFIED SERVICE PERSONNEL.
This symbol is intended to alert the user
“dangerous voltage” within the product’s
magnitude to constitute a risk of electric
DO NOT REMOVE COVER (OR BACK).
ELECTRIC SHOCK,
NO USER SERVICEABLE PARTS
INSIDE, REFER SERVICING TO
to the presence of uninsulated
enclosure that may be of sufficient
shock to persons.
The exclamation point within an
equilateral triangle is intended to alert
the user to the presence of important
operating and maintenance (servicing)
instructions in the literature
accompanying the product.
Warning
To prevent Fire or Shock Hazards, Do Not Expose This
PRODUCT to Rain or Moisture.
Apparatus shall not be exposed to dripping or splashing and
no object filled with liquids, such as vases, shall be placed
on the apparatus.
To avoid electrical shock, do not open the cabinet. Refer
servicing to qualified personnel only.
2

+CAM Robot-o HDQuick Start Guide
Regulatory Notices for USA
This equipment has been tested and found to comply with
the limits for a digital device, pursuant to Part 15 of the FCC
Rules. These limits are designed to provide reasonable
protection against harmful interference in a residential
installation. This equipment generates, uses, and can
radiate radio frequency energy and, if not installed and used
in accordance with the instructions, may cause harmful
interference to radio communications. However, there is no
guarantee that interference will not occur in a particular
installation. If this equipment does cause harmful
interference to radio or television reception, which can be
determined by turning the equipment off and on, the user is
encouraged to try to correct the interference by one or more
of the following measures:
- Reorient or relocate the receiving antenna.
- Increase the separation between the equipment and
receiver.
- Connect the equipment into an outlet on a circuit
different from that to which the receiver is connected.
- Consult the dealer or an experienced radio/TV
technician for help.
You are cautioned that any changes or modifications not
expressly approved in this manual could void your authority
to operate this equipment.
The shielded interface cable recommended in this manual
must be used with this equipment in order to comply with the
limits for a digital device pursuant to Subpart B of Part 15 of
FCC Rules.
The device has been evaluated to meet general RF exposure
requirement. The device can be used in portable exposure
condition without restriction.
3
+CAM Robot-o HD Quick Start Guide
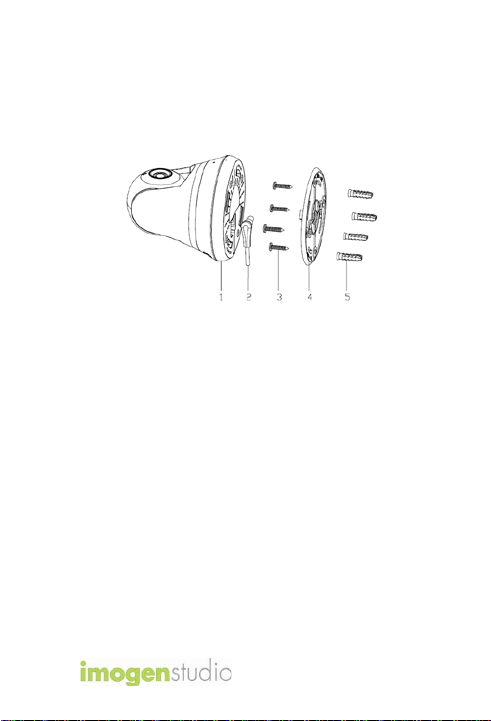
Camera Mounting
To mount the +CAM Robot-o HD to the
wall, place the camera in a position to
ensure the most comprehensive view for
video monitoring.
Unscrew the base of the camera and
remove the plate. The dots on the base
of the camera indicate the location of the
expansion bolts. Insert the expansion
bolts into the drilled holes.
Use a screwdriver to tighten or loosen
the screws and secure the +CAM Robot-o
HD. Connect the device cables.
4

+CAM Robot-o HDQuick Start Guide
1. iSecurity+ App
To get started, download the iSecurity+
app from Apple’s App store or the Google
Play Store.
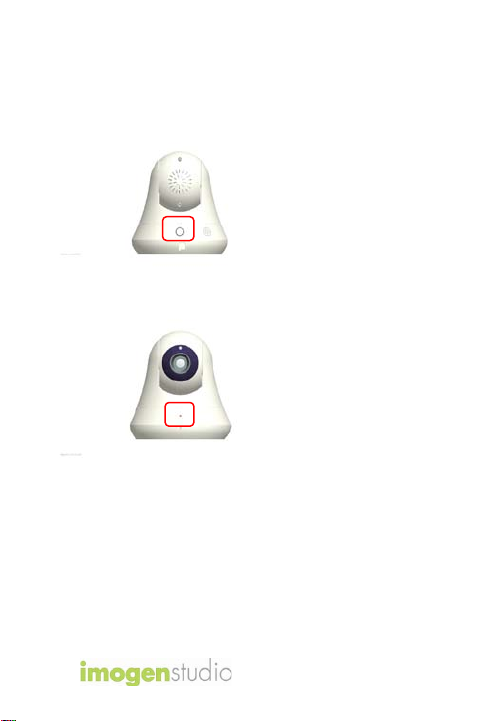
2. Connect to Power
Connect the +CAM Robot-o HDto the AC
power adapter, then plug your power cord
into the electrical outlet.
5
+CAM Robot-o HD Quick Start Guide
3a. Wi-Fi Setup Mode
The Setup button will glow the green.
The “Wi-Fi Setup” LEDs in the front of
the cam will twinkle the green/orange
alternatively and the +CAM Robot-o HD
will rotate when the camera is ready for
setup. (This may take up to 2 minutes
when the camera is first powered on.)
6

+CAM Robot-o HDQuick Start Guide
iOS
Android
3b. Connect device to +CAM
Robot-o HD
Go to your device’s settings ->
Under the Wi-Fi setting, connect to the
RobotoHDXXXX (last 4 digits of Cam
ID)network.
7

+CAM Robot-o HD Quick Start Guide
4a. Launch iSecurity+ App
Once your device establishes its
connection to the +CAM Robot-o HD,
(usually takes around 30 seconds,)
launch the iSecurity+ App. If you don’t
see the pop up prompt, please close the
app and re-launch it.
iSecurity+ app will automatically detect
your camera. When prompted, click ‘Yes’
to setup your camera.
8

+CAM Robot-o HDQuick Start Guide
4b. Setup Wizard
Follow the instructions in the Camera
SetupWizard to complete installation.
9

+CAM Robot-o HD Quick Start Guide
Turn off Wi-Fi setup
Setup Complete
4c. Setup Wizard Final Step
Camera setup is complete. Press the
reset/power button on the back of the
camera to turn off Wi-Fi setup mode and to
connect to your Wi-Fi network. Restart
iSecurity+ and please log in again.
You can use your iOS/ Android devices to
access the camera anywhere in the world.
Make sure your phone has access to the
internet via 3G, 4G orWi-Fi for internet
connection.
10

+CAM Robot-o HDQuick Start Guide
Camera
Configure
5. Using iSecurity+&Main
Features Window
Please enter your user name and
password, created during the setup
process to access your +CAM Robot-o
HD.
Status
Camera
Friends’
Cameras
Recorded
Events
App
Settings
11

+CAM Robot-o HD Quick Start Guide
6. iSecurity+ Features –
Camera Viewer
Swipe directional controls to change the
Audio-only
Mode
camera Pan & Tilt view.
Take a
Snapshot
Audio Muting
Record a
video clip
Off/On
12

+CAM Robot-o HDQuick Start Guide
6a. Zoom Function
Zooming In - Touch the screen with two
fingers and slide inward at an angle and the
image will zoom in.
Zooming Out - Touch the screen with two
fingers and slide outwards at an angle and it
will enlarge the image.
13

+CAM Robot-o HD Quick Start Guide
6a. Audio Talkback
1. To use Audio Talkback,
first press the Audio button
to initiate sound to listen in.
2. Then press the Audio Talkback button and
speak into your device, then let go for the
audio to transfer to the camera’s speaker.
14

+CAM Robot-o HDQuick Start Guide
Safety Information
Do not point the camera directly at the
sun, or else it will damage the image
sensor.
Keep the camera away from heat to
avoid electric shock.
Keep the camera away from rain and
moisture.
Do not attempt to open, dismantle,
repair, or service the camera. Doing so
may cause electric shock and other
hazards.
Any evidence of misuse, abuse, or
tampering will void the Limited Warranty.
To maintain compliance with FCC’s RF
exposure guidelines, this equipment
should be installed and operated
withminimum distance of 20 cm between
the radiator and your body. U se only the
supplied antenna.
15

+CAM Robot-o HD Quick Start Guide
Green:
Connected to iSecurity+
Orange:
Not connected to any network
Troubleshooting
LED Status Indicators
During Wi-Fi Setup Mode
Green:Setup mode on
Orange: Setup mode initializing
Light Off: Setup mode off
During Normal Operation
Orange: Connected to local Network
Flashing
16

+CAM Robot-o HDQuick Start Guide
Setup button
Press the button 5s, the camera will be
reset;
Press button for more than 10s to reset
factory default.
For More Information
To get the latest camera driver updates
or to learn more about Imogen Studio
products, please visit:
www.imogenstudio.com
To get the latest software updates or to
learn more about Seedonk, please visit:
www.isecurityplus.com
17
 Loading...