

imogenStudio Bambino User Manual
Power LED
ON/OFF
Switch
Microphone
Night Light / IR
Control Button
Pairing
Button
Camera
USB
Receiver

Bambino
2
FCC Statement
This equipment has been tested and found to comply with the limits for a Class B
digital device, pursuant to Part 15 of the FCC Rules.
These limits are designed to provide reasonable protection against harmful
interference in a residential installation. This equipment generates, uses, and
can radiate radio frequency energy, and, if not installed and used in accordance
with the instructions, may cause harmful interference to radio communications.
However, there is no guarantee that interference will not occur in a particular
installation.
If this equipment does cause harmful interference to radio or television reception,
which can be determined by turning the equipment off and on, the user is
encouraged to try to correct the interference by one or more of the following
measures:
Reorient or relocate the receiving antenna.
Increase the separation between the equipment and receiver.
Connect the equipment into an outlet on a circuit different from that to
which the receiver is connected.
Consult the dealer or an experienced radio/TV technician for help.
FCC Label Compliance Statement
This device complies with Part 15 of the FCC Rules. Operation is subject to the
following two conditions: (1) this device may not cause harmful interference,
and (2) this device must accept any interference received, including interference
that may cause undesired operation.
Note: The manufacturer is not responsible for any radio or TV interference
caused by unauthorized modifications to this equipment. Such modifications
could void the user's authority to operate the equipment.
Trademarks
Microsoft and Windows are registered trademarks of the U.S. Microsoft
Corporation in the United States and other countries.
In addition, system and product names used in this manual are, in
general, trademarks or registered trademarks of their respective
developers or manufacturers. However, the ™ or ® marks are not used
in all cases in this manual.
Bambino
3
Package Content
One camera
One USB receiver
One AC power adapter
One CD-ROM
This user’s manual
Product Layout
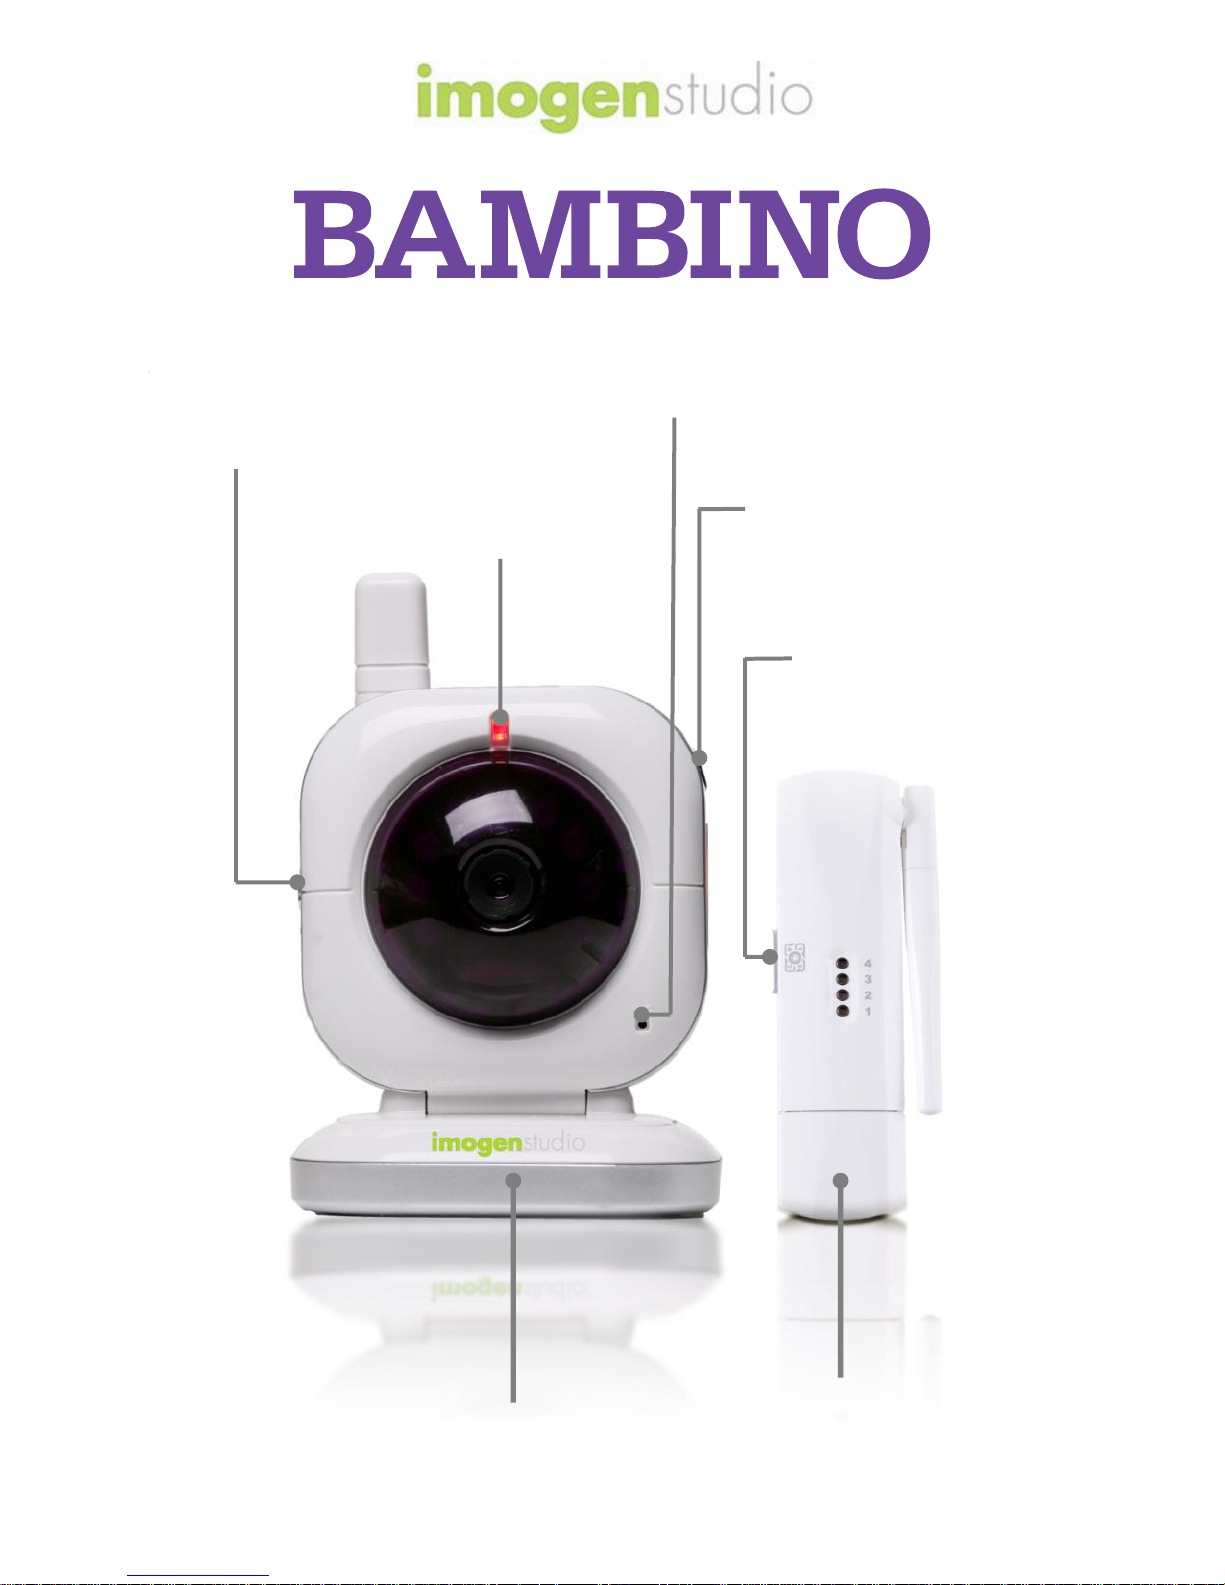
Camera
1. Antenna
2. Power indicator
LED
3. Infrared LEDs
4. Lens
5. Supporting stand
6. Night light/IR
control button
7. Night light
8. Microphone
9. Battery
compartment
10. Power ON/OFF
switch
11. Power adapter
socket
USB Receiver
1. Antenna
2. Camera indicator
LEDs
3. Pairing button
4. USB plug
1
2
3
4
1
3
4
5
6
7
8
2
MIC
9
10
11
Bambino
4
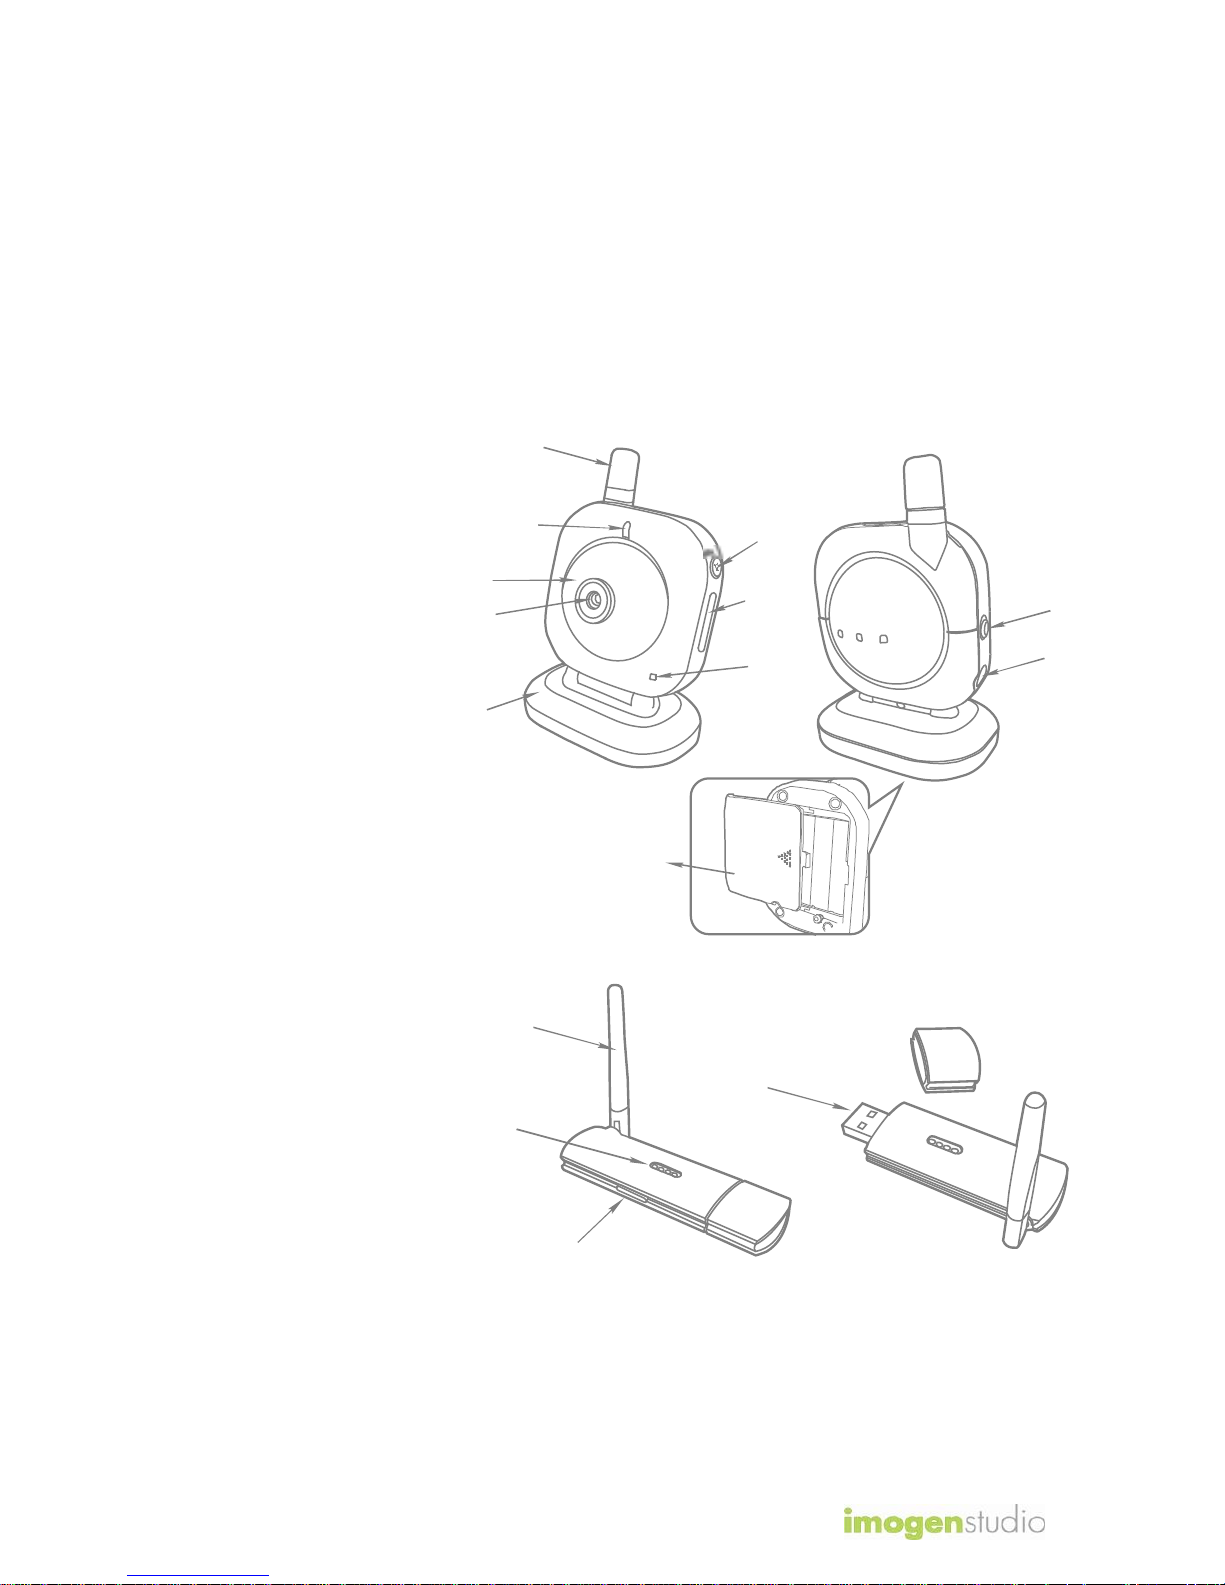
1. Supply Power to the Camera
The Bambino can be powered either by 4 AAA batteries (alkaline battery
recommended) or by household wall outlet using the AC power adapter.
Loading the Batteries
1. Use a screw driver and loosen
the screw on the bottom of
the camera.
2. Open the battery
compartment cover.
3. Insert 4 AAA batteries, then
close the battery compartment
cover and re-tighten the
screw.
4. Slide the power switch to the
ON position. The power
indicator LED will light up in
red.
Notes:
Make sure the (+) and (-) ends of the batteries are oriented correctly as
diagrammed on the inside of the battery compartment.
Do not mix old batteries with new ones.
Remove the batteries from the camera if you do not plan to use them for
a prolonged period of time.
The power indicator LED will continuously light up in red as long as there
is sufficient battery power.
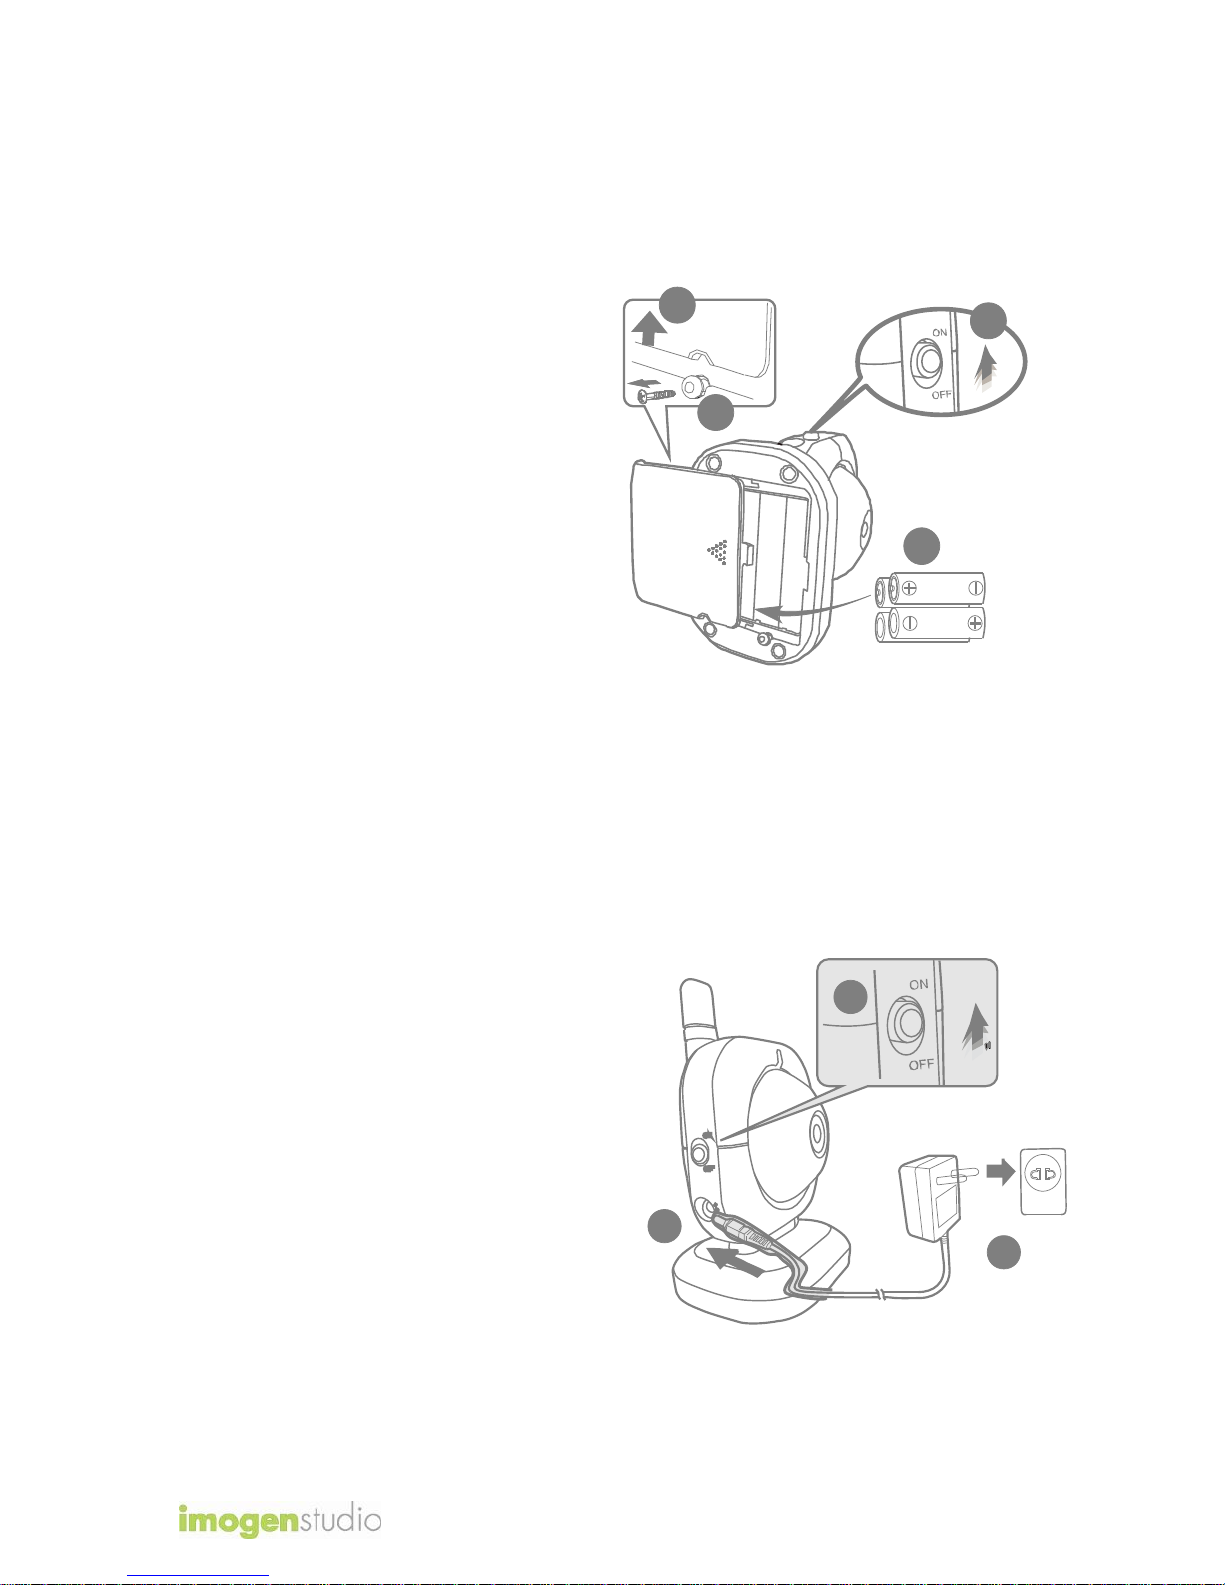
Using AC Power
1. Plug one end of the provided AC
power adapter into a wall outlet.
2. Plug the other end into the
power adapter socket of the
camera.
3. Slide the power switch to the ON
position. The power indicator
LED will light up in red.
3
4
2
1
2
1
3
 Loading...