

IMMOTOR GO Quick Start Manual
IMMOTOR GO
QUICK START GUIDE
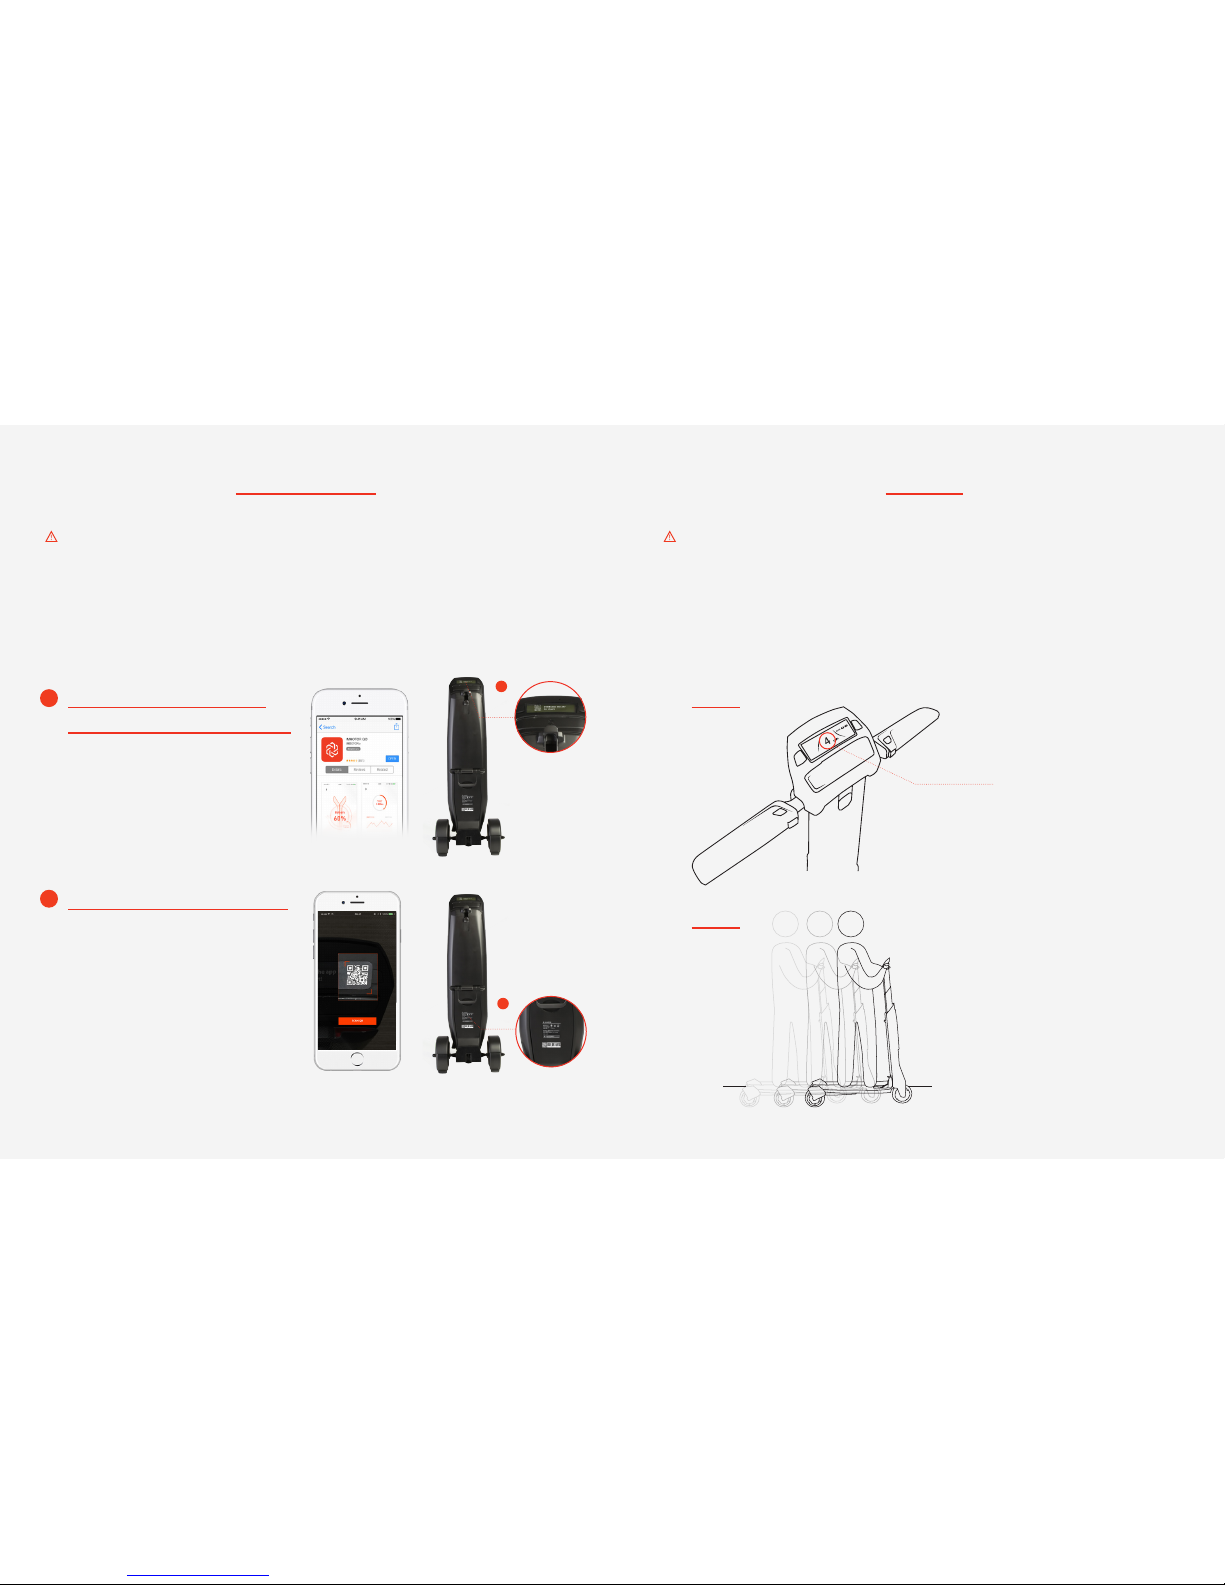
1) Scan the QR Code on the LCD Display
or go to App store and download the
Immotor APP.
2) Open the APP and create an account.
Download the Immotor APP and
experience all the features of the GO!
Use the QR Scanner in the APP to
scan the QR code by the rear wheels to
pair with your GO
Pair your device with your GO easily!
Before your first ride Speed limit
There are safety risks when learning to ride the Immotor GO. You must read the Instructions and
follow the User Tutorial in the Immotor GO App before your rst ride. Use your mobile device
(Android or iOS) to download the Immotor GO App, and be sure to follow the instructions before use.
·QUICK START GUIDE FILE AND GERMAN, FRENCH, AND SPANISH TRANSLATIONS ARE AVAILABLE
ONLINE AT WWW.IMMOTOR.COM.
You must rst download the Immotor GO App on your mobile device. The App will lead you
through the New Rider Tutorial. For your safety, the Immotor GO will limit the maximum speed
to 4 mph (6 km/h) for the rst 0.6 mile (~1km) until you have completed the New Rider Tutorial.
After completing the New Rider Tutorial, the max speed will be limited to 13 mph (20 km/h) in
mode 2, with the ability to activate Sport Mode in the App and reach a maximum speed of 16
mph (25 km/h).
After the rider has ridden 0.6
mile (1 km), mode 2 will be
unlocked and accessible.
Limited in mode 1 to 4 mph
(6 km/h) for the rst 0.6 miles
(1 km).
B
A
A
B
MODE 1
MODE 2
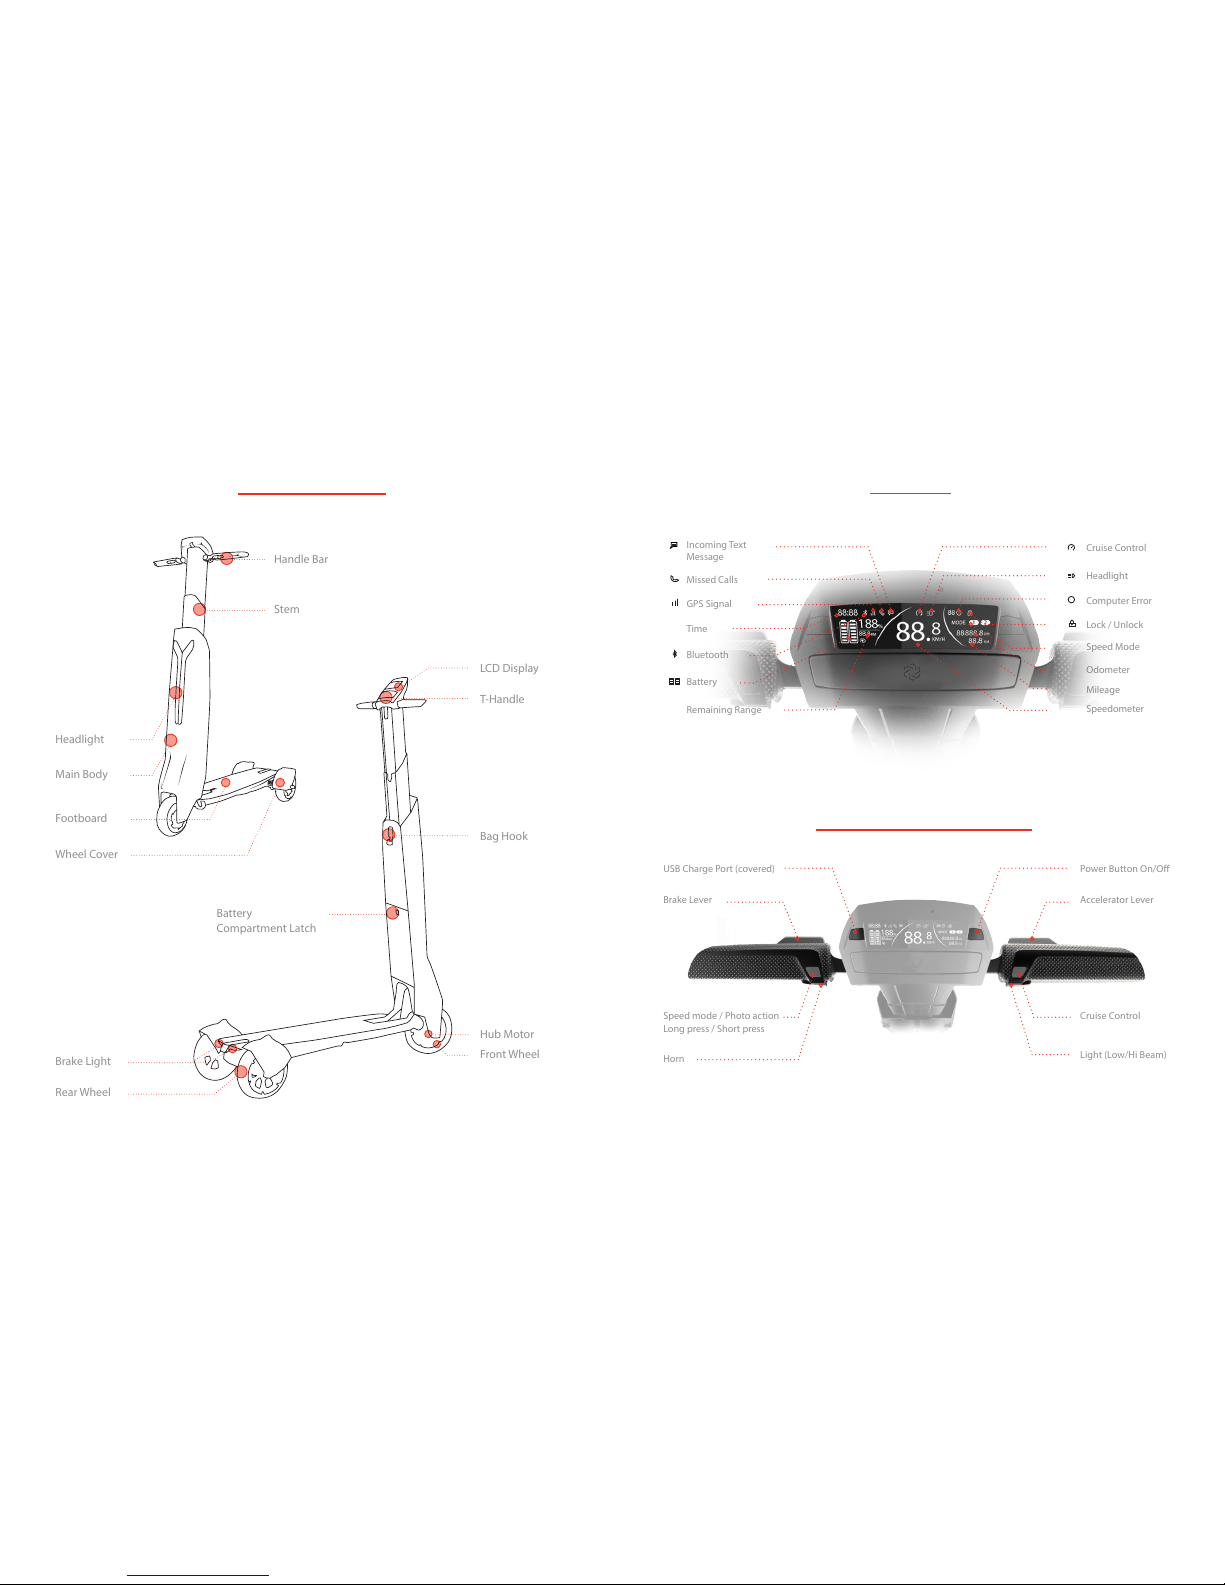
Features and Controls
Stem
Bag Hook
Battery
Compartment Latch
Brake Light
Rear Wheel
LCD Display
T-Handle
Handle Bar
Headlight
Main Body
Footboard
Wheel Cover
Front Wheel
Hub Motor
LCD Display
Missed Calls
Incoming Text
Message
GPS Signal
Bluetooth
Time
Battery
Remaining Range
88:88
88.8 km
Speedometer
Mileage
Odometer
Speed Mode
Lock / Unlock
Computer Error
Headlight
Cruise Control
MODE
8888.8km
88.8km
88.8km/h
!
Horn
USB Charge Port (covered)
Speed mode / Photo action
Long press / Short press
Brake Lever
Handle Bar and Button Controls
Power Button On/O
Cruise Control
Accelerator Lever
Light (Low/Hi Beam)
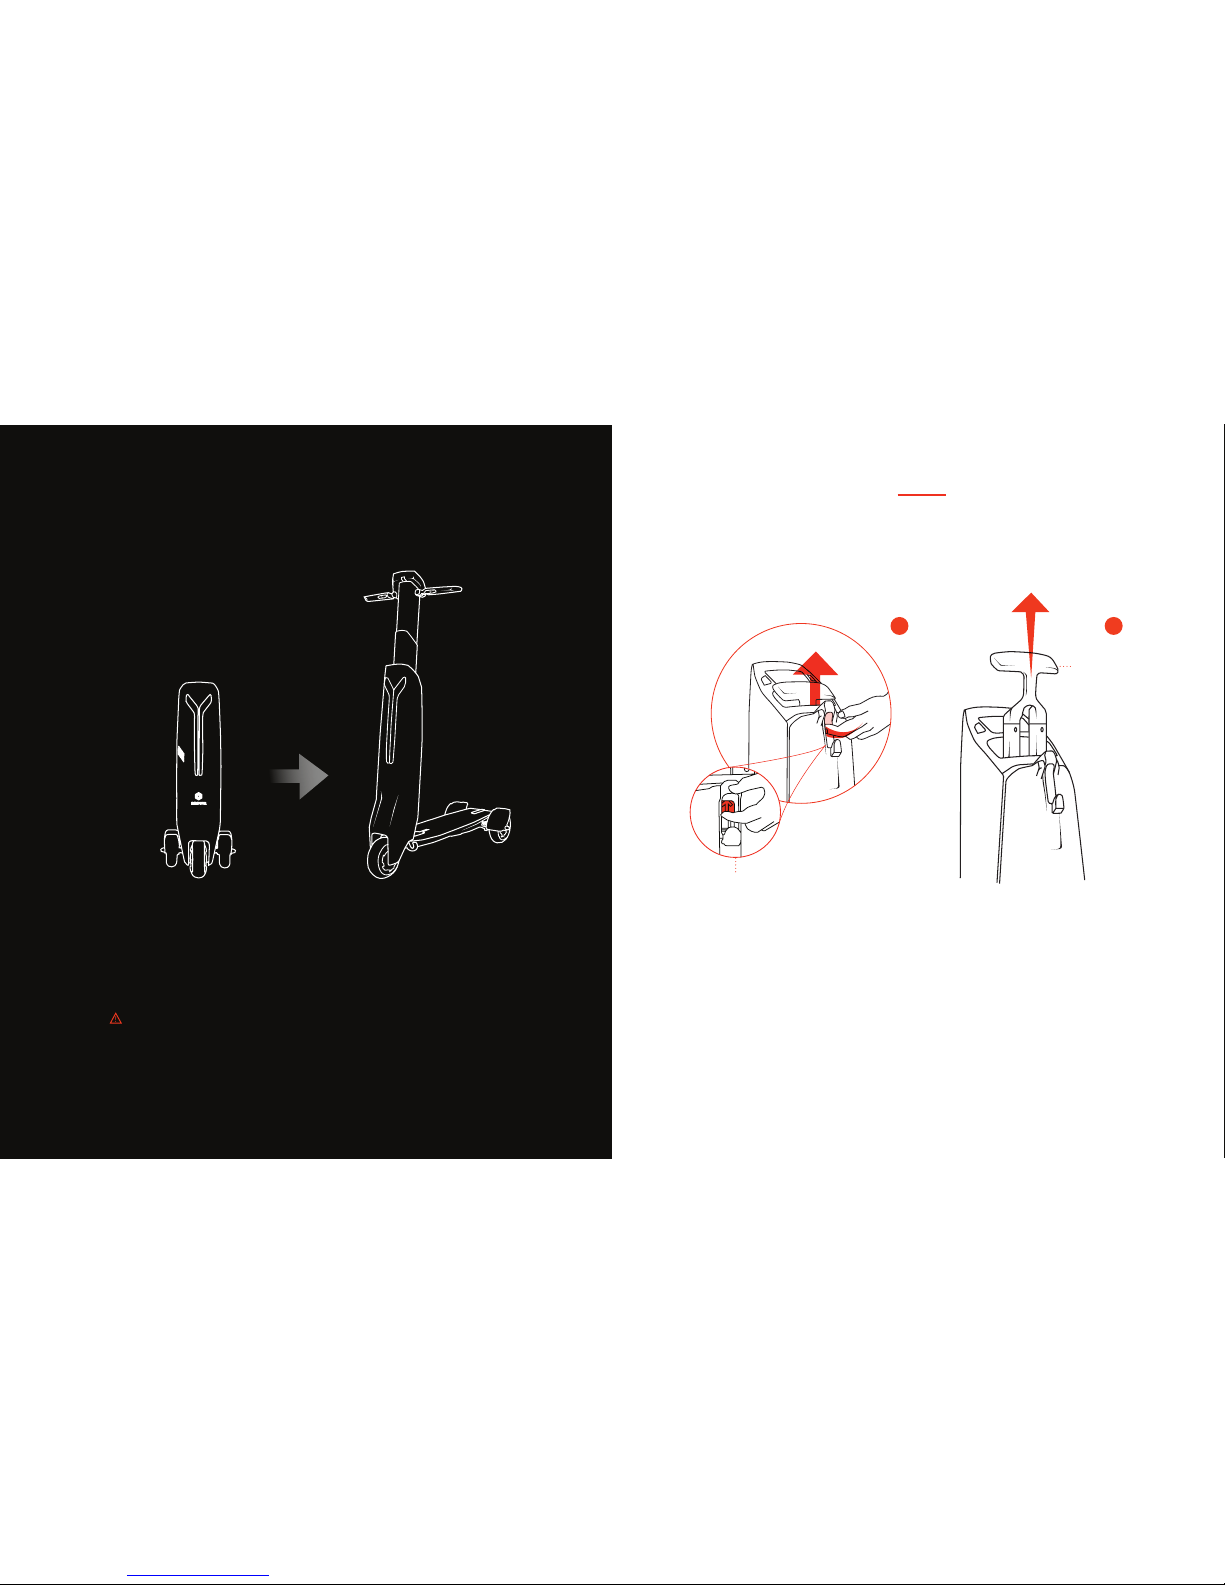
How to Unfold your Immotor GO
from Stand-By to Ride Mode
Stand-By Ride
1) Insert finger below the latch to the back of the slot,
then lift to pop “T” handle up.
(Figure A)
2) Pull up the “ T” handle until it stops
(About 5 inches)
STEP 1
“T” Handle
Figure A
WARNING: When folding up your Immotor GO, never place
your hands or fingers between footboard and main body
21
*Tutorial videos are available on the App and at www.immotor.com
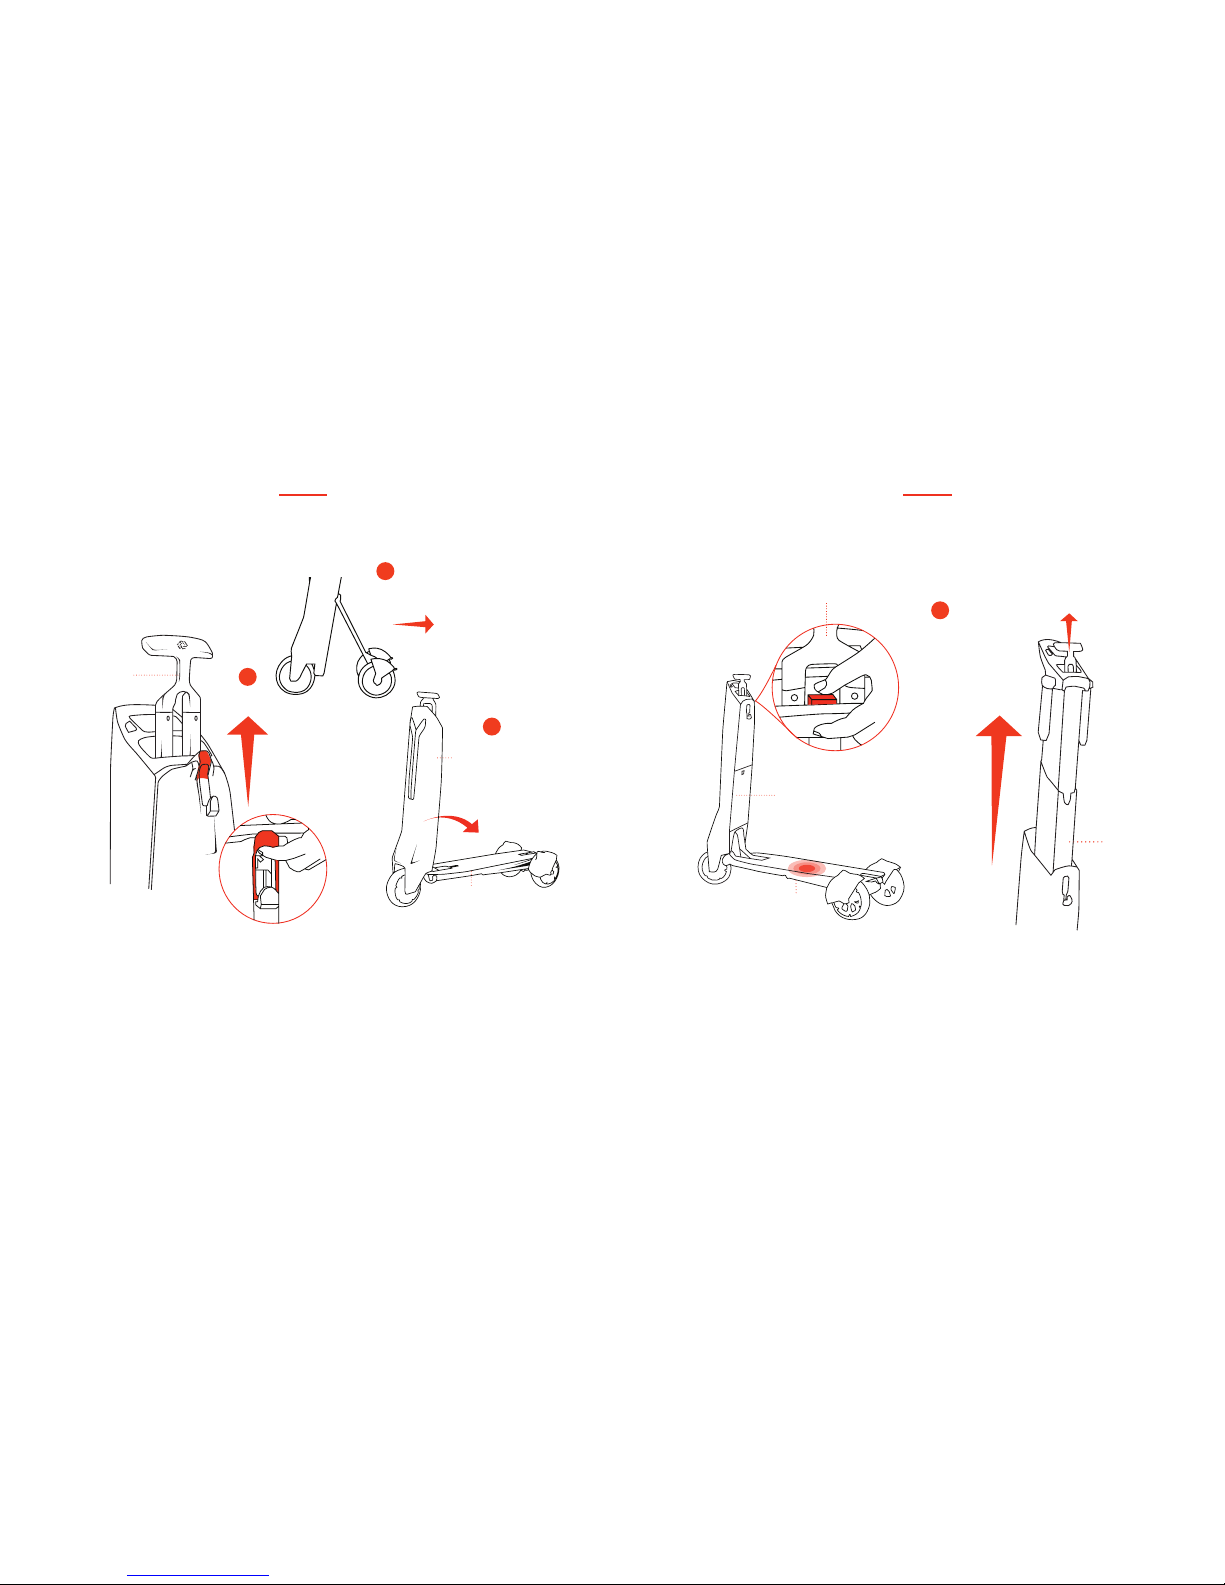
1) While holding “T” handle, lift trigger latch
to disengage footboard from body.
2 &3) Gently kick rear wheels away from main body as you
lower the footboard toward the ground until it latches
onto the rear axle.
Main Body
Main Body
Footboard
STEP 2
“T” Handle
1) With one hand on the “T” handle in up position, step on the footboard,
with one foot, and with opposite hand push red button located under the
“T’ handle with thumb to pull “T” handle up and extend fully.
STEP 3
“T” Handle
Foot board
Stem
1
2
1
3
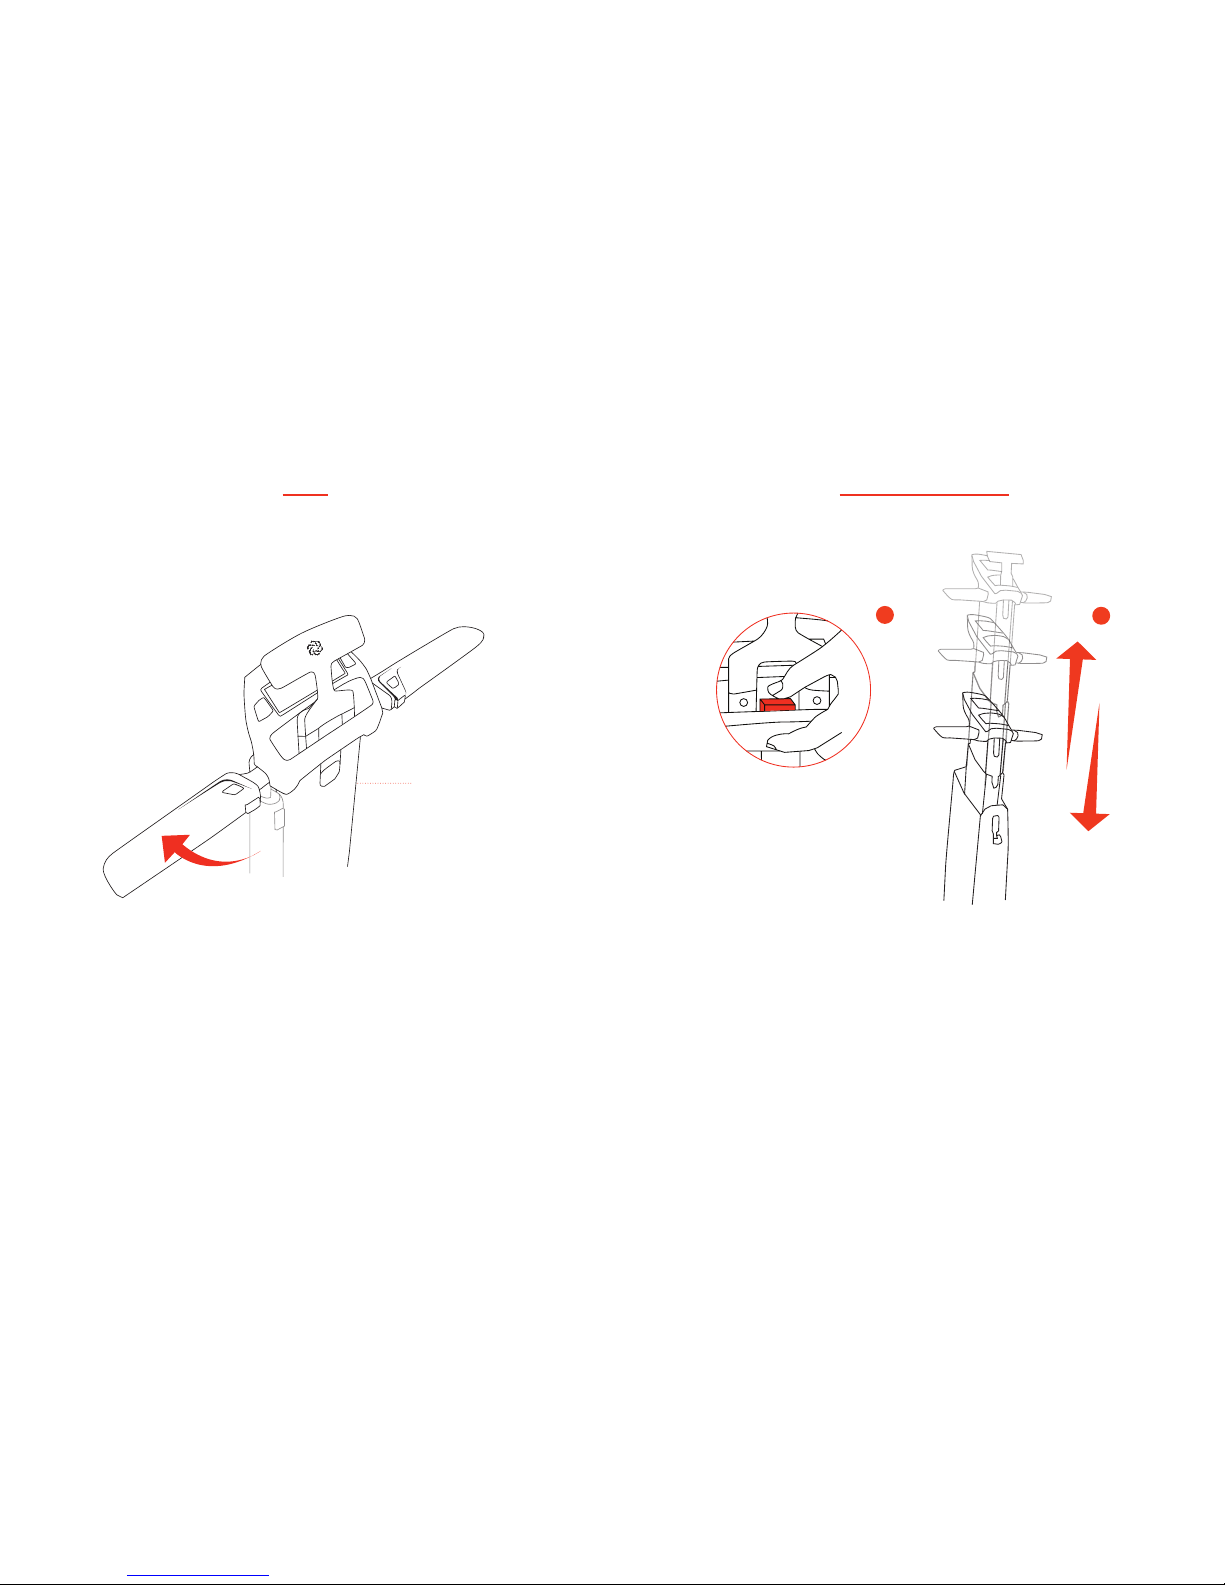
• Once stem is locked into an “up” position, lift up
the handle bars (both sides) into horizontal position.
STEP 4
Stem
1) Once handle bars are locked into their
horizontal position, you may select one of 3 preset handle bar/
stem heights by pressing the red button and sliding the stem up
or down until it locks at desired height.
2) Stow the “ T” handle by pushing it down
into its slot.
Select Handle Bar Height
1
2
 Loading...