

Page 1
Page 2
Page 3
Page 4

i Operating Elements and Connections
1.1 Receiver
I POWER LED
2 Reception LEDs A+ B
3 Overdrive indicator AF PEAK (independent of volume control AUX VOLUME (8)]
4 POWER switch
5 12 V Power SUPPLY via plug-in power supply unit (included in the delivery)
6 Antennas
7 Control SQUELCH for adjusting the muting threshold
S Volume control AUX VOLUME for the output level of the jack AUX (9)
9 Output AUX (6.3 jack, unbal.) for connecting an amplifier or a mixer with unbalanced input
10 Output BAL. MIC (XLR connection, bal.) for connecting an amplifier or a mixer with balanced input
1.2 Microphone with integrated transmitter
11 Screw cap
12 Battery compartment for a 9 V battery
13 Power switch
lower position: Off medium position: Mute upper position: On
14 Power LED
2 Safety Notes
These appliances (microphone, receiver, and plug-in power supply) correspond to the dtrcctive 8913361EEC for electromagnetic
compatibility. Additionally, the plug4n power supply corresponds to the low voltage directive
73~23IEEC.
I The plug-in power supply uses lethal mains voltage (230V~. In order to prevent a shock hazard, do not
open the plug-in power supply. Leave servicing to authorized, skilled personnel only. Moreover, any guarantee expires if one of the
units has been opened.
For operation also observe in any case the following:
· The units are only suitable for indoor use.
· Protect the units against humidity and heat (permissible ambient temperature range 0-40 ~C).
· Even if the receiver is switched off, the plug-in power supply has a low power consumption.
· Do not set the receiver to operation and immediately disconnect the plug-in power supply from the mains if:
1. damage at the plug-in power supply or the receiver is visible,
2. a defect might have occurred after a drop or similar accident,
3. there are malfunctions.
The units must be repaired in any case by authorized personnel.
elf the units are used for purposes other than originally intended, if they are operated in the wrong way
or not repaired by authorized, skilled personnel, ~ there is no liability for possible damage.
· For cleaning only use a dry, soft cloth, by no means chemicals or water.
· If the units are to be put out of operation definitively, bring them to a local recycling plant for disposal.
3 Applications
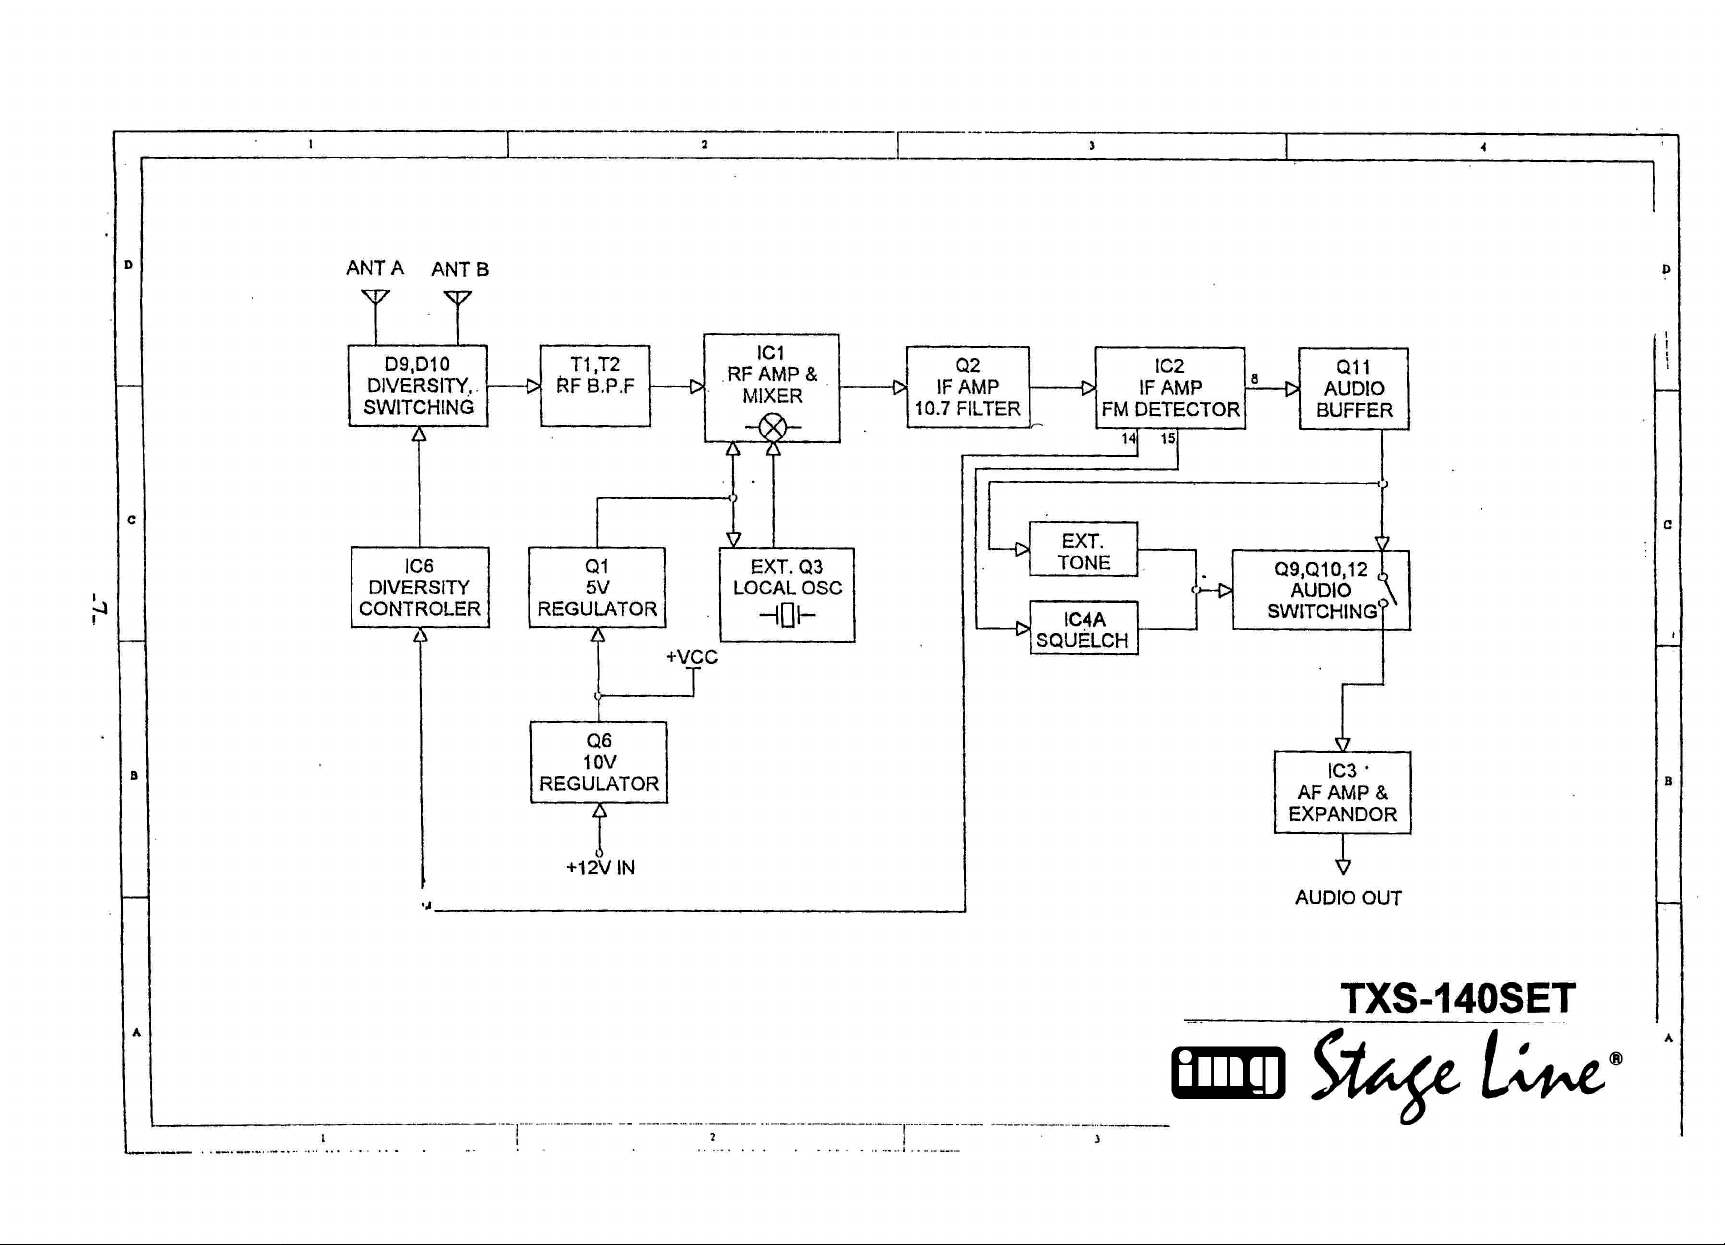
The wireless microphone system consists of a micro-phone with integrated, battery operated transmitter and antenna, the
corresponding receiver as well as a plug4n power supply. This system enables music and speech transmission from the microphone to
the receiver. The operating range is approx. 30 m and depends on local conditions.
The rnicrophone system is available for three different transmission channels:
TXS-i4OSET 175.00MHz colour code red TXS-1425ET 195.25MHz colour code green TxS-1435ET 197.10MHz colour code yellow
Thus three audio signals can be transmitted when using three models. Due to the colour code it can easily be recognized which
microphone cooperates with the respective receiver.
4 Compulsory Registration
With the purchase of this unit you have acquired the type examination certificate of the Reg TP (Regulierungsbehcrde sir
Telekommunikation und Post = German Regulating Authority for Telecommunication and Post). The IRZT number for the
microphone Is Al 30 664J RF.
Despite this, the user is obliged to apply for a frequency allotment at the local branch office of the Reg TP in the region where the
product will be used. The type examination certificate does not entitle the user to operate the unit without frequency allotment. The
map on page 9 displays the local branch offices. The addresses are listed on page 10, an application form for the frequency allotment
Page 5

is inserted on page 11 and 12. In case of failure to comply with the compulsory registration the telecommunIcation licence regulations
will be violated.
The BZT numbers are only valid for the Federal Republic of Germany In other countries a respective approval must be applied for.
5 Power Supply
5.1 Microphone
1) Screw off the screw cap (ii) at the lower end of the microphone.
2) Insert a 9V battery with the positive and negative connections as printed in the battery compartment (12). T~htiy screw the screw
cap (11) again.
3) with a new battery the microphone can be operated for approx. 65 hours.
4) if not used for a longer period of time (e.g. for mare than one week), the battery should be taken out of microphone. Thus the
microphone will not be damaged in case the battery should leak.
5.2 Receiver
1) Connect the plug-in power supply (included in the delivery) to the power supply jack SUPPLY 12V= (6).
2) Plug the plug-in power supply into a mains socket
(230 V~I50 Hz).
3) The receiver can also be supplied with any other
12 V DC power source of at least 300 mA current rating, e.g. car battery or other power supply. For the connection a DC power
plug 5.0/2.1 mm (out side/Inside diameters) is required. The positive pole must be at the centre pin.
6 Operation
1) For connecting the subsequent device (e.g. amplifiers, mixers) the receiver has a balanced output via the XLR connection (10) and
an unbalanced, controllable output via the 6.3 Jack (9). If the su~ sequent device has a balanced input the balanced output should be
used for obtaining an optimum signal transfer.
Connect the output BAL. MIC (10) or AUX (9) with a line input (e.g. for CD players) or a micro-phone input to the subsequent
device. Switch on the subsequent device or slide the fader of the id spective mixer control upward only when the entire microphone
system is switched on.
2) Place the antennas (6) in a vertical position and extract th em to their full extent. Turn each antenna in an angle of approx. 455 away
from the former position (resulting angle 90~).
3) Switch on the receiver with the POWER switch (4). The POWER LED (1) lIghts.
4) Leave the microphone switched off. Adjust the muting threshold of the Interference suppression. None of the reception LEDs A or
B (2) must light. If one of them lights there are reception interferences. In order to suppress these interferences, use a small
screwdnver and tum the control SQUELCH (7) anti-clockwise until neither display A o r B li ghts any longer. Do not tum the control
any further, otherwise the microphone signal may be su~ pressed as well.
5) Switch on the microphone with the switch (13). The power LED (14) lights. If It remains dark, a new battery must be inserted. For
audio transmission slide the switch (13) to the uppermost position. The microphone is mute in the medium position, i.e. the
transmitter operates but the audio signal is mute.
6) When the microphone is switched on (mute or ON)
one of the reception LEDs A or B (2) must light. If
the LEDs remain dark the reception is too weak
a lathe microphone battery exhausted?
b Is the distance microphone - receiver too great (max. approx. 30m)?
c Is the reception disturbed e.g. by objects In the transmission area?
d Can the reception be improved by turning the antenna?
e is a reception possible when tuning the control SQUELCH (7) anti clockwise?
7) Switch on the amplifier or slide the fader of the respective mixer control upwards. If the output AUX (9) is used, adjust the output
volume with the control AUX VOLUME (8) to the line input of the subsequent amplifier or mixer.
8) When the microphone system is over driven be-cause the volume at the microphone is too high, the red Indicator AF PEAK (3)
lights fthe overdrlve indicator PEAK is independent of the volume control (8)]. The volume of the sound source has to be reduced
or the distance between microphone and sound source has to be Increased.
If the volume at the microphone is Iowa poor SIN ratio is obtained. The volume of the sound source has to be be Increased or
the distance between microphone and sound source has to be reduced.
9) After operation the microphone must be switched off as well, otherwise the batteries will soon be exhausted. Disconnect the mains
plug If the microphone system is not to be used for a longer period of time, since the system has a low power consumption even
when switched off.
7 Specifications
Carrier frequency
Tx~140SET: 175.00MHZ
Tx~142SEi;' 195.25MHz
Tx~143SET' 197,1OMHz
Tranamiasion power: 15 mW
Frequency stability' iO.005 %I25 5C,
quartz-controlled
Page 6

Modulation: FM, i40 kHz
RF S/N ratio: >80dB
Audio range: 50-15000 Hz, ~3dB
Dynamic range: 100dB
THD: <0,8%
Audio output
balanced: 0-300 mV/10 ~
unbalanced' 300 mV/i 0 k(~
Operating range' approx. 30 m
Ambient temperature' 0-40 5C
Power supply
Microphone: 9 V battery,
lifetime 6-8 hours
Receiver: 12-18V=/3OOmAwith
230V~/50 HZI6VA
plug4n power supply
(Included in the deli
very)
Dimensions (W x H x D)
Microphone:........... ~ 54/36 mm x 245 mm
Receiver: 22Ox4OxllSmm
Piug4n power supply' 52 x 66.5 x 41 mm
Weight
Microphone: 220 g
Receiver: .............520 g
Plug-in power supply: .... 250g According to the manufacturer.
Subject to technical change.
 Loading...