

IMG STAGE LINE CD-152, 21.0700 Instruction Manual
Stage Line
R
BEDIENUNGSANLEITUNG • INSTRUCTION MANUAL • MODE D`EMPLOI • ISTRUZIONI PER L´USO
GEBRUIKSAANWIJZING • HANDLEIDING • MANUAL DE INSTRUCCIONES • MANUAL DE INSTRUÇÕES
BRUGSANVISNING • BRUKSANVISNING • KÄYTTÖOHJE
STEREO-CD-SPIELER
STEREO CD PLAYER
LECTEUR CD STEREO
CD-PLAYER STEREO
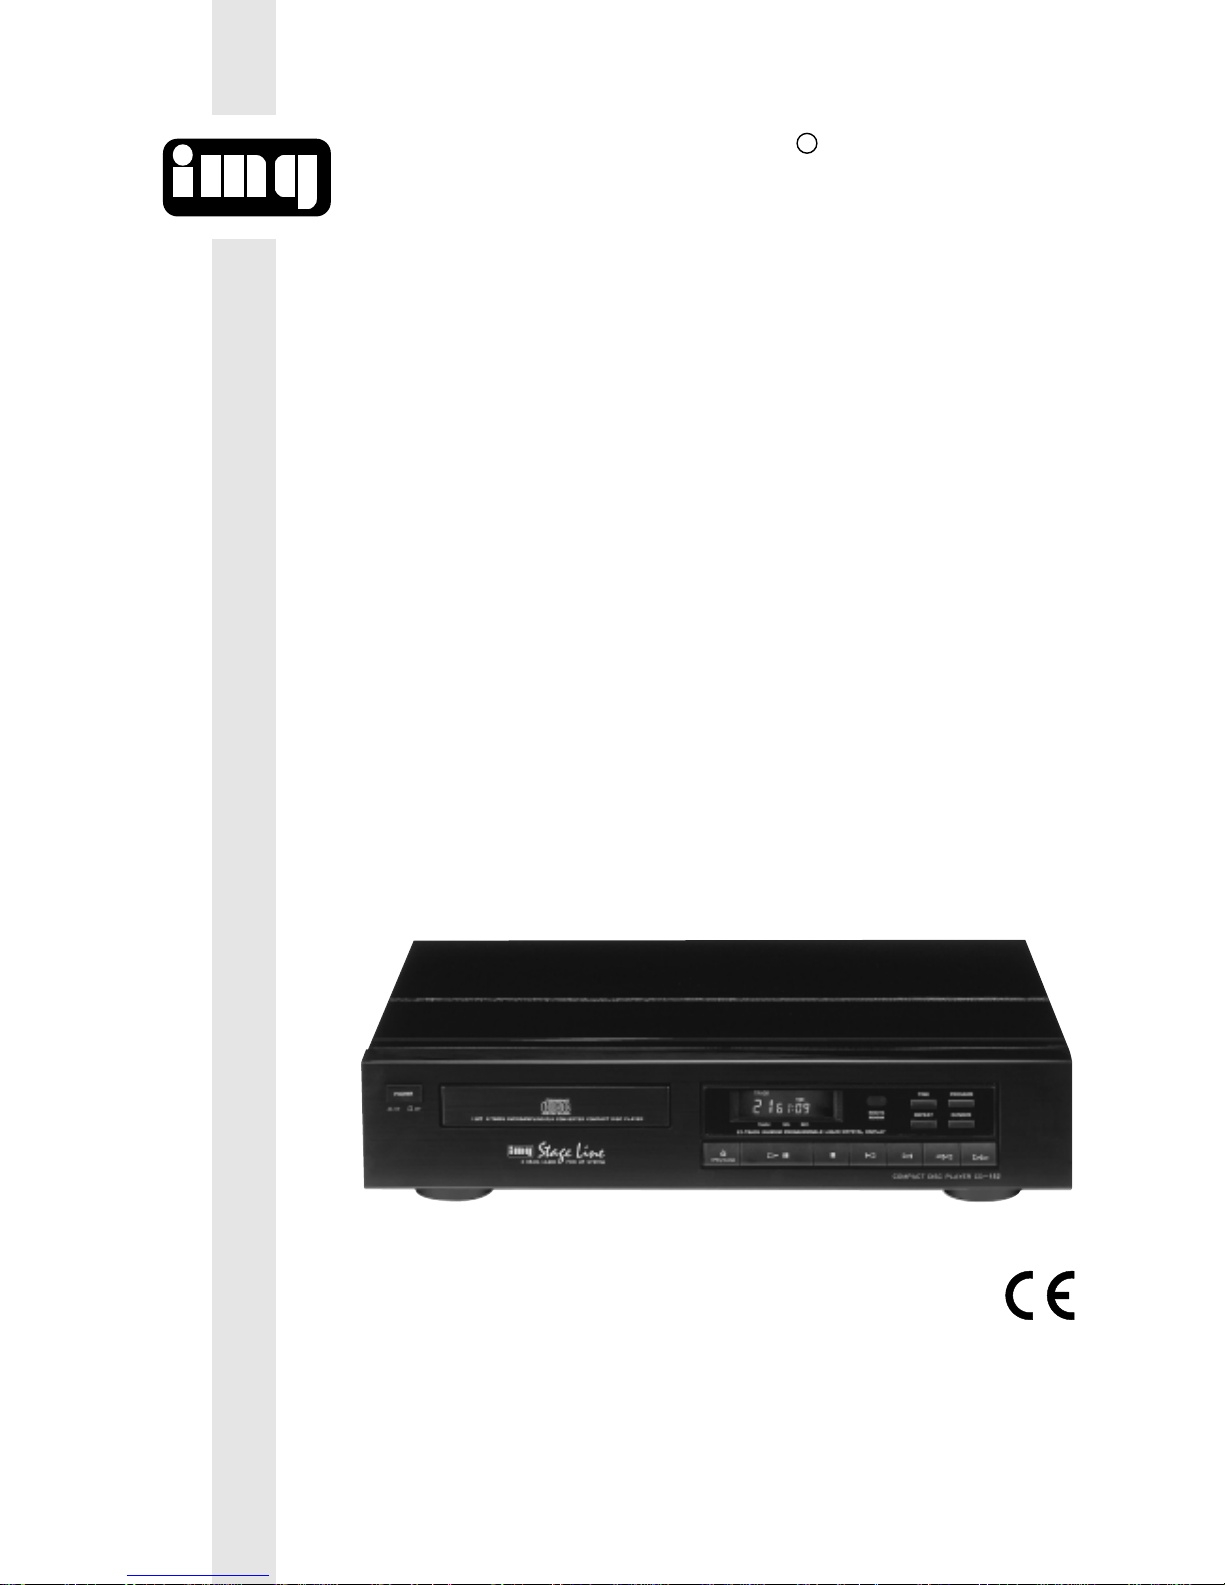
CD-152 Best.-Nr. 21.0700

2
Stage Line
R
Bevor Sie einschalten ...
Wir wünschen Ihnen viel Spaß mit Ihrem
neuen Gerät von img Stage Line. Dabei
soll Ihnen diese Bedienungsanleitung helfen, alle Funktionsmöglichkeiten kennenzulernen. Die Beachtung der Anleitung
vermeidet außerdem Fehlbedienungen
und schützt Sie und Ihr Gerät vor eventuellen Schäden durch unsachgemäßen Gebrauch.
Den deutschen Text finden Sie auf den
Seiten 4
-
7.
Before you switch on ...
We wish you much pleasure with your new
img Stage Line unit. With these operating
instructions you will be able to get to know
all functions of the unit. By following these
instructions false operations will be avoided, and possible damage to you and your
unit due to improper use will be prevented.
You will find the English text on the pages
4
-
7.
Prima di accendere ...
Vi auguriamo buon divertimento con il
Vostro nuovo apparecchio img Stage Line.
Le istruzioni per l’uso Vi possono aiutare a
conoscere tutte le possibili funzioni. E rispettando quanto spiegato nelle istruzioni,
evitate di commettere degli errori, e così
proteggete Voi stessi, ma anche l’apparecchio, da eventuali rischi per uso improprio.
Il testo italiano lo potete trovare alle pagine
8
-
11.
Avant toute mise en service ...
Nous vous remercions d’avoir choisi un
appareil img Stage Line et vous souhaitons beaucoup de plaisir à l’utiliser. Cette
notice a pour objectif de vous aider à
mieux connaître les multiples facettes de
l’appareil et à vous éviter toute mauvaise
manipulation.
La version française se trouve pages
8
-
11.
Voordat u inschakelt ...
Wij wensen u veel plezier met uw nieuw
toestel van img Stage Line. Met behulp
van bijgaande gebruiksaanwijzing kunt u
alle functiemogelijkheden leren kennen.
Door deze instructies op te volgen zal een
slechte werking vermeden worden, en zal
een eventueel letsel aan uzelf en schade
aan uw toestel tengevolge van onzorgvuldig gebruik worden voorkomen.
U vindt de nederlandstalige tekst op de
pagina’s 12
-
15.
Antes de pôr em funcionamento ...
Agradecemos-lhe por ter escolhido um
aparelho img Stage Line. Com estas instruções ficará habilitado a conhecer e utilizar todas as funções desta unidade.
Seguindo-as, evita possíveis manipulações defeituosas.
A versão em idioma português pode ser
encontrada nas páginas 16
-
19.
Antes de cualquier instalación
Tenemos de agradecerle el haber adquirido un equipo img Stage Line y le deseamos un agradable uso. Este manual quiere
ayudarle a conocer las multiples facetas
de este equipo y evitar cualquier uso inadecuado.
La versión española se encuentra en las
páginas 12
-
15.
D
A
CH
GB
NL
B
F
B
CH
E
I
P
Inden De tænder for apparatet ...
Vi ønsker Dem god fornøjelse med Deres nye
img Stage Line apparat. Denne brugsanvisning giver mulighed for at lære alle apparatets
funktioner at kende. Følg vejledningen for at
undgå forkert betjening og for at beskytte
Dem og Deres apparat mod skade på grund
af forkert brug.
Den danske tekst finder De på side 16-19.
Förskrift
Vi önskar dig mycket nöje med din nya
CD-152. Om du först läser instruktionerna
kommer du att få glädje av enheten under
lång tid. Kunskap om alla funktioner kan
bespara dig mycket besvär med enheten i
framtiden.
Du finner den svenska texten på sidan
20
-
23.
Ennen virran kytkemistä ...
Toivomme, että uusi img Stage Line-laitteesi tuo sinulle paljon iloa ja hyötyä. Tämä
käyttöohje esittää sinulle kaikki uuden laitteesi toiminnot. Seuraamalla sitä vältät virhetoiminnot ja niistä johtuvat mahdolliset
vahingot sinulle tai laitteellesi.
Löydät suomenkieliset käyttöohjeet sivuilta
20
-
23.
DK
S
FIN
3
POWER
ON OFF
REPEAT
21-TRACK RANDOM PROGRAMMABLE LIQUID CRYSTAL DISPLAY
OPEN/CLOSE
MIN. SEC.TRACK
PROGRAMTIME
1 BIT 4 TIMES OVERSAMPLING. D/A CONVERTER COMPACT DISC PLAYER
Stage Line
R
3 BEAM LASER PICKUP SYSTEM
RANDOM
REMAIN
REMOTE
SENSOR
REPEAT 1ALL A—B RANDOM
PROGRAM
MEMORY
INTRO
SPACE
1234
8765
9
1011 12
16151413
COMPACT DISC PLAYER CD-152
LINE OUT
L
R
12 345678
9101112 13
18 19
➀
POWER
ON OFF
REPEAT
21-TRAC
K RANDOM PR
OGRAMM
ABLE LIQUID
CRYSTAL DISPLAY
OPEN/CLOSE
MIN. SEC.TRACK
PROGRAMTIME
1
B
IT
4
T
IM
E
S
O
V
E
R
S
A
M
P
L
IN
G
. D
/A
C
O
N
V
E
R
T
E
R
C
O
M
P
A
C
T
D
I
S
C
P
L
A
Y
E
R
Stage Line
R
3 BEAM LASER PICKUP SYSTEM
RANDOM
R
E
M
A
I
N
REMOTE
SENSOR
R
E
P
E
A
T
1
A
L
L
A
—
B
R
A
N
D
O
M
P
R
O
G
R
A
M
M
E
M
O
R
Y
IN
T
R
O
S
P
A
C
E
1234
8765
9
1
0
1
1
1
2
1
6
1
5
1
4
1
3
COMPACT DISC PLAYER CD-152
➂
➃
OPEN/CLOSE STOP PLAY/PAUSE
INTRO
TIMEPROGRAM
SPACERANDOM
REPEAT A B
SKIP
SCAN
123
654
789
10+10
Stage Line
R
REMOTE CONTROL
CD-152
➁
8
9
14
5
15
16
11
10
7
6
12
13
17

Bitte klappen Sie die Seite 3 heraus. Sie sehen
dann immer die beschriebenen Bedienelemente
und Anschlüsse.
1 Übersicht der Bedienelemente und
Anschlüsse
1.1 Frontseite (Abb. 1)
1 Ein-/Ausschalter POWER
2 CD-Schublade
3 Multifunktionsdisplay
4 Infrarotsensor für die Fernbedienung
5 Taste REPEAT für die Wiederholfunktion
1. Tastendruck: Wiederholung des gerade laufenden Titels
2. Tastendruck: Wiederholung aller Titel der CD
bzw. Wiederholung einer programmierten Titelfolge
3. Tastendruck: Abschalten der Wiederholfunktion
6 Taste TIME zur Umschaltung der Display-Zeitan-
zeige
Grundeinstellung: Anzeige der bereits gespielten
Zeit des laufenden Titels
1. Tastendruck: Anzeige der Restzeit des lau-
fenden Titels
2. Tastendruck: Anzeige der Restzeit der ge-
samten CD bzw. Anzeige der
Restzeit einer programmierten
Titelfolge
3. T astendruck: Zurückschalten auf die Grund-
einstellung
7 Taste PROGRAM zum Zusammenstellen einer
beliebigen Titelfolge (siehe Kap. 5.2)
8 Taste RANDOM zum Aktivieren des Zufallsgene-
rators: Abspielen der Titel in einer zufallsbedingten Reihenfolge
9 Taste zum Öffnen/Schließen der CD-Schublade
10 Wiedergabe/Pause-Taste zum Schalten des CD-
Spielers auf Wiedergabe (Anzeige im Display)
oder auf Pause (Anzeige im Display)
11 Stopp-Taste zum Beenden des Abspielens
12 Skip-Tasten zum Anwählen einzelner Titel:
Bei jedem Drücken der Taste wird ein Titel
weitergesprungen. Wird die Taste einmal gedrückt, springt das Gerät an den Anfang des gerade laufenden Titels. Durch mehrfaches Drücken
der Taste wird immer ein Titel weiter zurückgesprungen. Der Titelsprung (vorwärts/rückwärts)
wird beendet, wenn der Anfang bzw . das Ende der
CD erreicht ist.
Hinweis: Bei aktiviertem Zufallsgenerator (siehe
Kap. 5.4) kann mit der Skip-Taste nicht auf
den vorherigen Titel zurückgesprungen werden.
Das Gerät springt nur auf den Titelanfang zurück.
13 Scan-Tasten für den schnellen V or- und Rücklauf:
Bei gedrückt gehaltener Taste läuft das
Gerät vor, bei gedrückt gehaltener Taste
läuft das Gerät zurück. Der Vor- und Rücklauf
fährt auch über mehrere Titel, er wird jedoch
beendet, wenn der Anfang bzw . das Ende der CD
erreicht ist.
Hinweis: Bei programmierter Titelfolge und bei
aktiviertem Zufallsgenerator (siehe Kap. 5.2 und
5.4) endet der schnelle Vor-/ Rücklauf mit dem
Ende bzw. Anfang des gerade laufenden Titels
1.2 Fernbedienung (Abb. 2)
5-13 Tasten entsprechen den Tasten am CD-Spie-
ler (siehe Kapitel 1.1 „Frontseite“)
14 Zifferntasten für die direkte Anwahl eines T itels
15 Taste SPACE für das automatische Einfügen
einer Pause von 4 Sekunden zwischen den
Titeln: bei der Überspielung der CD auf einen
Tonträger können Aufnahmegeräte, die mit
einer entsprechenden Titelsuch-Funktion ausgestattet sind, die Titelanfänge anhand der
eingefügten Pausen auffinden.
16 Taste A B zum Definieren einer Musikse-
quenz durch Festsetzen eines Startpunktes A
und eines Endpunktes B: Die so definierte Musiksequenz wird als Schleife endlos wiederholt.
17 Taste INTRO zum Anspielen der ersten 10
Sekunden eines jeden Titels der CD
1.3 Rückseite (Abb. 3)
18 Cinch-Ausgangsbuchsen LINE OUT für den An-
schluß des CD-Spielers an einen Verstärker oder
ein Mischpult
19 Netzkabel zum Anschluß an 230V~/50Hz
2 Hinweise für den sicheren Gebrauch
Dieses Gerät entspricht der Richtlinie für elektromagnetische Verträglichkeit 89/ 336/EWG und der Niederspannungsrichtlinie 73/23/EWG.
Das Gerät wird mit lebensgefährlicher Netzspannung (230V~) versorgt. Nehmen Sie deshalb niemals selbst Eingriffe im Gerät vor. Durch unsachgemäßes Vorgehen besteht die Gefahr eines
elektrischen Schlages. Außerdem erlischt beim
Öffnen des Gerätes jeglicher Garantieanspruch.
Beachten Sie für den Betrieb auch unbedingt die folgenden Punkte:
•
Vorsicht! Bei geöffneter CD-Schublade nicht in
den CD-Schacht blicken. Eventuell austretende
Laserstrahlen können zu Augenschäden führen.
•
Das Gerät ist nur zur Verwendung in Räumen
geeignet.
•
Schützen Sie das Gerät vor Staub, Vibrationen, direktem Sonnenlicht, Feuchtigkeit und Hitze (zulässiger Einsatztemperaturbereich 0
-
40°C).
•
Betreiben Sie das Gerät nicht in der Nähe von
Brummquellen wie z.B. Trafos oder Motoren.
•
Das Gerät nicht in Betrieb nehmen, und sofort den
Netzstecker ziehen, wenn:
1. sichtbare Schäden am Gerät oder an der Netzanschlußleitung vorhanden sind,
2. nach einem Sturz oder ähnlichem der Verdacht
auf einen Defekt besteht,
3. Funktionsstörungen auftreten.
Das Gerät in jedem Fall zur Reparatur in eine
Fachwerkstatt geben.
•
Eine beschädigte Netzanschlußleitung darf nur
durch den Hersteller oder eine autorisierte Fachwerkstatt ersetzt werden.
4
GB
D
A
CH
Please unfold page 3. Then you can always see the
operating elements and connections described.
1 Operating Elements and Connections
1.1 Front panel (fig. 1)
1 POWER switch
2 CD drawer
3 Multifunction display
4 Infrared sensor for the remote control
5 Button REPEAT for the repeat function
1st pressing of button: to repeat the actual title
2nd pressing of button: to repeat all titles of the
CD resp. of a programmed title sequence
3rd pressing of button: to switch off the repeat
function
6 Button TIME to switch the time display
Setting ex factory: display of the elapsed
time of the actual title
1st pressing of button: to display the remaining
time of the actual title
2nd pressing of button: to display the remaining
time of the total CD resp.
of a programmed title sequence
3rd pressing of button: to switch back to the set-
ting ex factory
7 Button PROGRAM to compile any desired title
sequence (see chapter 5.2)
8 Button RANDOM to activate the random gener-
ator: to play the titles in a random sequence
9 Button to open/close the CD drawer
10 Replay/pause button to set the CD player to replay
( is displayed) or to pause ( is displayed)
11 Stop button to stop the playing
12 Skip buttons to select individual titles:
With every pressing of the button a title is
skipped. If the button is pressed once, the unit
jumps to the beginning of the actual title. By
pressing the button several times, always one
more title is skipped backward. The skipping of
titles (forward/ backward) stops if the beginning
resp. the end of the CD is reached.
Note: With the random generator activated (see
chapter 5.4), with the skip button it is not possible to skip back to the previous title. The unit
only jumps back to the beginning of the title.
13 Scan buttons for the advance and reverse run:
with the button kept pressed the unit advances, with the button kept pressed, the
unit reverses. The advance and reverse run also
goes beyond several titles but stops if the beginning resp. the end of the CD is reached.
Note: With programmed title sequence and activated random generator (see chapters 5.2 and
5.4) the advance/reverse run stops with the end
resp. beginning of the actual title.
1.2 Remote control (fig. 2)
5-13 Buttons correspond to the respective buttons
at the CD player (see chapter 1.1 “Front panel”)
14 Numerical keys for the direct selection of a
title
15 Button SPACE to automatically insert a pause
of 4 seconds between the titles: while dubbing the CD on an audio unit, recording units
which are equipped with a corresponding title
search function are able to find the title beginnings by means of the pauses inserted.
16 Button A B to define a music sequence by
fixing a starting point A and a final point B:
The music sequence which is thus defined is
continuously repeated as a loop.
17 Button INTRO for short monitoring of the first
10 seconds of each title of the CD
1.3 Rear panel (fig.3)
18 Phono output jacks LINE OUT for the connection
of the CD player to an amplifier or a mixer
19 Mains cable for the connection to 230 V~/50 Hz
2 Safety Notes
This appliance corresponds to the directive for electromagnetic compatibility 89/ 336 /EEC and the low
voltage directive 73/23/EEC.
This unit uses dangerous mains voltage (230V~).
T o prevent a shock hazard do not open the cabinet.
Leave servicing to authorized skilled personnel
only. Furthermore, any guarantee claim expires if
the unit has been opened.
Always watch the following items regarding the operation:
•
Caution! Do not look into the CD shaft with open CD
drawer. The laser beam may cause eye damage.
•
The unit is designed for indoor use only.
•
Protect the unit against dust, vibrations, direct sun
radiation, humidity and heat (permissible operating
temperature range 0
-
40°C).
•
Do not use the unit near hum sources like e. g.
transformers or motors.
•
Do not take the unit into operation and immediately
take the mains plug out of the mains socket if:
1. damage at the unit or mains cable can be seen,
2. a defect might have occurred after a drop or
similar accident,
3. there are malfunctions.
The unit must in any case be repaired by authorized skilled personnel.
•
A damaged mains cable must only be repaired by
the manufacturer or authorized skilled personnel.
•
Never pull the mains plug out of the mains socket
by means of the mains cable.
•
If the unit is used for purposes other than originally
intended, if it is operated in the wrong way or not
repaired by authorized skilled personnel, there is
no liability for possible damage.
•
Only use a dry, soft cloth for cleaning, by no means
chemicals or water.
•
If the unit is to be put out of operation definitively,
bring it to a local recycling plant for disposal.
•
Important for U.K. Customers!
The wires in this mains lead are coloured in ac-

laufenden Batterien mögliche Schäden der Fernbedienung vermieden.
5 Bedienung
Die Bedienung des CD-Spielers kann wahlweise
über die Tasten an der Gerätevorderseite (Abb. 1)
oder über die Fernbedienung (Abb. 2) erfolgen. Die
T asten (5)
-
(13) auf der Fernbedienung entsprechen
den jeweiligen Tasten am Gerät. Einige Funktionen
des Gerätes (z. B. Definieren einer Musiksequenz
A
-
B, Titelanspiel-Funktion), lassen sich nur über
entsprechende Tasten auf der Fernbedienung ausführen.
Bei Bedienung des Gerätes über die Fernbedienung diese immer auf den Infrarotsensor (4) auf der
Gerätevorderseite richten. Bei Versagen der Fernbedienung bzw. nachlassender Reichweite sind wahrscheinlich die Batterien verbraucht und müssen
durch neue gleichen Typs ersetzt werden (siehe dazu
Kap. 4.2).
5.1 CD abspielen
1) Mit dem Ein-/Ausschalter POWER (1) das Gerät
einschalten. Wenn keine CD eingelegt ist, er-
scheint im Display (3) nach kurzer Zeit die An-
zeige „disc“. Zum Öffnen der CD-Schublade (2)
die Taste OPEN/ CLOSE (9) drücken. Im Display
erscheint die Anzeige „OPEN“.
2) Die CD mit der Beschriftung nach oben einlegen.
Zum Schließen der CD-Schublade die Taste (9)
erneut drücken. Bei korrekt eingelegter CD er-
scheint im Display nach kurzer Zeit eine Digital-
anzeige der Gesamttitelanzahl und der Gesamt-
spieldauer der CD. Die Gesamttitelanzahl wird
zusätzlich durch einen Titelkalender angezeigt.
Besitzt die CD mehr als 16 Titel, zeigt der Titelka-
lender nur die ersten 16 Titel.
[Soll die CD nach dem Einlegen gleich mit dem
ersten Titel gestartet werden, kann die CD-Schub-
lade auch durch Drücken der Wiedergabe/Pause-
Taste (10) geschlossen werden: Die CD-Schub-
lade schließt sich, und das Gerät startet sofort mit
dem Abspielen des ersten Titels.]
3) Soll die Wiedergabe mit dem ersten Titel gestartet
werden, die Wiedergabe/ Pause-Taste (10) drükken.
Soll mit einem anderen Titel gestartet werden, mit
der Skip-Taste (12) den gewünschten Titel
anwählen: bei jedem Drücken der T aste springt das
Gerät einen Titel weiter . Über die Zif ferntasten (14)
der Fernbedienung ist auch eine direkte Anwahl
des Titels möglich: Die entsprechende Zifferntaste
der Titelnummer drücken. Bei Titelnummern über
10 zuerst die Taste „+10“ (eventuell mehrfach
drücken) und dann die entsprechende Zifferntaste
für die Einerstelle drücken. Nach der Anwahl des
Titels die Wiedergabe/Pause-Taste (10) drücken.
4) Im Wiedergabebetrieb erscheint im Display die
Anzeige . Mit der Wiedergabe/Pause-Taste (10)
kann zwischen Wiedergabe und Pause (Unterbrechung des Musikstückes) umgeschaltet werden. Im Pause-Betrieb erscheint im Display die
Anzeige .
5) Sowohl während des Abspielens der CD als auch
bei eingeschalteter Pause kann mit den SkipTasten (12) oder mit den Zifferntasten (14) ein
anderer Titel angewählt werden:
Anwahl eines Titels über die Skip-Tasten: Bei
jedem Drücken der Taste wird ein Titel weitergesprungen. Wird die Taste einmal gedrückt,
springt das Gerät an den Anfang des gerade laufenden Titels. Durch mehrfaches Drücken der
Taste wird immer ein Titel weiter zurückgesprungen. Der Titelsprung (vorwärts/rückwärts)
wird beendet, wenn der Anfang bzw . das Ende der
CD erreicht ist.
Zur Anwahl über die Zifferntasten siehe oben
Punkt 3).
6) Mit den Scan-Tasten (13) ist sowohl während des
Abspielens der CD als auch bei eingeschalteter
Pause ein schneller Vor- und Rücklauf des Titels
möglich: Bei gedrückt gehaltener Taste läuft
das Gerät vor, bei gedrückt gehaltener Taste
läuft das Gerät zurück. Der Vor- und Rücklauf
5
D
A
CH
GB
cordance with the following code:
blue = neutral
brown = live
As the colours of the wires in the mains lead of this
appliance may not correspond with the coloured
markings identifying the terminals in your plug, proceed as follows:
1. The wire which is coloured blue must be connected to the terminal in the plug which is
marked with the letter N or coloured black.
2. The wire which is coloured brown must be connected to the terminal which is marked with the
letter L or coloured red.
3 Placing of the unit
The unit may be used as a table top unit or built into
a rack (482mm/19"). If it is used as a table top unit,
it must be placed on an even, horizontal surface. For
the installation of the CD player into a rack 2 rack
spaces (= 89mm) are necessary. Screw the included
mounting brackets according to fig. 4.
4 Setting into Operation
4.1 Connection of the unit
Carry out resp. change all connections only with the
unit disconnected from the mains!
Connect the Line outputs LINE OUT (18) Left (L)
and Right (R) at the rear side of the unit via a shielded audio cable with the corresponding CD input at
the amplifier or mixer. Then plug the mains plug into
a mains socket (230V~/50Hz).
4.2 Remote control
Insert two 1.5V batteries of AAAsize of the same type
into the battery compartment of the included remote
control. Watch the correct polarity (see indications in
the battery compartment). If the remote control is not
used for a longer period of time, the batteries should
be removed. Thus in case of leaking batteries possible damage to the remote control will be avoided.
5 Operation
The operation of the CD player can either be made
via the buttons at the front panel of the unit (fig. 1) or
via the remote control (fig. 2). The buttons (5)
-
(13)
on the remote control correspond to the respective
buttons at the unit. Some functions of the unit (e.g.
defining of a music sequence A
-
B, monitoring function of the title beginning) can only be carried out via
corresponding buttons on the remote control.
With operation of the unit via the remote control
always direct the remote control to the infrared sensor (4) at the front panel of the unit. In case the remote control should fail resp. with decreasing transmission range, the batteries are probably exhausted
and have to be replaced by new ones of the same
type (for this see chapter 4.2).
5.1 Playing a CD
1) Switch on the unit with the POWER switch (1). If no
CD has been inserted, “disc” is displayed (3) after
a short time. To open the CD drawer (2), press the
button OPEN/ CLOSE (9). “OPEN” is displayed.
2) Insert the CD with the lettering facing upwards. To
close the CD drawer, press the button (9) again.
With correct insertion of the CD there is a digital
display of the total title number and the total play-
ing time of the CD after a short time. The total title
number is additional displayed by a title calendar.
If the CD has more than 16 titles, the title calendar
only shows the first 16 titles.
[If after inserting the CD, the first title is immedi-
ately to be started, the CD drawer can also be
closed by pressing the replay/pause button (10):
the CD drawer is closed and the unit immediately
starts to play the first title.]
3) If the replay is to be started with the first title,
press the replay/pause button (10).
If another title is to be started, select the desired
title with the skip button (12): with every press-
ing of the button the unit skips one title. Via the
numerical keys (14) of the remote control a direct
selection of the title is possible as well: press the
corresponding numerical key of the title number.
With title numbers above 10 press the button
“+10” at first (if necessary, several times) and then
the corresponding numerical key for the digit number. After the selection of the title press the
replay/pause button (10).
4) In the replay mode is displayed. With the replay/
pause button (10) the CD player can be switched
between replay and pause (interruption of the
music piece). In the pause mode is displayed.
5) While playing the CD as well as with activated
pause, another title can be selected with the skip
buttons (12) or with the numerical keys (14):
Selection of a title via the skip buttons: with every
pressing of the button a title is skipped. If the
button is pressed once, the unit jumps to the
beginning of the actual title. If the button is
pressed several times, always one more title is
skipped back. The title jump (forward/ backward)
stops if the beginning resp. the end of the CD is
reached.
For the selection via the numerical keys see
above item 3).
6) With the scan buttons (13) while playing the CD
as well as with activated pause an advance/
reverse run of a title is possible: with the button
kept pressed the CD player advances, with
the button kept pressed the CD player
reverses. The advance and reverse run also goes
beyond several titles, however, it stops if the
beginning resp. the end of the CD is reached.
7) With the space function a pause of 4seconds can
automatically be inserted between the titles of the
CD. While dubbing the CD on an audio unit, recording units, which are equipped with a corresponding title search function, are able to find the
title beginnings by means of the pauses inserted.
To activate/desactivate the space function, press
the button SPACE (15) on the remote control.
8) Press the stop button (11) to stop the CD before
all titles have been played to the end.
9) Always close the CD drawer after use of the CD
player to protect the laser system against impu-
•
Den Netzstecker nie an der Zuleitung aus der
Steckdose ziehen.
•
Wird das Gerät zweckentfremdet, falsch bedient
oder nicht fachgerecht repariert, kann für eventuelle Schäden keine Haftung übernommen werden.
•
Für die Reinigung nur ein weiches, trockenes Tuch
verwenden, auf keinen Fall Wasser oder Chemikalien.
•
Soll das Gerät endgültig aus dem Betrieb genommen werden, übergeben Sie es zur Entsorgung
einem örtlichen Recyclingbetrieb.
3 Aufstellung
Das Gerät kann als freistehendes Tischgerät aufgestellt oder in ein Rack (482mm/19") eingebaut werden. Wird das Gerät als Tischgerät eingesetzt, muß
es auf einer ebenen, waagerechten Fläche stehen.
Für den Einbau des CD-Spielers in ein Rack werden
2 Höheneinheiten (= 89mm) benötigt. Die beiliegenden Montagewinkel nach Abb. 4 anschrauben.
4 Inbetriebnahme
4.1 Gerät anschließen
Alle Anschlüsse nur bei ausgeschaltetem Gerät vornehmen bzw. verändern.
Die Line-Ausgänge LINE OUT (18) Links (L) und
Rechts (R) auf der Geräterückseite über ein abgeschirmtes Audiokabel mit dem entsprechenden
CD-Eingang am Verstärker oder am Mischpult verbinden. Danach den Netzstecker in eine Steckdose
(230V~/50Hz) stecken.
4.2 Fernbedienung
In das Batteriefach der beiliegenden Fernbedienung
zwei 1,5-V-Microbatterien (AAA) gleichen Typs einsetzen. Dabei auf die richtige Polarität achten (siehe
Markierungen im Batteriefach). Wird die Fernbedienung für längere Zeit nicht benutzt, sollten die Batterien herausgenommen werden. So werden bei aus-
fährt auch über mehrere Titel, er wird jedoch
beendet, wenn der Anfang bzw. das Ende der CD
erreicht ist.
7) Die Space-Funktion ermöglicht das automatische
Einfügen einer Pause von 4 Sekunden zwischen
den Titeln der CD. Bei der Überspielung der CD auf
einen Tonträger können Aufnahmegeräte, die mit
einer entsprechenden Titelsuch-Funktion ausgestattet sind, die Titelanfänge anhand der Pausen
auffinden. Zum Aktivieren/Deaktivieren der SpaceFunktion die Taste SPACE (15) auf der Fernbedienung drücken.
8) Zum vorzeitigen Beenden der CD die Stopp-Taste
(11) drücken.
9) Nach dem Betrieb des CD-Spielers immer die
CD-Schublade schließen, um das Laser-Abtastsystem vor Verschmutzung zu schützen. Dann
das Gerät mit dem Ein-/Ausschalter POWER (1)
ausschalten.
5.1.1 Anzeige von Laufzeit und Titelnummer auf
dem Display
Bei der Anwahl bzw. dem Abspielen eines Titels und
auch bei eingeschalteter Pause zeigt das Display die
Titelnummer (Track) als Digitalanzeige an. Im Wiedergabe- und im Pausebetrieb blinkt zusätzlich die entsprechende Titelnummer im Titelkalender. (Der Titelkalender zeigt nur die ersten 16 Tracks einer CD an.)
In der Grundeinstellung zeigt das Display im Wie-
dergabe- und im Pausebetrieb die bereits abgelaufene Zeit des gerade gespielten Titels an. Durch
mehrfaches Drücken der Taste TIME (6) können weitere Zeitinformationen abgerufen werden:
-
1. Drücken der Taste TIME:
Anzeige der Restzeit des laufenden Titels (im Display wird „REMAIN“ eingeblendet)
-
2. Drücken der Taste:
Anzeige der Restzeit der CD bzw. Anzeige der
Restzeit einer programmierten Titelfolge (siehe
dazu Kap. 5.2)
-
3. Drücken der Taste:
Zurücksetzen des Displays auf die Grundeinstellung (im Display erlischt die Einblendung
„REMAIN“)
Steht das Gerät auf Stopp (nach Abspielen der CD
bzw. der programmierten T itelfolge oder nach Drücken
der Stopp-Taste), zeigt das Display die Gesamttitelanzahl und die Gesamtspieldauer der CD an.
5.2 Eigene Titelfolge zusammenstellen
Sollen von einer CD nur bestimmte Titel in einer anderen gewünschten Reihenfolge abgespielt werden,
muß die Titelfolge programmiert werden.
1) Für die Titelprogrammierung muß das Gerät auf
Stopp stehen. Gegebenenfalls die Stopp-Taste
(11) drücken.
2) Die Taste PROGRAM (7) drücken: Im Display wird
statt einer Titelnummer die Anzeige „00“ eingeblendet, gefolgt von der Speicherplatznummer „P 01“.
Der Titelkalender wird ausgeblendet, und es erscheint die Anzeige „MEMORY“.
3) Mit den Skip-Tasten (12) den gewünschten ersten
Titel anwählen: Bei jedem Drücken der Taste
wird — ausgehend vom Anfang der CD — ein Titel
weitergesprungen, bei jedem Drücken der Taste
wird — ausgehend vom Ende der CD — ein
Titel zurückgesprungen. Der gewünschte Titel
kann auch über die Zifferntasten (14) der Fernbedienung angewählt werden. Die Titelnummer des
angewählten Titels wird im Display angezeigt.
4) Die Taste PROGRAM erneut drücken. Der erste
Titel ist jetzt unter der Speicherplatznummer „P 01“
abgespeichert. Im Titelkalender leuchtet die entsprechende Titelnummer.
5) Für die Eingabe des zweiten Titels erscheint im
Display wieder die Anzeige „00“, gefolgt von der
Speicherplatznummer „P 02“. Den zweiten Titel
auswählen und anschließend wieder die Taste
PROGRAM drücken. Diesen Programmiervorgang für alle Titel der gewünschten Titelfolge wiederholen. Es können maximal 21 Titel abgespeichert werden. Ein Titel kann auch mehrfach, d.h.
unter mehreren Speicherplatznummern, programmiert werden.
6) Zum Abspielen der programmierten Titelfolge die
Wiedergabe/ Pause-Taste (10) drücken. Bei der
Wiedergabe erlischt im Display die Anzeige
„MEMORY“, und die Anzeige „PROGRAM“ wird
eingeblendet.
7) Mit den Skip-Tasten (12) kann während der Wiedergabe vor- und zurückgesprungen werden: Bei
jedem Drücken der Taste wird ein Titel weitergesprungen. Wird die Taste einmal gedrückt,
springt das Gerät an den Anfang des gerade laufenden Titels. Durch mehrfaches Drücken der
Taste wird immer ein Titel weiter zurückgesprungen.
Mit den Scan-Tasten (13) kann der CD-Spieler
während der Wiedergabe vorwärts und rückwärts
gefahren werden. Der schnelle Vor-/Rücklauf endet jeweils am Ende bzw. Anfang des gerade laufenden Titels.
8) Nach dem Abspielen der programmierten Titelfolge schaltet das Gerät auf Stopp. Nun kann wahlweise auf normalen Wiedergabebetrieb (Abspielen
der CD) geschaltet oder die programmierte Titelfolge erneut gestartet werden. Um vom normalen
Wiedergabebetrieb wieder auf das Abspielen der
programmierten Titelfolge zu schalten, das Gerät
immer zuerst auf Stopp stellen. Dann die Taste
PROGRAM drücken und die programmierte Titelfolge mit der Wiedergabe/Pause-Taste starten.
9) Zum Löschen der gesamten programmierten
Titelfolge die CD-Schublade mit der Taste OPEN/
CLOSE (9) öffnen oder das Gerät mit dem Ein-/
Ausschalter POWER (1) ausschalten.
5.3 Wiederholfunktion
Die Wiederholfunktion bietet die Möglichkeit, einzelne Titel der CD, die gesamte CD bzw . die gesamte
programmierte Titelfolge (siehe dazu Kap. 5.2) oder
eine definierte Musiksequenz zu wiederholen.
5.3.1 Wiederholung einzelner Titel oder
der gesamten CD
1) Zum Wiederholen eines einzelnen Titels die Taste
REPEAT (5) einmal drücken: Der gerade angewählte oder gespielte Titel wird endlos wiederholt.
Im Display erscheint die Einblendung „REPEAT1“.
6
GB
D
A
CH
rities. Then switch off the unit with the POWER
switch (1).
5.1.1 Display of playing time and title number
While selecting resp. playing a title as well as with
activated pause, there is a digital display of the title
number (track). In the replay and pause mode the
corresponding title number is additionally blinking in
the title calendar. (The title calender only shows the
first 16 tracks of a CD.)
In the setting ex factory in the replay and pause
mode the playing time already elapsed of the actual
title is displayed. Press the button TIME (6) several
times for further time information:
-
1st pressing of the TIME button:
display of the remaining time of the actual title (in
the display “REMAIN” is inserted)
-
2nd pressing of the button:
display of the remaining time of the CD resp. of a
programmed title sequence (for this see chapter
5.2)
-
3rd pressing of the button:
reset of the display to the setting ex factory (the
insertion “REMAIN” expires in the display)
If the unit is set to stop (after playing the CD resp. the
programmed title sequence or after pressing the stop
button), the display shows the total title number and
the total playing time of the CD.
5.2 Compiling your own title sequence
If only certain titles of a CD are to be played in another desired sequence, the title sequence must be
programmed.
1) For the title programming the unit must be set to
stop. If necessary, press the stop button (11).
2) Press the button PROGRAM (7): instead of a title
number “00” is inserted in the display, followed by
the memory place number “P01”. The title calendar
is no longer inserted, and “MEMORY” is displayed.
3) With the skip buttons (12) select the desired first
title: Starting from the beginning of the CD, with
every pressing of the button a title is skipped.
Starting from the end of the CD, with every press-
ing of the button a title is skipped backward.
The desired title can also be selected via the
numerical keys (14) of the remote control. The title
number of the selected title is displayed.
4) Press the button PROGRAM again. The first title
is now memorized with the memory place number
“P 01”. In the title calendar the corresponding title
number is lighting.
5) For the input of the second title “00” is displayed
again, followed by the memory place number
“P 02”. Select the second title and then press the
button PROGRAM again. Repeat this programming procedure for all titles of the desired title
sequence. Max. 21 titles can be memorized. It is
also possible to programme the same titles into
different memory places.
6) To play the programmed title sequence, press the
replay/pause button (10). With the replay “MEMORY” expires and “PROGRAM” is inserted in the
display.
7) While replaying, with the skip buttons (12) it is
possible to skip forward and backward: With every
pressing of the button a title is skipped. If the
button is pressed once, the unit jumps to the
beginning of the actual title. With several pressing
of the button always one more title is skipped
backward.
With the scan buttons (13) the CD player can
be advanced and reversed while replaying. The
advance/ reverse run stops in each case at the
end resp. beginning of the actual title.
8) After playing the programmed title sequence the
unit is set to stop. Now the unit can be set to normal replay mode (playing of the CD) or the programmed title sequence can be started again. To
switch from normal replay mode again to playing
of the programmed title sequence, at first always
set the unit to stop. Then press the button PROGRAM and start the programmed title sequence
with the replay/pause button.
9) To cancel the total programmed title sequence,
open the CD drawer with the button OPEN/
CLOSE (9) or switch off the unit with the POWER
switch (1).
5.3 Repeat function
The repeat function offers the facility to repeat individual titles of the CD, the total CD resp. the total programmed title sequence (for this see chapter 5.2) or
a defined music sequence.
5.3.1 Repeat of individual titles or the total CD
1) To repeat individual titles, press the button REPEAT(5) once: the actually selected or played title
is continuously repeated. The insertion “REPEAT
1” is displayed.
2) For continuous repeat of the total CD or of a programmed title sequence press the button REPEATa second time. The insertion “REPEA TALL”
is displayed.
3) To switch off the repeat function, press the button
REPEATa third time.
5.3.2 Repeat of a special music sequence
1) While playing the CD, press the button A B (16)
of the remote control at the point of a title where
the repeat is to start (point A, fig. 5). “REPEAT”
and “A
-
B” with the “B” blinking are displayed.
2) If point B is reached on the CD from where the unit
is to jump back to spot A, press the button A B a
second time. The “B” of the display “A
-
B” stops
blinking. The unit jumps back to starting point A
and repeats the music sequence between Aand B
continuously.
3) To cancel this function, press the button REPEAT
(5) or the button A B a third time.
AB
repeat of a special music sequence
➄
2) Zur Endloswiederholung der gesamten CD oder
einer programmierten Titelfolge die Taste REPEAT
ein zweites Mal drücken. Im Display erscheint die
Einblendung „REPEAT ALL“.
3) Zum Ausschalten der Wiederholfunktion die Taste
REPEATein drittes Mal drücken.
5.3.2 Wiederholung einer bestimmten
Musiksequenz
1) Während des Abspielens der CD an der Stelle
eines Titels, an der die Wiederholung starten soll
(Punkt A, Abb. 5), die Taste A B (16) auf der
Fernbedienung drücken. Im Display erscheinen
die Anzeigen „REPEAT“ und „A
-
B“, wobei das
„B“ blinkt.
2) Ist auf der CD der Punkt B erreicht, an dem zum
Punkt A zurückgesprungen werden soll, die Taste
A B ein zweites Mal drücken. Das „B“ der
Anzeige „A
-
B“ hört auf zu blinken. Das Gerät
springt zum Startpunkt Azurück und wiederholt die
Musiksequenz zwischen Aund B endlos.
3) Zum Löschen dieser Funktion entweder die Taste
REPEAT(5) drücken oder die Taste A B ein drittes Mal drücken.
5.4 Abspielen der Titel in zufälliger Reihenfolge
Mit der Taste RANDOM (8) wird ein Zufallsgenerator
aktiviert, d.h. die Titel der CD werden nicht mehr in
der angegebenen Reihenfolge abgespielt, sondern
das Zufallsprinzip bestimmt die Reihenfolge der
Musikstücke.
1) Die Taste RANDOM (8) drücken. Im Display erscheint die Anzeige „RANDOM“.
Steht das Gerät auf Stopp, mit der Wiedergabe/
Pause-Taste (10) die Wiedergabe starten: Der
CD-Spieler springt auf den Anfang des ersten,
willkürlich ausgewählten Musiktitels.
Befindet sich das Gerät im Wiedergabebetrieb,
wird zuerst der gerade laufende Titel abgespielt
und danach nach dem Zufallsprinzip der nächste
Musiktitel angewählt.
2) Mit den Skip-Tasten (12) kann während der Wiedergabe vor- und zurückgesprungen werden.
Durch Drücken der Taste springt das Gerät auf
den nächsten, willkürlich ausgewählten Titel und
durch Drücken der Taste zurück auf den Anfang des gerade laufenden Titels.
3) Mit den Scan-Tasten (13) kann der CD-Spieler
während der Wiedergabe vorwärts und rückwärts
gefahren werden. Bei gedrückt gehaltener Taste
läuft das Gerät bis zum Anfang des näch-
sten Titels vor, bei gedrückt gehaltener Taste
läuft das Gerät bis zum Anfang des gerade
laufenden Titels zurück.
4) Zum Abschalten der Funktion die Stopp-Taste (11)
drücken (Gerät stoppt) oder die Taste RANDOM
ein zweites Mal drücken bzw. eine der Zifferntasten (14) auf der Fernbedienung drücken (Abspielen wird in fortlaufender Reihenfolge fortgesetzt).
5.5 Kurzes Anspielen aller Titel
Die Intro-Funktion ermöglicht es, alle Titel der CD
nacheinander für 10 Sekunden anzuspielen.
1) Für die Intro-Funktion muß das Gerät auf Stopp stehen. Gegebenenfalls die Stopp-Taste (11) drücken.
2) Die Taste INTRO (17) auf der Fernbedienung
drücken: Das Gerät startet den Schnelldurchlauf.
3) Zum Abschalten der Funktion eine beliebige Taste
drücken.
6 Technische Daten
Frequenzbereich:. . . . . . . 20-20000Hz
Klirrfaktor: . . . . . . . . . . . . < 0,1%
Kanaltrennung: . . . . . . . . > 80dB
Dynamikumfang: . . . . . . . > 90 dB
Störabstand: . . . . . . . . . . > 80dB
Gleichlaufschwankungen: nicht meßbar, quarz-
genau
Ausgang: . . . . . . . . . . . . . 2V
Zulässige
Einsatztemperatur: . . . . . 0
-
40°C
Stromversorgung: . . . . . . 230 V~/50 Hz/13VA
Abmessungen (BxHxT):. 420 x 90 x 285 mm
(ohne Montagewinkel),
2 Höheneinheiten
Gewicht:. . . . . . . . . . . . . . 4kg
Laut Angaben des Herstellers.
Technische Änderungen vorbehalten.
AB
5.4 Playing of the titles in a random sequence
With the button RANDOM (8) a random generator is
activated, i.e. the titles of the CD are no longer played in the indicated sequence but the music pieces
are played in a random way.
1) Press the button RANDOM (8). “RANDOM” is displayed.
If the unit is set to stop, start the replay with the
replay/pause button (10): The CD player jumps to
the beginning of the first music title selected at
random.
If the unit is in the replay mode, at first the actual
title is played and then the next music title in a random way.
2) With the skip buttons (12) it is possible to skip forward or backward while replaying. By pressing the
button the unit jumps to the next title selected
at random and by pressing the button back to
the beginning of the actual title.
3) With the scan buttons (13) the CD player can be
advanced and reversed while replaying. With the
button kept pressed, the unit advances to
the beginning of the next title, with the button
kept pressed, the unit reverses to the begin-
ning of the actual title.
4) To switch off the function, press the stop button
(11) (the unit stops) or the button RANDOM a
second time resp. one of the numerical keys (14)
on the remote control (replaying is continued in
the normal sequence).
5.5 Short monitoring of all titles
With the intro function all titles of the CD can shortly
be monitored successively for the first 10 seconds.
1) For the intro function the unit must be set to stop.
If necessary, press the stop button (11).
2) Press the button INTRO (17) on the remote control: the unit starts the quick short monitoring of all
titles.
3) To switch off the function, press any key.
6 Specifications
Frequency range: . . . . . . 20-20000Hz
THD: . . . . . . . . . . . . . . . . < 0.1%
Channel separation: . . . . > 80 dB
Dynamic range: . . . . . . . . > 90dB
S/N ratio:. . . . . . . . . . . . . > 80dB
Wow and flutter:. . . . . . . . not measurable, quartz
precision
Output:. . . . . . . . . . . . . . . 2V
Permissible
operating temperature: . . 0
-
40°C
Power supply: . . . . . . . . . 230 V~/50 Hz/13VA
Dimensions (W x H x D): . 420 x 90 x 285mm
(w/o mounting brackets),
2 rack spaces
According to the manufacturer.
Subject to technical change.
7
D
A
CH
GB
bestimmte Musiksequenz wiederholen
➄

Ouvrez le présent livret page 3 de manière à visualiser les éléments et branchements.
1 Eléments et branchements
1.1 Face avant (schéma 1)
1 Interrupteur POWER: Marche/Arrêt
2 Tiroir CD
3 Affichage multifonctions
4 Détecteur infrarouge pour la télécommande
5 Touche REPEAT: fonction répétition
première pression: répétition du titre en cours
de lecture
deuxième pression: répétition de tous les titres
du CD ou répétition d'une
programmation
troisième pression: déconnexion de la fonction
répétition
6 Touche TIME: commutation du mode d'affichage
position de base: affichage du temps écoulé
du titre en cours de lecture
première pression; affichage de la durée restan-
te du titre en cours
deuxième pression: affichage de la durée restan-
te de tout le CD ou d'une
programmation
troisième pression: retour à la position de base
7 Touche PROGRAM: composition d'une program-
mation (voir chapitre 5.2)
8 Touche RANDOM: activation du générateur aléa-
toire: lecture des titres dans un ordre aléatoire
9 Touche de commande d'ouverture/ fermeture du
tiroir CD
10 Touche Lecture/Pause: sélection du mode de
fonctionnement : Lecture (affichage ) ou Pause
(affichage )
11 Touche STOP: arrête de la lecture
12 Touches SKIP: sélection des titres
A chaque pression sur la touche , vous avancez d'un titre; à chaque pression sur la touche
, vous revenez au début du titre en cours. Par plusieurs pressions sur la touche , vous reculez
toujours d'un titre. Le saut de titres (en avant ou
arrière) cesse immédiatement lorsqu’on atteint le
début ou la fin du CD.
Conseil: lorsque le générateur aléatoire est activé
(voir chap. 5.4), il n'est pas possible avec la touche de revenir au titre précédent. Le lecteur
ne revient qu'au début du titre.
13 Touches SCAN: lecture avant/arrière
Lorsque la touche est maintenue enfoncée,
le lecteur va en avant, lorsque la touche est
enfoncée, il va en arrière. L'avance/ retour concerne plusieurs titres mais cesse lorsque le
début/fin du CD est atteinte.
Conseil: lorsque le générateur aléatoire est activé
et pour une série programmée, l'avance/ retour
cesse à la fin/début du titre en cours (voir chapitres 5.2 et 5.4).
1.2 Télécommande (schéma 2)
5-13 Touches correspondant aux touches du lec-
teur (voir chapitre 1.1 “Face avant”)
14 T ouches numérotées pour la sélection directe
d'un titre
15 Touche SPACE: insertion automatique d'une
pause de 4 secondes entre les titres : lorsque
vous enregistrez un CD, le magnétophone,
équipé de cette fonction recherche de titres,
peut ainsi trouver le début du titre grâce aux
pauses insérées.
16 T ouche A B: permet de définir le point de dé-
part Aet le point final B d’une séquence musicale pouvant être répétée en boucle à l'infini
17 Touche INTRO: lecture des 10 premières se-
condes de chaque titre du CD
1.3 Face arrière (schéma 3)
18 Prises RCA de sortie LINE OUT pour brancher le
lecteur CD à un amplificateur ou une table de
mixage
19 Cordon secteur 230 V~/50 Hz
2 Conseils d'utilisation
Le CD-152 répond à la norme européenne 89/336/
CEE relatives à la compatibilité électromagnétique et
à la norme 73/ 23 /CEE portant sur les appareils à
basse tension.
L’appareil est alimenté par une tension dangereuse en 230V~. Ne touchez jamais l'intérieur de l'appareil car en cas de mauvaise manipulation vous
pourriez subir une décharge électrique mortelle.
En outre, l'ouverture de l'appareil rend tout droit à
la garantie caduque.
Respectez scrupuleusement les points suivants:
•
Attention! Lorsque le tiroir CD est ouvert, ne
regardez jamais à l'intérieur; un rayon laser pourrait engendrer des troubles de la vision.
•
L'appareil n'est conçu que pour une utilisation en
intérieur.
•
Protégez-le de la poussière, des vibrations, de la
lumière directe de soleil, de l'humidité et de la
chaleur (température autorisée de fonctionnement
0
-
40°C)
•
Ne le faites pas fonctionner à proximité de sources
de ronflements, comme par exemple des transformateurs ou des moteurs.
•
Ne le faites jamais fonctionner et débranchez-le
immédiatement du secteur lorsque:
1. des dommages sur l'appareil ou le cordon secteur apparaissent
2. après une chute ..., vous avez un doute sur l’état
de l’appareil.
3. des dysfonctionnements apparaissent.
Dans tous les cas, les dommages doivent être
réparés par un technicien spécialisé.
•
Tout cordon secteur endommagé ne doit être remplacé que par le constructeur ou un technicien habilité.
•
Ne retirez jamais le cordon secteur de la prise en
tirant dessus.
•
Nous déclinons toute responsabilité en cas de dommage si l'appareil est utilisé dans un but autre que
celui pour lequel il a été conçu, s'il n'est pas correctement utilisé ou réparé par une personne habilitée.
Vi preghiamo di aprire completamente la pagina 3. Così vedrete sempre gli elementi di comando e i collegamenti descritti.
1 Elementi di comando e collegamenti
1.1 Pannello frontale (fig. 1)
1 Interruttore on/off POWER
2 Cassetto CD
3 Display multifunzione
4 Sensore a raggi infrarossi per il telecomando
5 Tasto REPEAT per la funzione di ripetizione
1. pressione del tasto: ripetizione del titolo attuale
2. pressione del tasto: ripetizione di tutti i titoli
del CD oppure ripetizione di una sequenza programmata
3. pressione del tasto: disattivazione della funzione di ripetizione
6 Tasto TIME per commutare l’indicazione del tem-
po sul display
posizione base: tempo già passato del ti-
tolo attuale
1. pressione del tasto: tempo restante del titolo
attuale
2. pressione del tasto: tempo restante dell’intero
disco o della sequenza
programmata
3. pressione del tasto: ritorno sull’impostazione
base
7 Tasto PROGRAM per compilare una sequenza a
piacere (vedere cap. 5.2)
8 Tasto RANDOM per attivare il generatore ran-
dom: riproduzione dei titoli in ordine casuale
9 Tasto per aprire/chiudere il cassetto CD
10 Tasto Riproduzione/Pausa per attivare la riprodu-
zione (segno sul display) o la pausa (segno
sul display)
11 Tasto Stop per terminare la riproduzione
12 Tasti SKIP per selezionare singoli titoli:
Con ogni pressione sul tasto si salta al titolo
successivo. Premendo il tasto una volta, si
torna all’inizio del titolo corrente. Con ogni nuova
pressione del tasto si salta indietro di un titolo.
Il salto dei titoli (in avanti o indietro) è terminato
quando viene raggiunto l'inizio o la fine del CD.
N.B.: Se è attivato il generatore random (vedere
cap. 5.4), il tasto SKIP non permette il salto al
titolo precedente. È possibile ritornare solo all'inizio del titolo attuale.
13 Tasti SCAN per l'avanzamento e ritorno veloce:
Se si tiene premuto il tasto , il lettore gira in
avanti, con gira indietro. L'avanzamento /
ritorno veloce salta diversi titoli, ma si ferma
quando è raggiunto l'inizio o la fine del CD.
N.B.: Con sequenza dei titoli programmata e con
generatore random attivato (vedere capp. 5.2 e
5.4), l'avanzamento/ritorno si ferma alla fine/
all'inizio del titolo attuale.
1.2 Telecomando (fig. 2)
5-13 Tasti che corrispondono a quelli del lettore
CD (vedere cap. 1.1 “Pannello frontale”)
14 Tastierino numerico per selezionare un titolo
15 Tasto SPACE per l'inserimento automatico di
un intervallo di 4 secondi fra i titoli: in caso di
registrazione dal CD, il registratore equipaggiato con la funzione di ricerca titoli, trova gli
inizi sulla base degli intervalli inseriti
16 Tasto A B per definire una sequenza di
musica, fissando il punto di partenza A ed il
punto terminale B. La sequenza viene ripetuta senza fine.
17 T asto INTRO per riprodurre i primi 10 secondi
di ogni titolo del CD
1.3 Pannello posteriore (fig. 3)
18 Prese cinch d'uscita LINE OUT per il collega-
mento del lettore CD con un amplificatore o un
mixer.
19 Cavo rete 230 V~/50 Hz
2 Avvisi di sicurezza
Questo apparecchio è conforme alla direttiva EMC
89/ 336 /CEE e alla direttiva 73 /23 /CEE per apparecchi a bassa tensione.
Questo apparecchio funziona con tensione pericolosa di rete di 230 V~. Non intervenire mai al suo
interno; la manipolazione scorretta può provocare
delle scariche pericolose. Se l’apparecchio viene
aperto, cessa ogni diritto di garanzia.
Durante l’uso si devono osservare assolutamente i
seguenti punti:
•
Attenzione! Non guardare dentro il vano cassetto
del CD mentre è aperto. I raggi laser potrebbero
danneggiare gli occhi.
•
L’apparecchio è previsto solo per l’uso all’interno di
locali.
•
Proteggere l'apparecchio dalla polvere, da vibrazioni, dalla luce diretta del sole, dall'umidità e dal
calore (temperatura d'impiego ammessa 0
-
40°C).
•
Non far funzionare l’apparecchio vicino a sorgenti
di ronzii, come p. es. trasformatori o motori.
•
Non mettere in funzione l’apparecchio e staccare
subito la spina rete se:
1. l’apparecchio o il cavo rete presentano dei danni
visibili;
2. dopo una caduta o dopo eventi simili sussiste il
sospetto di un difetto;
3. l’apparecchio non funziona correttamente.
Per la riparazione rivolgersi sempre ad una officina
competente.
•
Il cavo rete, se danneggiato, può essere sostituito
solo dal costruttore o da un laboratorio autorizzato.
•
Staccare il cavo rete afferrando la spina, senza tirare il cavo.
•
Nel caso di uso improprio, di impiego scorretto o di
riparazione non a regola d’arte non si assume nessuna responsabilità per eventuali danni.
•
Per la pulizia usare solo un panno asciutto; non
impiegare in nessun caso prodotti chimici o acqua.
•
Se si desidera eliminare l'apparecchio definitivamente, consegnarlo per lo smaltimento ad un'istituzione locale per il riciclaggio.
8
I
F
B
CH
 Loading...