

Page 1

Wireless Outdoor Bridge
XI-1500-IH
Quick Installation Guide
2.9.3
1
Page 2

XI-1500-IH Introduction
Appearance of products
Hardware Installation
Product kit
Hardware Installation
Initialize
Configuation PC
Use the function of bridge graft fast
Table of Contents
2
Page 3

XI-1500-IH Introduction
The new-generation wireless LAN device – 11Mbps Wireless Inter-building Access Point,
XI-1500-IH is specially designed for Point-to-Point and Point-to-Multipoint applications,
offering campus-wide connections between buildings at a speed of up to 11Mbps. The new
features and benefits are, support POE (Power over Ethernet), support test-link, use this utility,
you can point the antenna to the best direction, Fully compliant with IEEE802.11b standard, the
Wireless Inter-building Access Point provides powerful features such as the Windows-based
configuration utility, MAC address filtering, WEP security and more.
Appearance of Product
Hardware Installation
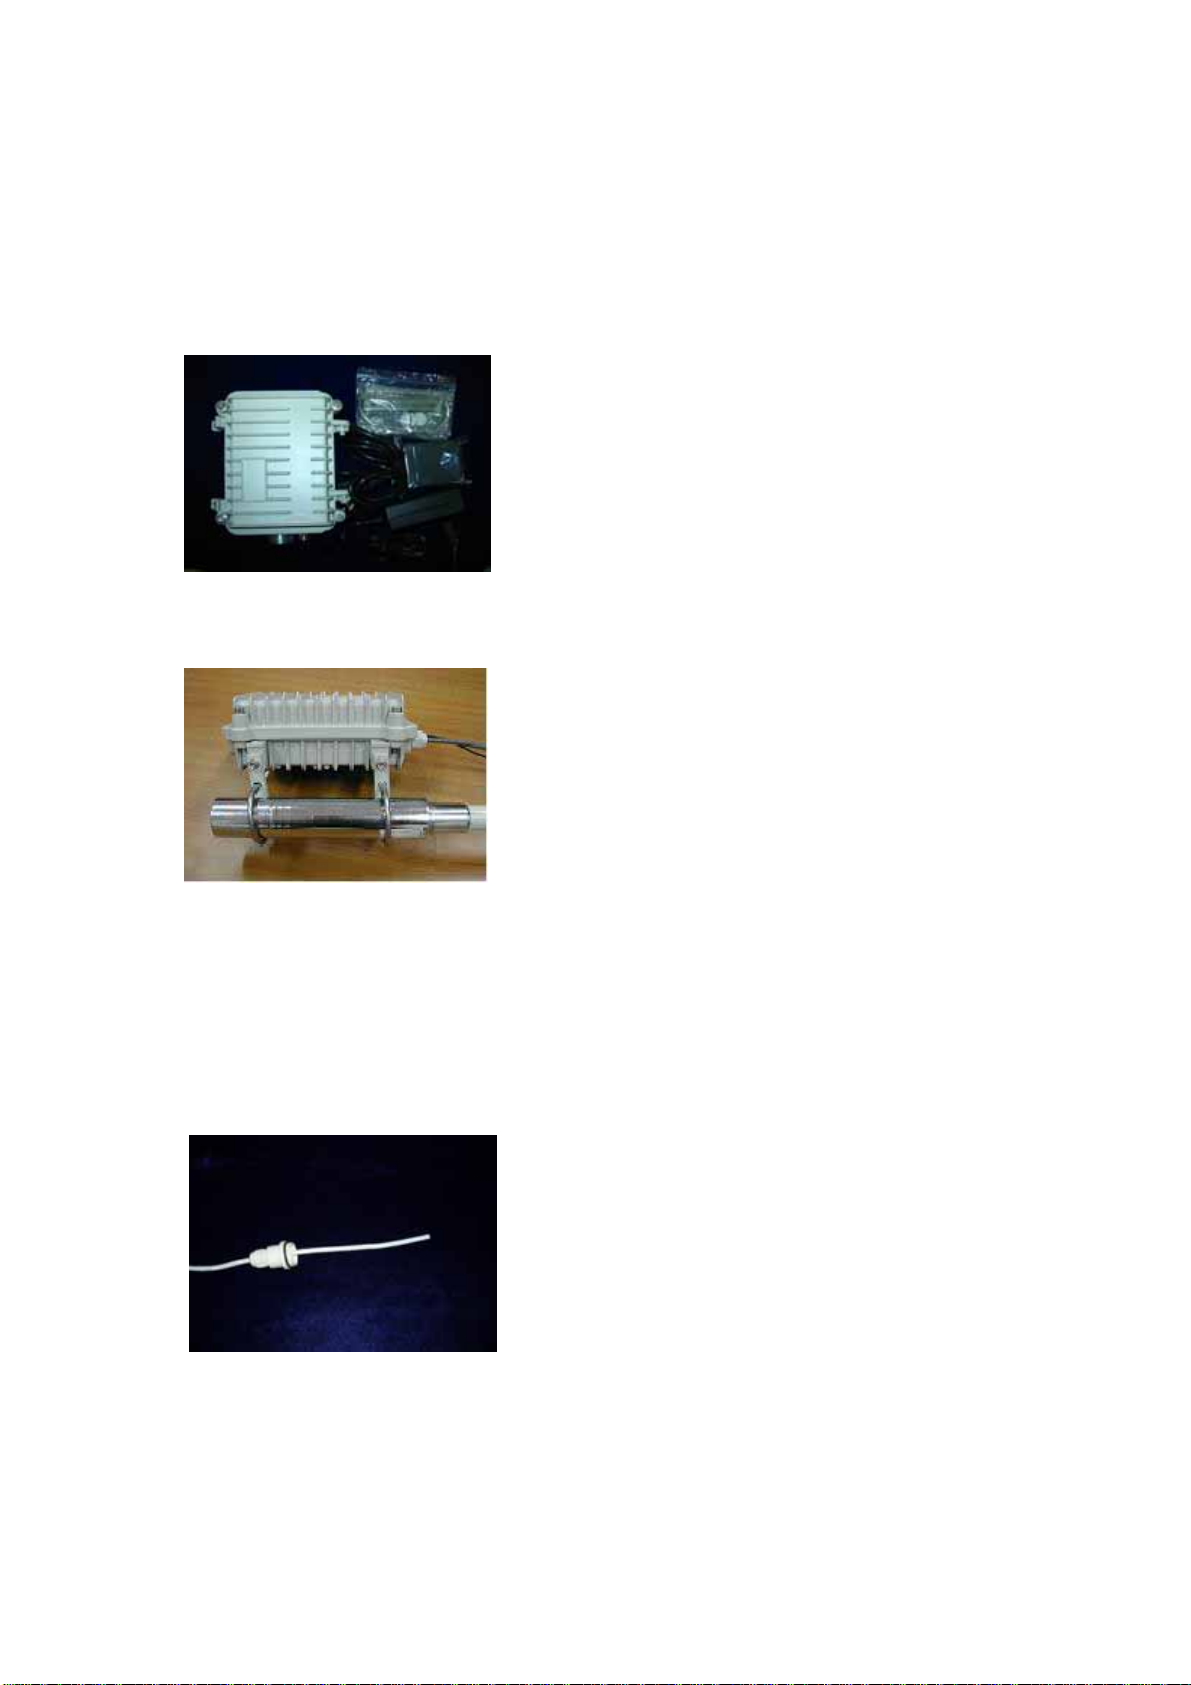
Product Kit
Before installation, make sure that you the following items:
The Wireless Outdoor Bridge (XI-1500-IH)*1
DC Injector*1
Product CD*1
Power Adapter*1
Fixed settings*1
If any of the above items are not included or damaged, please contact your local dealer for
support.
3
Page 4
Hardware Installation
Take the following steps to set up the Wireless Outdoor Bridge.
◆Hardware equipment
◆Fixation
First you should fix the Wireless Outdoor Bridge, the following figure show it:
◆Connect the Ethernet Cable
The Wireless Outdoor Bridge supports 10/100M Ethernet connection. Attach UTP Ethernet
cable to the RJ-45 connector on the Wireless Outdoor Bridge. Then connect the other end of the
RJ-45 cable to a hub or a station. Please note that, use the crossover cable when you desire to
connect the Wireless Outdoor Bridge to a PC.
Put UTP cable through the water-joint
Make the crystal head (not cross-over cable):
white orange∣orange white green∣blue white blue∣green white brown∣brown
4
Page 5

Plug water-joint into the Wireless Outdoor Bridge
Close the water-joint
Note:Two LEDs in the cable connecter of the XI-1500-IH. A DEFAULT button
aside of the LEDs. The DEFAULT button restore the factory default settings.
Warning:Please make sure the Wireless Outdoor Bridge to DC Ground.
Initialize
Have initial value , network of bridge whether which is short of province parameter set up ,
is it install after finishing is it can make working to it to supply powering in hardware to need
only.
Warning:Please don't insert and pull out the Ethernet cable with electricity.
5
Page 6

Configuration PC
This section introduces you how to configuration TCP/IP protocol into your personal
computer. And suppose you have been successfully installed one network card on your personal
computer.
Windows 98/Me
1、Click the Start button, select Settings, then select Control Panel
2、Double-click the Network Icon
3、In the configuration tab, select the TCP/IP protocol line that is associated with your
network card/adapter. If there is no TCP/IP line listed, you will need to first install the TCP/IP
protocol.
4、Click the Properties button, then choose the IP Address tab. Select Specify an IP address.
5、enter an ip address in the ip field, within the range of 192.168.1.X(X can’t be 1).
6、After clicking OK, windows might ask you to restart the PC. Click Yes.
Windows 2000/XP
1、click start, settings, then click control panel.
2、right-click the network icon and select open to open the network connections dialog.
3、right-click the appropriate LAN connection and click properties to open the properties
dialog for the connection:
4、check the box next to Internet Protocol (TCP/IP) and click properties.
5、in the TCP/IP Properties dialog box, click the radio button next to use the following ip
address.
6、enter an IP address in the IP field, within the range of 192.168.1.X(X can’t be 1).
6
Page 7

7
Page 8

Build Point-to-Point and Point-to-Multipoint
Step
1、The hardware is installed.
Note: Please configuration all the parameters of the Wireless Outdoor Bridge
according to the actual conditions indoors. Install the Wireless Outdoor Bridge to
the bracket after the wireless chain is adjusted openly.
Note: The bracket that should be possible is high while installing the Wireless
2、The equipment is initialized.
3、Use the Utility or WEB Management.
Method A: Using Utility Management
Installed on your Windows 98SE/NT/ME/2000/XP desktop computer, the Windows-based
utility “Access Point XI-1500-IH Utility” provides a user-friendly interface.
Insert the Software and Documentation CD into the CD-ROM driver.
Open the CD-ROM driver in the My Computer.
Follow the on-screen instructions to install the Access Point XI-1500-IH Utility.
Upon completion, go to Program Files and execute the Access Point XI-1500-IH
Outdoor Bridge.
Utility. It will begin to browse all the Wireless Outdoor Bridge available on the
network.
8
Page 9

The bridge’s IP differ from the computer’s IP, you can also find the bridge from
utility.
Double click an Wireless Outdoor Bridge icon to access its property dialog box. Enter
the password in the entry field. The default password is “default”.
After entering the correct password, a configuration window appears.
4、Configuration the parameter of XI-1500-IH, include Radio Mode, Channel, Tx Rate:
Warning: XI-1500-IH is used in pairs when work as the bridge mode, so Radio Mode
of the Wireless Outdoor Bridge must choose PXP mode, Channel and Tx Rate must
choose the same parameters, otherwise unable to setup a wireless chain.
9
Page 10

Note: If you experience interference (shown by lost connections and/or slow data
transfers) you may need to experiment with different channels to see which is the
best.
5、Configuration IP Address
Note: To enable remote access to the Wireless Outdoor Bridge using Web
Management, you must assign an IP address to the Wireless Outdoor Bridge.
6、Test-link
Click “Test-link” to the test-link mode
MyMacAddress-show MacAddress of local AP.
10
Page 11

TTestMacAddress-fill MacAddress of remote AP.
Transmit Pkt Num-display the number of frame be sended.
RcvPkNumLabel-display the number of frame be received.
Recv/Trans Rate-display the successful rate of transmitting.
Time Elapsed-show the time cost of sending data.
Local Signal Level-show local signal level.
Remote Signal Level-show remote signal level.
Note: View the intensity of signal, and adjust the positions and angles of the antenna
according to the intensity of signal. Adjust the antenna from side to side from head
to foot, observe the number value of signal level at the same time , when the number
value is 100%, the antenna is in the best positions and angles promptly.
Start-click it will begin test link:
Stop-click it to stop test link.
Close-click to stop test link.
Channel-test the channel quality.
Note: channel quality test must be perform after TX/RX data in gear, click “stop”
and the “channel” will be enable, click it to enter test window, be sure the MAC
Address of the remote Wireless Outdoor Bridge is right.
Start-click it start channel quality test.
Stop-click stop channel quality test.
Cancel-cancel test.
Set Channel-set the channel to the best one, remember click “Apply”.
Note: Two Wireless Outdoor Bridge’s channel will be reset after apply set channel.
11
Page 12

Method B: Using WEB management
The built-in Web Management provides you with a user-friendly graphical user interface to
manage the AP. The AP with an assigned IP address (e.g.
http://192.168.1.1) will allow you
via web browser (e.g. Netscape Navigator 3.0 ~ 4.5 or MS Internet Explorer 4.0) to monitor
and configure. Enter the password to login to the AP. The default password is default
1. configuration IP address
12
Page 13

2. Configuration the parameter of XI-1500-IH, include Radio Mode, Channel, Tx Rate
Troubleshooting
If you meet difficulty and please contact our supplier in the course of installing and using
the Wireless Outdoor Bridge.
13
 Loading...