

These are instructions for swapping the extruder stepper motor wire pairs on a Clay DeltaWASP
3D printer.
This part replacement will require the use of safety knife, a pair of tweezers.
Before you begin, do the following:
• Turn off the DeltaWASP 3D printer
• Unplug power and USB cables
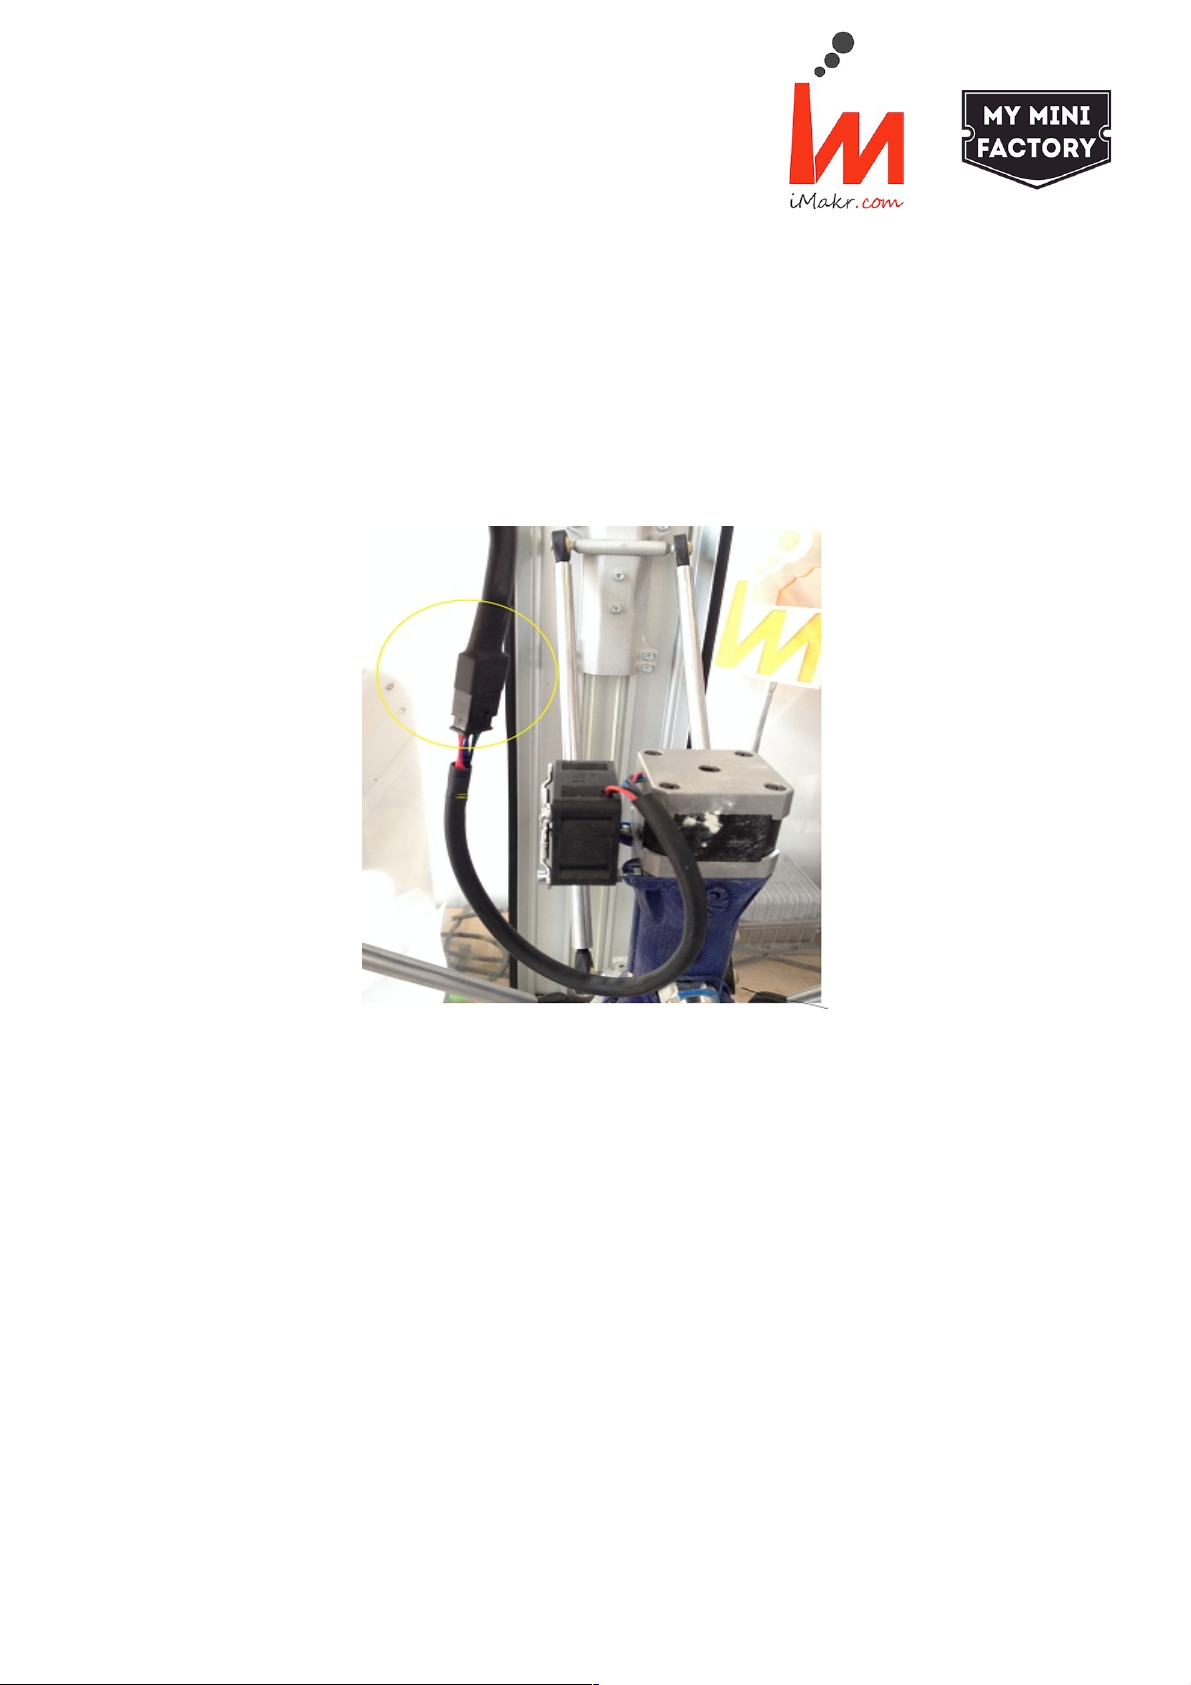
1. Disconnect the clay extruder connector shown in the picture.
2. Use a safety knife or a blade to carefully cut and remove the heat shrink tube as shown in the
picture. Make sure to cut the heat shrink very gently to avoid cutting the cable wires.
1
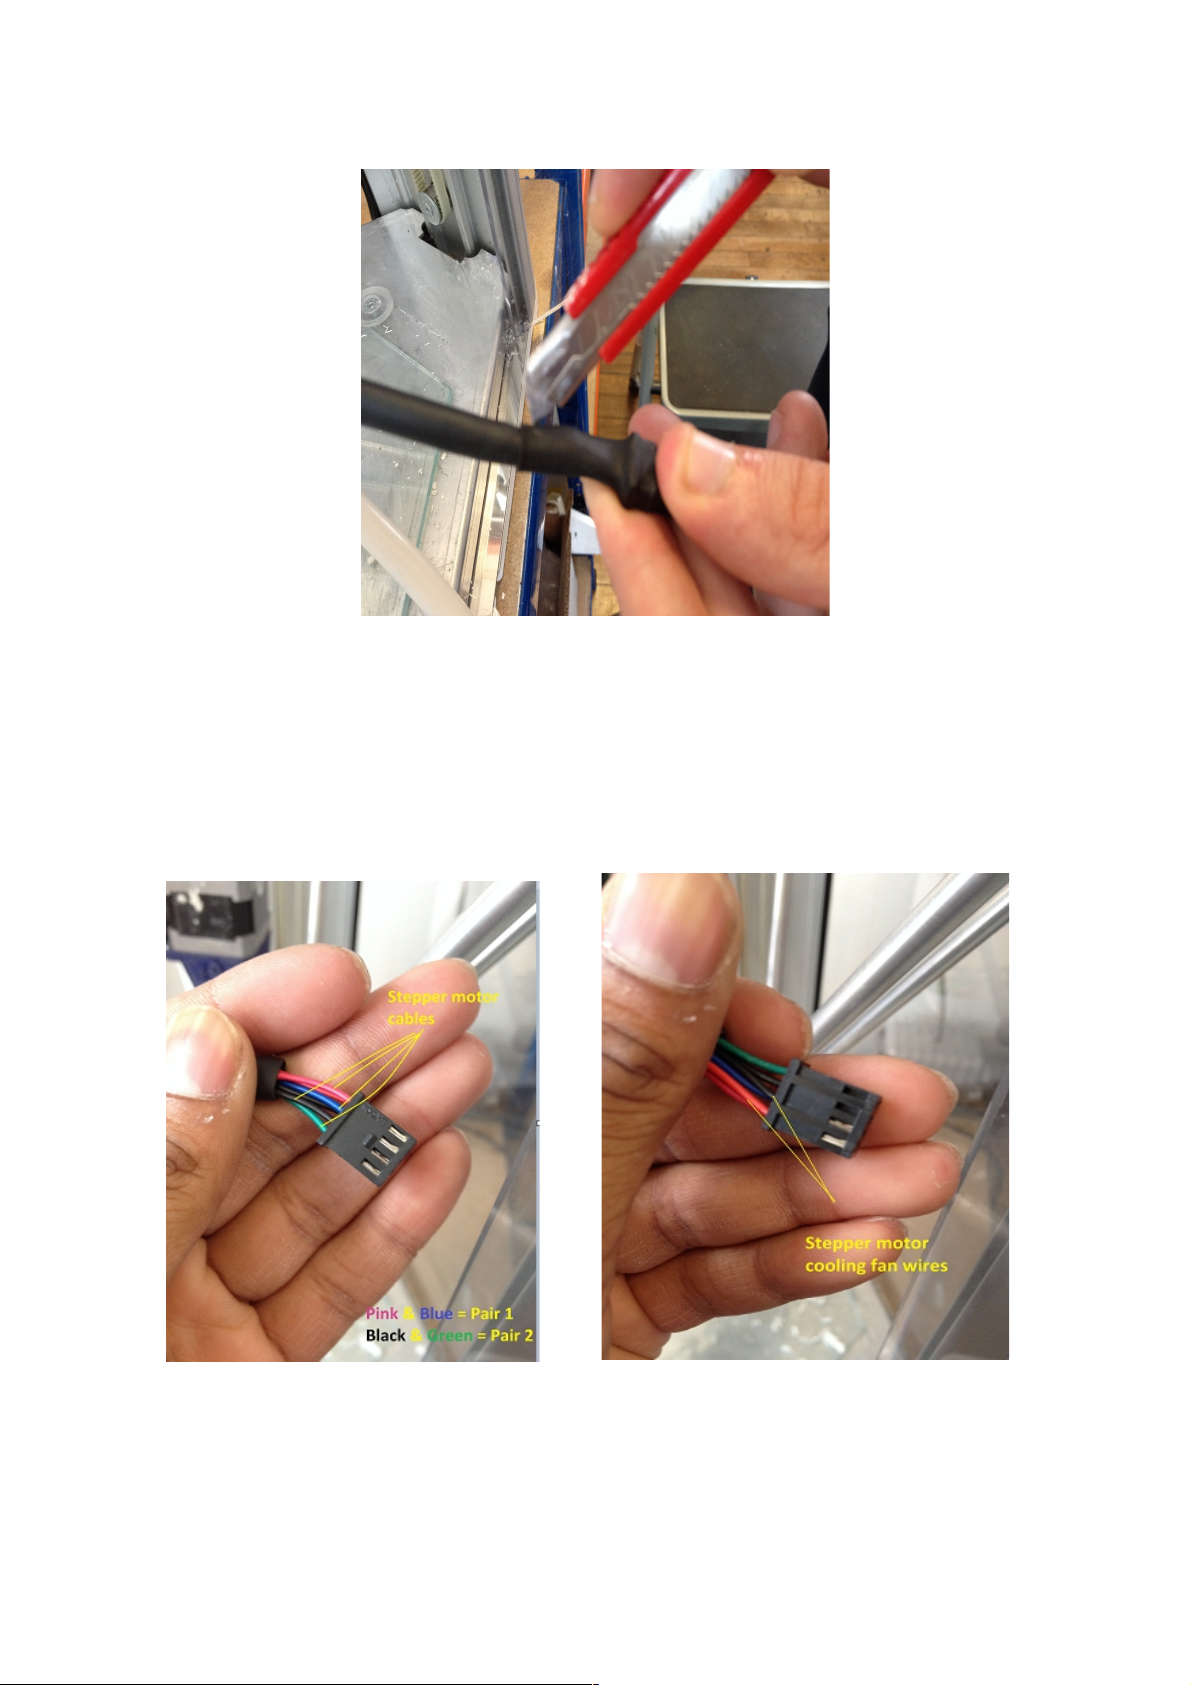
3. As you can see in the below pictures, the cable is composed of six wires within a single
connector which connects to the extruder extension cable connector. Out of these six wires, two
wires are for the stepper motor cooling fan and four wires are for the stepper motor.
Further, out of four wires of the stepper motor, Pink & Blue wires is one pair and Black & Green is
the second pair.
4. Now, check the connections on your extruder connector as they should match the combination
shown in the above pictures. If any of the wire is not in combination then you need to disconnect
that individual wire and swap it accordingly, further if the wires are in combination as shown but
2

your extruder stepper motor spins in the opposite direction then you need to swap the pairs of
stepper motor wires, to do so follow the below steps.
5. Use a tweezer or similar tool, and gently press it on the metal tab in the connector to release the
Pink wire. Now carefully slide the Pink wire out from the connector. Do the same with Black wire.
6. Insert the Pink wire of the extruder cable into the connector from which you removed the Black
one. To do so, very gently bend the metal tab on the crimp outwards using your finger nail, and
carefully slide it into its connector. You should hear a soft 'click'.
7. Insert the Black wire of the extruder cable into the connector from which you removed the Pink
one. To do so, very gently bend the metal tab on the crimp outwards using your finger nail, and
carefully slide it into its connector. You should hear a soft 'click'.
8. Use the method stated in the above steps 6 and 7 to swap the Blue and Green wires.
9. Connect the extruder cable back into the extruder extension cable connector.
The swapping of the clay extruder stepper motor wires is now complete, plug in your Clay
DeltaWASP 3D printer, power it on, load filament, and return to printing. For further assistance with
3

this guide, or any other issue related to the
DeltaWASP 2040 3D printer, contact iMakr Technical Support at support@imakr.com.
-iMakr Engineering Team
4
 Loading...