

Page 1
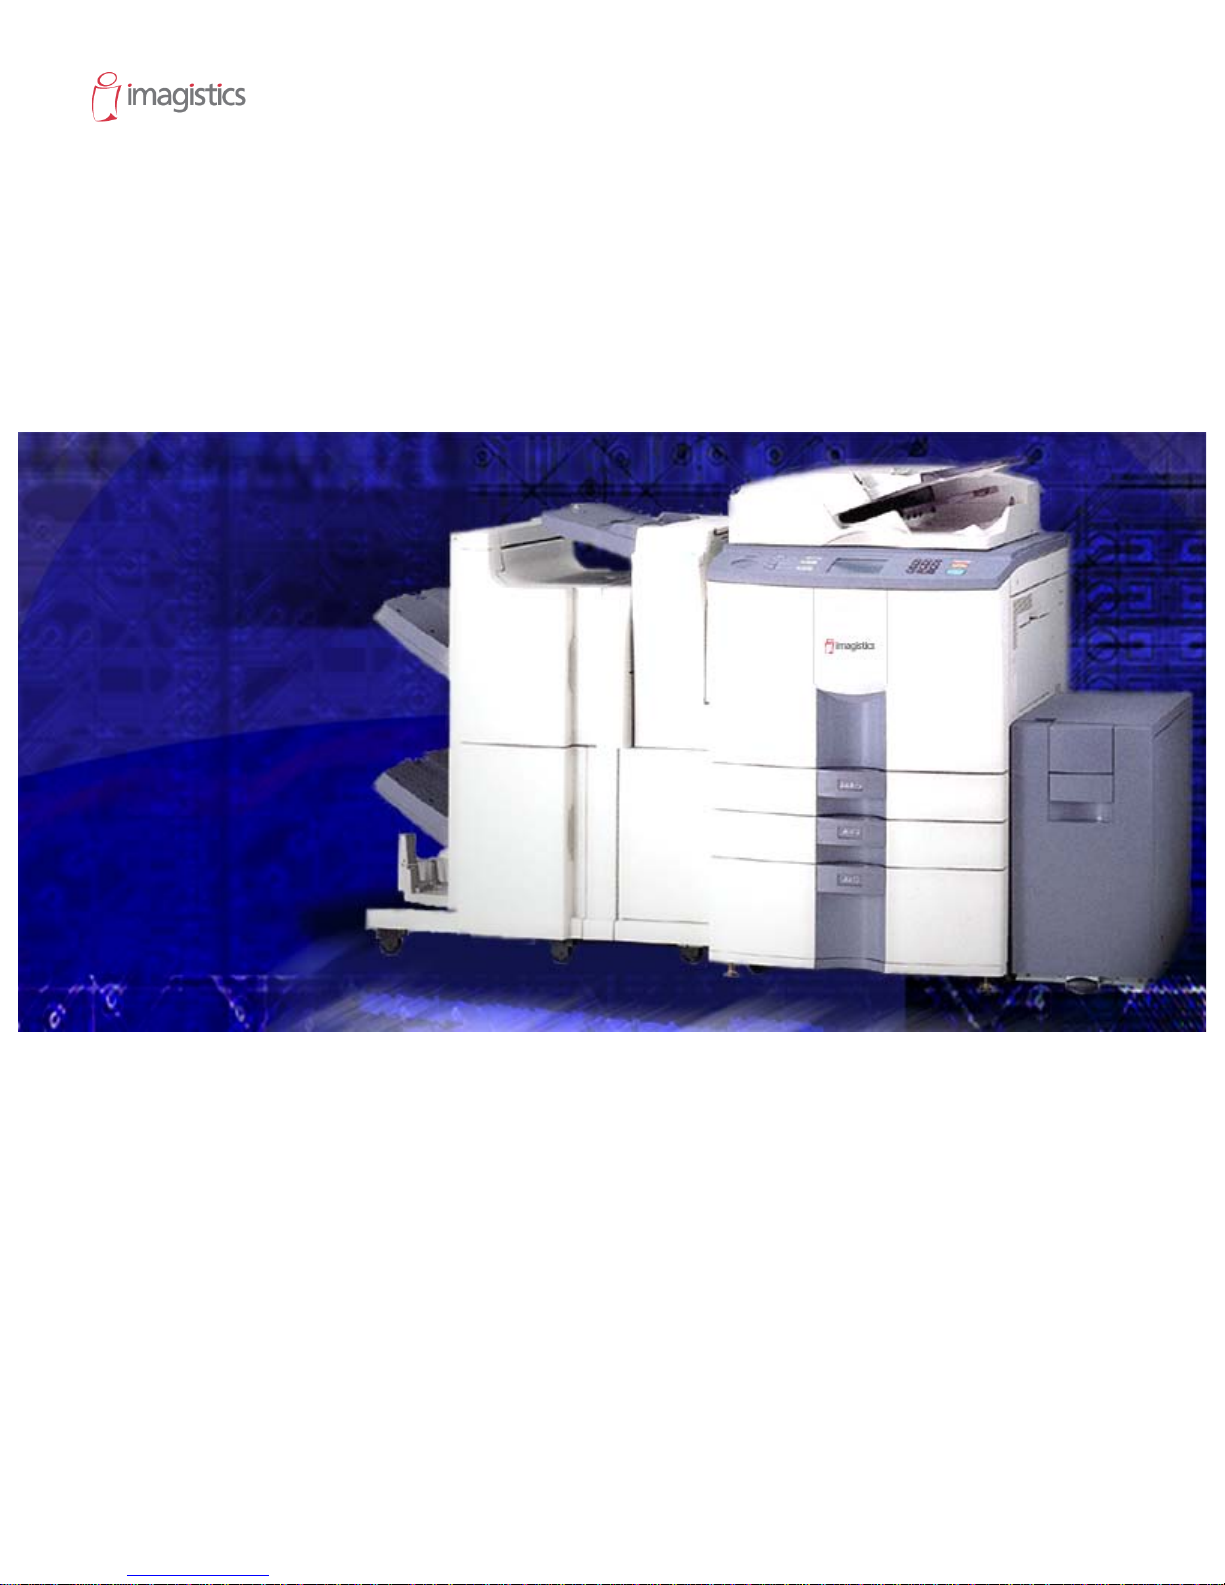
Administrator’s Guide
Version 1.2.0
Your guide to installing, configuring, and troubleshooting the Imagistics
Electronic Document Processing System
im6530, im8130
Page 2

END USER SOFTWARE LICENSE AGREEMENT
INSTALLING OR OTHERWISE USING THIS SOFTWARE PRODUCT CONSTITUTES YOUR ACCEPTANCE OF THE FOLLOWING
TERMS AND CONDITIONS (UNLESS A SEPARATE LICENSE IS PROVIDED BY THE SUPPLIER OF APP LICABLE SOFTWARE IN
WHICH CASE SUCH SEPARATE LICENSE SHALL APPLY). IF YOU DO NOT ACCEPT THESE TERMS, YOU MAY NOT INSTALL
OR USE THIS SOFTWARE, AND YOU MUST PROMPTLY RETURN THE SOFTWARE TO THE LOCATION WHERE YOU
OBTAINED IT.
GRANT OF LICENSE:
This is a legal agreement between you, the end-user (“You”), and Imagistics Int ernational Inc. (“Imagistics”) and its suppliers. This
software, fonts (including their typefaces) and related documentation (“Software”) is licen sed for use with the system CPU on which it
was installed (“System”) in accordance with t he terms con t a ine d in th is Agreeme nt. This Software is proprietary to Imag isti cs and/or its
suppliers.
Imagistics and its suppliers disclaim responsibility for the installation and/or use of this Software, and for the results obtained by usi ng
this Software. You may use one copy of the Software as installed on a single System, and may not copy the Software for any reason
except as necessary to use the Software on a single System. Any copies of the Sof tware shall be subject to the conditions of this
Agreement.
You may not, nor cause or permit any third party to, modify, adapt, merge, translate, reverse compile, reverse assemble, or reverse
engineer the Software. You may not use the Software, except in accordance with this license. No title to the intellectual property in the
Software is transferred to you and full ownership is retained by Imagistics or its suppliers. Source code of the Software is not licensed
to you. You will be held legally responsi ble f or any copyrig ht in fringeme nt, unaut horized transfer, reproduction or use of th e Sof tware or
its documentation.
TERM:
This license is effective until termi nated by Imagisti cs or upon your failure to comply with any term of t his Agreement. Upon termination,
you agree to destroy all copies of the Software and its documentation. You may terminate this license at any time by destroying the
Software and its documentation and al l copies.
DISCLAIMER OF WARRANTY:
This Software is provided “AS IS” without warranty of any kind, either express or implied, including, but not limited to, the implied
warranties of merchantability, fitness for a particular purpose, title, and non-infringement. Imagistics and its suppliers disclaim any
warranty relating to the quality and performance of the Software. If the Software proves defective, You (and not Imagistics or its
suppliers) shall be responsible for the entire cost of all necessary servicing, repair or correction. Imagistics and its suppl iers do not
warrant that the functions contained in the Software will meet your requirements or that the operation of the Software will be
uninterrupted or error free.
LIMITATION OF LIABILITY:
IN NO EVENT WILL Imagistics OR ITS SUPPLIERS BE LIABLE TO YOU FOR ANY DAMAGES, WHETHER IN CONTRACT, TORT,
OR OTHERWISE (except personal injury or death resulti ng from negligence on the part of Imagistics or its SUPPLIERS), INCLUDING
WITHOUT LIMITATION ANY LOST PROFITS, LOST DATA, LOST SAVINGS OR OTHER INCIDENTAL, SPECIAL OR
CONSEQUENTIAL DAMAGES ARISING OUT OF THE USE OR INABILITY TO USE THE SOFTWARE, EVEN IF Imagistics OR ITS
SUPPLIERS HAVE BEEN ADVISED OF THE POSSIBILITY OF SUCH DAMAGES, NOR FOR THIRD PARTY CLAIMS.
U.S. GOVERNMENT RESTRICTED RIGHTS:
The Software is provided with RESTRICTED RIGHTS. Use, duplication or disclosure by the U.S. Government is subject to restrictions
set forth in subdivision (b)(3)(ii) or (c)(i)(ii)of the Rights in Technical Data and Computer Software Clause set forth in 252.227-7013, or
52.227-19 (c)(2) of the DOD FAR, as appropriate. Contractor/Manufacturer is Imagistics International Inc., 100 Oakview Drive
Trumbull, Connecticut 06611 USA.
GENERAL:
You may not sublicense, lease, rent, assign or transfer this license or the Software. Any attempt to sublicense, lease, rent, assign or
transfer any of the rights, duties o r obligations hereunder is void. You agree that you do not intend to, and will not ship , transmit (directly
or indirectly) the Software, including any copies of the Software, or any technical data contained in the Software or its media, or any
direct product thereof, to any country or destinatio n proh ibi ted by th e Unit ed States Government. This license shall be governed by the
laws of Japan or , at t he election o f a Supplier of Imagisti cs concerned with a di spute arisi ng from or relating to this Agreeme nt, the l aws
of the Country designated from time to time by the relev ant Suppli er of Ima gistics. If any pro vision or portion o f this Agre ement shal l be
found to be illegal, invalid or unenforceable, the remaining provisions or portions shall remain in full force and effect.
YOU ACKNOWLEDGE THAT YOU HAVE READ THIS LICENSE AGREEMENT AND THAT YOU UNDERSTAND ITS PROVISIONS.
YOU AGREE TO BE BOUND BY ITS TERMS AND CONDITIONS. YOU FURTHER AGREE THAT THIS LICENSE AGREEMENT
CONTAINS THE COMPLETE AND EXCLUSIVE A GREEMENT BETWEEN YOU AND Imagistics AND ITS SUPPLIERS AND
SUPERSEDES ANY PROPOSAL OR PRIOR AGREEMENT, ORAL OR WRITTEN, OR ANY OTHER COMMUNICATION RELATING
TO THE SUBJECT MATTER OF THIS LICENSE AGREEMENT.
Imagistics International Inc., 100 Oakview Drive Trumbull, Connecticut 06611 USA.
im6530, im8130
Page 3

TRADEMARKS:
The official name of Windows 98 is Microsoft Windows 98 Operating System.
The official name of Windows Me is Microsoft Windows Me Operating System.
The official name of Windows 2000 is Microsoft Windows 2000 Operating System.
The official name of Windows XP is Microsoft Windows XP Operating System.
Microsoft, Windows, Windows NT, and the brand names and product names of other Microsoft products are trademarks of Microsoft
Corporation in the US and other countries.
Apple, AppleTalk, Macintosh, Mac, TrueType and LaserWriter are trademarks of Apple Computer Inc. in the US and other countries.
PostScript is a trademark of Adobe Systems Incorporated.
Netscape is a trademark of Netscape Communications Corporation.
IBM, AT and AIX are trademarks of International Business Machines Corporation.
Novell, NetWare, and NDS are trademarks of Novell , Inc.
3Com is a trademark of 3Com Corporation.
The Bluetooth trademark is owned by Bluetooth SIG, Inc.
Other company names and product names in this manual are the trademar ks of their respective companies.
The technology of Dartcom is used in the scanning process.
COPYRIGHT:
Copyright © 1999-2002 Imagistics Internationa l Inc.. All Rights Reserved.
im6530, im8130
Page 4

im6530, im8130
Page 5
ipc1-im8130 Administrator’s Guide i
Contents
Preface . . . . . . . . . . . . . . . . . . . . . . . . . . . . . . . . . . . . . . . . . . . . . . vii
Introduction. . . . . . . . . . . . . . . . . . . . . . . . . . . . . . . . . . . . . . . . . . .vii
Who Should Read This Guide. . . . . . . . . . . . . . . . . . . . . . . . . . . . . viii
Features and Functions . . . . . . . . . . . . . . . . . . . . . . . . . . . . . . . . . viii
Controller Software . . . . . . . . . . . . . . . . . . . . . . . . . . . . . . . . . . . . . .x
Supplemental References . . . . . . . . . . . . . . . . . . . . . . . . . . . . . . . . xvi
Software CD-ROM Contents. . . . . . . . . . . . . . . . . . . . . . . . . . . . . xviii
Part 1 Setting Up the Controller
1 Installation Overview. . . . . . . . . . . . . . . . . . . . . . . . . . . . . . . . . . . . 3
The Big Picture . . . . . . . . . . . . . . . . . . . . . . . . . . . . . . . . . . . . . . . . 3
Planning and Preparation . . . . . . . . . . . . . . . . . . . . . . . . . . . . . . . . 5
2 Modifying Controller Settings at the Control Panel . . . . . . . . . . . . 11
Navigating the Control Panel . . . . . . . . . . . . . . . . . . . . . . . . . . . . . 12
Logging In . . . . . . . . . . . . . . . . . . . . . . . . . . . . . . . . . . . . . . . . . . . 13
Setting the Password . . . . . . . . . . . . . . . . . . . . . . . . . . . . . . . . . . . 14
Modifying Protocol Settings Locally . . . . . . . . . . . . . . . . . . . . . . . . 15
Naming the Device and Workgroup . . . . . . . . . . . . . . . . . . . . . . . . 22
im6530, im8130
Page 6

ii ipc1-im8130 Administrator’s Guide
Restoring the Default Controller Settings . . . . . . . . . . . . . . . . . . . . 23
Changing Control Panel Options . . . . . . . . . . . . . . . . . . . . . . . . . . . 23
Controlling the Operation of the Controller . . . . . . . . . . . . . . . . . . . 29
Monitoring the Print Queue . . . . . . . . . . . . . . . . . . . . . . . . . . . . . . 38
Creating and Using Department Codes . . . . . . . . . . . . . . . . . . . . . . 47
3 Modifying Controller Settings Remotely. . . . . . . . . . . . . . . . . . . . . 53
Overview. . . . . . . . . . . . . . . . . . . . . . . . . . . . . . . . . . . . . . . . . . . . . 54
System Requirements . . . . . . . . . . . . . . . . . . . . . . . . . . . . . . . . . . . 54
Opening Printer Utility . . . . . . . . . . . . . . . . . . . . . . . . . . . . . . . . . . 56
Logging In. . . . . . . . . . . . . . . . . . . . . . . . . . . . . . . . . . . . . . . . . . . . 57
Accessing Online Help . . . . . . . . . . . . . . . . . . . . . . . . . . . . . . . . . . 60
Using Online Help . . . . . . . . . . . . . . . . . . . . . . . . . . . . . . . . . . . . . 61
Managing Print Jobs. . . . . . . . . . . . . . . . . . . . . . . . . . . . . . . . . . . . 63
Managing Scan Jobs. . . . . . . . . . . . . . . . . . . . . . . . . . . . . . . . . . . . 66
Setting Your Preferences. . . . . . . . . . . . . . . . . . . . . . . . . . . . . . . . . 69
Managing Counters . . . . . . . . . . . . . . . . . . . . . . . . . . . . . . . . . . . . 70
Remote Device Management . . . . . . . . . . . . . . . . . . . . . . . . . . . . . . 74
Administrator Site Map. . . . . . . . . . . . . . . . . . . . . . . . . . . . . . . . . . 74
Getting Started . . . . . . . . . . . . . . . . . . . . . . . . . . . . . . . . . . . . . . . . 76
Setting up Error and Event Notification . . . . . . . . . . . . . . . . . . . . . 79
Setting Controller Preferences. . . . . . . . . . . . . . . . . . . . . . . . . . . . . 79
Setting Copier Preferences . . . . . . . . . . . . . . . . . . . . . . . . . . . . . . . 83
Setting Printer Preferences . . . . . . . . . . . . . . . . . . . . . . . . . . . . . . . 88
Configuring Network Protocol Properties . . . . . . . . . . . . . . . . . . . . . 94
Configuring Wireless Network Protocol Properties . . . . . . . . . . . . . . 99
Setting Up Network Print Services. . . . . . . . . . . . . . . . . . . . . . . . . 104
Configuring Agent Settings . . . . . . . . . . . . . . . . . . . . . . . . . . . . . . 107
Setting Up E-mail . . . . . . . . . . . . . . . . . . . . . . . . . . . . . . . . . . . . . 111
Configuring Directory Services . . . . . . . . . . . . . . . . . . . . . . . . . . . 115
Configuring Client Software . . . . . . . . . . . . . . . . . . . . . . . . . . . . . 116
4 Wireless Networking. . . . . . . . . . . . . . . . . . . . . . . . . . . . . . . . . . . 119
Introduction . . . . . . . . . . . . . . . . . . . . . . . . . . . . . . . . . . . . . . . . . 120
Setting up a Wireless Network . . . . . . . . . . . . . . . . . . . . . . . . . . . 123
Setting Wireless Network Protocol Properties. . . . . . . . . . . . . . . . . 126
Setting up Bluetooth Using a USB Adapter . . . . . . . . . . . . . . . . . . 130
Part 2 Establishing Network Print Services
5 Setting Up Novell Printing . . . . . . . . . . . . . . . . . . . . . . . . . . . . . . 139
Network Printer Mode . . . . . . . . . . . . . . . . . . . . . . . . . . . . . . . . . . 140
im6530, im8130
Page 7

ipc1-im8130 Administrator’s Guide iii
Print Server Mode . . . . . . . . . . . . . . . . . . . . . . . . . . . . . . . . . . . . 142
NDPS Mode . . . . . . . . . . . . . . . . . . . . . . . . . . . . . . . . . . . . . . . . . 145
6 Setting Up Microsoft Print Services . . . . . . . . . . . . . . . . . . . . . . . 155
Peer to Peer Printing . . . . . . . . . . . . . . . . . . . . . . . . . . . . . . . . . . 156
LPR/LPD Printing . . . . . . . . . . . . . . . . . . . . . . . . . . . . . . . . . . . . 157
IPP Printing . . . . . . . . . . . . . . . . . . . . . . . . . . . . . . . . . . . . . . . . . 157
7 Setting Up Unix Printing . . . . . . . . . . . . . . . . . . . . . . . . . . . . . . . 159
Installing the Unix TAR File . . . . . . . . . . . . . . . . . . . . . . . . . . . . . 160
Managing Unix Print Queues . . . . . . . . . . . . . . . . . . . . . . . . . . . . 162
Printing to the Controller in Unix . . . . . . . . . . . . . . . . . . . . . . . . . 164
8 Setting Up Macintosh Printing . . . . . . . . . . . . . . . . . . . . . . . . . . . 183
Setting Up AppleTalk Printing . . . . . . . . . . . . . . . . . . . . . . . . . . . 184
Configuring LPR/LPD Printing . . . . . . . . . . . . . . . . . . . . . . . . . . . 187
9 Installing Client Software . . . . . . . . . . . . . . . . . . . . . . . . . . . . . . 189
Installing Windows Software . . . . . . . . . . . . . . . . . . . . . . . . . . . . 190
Installing Windows Printer Drivers . . . . . . . . . . . . . . . . . . . . . . . . 192
Installing Macintosh PPD Files . . . . . . . . . . . . . . . . . . . . . . . . . . . 194
Part 3 Managing the System
10 Managing Operations . . . . . . . . . . . . . . . . . . . . . . . . . . . . . . . . . 197
Managing Print Jobs . . . . . . . . . . . . . . . . . . . . . . . . . . . . . . . . . . 198
Creating and Using Department Codes. . . . . . . . . . . . . . . . . . . . . 200
Managing Counters . . . . . . . . . . . . . . . . . . . . . . . . . . . . . . . . . . . 204
Managing Message and Job logs . . . . . . . . . . . . . . . . . . . . . . . . . 207
Creating Custom Tabs . . . . . . . . . . . . . . . . . . . . . . . . . . . . . . . . . 209
11 Managing the Address Book . . . . . . . . . . . . . . . . . . . . . . . . . . . . 211
Managing the Address Book. . . . . . . . . . . . . . . . . . . . . . . . . . . . . 212
Using the Address Book with Scan Templates . . . . . . . . . . . . . . . 217
12 Managing Scan Operations. . . . . . . . . . . . . . . . . . . . . . . . . . . . . 221
Setting Up Templates . . . . . . . . . . . . . . . . . . . . . . . . . . . . . . . . . . 221
Public Groups and Templates . . . . . . . . . . . . . . . . . . . . . . . . . . . 222
Templates Pages . . . . . . . . . . . . . . . . . . . . . . . . . . . . . . . . . . . . . 226
Template Groups Pages . . . . . . . . . . . . . . . . . . . . . . . . . . . . . . . . 233
Managing Scan Jobs . . . . . . . . . . . . . . . . . . . . . . . . . . . . . . . . . . 235
im6530, im8130
Page 8

iv ipc1-im8130 Administrator’s Guide
Downloading Scan Files . . . . . . . . . . . . . . . . . . . . . . . . . . . . . . . . 237
13 Maintaining the System . . . . . . . . . . . . . . . . . . . . . . . . . . . . . . . 239
Placing the Controller Offline . . . . . . . . . . . . . . . . . . . . . . . . . . . . 240
Backing up Files. . . . . . . . . . . . . . . . . . . . . . . . . . . . . . . . . . . . . . 240
Restoring Files . . . . . . . . . . . . . . . . . . . . . . . . . . . . . . . . . . . . . . . 241
Deleting Files Stored on the Controller . . . . . . . . . . . . . . . . . . . . . 242
Font Management. . . . . . . . . . . . . . . . . . . . . . . . . . . . . . . . . . . . . 243
Part 4 Troubleshooting Network Printing
14 Troubleshooting Overview . . . . . . . . . . . . . . . . . . . . . . . . . . . . . 247
Network Connectivity Problems. . . . . . . . . . . . . . . . . . . . . . . . . . . 248
Cannot Discover Device . . . . . . . . . . . . . . . . . . . . . . . . . . . . . . . . 253
Cannot PING Controller . . . . . . . . . . . . . . . . . . . . . . . . . . . . . . . . 255
Cannot Print from Client. . . . . . . . . . . . . . . . . . . . . . . . . . . . . . . . 257
Job Not Listed in Current Jobs . . . . . . . . . . . . . . . . . . . . . . . . . . . 259
15 Troubleshooting Hardware Errors . . . . . . . . . . . . . . . . . . . . . . . . 263
Common Errors . . . . . . . . . . . . . . . . . . . . . . . . . . . . . . . . . . . . . . 264
Device Status Indicators . . . . . . . . . . . . . . . . . . . . . . . . . . . . . . . . 267
Error Messages. . . . . . . . . . . . . . . . . . . . . . . . . . . . . . . . . . . . . . . 268
LED Indicators . . . . . . . . . . . . . . . . . . . . . . . . . . . . . . . . . . . . . . . 275
Corrupt Controller Software . . . . . . . . . . . . . . . . . . . . . . . . . . . . . 276
Indeterminate, Unexpected Behavior. . . . . . . . . . . . . . . . . . . . . . . 278
16 Troubleshooting Network Errors . . . . . . . . . . . . . . . . . . . . . . . . 279
Cannot See the Controller. . . . . . . . . . . . . . . . . . . . . . . . . . . . . . . 280
Cannot Print to the Controller. . . . . . . . . . . . . . . . . . . . . . . . . . . . 282
Unknown Controller Network Settings . . . . . . . . . . . . . . . . . . . . . 284
17 Troubleshooting Client Errors . . . . . . . . . . . . . . . . . . . . . . . . . . 285
General Software Error Conditions . . . . . . . . . . . . . . . . . . . . . . . . 286
Printer Utility Error Conditions. . . . . . . . . . . . . . . . . . . . . . . . . . . 288
ipc1 Document Monitor Error Conditions . . . . . . . . . . . . . . . . . . . 289
ipc1 Document Monitor Error Messages . . . . . . . . . . . . . . . . . . . . 293
Printer Driver Installation Error Messages . . . . . . . . . . . . . . . . . . 294
Printer Driver General Errors . . . . . . . . . . . . . . . . . . . . . . . . . . . . 296
TWAIN Driver Errors. . . . . . . . . . . . . . . . . . . . . . . . . . . . . . . . . . . 298
im6530, im8130
Page 9

ipc1-im8130 Administrator’s Guide v
18 Troubleshooting Output Errors . . . . . . . . . . . . . . . . . . . . . . . . . 301
Job Submitted But Never Printed . . . . . . . . . . . . . . . . . . . . . . . . . 302
Error Message Printed Instead of Job . . . . . . . . . . . . . . . . . . . . . . 303
Stapling Errors . . . . . . . . . . . . . . . . . . . . . . . . . . . . . . . . . . . . . . 303
Collation Errors . . . . . . . . . . . . . . . . . . . . . . . . . . . . . . . . . . . . . . 304
Image Overlay Errors . . . . . . . . . . . . . . . . . . . . . . . . . . . . . . . . . . 305
Duplex Errors . . . . . . . . . . . . . . . . . . . . . . . . . . . . . . . . . . . . . . . 306
Problems with Banner Pages . . . . . . . . . . . . . . . . . . . . . . . . . . . . 307
Partial, Blank, or Blurry Pages . . . . . . . . . . . . . . . . . . . . . . . . . . . 308
Part 5 Reference
19 Reference . . . . . . . . . . . . . . . . . . . . . . . . . . . . . . . . . . . . . . . . . 313
Parts of a Printer Utility Page . . . . . . . . . . . . . . . . . . . . . . . . . . . . 314
Device Tab . . . . . . . . . . . . . . . . . . . . . . . . . . . . . . . . . . . . . . . . . . 315
Print Jobs Tab . . . . . . . . . . . . . . . . . . . . . . . . . . . . . . . . . . . . . . . 316
Scan Tab . . . . . . . . . . . . . . . . . . . . . . . . . . . . . . . . . . . . . . . . . . . 319
Preferences Tab . . . . . . . . . . . . . . . . . . . . . . . . . . . . . . . . . . . . . . 320
Counters Tab . . . . . . . . . . . . . . . . . . . . . . . . . . . . . . . . . . . . . . . . 321
Administration Tab . . . . . . . . . . . . . . . . . . . . . . . . . . . . . . . . . . . 322
Glossary . . . . . . . . . . . . . . . . . . . . . . . . . . . . . . . . . . . . . . . . . . . . 325
Index . . . . . . . . . . . . . . . . . . . . . . . . . . . . . . . . . . . . . . . . . . . . . . . 337
im6530, im8130
Page 10

vi ipc1-im8130 Administrator’s Guide
im6530, im8130
Page 11
ipc1-im8130 Administrator’s Guide vii
Preface
Congratulations on purchasing the Imagistics Electronic Document
Processing System. These systems incorporate the im8130/im6530
digital copier with the ipc1-im8130 controller to provide a one-source
solution for all your document copying and network printing needs.
This Administrator’s Guide provides detailed instructions for setting up
the controller and installing client software, transforming the digital
copier into a complete, network-connected, document processing system.
The controller software supports existing ipc1-im8130 controllers,
simplifying setup, integrating procedures, and improving quality and
dependability. Upgrading your ipc1-im8130 controllers increases their
functionality. Because the upgrade is accomplished through software,
hardware characteristics and features remain unchanged.
This Preface defines the scope and audience of this guide and introduces
the system features and functions.
Introduction
The controller provides cross-platform support for Windows®, Macintosh®,
and Unix® operating systems over a wide variety of network protocols,
including TCP/IP, IPX/SPX, SMB, and AppleTalk. It supports both wired
(Ethernet) and wireless networks.
im6530, im8130
Page 12

viii ipc1-im8130 Administrator’s Guide
The client software package and web-based device management utility
provide unparalleled device and job control from the convenience of your
desktop.
Who Should Read This Guide
This guide is intended primarily for Network Administrators or those
responsible for setting up, maintaining, and managing Imagistics devices
over the network.
A prerequisite for using this guide is a thorough understanding of your
network environment: type, configuration, and terminology.
This guide is not intended for digital copier service technicians, operators,
or end users. For information on using and maintaining the digital copier,
refer to the Operator’s Guide for Copying Functions or contact your
Imagistics authorized dealer for support. For information on using printer
drivers and other client software, refer to the Operator’s Guide.
This guide assumes that you are a proficient user of your network
management tools, such as Microsoft’s Server Manager and Novell’s
NetWare Administrator. Although references are made to third-party
software, detailed instructions for using these products are outside the
scope of this guide.
Features and Functions
Whether you use the controller in a high volume, large office environment,
centralized copy and reprographics center, or print-for-pay facility, the
feature-rich client software affords all users the opportunity to output
their documents with increased productivity.
Expanded Client Platform Support
The controller supports printing from Windows, Unix, Novell, and
Macintosh operating systems.
Wireless Networking Support
The controller supports these methods of wireless networking:
Wireless Local Area Network (LAN) only, using a wireless Network
Interface Card (NIC) installed in the controller and a Wireless Fidelity
(Wi-Fi) compatible access point nearby
Wireless LAN in conjunction with a wired Ethernet LAN
Wired Ethernet LAN with the wireless NIC used to communicate with
clients that are not connected to the network
im6530, im8130
Page 13

ipc1-im8130 Administrator’s Guide ix
Web-based Device Administration and Job Management
Printer Utility, an embedded web-based device management tool, allows
you to perform device management functions over the Internet using
either the Internet Explorer 5.0+ or Netscape Navigator 4.75+ browsers
(Unix requires Netscape Navigator 4.76+ and Macintosh requires
Netscape Navigator 4.78+). Printer Utility also allows end users to monitor
and manage their print jobs over the Internet.
SNMP-based Communication
The controller incorporates Simple Network Management Protocol (SNMP)
technology for device discovery and management.
Scheduled Printing
The Print Scheduling feature allows you to specify the date and time you
want to print your job. This can be especially useful if you want to avoid
printing during peak hours.
Proof Printing
The Proof Print feature allows you to check the printed output on a
sample copy before printing an entire multi-copy job. This prevents costly
mistakes and ensures that you get the results you expect.
Private Printing
You can send a sensitive or confidential document to the copier and then
release it for printing by entering a private Document Identification
Number (DIN) from the copier Liquid Crystal Display (LCD) touch screen.
Document Management
You can use the Document Manager web-based utility to view, edit,
merge, and store documents on the controller. You can then print your
document using a web browser.
Queue-based or NDPS Novell Printing
The controller supports Novell’s traditional queue-based print services
and can function as either a network printer or a print server.
Additionally, the Imagistics Novell Distributed Printing Services (NDPS)
Gateway, distributed on the ipc1-im8130 Admin’s Client CD-ROM, allows
the controller to emulate an NDPS-aware printer. NDPS is available on the
im6530, im8130
Page 14

x ipc1-im8130 Administrator’s Guide
NetWare 4.11, NetWare 4.2, NetWare 5, and NetWare 6 releases. It moves
away from the queue-based paradigm allowing you to more quickly and
easily establish Novell print services.
Network Scan Support
The Network Scan feature allows you to turn a hard copy document into
an electronic file. Once captured, you can store it on the network, retrieve
it from TWAIN-compliant applications, upload it to an FTP server, or
distribute it via e-mail.
Using the copier control panel or the Printer Utility, a web-based utility,
you can configure scan and distribution parameters, including scan
settings, transfer type, and distribution locations. Additionally, you can
use Printer Utility to create scan templates that contain all required scan
and distribution information. When downloaded to the copier, these
templates provide a way to perform one-touch scan and send tasks from
the copier control panel.
Another capability provided by the Network Scan feature is sending a
scanned file as an Internet Fax job (iFax).
Controller Software
Printer Utility
With the Printer Utility in administrator mode, you can:
Configure network and device settings
View and filter message and job logs
Control current jobs
Shut down or reboot the controller
Print test pages remotely
Enable event confirmation and notification
Set the copier and print settings
Remotely configure network settings
Document Manager
Document Manager enables end-users to store, edit, and manage postprint (prior to hard copy release) and scan documents. It provides two
predefined system folders, Department and Public, and creates a private
folder for each user account.
im6530, im8130
Page 15

ipc1-im8130 Administrator’s Guide xi
Document Manager maintains a database of user information for
registered users, including the user name, password, e-mail address and
account description; and limits access to folders based on this
information.
ipc1 Document Monitor
ipc1 Document Monitor provides end-users with a way of monitoring all
jobs and controlling their own current jobs on the controller. With the
notification feature enabled, end users are informed of copier or printing
events, such as paper-out or cassette open, before they walk to the copier
only to find their job incomplete or unsuccessful. ipc1 Document Monitor
also provides a menu link to the Printer Utility in end-user mode.
Printer Drivers
The ipc1-im8130 Client CD-ROM and ipc1-im8130 Admin’s Client CD-ROM
contain several printer drivers, filters and utilities to allow cross-platform
printing to the controller from client machines running Windows, Unix, or
Macintosh operating systems. They are described in detail below:
Windows Printer Driver
For the Windows 98/Me/2000/XP and Windows NT operating systems,
you can install these drivers for either controller to provide network
printing:
PCL6
PostScript 3 (level 1, 2, and 3 compatible)
The PCL and PS printer drivers allow end users to define job properties
from the orientation and resolution of their pages to complex finishing
options such as booklet layout and multi-position stapling.
End users can also enhance their printed documents with image overlays
and watermarks. Then, by using the Proof Print feature, they can check
the output by printing a proof copy before printing an entire multi-copy
job. Users can also employ private print mode, so that their secure or
confidential documents are held until they enter the DIN at the copier.
The scheduled print feature allows users to take advantage of off-peak
hours to print large jobs.
Other features include print profiles, which allow users to define specific
settings so that they can configure future jobs with a click of the mouse.
Other features that the printer drivers support are cover printing, sheet
insertion, and page interleaving.
im6530, im8130
Page 16

xii ipc1-im8130 Administrator’s Guide
Macintosh Printer Drivers
For the Macintosh platform, software includes a PPD driver extension file
that works in conjunction with the standard Macintosh LaserWriter 8
printer driver, version 8.6.5 (or higher), to provide printing through the
controller.
Unix Print Filters
Filters in TAR format are distributed on the ipc1-im8130 Admin’s Client
CD-ROM to provide printing services from Unix machines running the HP-
UX, Sun Solaris, IBM AIX, or Linux operating systems.
im6530, im8130
Page 17

ipc1-im8130 Administrator’s Guide xiii
Styles and Conventions
This guide employes several typographic styles to visually convey
information. The following table lists the styles and illustrates their use.
Styles and Conventions Used In This Guide
STYLE USAGE DESCRIPTION EXAMPLE
BOLD, SANS
SERIF FONT, ALL
CAPS
All hard keys on the copier
control panel.
Press START.
SANS SERIF FONT,
ALL CAPS
All soft keys and function
tabs on the copier LCD touch
screen.
Press ADMIN.
Bold, sans serif
font, initial caps
Names of buttons, controls,
tabs, and menu options
(items).
Double-click Properties and click Services.
From the Start menu, choose Programs >
Imagistics ipc1-Client Software > ipc1
Document Monitor
.
Courier Screen messages and text
you type in a field or at the
command line.
Type the following command: setup.exe
<Brackets
enclosing
variable text>
Variable text that is to be
replaced with specific text
applicable to your network.
Enter GL<device name>, where device
name is the Microsoft Computer Name
assigned to the controller.
Italic, blue,
underlined
Cross-reference to additional
information.
See, Scanning on page 25 for the steps
required to scan images.
Light blue and
underlined
Indicates text that is linked on
a web page. This text is not
linked in the documentation.
Click the Install Software link at the
bottom of the page.
im6530, im8130
Page 18

xiv ipc1-im8130 Administrator’s Guide
Guide Organization
This Administrator’s Guide is organized in five parts, which are
subdivided into chapters. The following outline summarizes the
information contained in each part and chapter.
PART 1: Setting Up the Controller on page 1
Chapter 1, Installation Overview on page 3 describes how the various
hardware and software components of the Electronic Document
Processing System (EDPS) fit within the overall installation scheme and
offers suggestions for devising your own installation strategy.
Chapter 2, Modifying Controller Settings at the Control Panel on
page 11 explains how to use the copier LCD touch screen to access the
controller protocol settings and then how to enable, disable, or adjust
them to match your network configuration.
Chapter 3, Modifying Controller Settings Remotely on page 53
explains how to access and change the controller settings from your
workstation using the web-based Printer Utility.
Chapter 4, Wireless Networking on page 119 explains how to configure
the controller for use with a wireless LAN or a wireless peer-to-peer
network.
PART 2: Establishing Network Print Services on page 137
Chapter 5, Setting Up Novell Printing on page 139 provides an overview
of how to set up the controller as a Novell network printer, print server, or
NDPS printer agent. For more detailed information, refer to your Novell
documentation.
Chapter 6, Setting Up Microsoft Print Services on page 155 discusses
the issues you should consider and the prerequisites for enabling printing
over a Microsoft-based network. It also provides step-by-step instructions
for using Printer Utility to enable network printing on the controller over a
Microsoft-based network.
Chapter 7, Setting Up Unix Printing
on page 159 describes how to set
up Unix printing services for SPARC platforms running Solaris v 2.5x,
2.6, or 7.0, PA-RISC platforms running HP-UX, or RS6000 platforms
running IBM AIX 4.3x.
Chapter 8, Setting Up Macintosh Printing on page 183 describes how to
set the necessary protocol and services properties on the controller to
support Macintosh printing services.
Chapter 9, Installing Client Software
on page 189 provides procedures
for installing client software and printer drivers, as well as optional tools,
to establish network printing to the controller from client workstations.
PART 3: Managing the System on page 195
im6530, im8130
Page 19

ipc1-im8130 Administrator’s Guide xv
Chapter 10, Managing Operations
on page 197 describes how to use the
control panel and the Printer Utility interface to manage the controller
and jobs.
Chapter 11, Managing the Address Book on page 211 includes
instructions for adding and modifying contact information, sorting
address book lists, searching the address book, and importing/exporting
address book data.
Chapter 12, Managing Scan Operations on page 221 explains how to
create and use scan templates, and how to monitor the scan job status.
Chapter 13, Maintaining the System on page 239 includes procedures
for backing up, restoring, and archiving files, and for recovering and
updating the controller software.
PART 4: Troubleshooting Network Printing on page 245
Chapter 14, Troubleshooting Overview on page 247 helps you identify
the origin of an error if it is not immediately apparent from the problem
itself, and then directs you to subsequent chapters for instructions on
resolving it. Checklists provided in this chapter allow you to identify the
subsystem that is most likely to be the source of an error.
Chapter 15, Troubleshooting Hardware Errors on page 263 covers
those errors or faults that affect normal digital copier or controller
operation.
Chapter 16, Troubleshooting Network Errors on page 279 describes the
most common network configuration problems and provides steps for
resolving them.
Chapter 17, Troubleshooting Client Errors on page 285 describes the
most frequent client errors and provides steps for resolving them.
Chapter 18, Troubleshooting Output Errors
on page 301 describes
several common output errors and gives the likely cause. This chapter
also suggests ways to resolve or work around the limitation to achieve the
desired output effects.
PART 5: Reference on page 311
Chapter 19, Reference on page 313 documents each tab on the Printer
Utility start page.
Glossary on page 325
im6530, im8130
Page 20

xvi ipc1-im8130 Administrator’s Guide
Supplemental References
In addition to the information in this guide, the following reference
materials are available to assist you in using and optimizing your
controller:
Operator’s Guide for Copying Functions
This manual describes the digital copier functions: how to make copies,
maintain the copier, and troubleshoot mechanical and copying problems.
Quick Start Guide
The purpose of this guide is to introduce the controllers, summarize
installation and operational procedures, and describe system
requirements and specifications. A printed copy of this manual ships with
the controller.
Operator’s Guide
This guide provides detailed instructions for installing and using the
printer drivers and the job monitoring utility, ipc1 Document Monitor, to
print to the Electronic Document Processing System. It also describes
how to use the web-based application Printer Utility to monitor and
manage print jobs. You can find the .pdf version of this guide on the ipc1-
im8130 Client CD-ROM.
Document Manager Operator’s Guide
You can find the .pdf version of this guide on the ipc1-im8130 Admin’s
Client CD-ROM and on the ipc1-im8130 Client CD-ROM. It contains
information on storing, managing, editing, and printing documents using
the web-based tool, Document Manager.
Scan Operator’s Guide
You can find a .PDF version of this guide in the ipc1-im8130 Client CDROM. It provides information on enabling network scanning functionality
via the controller and includes procedures for configuring scan
functionality using the web-based utility, Printer Utility. The guide also
provides instructions for local scanning and remote management of scan
jobs.
im6530, im8130
Page 21

ipc1-im8130 Administrator’s Guide xvii
Application-SpecificOnline Help
All of the Electronic Document Processing System software and drivers
come with application-specific online help. Click Help or choose the
Contents and Index options from the Help menu. For web-based help in
Printer Utility, click the Help link.
im6530, im8130
Page 22

xviii ipc1-im8130 Administrator’s Guide
Software CD-ROM Contents
The controller ships with three software CD-ROMs:
ipc1-im8130 Admin’s Client CD-ROM
This CD-ROM includes the following Administration tools and
applications:
Imagistics’s NDPS Gateway that enables Novell NDPS printing to the
controller.
Unix filters for printing from Sun Solaris, HP-UX, IBM AIX, and Linux
operating systems.
MIB folder.
ipc1-im8130 Client CD-ROM
This CD-ROM includes the following client drivers and utilities:
ipc1 Document Monitor, the Windows-based job monitoring utility.
PCL6 printer drivers for the ipc1-im8130 controllers through
Windows 98/Me/2000, Windows NT, and Windows XP-based
workstations.
PostScript level 3 printer drivers for the ipc1-im8130 controllers
through Windows 98/Me/2000, Windows NT, and Windows XP-based
workstations.
AGFA Font Manager and font collection.
Macintosh PPD files, which extends the LaserWriter driver to support
printing to the controller from Macintosh workstations.
ipc1-im8130 Recovery CD-ROM
This CD-ROM includes the following controller software:
The Operating System software, which enables you to recover the
controller’s embedded Operating System in the event the internal
hard drive or files become corrupted or destroyed. Additionally, if you
have a previous version of the software installed, you can use this
CD-ROM to perform a version upgrade.
The controller software, which enables you to install or restore the
baseline software version on the controller.
im6530, im8130
Page 23
ipc1-im8130 Administrator’s Guide 1
PART 1
Setting Up the Controller
im6530, im8130
Page 24

2 ipc1-im8130 Administrator’s Guide
im6530, im8130
Page 25
ipc1-im8130 Administrator’s Guide 3
1 INSTALLATION OVERVIEW
The Imagistics Electronic Document Processing Systems consist of
several integrated hardware and software components. The default
installation settings are designed to suit the needs of most sites, so they
may need adjustment for your network environment. Accordingly,
forethought and planning play critical roles in a successful
implementation.
This chapter describes how the various hardware and software
components fit within the overall installation scheme and offers
suggestions for devising your own installation strategy.
The Big Picture
The Imagistics im8130/im6530 Electronic Document Processing System
consists of a Imagistics im8130/im6530 digital copier, ipc1-im8130
controller, and client software. At a high level, the steps for implementing
the system include:
Install the digital copier, controller, and NIC.
Configure the controller software for your network environment.
This involves using the copier LCD touch screen to establish networkspecific print services (Novell, Microsoft, Unix, or Macintosh), set up
im6530, im8130
Page 26

4 ipc1-im8130 Administrator’s Guide
wireless networking, optimize network settings, and customize device
properties.
On networks running TCP/IP, you can also perform these functions
using the controller embedded web utility, Printer Utility.
Install client software on your workstation, including the document
monitoring utility, ipc1 Document Monitor, and applicable printer
drivers, filters, or PPD files.
You or your users can use the CD or Printer Utility to install client
software on individual workstations.
Hardware Installation
Digital Copier
The Imagistics Electronic Document Processing System is installed by
your certified Imagistics service technician usually prior to and
independent of the network implementation.
Controller
Your Imagistics service technician also installs the controller, which is
physically mounted on the back of the digital copier and connected to the
PCI bridge board.
Network Interface Card
The controller ships with an embedded Ethernet NIC. To connect the
controller to an Ethernet network, insert the network cable into the
socket on the card.
To support a wireless LAN, you can install a Cisco Aironet 350 PCI
802.11b Wireless NIC.
Network Configuration
Once the service technician has finished installing the controller and
copier hardware, you can configure the controller software.
Use the copier LCD touch screen to perform the following administrative
functions:
Enable or disable the network cards.
Set the Transmission Control Protocol/Internet Protocol (TCP/IP)
addressing mode to employ Dynamic Host Configuration Protocol
(DHCP) services, or manually enter the addressing information.
im6530, im8130
Page 27

ipc1-im8130 Administrator’s Guide 5
Enter the primary Windows Internet Naming Service (WINS) server IP
addresses.
Enable or disable the Internetwork Packet Exchange/Sequenced
Packet Exchange (IPX/SPX) protocol and set the appropriate frame
type.
Enable or disable Server Message Block (SMB).
Enable or disable the AppleTalk protocol and enter an AppleTalk
name and zone.
Enable wireless networking.
Set the device Name and workgroup.
Note: Many of these settings can also be made from a remote
workstation using Printer Utility. In addition to system configuration,
Printer Utility provides job monitoring and system management
functions.
Depending on how you intend to use your controller, you may need to
perform specific administrative functions before establishing print
services. For example, you may have to set up Novell printer and
server objects.
Client Software Installation
At this point in the installation process, your controller and copier are
fully functional. However, you cannot print to the copier from
workstations connected to the network until you have installed the
drivers (Unix filters or Macintosh PPD file) on the client machines.
Planning and Preparation
The following guidelines should make you aware of potential issues, but
cannot take the place of your knowledge and experience in administering
your network. Use them as a starting point from which to develop your
installation plan.
Notify Users
Whether you are upgrading an existing system or installing a new one,
you want to limit the inconvenience to users. You should provide advance
notification that walk-up functions and network printing will be disabled
temporarily. We also recommend installing or upgrading your system
during non-peak hours to minimize the impact on network traffic.
im6530, im8130
Page 28

6 ipc1-im8130 Administrator’s Guide
Consider Network Protocol Limitations
The following sections outline the various configuration options the
controller supports as well as any limitations you may encounter.
Decide Whether to Use WINS Servers
The controller supports the WINS host name resolution service. Using a
WINS server is optional but has several advantages, especially if you are
using DHCP to dynamically assign IP Addresses (enabled by default):
Users can refer to the device by its name instead of its IP address.
Users do not have to look up the currently assigned IP address every
time they want to access the embedded web server.
It simplifies command line printing for LPR/LPD clients.
Determine the Printing Mode
Microsoft Print Modes
The controller supports the following Microsoft print services modes:
Peer to Peer (NetBIOS on TCP/IP and IPX/SPX)
Controller-Supported Protocols
Protocol Considerations and Limitations
TCP/IP
• Required to manage the device using Printer Utility.
• Required for LPD printing.
• If you are using DHCP for IP address acquisition, which may assign different IP
addresses to the controller, consider setting up WINS servers for host name resolution.
• Imagistics does not support running the controller as a print server in a Novell
environment over IP. However, you can use the controller as a printer agent if you
set up NDPS printing.
IPX/SPX
• Running the controller as a print server in a Novell envir onment is supported only
over IPX/SPX. NetWare 5.x and 6.x default to TCP/IP and must be reset to use
IPX/SPX if you want to use the controller in this way.
• The frame type is set to
Auto Sense by default. To optimize the controller for your
network, you may want to set the frame type yourself.
AppleTalk
• The controller supports all Macintosh computers that use AppleShare, which
includes all workstations running version 6.0.7 (or later) operating system, except
for the Macintosh XL and 128K.
im6530, im8130
Page 29

ipc1-im8130 Administrator’s Guide 7
LPR/LPD on TCP/IP, provided Microsoft TCP/IP printing services are
installed on the client workstation
Internet Printing Protocol (IPP) with an IPP port configured on the
client workstation.
Novell Print Modes
The controller supports the following Novell NetWare printing modes:
NetWare 4.x Bindery mode PSERVER or RPRINTER
NetWare 4.x, 5.x, or 6.x NDS mode PSERVER or NPRINTER
NetWare NDPS printer agent (using the Imagistics NLM-based
gateway)
Unix Print Modes
The controller supports LPR/LPD printing for the Unix Sun Solaris, HPUX, IBM AIX, and Linux environments, providing you install the
Imagistics filters.
Macintosh Print Mode
The controller supports the following Macintosh printing modes:
AppleTalk
LPR/LPD (over TCP/IP only)
Choose a Device Naming Convention
Device Name
Decide on a unique name for the device, such as the host name. Both
Microsoft and Macintosh printing, and controller software updates
require a device name.
By default, the Microsoft Computer name is set to GL<MAC Address>,
where MAC Address is the unique Media Access Control address of the
NIC installed in the controller. You may rename the device to retain
consistency within your network. Choose a unique name of up to 15
alphanumeric characters.
Do not use the underscore (“_”) or at (“@”) characters in the device
(controller) name.
im6530, im8130
Page 30

8 ipc1-im8130 Administrator’s Guide
Workgroup Name
You cannot assign the controller to a Microsoft Domain. You must assign
it to a workgroup. Both Microsoft print services and controller software
updates require the workgroup name.
By default, the workgroup name is WORKGROUP. However, you can change
it to retain consistency within your network. Choose a name of up to 15
alphanumeric characters.
Analyze the Default Controller Network Settings
The following table summarizes the default controller settings. To adjust
these settings locally use the copier control panel. To adjust them
remotely, use Printer Utility.
Default Controller Settings
Property Default Setting Comments
TCP/IP
(Ethernet)
Enabled Frame Type set to Ethernet II.
IP Addressing DHCP If you do not want to take advantage of your
network DHCP services, change IP Addressing to
Manual and enter the IP Address either locally or
remotely.
Gateway [blank] Specify the Gateway address if TCP/IP is enabled
and IP Addressing is set to Manual. Otherwise, use
DHCP to set the Gateway address.
Subnet Mask 255.0.0.0 Specify the Subnet Mask address if TCP/IP is
enabled and IP Addressing is set to Manual.
Otherwise, use DHCP to set the Subnet Mask
address.
Primary WINS [blank] DHCP sets the primary WINS address or you can
do it manually.
Microsoft Device
Name
GL<MAC Address><MAC Address> is the unique media access
control address of the NIC installed in the
controller. The Microsoft Device Name is
mandatory. It is used for both Microsoft and
Macintosh print services.
im6530, im8130
Page 31

ipc1-im8130 Administrator’s Guide 9
Microsoft
Workgroup
WORKGROUP The Microsoft Workgroup Name is mandatory for
Microsoft print services. Additionally, it is required
if you want to update the controller software using
Printer Utility.
IPX/SPX
(Ethernet only)
Auto Sense The controller attempts to automatically sense the
IPX frame type. This facilitates automatic device
discovery. However, if you are running a TCP/IPonly network, disable IPX/SPX to eliminate
unnecessary network traffic.
NetWare Printing Disabled For NDPS support, you must configure the
controller as an NDS PSERVER or NPRINTER.
NDPS is a separate software component NLM,
which you must install on the NetWare file server.
Microsoft print
services
Enabled Peer to Peer SMB/NETBIOS printing on TCP/IP or
IPX/SPX. The printer name portion of the port
name is DSSC, which you cannot modify.
LPD Printing Enabled The queue name is DSSC, which you cannot
modify.
EtherTalk Phase II Currently, Macintosh printing is supported only
over EtherTalk; TokenTalk is not supported.
AppleTalk Name GL<MAC Address>
<MAC Address> is the unique machine address of
the NIC installed in the controller.
AppleTalk Type LaserWriter You cannot modify this setting.
AppleTalk Zone * Default (local) zone. If you have defined more
than one AppleTalk zone, the controller appears in
the default zone unless you specify another zone
manually.
Macintosh
Printing
Enabled For Macintosh print services, you must have an
Ethernet NIC installed in the controller.
HTTP Server Enabled The HTTP server is integral for device
management and job monitoring. Therefore, you
cannot disable it.
IPP Enabled IPP works only over TCP/IP.
Default Controller Settings
Property Default Setting Comments
im6530, im8130
Page 32

10 ipc1-im8130 Administrator’s Guide
im6530, im8130
Page 33
ipc1-im8130 Administrator’s Guide 11
2 MODIFYING CONTROLLER SETTINGS AT THE
CONTROL PANEL
This chapter explains how to use the LCD touch screen on the copier
control panel to enable and disable controller options.
im6530, im8130
Page 34
12 ipc1-im8130 Administrator’s Guide
Navigating the Control Panel
ipc1-im8130 Controller
You can program standard copy operations, network printing, and
administrative functions from the control panel on the top front of the
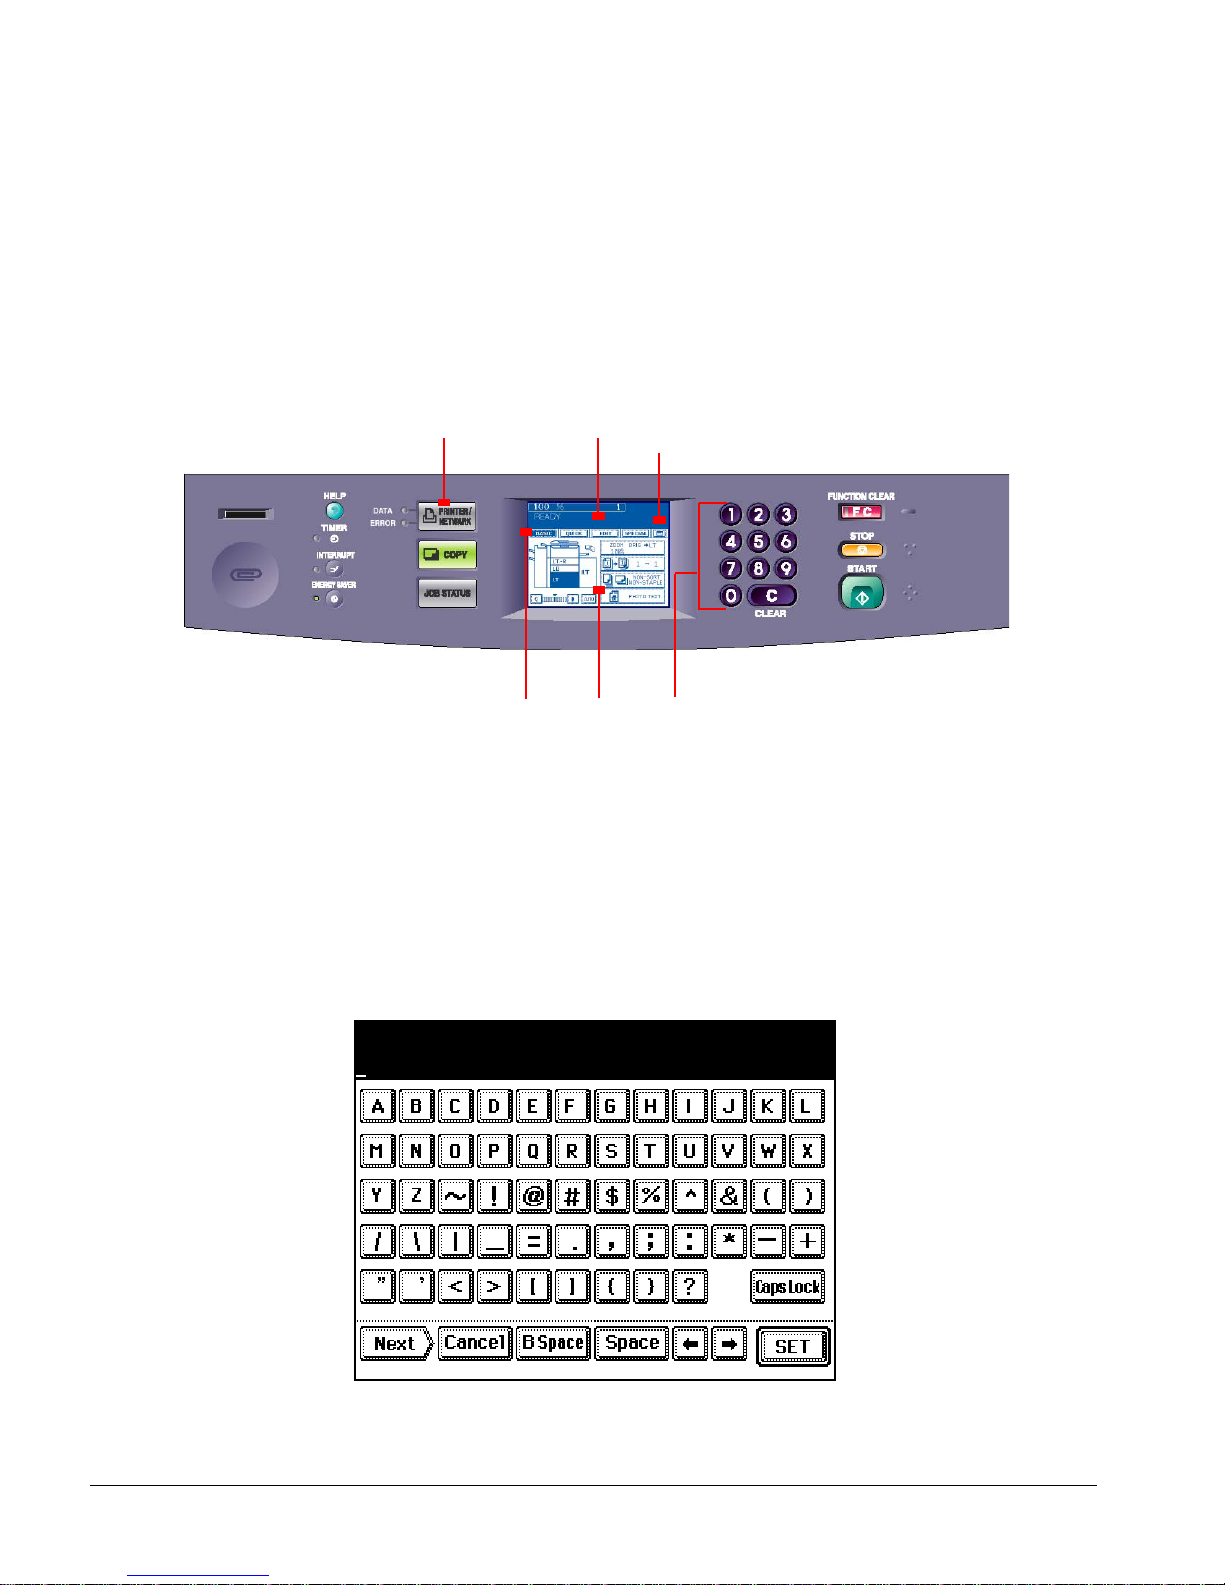
copier. The control panel includes both hard keys and an LCD touch
screen. Buttons on the touch screen are called soft keys.
im8130/im6530 Copier Control Panel
When you press PRINTER/NETWORK, the Print, and Admin tabs open. Use
these tabs to configure the system and monitor operations. If the Scan
option is installed, the Scan tab also opens.
Use the numeric keypad to type numeric data, such as the administrator
password.
For items, such as device names, an alphabetic touch keyboard opens on
the LCD touch screen.
Alphabetic Keypad on the LCD Touch Screen
PRINTER/NETWORK
hard key
Function tab
Soft keys
LCD touch screen
Press HELP to see the help text
for the current screen
Numeric keypad
im6530, im8130
Page 35
ipc1-im8130 Administrator’s Guide 13
Logging In
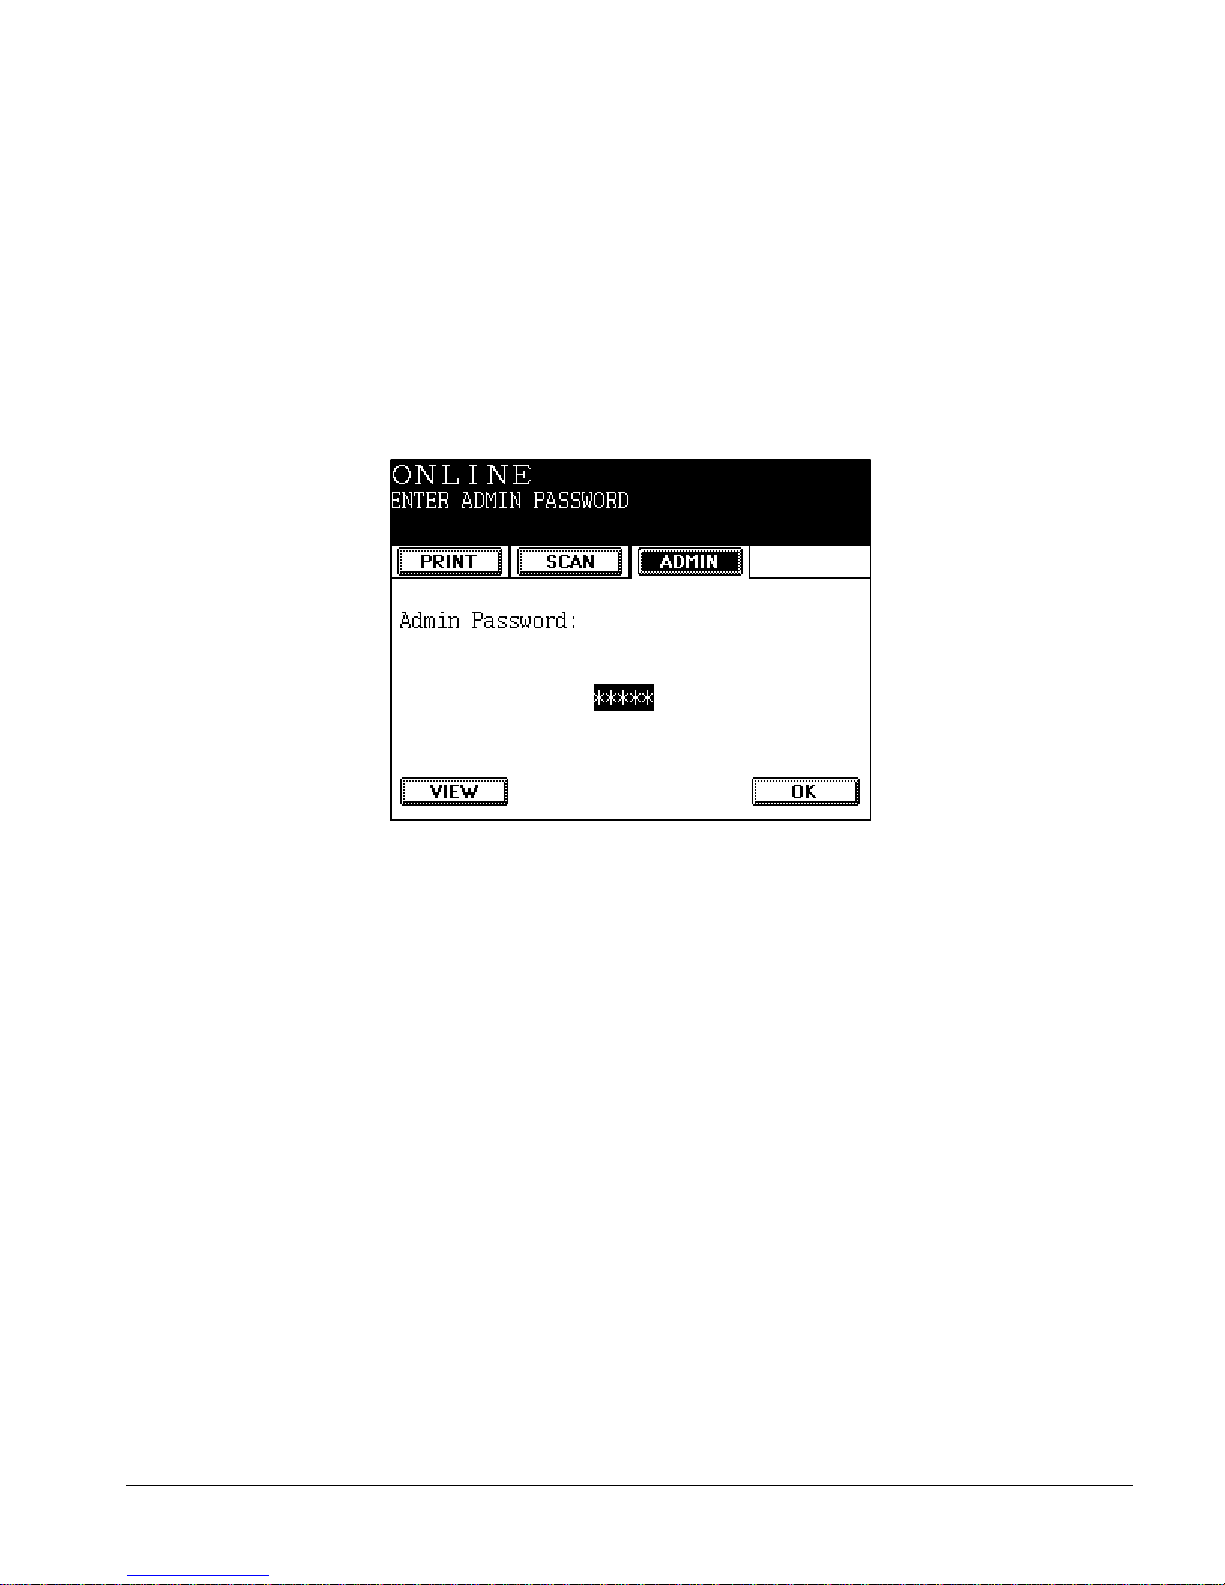
The first time you access administrative functions from the copier LCD
touch screen, you must define a five-digit password. You are required to
type this code each time you access the administration screens.
Note: If you forget your password, contact your Imagistics authorized
dealer.
1 Press PRINTER/NETWORK.
2 Press the ADMIN tab. The Enter Admin Password screen opens.
Enter Admin Password Screen
im6530, im8130
Page 36
14 ipc1-im8130 Administrator’s Guide
3 Use the control panel numeric keypad to type the five-digit
administrator password. If you have not decided on a password yet,
use the default password,
12345.
4 Press OK to display the main Admin menu.
Setting the Password
The first time you log on, you should change the password immediately to
prevent unauthorized access.
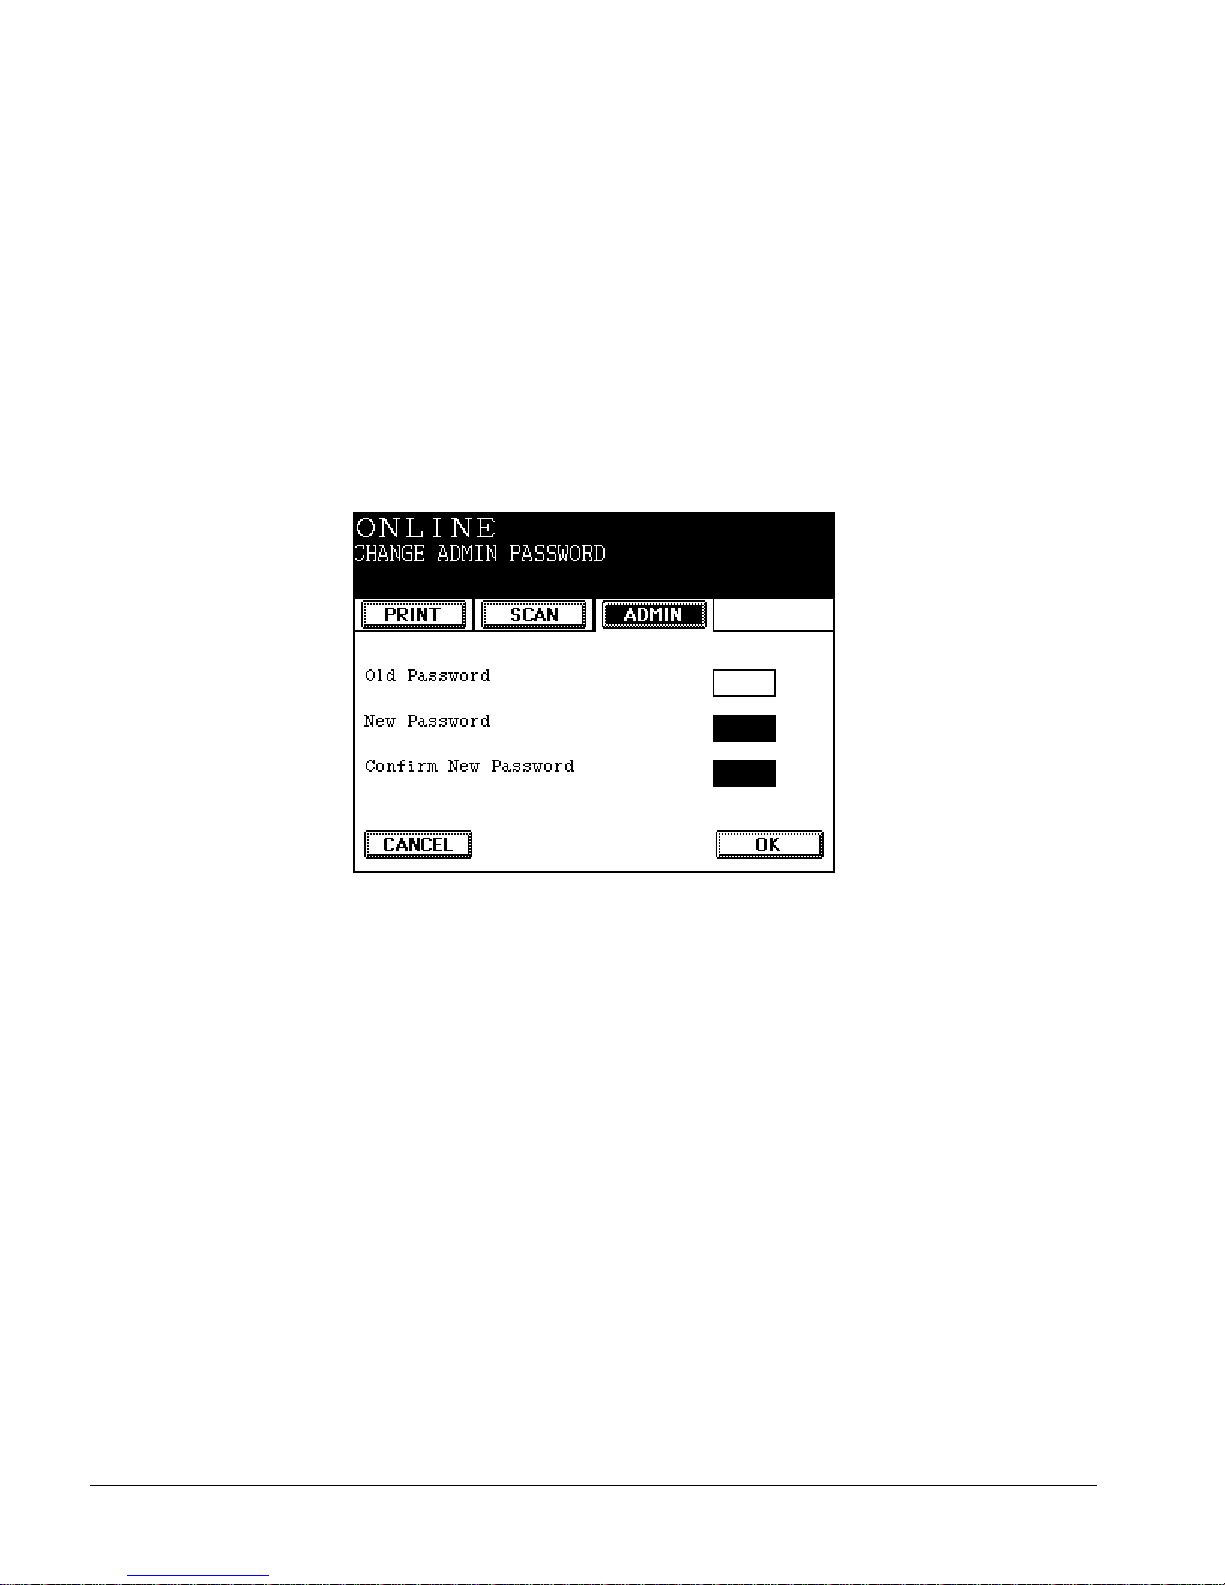
1 In the main Admin menu press CHANGE PASSWORD to display the
Change Admin Password screen.
Change Admin Password Screen
2 Press OLD PASSWORD to select it and type the existing password.
3 Press
NEW PASSWORD to select it and type a new five-digit password.
4 Press CONFIRM NEW PASSWORD and type the new five-digit code again to
ensure you typed it correctly.
5 Press OK.
If the password in CONFIRM NEW PASSWORD does not match the value in
NEW PASSWORD, a message informs you the access code was not
changed. Type and confirm the password again.
If the values match, a message informs you the password was
changed successfully. Printer Utility requires you to enter this code
each time you access the administration functions.
Note: If you forget your password, contact your Imagistics authorized
dealer.
im6530, im8130
Page 37
ipc1-im8130 Administrator’s Guide 15
Modifying Protocol Settings Locally
The controller default protocol settings ensure quick and easy
installation. However, you may want to customize the settings for optimal
operation in your network environment.
Note: For a complete list of the default controller Network
Configuration settings, refer to Analyze the Default Controller
Network Settings on page 8.
For example, the Auto Sense configuration setting for the IPX protocol is
enabled by default. With Auto Sense enabled, the controller automatically
determines the appropriate IPX frame type and issues SAP packets over
the network. This default setting makes device discovery immediate and
automatic. However, it generates IPX packets on any network, even one
that only runs TCP/IP.
You can change the default network configuration settings from the LCD
touch screen as described here. Alternatively, you can use Printer Utility
to adjust network settings. For details, refer to Modifying Controller
Settings Remotely on page 53.
Accessing Network Protocol Settings
1 Press PRINTER/NETWORK.
2 Press the ADMIN tab.
3 Type your five-digit password.
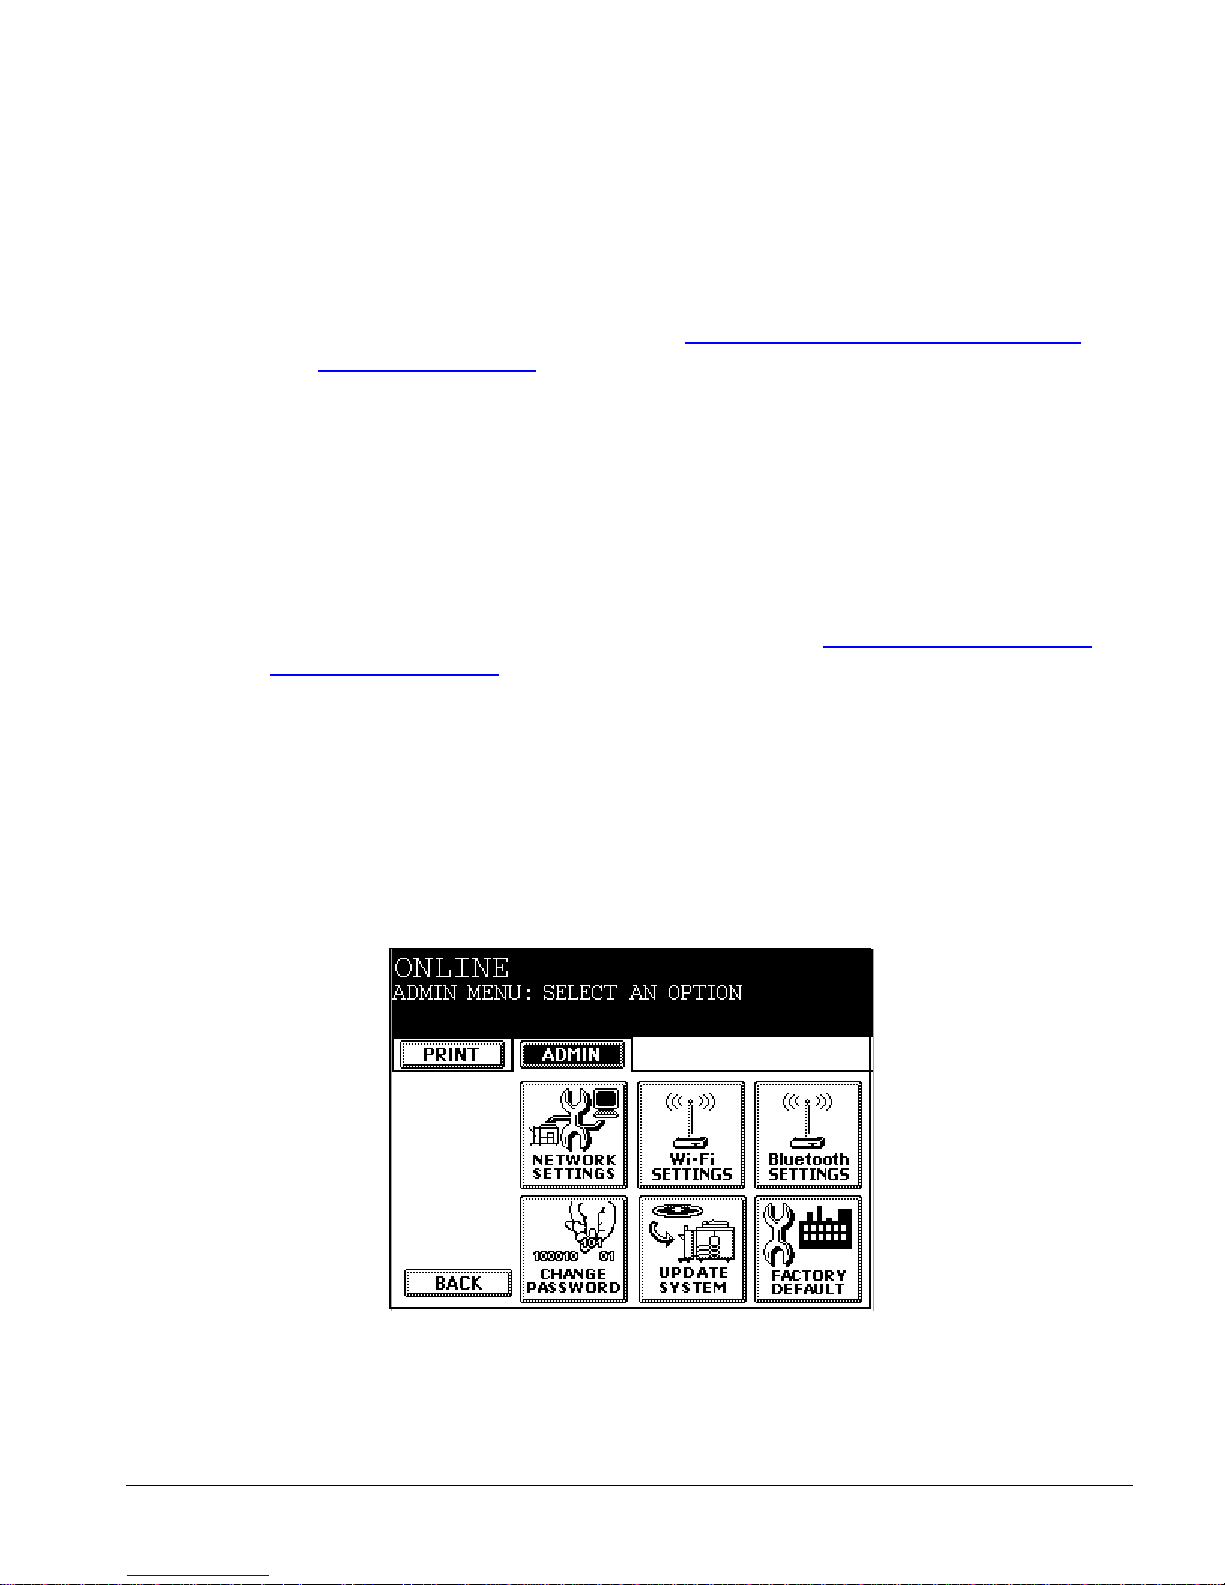
4 Press OK. The Admin menu opens.
Admin Menu Screen
im6530, im8130
Page 38
16 ipc1-im8130 Administrator’s Guide
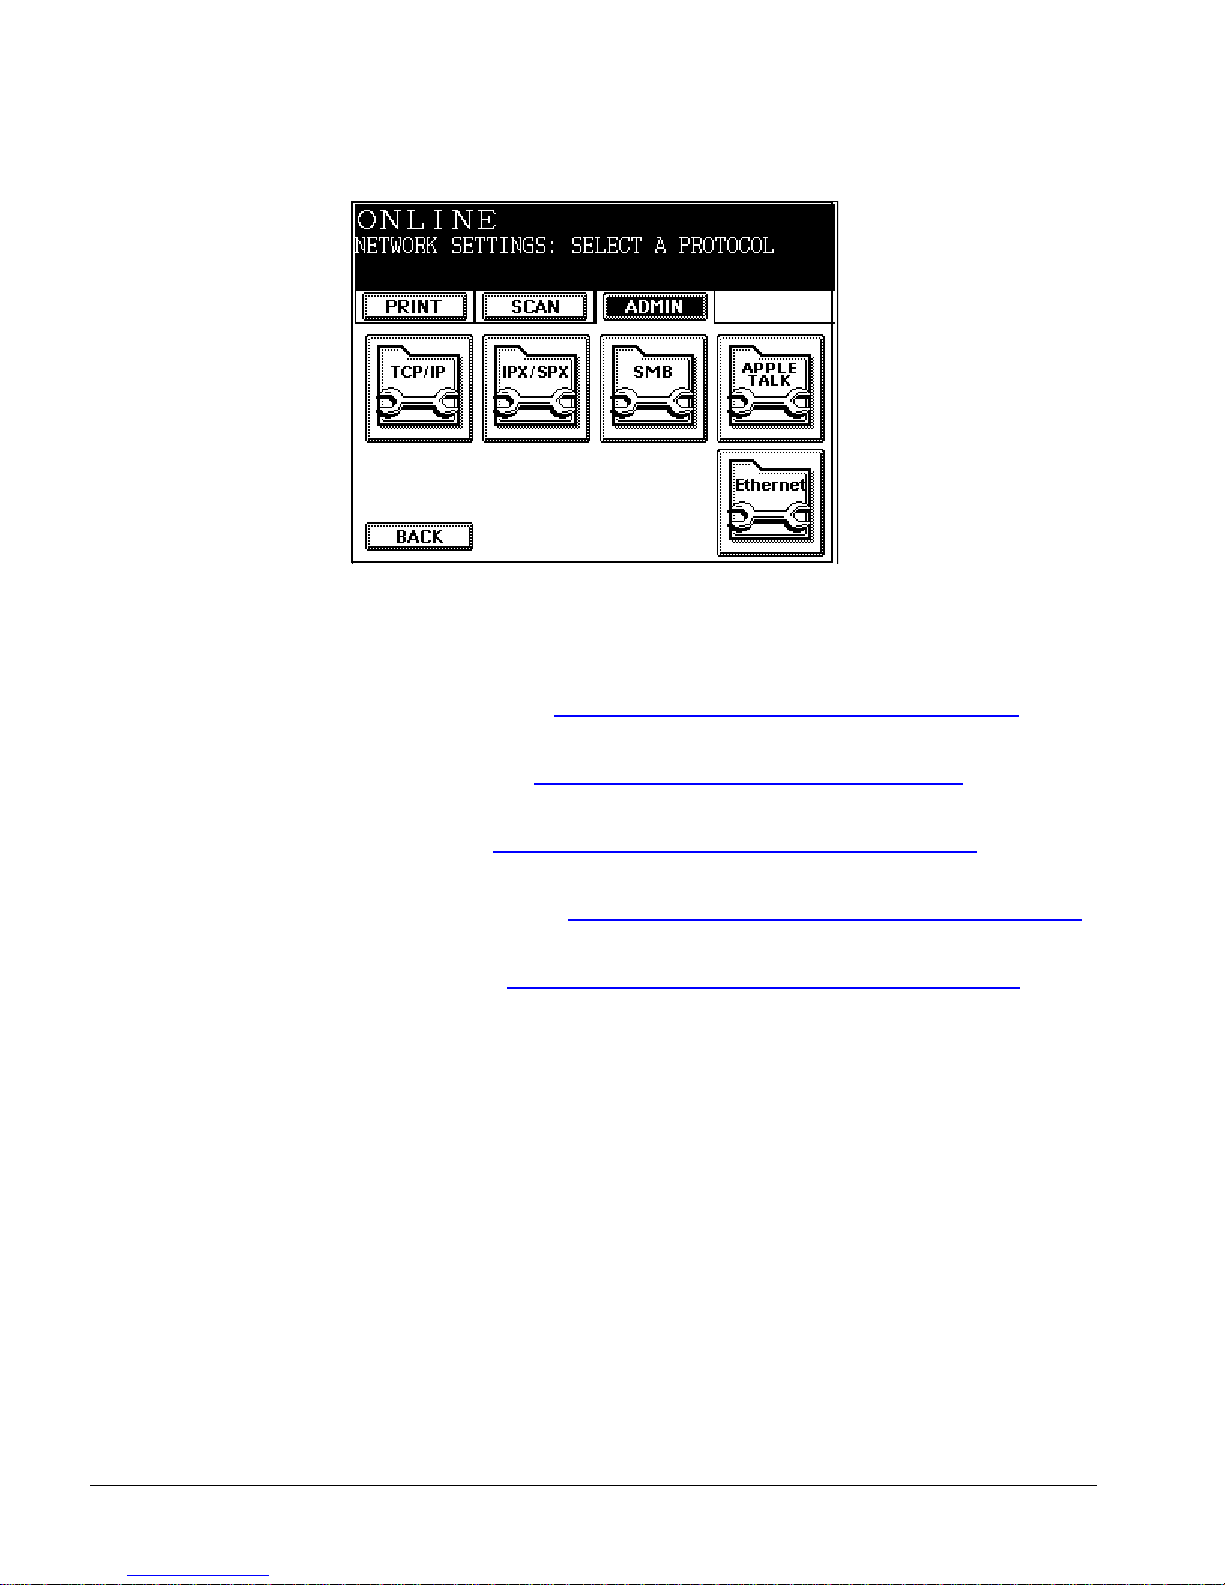
5 Press
NETWORK SETTING. The Network Setting screen opens.
Network Setting Screen
6 To access specific protocol settings, press the applicable soft key.
For more details, refer to the following pages in this manual:
TCP/IP server (see Configuring TCP/IP Protocol Settings on
page 17)
WINS server (see Setting Up WINS and DNS Servers on
page 18)
IPX/SPX (see Configuring IPX/SPX Protocol Settings on
page 18)
Ethernet speed (see Configuring the Ethernet Speed Settings
on page 20) only for Ethernet
AppleTalk (see Configuring AppleTalk Protocol Settings on
page 21) only for Ethernet
After you finish updating network or device settings, you must apply the
changes you made during the session. This process updates and reboots
the controller so the modifications can take effect. If you do not apply
your changes, they are lost when you press
COPY or the copier times out.
Note: Check the configuration page that automatically prints upon
start up to confirm that the changes were applied.
im6530, im8130
Page 39
ipc1-im8130 Administrator’s Guide 17
Configuring TCP/IP Protocol Settings
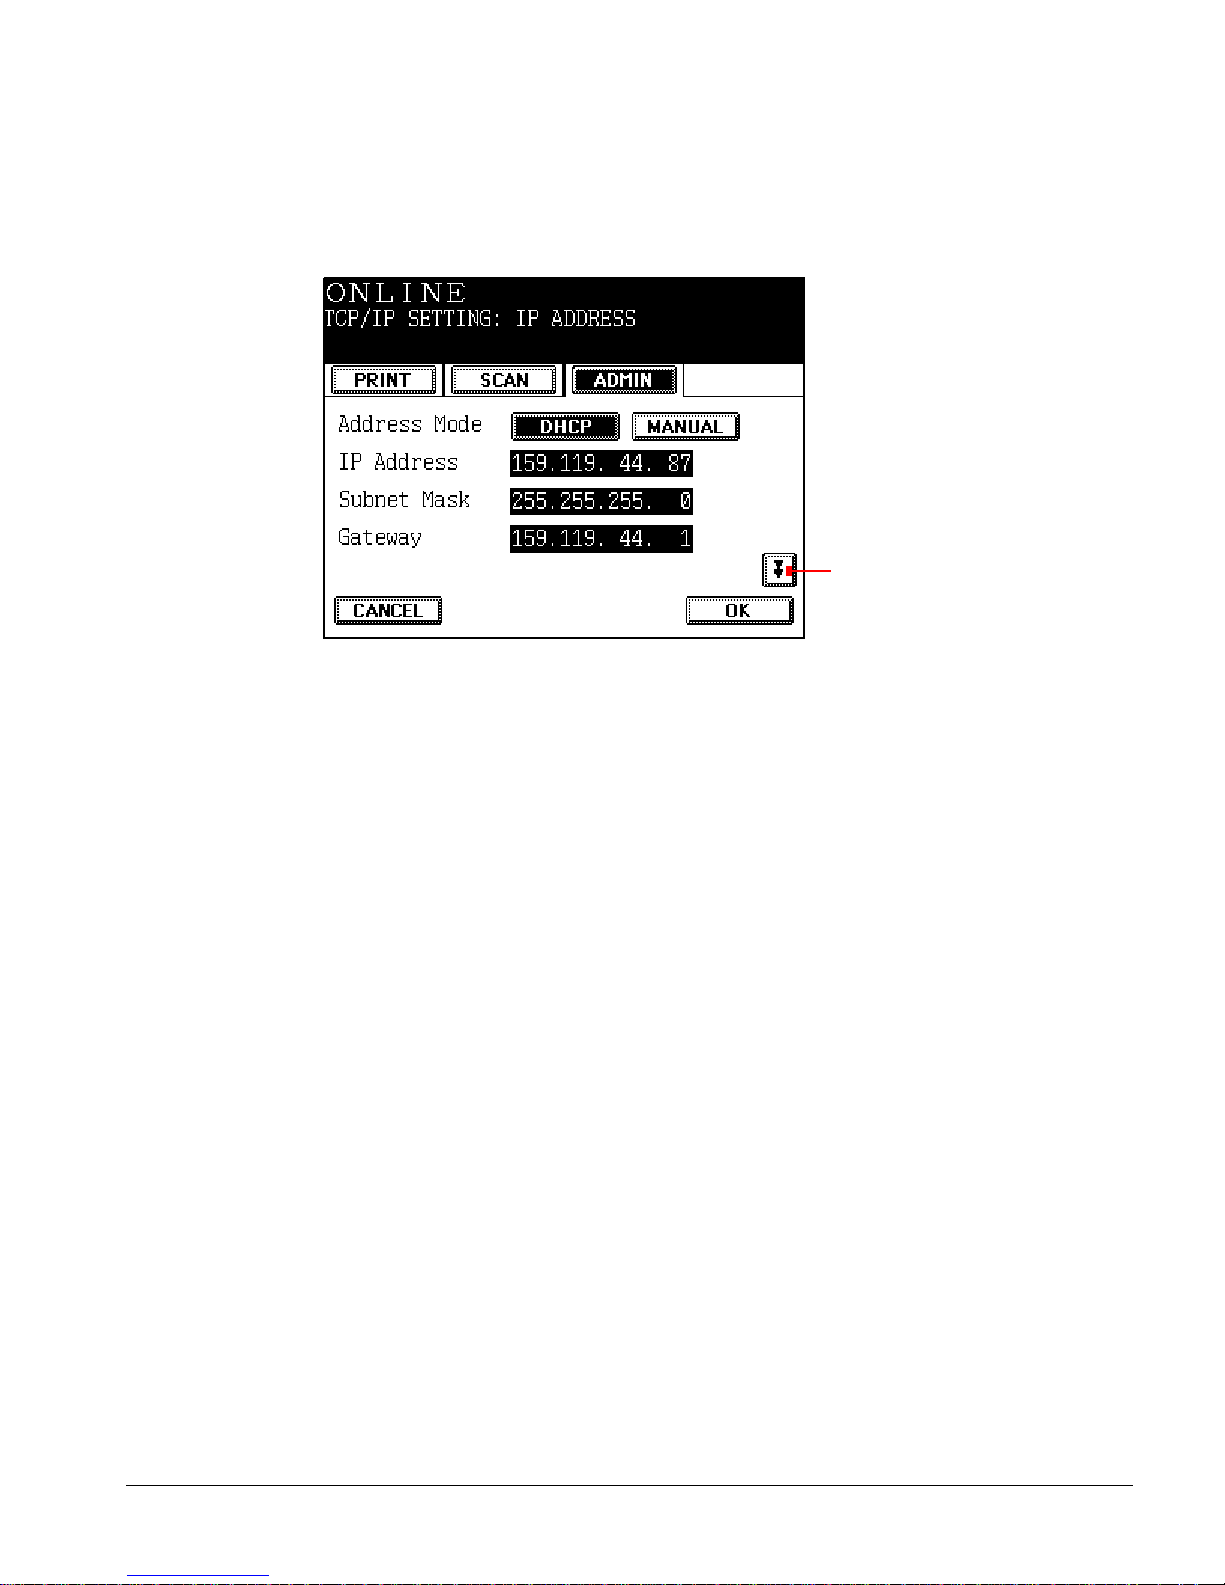
1 From the Network Setting screen, press TCP/IP. The TCP/IP Setting
screen opens.
TCP/IP Setting Screen
By default, the IP Address acquisition mode is DHCP. If you are
entering this screen for the first time, the other fields are not editable.
Page down
arrow
im6530, im8130
Page 40
18 ipc1-im8130 Administrator’s Guide
2 Press
MANUAL.
3 Enter the IP ADDRESS, SUBNET, and GATEWAY using the control panel
numeric keypad.
4 To view or modify the WINS server IP Addresses, press the page-down
arrow and continue with Setting Up WINS and DNS Servers on
page 18. Otherwise, press OK to save the changes.
Setting Up WINS and DNS Servers
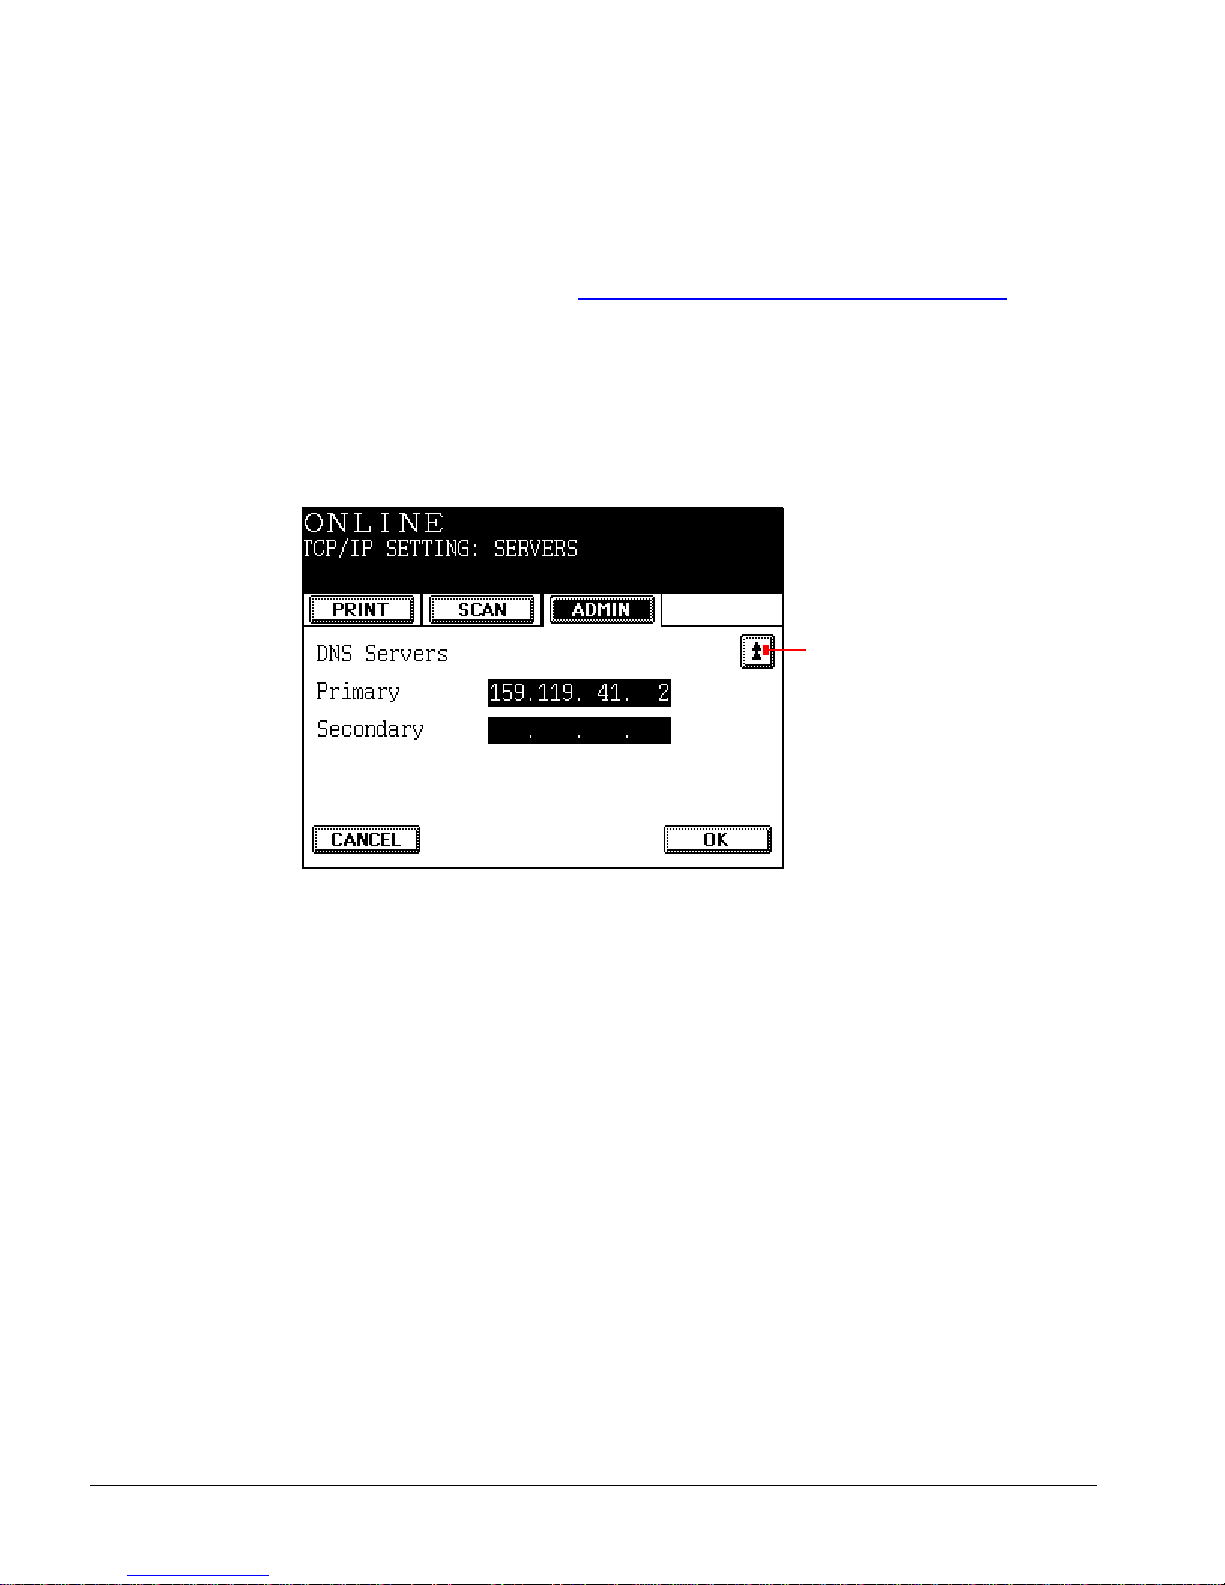
1 From the TCP/IP Setting menu, press the page-down arrow. The
TCP/IP Setting: Servers screen opens.
TCP/IP Setting: Servers Screen
Note: If you have DHCP enabled, it obtains WINS and DNS server
information automatically. Any information you enter on the TCP/IP
Setting: Servers screen overrides the settings acquired by DHCP.
2 Press
PRIMARY or SECONDARY for WINS Servers or DNS Servers to select
it.
3 Enter the IP Address of the Primary or Secondary WINS or DNS server
using the control panel numeric keypad.
4 Press
OK to save the changes for the duration of the session.
5 Press the page-up arrow to return to the TCP/IP Setting screen.
Configuring IPX/SPX Protocol Settings
By default, the frame type is set to AUTO. With the Auto Sense option
enabled, the controller inspects network traffic to determine the
appropriate frame type. While this makes frame type discovery automatic,
it can also cause network congestion.
Page up
arrow
im6530, im8130
Page 41
ipc1-im8130 Administrator’s Guide 19
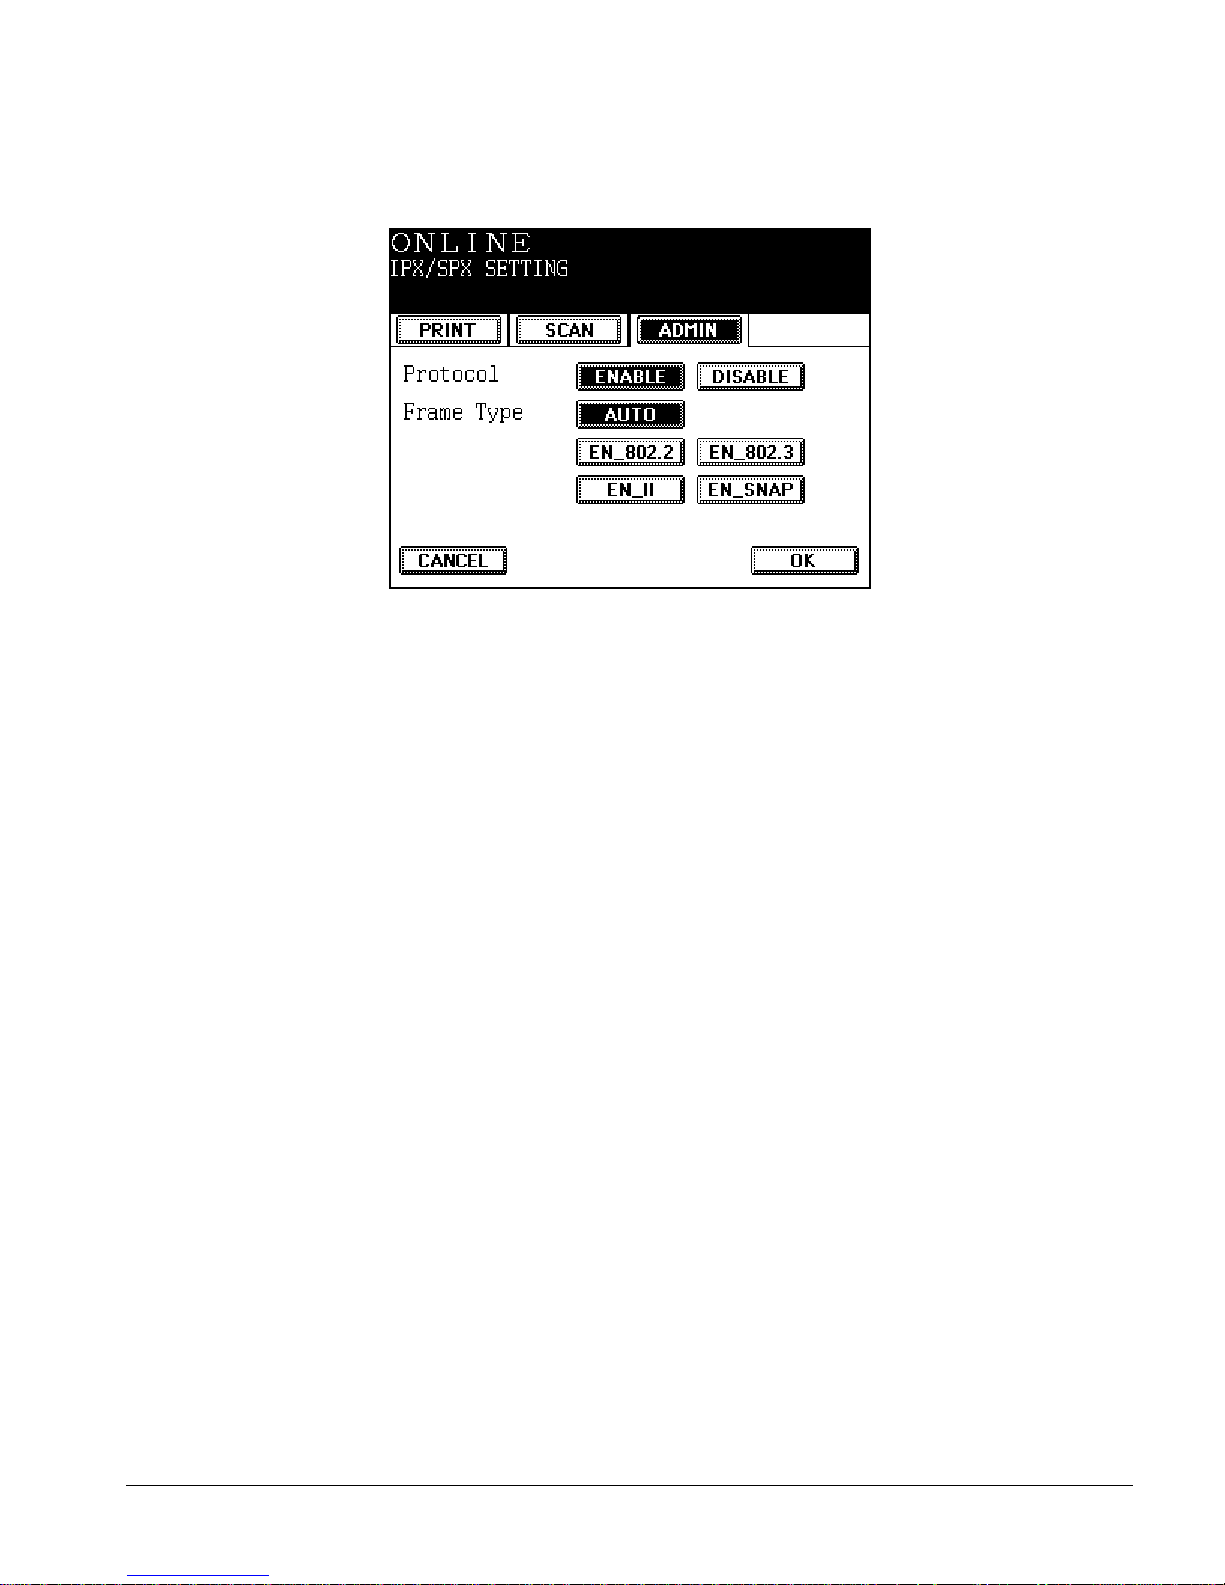
1 From the Network Setting menu, press
IPX/SPX to open the IPX/SPX
Setting screen.
IPX/SPX Setting Screen
Note: The IPX/SPX Setting screen shown displays the Ethernet NIC
settings.
im6530, im8130
Page 42
20 ipc1-im8130 Administrator’s Guide
2 If you are running a TCP/IP-only network, press
DISABLE. Otherwise,
press ENABLE to accept or modify the IPX/SPX frame type.
3 Select the frame type from the options shown, EN_802.2, EN_802.3, EN_11,
or EN_SNAP.
4 Press OK to save the changes.
Configuring the Ethernet Speed Settings
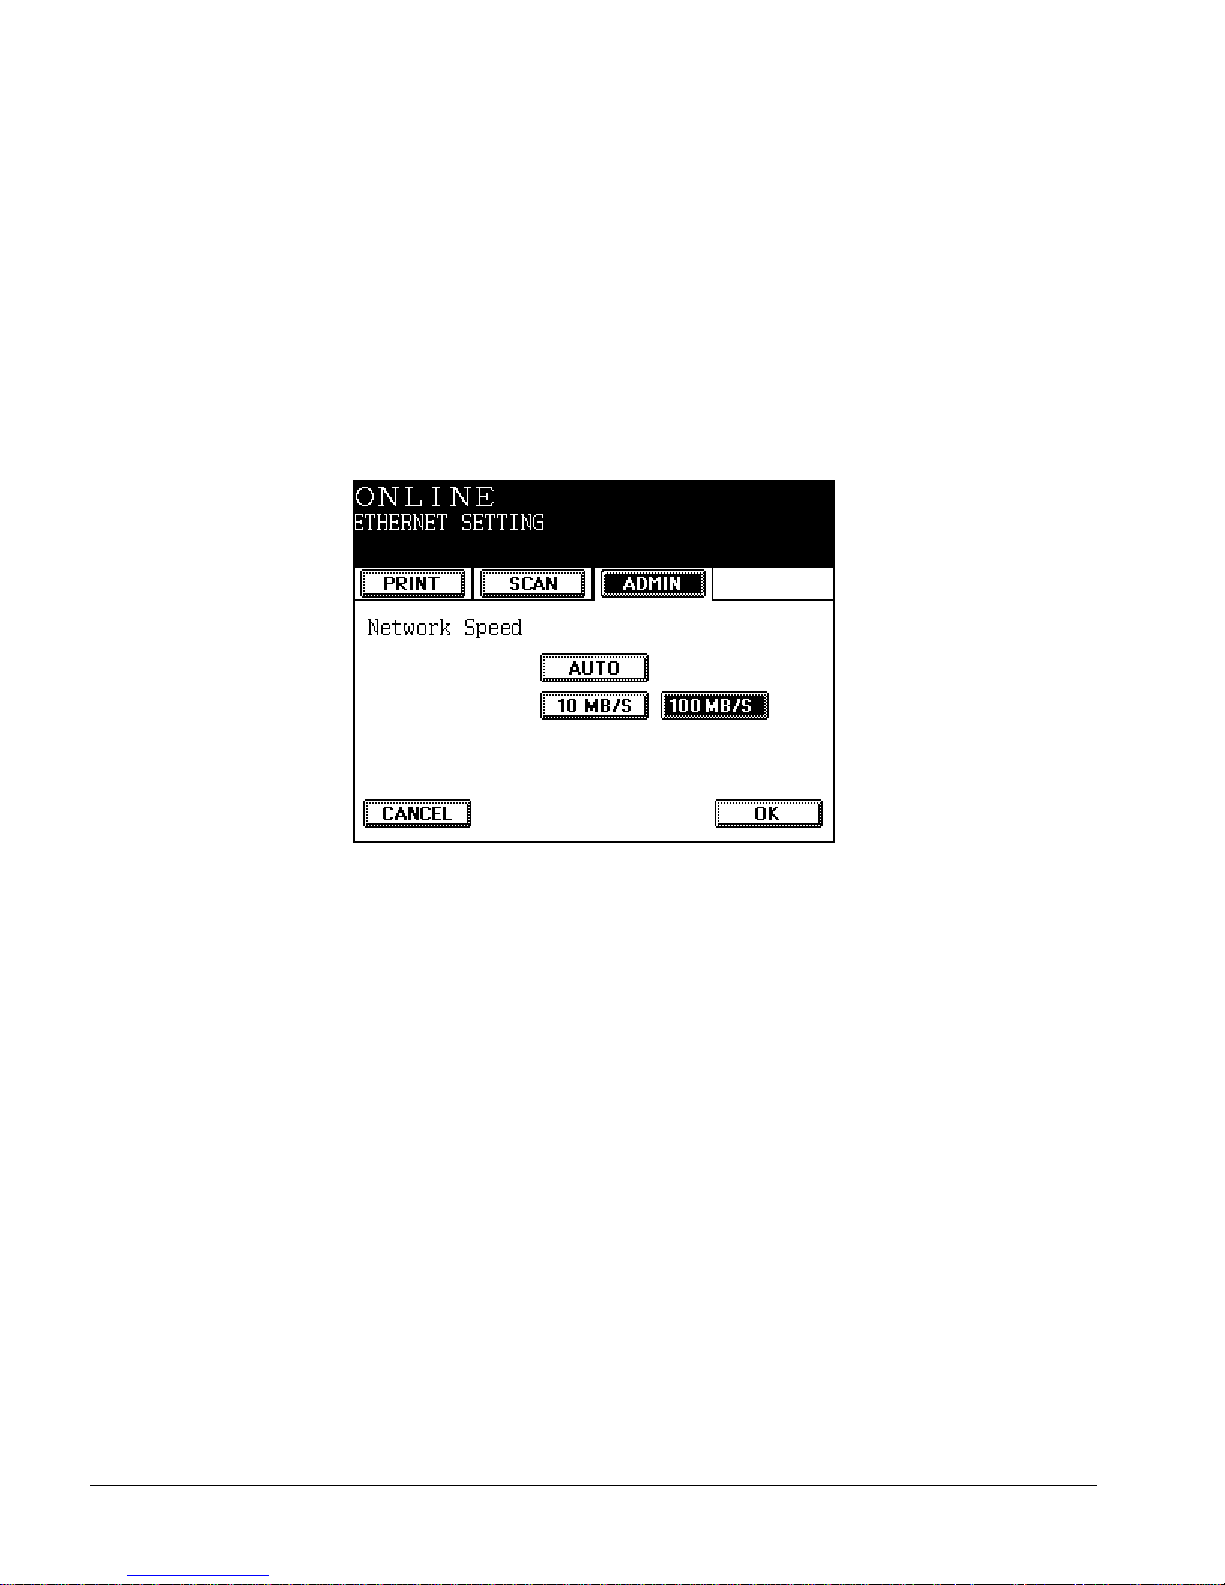
1 From the Network Setting menu, press ETHERNET to open the Ethernet
Setting screen.
Ethernet Setting Screen
im6530, im8130
Page 43
ipc1-im8130 Administrator’s Guide 21
2 Set the network speed to 10
MB/S or 100 MB/S. Alternatively, select AUTO
to automatically sense and set the correct speed.
3 Press OK to save your setting.
Configuring AppleTalk Protocol Settings
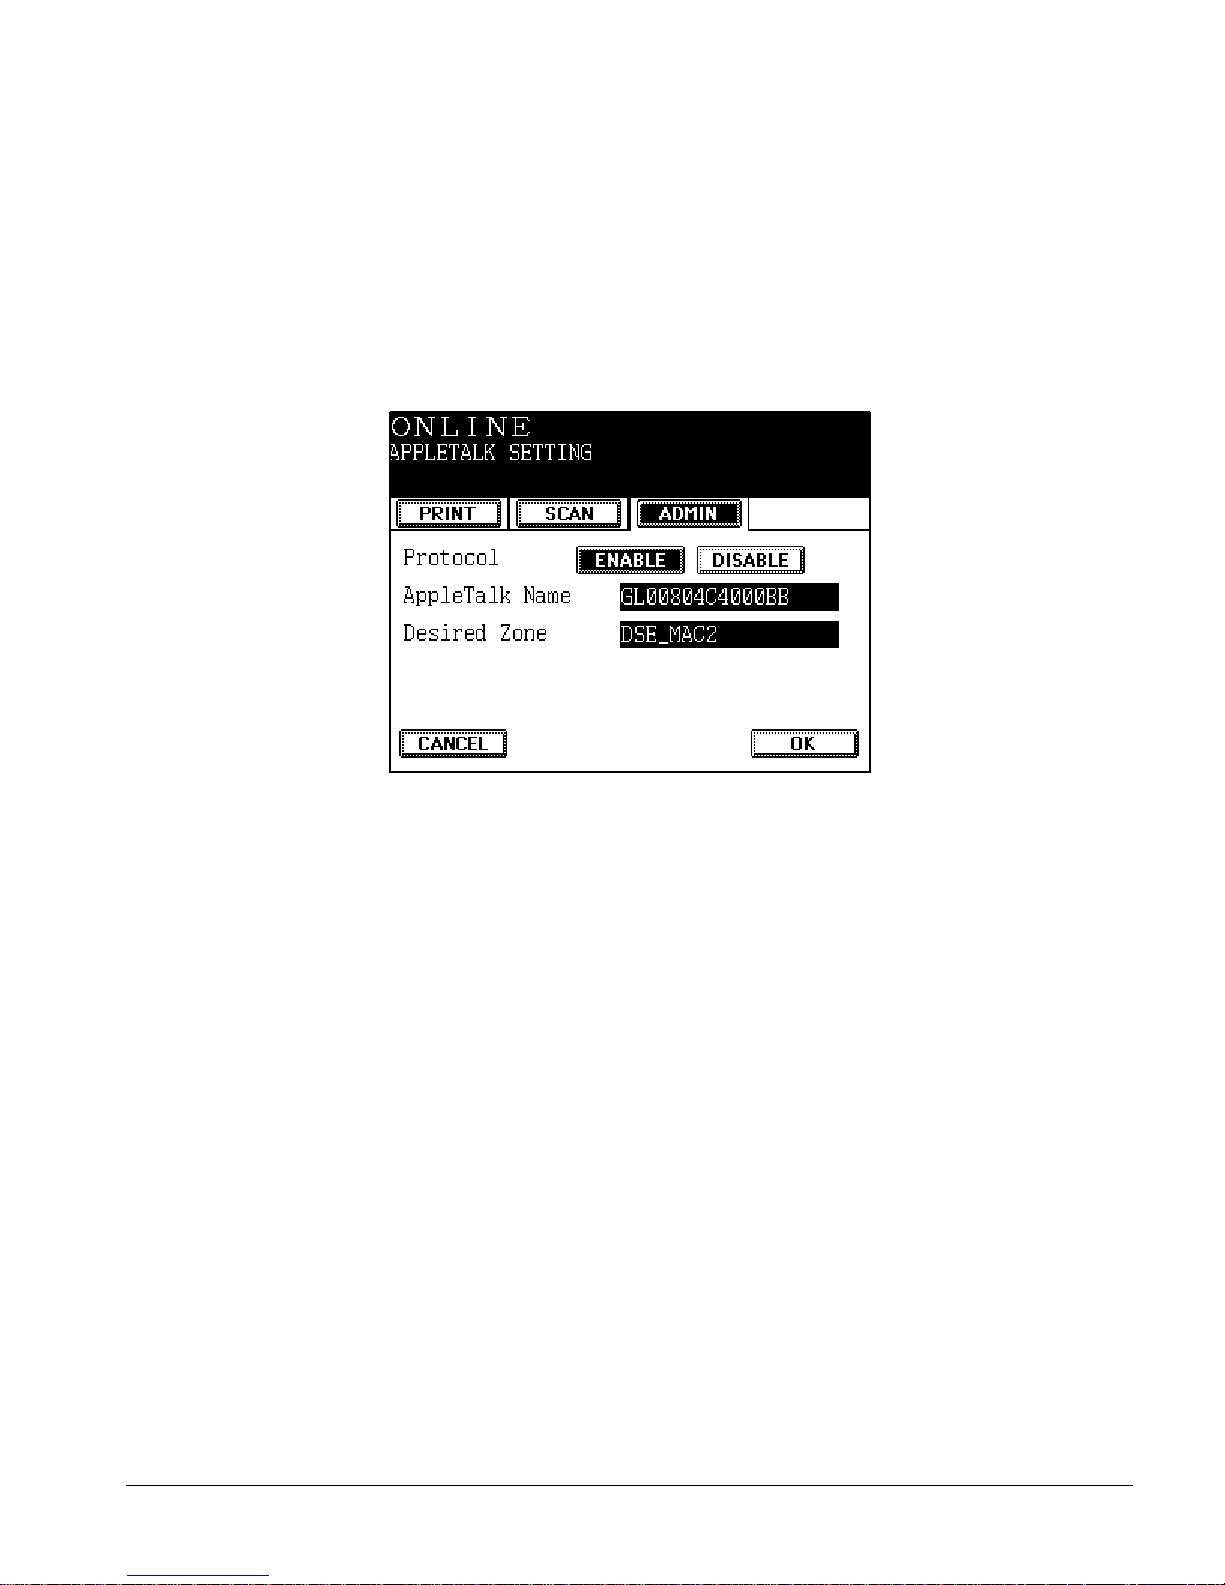
1 From the Network Setting menu, press APPLETALK to open the
AppleTalk Setting screen.
AppleTalk Setting Screen
Note: Currently, the controller supports EtherTalk access only;
TokenTalk is not supported.
2 By default, Macintosh printing is enabled. If it has been disabled,
press ENABLE to establish Macintosh print services.
3 Press APPLETALK NAME to display the touch keyboard.
4 Enter the AppleTalk name. The name is the same as the Microsoft
computer name (device name).
By default, the device name is GL<MAC Address>, where <MAC
Address> is the media access control number of the NIC installed in
the controller. For example, GL00DOC9165206. You can specify a
different name of up to 15 alphanumeric characters, provided it is
unique within your network.
im6530, im8130
Page 44
22 ipc1-im8130 Administrator’s Guide
5 Press
DESIRED ZONE to display the touch keyboard.
6 Enter the AppleTalk Zone, which is “*” by default. This indicates the
local zone, although you can specify a different name of up to 32
alphanumeric characters.
7 Press OK to save your changes.
Naming the Device and Workgroup
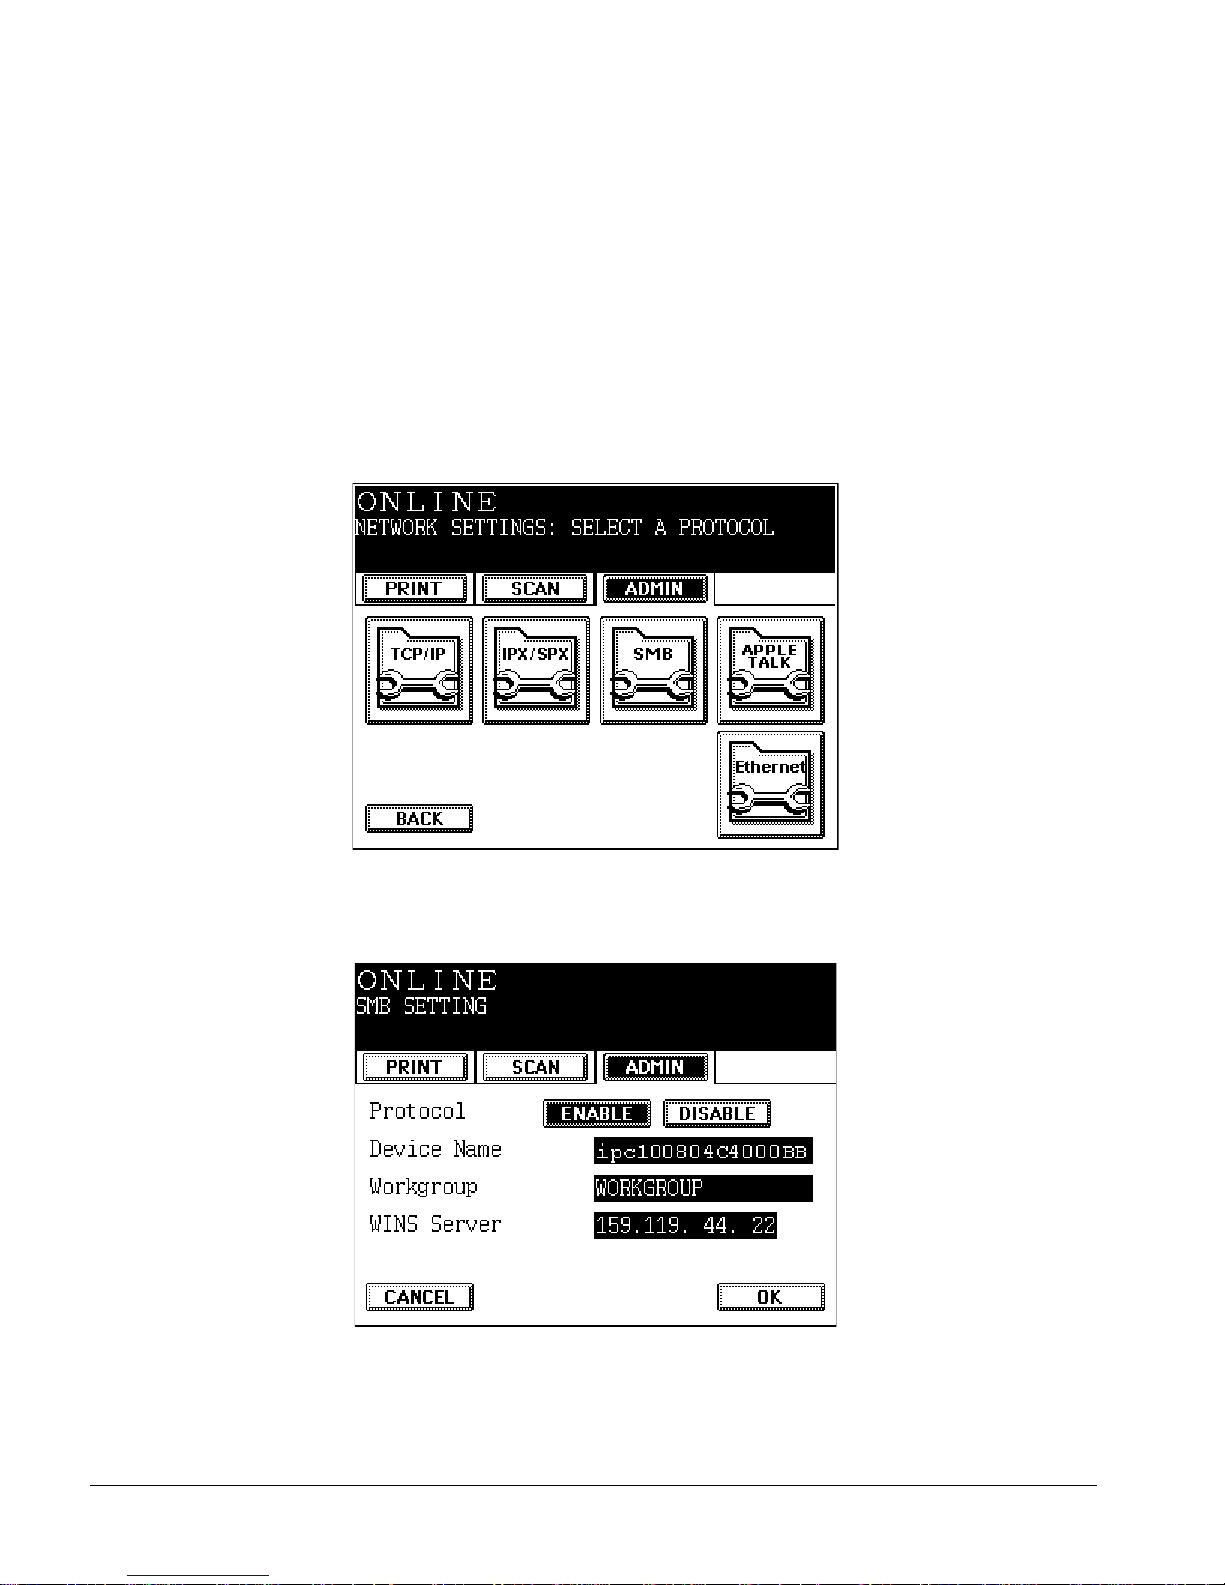
1 From the Admin menu, press NETWORK SETTING to open the Network
Setting screen.
Device Setting Screen
2 Press SMB to open the SMB screen.
SMB Setting Screen
im6530, im8130
Page 45

ipc1-im8130 Administrator’s Guide 23
3 Press DEVICE NAME to display the touch keyboard.
4 Enter the device name.
This is the same as the Microsoft Computer Name. By default, the
device name is GL<MAC Address>, where MAC Address is the Media
Access Control number of the NIC installed in the controller. For
example, GL00DOC9165206. You can specify a different name of up to
15 alphanumeric characters, provided it is unique within your
network.
Do not use the underscore (“_”) or the at (“@”) characters in the
device (controller) name.
5 Press
WORKGROUP to display the alphanumeric touchpad.
6 Enter the name of the workgroup to which the controller belongs. The
workgroup name can have no more than 15 characters.
7 Press OK to save your changes.
Restoring the Default Controller Settings
1 From the Admin menu, press FACTORY DEFAULT. A confirmation
message opens.
2 Press YES to restore all network and device settings. To return to the
Admin menu without changing the current settings, press NO.
Changing Control Panel Options
As an administrator, you can turn on or off some of the controller special
features:
im6530, im8130
Page 46
24 ipc1-im8130 Administrator’s Guide
1 Press
PRINTER/NETWORK.
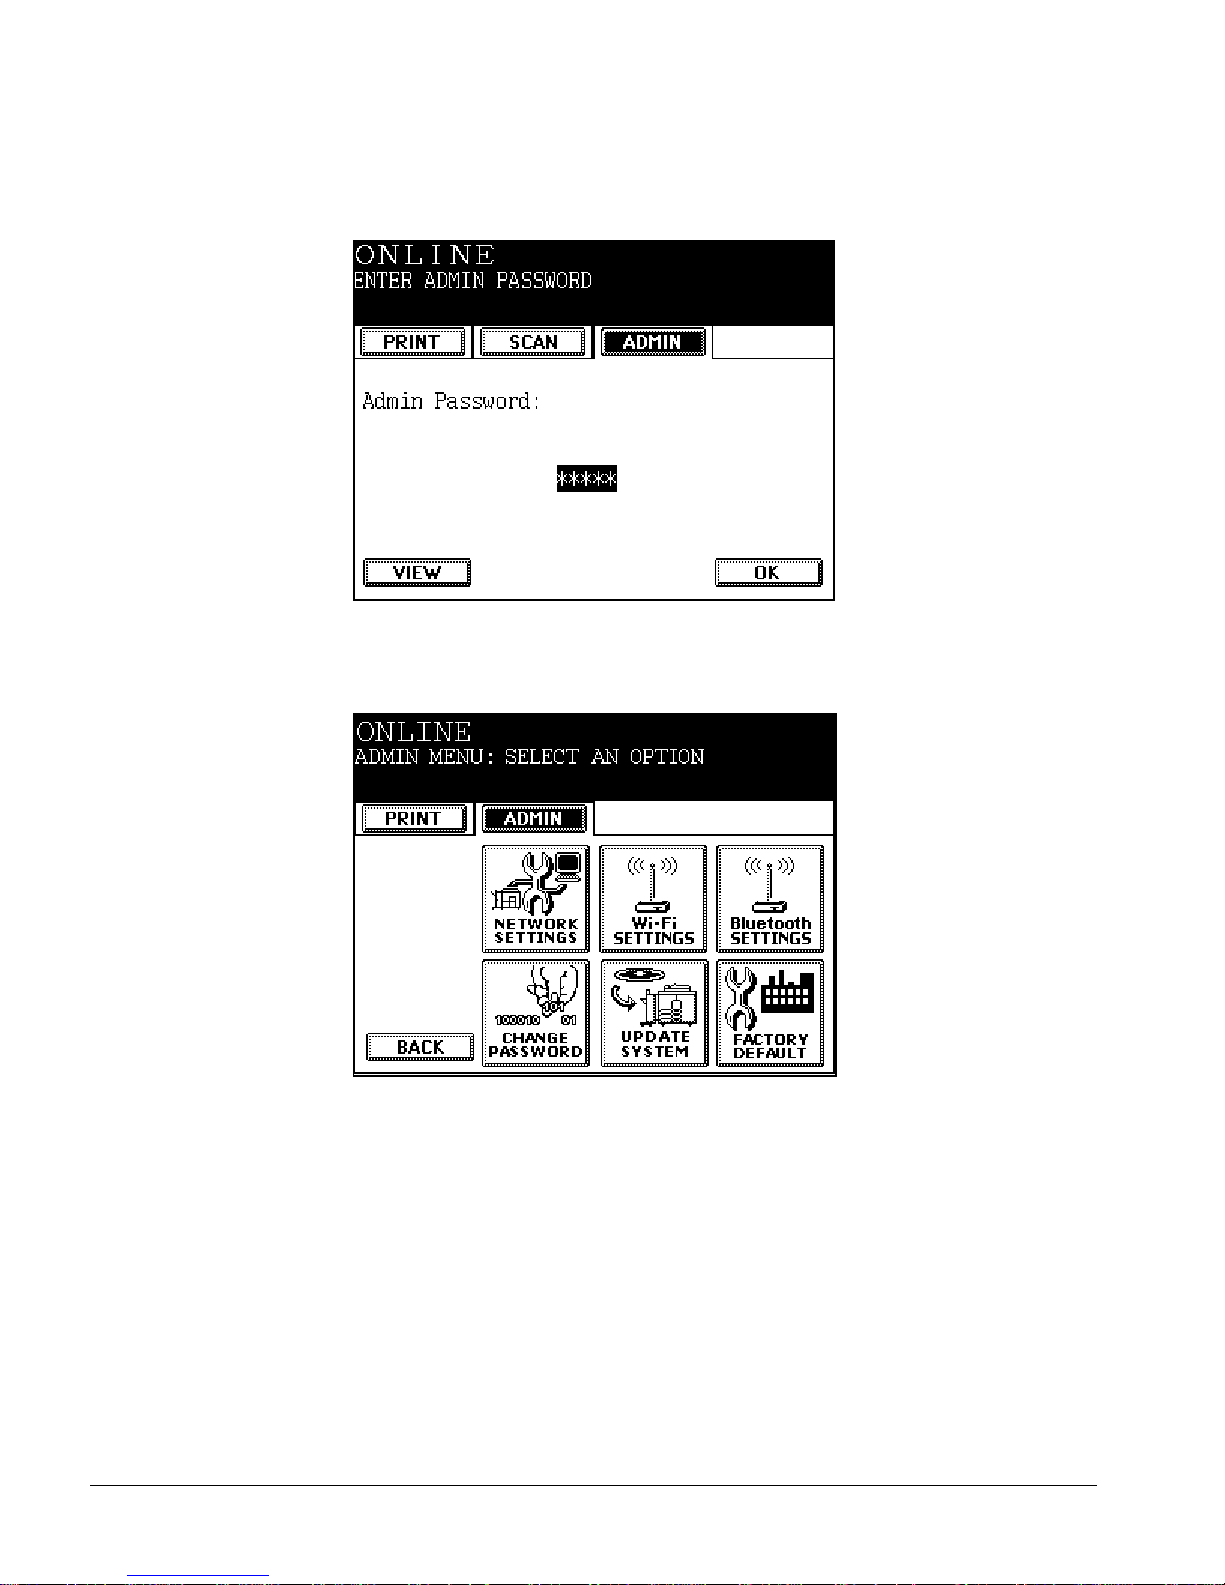
2 Press the ADMIN tab. The Enter Admin Password screen opens.
Enter Admin Password Screen
3 Enter your five-digit password and press OK. The Admin menu opens.
Admin Menu Screen
im6530, im8130
Page 47

ipc1-im8130 Administrator’s Guide 25
Using the control panel numeric keypad, type the appropriate panel code
depending on which feature you want to turn on or off.
Panel Codes for Turning Controller Features On or Off
ipc1-im8130 Panel Code
[Stop][ON/OFF][INDEX][Start] Service/Options ON/OFF
[Stop]100[Start] Print Panel Code Status
[Stop]001[Start] Internet Server OFF
[Stop]101[Start] Internet Server ON*
[Stop]002[Start] Server Service OFF
[Stop]102[Start] Server Service ON*
[Stop]003[Start] Master Browser OFF*
[Stop]103[Start] Master Browser ON
[Stop]004[Start] LT<-->A4, LD<-->A3 conversion OFF
[Stop]104[Start] LT<-->A4, LD<-->A3 conversion ON*
[Stop]005[Start] Document Manager OFF*
[Stop]105[Start] Document Manager ON
[Stop]006[Start] Department Code Enforcement OFF*
[Stop]106[Start] Department Code Enforcement ON
[Stop]007[Start] SNMP Service OFF
[Stop]107[Start] SNMP Service ON*
[Stop]009[Start] GL_Share Shared Folder OFF
[Stop]109[Start] GL_Share Shared Folder ON*
[Stop]010[Start] GL_Twain Shared Folder OFF
[Stop]110[Start] GL_Twain Shared Folder ON*
[Stop]011[Start] GL_PCL6 Shared Printer Port OFF
[Stop]111[Start] GL_PCL6 Shared Printer Port ON*
[Stop]012[Start] GL_PS Shared Printer Port OFF
[Stop]112[Start] GL_PS Shared Printer Port ON*
[Stop]013[Start] DSSC Shared Printer Port OFF
[Stop]113[Start] DSSC Shared Printer Port ON*
*System Default
im6530, im8130
Page 48

26 ipc1-im8130 Administrator’s Guide
4 The system prompts you to reboot the controller to apply the changes.
5 To enter another code, reply No and type the next panel code.
6 Continue until you have entered all of the panel codes that you want.
7 When the system prompts you to reboot the controller and apply the
changes, select Y
ES.
Current Status
To determine the current status of these options, you may enter the
special code 100. This prints a page indicating the current status of each
feature. This code does not require a reboot.
Master Browser Service
This is a component of the operating system and it is turned off by
default. The browser service maintains a list of the domain name or
workgroup name the computer is in, and the protocol being used for each
computer on the network segment being served by the computer running
the browser service. The browser on a given network segment provides a
browse list to the client computers located in the same segment. Although
it is unlikely for a controller to become the host of the browse list, even
when the feature is turned on, it is recommended that the service not be
used. An additional benefit of turning it off is reduced network traffic.
Server Service
This is a component of the operating system and it is turned on by
default. The following are the effects on system operation when this
service is disabled:
Shutting down the server service shuts down the browser service as
well
The controller cannot be seen as a device when browsing the network
[Stop]014[Start] Offline Fixed Enforcement OFF*
[Stop]114[Start] Offline Fixed Enforcement ON
Panel Codes for Turning Controller Features On or Off
ipc1-im8130 Panel Code
[Stop][ON/OFF][INDEX][Start] Service/Options ON/OFF
*System Default
im6530, im8130
Page 49

ipc1-im8130 Administrator’s Guide 27
The controller shared scan folder (e.g. GL_SHARE) is not accessible
Network Scan using the shared folder fails
Printer drivers using printer ports such as \\Device Name\DSSC,
\\Device Name\GL_PCL6, and \\Device Name\GL_PS cannot print
(SMB printing). Novell, TCP/IP, and IPP printing are not affected
Printer Driver download (Point-And-Print) from the controller does not
work because the shared printer folder is not accessible
The Microsoft Printing setting on the startup page and in Printer
Utility remains Enabled, but in fact it is disabled
No effect on ipc1 Document Monitor
Internet Server
The following are the effects on system operation when this service is
disabled:
Printer Utility and Document Manager are not available
IPP printing is not available
Controller can send and receive e-mail normally
The Internet Server in the controller cannot be used to setup an illegal
or malicious web site or spread web-based viruses
Document Manager
The following are the effects on system operation when this feature is
enabled:
Port 6666 is enabled
im6530, im8130
Page 50

28 ipc1-im8130 Administrator’s Guide
SNMP Service
The following are the effects on system operation when this service is
disabled:
This controller cannot serve SNMP client queries from software
components such as:
HP Open View
Printer Utility (Device, Counters, Administration pages, and
Device Search results)
ipc1 Document Monitor
Print driver bi-directional communication
SNMP cannot be used to hack in or modify the controller content
SNMP traps do not work
im6530, im8130
Page 51
ipc1-im8130 Administrator’s Guide 29
Controlling the Operation of the Controller
You can use the following functions from the copier LCD touch screen to
control the operation of the controller, including:
Take the controller offline
Print test pages
Reboot the controller
Shut down the controller
Controller software recovery update
Controller software maintenance update
Update the controller with new or localized printer drivers
Taking the Controller Offline
The controller must be online to perform network printing functions. By
taking the controller offline, you prevent anyone from printing to the
device.
1 Press PRINTER/NETWORK.
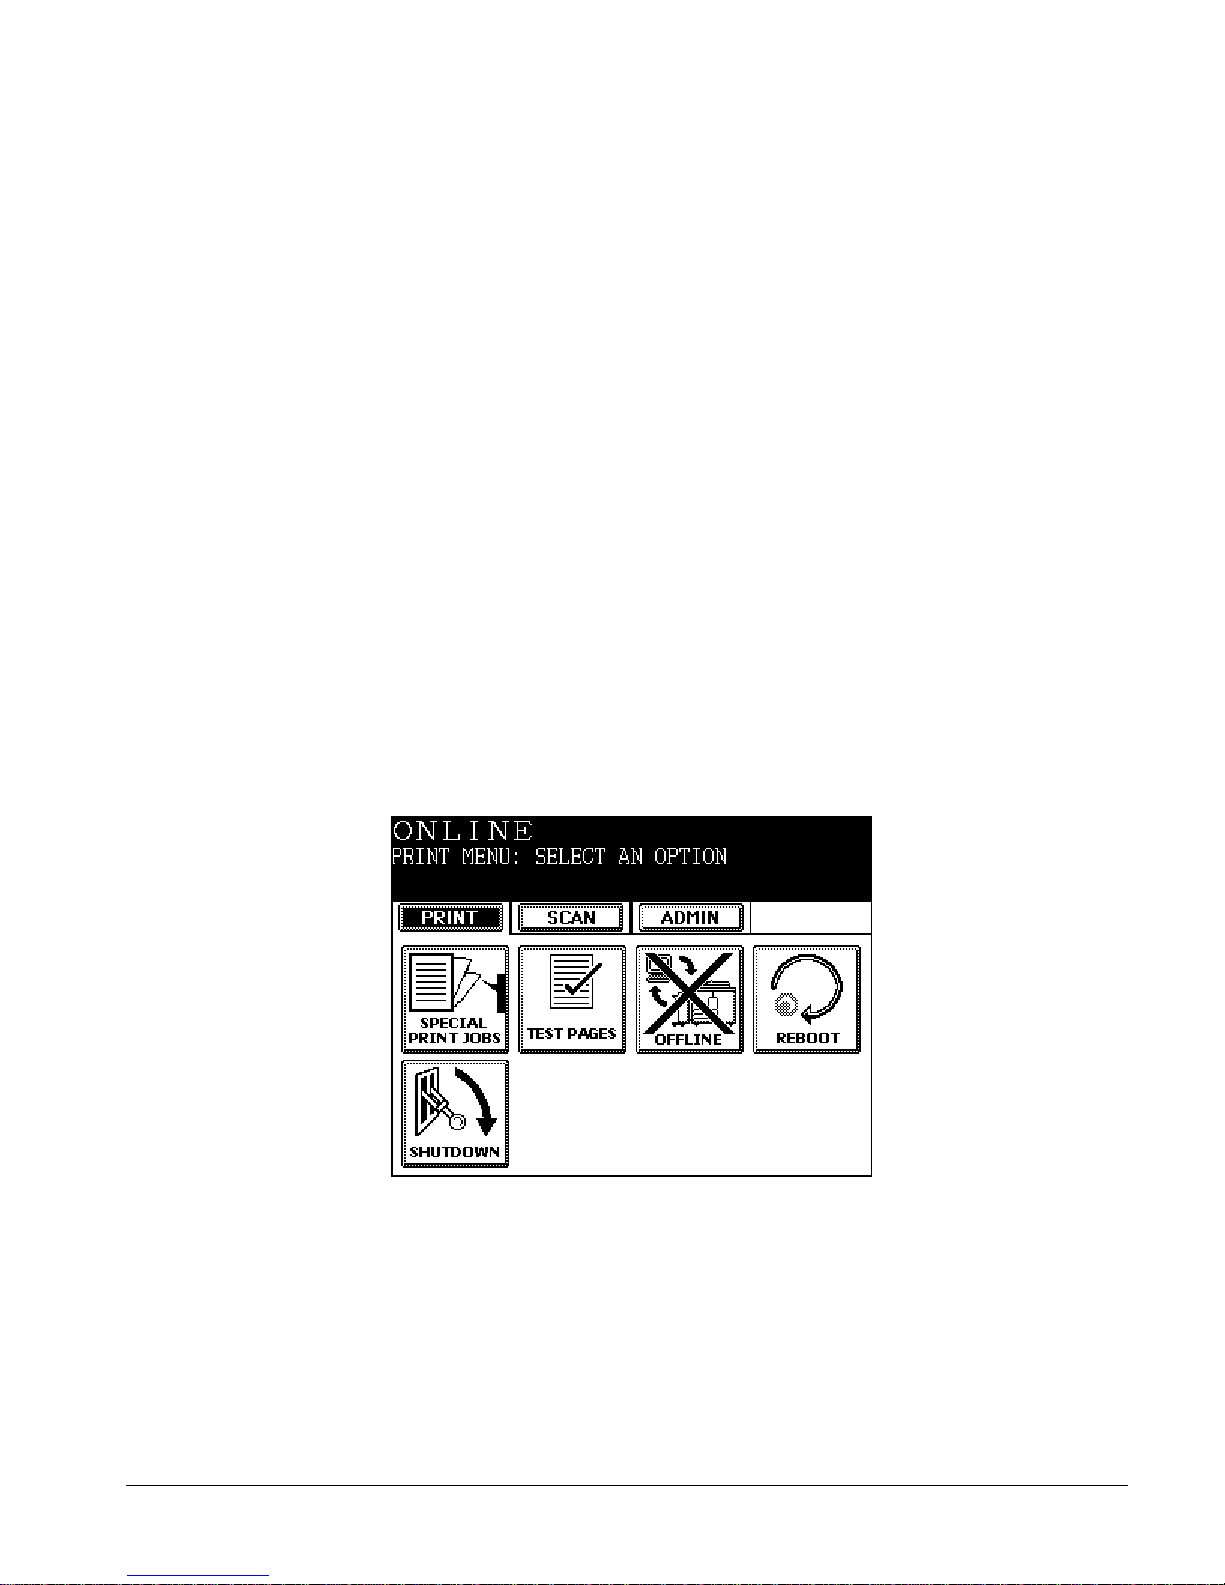
2 Press the PRINT tab. The main Print menu opens.
Print Menu Screen
im6530, im8130
Page 52
30 ipc1-im8130 Administrator’s Guide
3 To take the controller offline and disable printing, press
OFFLINE. The
printer remains offline until you enable it manually.
Printing Test Pages
There are three types of test page you can print.
The Administrator page: lists the controller and network settings
The PCL font list: shows all PCL printer fonts installed on the
controller
The PS3 font list: shows all PostScript (level 3-compatible) fonts
installed on the controller
You can print only one test page at a time.
1 Press PRINTER/NETWORK.
2 Press the PRINT tab. The main Print menu opens.
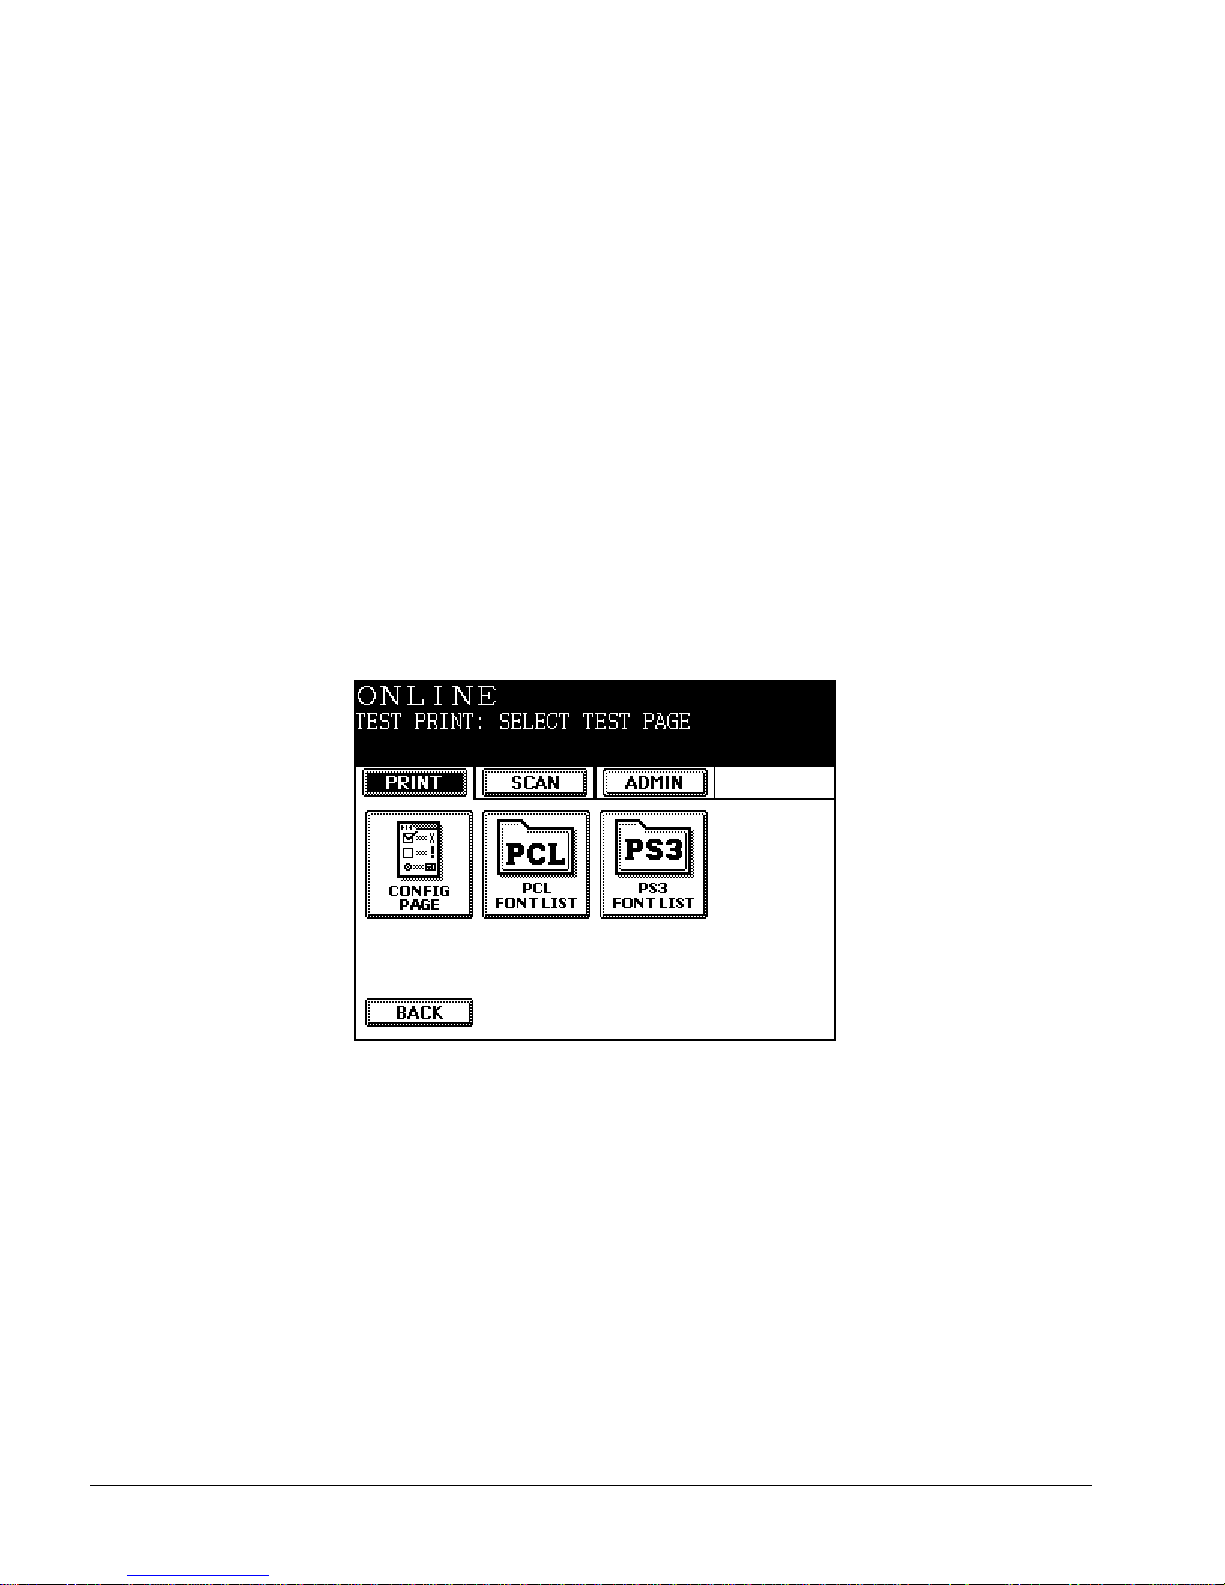
3 Press TEST PAGES to display the Test Print menu.
Test Print Screen
4 Press the soft key corresponding to the type of test page you want to
print:
CONFIG PAGE, PCL FONT LIST, or PS3 FONT LIST.
5 After printing the test page, press BACK to return to the Print menu.
Rebooting the Controller
Sometimes you need to reboot the controller before new settings take
effect. At other times, you may need to reboot the controller to
synchronize communication with the copier again. If possible, avoid
rebooting the controller by physically resetting it.
im6530, im8130
Page 53

ipc1-im8130 Administrator’s Guide 31
The preferred way to reboot is as follows:
1 Press
PRINTER/NETWORK.
2 Press the PRINT tab. The main Print menu opens.
3 Press REBOOT. A confirmation message appears.
4 Press YES to proceed. The controller goes offline while rebooting and
the LCD touch screen displays first Shut-down in progress and
then Starting Controller. Please wait. When the controller
comes back online, you can resume network and printing functions.
Alternate Reboot Procedure
Warning! Do NOT reboot the controller using this method unless
absolutely necessary. Any job currently being processed is lost during
the reboot process.
If you cannot reboot using the preferred procedure:
1 Press PRINTER/NETWORK, AND hold down the button for at least 10
seconds.
2 Press START. The controller reboots.
Shutting Down the Controller
Gracefully powering down the Imagistics Network Document Processing
System begins with shutting down the controller from the copier control
panel. After you shut down the controller, you can safely power off the
copier.
Caution! Do NOT power off the controller by pressing the controller
power switch because this may damage the controller hard drive or
corrupt the software.
Power down the controller from the copier LCD touch screen, using the
SHUTDOWN function.
1 Press
PRINTER/NETWORK.
2 Press the PRINT tab. The main Print menu opens.
3 Press
SHUTDOWN. Printer Utility prompts you to confirm your request.
4 Press
YES to proceed.
To restart the controller, turn on the power switch.
Controller Software Recovery Update
Replaces the operating system (OS) software and the controller software
from the bootable ipc1-im8130 Recovery CD-ROM.
im6530, im8130
Page 54
32 ipc1-im8130 Administrator’s Guide
There are two ways to update the operating system:
Boot the controller from the ipc1-im8130 Recovery CD-ROM.
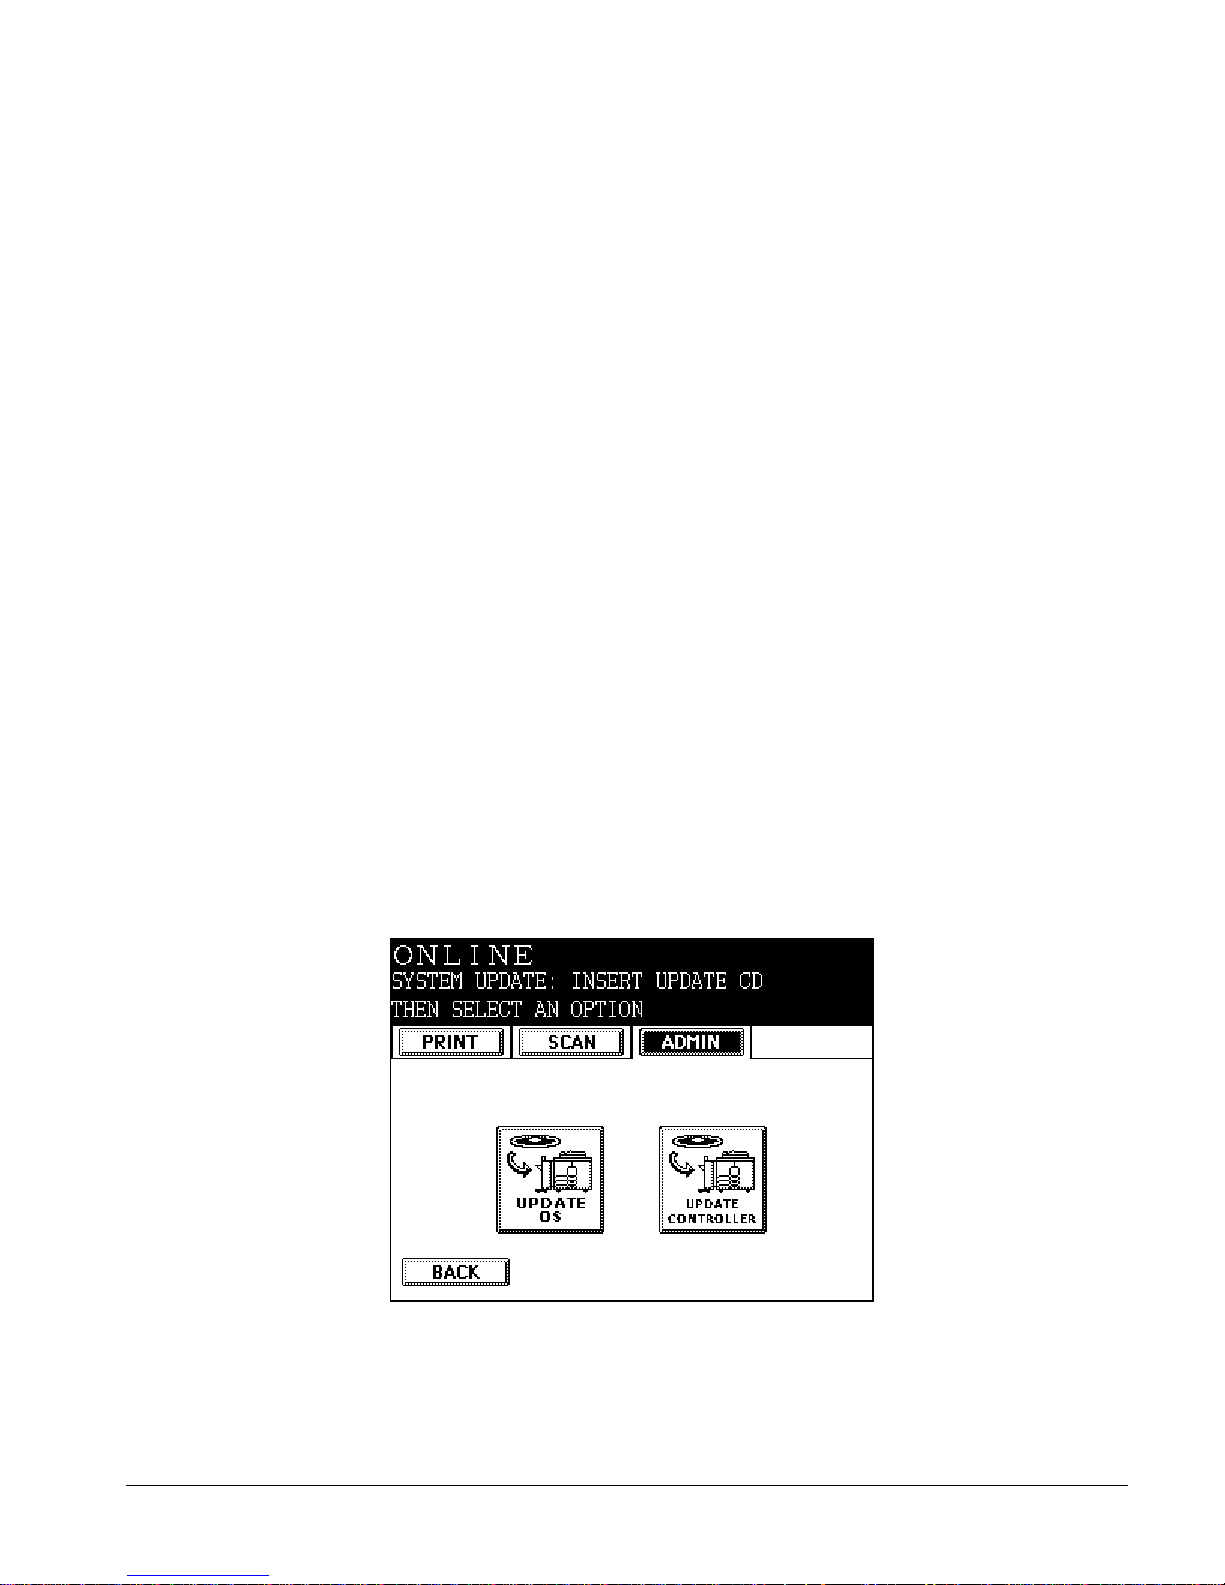
Perform an OS UPDATE from the copier control panel. This is the
recommended method of updating the OS software. The controller
performs a backup operation and saves the administrator password,
network settings, scan templates, address book, and other settings
which are then restored following the update.
This section provides procedures for performing each method of operating
system update.
Update from the ipc1-im8130 Recovery CD-ROM
1 Power up the system if it is not already running.
2 Immediately insert the ipc1-im8130 Recovery CD-ROM into the drive.
If the controller was already up, reboot it. The flashing light on the
CD-ROM drive indicates the controller is trying to boot off of the CD.
If this light does not flash, leave the CD in the drive and reboot the
controller.
3 Check the LCD touch screen on the copier. It displays the following
message as the controller boots off of the CD-ROM: Starting
controller. Please wait.
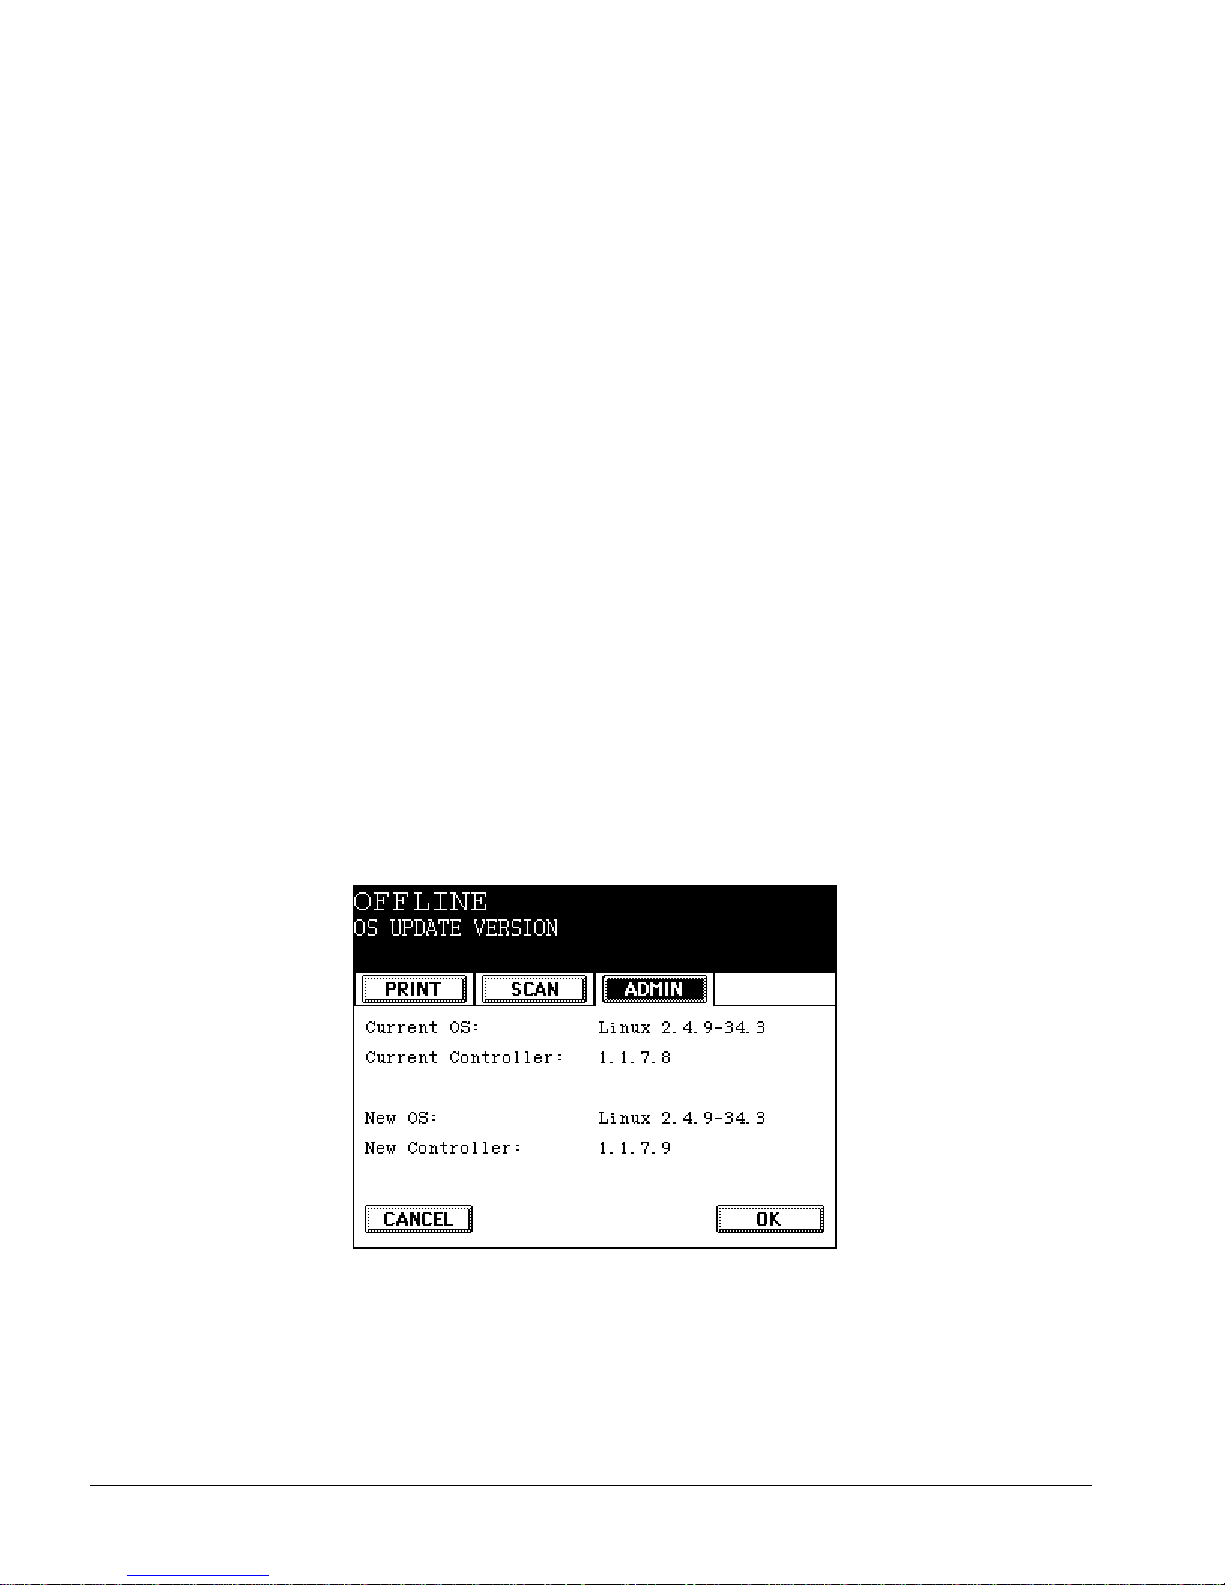
4 When the controller finishes booting up, a process that takes almost
three minutes, the Offline OS Update Version screen opens:
The Offline OS Update Version Screen
If this screen does not open, the controller did not boot from the CD
successfully.
5 Press
OK to continue. The controller begins copying the software from
the CD to the hard drive. This process takes approximately five
im6530, im8130
Page 55
ipc1-im8130 Administrator’s Guide 33
minutes, during which time the touch screen displays the OS Update
Progress screen.
6 When the system update process completes, the CD-ROM is ejected
and the touch screen displays Press the START key to start
controller.
7 Remove the CD-ROM from the drive and press the
START button. You
must remove the CD-ROM before the controller can boot up.
8 After boot up, an initialization process begins. This takes
approximately 10 minutes. During that time, the touch screen
displays Processing Controller update, don’t switch off.
9 When communications with the copier resume, a test page prints out
on the copier and the front panel becomes operational again. The
controller software version printed on the test page should match the
update version. If so, the system update has completed successfully.
If you experience problems during the update process, or if the
system does not come back online after the update process
completes, contact your Imagistics authorized dealer for support.
Update OS From Control Panel
1 Press the PRINTER/NETWORK hard key on the copier control panel.
2 Press the ADMIN tab.
3 Log on to perform administrative functions.
4 Press SYSTEM UPDATE to display the System Update menu.
System Update Menu
im6530, im8130
Page 56

34 ipc1-im8130 Administrator’s Guide
5 Insert the ipc1-im8130 Recovery CD-ROM into the controller CD drive
and then press
UPDATE OS. The touch screen displays the OS Update
Version screen.
6 Confirm that the Current OS and New OS versions are correct.
7 Press OK to continue.
8 A message is displayed, prompting you to confirm that you want to
reboot the controller.
9 Press YES to continue with the update. The existing system settings
are backed up and then the controller reboots to CD-ROM mode. The
touch screeen displays the OS Update Version screen. Note that the
controller is now offline.
If the touch screen does not display the OS Update Version screen,
the controller did not boot off the CD successfully.
10 Press OK to continue. The controller begins copying the software from
the CD to the hard drive. This process takes approximately seven
minutes, during which time the touch screen displays the OS Update
Progress screen.
11 When the system update process completes, the CD-ROM is ejected
and the touch screen displays the message Press the START key
to start controller.
12 Remove the CD-ROM from the drive and press the START button. You
must remove the CD-ROM before the controller can boot up.
13 After boot up, an initialization process begins. This takes
approximately 10 minutes. During that time, the touch screen
displays the message Processing Controller update, don’t
switch off.
14 When communications with the copier resume, a test page prints out
on the copier and the front panel becomes operational again. The
controller software version printed on the test page should match the
update version. If so, the system update has completed successfully.
If you experience problems during the update process, or if the
system does not come back online after the update process
completes, contact your Imagistics authorized dealer for support.
Controller Software Maintenance Update
Use the Maintenance Update procedure to update the controller software
only (not the OS). This method retains the current controller
configuration.
Perform the following steps from the copier control panel:
im6530, im8130
Page 57
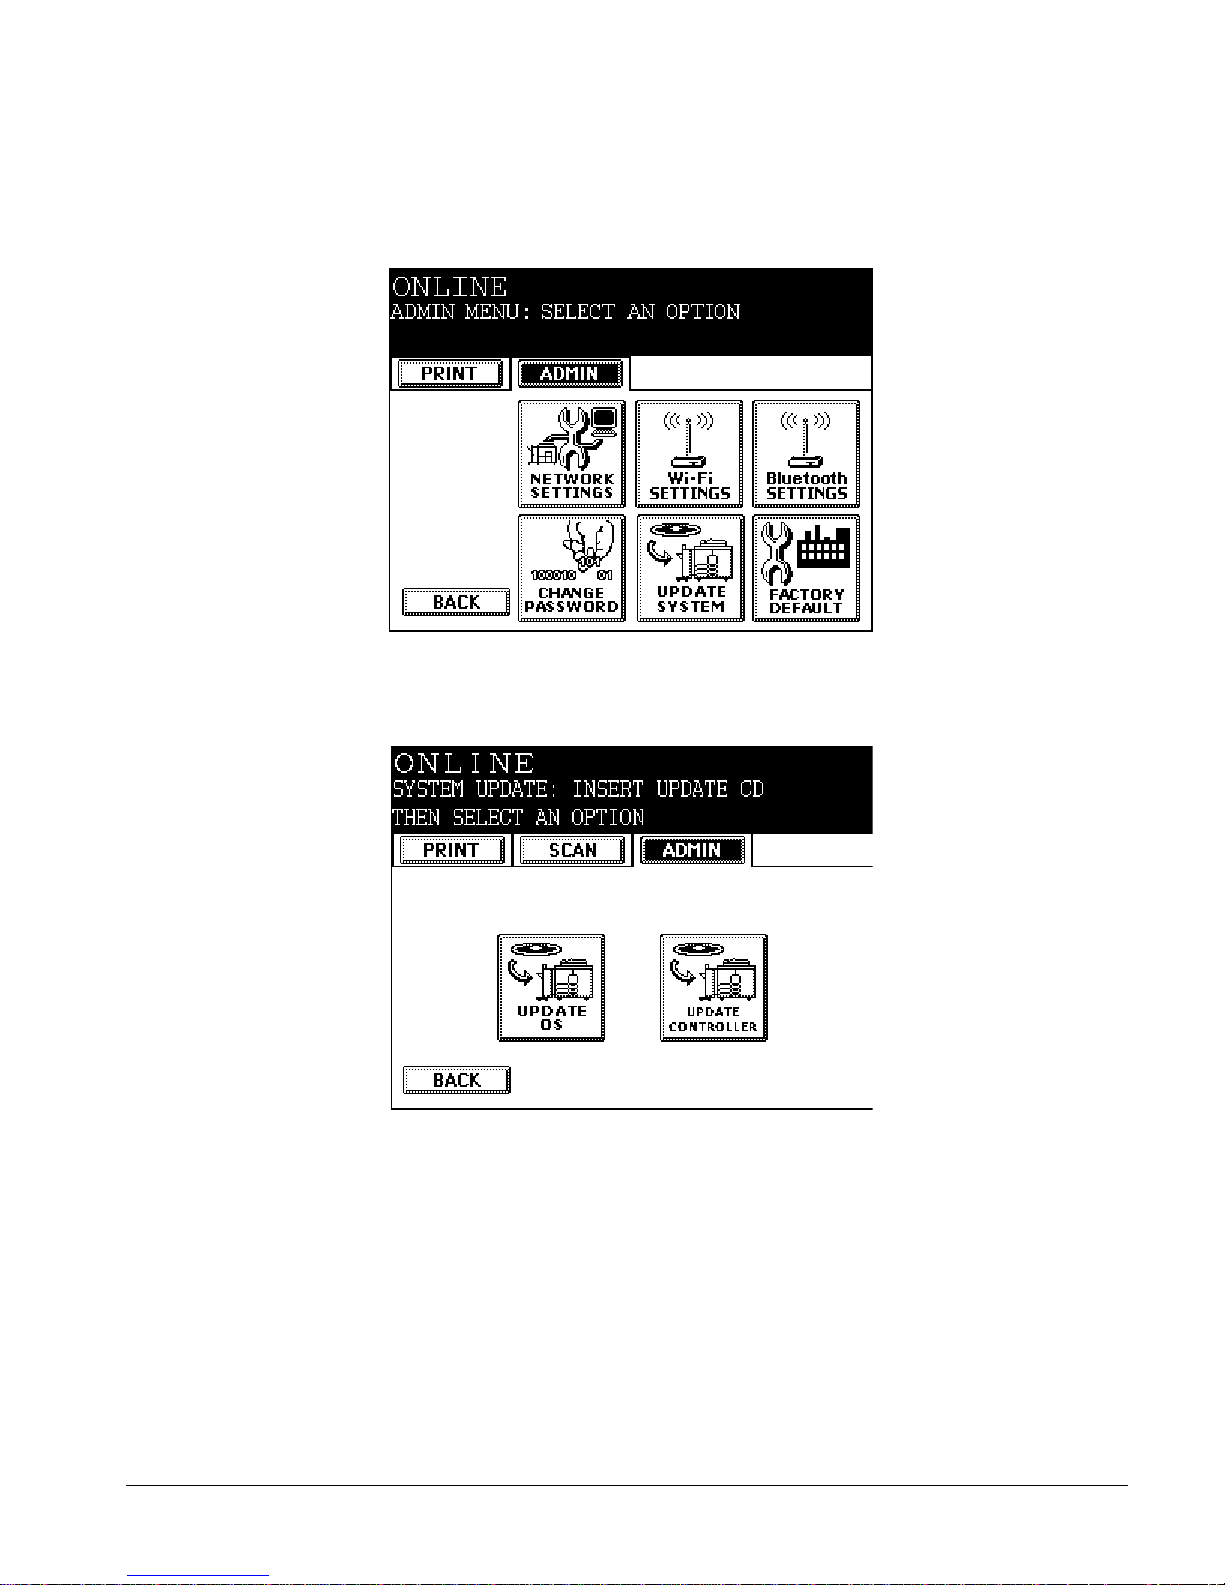
ipc1-im8130 Administrator’s Guide 35
1 Press the
PRINTER/NETWORK key and then press the ADMIN tab.
2 Enter the administrator password and press OK to display the Admin
menu.
Admin Menu
3 Press UPDATE SYSTEM to display the System Update menu.
System Update Menu
im6530, im8130
Page 58
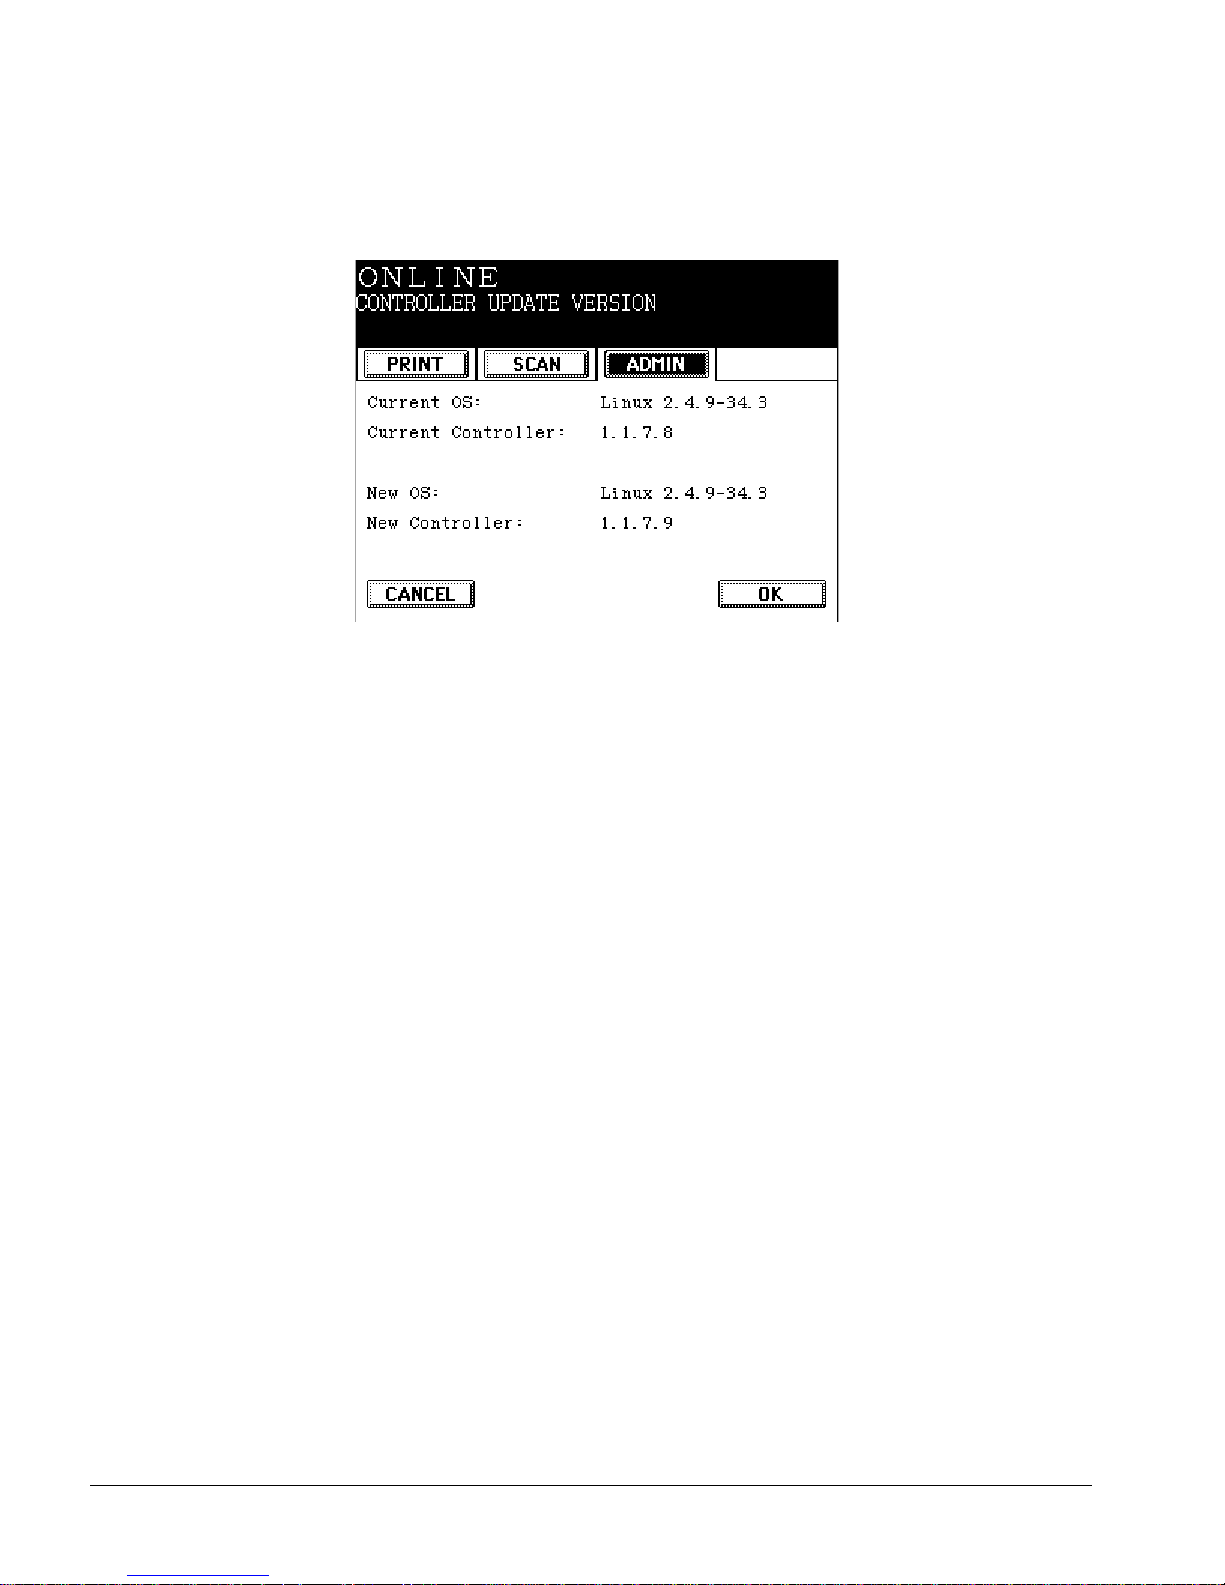
36 ipc1-im8130 Administrator’s Guide
4 Insert the CD that contains the updated controller software into the
controller CD-ROM drive and then press
UPDATE CONTROLLER. The
touch screen displays the Controller Update Version screen.
Controller Update Version Screen
5 Make sure the information displayed is correct. If not, press CANCEL to
return to the System Update menu.
6 If it is correct, press OK to begin the controller update process. The
status message now displays CONTROLLER UPDATE PROGRESS.
When the update completes, the CD-ROM ejects and the status
message displays Please remove the update CD from the
CD-ROM drive.
7 Remove the CD-ROM and press OK. The controller reboots.
8 When communications with the copier resume, a test page prints out
on the copier and the front panel becomes operational again. The
controller software version printed on the test page should match the
update version. If so, the system update has completed successfully.
If you experience problems during the update process, or if the
system does not come back online after the update process
completes, contact your Imagistics authorized dealer for support.
Update with New or Localized Printer Drivers
The controller does not come with localized printer drivers pre-installed.
The printer drivers that are pre-installed in the controller are U.S.
English. When new drivers are released periodically or if users want to
im6530, im8130
Page 59
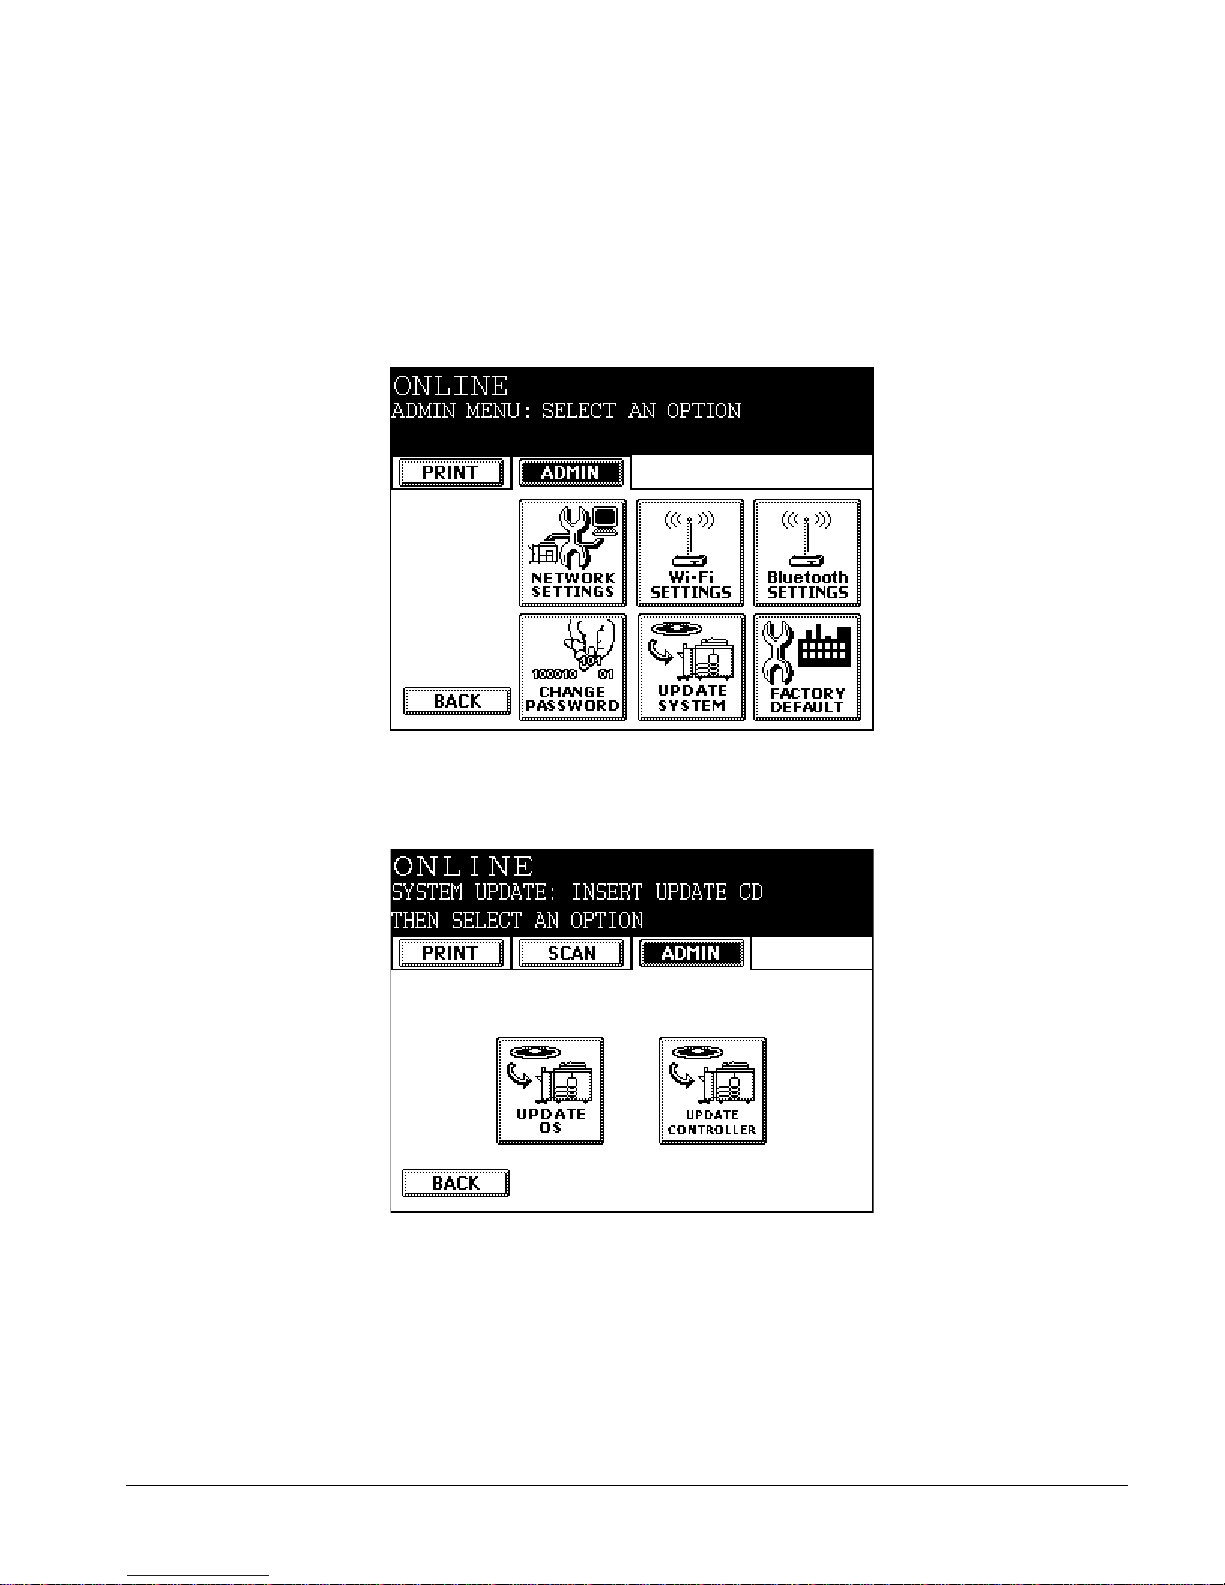
ipc1-im8130 Administrator’s Guide 37
download the localized drivers from the controller, you must first install
them from the ipc1-im8130 Client CD-ROM.
1 From the copier LCD panel, press the
PRINTER/NETWORK key and then
press the ADMIN tab.
2 Enter the administrator password and press OK to display the Admin
menu.
The Admin Menu
3 Press UPDATE SYSTEM to display the System Update menu.
The System Update Menu
im6530, im8130
Page 60
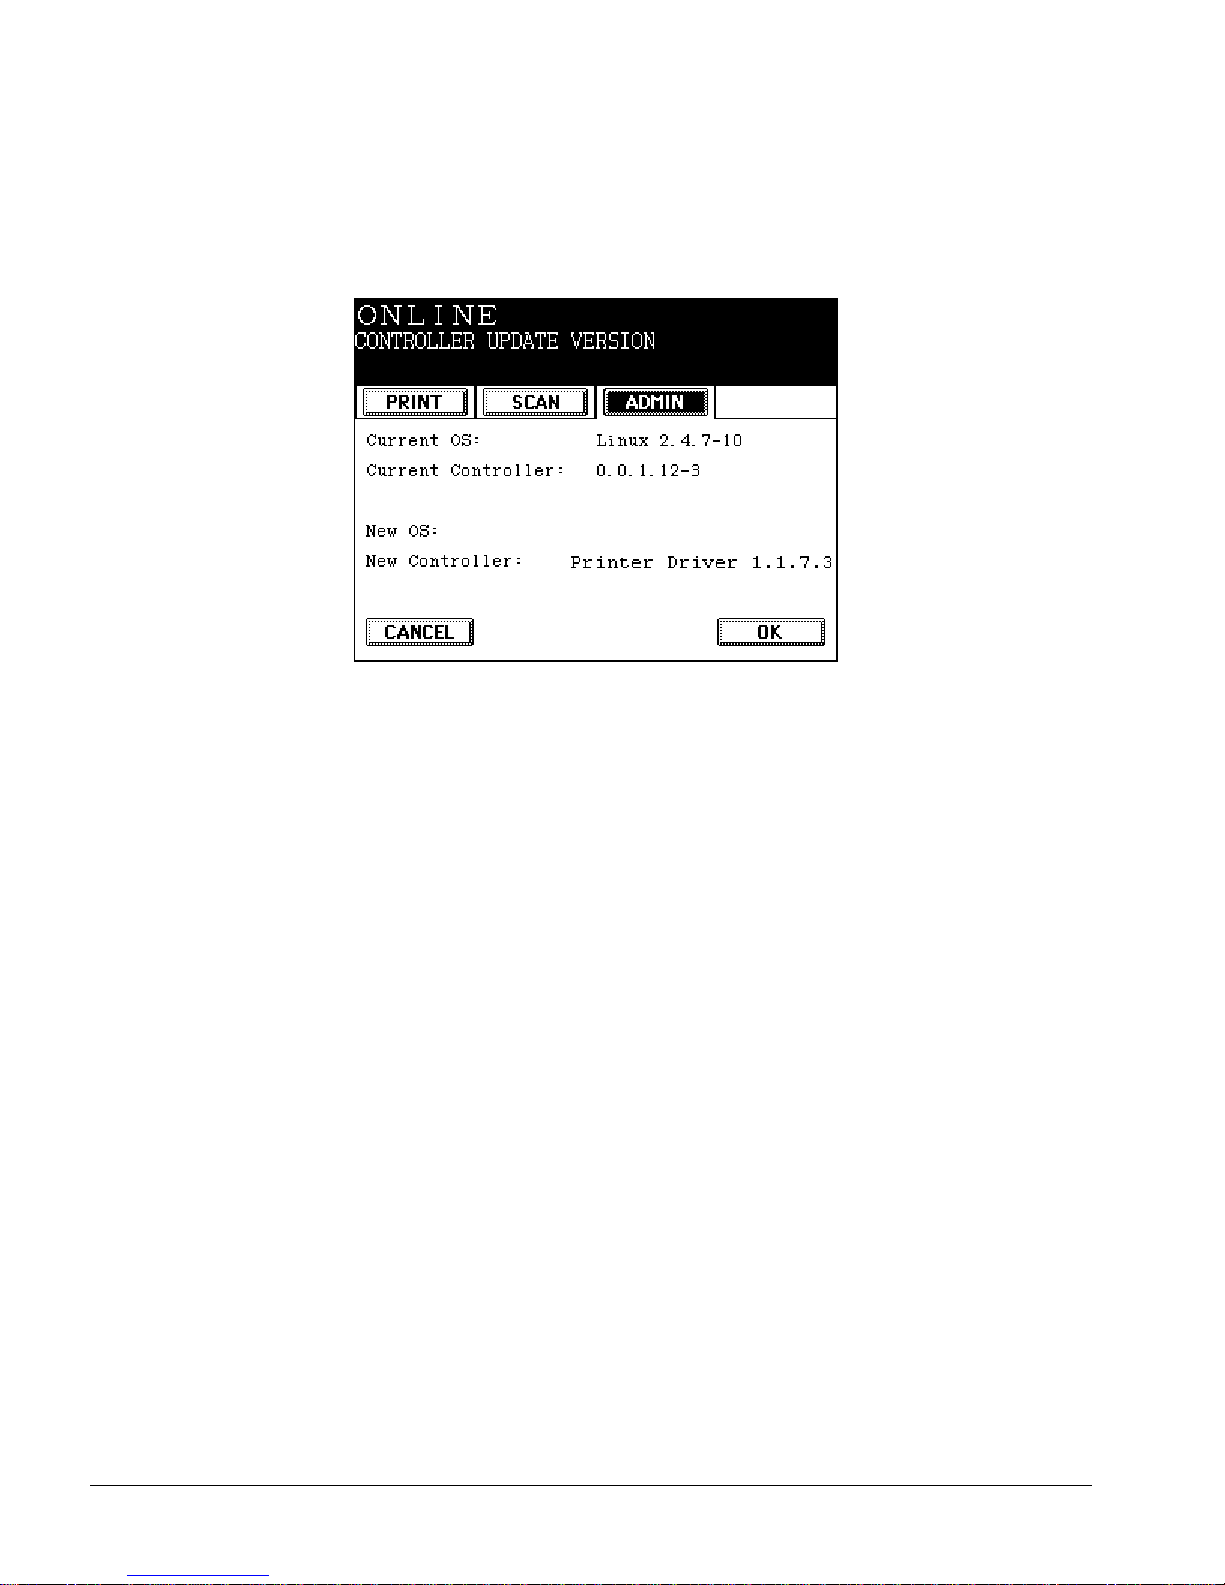
38 ipc1-im8130 Administrator’s Guide
4 Insert the ipc1-im8130 Client CD-ROM in the controller CD-ROM
drive.
5 Press
UPDATE CONTROLLER. The touch screen displays the Controller
Update Version screen.
The Controller Update Version Screen
6 Press OK to begin installing the appropriate printer driver on the
controller. The language installed depends on the copier language
setting. If the copier language setting does not match one of the
supported driver languages, US English is installed by default.
When the update completes, the CD-ROM ejects and the LCD panel
displays the message Please remove the update CD from the
CD-ROM drive.
7 Remove the CD-ROM and press OK. The controller reboots.
8 When communications with the copier resume, a test page prints out
on the copier and the front panel becomes operational again. The
printer driver software version printed on the test page should match
the update version. If so, the system update has completed
successfully.
If you experience problems during the update process, or if the
system does not come back online after the update process
completes, contact your Imagistics authorized dealer for support.
Monitoring the Print Queue
From the copier LCD touch screen, you can manage scheduled jobs,
private print jobs, proof print jobs, and Document Manager jobs.
im6530, im8130
Page 61

ipc1-im8130 Administrator’s Guide 39
About Print Queues
The information in this section applies to all types of print jobs.
Scrolling Through a Queue
Each print job screen has scroll arrows at the right hand side.
Press the up- and down-arrow soft keys to scroll through the jobs in the
list one at a time.
Use the double-arrow keys to move from page to page of listings.
Status Messages
Document has printed successfully
The job you sent to the controller printed without error. You may retrieve
the print job from the copier.
Private print document is being held
Your private print job has been spooled to the controller without error.
You can now go to the copier to release the job for printing. You must
enter the correct DIN to print the job.
Document has been cancelled
The job you submitted for printing has been cancelled either at your
request or because the time-out interval was exceeded.
Managing Scheduled Jobs
You can view the list of scheduled jobs, delete jobs from the list, or release
a job from the queue and print it immediately.
Viewing the Scheduled Jobs Queue
To display the list of pending print jobs and their status:
im6530, im8130
Page 62
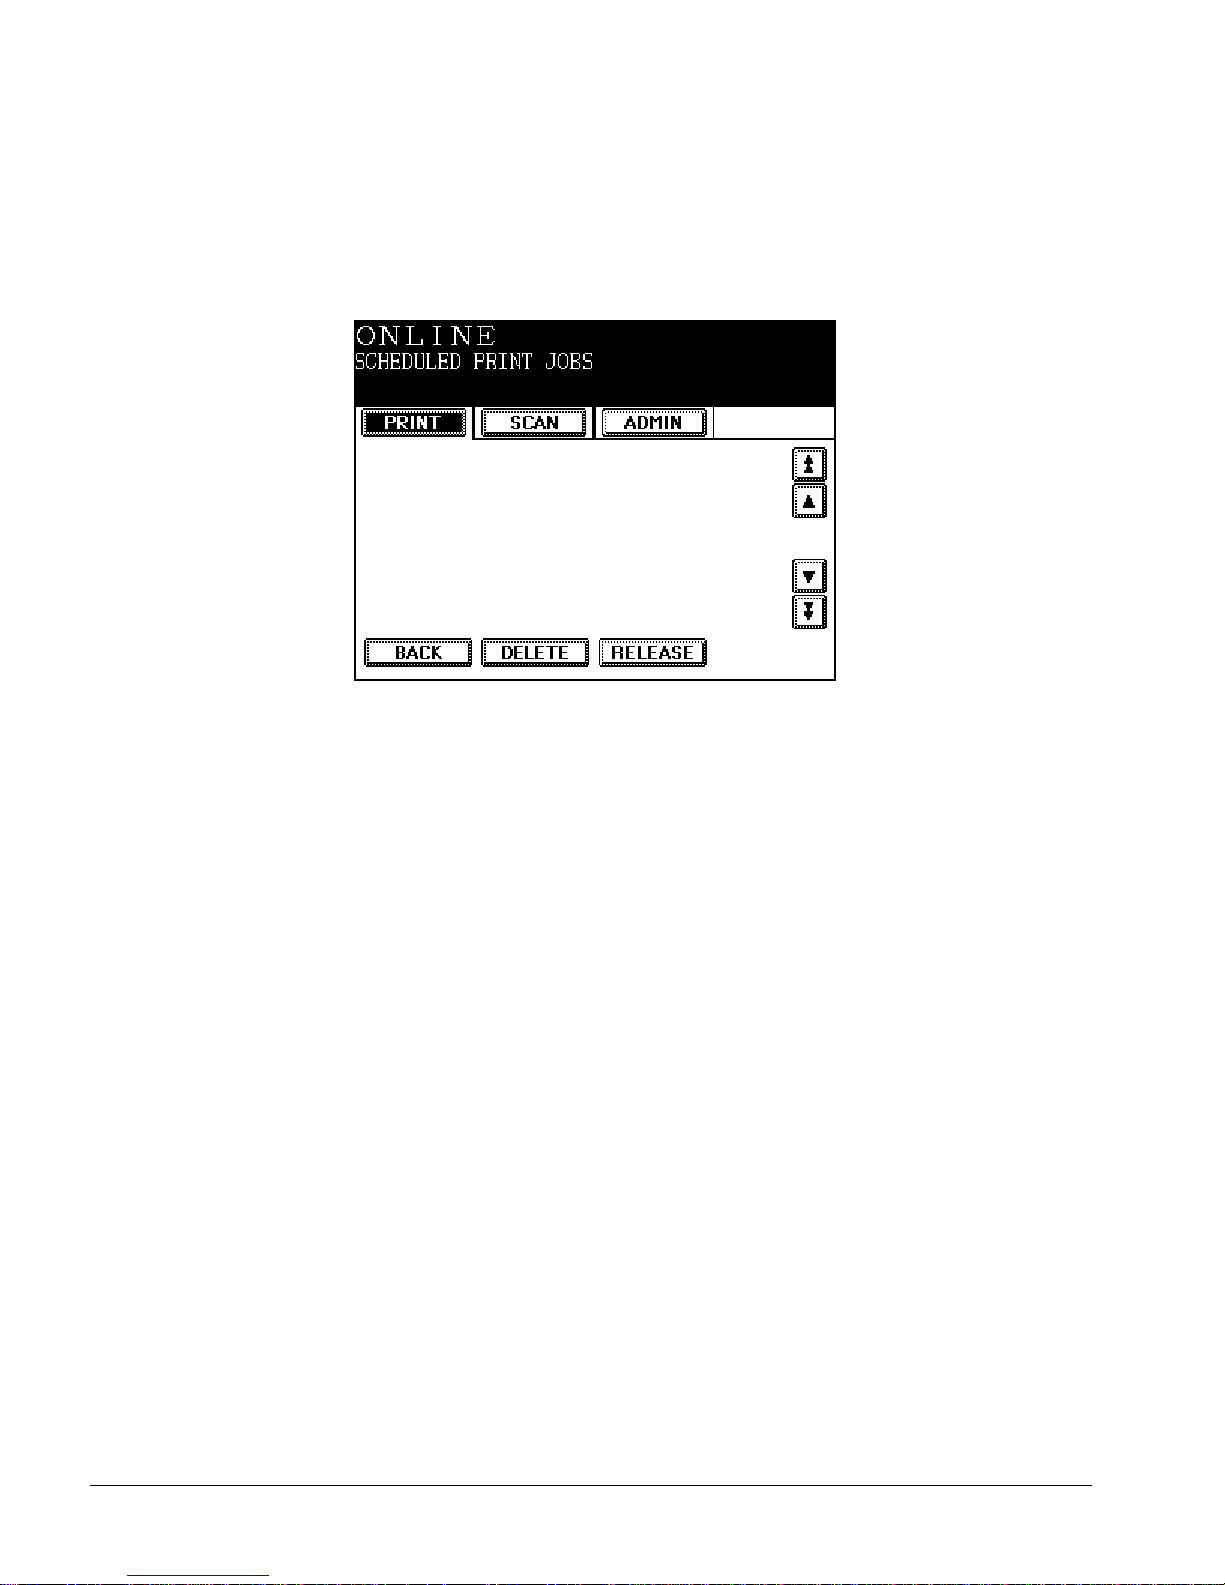
40 ipc1-im8130 Administrator’s Guide
1 Press
PRINTER/NETWORK.
2 Press the PRINT tab.
3 Press SPECIAL PRINT JOBS.
4 In the Special Print Jobs screen, press SCHEDULED PRINT JOBS.
Scheduled Print Jobs Screen
5 When you have finished viewing the list, press BACK to return to the
main Print menu.
Deleting Scheduled Jobs
To remove a scheduled print job:
1 Press PRINTER/NETWORK.
2 Press the PRINT tab.
3 Press
SPECIAL PRINT JOBS.
4 In the Special Print Jobs screen, press
SCHEDULED PRINT JOBS.
5 In the Scheduled Print Jobs screen, scroll to the job you want to
delete.
6 Press
DELETE. A confirmation message appears.
7 Press
DELETE again to remove the job from the print queue.
8 Press
BACK to return to the main Print menu.
Releasing Scheduled Jobs
To print a job now, instead of at the scheduled time:
im6530, im8130
Page 63
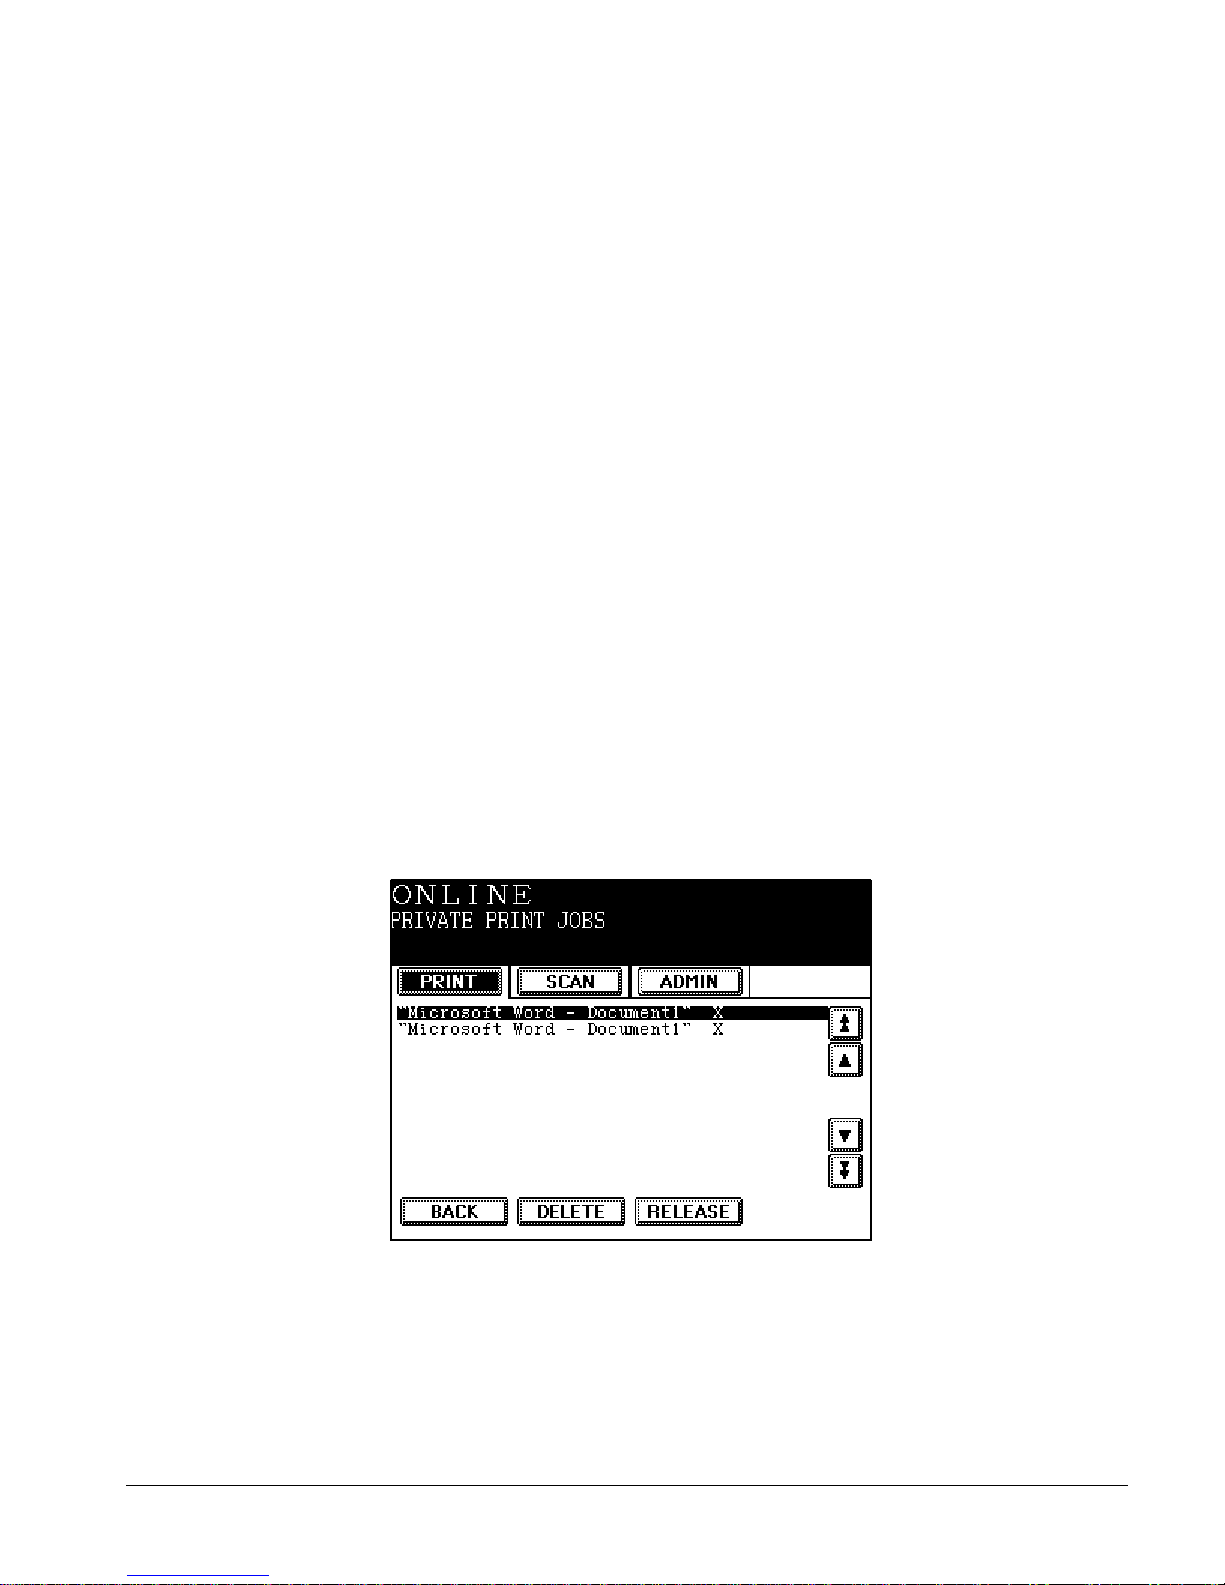
ipc1-im8130 Administrator’s Guide 41
1 Press
PRINTER/NETWORK.
2 Press the PRINT tab.
3 Press SPECIAL PRINT JOBS.
4 In the Special Print Jobs screen, press SCHEDULED PRINT JOBS.
5 In the Scheduled Print Jobs screen, scroll to the job you want to
print.
6 Press RELEASE.
7 Press BACK to return to the main Print menu.
Managing Private Print Jobs
You can view the list of private print jobs, delete jobs from the list, or
release a job for printing.
Viewing the Private Print Queue
To display the list of pending private print jobs and their status:
1 Press PRINTER/NETWORK.
2 Press the PRINT tab.
3 Press SPECIAL PRINT JOBS.
4 In the Special Print Jobs screen, press PRIVATE PRINT JOBS.
Private Print Jobs Screen
im6530, im8130
Page 64
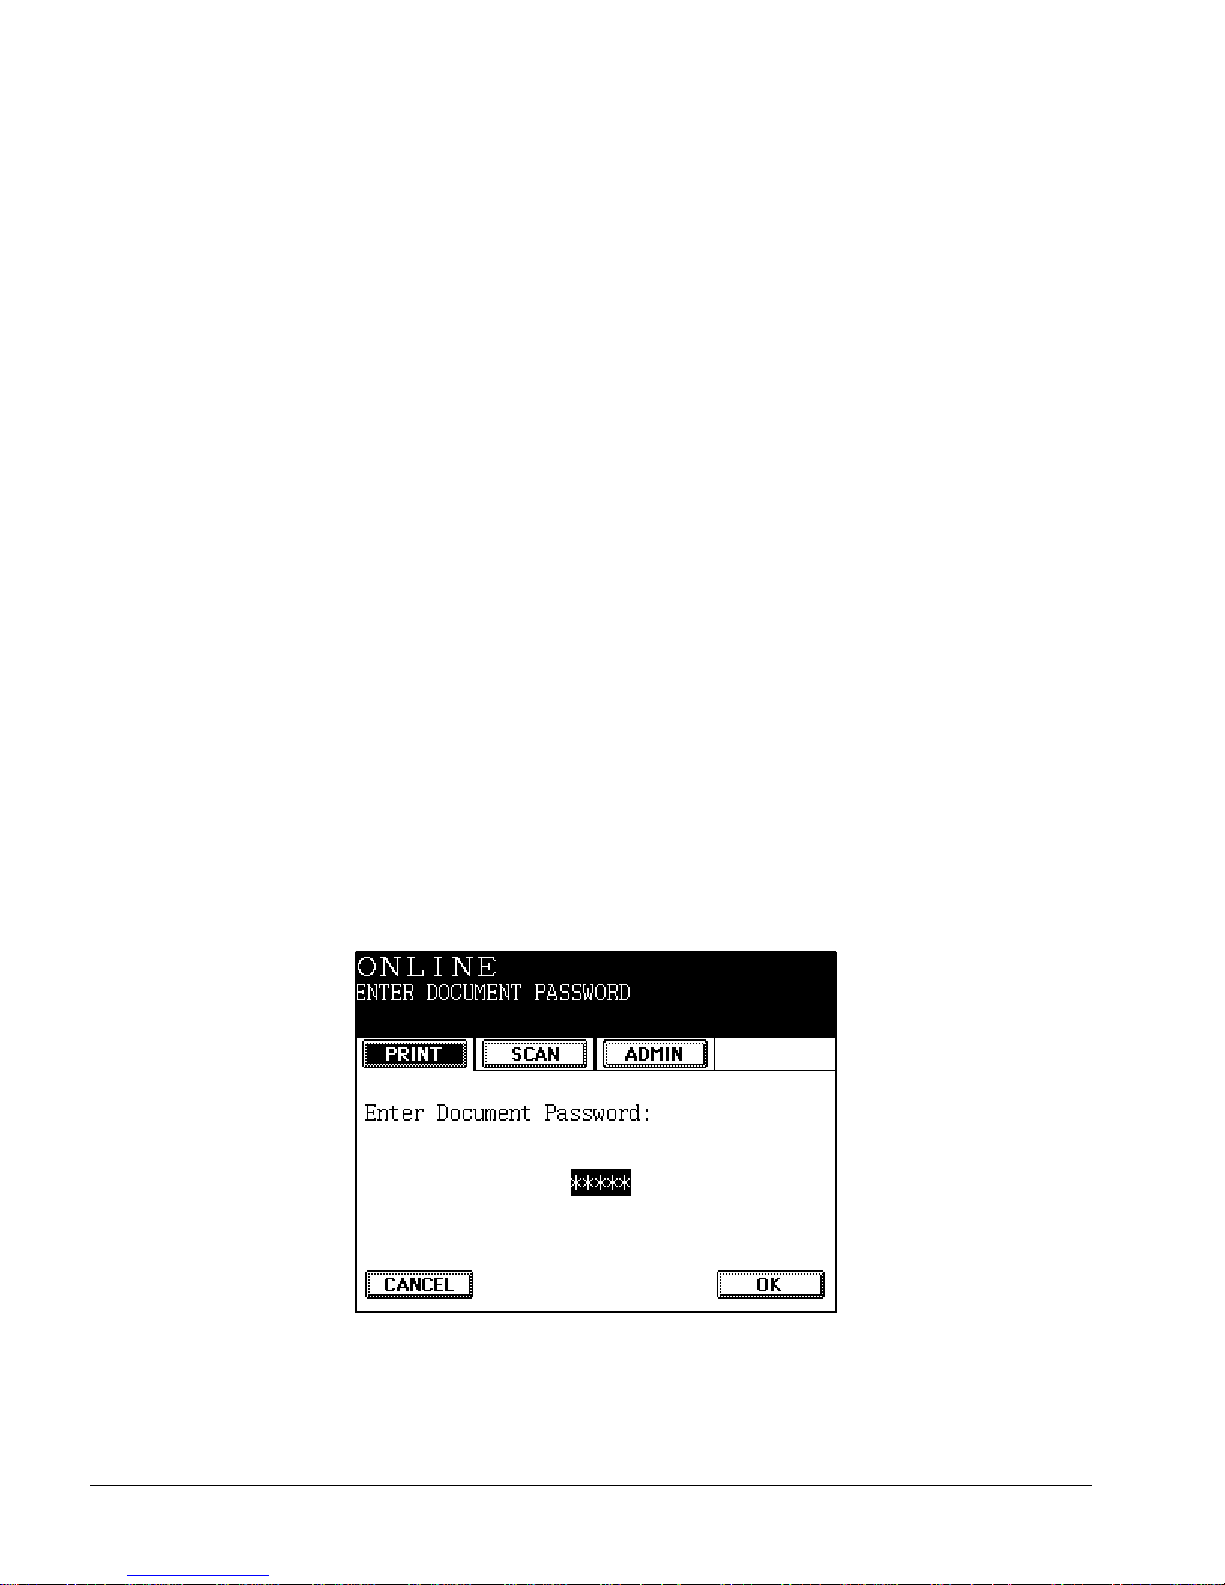
42 ipc1-im8130 Administrator’s Guide
5 When you finish viewing the list, press
BACK to return to the main
Print menu.
Deleting a Private Print Job
1 Press PRINTER/NETWORK.
2 Press the PRINT tab.
3 Press SPECIAL PRINT JOBS.
4 In the Special Print Jobs screen, press PRIVATE PRINT JOBS.
5 In the Private Print Jobs screen, scroll to the job you want to delete.
6 Press DELETE. A confirmation message appears.
7 Press DELETE again to remove the job from the print queue.
8 Press BACK to return to the main Print menu.
Releasing a Private Print Job
1 Press PRINTER/NETWORK.
2 Press the PRINT tab.
3 Press SPECIAL PRINT JOBS.
4 In the Special Print Jobs screen, press PRIVATE PRINT JOBS.
5 In the Private Print Jobs screen, scroll to the job you want to release
for printing.
6 Press RELEASE. The Enter Document Password screen opens.
Enter Document Password Screen
im6530, im8130
Page 65
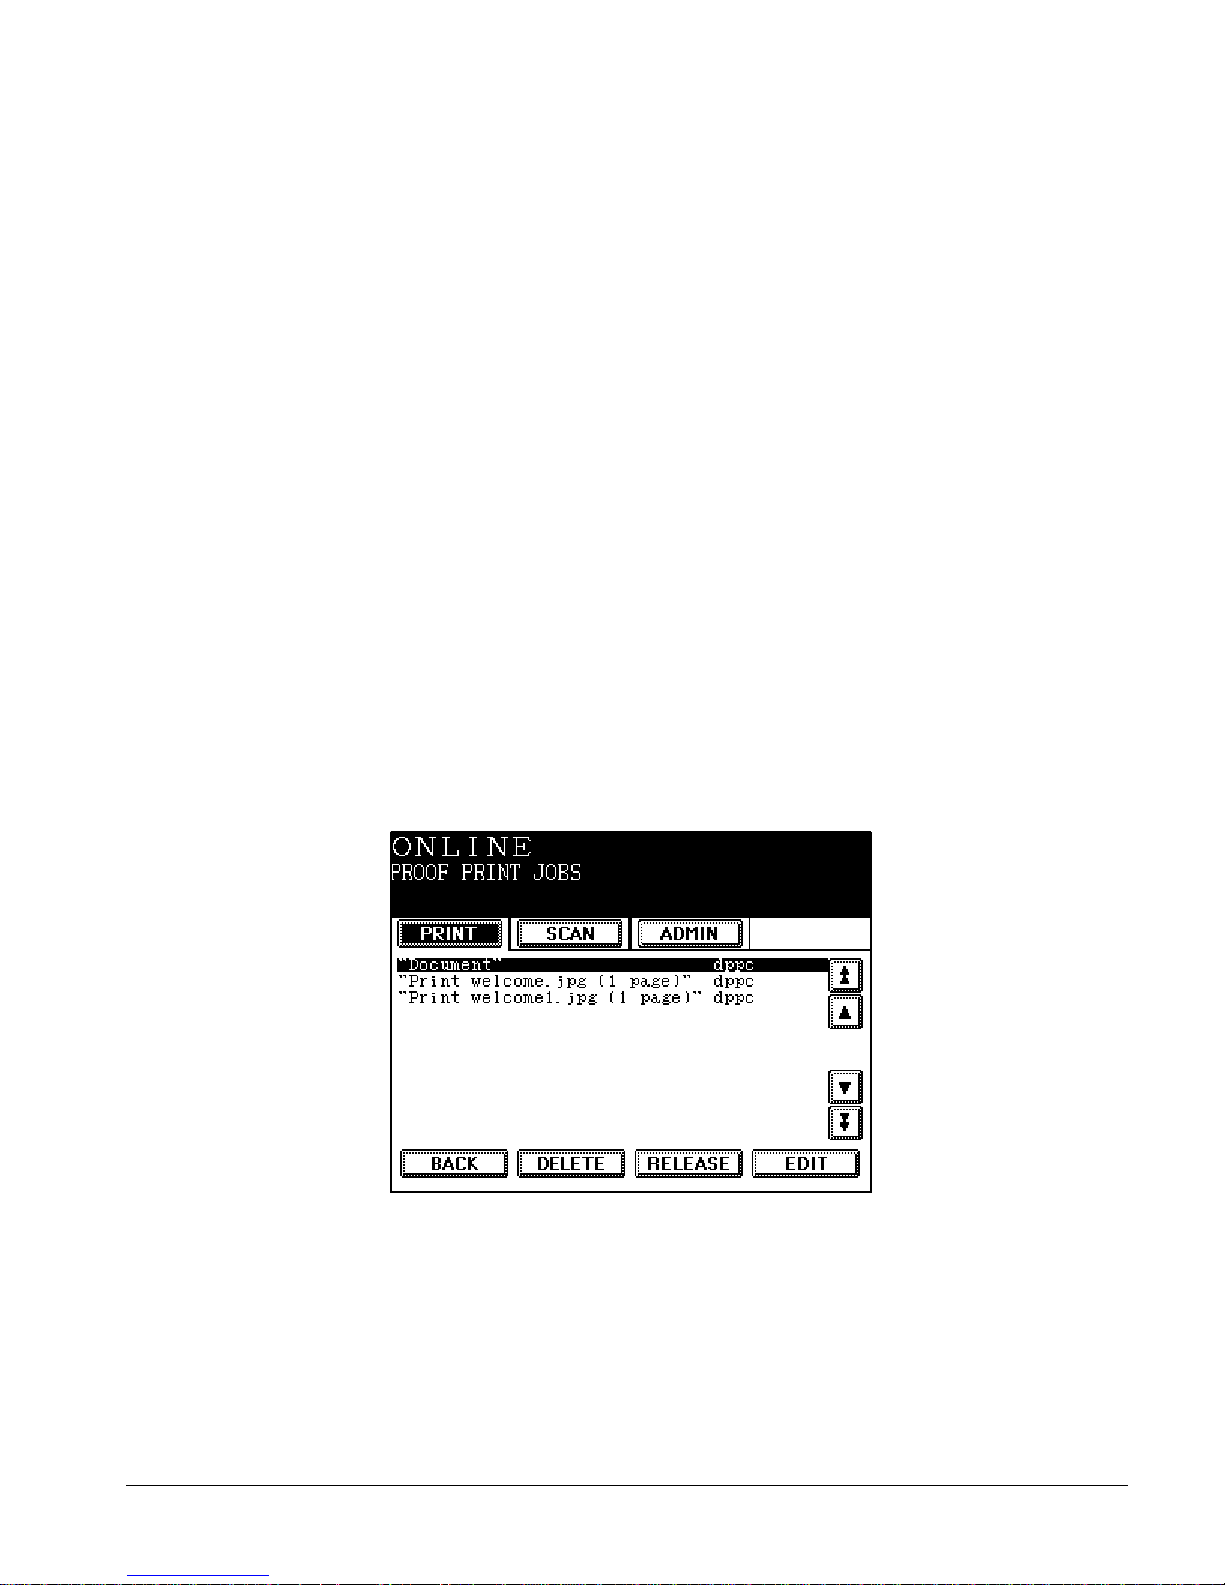
ipc1-im8130 Administrator’s Guide 43
7 Use the control panel numeric keypad to type the five-digit DIN and
press
OK.
If the number you entered is correct, the job is released to the current
jobs print queue. Once the private print job becomes a current job,
manage it like any other current job.
If you do not know or cannot remember the document password, you
must delete the job from the private print jobs queue and resubmit
the job.
Managing Proof Print Jobs
You can view the list of proof print jobs, delete jobs from the list, or
release a job from the queue and print the remaining copies.
Viewing the Proof Print Jobs Queue
To display the list of pending proof print jobs and their status:
1 Press PRINTER/NETWORK.
2 Press the PRINT tab.
3 Press SPECIAL PRINT JOBS.
4 In the Special Print Jobs screen, press PROOF PRINT JOBS.
Proof Print Jobs Screen
im6530, im8130
Page 66
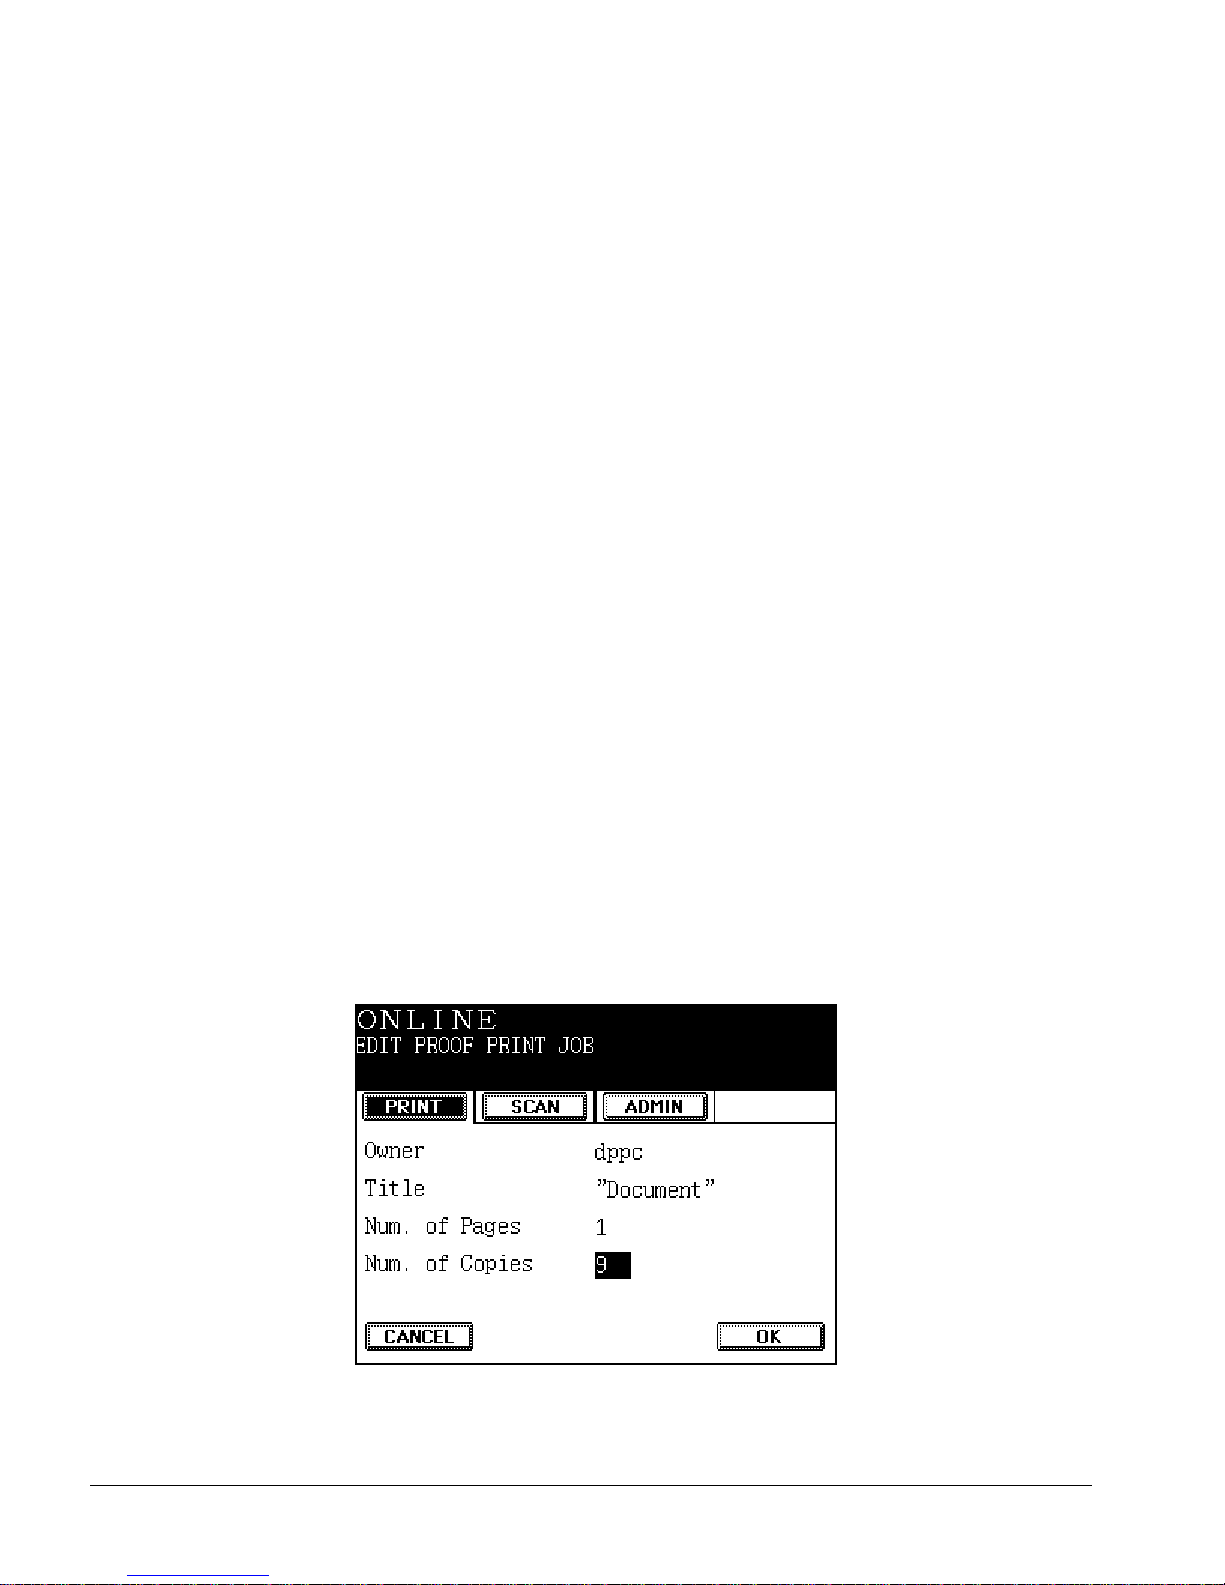
44 ipc1-im8130 Administrator’s Guide
5 When you finish viewing the list, press
BACK to return to the Print
menu.
Deleting a Proof Print Job
1 Press PRINTER/NETWORK.
2 Press the PRINT tab.
3 Press SPECIAL PRINT JOBS.
4 In the Special Print Jobs screen, press PROOF PRINT JOBS.
5 In the Proof Print Jobs screen, scroll to the job you want to delete.
6 Press DELETE. A confirmation message appears.
7 Press DELETE again to remove the job from the print queue.
8 Press BACK to return to the Print menu.
Releasing a Proof Print Job
To print the remaining copies of a proof print job:
1 Press PRINTER/NETWORK.
2 Press the PRINT tab.
3 Press SPECIAL PRINT JOBS.
4 In the Special Print Jobs screen, press PROOF PRINT JOBS.
5 In the Proof Print Jobs screen, scroll to the job you want to print.
6 Press RELEASE.
7 The Edit Proof Print Job screen opens.
Edit Proof Print Job Screen
im6530, im8130
Page 67
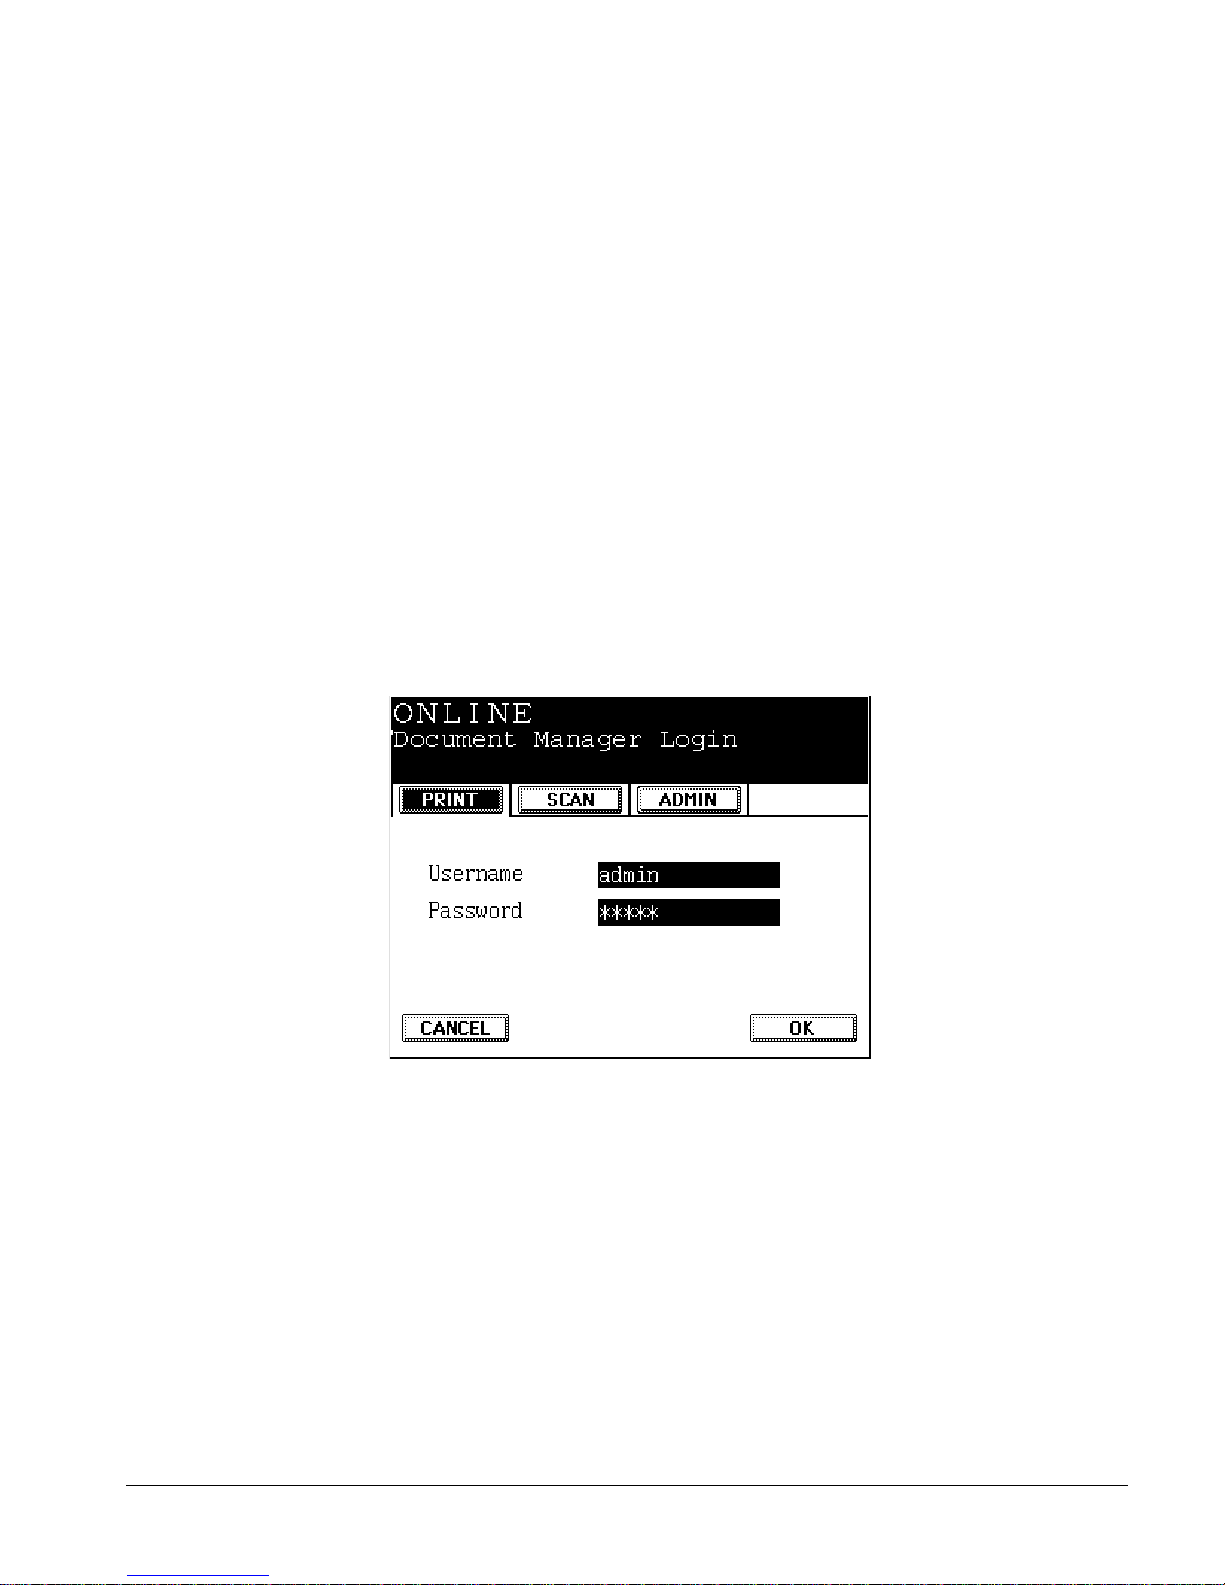
ipc1-im8130 Administrator’s Guide 45
8 The original number of copies selected to print, minus the proof print
copy, appears in
NUM. OF COPIES. If necessary, change the number of
remaining copies using the numeric keypad.
9 Press OK to send the remaining copies to print.
Managing Document Manager Jobs
You can set print properties and print Document Manager jobs from the
copier LCD touch screen.
Releasing Document Manager Jobs
1 Press PRINTER/NETWORK.
2 Press the PRINT tab.
3 Press SPECIAL PRINT JOBS.
4 In the Special Print Jobs screen, press DOCUMENT MANAGER to display
the Document Manager Login screen.
Document Manager Login Screen
5 To access the Department or Private folder, type your user name and
password and press
OK.
To access the Public folder only, press
OK without entering a user
name or password.
im6530, im8130
Page 68
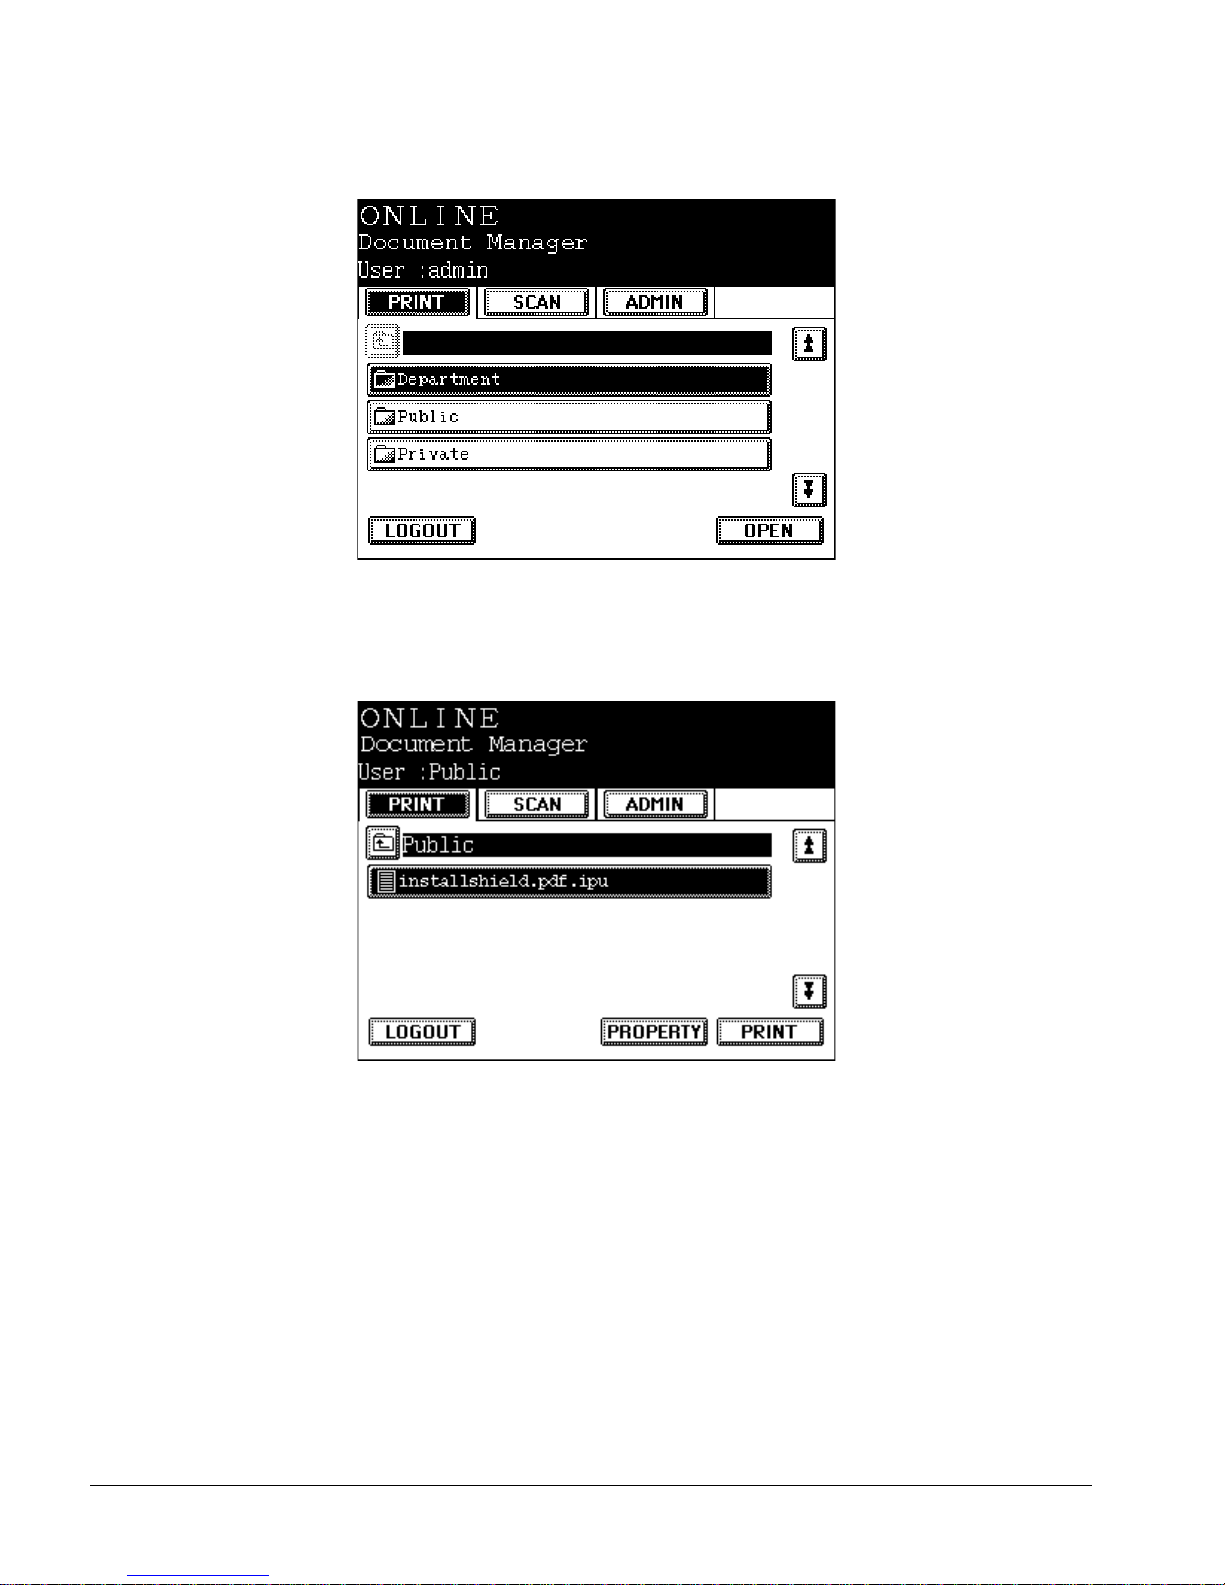
46 ipc1-im8130 Administrator’s Guide
The Document Manager folder screen opens.
Document Manager Folder Screen
6 Press the folder containing the print queue you want to view, and
press
OPEN. The folder contents screen opens.
The Folder Contents Screen
im6530, im8130
Page 69
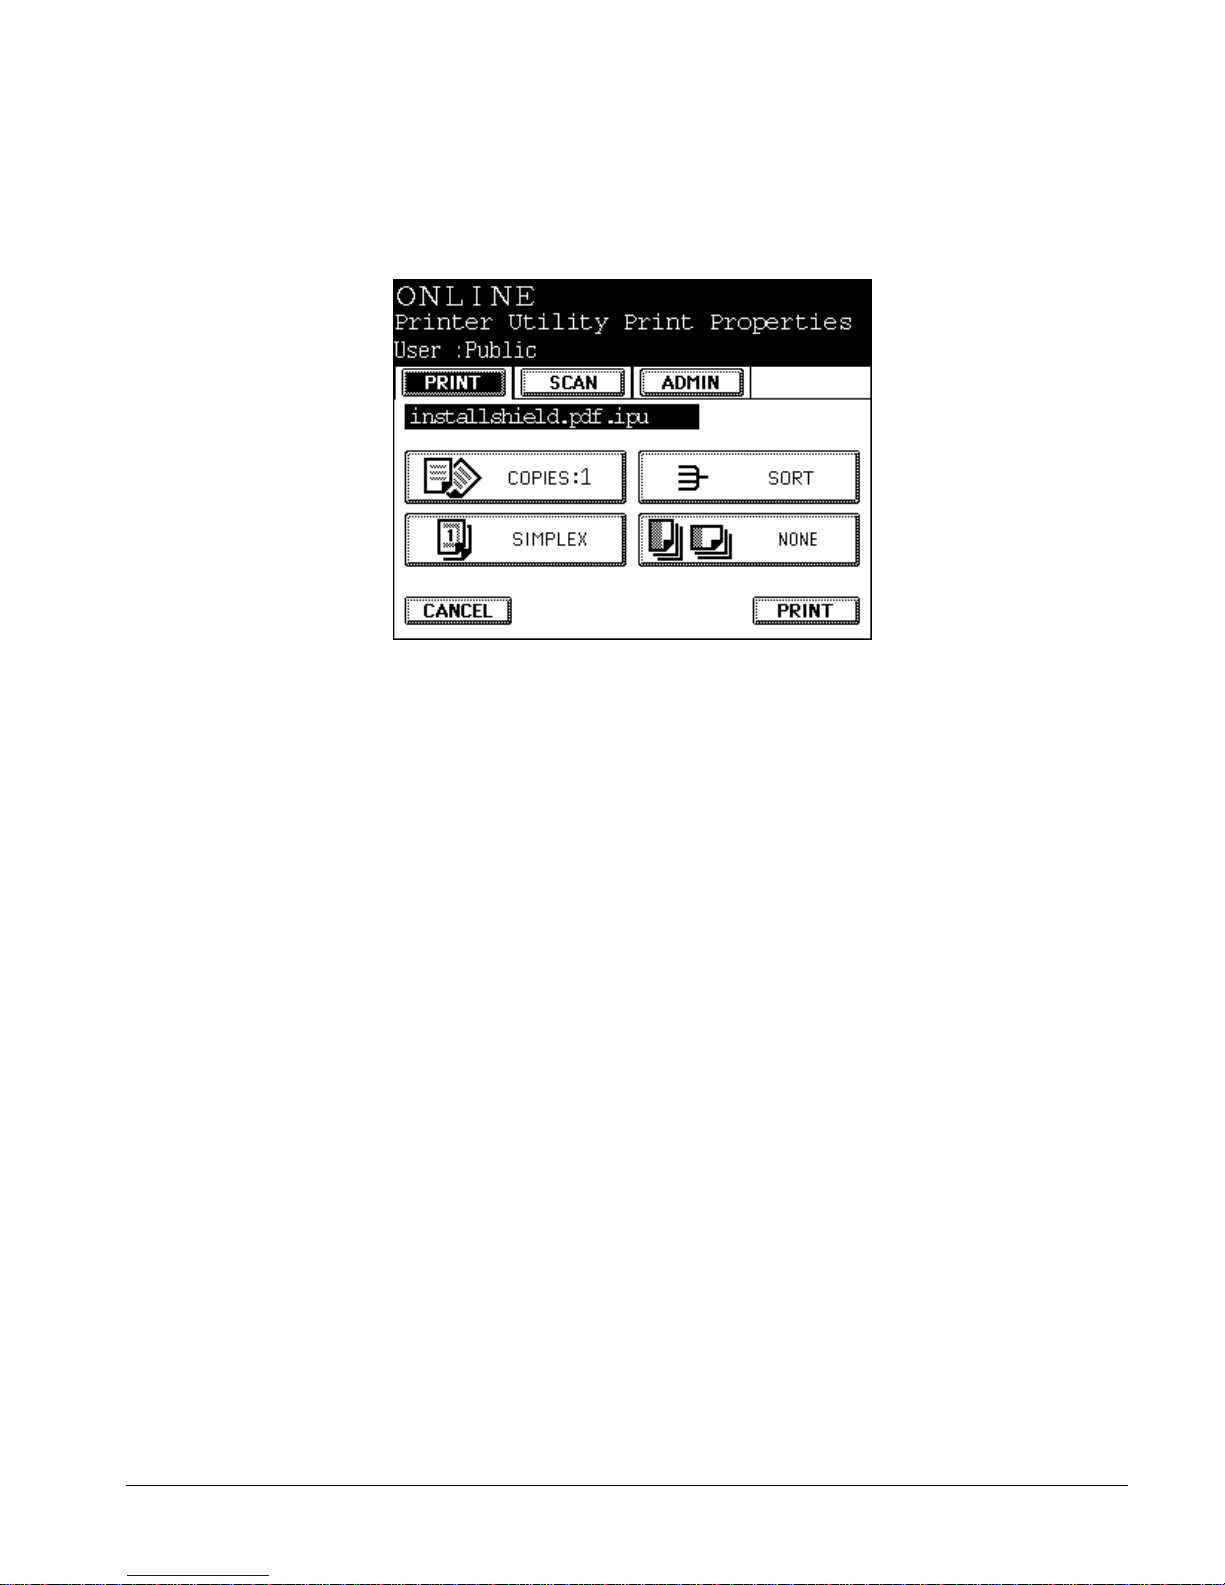
ipc1-im8130 Administrator’s Guide 47
7 Scroll to the job you want to print.
8 To change the print properties, press
PROPERTY.
The Printer Utility Print Properties screen opens.
Printer Utility Print Properties Screen
9 Modify the print settings and press PRINT.
10 Press CANCEL to return to the Document Manager Login screen.
Creating and Using Department Codes
The Electronic Document Processing System uses counters to keep track
of the number of pages printed, copied, and scanned. It displays these
statistics as totals or by department.
Each department has a name and a corresponding five-digit code. With
the department code feature enabled, if you enter a department code
when using the printer drivers, the controller adds the number of printed
pages to the counter for that department. When no department codes
exist, the system assigns all prints, copies etc. to a default department
called UNDEFINED.
If the department code feature is enabled, the administrator may enable
department code enforcement from Printer Utility. If the department code
feature is disabled, the department code enforcement option is
unavailable.
When enabled, this option requires all users to enter a valid department
code to print to the controller.
Note: There is no enforcement of department codes in Unix filters,
Macintosh PPD files, or raw print jobs.
im6530, im8130
Page 70

48 ipc1-im8130 Administrator’s Guide
Enabling Department Codes
You enable or disable the department code feature from the copier control
panel. You cannot enable department codes until the administrator has
created the master department code. The administrator can use Printer
Utility to see whether the department code feature is enabled.
Enabling Department Code Enforcement
1 Log in to Printer Utility as the administrator.
2 Click the Administration tab.
3 Click the Device submenu.
4 From the Department Code Enforcement drop-down menu, click Enable.
5 Click Save.
Creating the Master Department Code
You create department codes from the copier control panel or using
Printer Utility. The first department code must be created through the
copier control panel. It becomes the master department code. The person
in possession of this code has access to all other codes.
Once the master department code exists, you can create, edit, or delete
other department codes from the copier control panel or using Printer
Utility. For more information on creating department codes from the
control panel, see the Operator’s Guide for Copying Functions.
Creating Additional Department Codes
1 In Printer Utility, click the Counters tab.
2 Click the Copy/Print submenu.
3In the
Enter a department code to access department counters field enter the
master department code.
4 Click
Enter.
5 Click
New. The Add New Department Code window appears.
6 Enter the new department code and the new department name.
Note: The system supports a maximum of 500 department codes.
im6530, im8130
Page 71

ipc1-im8130 Administrator’s Guide 49
7 Click
OK.
Displaying Print and Copy Totals
Regardless of whether the department code feature is enabled, you can
click the Counters tab in Printer Utility to display the print and copy
totals.
Department Code Functionality
There are three possible cases:
The department code feature is disabled
The department code feature is enabled, but enforcement is not
Both the department code feature and the enforcement option are
enabled.
Department Code Feature is Disabled
In this case:
The controller ignores any department codes submitted with a print
job and does not prompt you to enter the code. This applies to all
jobs, including raw and non-Windows operating system jobs.
In the printer drivers, the Department Code label and Edit field are
disabled.
In Printer Utility, the Enforce Department Codes option is unavailable.
Only the Department Code Feature is Enabled
If the department code feature is enabled but enforcement is disabled:
In the printer drivers, the controller enables the Department Code label
and Edit fields.
If you enter a department code, the controller reports the code to the
copier and includes it in the print job, but does not check the validity
of the code.
Similarly, if a Macintosh, Unix, or raw print job includes a
department code, the code is not checked.
In Top Access, the Enforce Department Codes option is available.
VALID DEPARTMENT CODES
If the department code is valid, the system increments the appropriate
department counter.
im6530, im8130
Page 72

50 ipc1-im8130 Administrator’s Guide
If you enter a valid department code other than the master department
code, Printer Utility displays the counter totals for the department. You
cannot change any counters.
If you enter the master department code, Printer Utility displays the
counter totals and the counters for all departments. You can reset the
counters of any department, but you cannot change the total counters.
You can also delete any department and its code.
You can export the displayed counter information to a .CSV file.
I
NVALID DEPARTMENT CODES
In Printer Utility, if you enter an invalid department code you are
prompted to enter a valid code.
In the printer drivers, if you supply an invalid department code, the
system increments the UNDEFINED department counter.
Both Department Code and Enforcement are Enabled
If both the department code feature and the enforcement option are
enabled:
In the printer drivers, you must enter a department code. The
controller not only reports the department code to the copier, but also
confirms its validity with the copier.
If the code is valid, the controller queues the job for printing.
In Printer Utility, the administrator may disable department code
enforcement.
VALID DEPARTMENT CODES
The system handles these in the same way as when enforcement is
disabled. See Valid Department Codes on page 49 for details.
H
OLDING JOBS WITH INVALID DEPARTMENT CODES
If the department code is invalid, the controller puts the job on hold in the
Invalid Department Code (IDC) queue. The IDC job icon is enabled on the
copier LCD touch screen. Press it to see the list of all jobs with invalid
department codes.
The controller processes Macintosh, Unix, and raw print jobs that lack a
valid department code as IDC jobs.
Printer Utility adds a submenu for IDC jobs, called Invalid, to the Print
Jobs tab.
im6530, im8130
Page 73

ipc1-im8130 Administrator’s Guide 51
R
ELEASING IDC JOBS
To release jobs held in the IDC queues for processing, enter a valid
department code or the master department code at the copier control
panel.
After release, the controller queues the job for printing.
PURGING UNRELEASED IDC JOBS
The controller purges unreleased IDC jobs according to the Number of days
to save Private, Proof & Invalid Print Jobs
entry in Printer Utility and recorded in
the jobs log.
PROCESSING DOCUMENT MANAGER JOBS
Document Manager and Document Manager Print jobs also require a
valid department code. If the code is invalid, the controller processes the
Document Manager portion of the job normally and stores the document
in Document Manager. It treats the Print portion of the job as an IDC job.
im6530, im8130
Page 74

52 ipc1-im8130 Administrator’s Guide
im6530, im8130
Page 75
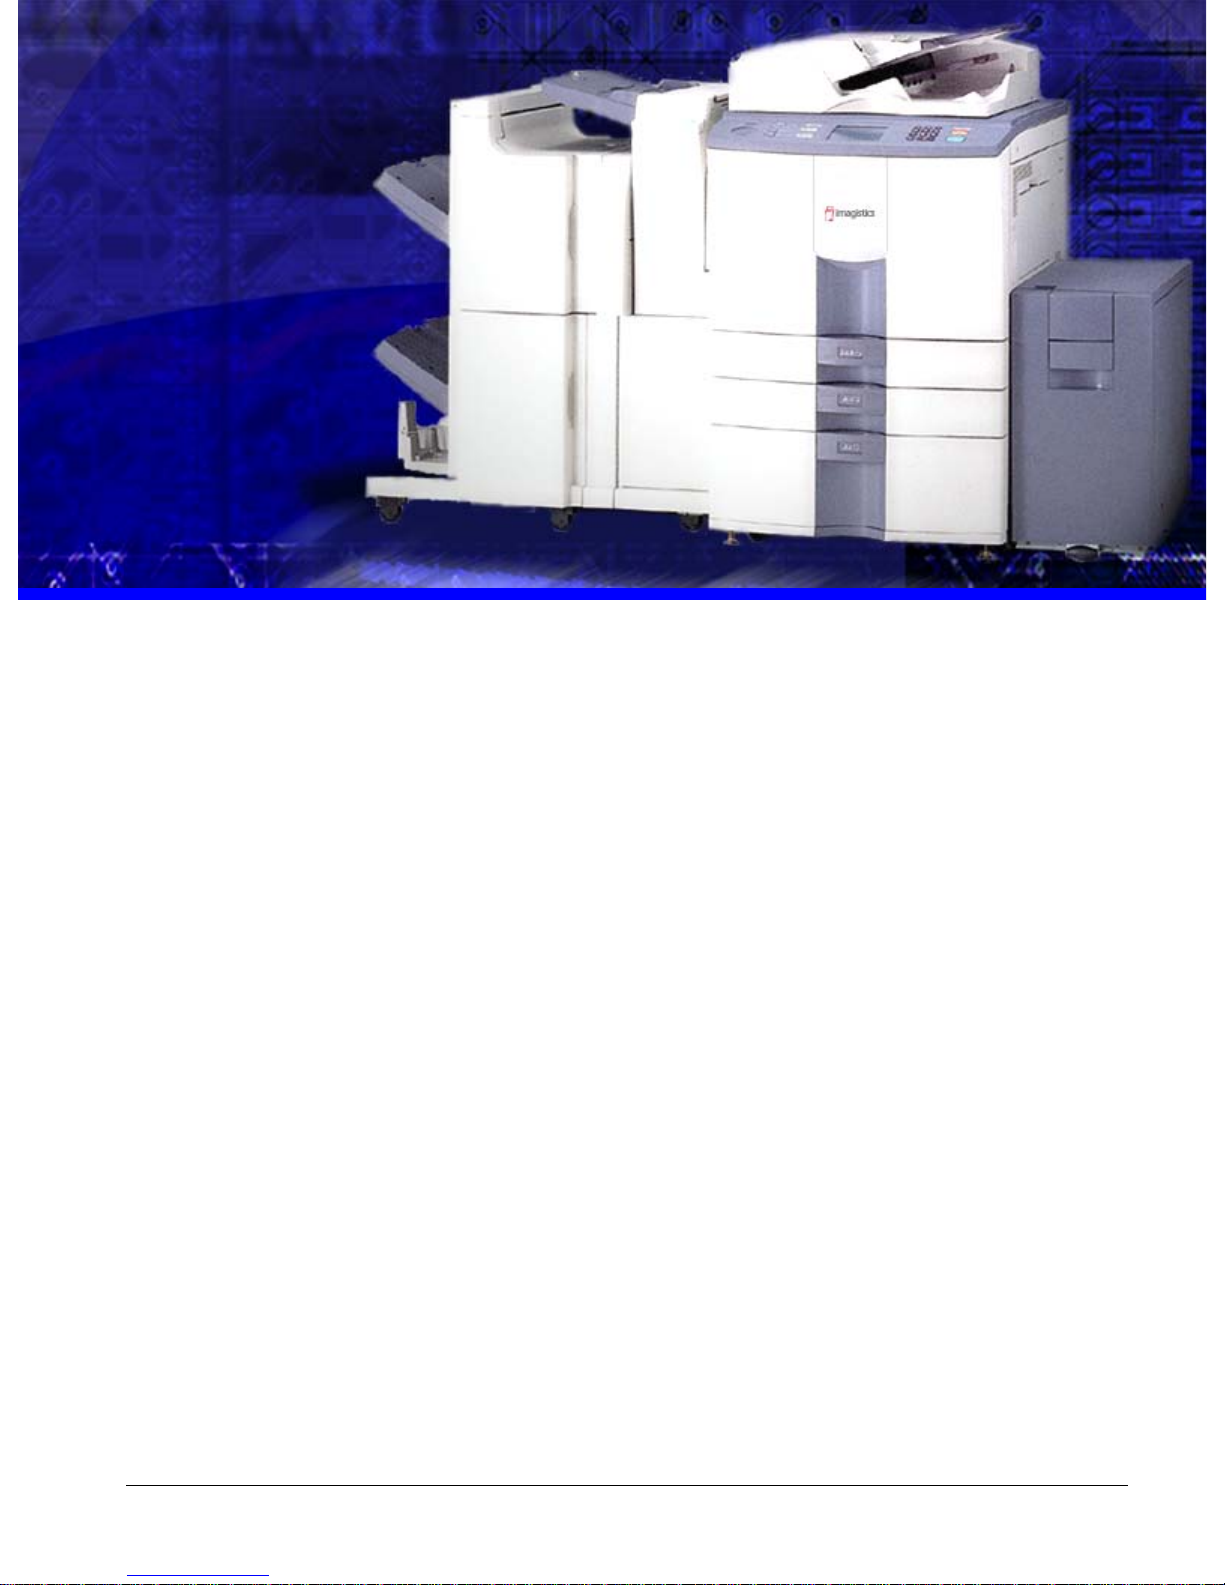
ipc1-im8130 Administrator’s Guide 53
3 MODIFYING CONTROLLER SETTINGS REMOTELY
Imagistics’s web-based device and job administration utility, Printer
Utility, allows administrators to configure device and network settings,
monitor and manage jobs, and diagnose network printing errors. As the
administrator, you can also use Printer Utility to remotely configure all of
the device and network configuration options you set from the copier
control panel LCD.
End users may use Printer Utility to view general information, device
status alerts and messages, and scan details.
This chapter explains how to configure the controller using the
administrative functions of Printer Utility. The Operator’s Guide
documents end-user functions.
im6530, im8130
Page 76

54 ipc1-im8130 Administrator’s Guide
Overview
Printer Utility has two web sites available. One site is designed for end
users and the other is for administrators.
The end-user site displays controller and scan job status as well as
enabling users to create and maintain private groups and templates.
The administrator site enables you to configure controller settings,
conduct maintenance, and update the address book, public group,
and public templates.
With Printer Utility, administrators and service engineers can:
View controller status
Configure controller and network properties
Set up default print options
View and modify job queues
View and modify copier attributes
View cassette/accessory configuration
View and clear the log files for jobs, messages, and counters
Locate other Imagistics devices on the network
Upload client software to the network
Install client software
Initiate a scan
With Printer Utility, end users can:
View general copier information including controller status and alerts
View cassette/accessory configuration
View and modify the status of your jobs
View the counter logs
Locate other Imagistics devices on the network
Install client software
Note: Because Printer Utility uses cookies to store persistent
information on your system, you must have cookies enabled in your
browser for Printer Utility to work correctly.
System Requirements
Before installing the software, make sure your network and client
workstations meet the following minimum requirements:
im6530, im8130
Page 77

ipc1-im8130 Administrator’s Guide 55
Operating System and Networking Requirements
Windows
98
Novell Client v3.1 and Client Service Pack 1 are required to run
IPX-based SNMP access and Novell printing.
The Microsoft Client for NetWare can replace the Novell Client
except for NDPS printers.
Windows Me
Novell Client v3.3 is required to run IPX-based SNMP access and
Novell printing.
The Microsoft Client for NetWare can replace the Novell Client
except for NDPS printers.
Windows NT 4.0
Microsoft Service Pack 6A or higher
Novell Client v4.6 or higher with Z.E.N works Starter Pack and
Service Pack 1 are required to run IPX-based SNMP access and
Novell printing.
The Microsoft Client for NetWare can replace the Novell Client
except for NDPS printers.
Windows 2000
Microsoft Windows 2000 Service Pack 1 or higher
Novell Client v4.7 or higher with Z.E.N works Starter Pack is
required to run IPX-based SNMP access and Novell printing.
The Microsoft Client for NetWare can replace the Novell Client
except for NDPS printers.
Windows XP
Novell Client v4.82 or higher is required to run IPX-based SNMP
access and Novell printing.
The Microsoft Client for NetWare can replace the Novell Client
except for NDPS printers.
im6530, im8130
Page 78

56 ipc1-im8130 Administrator’s Guide
Macintosh
Operating System version 8.0, 8.5, 8.6, 9.0, or Mac OS X
LaserWriter 8 printer driver
Unix
SPARC platform running Solaris v 2.5x, 2.6, or 7.0
PA-RISC platform running HP-UX
RS6000 platform running IBM AIX 4.3.x
Linux platforms
E-mail Requirement
E-mail software must be installed to use the Send to E-mail function.
Supported Browsers
You can use the Printer Utility from a Windows, Macintosh, or Unix
operating system environment. The following browsers are supported:
Internet Explorer 5.0 or higher for the Windows operating system
Internet Explorer 5.0+ or Netscape Navigator 4.78 or higher for
Macintosh
Internet Explorer 5.0+ or Netscape Navigator 4.76 or higher for Unix
Other TCP/IP-enabled browsers.
Note: Other TCP/IP-enabled browsers have not been tested and may
produce unpredictable results.
Opening Printer Utility
To navigate to Printer Utility, enter the following URL on the search line of
your Internet browser.
http://<IP Address> or http://<Device Name>
where <IP Address> is the IP address of the controller and <Device Name>
is the device name of the controller.
For example:
http://159.119.44.234 or http://myipc1-im8130
The Printer Utility web page opens.
im6530, im8130
Page 79
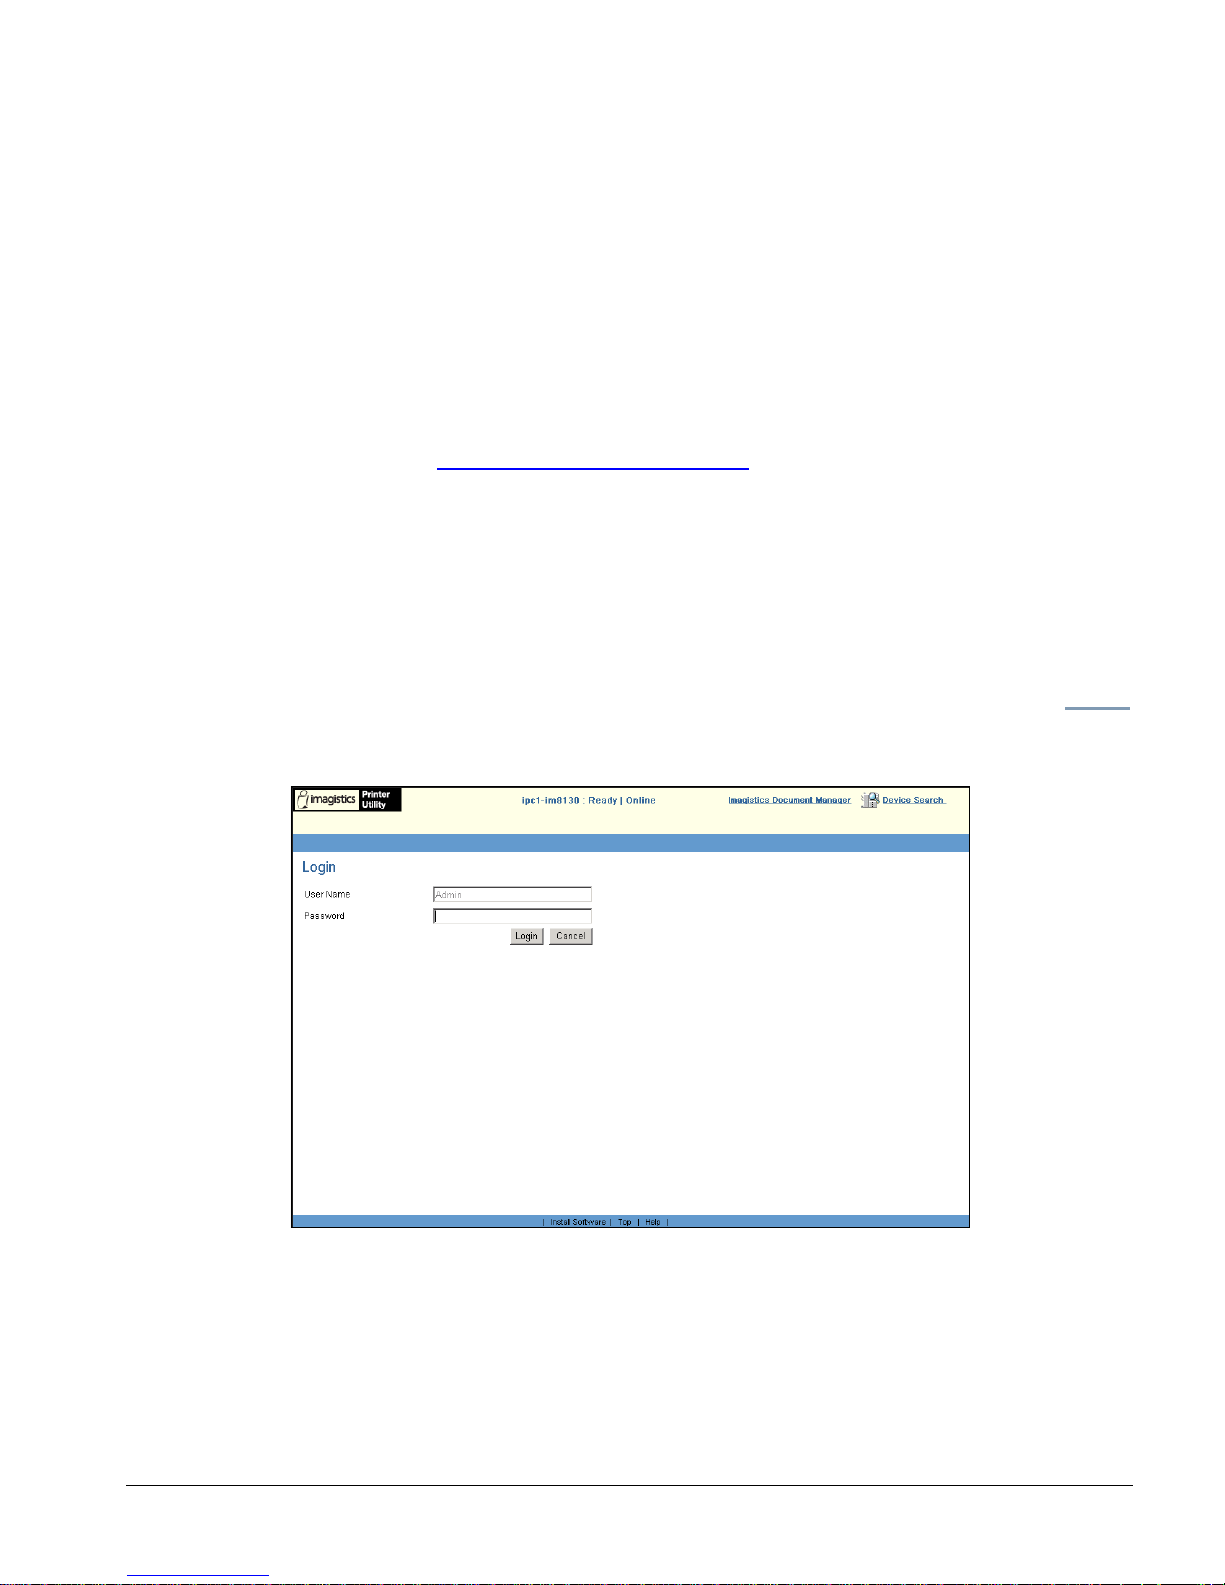
ipc1-im8130 Administrator’s Guide 57
Using the ipc1 Document Monitor Link
1 Right-click the ipc1 Document Monitor icon.
2 Select the printer driver associated with the Imagistics controller.
3 Select Printer Utility.
Logging In
When you start Printer Utility, it opens the start page defined on the
Preferences page. The default start page is the Device page. To change
this page, see Setting Your Preferences on page 69.
End users are not required to log in to use Printer Utility. Administrators
are required to log in for particular functions. After Printer Utility has
verified name and password, Printer Utility grants an administrator
access to the Administration page for device management.
Log in as the Administrator
1 At the top right-hand corner of the Printer Utility window, click Login
The Login page opens.
Printer Utility Login Page
2 Enter the administrator user name and password.
This is the same password used at the LCD touch screen to log in for
administrative functions.
im6530, im8130
Page 80

58 ipc1-im8130 Administrator’s Guide
The default administrator user name is “Admin” and the default
password is
“12345”.
If you have not set the user name and password, use the defaults and
change the password immediately to maintain secure access.
For instructions on setting the administrator password, see Setting
the Administrator Password on page 66.
3 To cancel the login process click Cancel.
Printer Utility returns you to the page you came from.
Note: Clicking Login with an invalid password (or no password while a
password has been set) causes the message “Invalid Password” to
display in the Login page. You can then either click Cancel to cancel
the login or log in again with a valid password.
Logging Out
To log out, click the Logout link in the top, right-hand corner of the
Printer Utility window.
Clicking Logout changes the menu and tabs from those for the
administrator to those for the user and the Logout link in the upper right
corner changes to Login.
Note: Clicking Logout when you are in an Administration page takes
you either to the first end-user version of the current menu or to the
first non-administrative page of the next higher-level menu, if the
current menu has no end-user page.
If the current top-level menu is the Administration tab, Printer Utility
takes you to the start page, which you define on the Preferences page.
Auto Log Out
Printer Utility automatically logs out the administrator after a period of
inactivity. You, as the administrator, can define this period, between five
and 120 minutes, on the Preferences page. The user screen does not
change.
im6530, im8130
Page 81
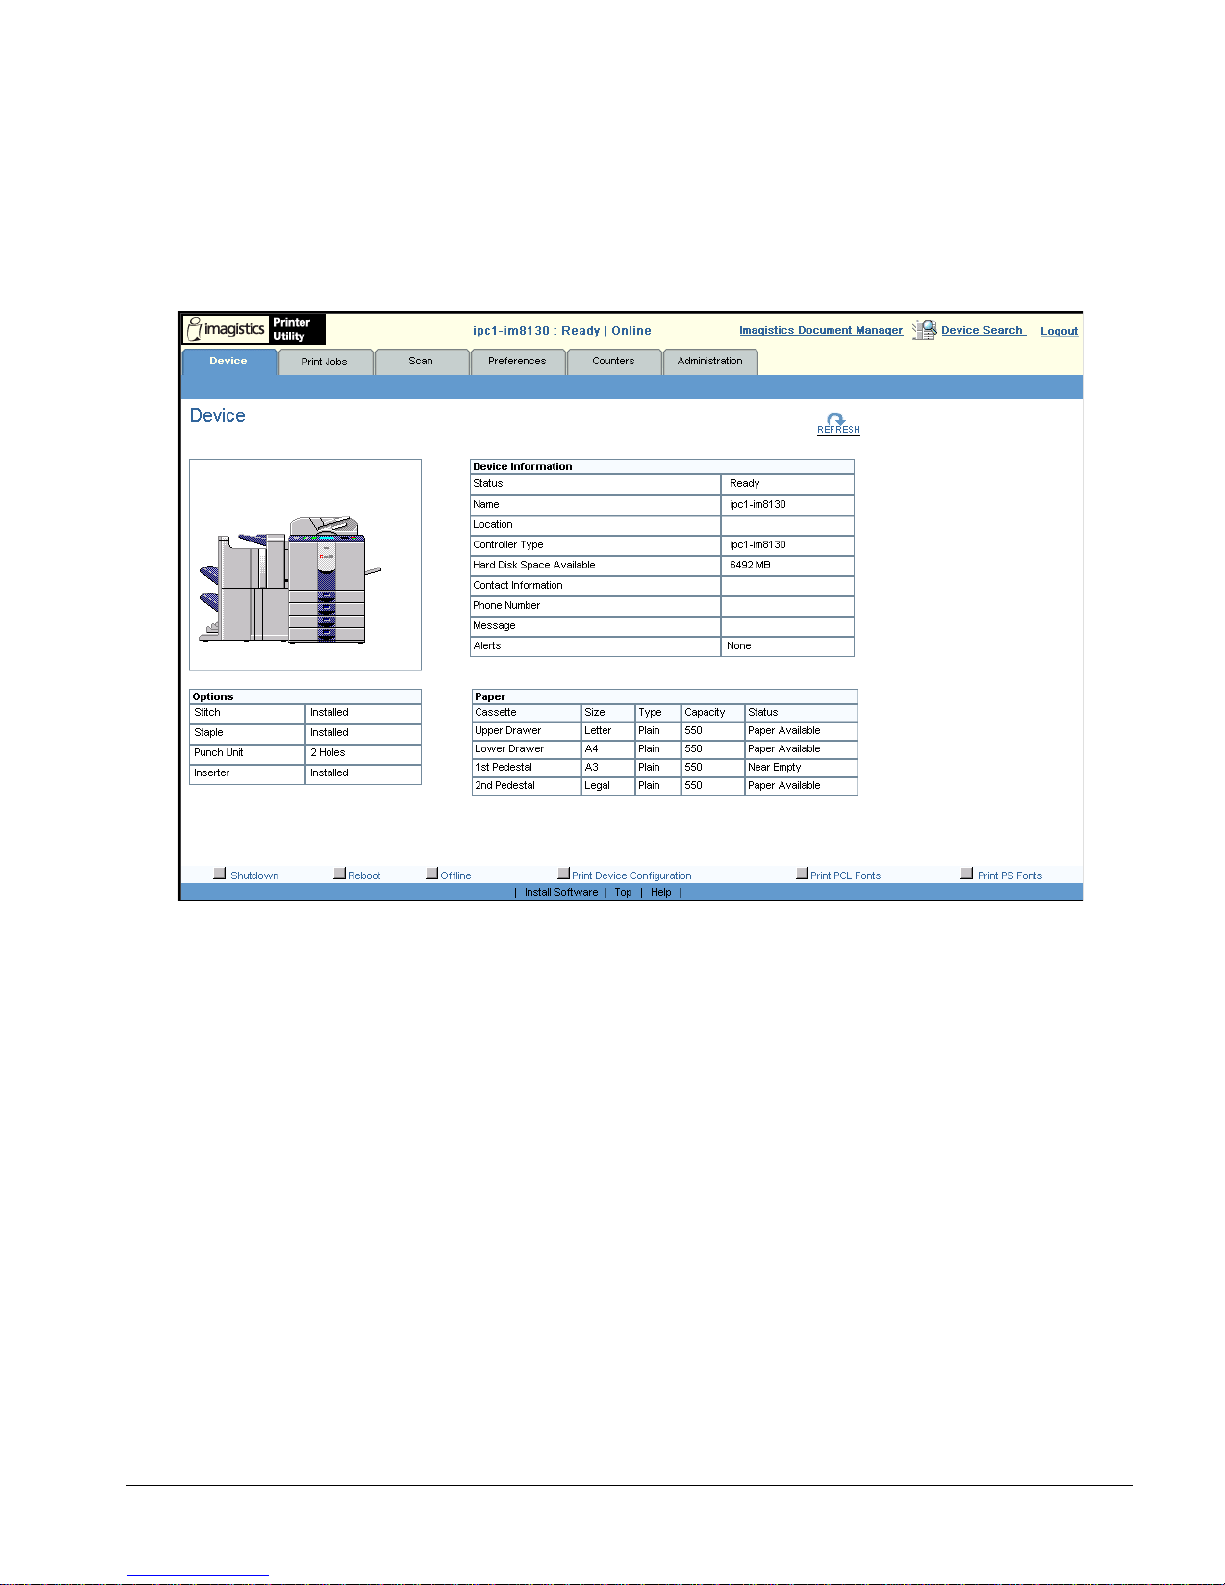
ipc1-im8130 Administrator’s Guide 59
Navigating in the Printer Utility Home Page
The Printer Utility Home Page or Main page is the general information
page and opens when you launch the application. From here, you can
initiate most device monitoring and management functions.
The Printer Utility Home Page
The Printer Utility home page contains a header area, body area, and a
footer area.
The header area includes:
The Printer Utility logo
Device and communications status (Ready/Alert and Online/Offline)
Short-cut access to Document Manager
Short-cut access to Device Search
Short-cut access to the Login page or the Logout command
A menu bar to provide access to the main pages of Printer Utility
A submenu bar
The body frame displays the main menu items as well as icon links to the
menu items.
im6530, im8130
Page 82
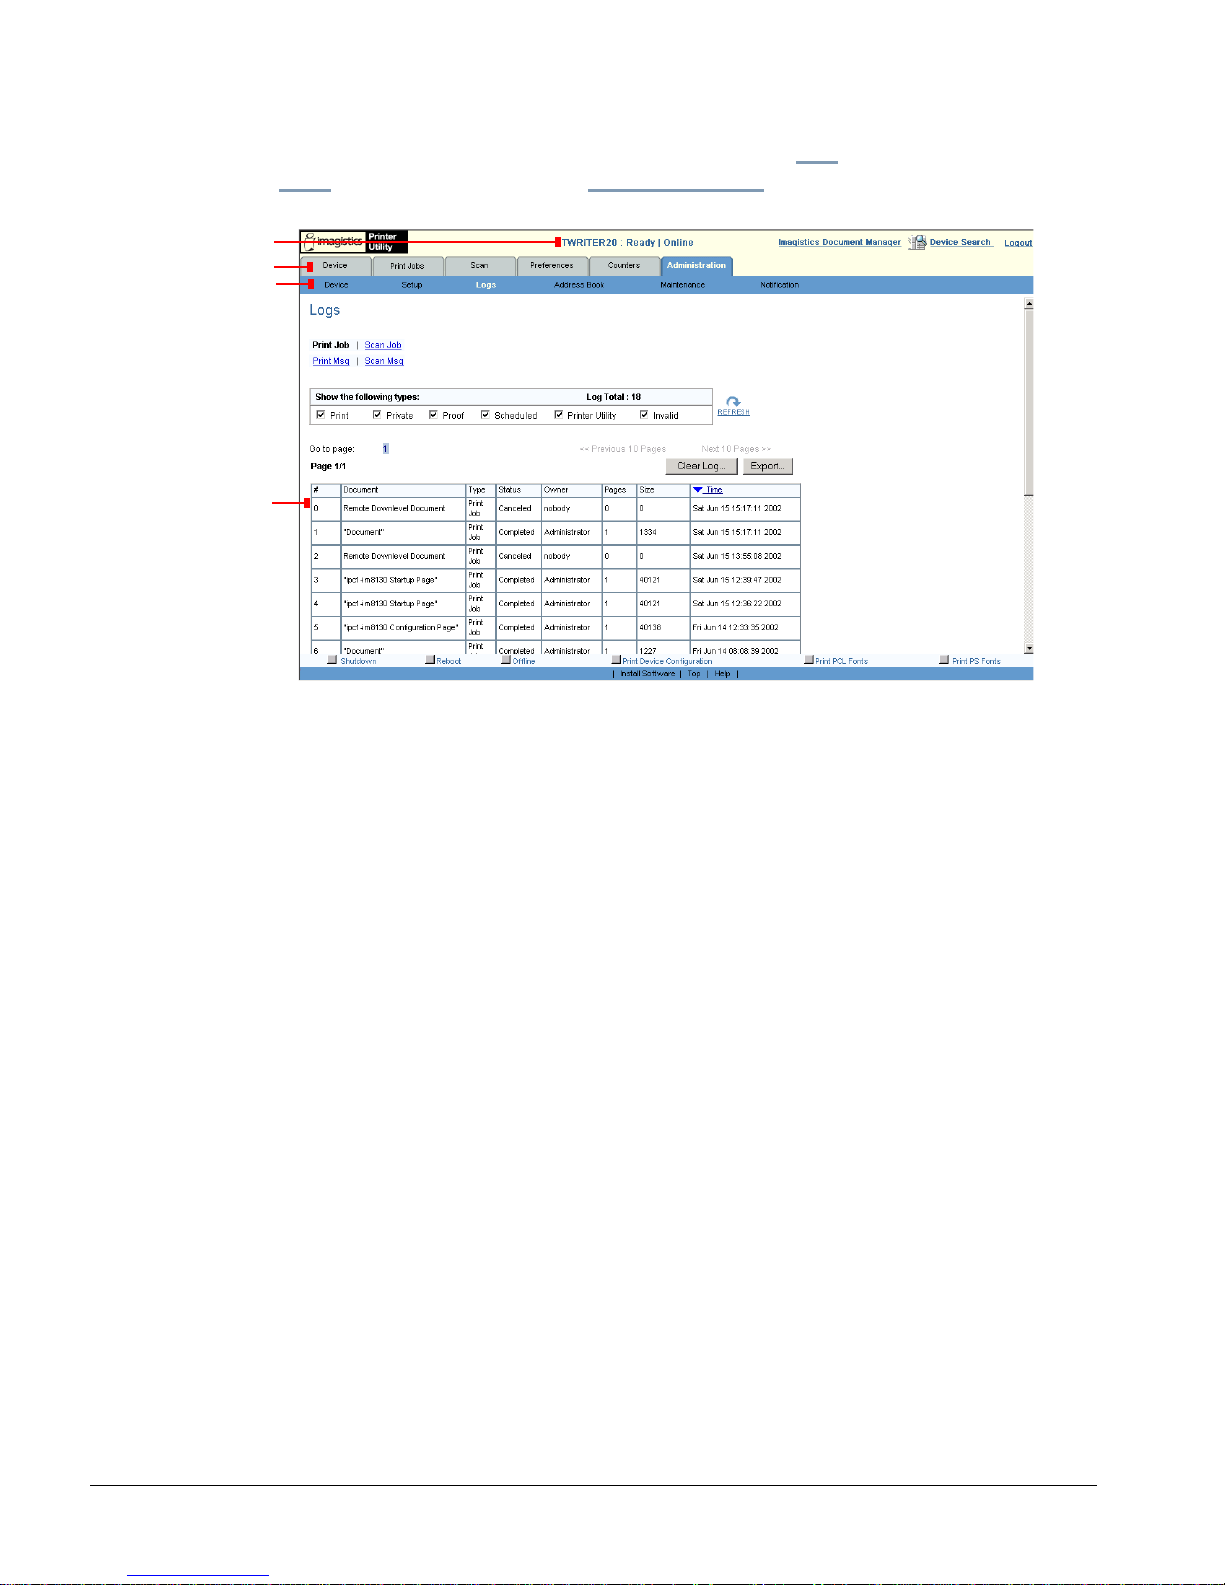
60 ipc1-im8130 Administrator’s Guide
The footer area contains navigation links to the Top
of the current page,
the Help information, and the Install Software feature.
Printer Utility User Interface
The Status line shows the current state of the device.
Click a tab to select a desired function. Each tab may have additional tabs
and menus enabling you to find the detailed information you need.
When you initially open the Printer Utility web site, you have access to
functions like viewing device settings and the print queues. You must log
in as an administrator to perform administrative functions.
Accessing Online Help
Online help is a fast and simple way to find the answers to questions you
may have about using an application. This section explains how to access
and search the online help for the Electronic Document Processing
System from a workstation running the Windows operating system.
Printer Driver Online Help
To access the printer driver Help, click the Help button from any property
page, and then click the
Contents link at the top of the page. This opens the
complete online help system.
Function tabs
Detail
Submenu
Status
im6530, im8130
Page 83

ipc1-im8130 Administrator’s Guide 61
ipc1 Document Monitor Online Help
To access the help system for ipc1 Document Monitor, choose Contents and
Index
from the Help menu or click the Help button at the bottom of the
page.
Using Online Help
Printer Utility Help
Printer Utility includes extensive web-based help to assist you in
performing both end-user and administrative functions. The help system
organizes information into task-oriented, procedural topics so that you
can easily perform your monitoring and management jobs.
To access the web help topics and index from Printer Utility, click the Help
link at the bottom of the page.
How to Find a Help Topic
In Help, click one of the following tabs:
To browse through topics by category, click the Contents tab.
Topics are organized into books. Double-click the book or click the
plus sign to the left of the book to expand the list of related help
topics. To collapse the topic, simply click the link once more. Also,
within most topics, you can see related topics by clicking the Related
Topics
button.
Within a topic, click the Related Topics links to jump to step-by-step
procedures.
To see a list of index entries, click the Index tab, and either type a word
or scroll through the list.
To search for words or phrases that may be contained in a Help topic,
click the
Search tab.
In the left frame of the Help window, click the topic, index entry, or phrase
to display the corresponding topic in the right frame.
im6530, im8130
Page 84
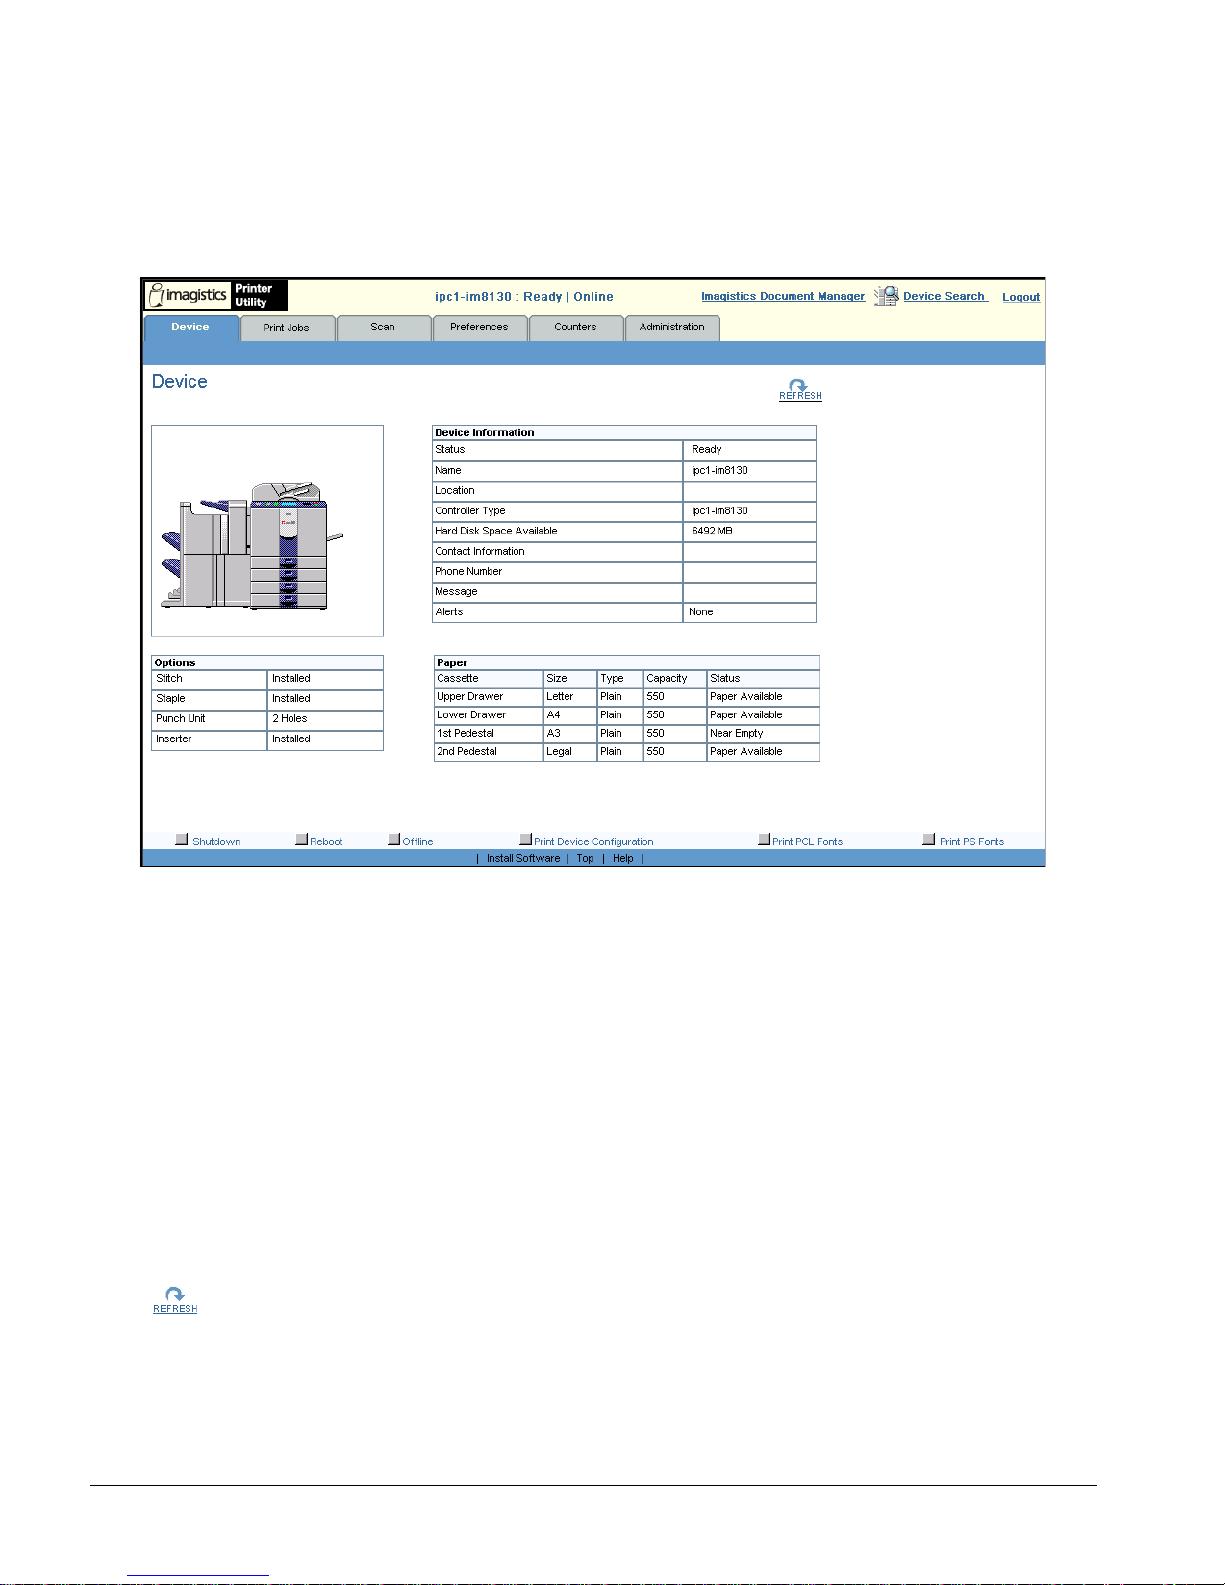
62 ipc1-im8130 Administrator’s Guide
Checking Device Status
Printer Utility opens to the Device tab, which includes an illustration of
the device.
Printer Utility Device Status
This tab shows the following information about the controller:
Device status, which can be Ready or a number that identifies an
alert condition. Errors are in red and warnings are in yellow.
Device name and location.
The contact name and phone number for the person responsible for
managing the controller.
Paper trays on this device (media size, media types, cassettes, and
their status).
List of optional components installed on the device.
Administrative message.
At any time, you can click
Refresh to update the Printer Utility status
information.
im6530, im8130
Page 85
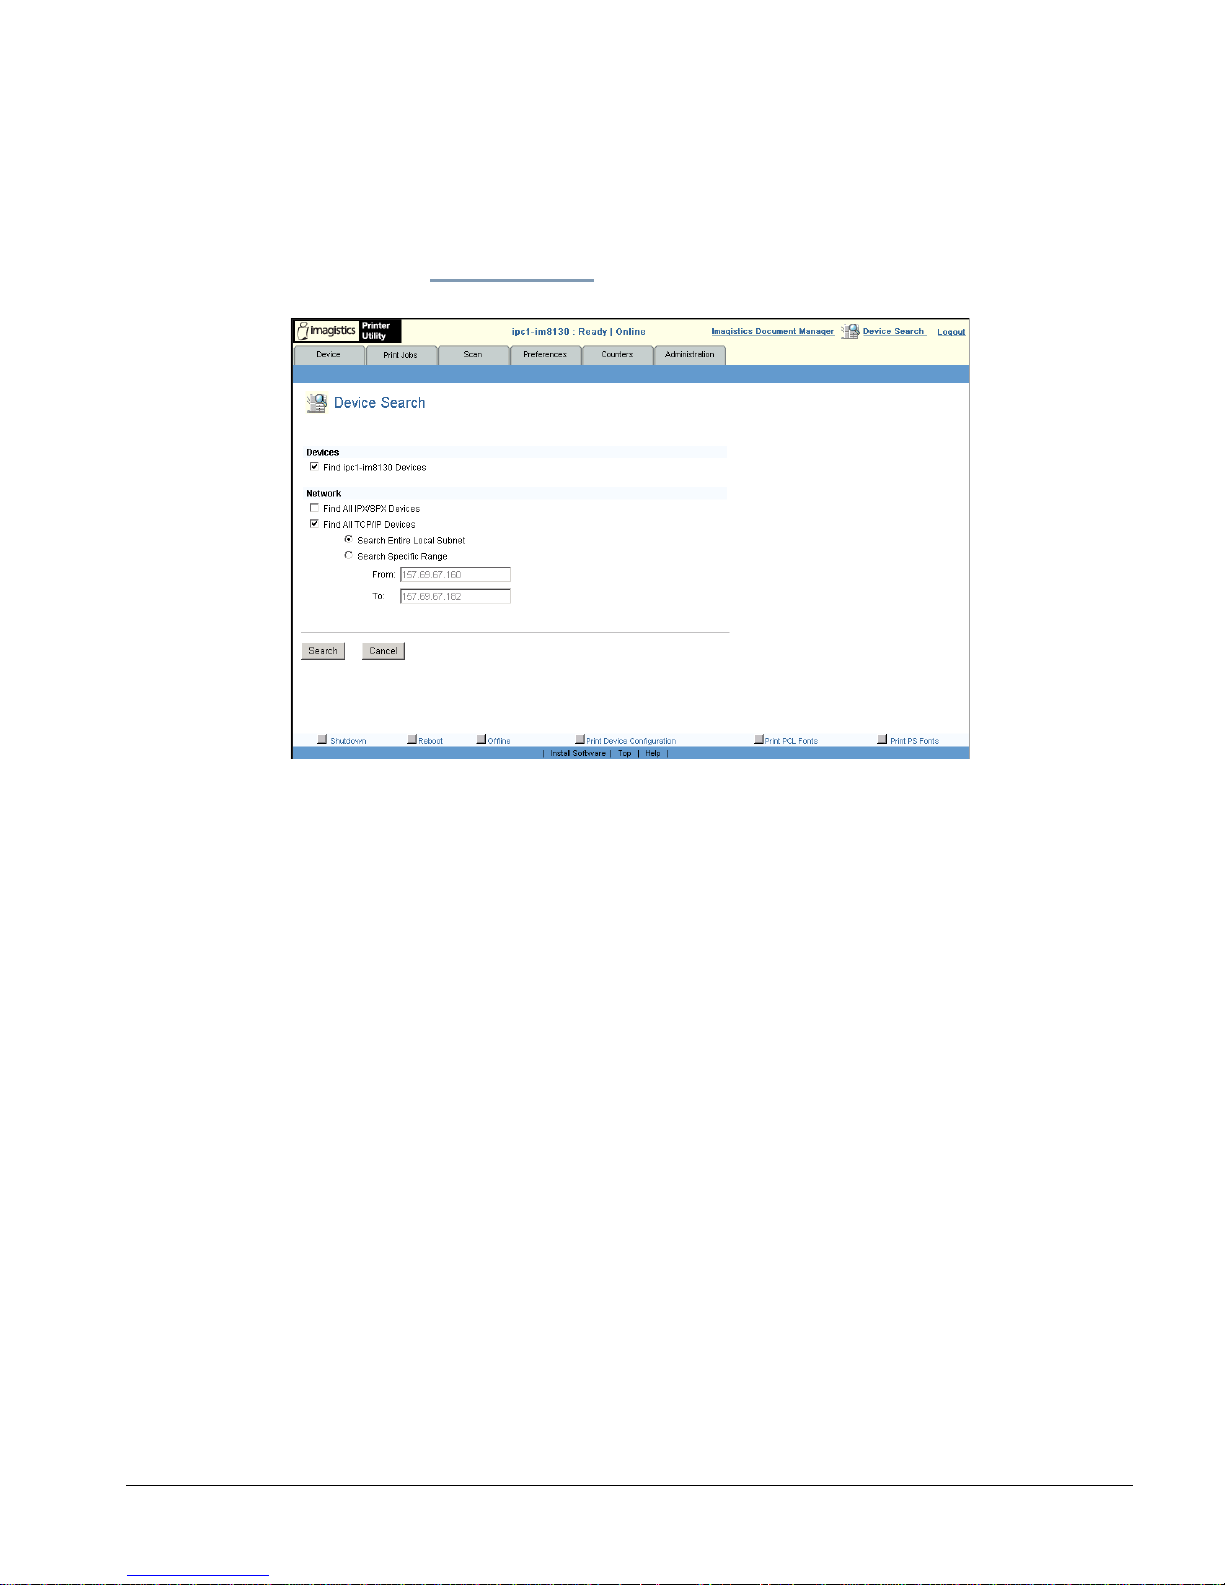
ipc1-im8130 Administrator’s Guide 63
Finding and Connecting to Devices
You can locate and connect to all other Imagistics controllers on your
network.
1 Click the Device Search link.
Device Search
2 Check the boxes to select the devices and network protocol.
3 Click Search. Printer Utility displays the results of your device search.
4 Find the controller you want to connect to in the Device Search Results
list and click the corresponding link. A browser window containing
the Printer Utility screen for the selected device opens.
Managing Print Jobs
Using Printer Utility, you can view, delete, and release print jobs.
You can manage your own jobs while the administrators can manage all
jobs.
im6530, im8130
Page 86
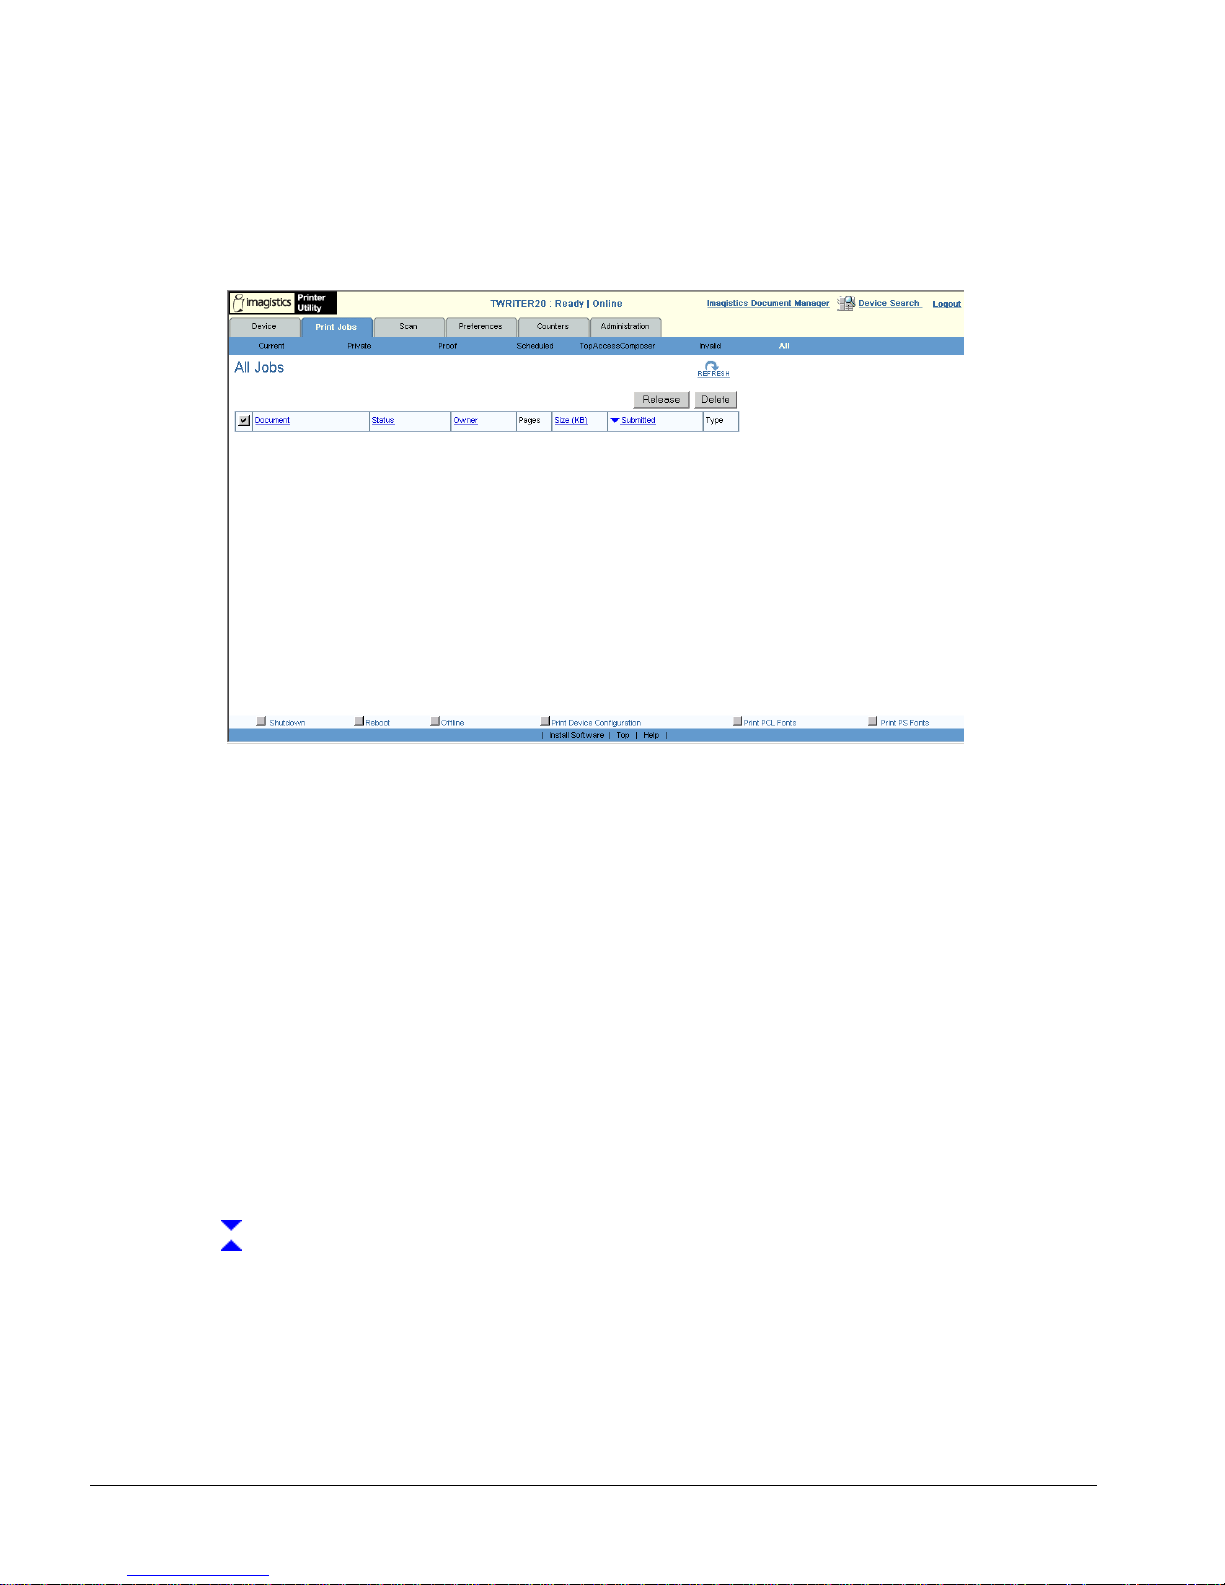
64 ipc1-im8130 Administrator’s Guide
Viewing Print Jobs
To view the jobs in the various queues:
1 Click the Print or Scan Jobs tab. Current Jobs is the default page.
Print Jobs Page
The Print Jobs page displays links to these job types:
Private Jobs
Proof Jobs
Scheduled Jobs
Document Manager Jobs
Invalid Jobs: those jobs submitted with an invalid department
code
All Jobs
2 To update the information on the page, click
Refresh in the right
corner.
3 To sort the results, click a heading.
The page refreshes and a small triangle on the column heading
indicates the sort sequence. The direction of the triangle indicates
ascending or descending order. The default sort order is
ascending.
im6530, im8130
Page 87

ipc1-im8130 Administrator’s Guide 65
Deleting Jobs from the Queue
You can delete your pending print or scan job from the queue if it is listed
on one of the Jobs pages.
1 Click the Print or Scan tab. Printer Utility opens the Print Jobs or Scan
Jobs page.
2 For print jobs, click the sub tab for the type of job you want to delete.
3 Click the check box next to the job name.
To delete all jobs, click the checkmark on the header. This button
marks all of the jobs in the list. Clicking the checkmark again clears
all the checkmarks.
4 Click Delete.
While Printer Utility is deleting a job the status changes to Deleting.
Changing Proof Print Job Copy Counters
After reviewing the first copy of a proof print job you can change the
remaining copy count on the Proof Jobs page. The Copies column displays
the number of copies for each proof job.
1 Click the Print Jobs tab. The Current Jobs page opens.
2 Select the Proof page. The Proof page displays the details of proof
print jobs.
3 Scroll down the list to locate the job.
4 Check the box next to the job of which you are changing the count.
To select all jobs, click the checkmark on the header. This button
marks all the jobs in the list. Clicking the checkmark again clears all
the checkmarks.
5 Change the copy count number in the Copies column. The count must
be between 1 and 9999.
You can change the copy count and release the job or you can release
the job without changing the count.
6 Click Release to release the job to printing. After you release the job,
monitor its status using the Current Jobs list.
im6530, im8130
Page 88

66 ipc1-im8130 Administrator’s Guide
Releasing Proof and Scheduled Jobs
1 Click the Print Jobs tab.
2 Select Proof or Scheduled jobs. For Scheduled jobs, Printer Utility
displays the date the job is scheduled to print in the Status column.
3 Scroll down the list to locate the job.
4 Check the box next to the job you want to print.
To release all jobs, click the check-all button in the header. Clicking
this button again clears all the checkmarks.
5 Click Release to print the selected job(s). After you release the job,
monitor its status using the Current jobs list.
Print Job Administration
It is a good idea to perform regular maintenance tasks, such as resetting
the counter, backing up and restoring the address book and scan
templates, or deleting files stored on the controller.
For information about how to reset job counters, see Resetting Scan
Counters on page 193.
For backing up, restoring, and deleting files, refer to Maintaining the
System on page 239.
Managing Scan Jobs
To determine the status of a scan job, you can view the various scan logs:
Current Jobs: lists all scan jobs currently queued for processing
Scan Jobs Log: lists completed scan jobs
Scan Message Log: lists system messages related to the scan
function
Besides viewing these logs, you can delete scan jobs.
Viewing Current Scan Jobs
The Scan Jobs page displays the list of current scan jobs and provides
links to the scan jobs log and scan message log.
The Current Jobs list displays the Group, Template, Agent, Status, number of
Pages, start Time, and Detail Status for each scan job.
im6530, im8130
Page 89
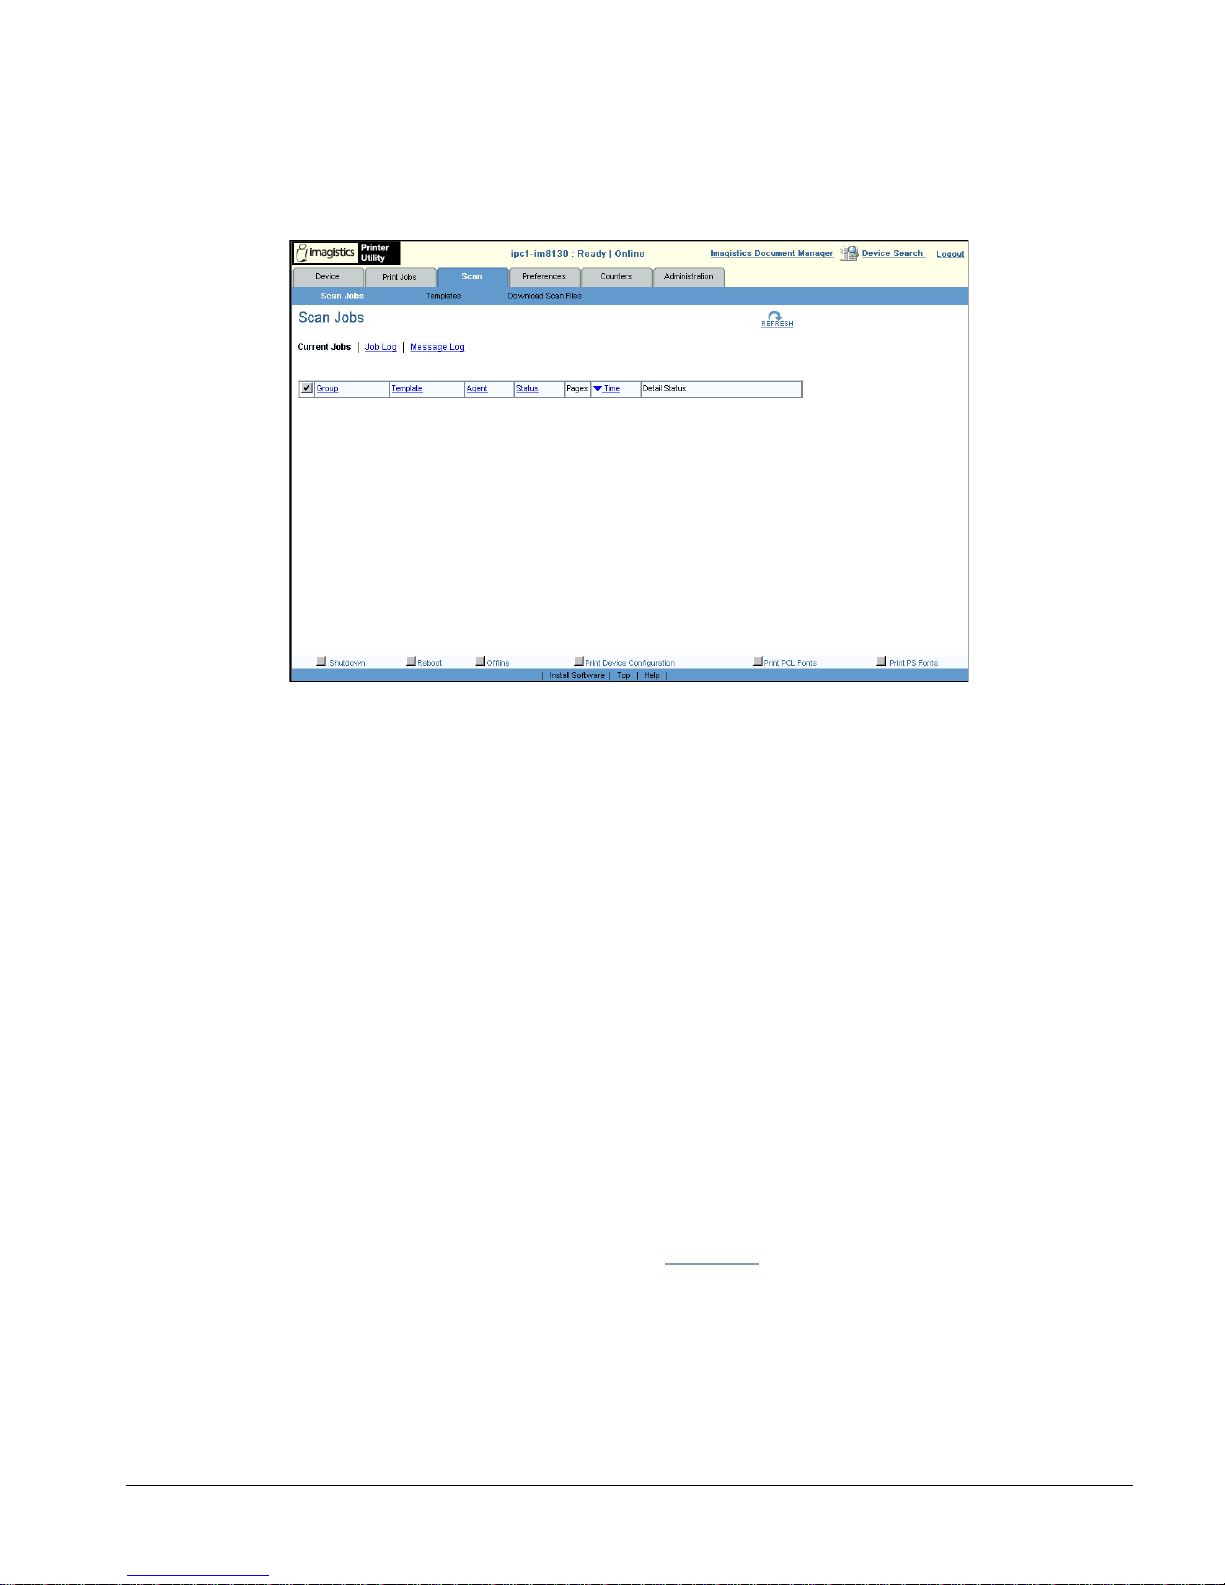
ipc1-im8130 Administrator’s Guide 67
1 Log in as an administrator.
2 Click the Scan tab.
Scan Jobs Page
The Scan Jobs page displays links to the various scan logs:
Current Scan Jobs: lists all scan jobs currently queued for
processing
Scan Jobs Log: lists completed scan jobs
Scan Message Log: lists system messages related to the scan
function.
3 If necessary, click Current Jobs to open the Current Jobs page.
4 To sort the current jobs list so that a particular job is easier to find,
click the appropriate table heading. The page refreshes to display the
information in the order you requested.
5 Scroll down the list to see details of the job.
Viewing the Scan Jobs Log
To view the list of completed scan jobs:
1 On the Scan Jobs page, click Job Log
.
2 To sort the log in a particular order, click the appropriate table
heading.
im6530, im8130
Page 90

68 ipc1-im8130 Administrator’s Guide
3 Scroll down the list to see the details of the job.
4 Click the
Refresh icon in the right corner to update the information on
this page.
The Scan Jobs Log displays the Group, Template, Agent, and Status for each
scan job.
Viewing the Scan Message Log
To view the list of system messages for scan jobs:
1 On the Scan Jobs page, click Message Log.
2 To sort the list of messages in a particular order, click the appropriate
table heading.
3 Scroll down the list to locate the messages.
Deleting Scan Jobs
You can cancel any job that is in the Current Jobs queue by deleting it.
1 On the Current Jobs page, check the box next to the scan job that
you want to delete or click the Check All heading to select all jobs.
2 Click Delete.
3 Click OK to confirm the deletion process. The scan job(s) are deleted
from the queue.
Working with Scan Templates
You can access the scan templates and template groups through the Scan
tab in Printer Utility. For a complete description of thescan templates and
template groups, refer to the Scan Operator’s Guide.
Downloading Scan Files
You can download scan files that were stored on the controller as
electronic files from within Printer Utility.
im6530, im8130
Page 91

ipc1-im8130 Administrator’s Guide 69
1 On the Scan tab, click the Download Scan Files
link to open the
Download Scan Files page.
2 Click the plus sign (+) to the left of the directory name to open the
directory and view its contents.
3 Navigate to the directory or subdirectory that contains the file you
want to download.
4 When you find the file you want to download, click the name of the
file. The File Download dialog box opens.
5 Click Save to save the file on your local workstation. The Save As
dialog box opens.
6 Browse to the directory on your local workstation where you want to
place the file.
7 Click Save to download the file. The file is downloaded to the directory
you selected on your local workstation. The two dialog boxes close
automatically and return you to the Download Scan Files page.
Scan Administration
It is a good idea to perform regular maintenance tasks such as resetting
the scan counter, backing up and restoring the address book and scan
templates, or deleting scan files stored on the controller.
For information about how to reset scan counters, see Resetting Scan
Counters on page 193.
For backing up, restoring, and deleting files, refer to Maintaining the
System on page 239.
Setting Your Preferences
You can customize the appearance of Printer Utility. If you do not log in or
if you log in as an end-user, setting preferences only affects your view of
Printer Utility. If you log in as the administrator, setting the preferences
affects all users.
im6530, im8130
Page 92

70 ipc1-im8130 Administrator’s Guide
1 Click the Preferences tab to open the Preferences page.
2 To change the way dates are displayed, select the appropriate format
from the
Date Format pull-down list.
3 To change the way times are displayed, select the appropriate format
from the Time Format pull-down list.
4 To change the frequency with which Printer Utility updates the device
status, select the frequency from the Device Status Refresh Rate pull-down
list.
5 To change the frequency with which Printer Utility updates the job
queues, select the frequency from the Job Queue Refresh Rate pull-down
list.
6 To change the number of items shown in the logs, enter the number
you want in the Number of items to show for logs text box.
7 To change the tab displayed when you first access Printer Utility,
select the tab from the Start Page pull-down list.
8 To change the display language used by Printer Utility, select the
language you want from the Language pull-down list.
Managing Counters
The controller keeps track of the number of pages printed, copied, and
scanned and maintains a set of counters. These statistics can be
displayed in totals or broken down by department. This topic describes
how to view the statistics and manage department counters.
All users can view the statistics maintained by the controller. If you use
department codes, you can also reset department counters and save
department statistics in a format that you can use for reporting.
Only administrators can reset the scan counters.
im6530, im8130
Page 93
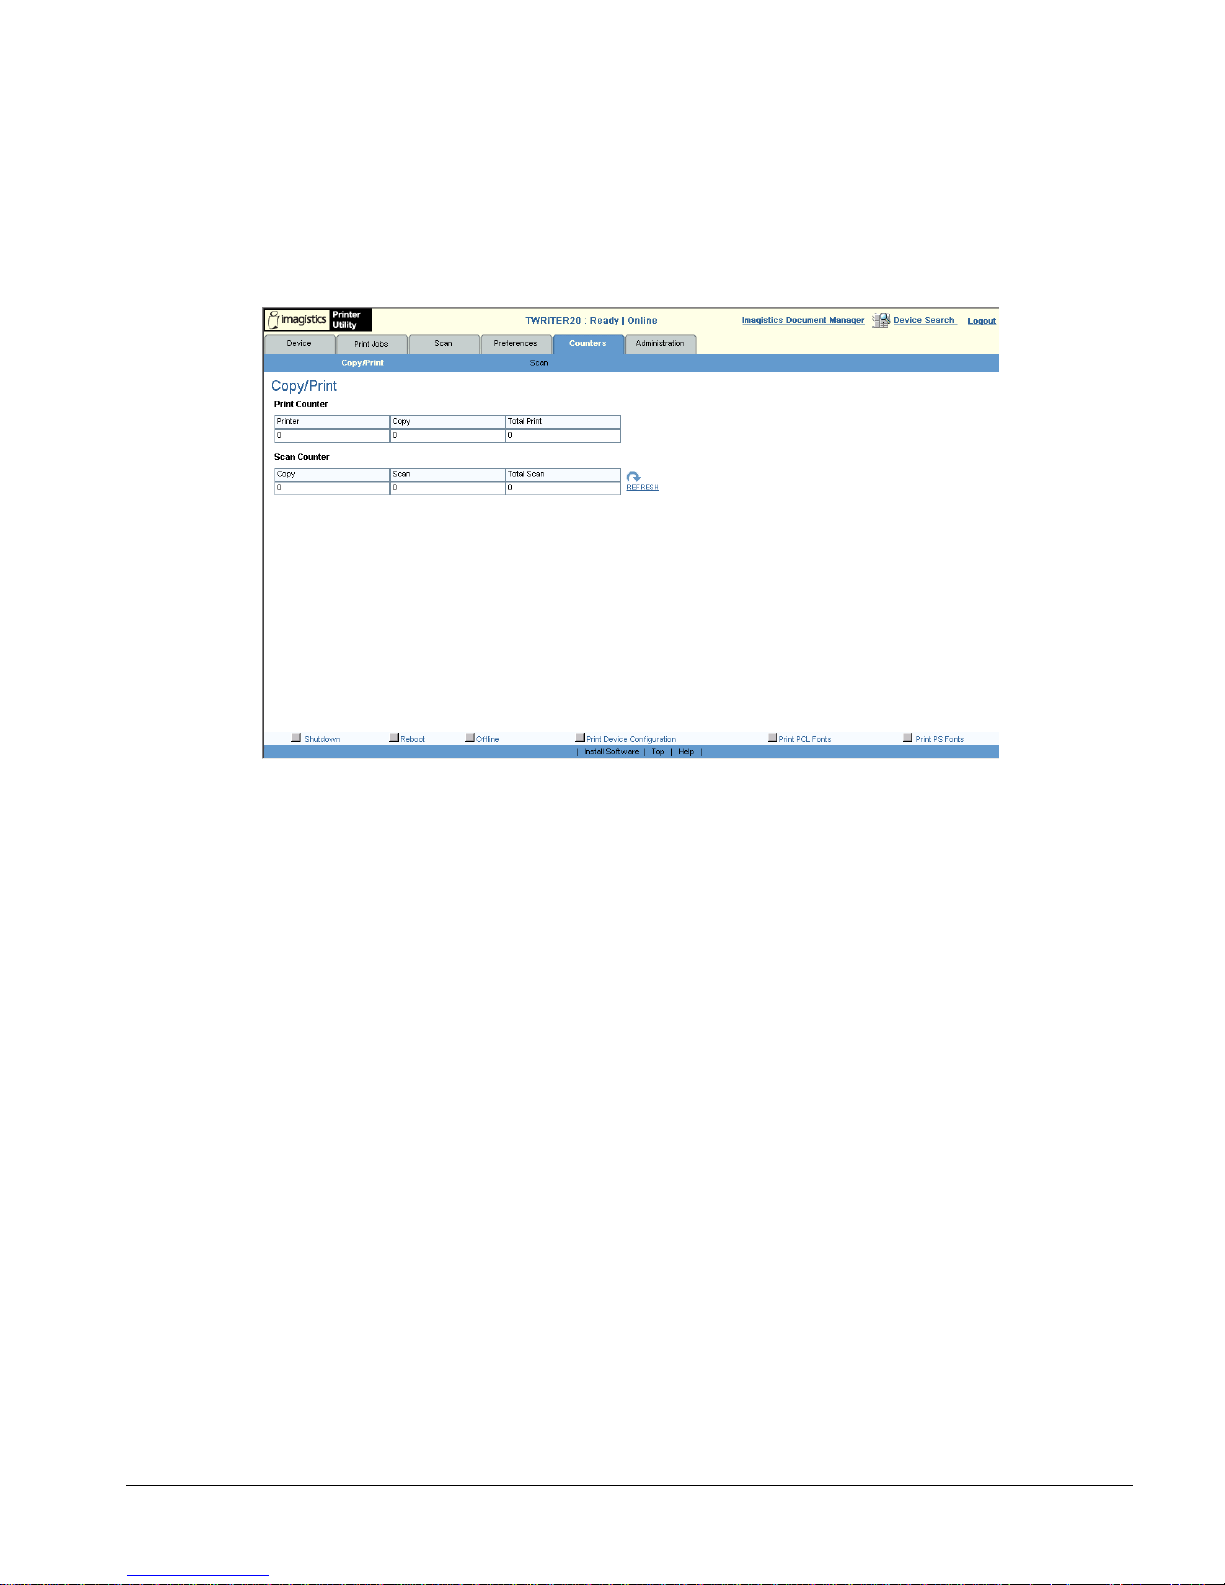
ipc1-im8130 Administrator’s Guide 71
Viewing Job Statistics
The Counters page shows job statistics by department and for all
departments. You must enter a valid department code to access this
information.
Printer Utility Counters Page
To view the count for a department:
1 Click the Counters tab. The Copy/Print page opens.
2 To view the specific counters for your department, in the Enter a
department code to access department counters
text box, type the five digit
department code for your department or enter the master department
code to display counters for all the departments.
3 Click Enter.
If you enter a correct department code, Printer Utility displays the
counters for the department.
If you enter an invalid department code, Printer Utility displays an
error message and prompts for the department code again.
Resetting Department and Job Counters
To reset the counters for a department or type of job:
im6530, im8130
Page 94

72 ipc1-im8130 Administrator’s Guide
1 Click the Counters tab.
2 Type the master department code and click
Enter.
3 Select the department by clicking the cirlce to the left of the
department name.
4 Click Reset Counter. The Reset Department Counter window opens.
5 Click OK to reset the counters or Cancel to terminate the process
without resetting the counters..
Exporting Counters
To save department or job type counters in a format that can be used for
reporting:
1 Click the Counters tab.
2 Type the master department code and click Enter.
3 Select the department that you want to export to counters for by
clicking the circle to the left of the department name.
4 Click Export.
5 Select the delimiter from the drop-down menu.
6 Check the box to include field names in the exported file.
7 Click OK to export the data or Cancel to terminate the process.
8 Click the File Name link to download.
Note: If you experience any problems, you can use the filename
hyperlink to download the exported file. Right-click the filename
hyperlink and select Save Target As... (Internet Explorer) or Save Link As...
(Netscape Navigator) from the drop-down menu.
Resetting Scan Counters
You must be logged in as an administrator to reset scan counts.
Note: You cannot reset the total scan counter.
im6530, im8130
Page 95

ipc1-im8130 Administrator’s Guide 73
1 Click the Counters tab.
2 Click the Scan submenu. Printer Utility displays the scan counters
for each template group.
3 To reset the scan counter of a template group, check the checkbox
adjacent the group or click the heading button to select all the
template groups.
4 Click
Reset Counter.
im6530, im8130
Page 96
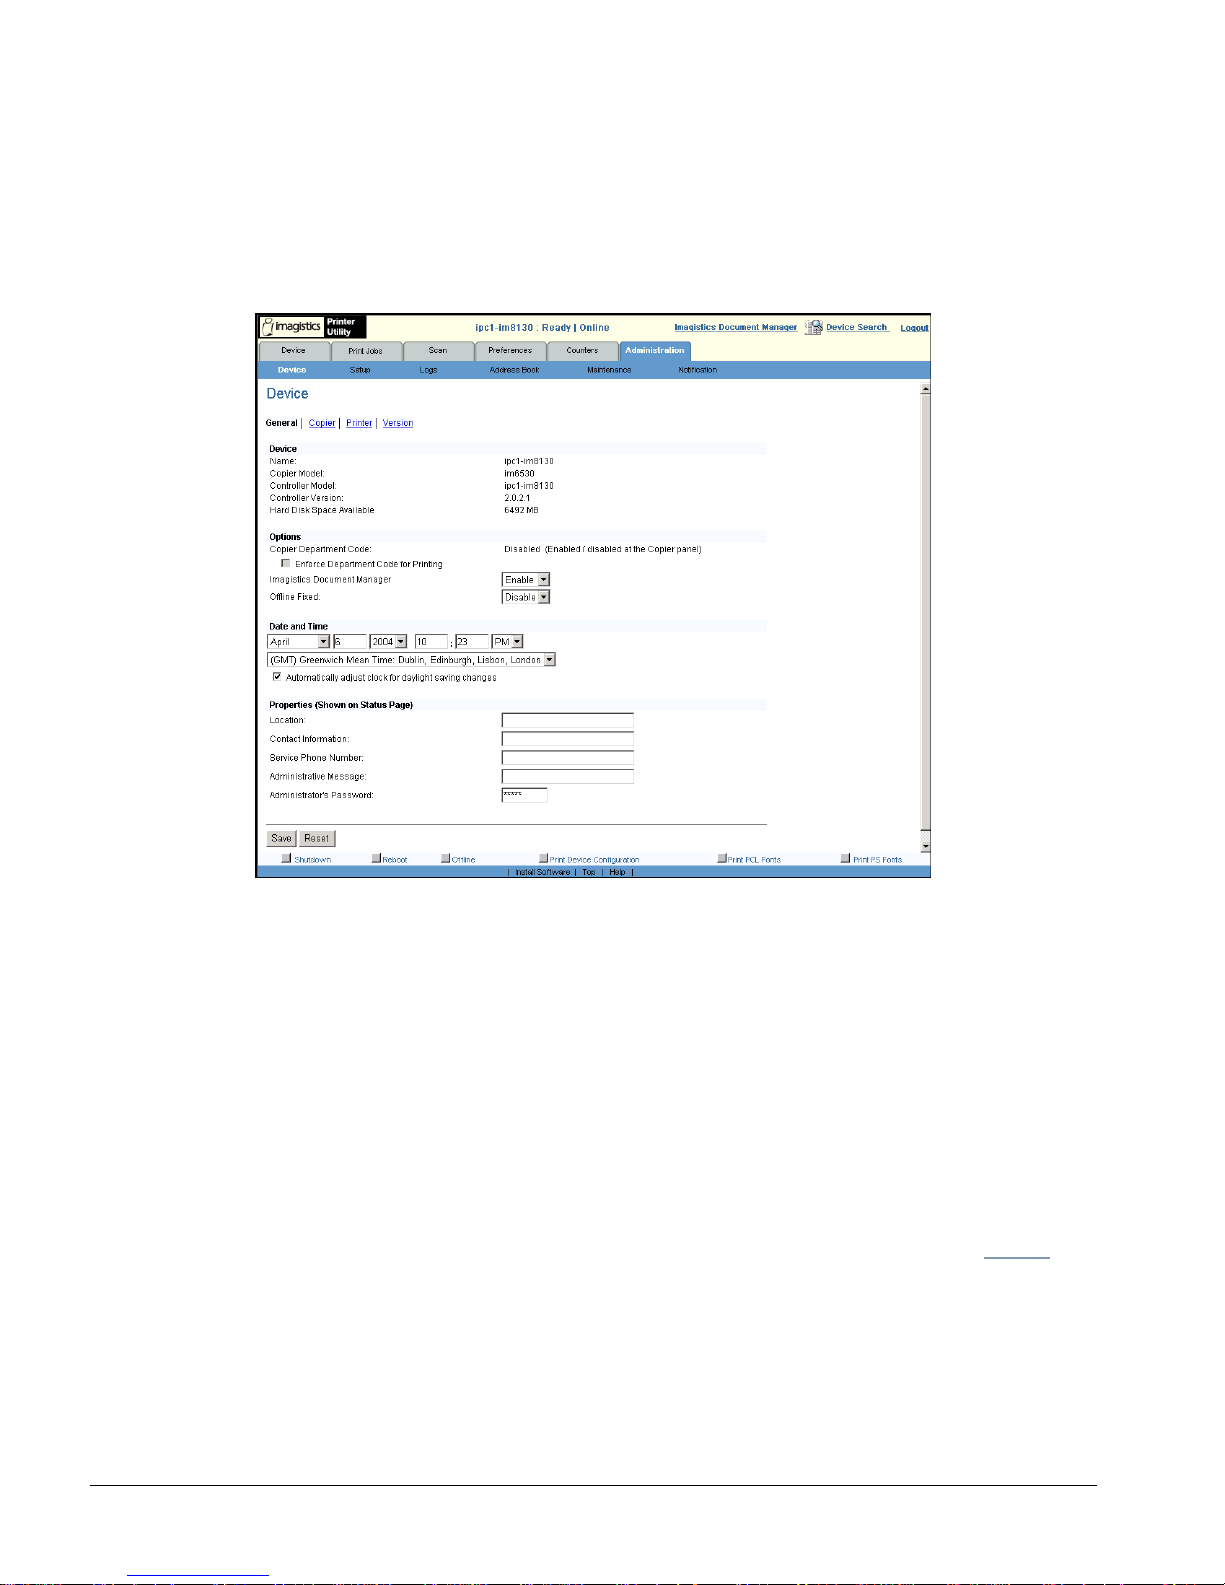
74 ipc1-im8130 Administrator’s Guide
Remote Device Management
When you log in as an administrator, the first screen Printer Utility
displays is the Administration tab, which opens by default to the General
page of the Device subtab.
Administration Device Page
You can perform the following remote operations by clicking the
corresponding buttons at the foot of the page:
Shut down the controller
Reboot the controller
Take the digital copier online or offline
Print configuration and font pages
Administrator Site Map
Once you have successfully logged into Printer Utility using the Login
link, you can perform administrative functions.
As an administrator, you can:
View the status of the device and network
View and modify job queues
im6530, im8130
Page 97

ipc1-im8130 Administrator’s Guide 75
View and modify copier attributes
View accessory configuration
Scan
View the log files (counters)
The following is the Printer Utility site map:
Device Tab
Print Jobs Tab
Current Subtab
Private Subtab
Proof Subtab
Scheduled Subtab
Document Manager Subtab
Invalid Subtab
All Subtab
Scan Tab
Scan Jobs Subtab
Current Jobs
Job Log
Message Log
Templates Subtab
Templates
Template Groups
Download Scan Files Subtab
Preferences Tab
Counters Tab
Copy/Print Subtab
Scan Subtab
Administration Tab
Device Subtab
General
Copier
Printer
Version
Setup Subtab
Network
Wireless Network
Print Services
SNMP
E-mail
Scan Agents
Send to TWAIN
Send to File
im6530, im8130
Page 98

76 ipc1-im8130 Administrator’s Guide
Send to E-mail
Send to iFax
Send to FTP Server
Send to Document Manager
Logs Subtab
Print Job
Print Msg (message)
Scan Job
Scan Msg (message)
Address Book Subtab
Contacts
Groups
Directory Services
Import
Export
Maintenance Subtab
Upload Software
Remove Software
Backup
Restore
Delete Files
Font Management
Notification Subtab
Getting Started
There are five major tasks required to configure Printer Utility to meet
your unique needs:
1 Set up the administrative functions, such as password, contact
information, messages, department codes, and preferences.
2 Set up the copier and printer functions.
3 Configure network protocols and set up e-mail.
4 Set up scan agents and templates.
5 Upload client software to the controller so your users can install it on
their workstations.
The following topics explain administrative tasks to set up the system.
im6530, im8130
Page 99

ipc1-im8130 Administrator’s Guide 77
Setting the Administrator Password
1 Log in as an administrator.
2 Click the Administration tab.
3 Click the Device subtab. The Device page opens.
4 In the Properties area, enter a five-digit administrator password for
the controller in the Administrator Password field. Printer Utility
requires this password for you to log in as an administrator.
5 To enter a new password, type the new password over the old
password.
6 Click Save.
Setting the Default Start Page
1 Click the Preferences tab. The Preferences page opens.
2 Click the Start Page drop-down arrow and select the start page.
3 Click Save.
4 You can click Reset if you have not saved your changes. This refreshes
and restores the settings to their original states.
Setting the Default Admin Login Timeout Period
1 Log in as an administrator.
2 Click the Preferences tab.
3 Click the Admin Login Timeout Period drop-down arrow and select the
amount of time before the administrator login times out. The default
is 20 minutes.
4 Click
Save. You can click Reset if you have not saved your changes.
Resetting refreshes and restores the settings to their last saved state.
Setting the Contact Information
1 Log in as an administrator.
2 Click the
Administration tab.
3 Click the
Device subtab. The Device page opens.
4 Under Properties, enter the name or title of the contact person for the
device in the
Contact Information field.
5 Click
Save.
im6530, im8130
Page 100

78 ipc1-im8130 Administrator’s Guide
Setting the Service Phone Number
1 Log in as an administrator.
2 Click the Administration tab.
3 Click the Device subtab. The Device page opens.
4 Under Properties, enter the phone number for service on the
controller in the Service Phone Number field.
5 Click Save.
Setting the Administrative Message
To display a message about the controller on the Device page for all users
to read:
1 Login as an administrator.
2 Click the Administration tab.
3 Click the Device subtab. The Device page opens.
4 Under Properties, type your message in the Administrative Message field.
This field allows a maximum of 39 characters.
5 Click Save.
Setting the Date and Time
1 Log in as an administrator.
2 Click the Administration tab.
3 Click the Device subtab. The Device page opens.
4 Under D
ATE AND TIME, click the drop-down menus and select the
month, day, year, hour, minute, second, and AM or PM settings.
5 Click the
Time-Zone drop-down menu and select the appropriate time
zone.
6 Check the
Automatically Adjust for Daylight Savings Change box to
automatically adjust the controller time settings on the daylight
savings scheduled dates. Deselect to adjust time manually or for
areas not affected by Daylight Savings Time schedules.
7 Click
Save.
Note: When you perform this procedure, Printer Utility synchronizes
the date and time settings of the controller with those of the copier.
To change the format of the date or time, see Setting the Default
Date and Time Formats on page 71.
im6530, im8130
 Loading...