

imagistics im7520, im6020 User Manual
www.imagistics.com
User's Guide
im7520
im6020
Copy Operations
®

9
Replacing Toner Cartridges and Staples and Emptying Dust Boxes Chapter 9
Replacing Toner
Cartridges and Staples
and Emptying Dust Boxes
9
Replacing Toner Cartridges and Staples and Emptying Dust Boxes
9-2 im7520/im6020
Replacing Toner Cartridges and Staples and Emptying Dust Boxes Chapter 9
9 Replacing Toner Cartridges and Staples
and Emptying Dust Boxes
9.1 Replacing the Toner Cartridge
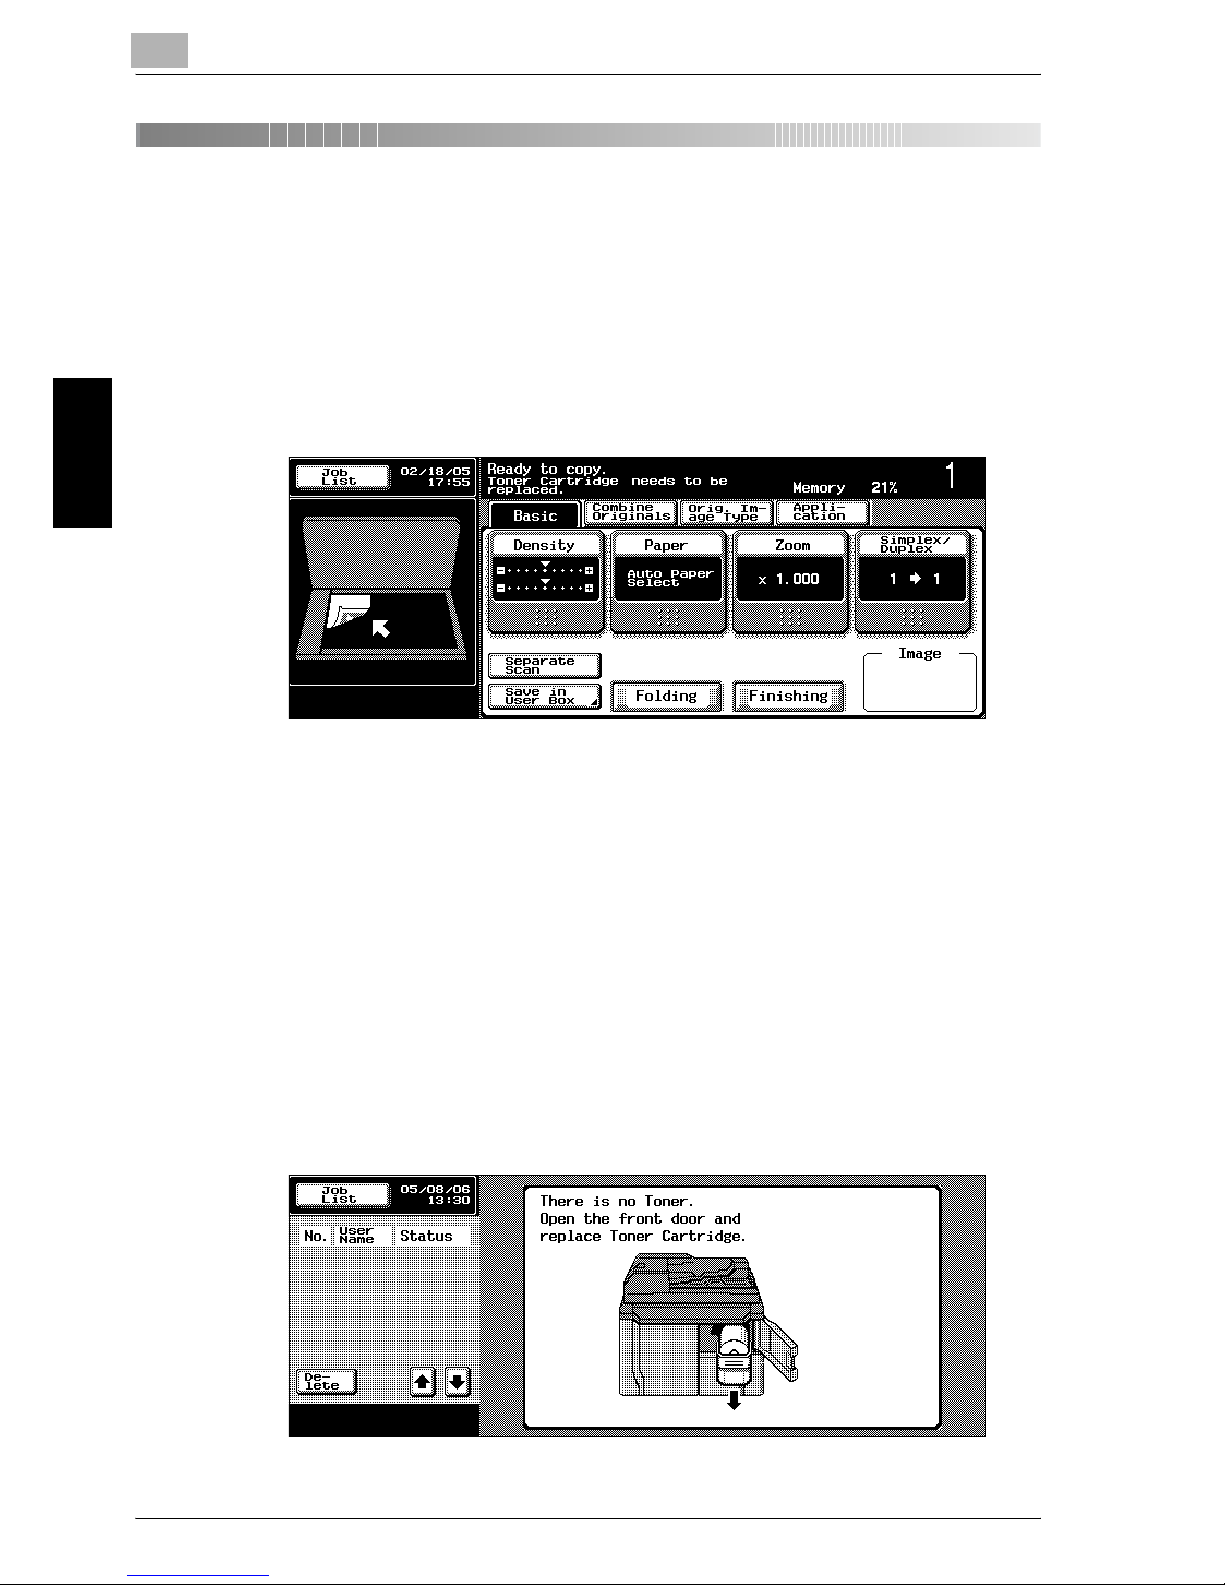
When the toner is about to run out, the warning message shown below appears. Replace the toner cartridge.
!
Detail
Some copies can be printed between the time that the message “Toner
Cartridge needs to be replaced.” appears until the time that the message
“Replace the Toner.” appears. However, it is recommended that the toner cartridge be replaced when the message “Toner Cartridge needs to be
replaced.” appears.
When the message“Replace the toner” appears, the machine is stopped.
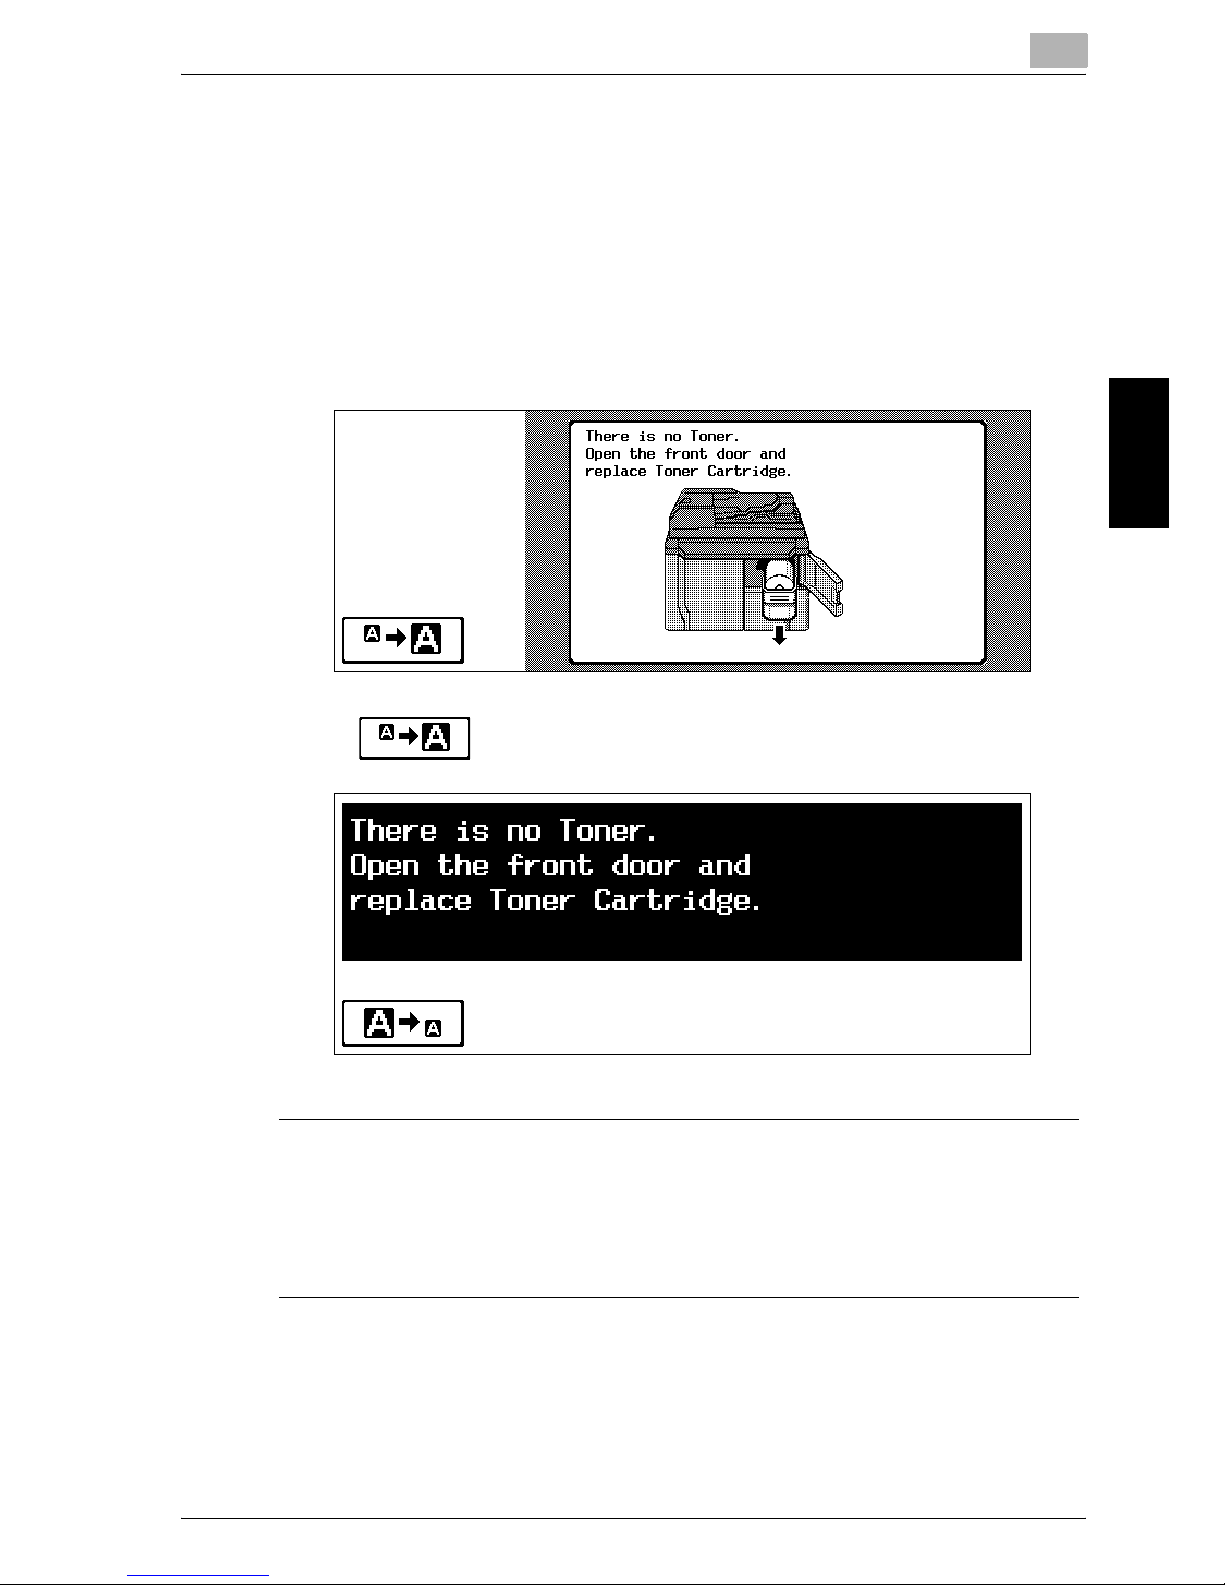
When the toner is empty, the warning message shown below appears and
copies can no longer be made.
Replacing Toner Cartridges and Staples and Emptying Dust Boxes
9
im7520/im6020 9-3
Replacing Toner Cartridges and Staples and Emptying Dust Boxes Chapter 9
!
Detail
For details on replacing the toner cartridges, refer to “To replace the toner
cartridge” on page 9-4.
Display in Enlarge Display Mode
When the toner is empty, the screen shown below appears.
Touch to display the message enlarged.
7 WARNING
Handling toner and the toner cartridges
% Do not throw toner or the toner cartridge into a fire.
% Toner expelled from the fire may cause burns.
9
Replacing Toner Cartridges and Staples and Emptying Dust Boxes
9-4 im7520/im6020
Replacing Toner Cartridges and Staples and Emptying Dust Boxes Chapter 9
7 CAUTION
Precautions for toner spills
% Be careful not to spill toner inside the machine or get toner on your
clothes or hands.
% If your hands become soiled with toner, immediately wash them with
soap and water.
% If toner gets in your eyes, immediately flush them with water, and then
seek professional medical attention.
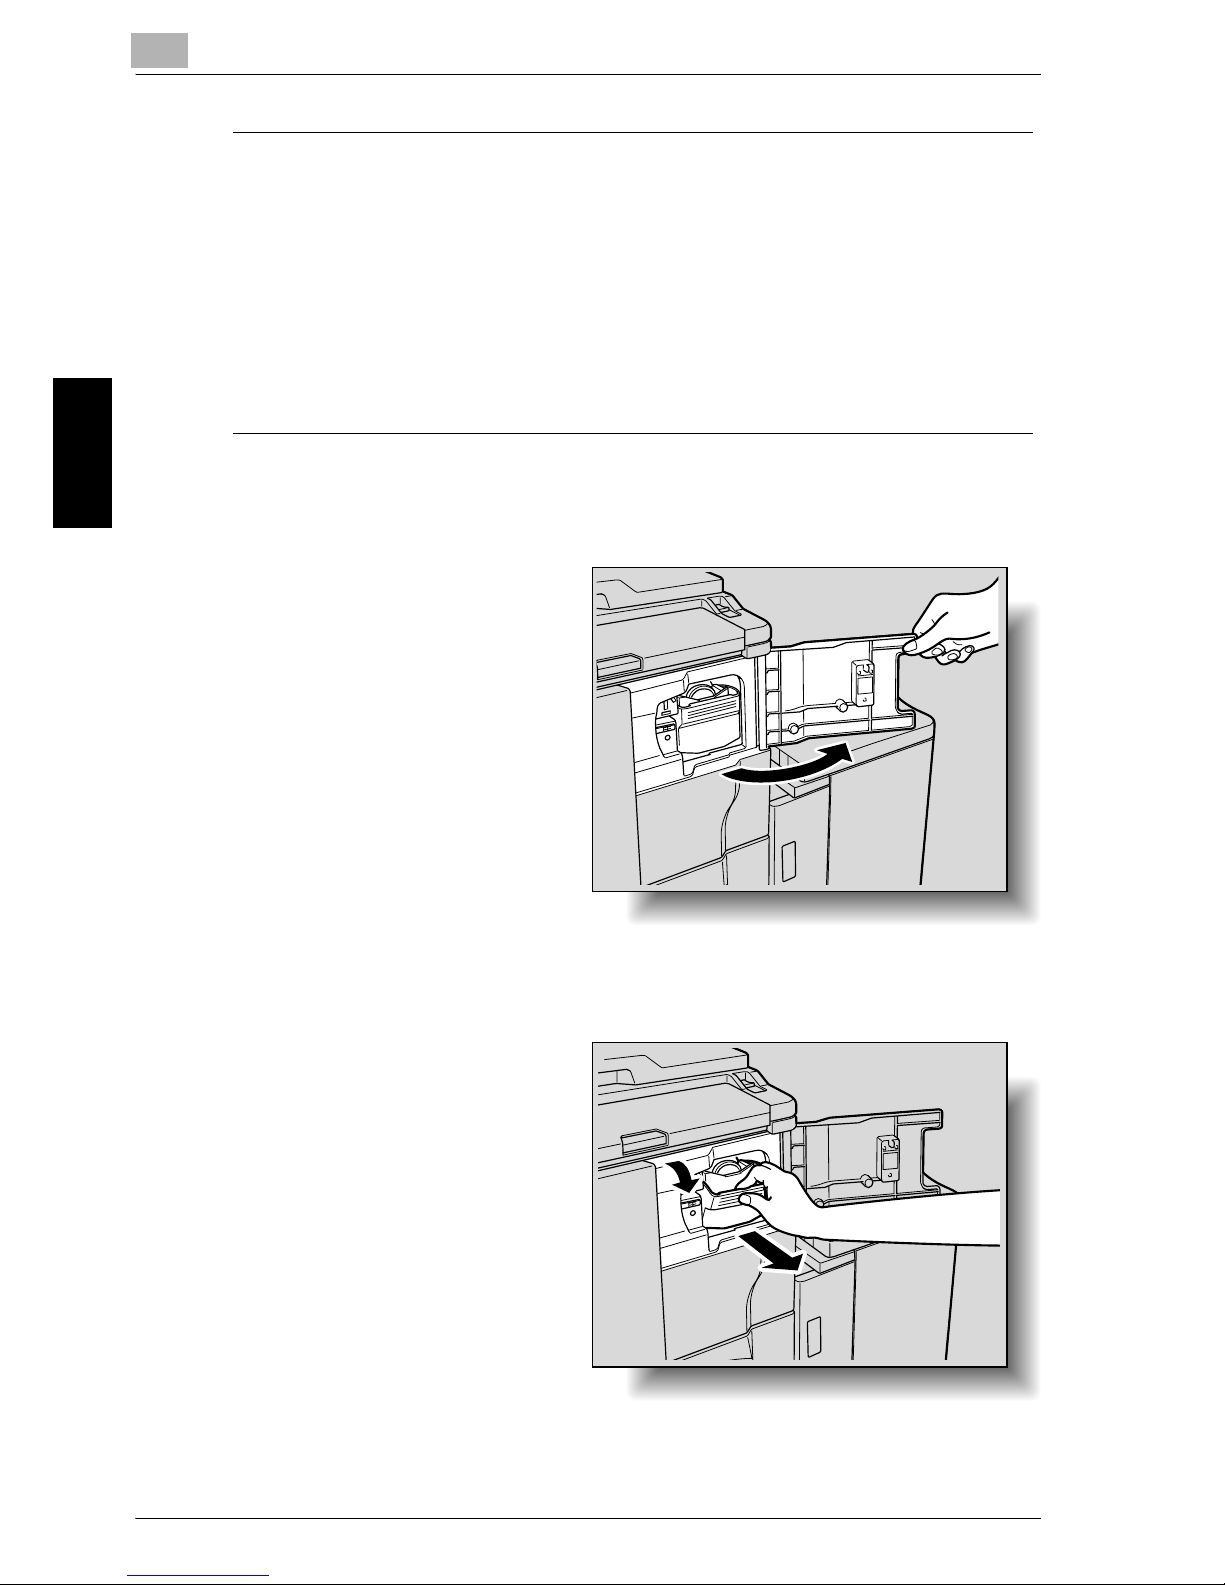
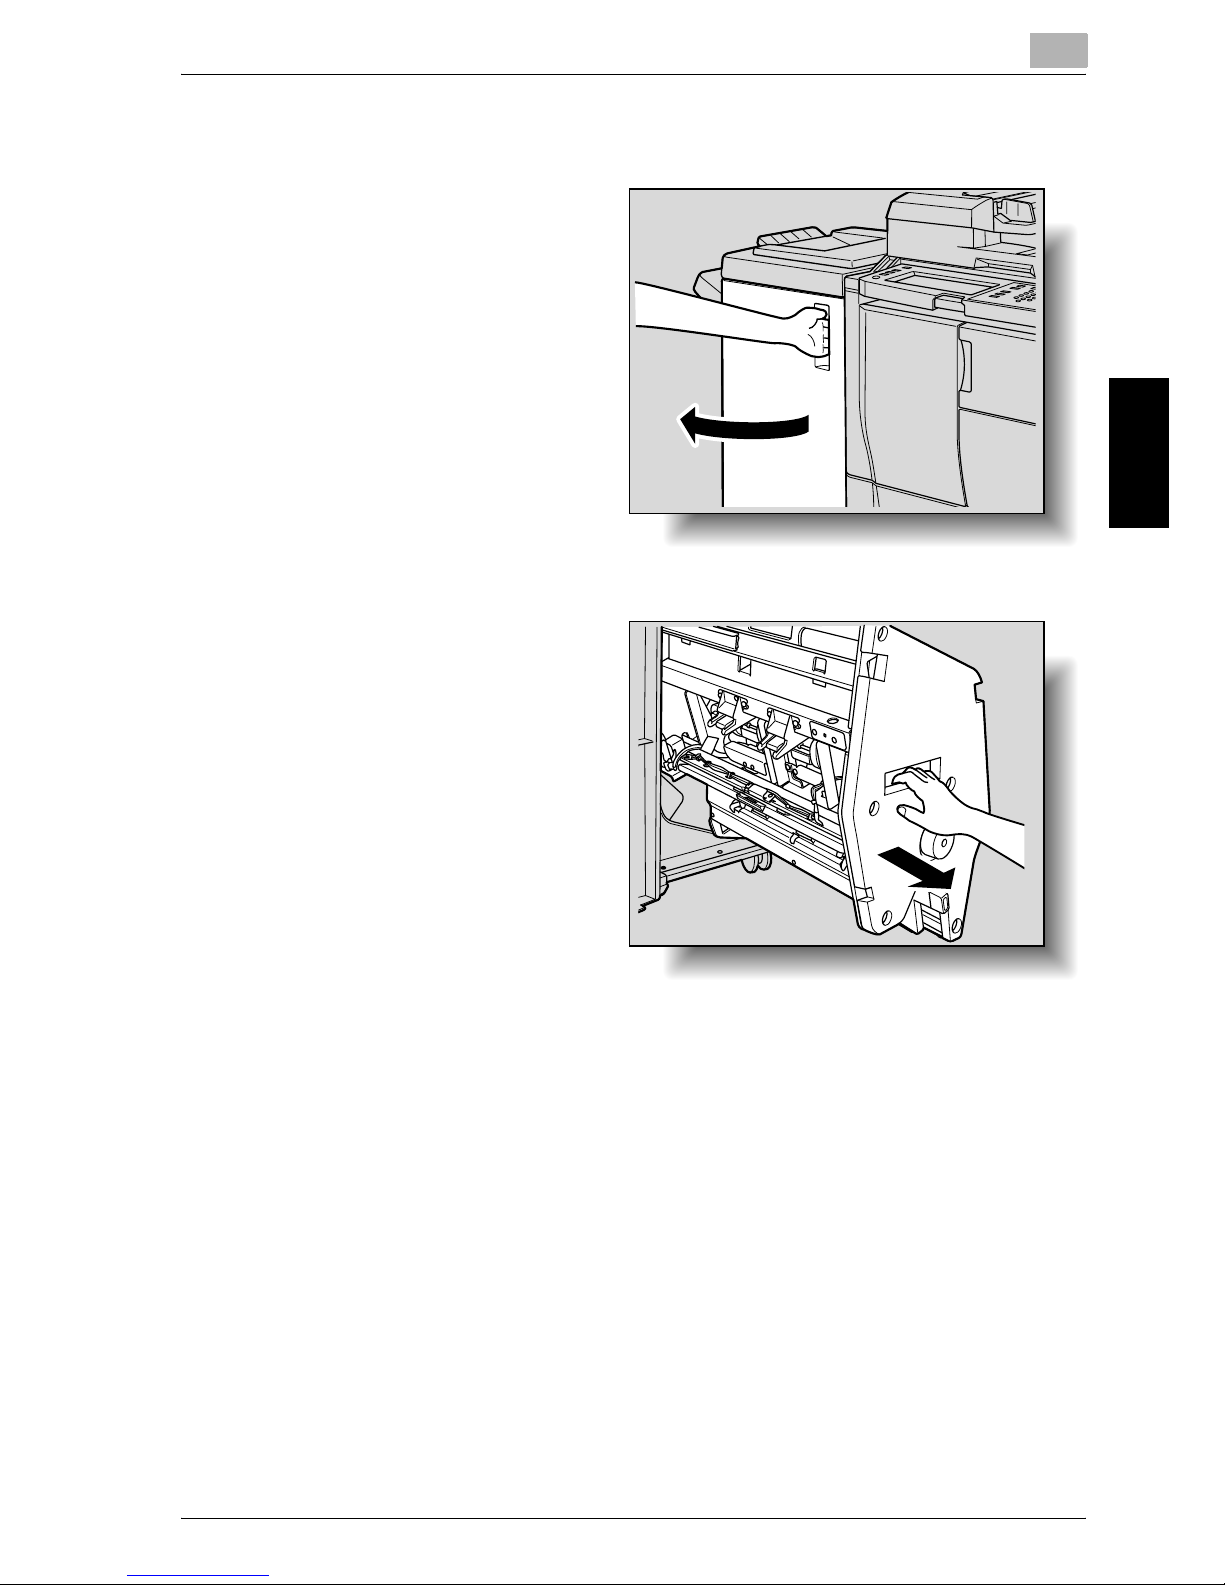
To replace the toner cartridge
1 Open the toner cartridge
door.
2 Pull out the cartridge holder.
While pulling the tonercartridge-securing lever
toward you, pull the cartridge holder out toward
you as far as possible.

Replacing Toner Cartridges and Staples and Emptying Dust Boxes
9
im7520/im6020 9-5
Replacing Toner Cartridges and Staples and Emptying Dust Boxes Chapter 9
3 Pull up the used toner
cartridge to remove it.
4 Shake the new toner
cartridge by turning it
over about five times.
– The toner within the
toner cartridge may
have become compacted. If it has, be
sure to shake the
toner cartridge until
the toner is mostly
broken up before installing the cartridge.
5 Remove the cover from
the toner cartridge.
9
Replacing Toner Cartridges and Staples and Emptying Dust Boxes
9-6 im7520/im6020
Replacing Toner Cartridges and Staples and Emptying Dust Boxes Chapter 9
6 Install the toner cartridge, making sure that it is correctly oriented.
With the label at the end
of the toner cartridge
facing up, insert the bottom of the cartridge into
the slot in the cartridge
holder.
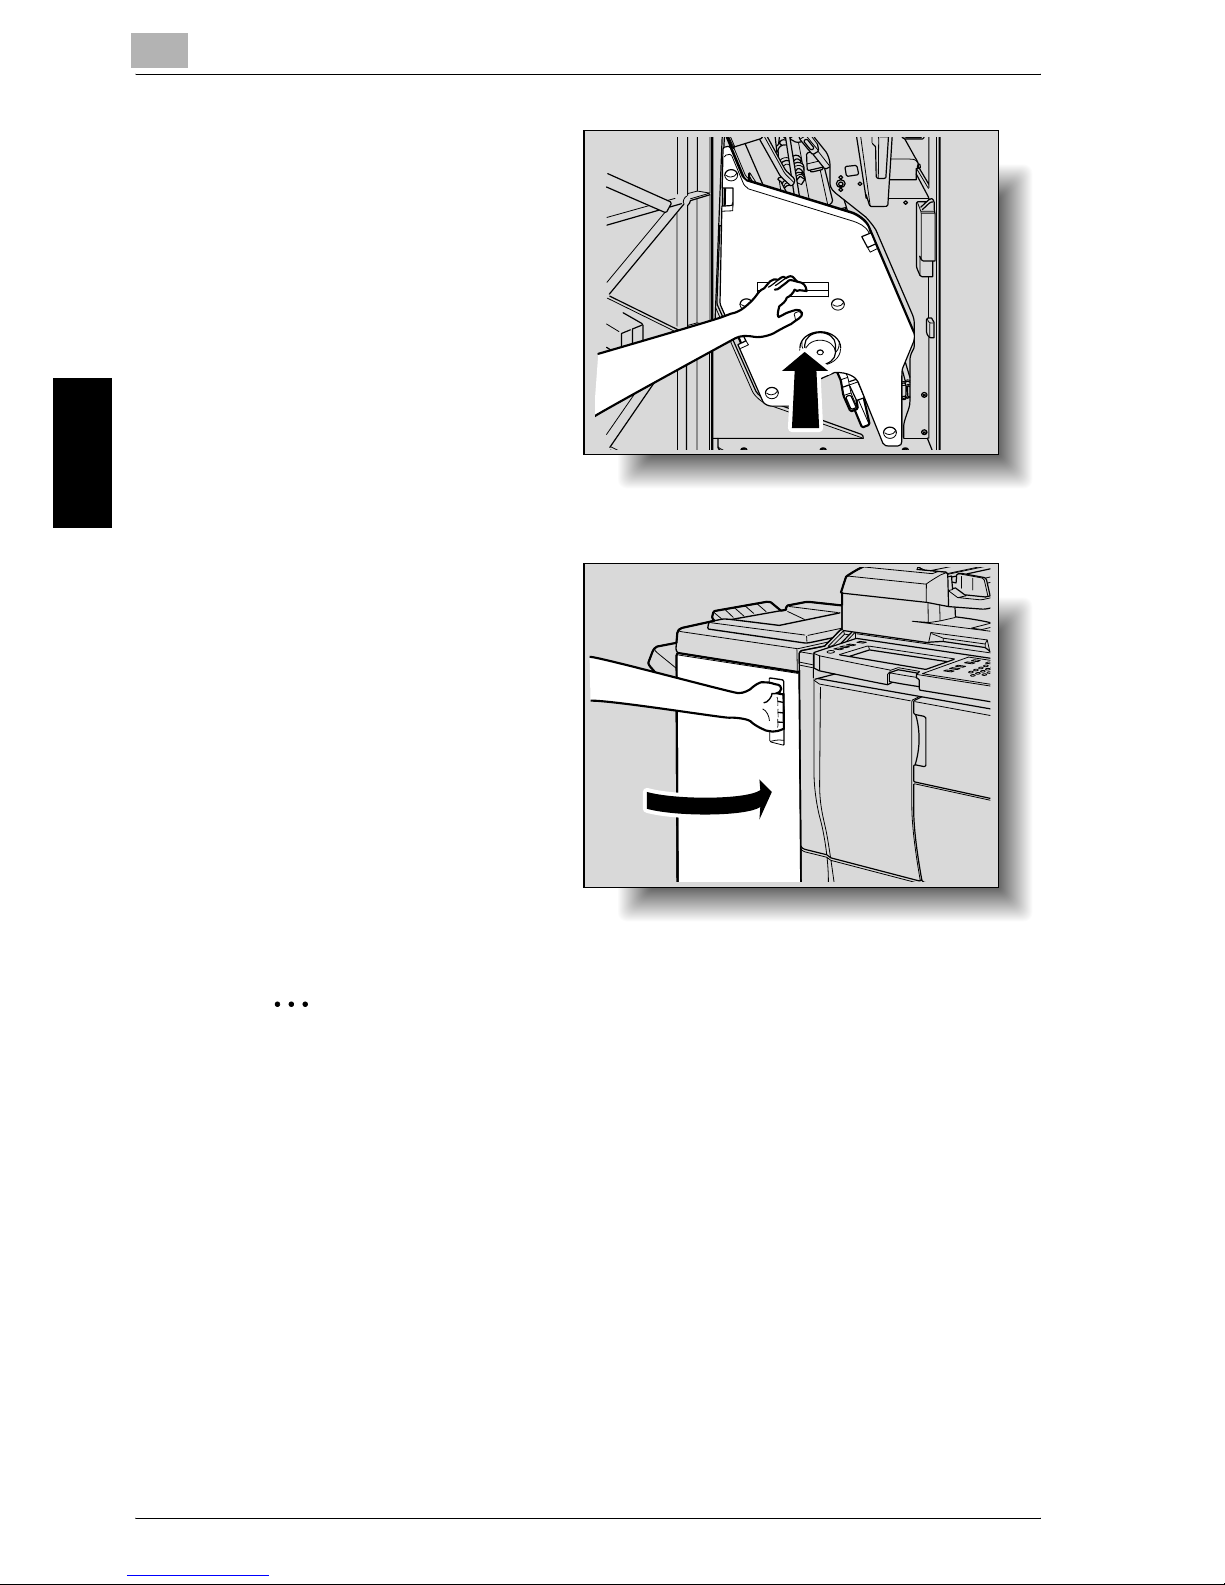
7 Return the cartridge
holder to its original position, and then close the
toner cartridge door.
Replacing Toner Cartridges and Staples and Emptying Dust Boxes
9
im7520/im6020 9-7
Replacing Toner Cartridges and Staples and Emptying Dust Boxes Chapter 9
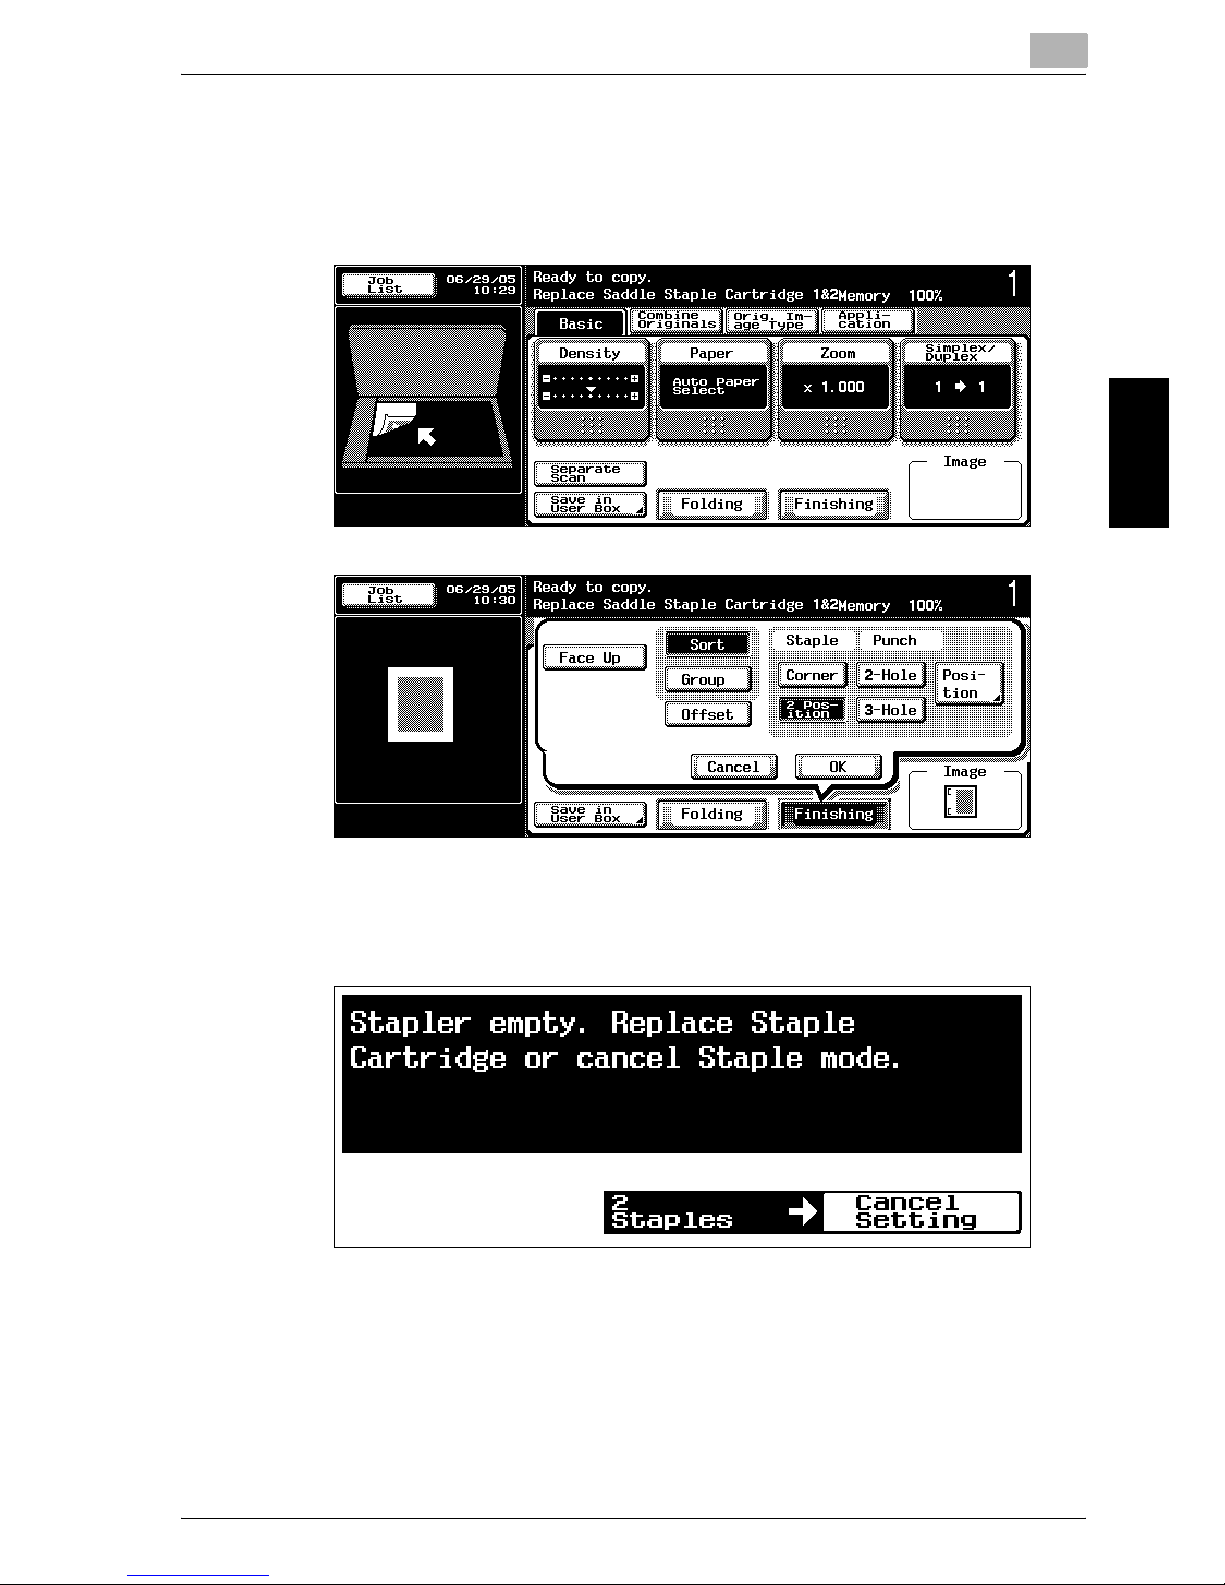
9.2 Replacing the Staples
When finisher 9202/9204 is installed and is about to run out of staples, the
message shown below appears.
Display in Enlarge Display Mode
9
Replacing Toner Cartridges and Staples and Emptying Dust Boxes
9-8 im7520/im6020
Replacing Toner Cartridges and Staples and Emptying Dust Boxes Chapter 9
!
Detail
Be sure to replace the staple cartridge only after the message appears,
otherwise the machine may be damaged.
When staples run out in either of Saddle Staple Cartridge 1 or 2, the message “Replace Staple Cartridge 1” or “Replace Staple Cartridge 2” appears.
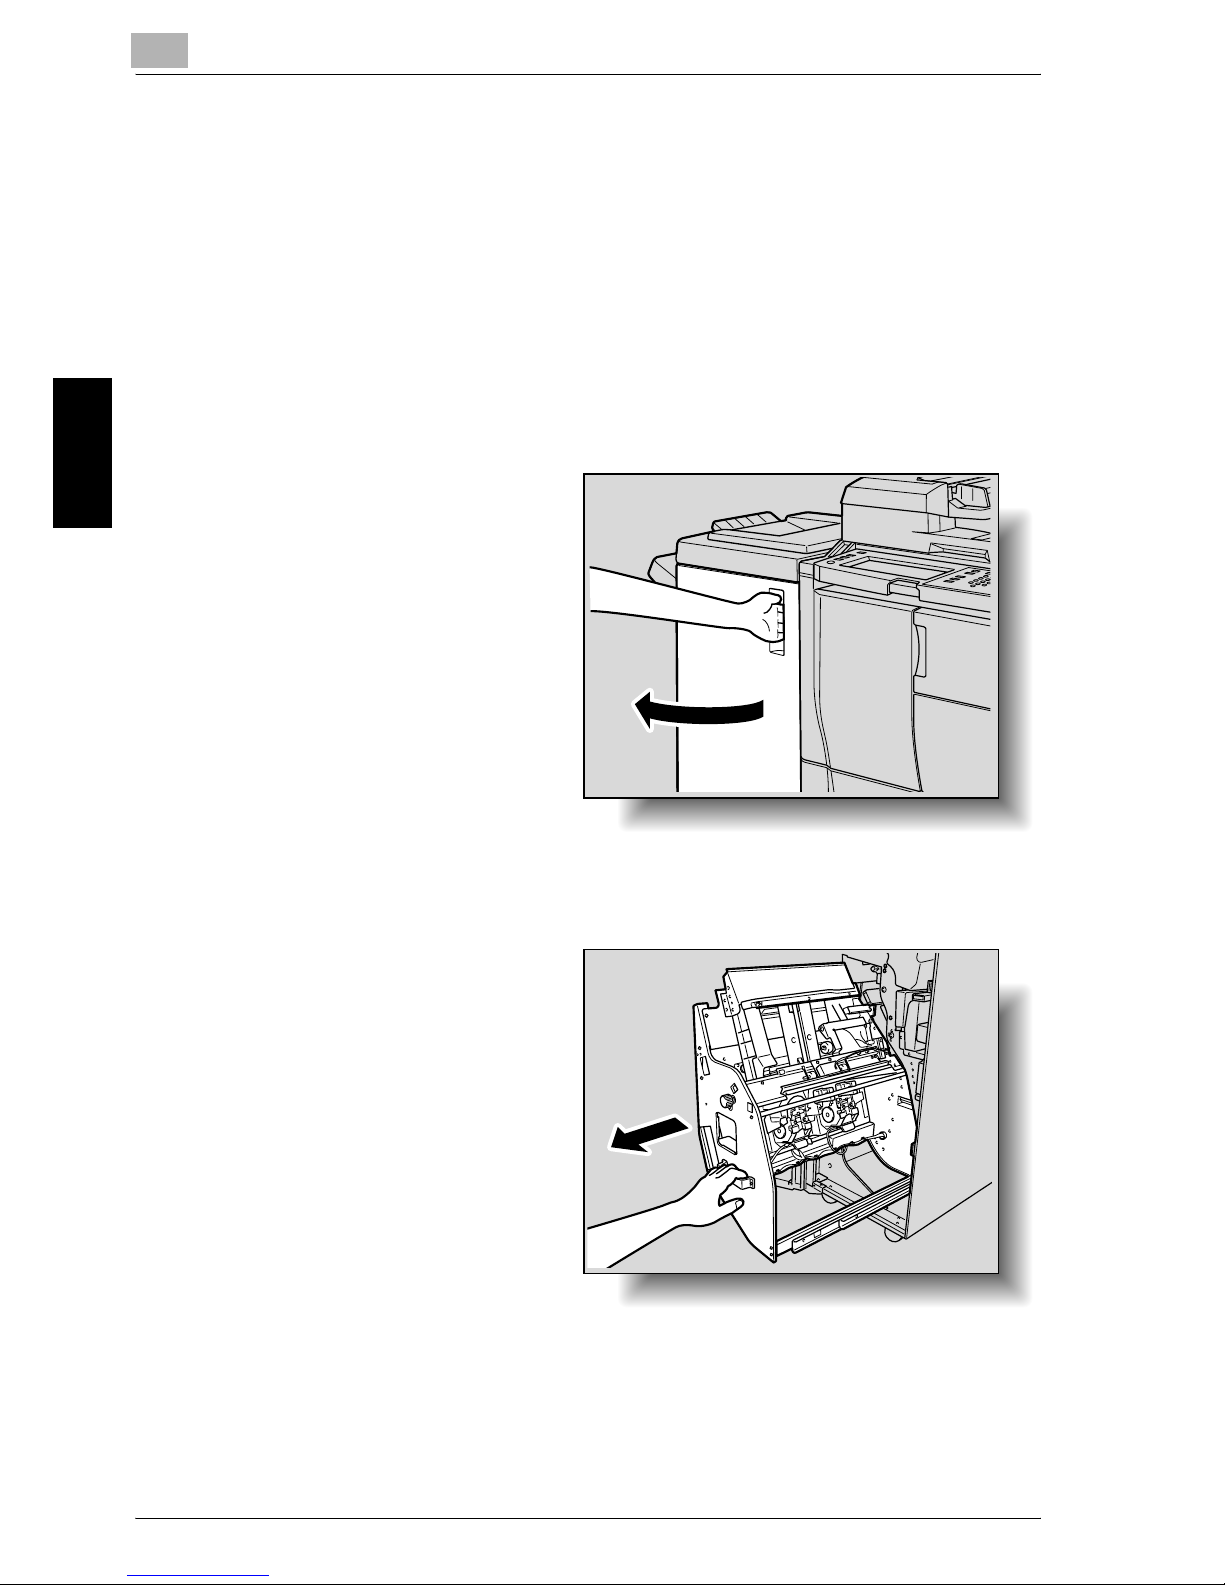
To replace the staple cartridge for finisher 9202
1 Open the finisher door.
2 Pull out the stacker unit.
– Hold the stacker unit
handle, and then
slowly pull out the
stacker unit as far as
possible.

Replacing Toner Cartridges and Staples and Emptying Dust Boxes
9
im7520/im6020 9-9
Replacing Toner Cartridges and Staples and Emptying Dust Boxes Chapter 9
3 Remove the empty staple cartridge from the staple cartridge holder.
– Hold the lever on the
staple cartridge, and
then pull the cartridge down to remove it.
4 Install the new staple cartridge.
– Push up the staple
cartridge, and then
check that the cartridge is securely installed.
5 Return the stacker unit
to its original position.
9
Replacing Toner Cartridges and Staples and Emptying Dust Boxes
9-10 im7520/im6020
Replacing Toner Cartridges and Staples and Emptying Dust Boxes Chapter 9
6 Close the finisher door.
Replacing Toner Cartridges and Staples and Emptying Dust Boxes
9
im7520/im6020 9-11
Replacing Toner Cartridges and Staples and Emptying Dust Boxes Chapter 9
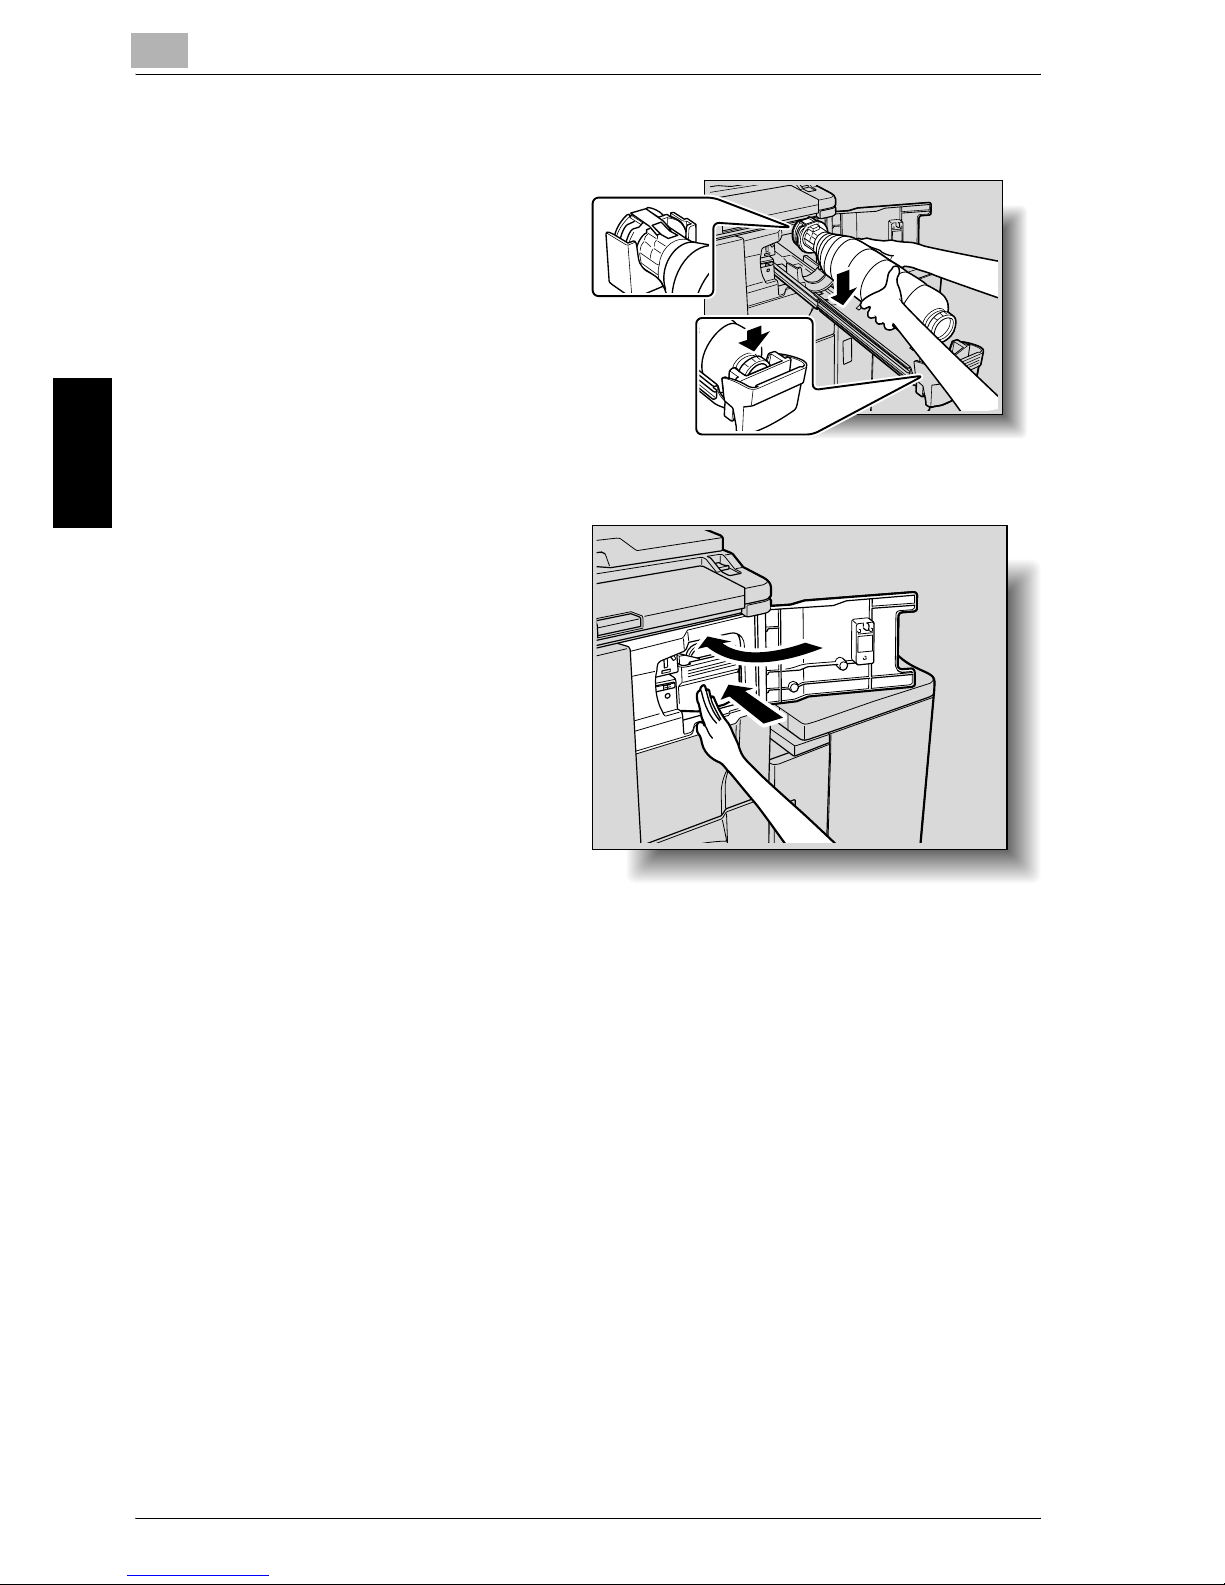
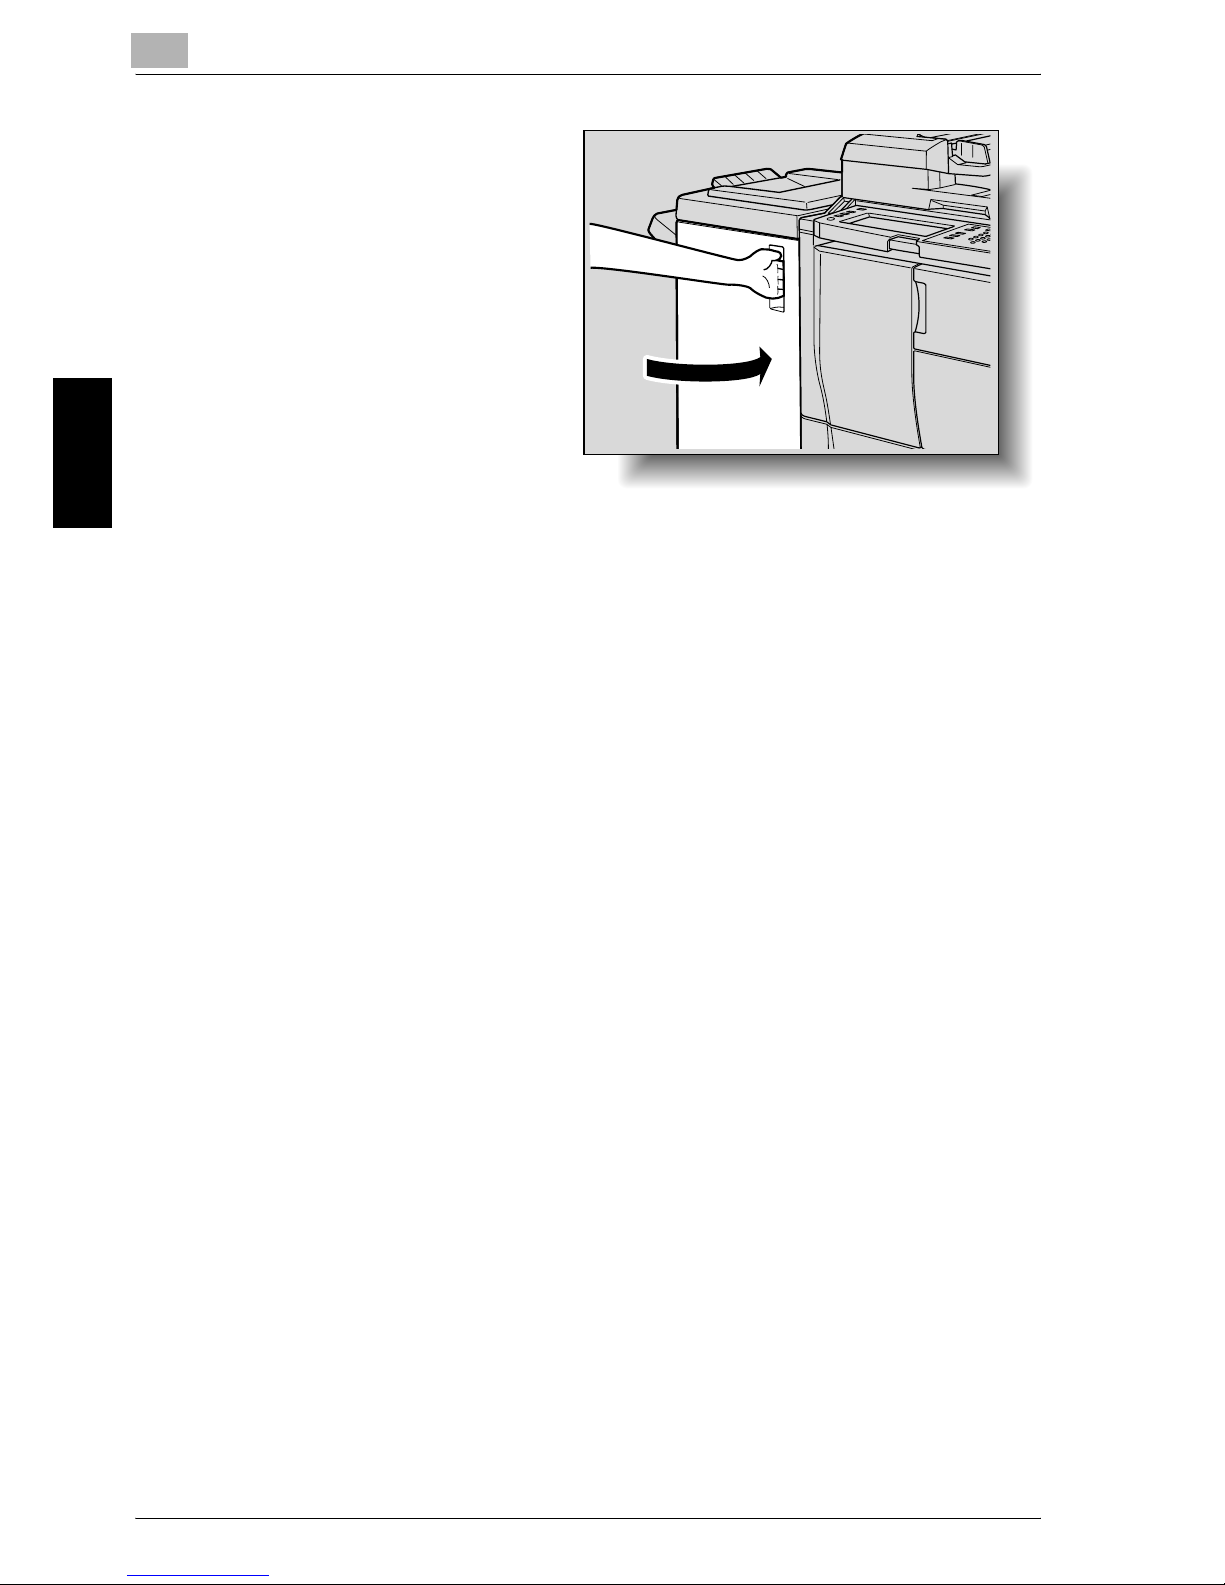
To replace the staple cartridge for finisher 9204
1 Open the finisher door.
2 Pull out the stacker unit.
– Hold the stacker unit
handle, and then
slowly pull out the
stacker unit as far as
possible.
9
Replacing Toner Cartridges and Staples and Emptying Dust Boxes
9-12 im7520/im6020
Replacing Toner Cartridges and Staples and Emptying Dust Boxes Chapter 9
3 Remove the staple cartridge.
– While lifting the lever
on the staple cartridge, pull the cartridge toward you to
remove it.
– Remove the staple
cartridge by guiding
it along the rails.
4 Remove the empty car-
tridge case from the staple cartridge.
1
2

Replacing Toner Cartridges and Staples and Emptying Dust Boxes
9
im7520/im6020 9-13
Replacing Toner Cartridges and Staples and Emptying Dust Boxes Chapter 9
5 Load the new cartridge
case into the staple cartridge.
– Align the side of the
staple cartridge
marked by the arrow
with the side of the
cartridge case
marked by the arrow,
and then fully insert
the staple cartridge.
– Carefully pull the seal
off the cartridge
case.
6 Install the staple cartridge.
– Place the staple car-
tridge on the rails,
and then guide it
back to its original
position.
– Push down the sta-
ple cartridge, and
then check that the
cartridge is securely
installed.
1
2
9
Replacing Toner Cartridges and Staples and Emptying Dust Boxes
9-14 im7520/im6020
Replacing Toner Cartridges and Staples and Emptying Dust Boxes Chapter 9
7 Return the stacker unit
to its original position.
8 Close the finisher door.
2
Reminder
Do not remove the remaining staples, otherwise the machine will not be
able staple after the cartridge is replaced.
Replacing Toner Cartridges and Staples and Emptying Dust Boxes
9
im7520/im6020 9-15
Replacing Toner Cartridges and Staples and Emptying Dust Boxes Chapter 9
9.3 Emptying the Dust Boxes
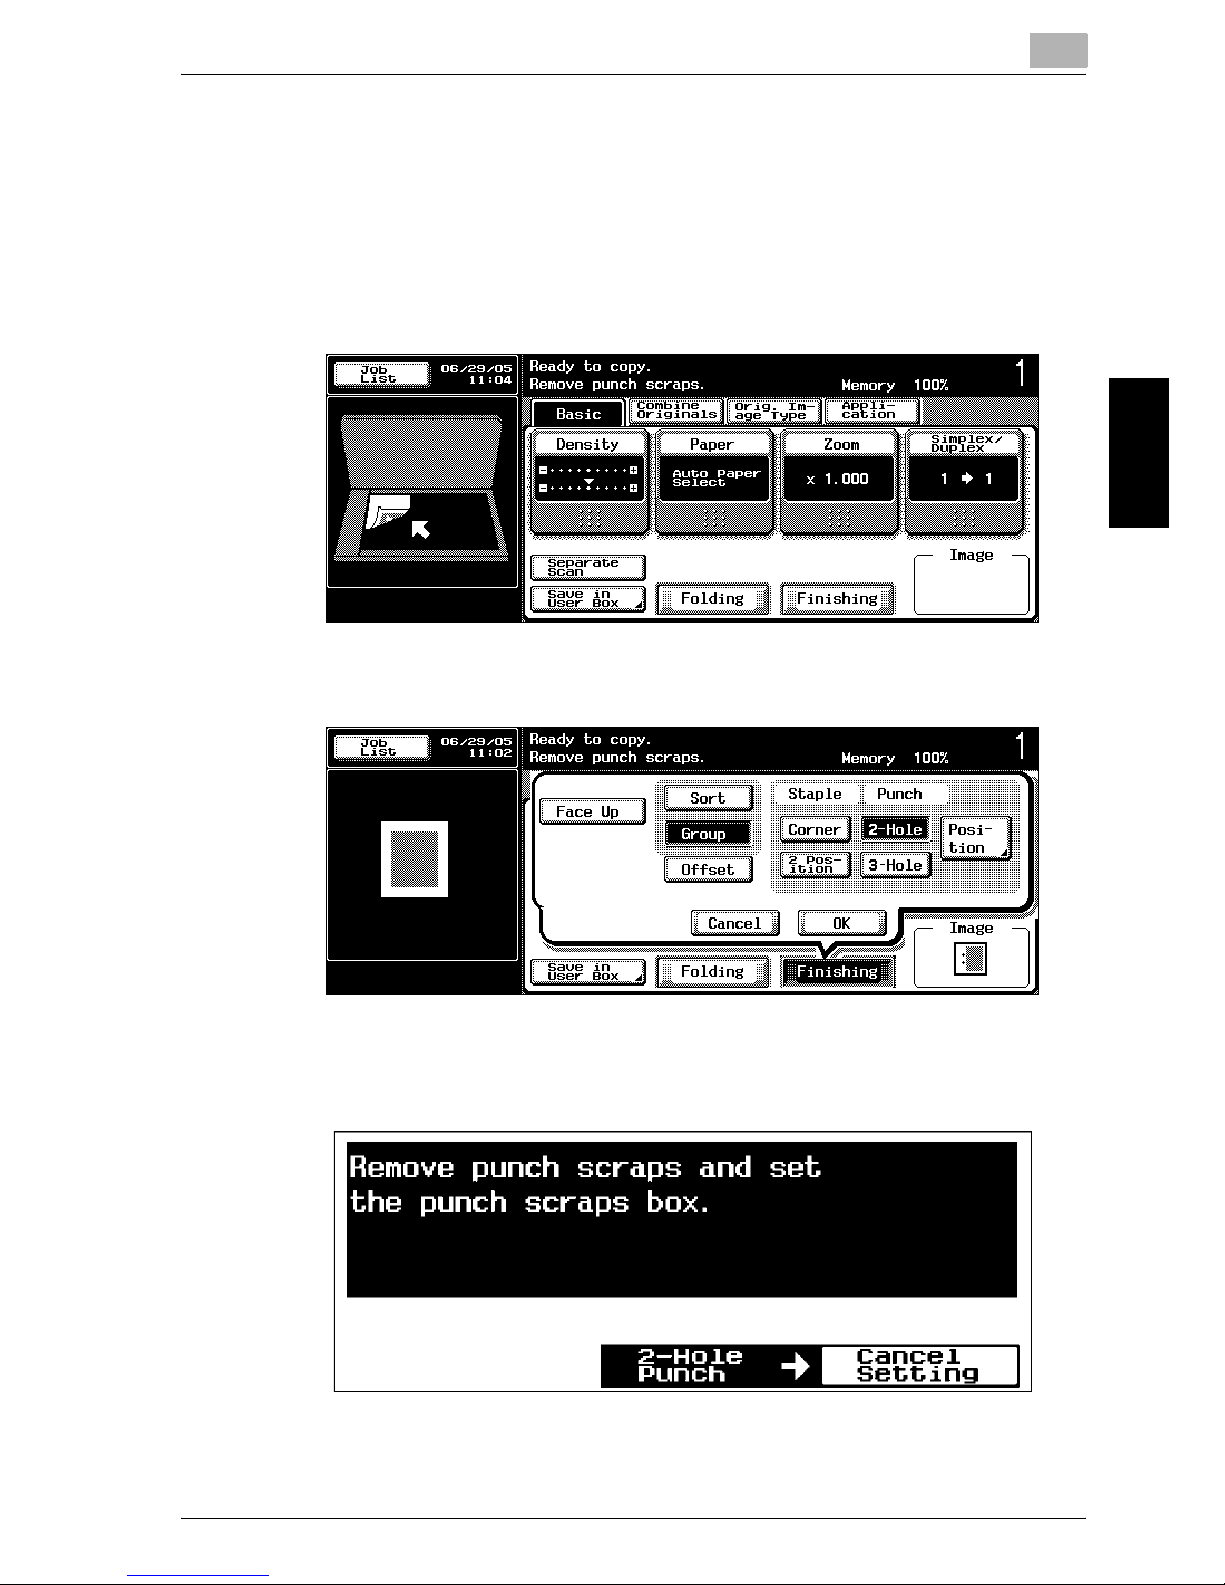
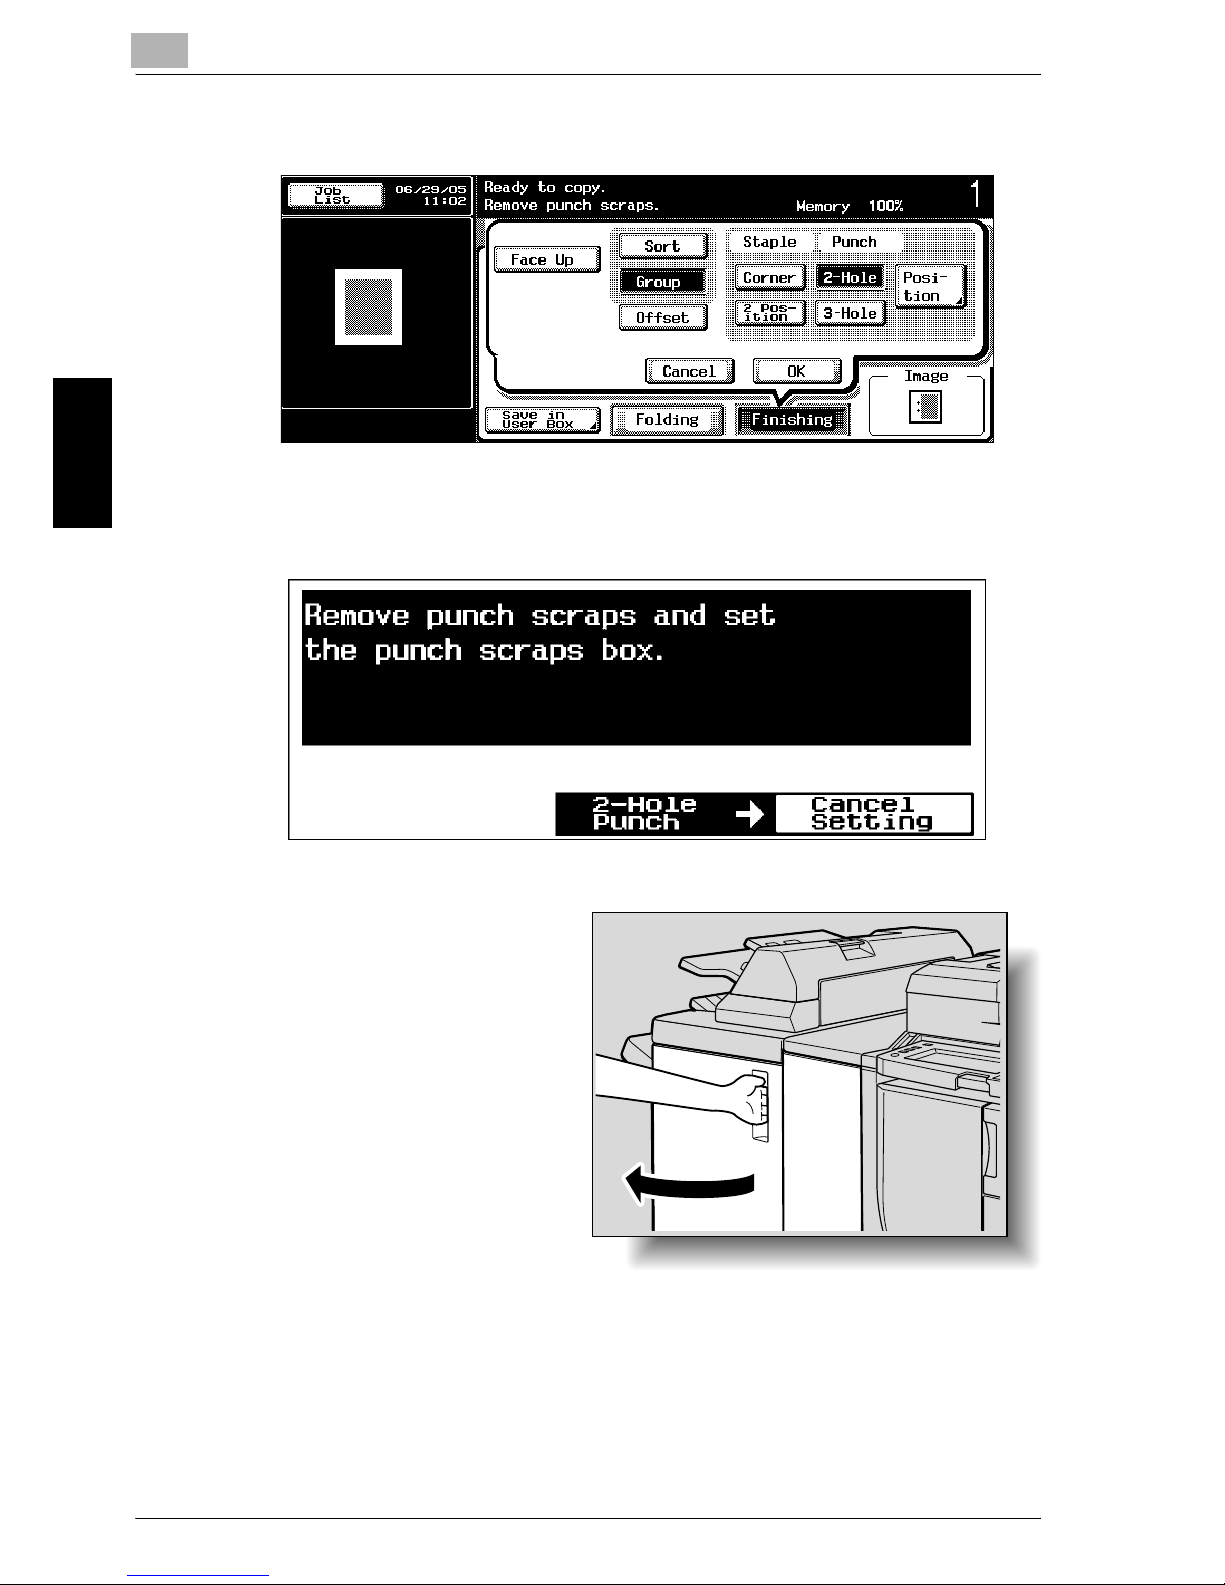
To empty the dust box of the punch kit
If the punch dust box in punch kit im9220010 installed on finisher 9202/9204
becomes full, the message shown below appears.
Display in Enlarge Display Mode

9
Replacing Toner Cartridges and Staples and Emptying Dust Boxes
9-16 im7520/im6020
Replacing Toner Cartridges and Staples and Emptying Dust Boxes Chapter 9
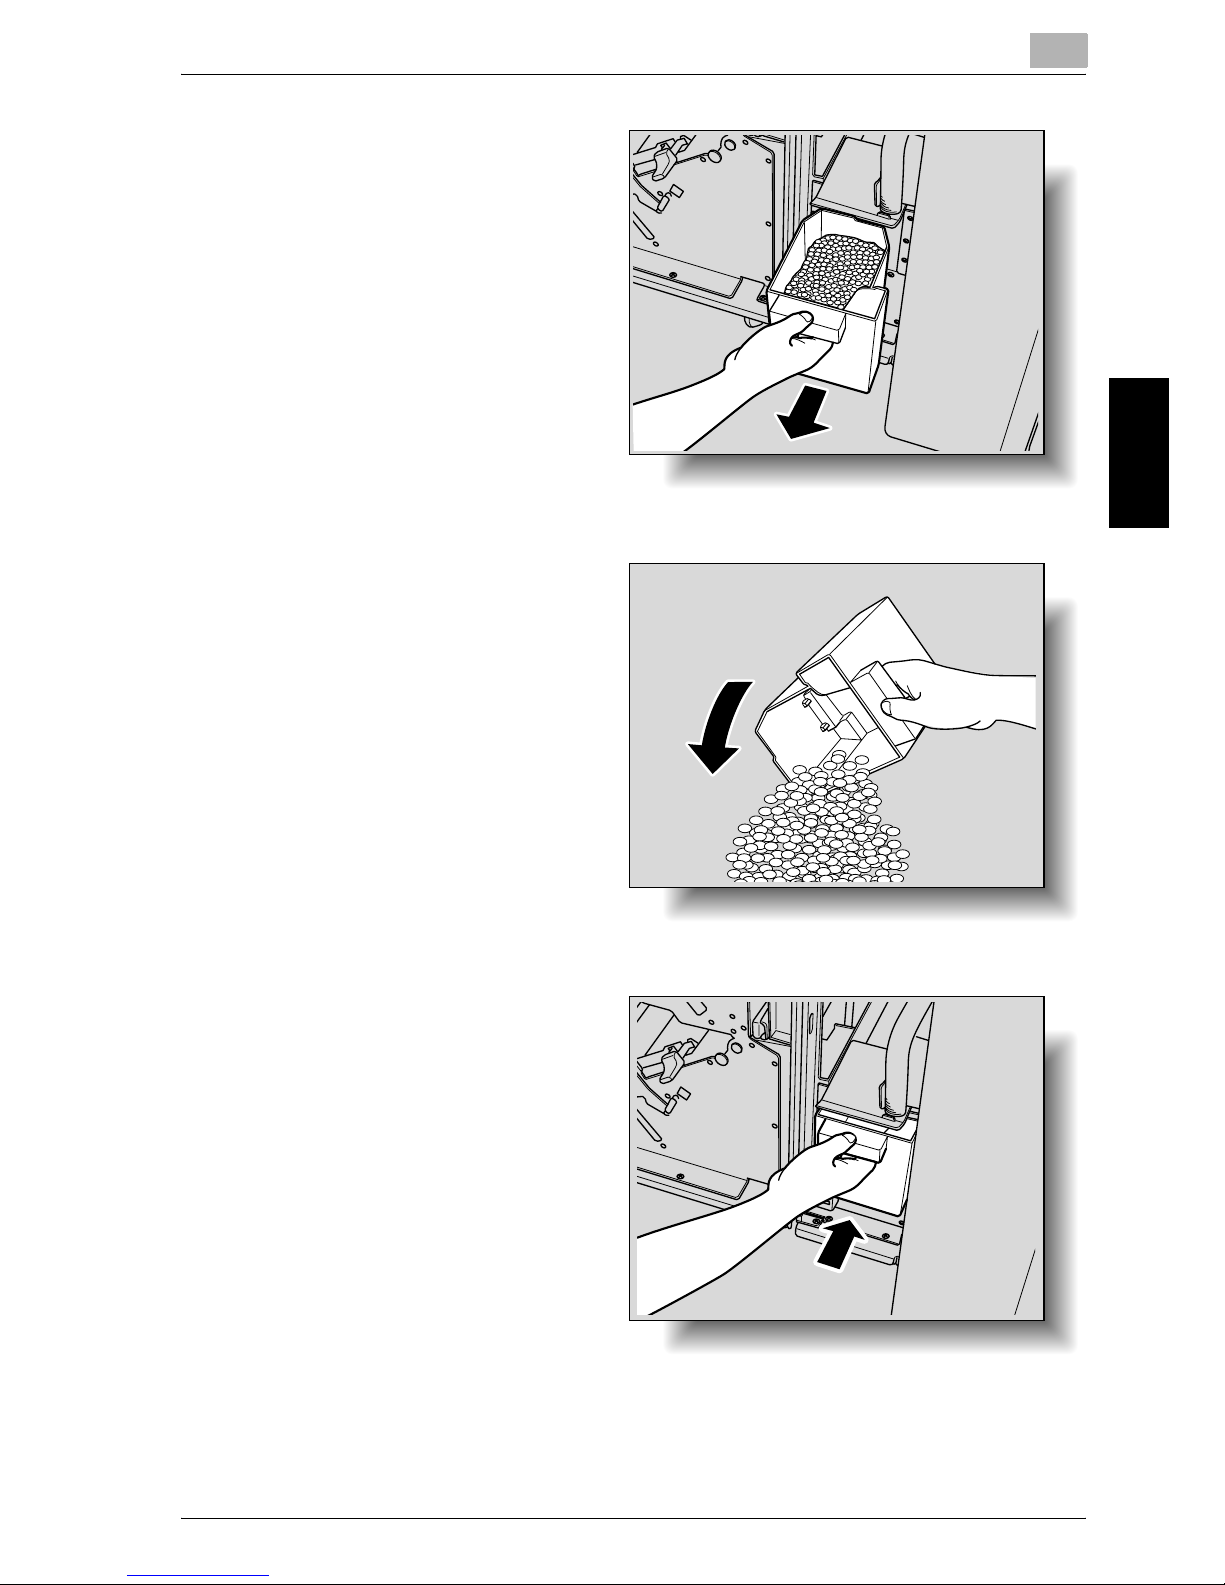
1 Open the finisher door.
2 Pull out the punch dust
box.
3 Empty the punch dust
box.

Replacing Toner Cartridges and Staples and Emptying Dust Boxes
9
im7520/im6020 9-17
Replacing Toner Cartridges and Staples and Emptying Dust Boxes Chapter 9
4 Install the punch dust
box into its original position.
5 Close the finisher door.
To empty the dust box of the Z-folding unit
If the punch dust box in Z-folding unit 9263 installed on finisher 92029202/
9204 becomes full, the message shown below appears.
9
Replacing Toner Cartridges and Staples and Emptying Dust Boxes
9-18 im7520/im6020
Replacing Toner Cartridges and Staples and Emptying Dust Boxes Chapter 9
Display in Enlarge Display Mode
1 Open the finisher door.
Replacing Toner Cartridges and Staples and Emptying Dust Boxes
9
im7520/im6020 9-19
Replacing Toner Cartridges and Staples and Emptying Dust Boxes Chapter 9
2 Pull out the punch dust
box.
3 Empty the punch dust
box.
4 Install the punch dust
box into its original position.

9
Replacing Toner Cartridges and Staples and Emptying Dust Boxes
9-20 im7520/im6020
Replacing Toner Cartridges and Staples and Emptying Dust Boxes Chapter 9
5 Close the finisher door.

10
Care of the Machine Chapter 10
Care of the Machine
10
Care of the Machine
10-2 im7520/im6020
Care of the Machine Chapter 10
10 Care of the Machine
10.1 Cleaning
This section describes the procedures for cleaning each part.
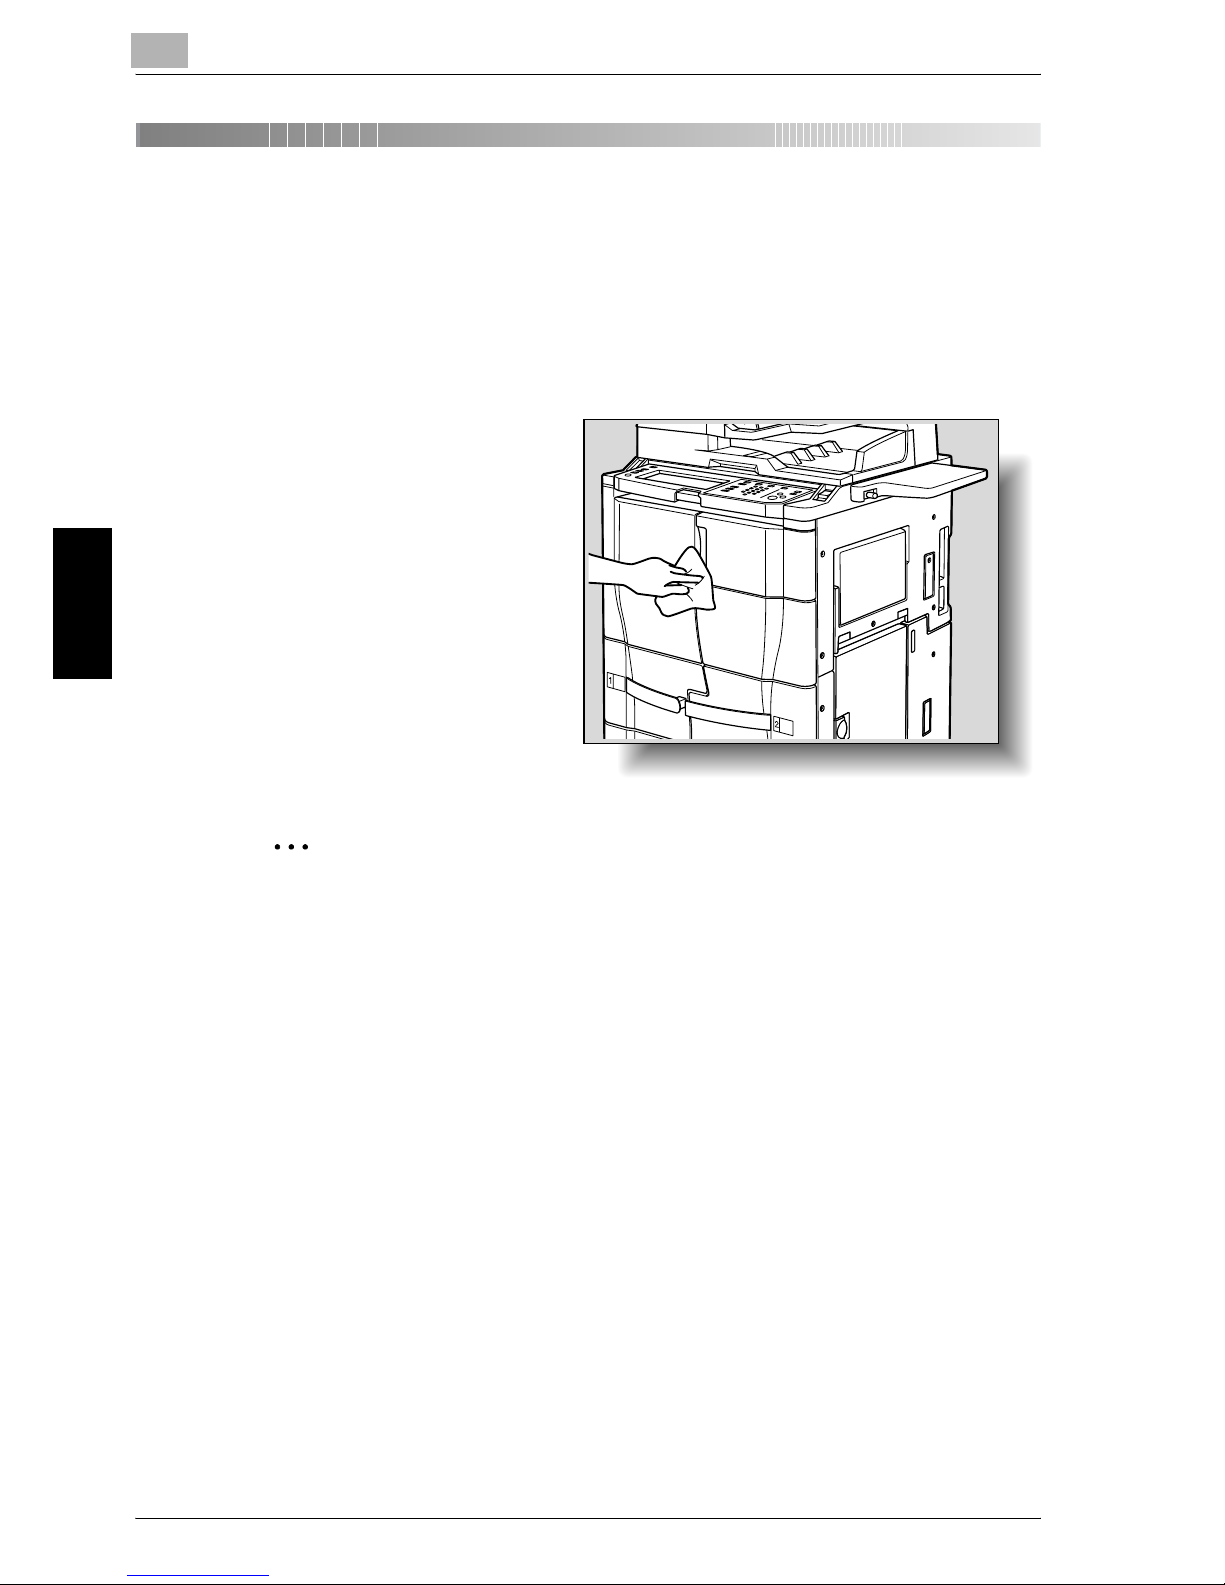
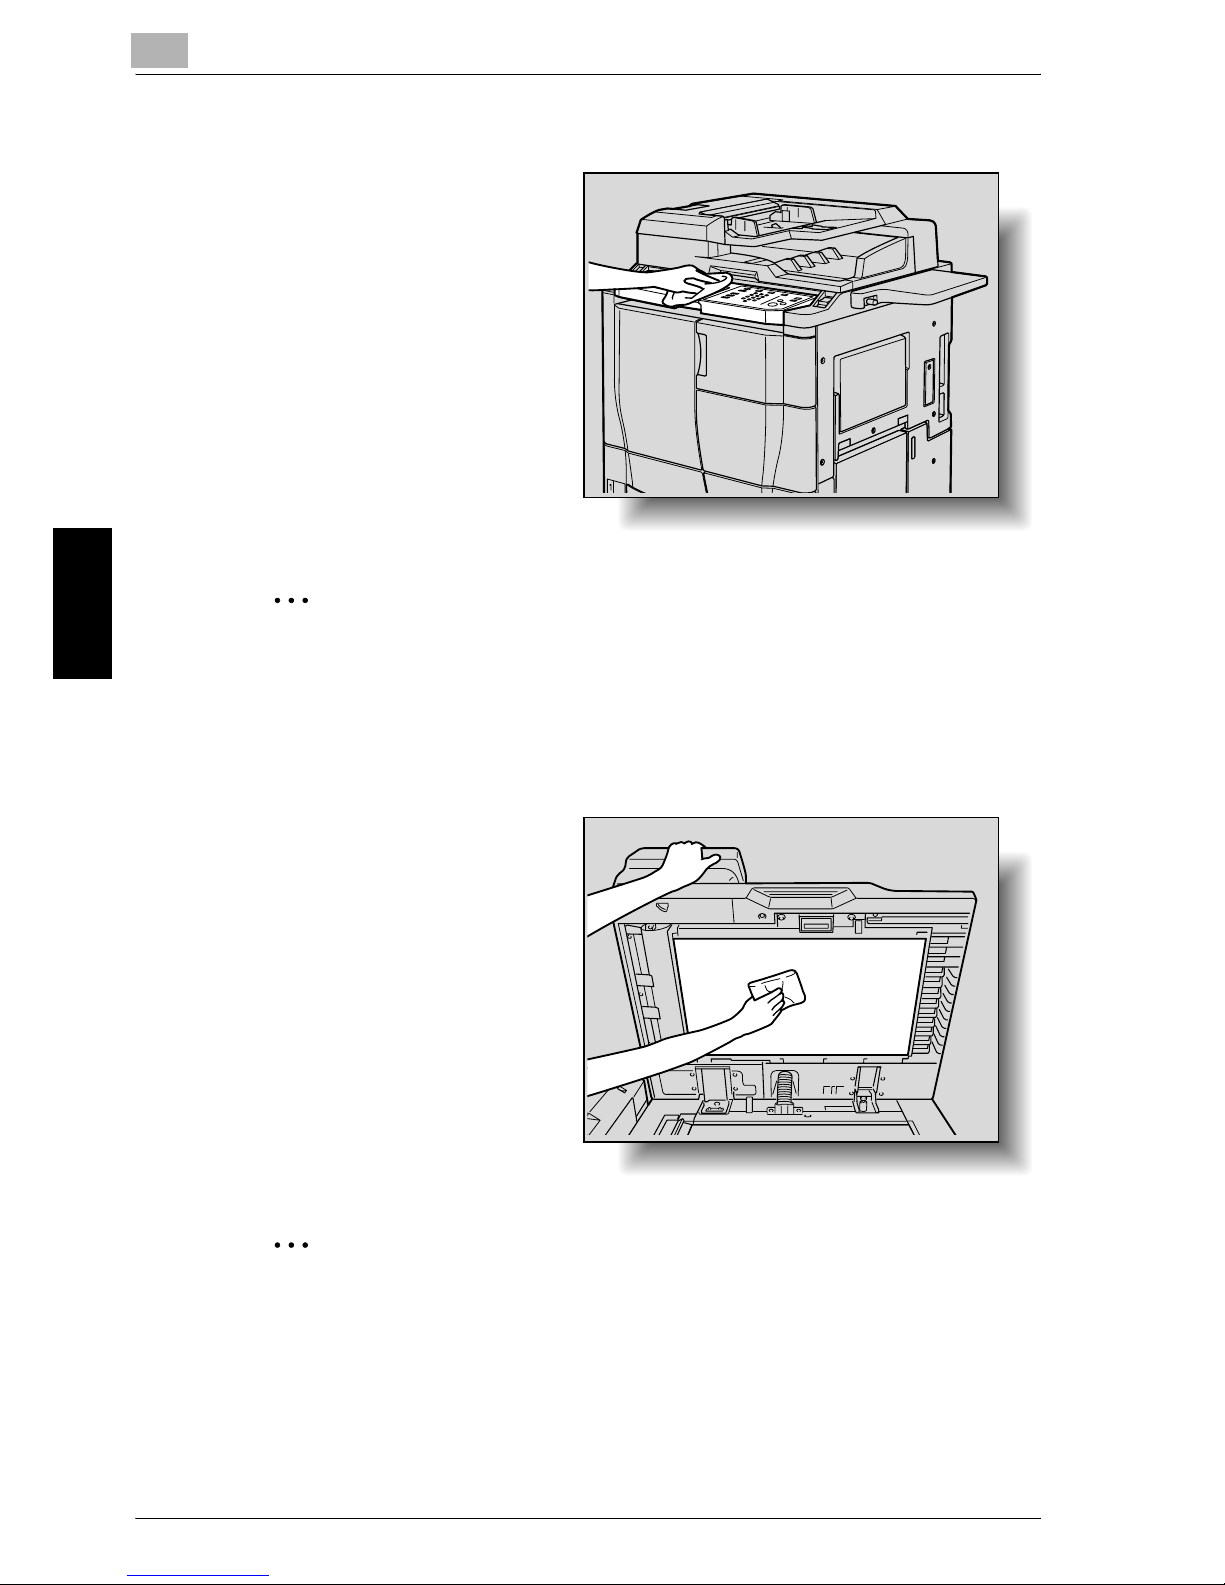
Main body
% Clean the surface of the
main body by wiping it
with a soft cloth dampened with a mild household detergent.
2
Reminder
Be sure to turn off the machine (set the power switch to “o”) before
cleaning it.
Never use solvents, such as benzene or thinner, to clean the main body.
Care of the Machine
10
im7520/im6020 10-3
Care of the Machine Chapter 10
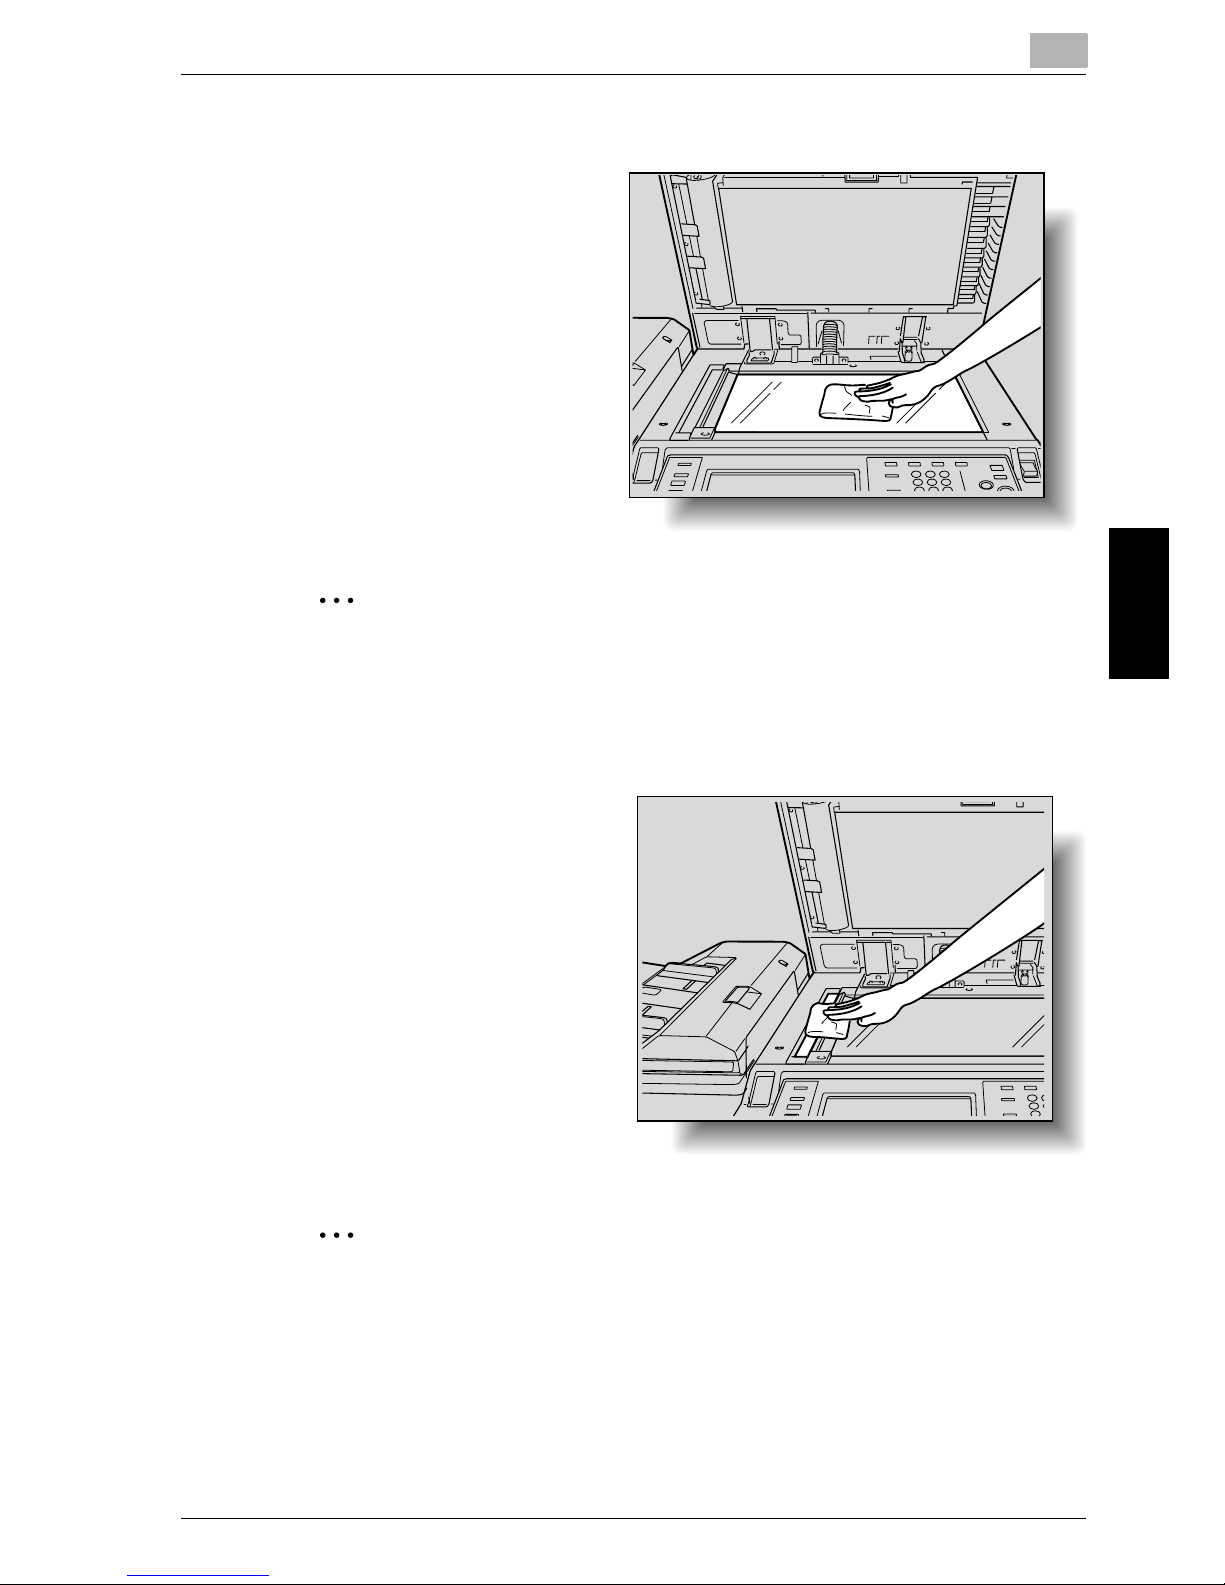
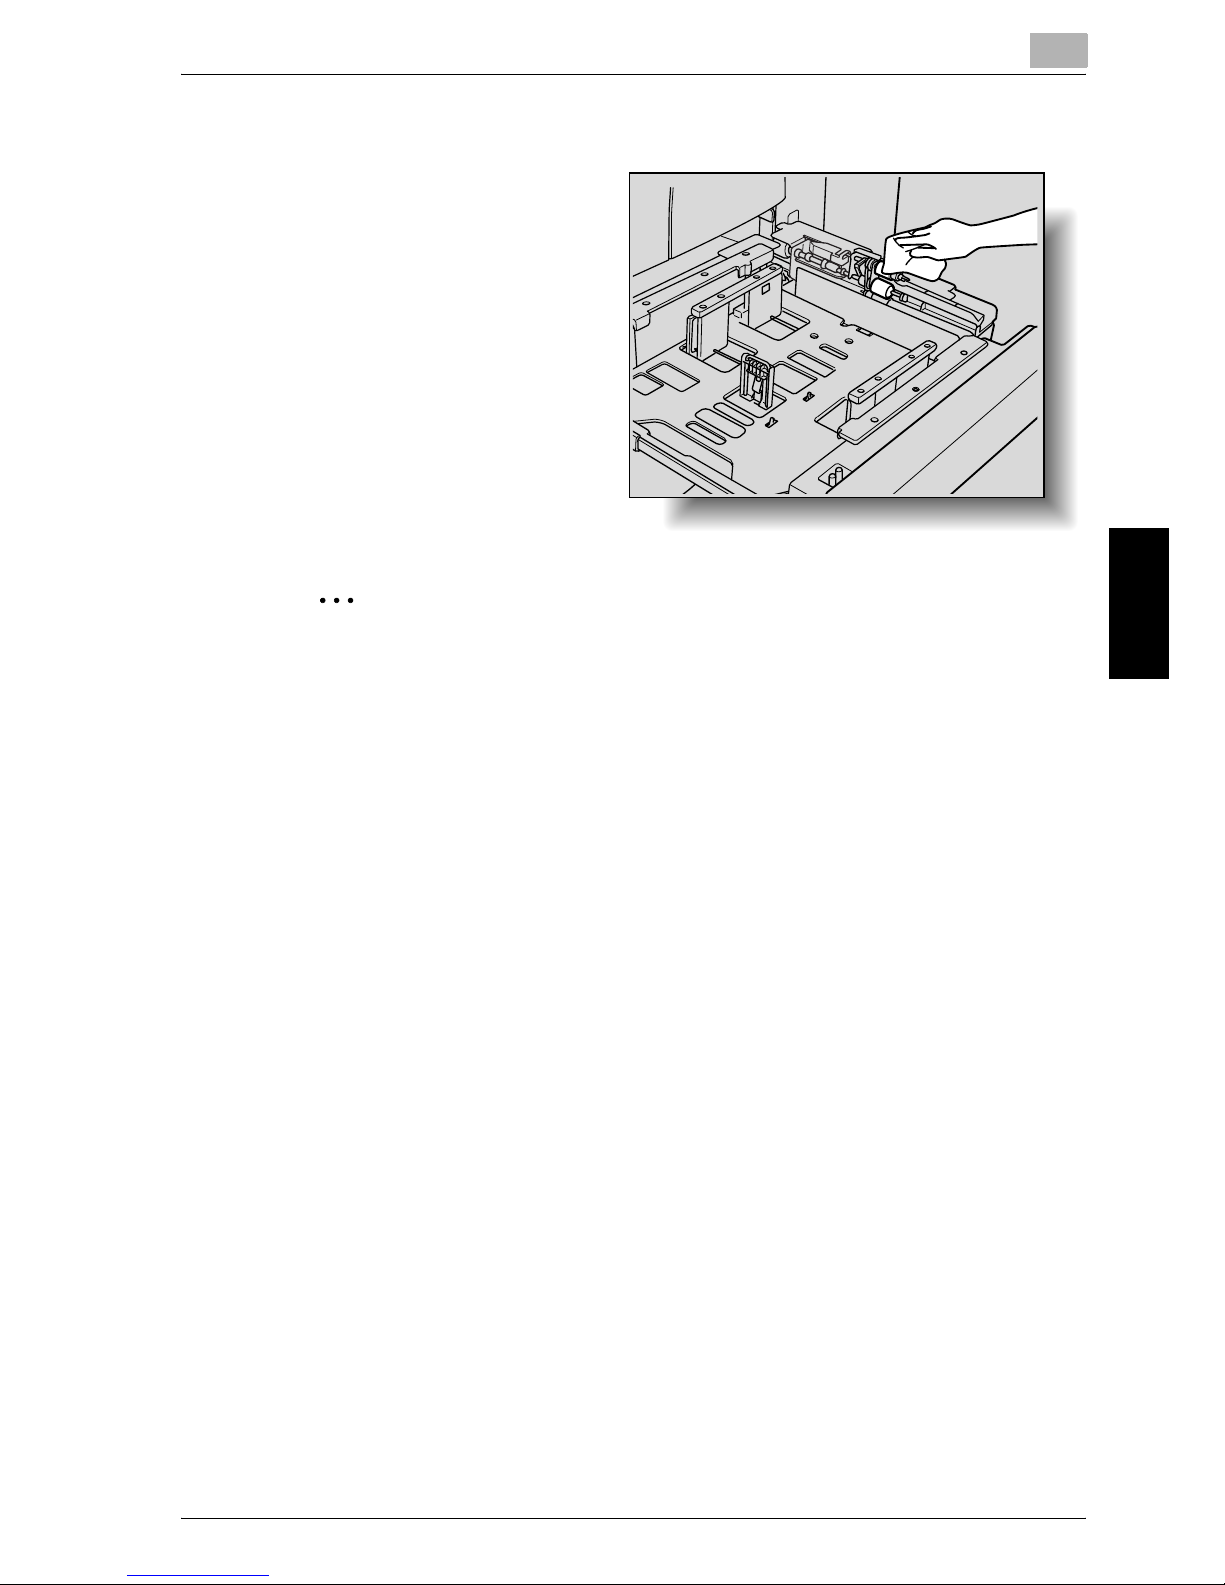
Original Glass
% Clean the surface of the
original glass by wiping it
with a soft, dry cloth.
2
Reminder
Never use solvents, such as benzene or thinner, to clean the original
glass.
Left Partition Glass
% Clean the left partition
glass by wiping it with a
soft, dry cloth.
2
Reminder
Never use solvents, such as benzene or thinner, to clean the left partition
glass.
10
Care of the Machine
10-4 im7520/im6020
Care of the Machine Chapter 10
Control Panel
% Clean the control panel
by wiping it with a soft,
dry cloth.
2
Reminder
Pressing too hard on the control panel or the touch panel may damage
them. In addition, never use a mild household detergent, glass cleaner,
benzene or thinner to clean the control panel or touch panel.
ADF platen guide cover
% Clean the ADF platen
guide cover by wiping it
with a soft, dry cloth.
2
Reminder
Never use solvents, such as benzene or thinner, to clean the ADF platen
guide cover.
Care of the Machine
10
im7520/im6020 10-5
Care of the Machine Chapter 10
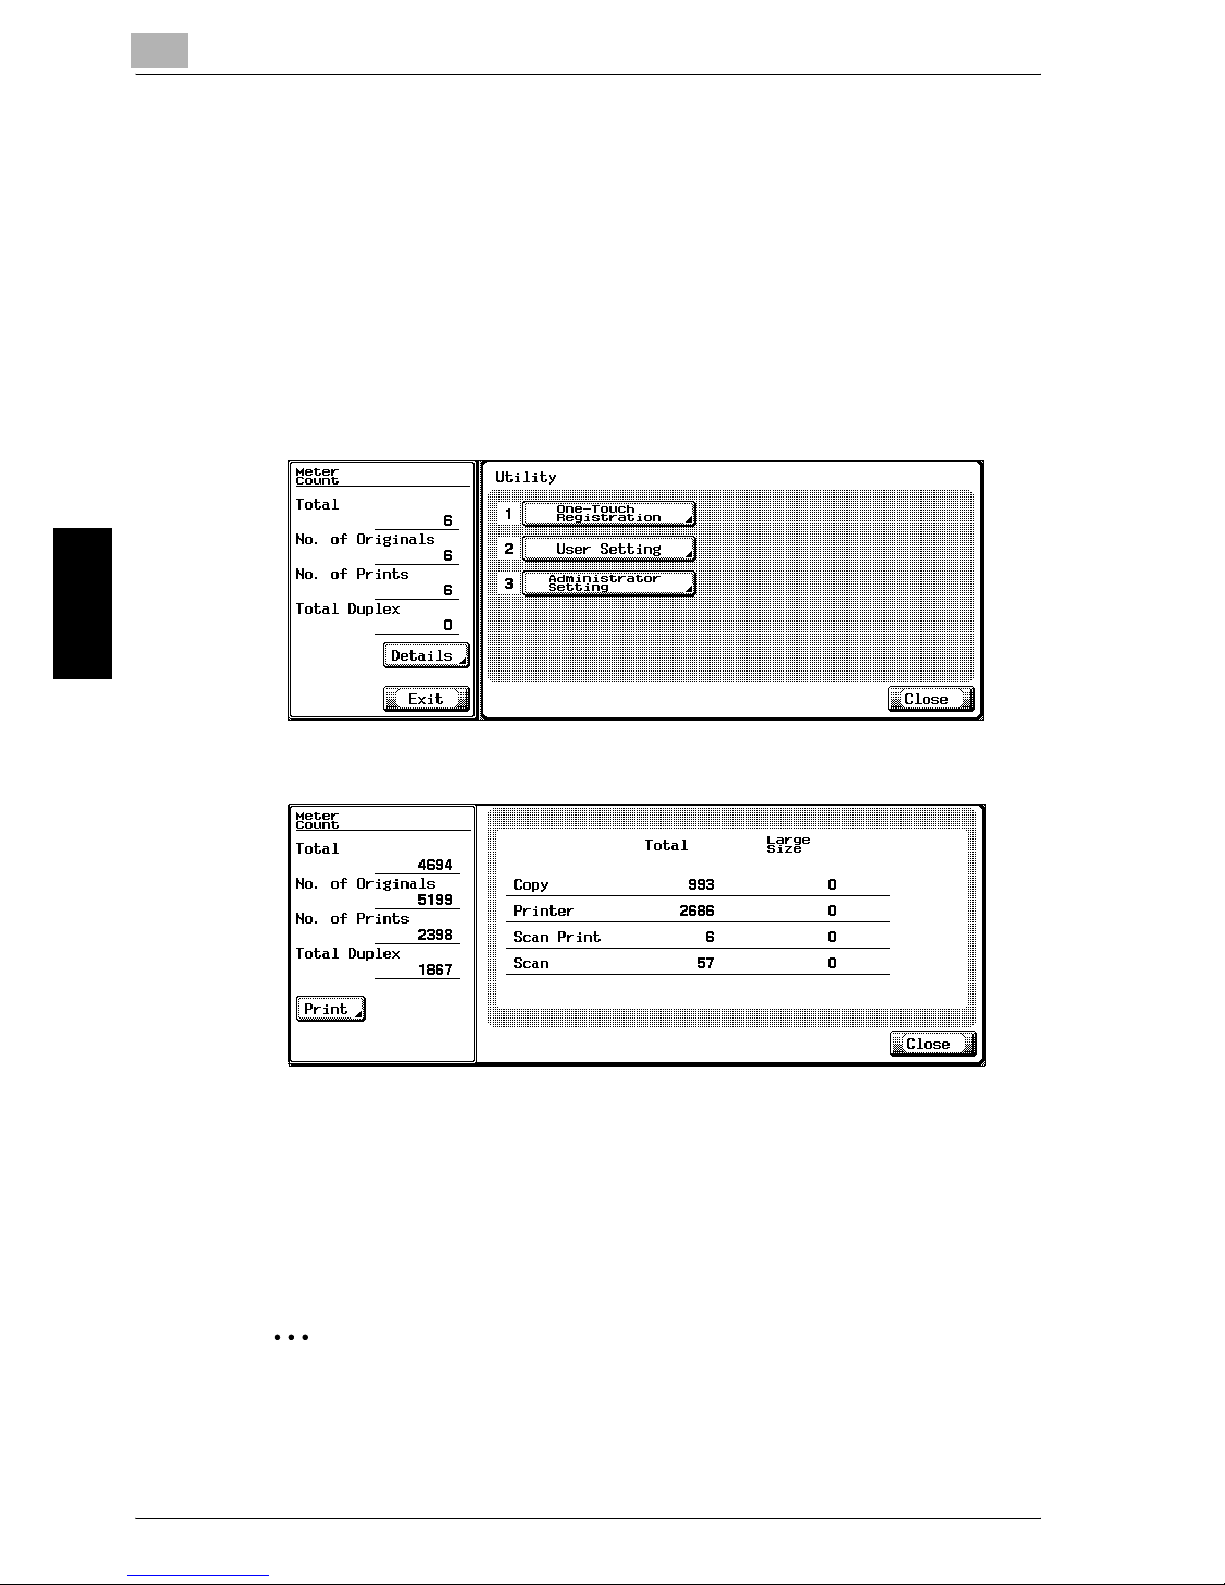
Paper Take-Up Roller
% Clean the paper take-up
rollers by wiping them
with a soft, dry cloth.
2
Reminder
Never use solvents, such as benzene or thinner, to clean the paper takeup roller.
10
Care of the Machine
10-6 im7520/im6020
Care of the Machine Chapter 10
10.2 Viewing Counters (Meter Count)
The Meter Count screen can be displayed so that the total number of prints
since counting started can be viewed.
In addition, the list of counters can be printed.
To view the counters
1 Press the [Utility/Counter] key.
2 Touch [Details] in the sub display area.
The list of counters appears.
?
Can the list of counters be printed?
% To print the list of counters, touch [Print], select the paper size, and
then press the [Start] key.
3 Touch [Close].
The Basic screen appears again.
2
Note
The list of counters can be displayed even while the machine is copying
or printing.
Care of the Machine
10
im7520/im6020 10-7
Care of the Machine Chapter 10
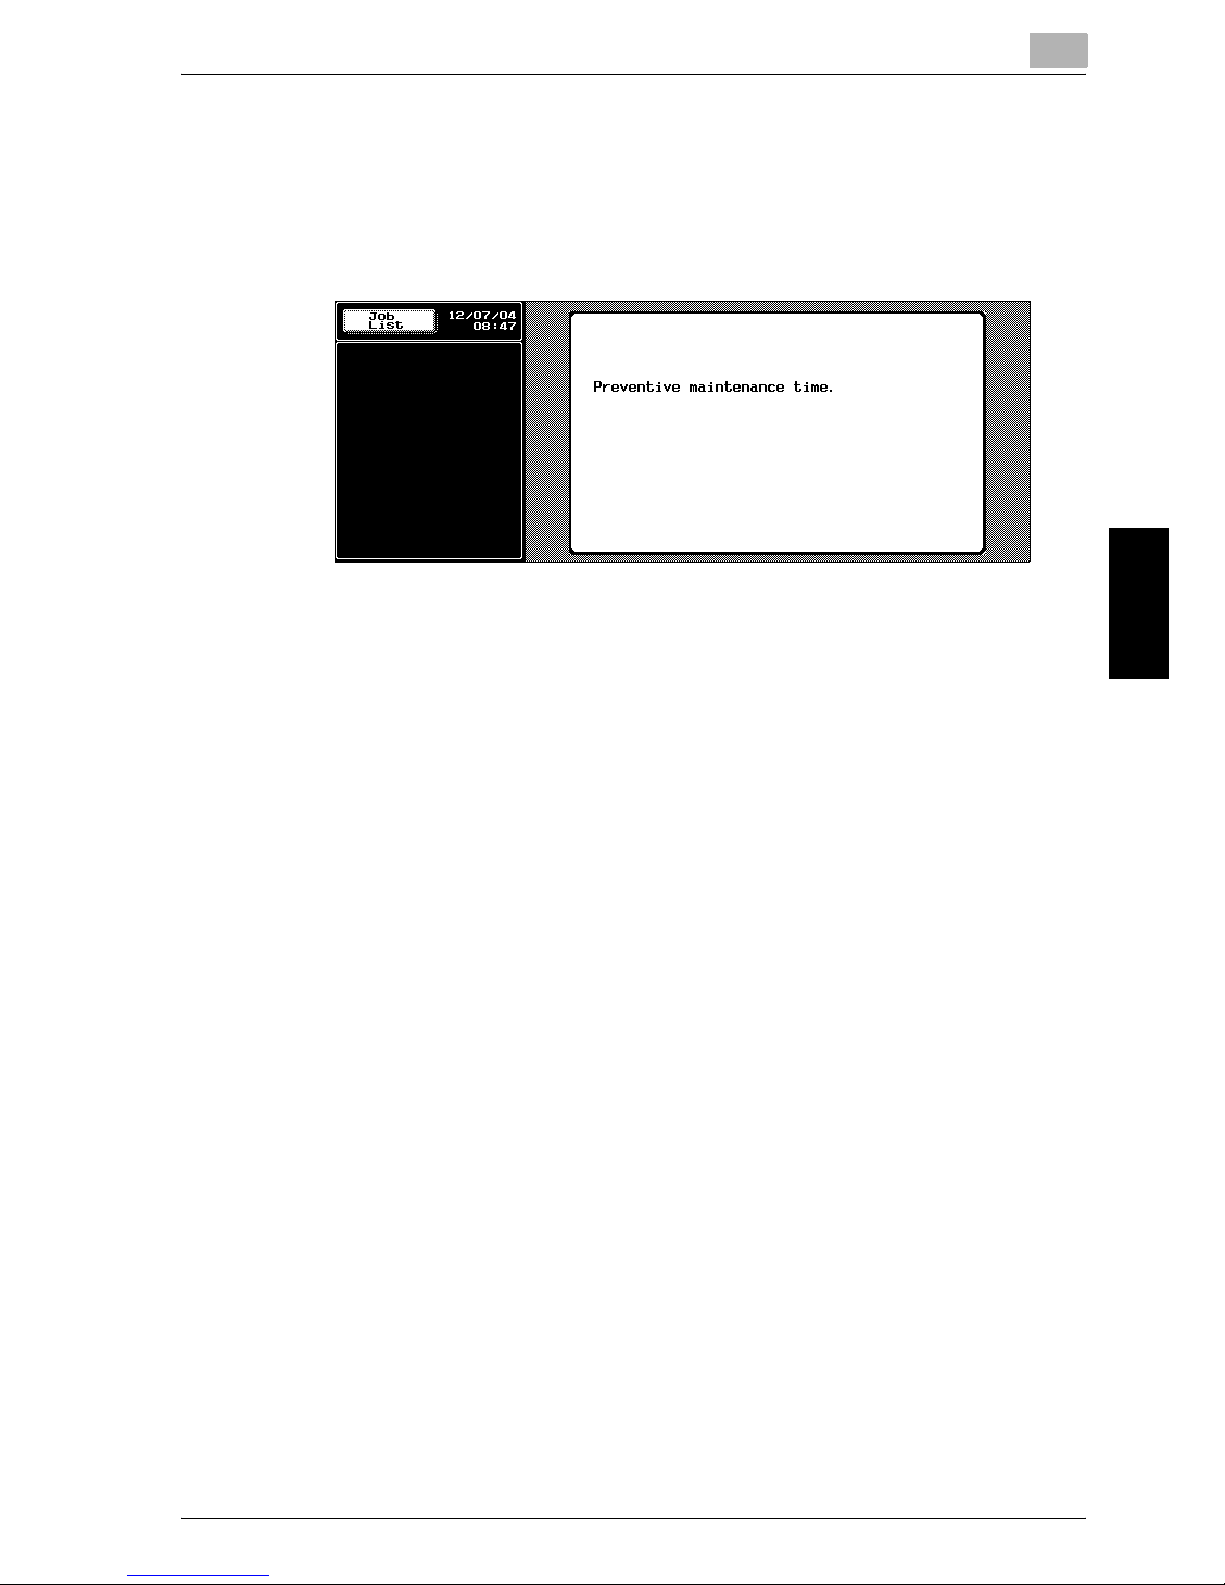
10.3 When the Message “Preventive maintenance time.”
Appears
If the message “Preventive maintenance time.” appears, contact your technical representative and request a periodic maintenance inspection.


11
Managing Jobs (Job List) Chapter 11
Managing Jobs (Job List)
 Loading...