

All-in-One
Duplicator
User’s
V
Guide
3.10

Content Index
I. Introduction
1. Features 3
System
2.
2-1. Package
2-2.
2-3.
2-4. Main Function Structur e
2-5.
II. Fu
F
unction T
Chapter 1.MultiMedia
1. Copy 10
2. Compare 12
Copy + Compare 14
3.
4. Information 14
4-1. Flash Device
4-2. Disc
4-3. System
5. Utility 16
6. Setup 17
6-1.
6-2. Disc
6-3. MultiDisc
6-4. Burn
6-5. Advanced
F
unction T
Chapter
1. Copy 24
T
est
2.
Overview 3
Contents 3
All-in-One
All-in-One
Reminding 8
nction
able-Multimedia Duplication 9
Multi-Session 17
able-Disc to
2.
25
Duplicator 3
Interface 4
6
Introduction
Duplication 10
Information 14
Information 15
Information 15
Spanning 17
18
Speed 19
Setup 19
Disc
Duplication 21
Disc
Duplication 24
7. Utility 28
7-1.
Information 28
7-2. Erase Disc
7-3. PreScan
7-4.
Track Ed it
7-5.
Eject All Disc
7-6. Copy
7-7. Update BIOS
8. Setup 33
8-1. Auto Start Time
8-2. Display
8-3. Button
8-4. Eject On
8-5.
Reader
8-6.
Compare
8-7.
Language 35
8-8. Clear
8-9. Advanced
HDD
9.
Manager
9-1. Select
9-2. Disc
9-3. Set Reader
9-4. Show Image
9-5. Rename
9-6. Delete
9-7. Show HDD
9-8. Format HDD
to Image 37
29
Source 30
31
31
Counter 32
32
33
Mode 34
Beep 34
Start 34
Speed 35
Speed 35
Setup 35
Setup 35
(For
HDD
-installed duplicator)
Image 37
Speed 38
Info. 38
Image 38
Image 39
Info. 39
40
37
III. Specification
41
IV. FAQ
42
3. Compare 26
Copy + Compare 26
4.
Set Burn
5.
Select
6.
Speed 27
Source 28
2
Appendix
I. Introduction
1. Features
• Multi-Session, MultiDisc, Disc Spanning, Disc to Disc duplication.
• High speed DDR2 SDRAM.
• Support various Flash m edi a interface, ex: USB, SD, CF, MicroSD….
• Support high speed 20X DV D, 52X CD, and 8X Blu-ray burning.
• Special blue back-lit LCD display.
• Support built-in HDD to load disc images.
• Easy operation for separate DVD and Flash to DVD duplication.
2. System Overview
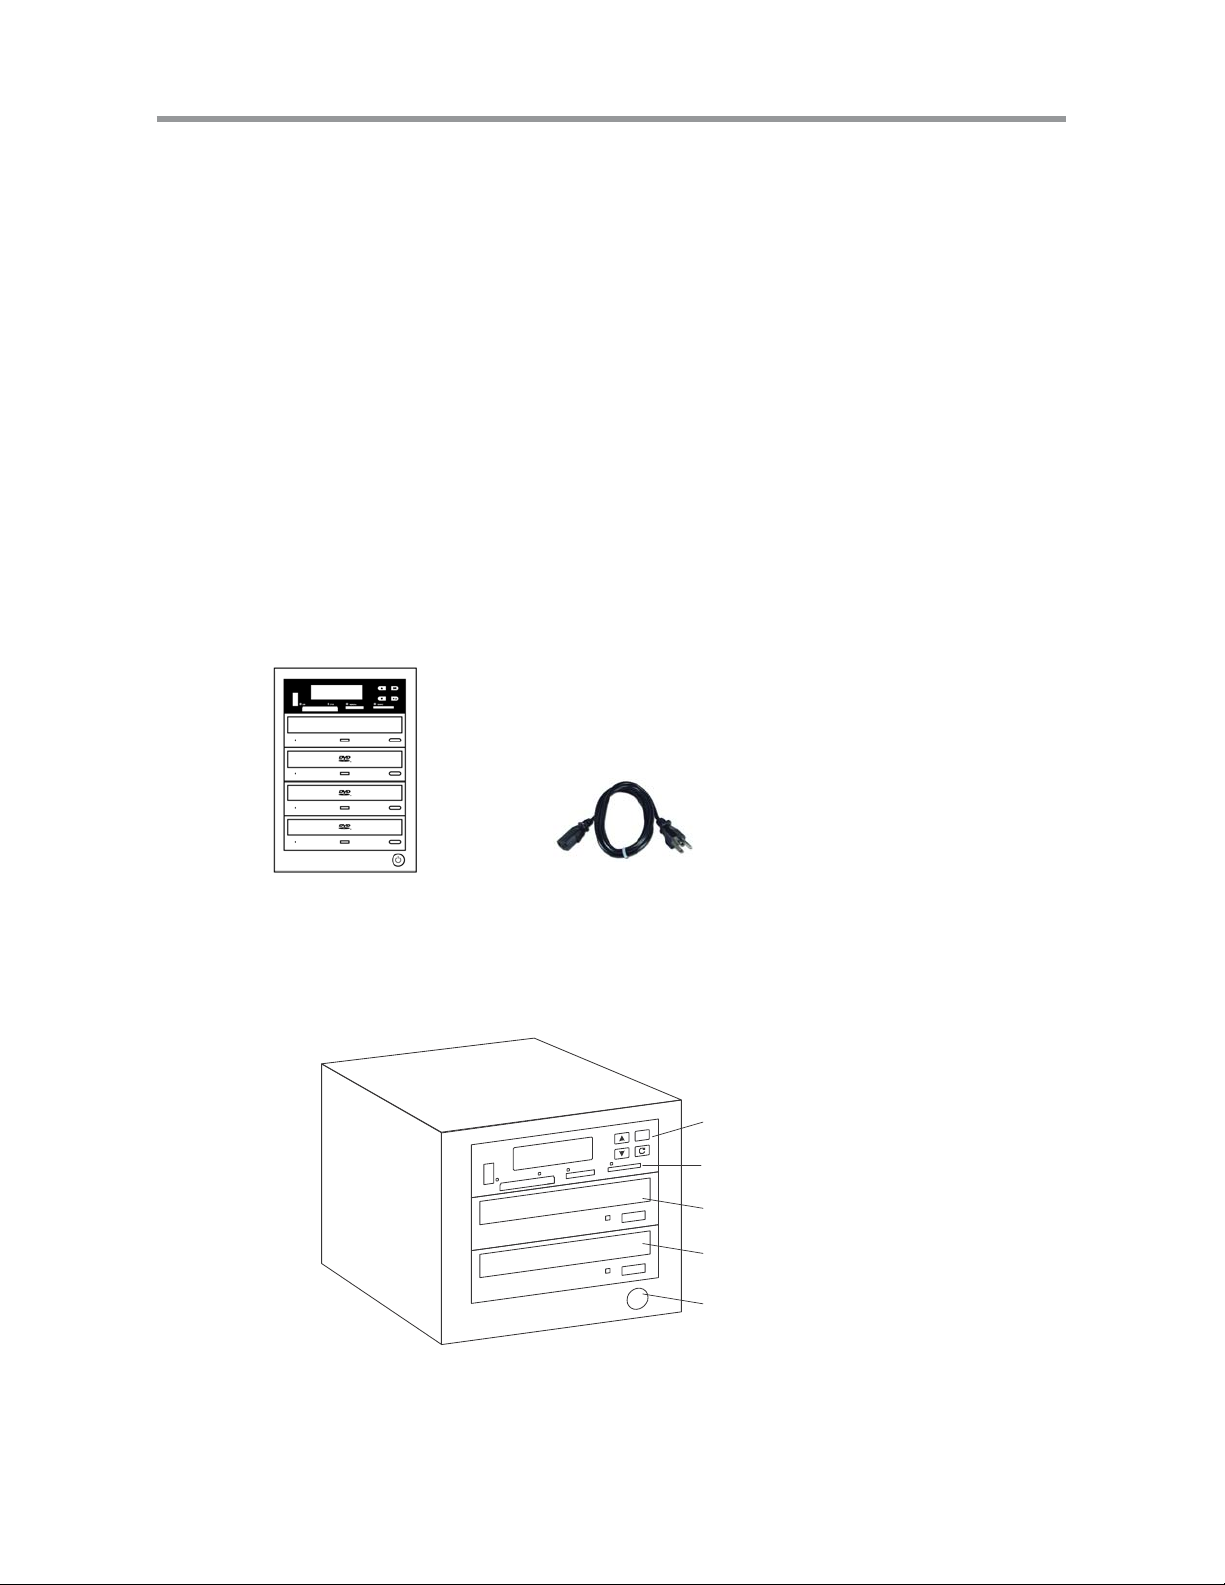
2-1. Package Contents
Duplicator
Power Cord
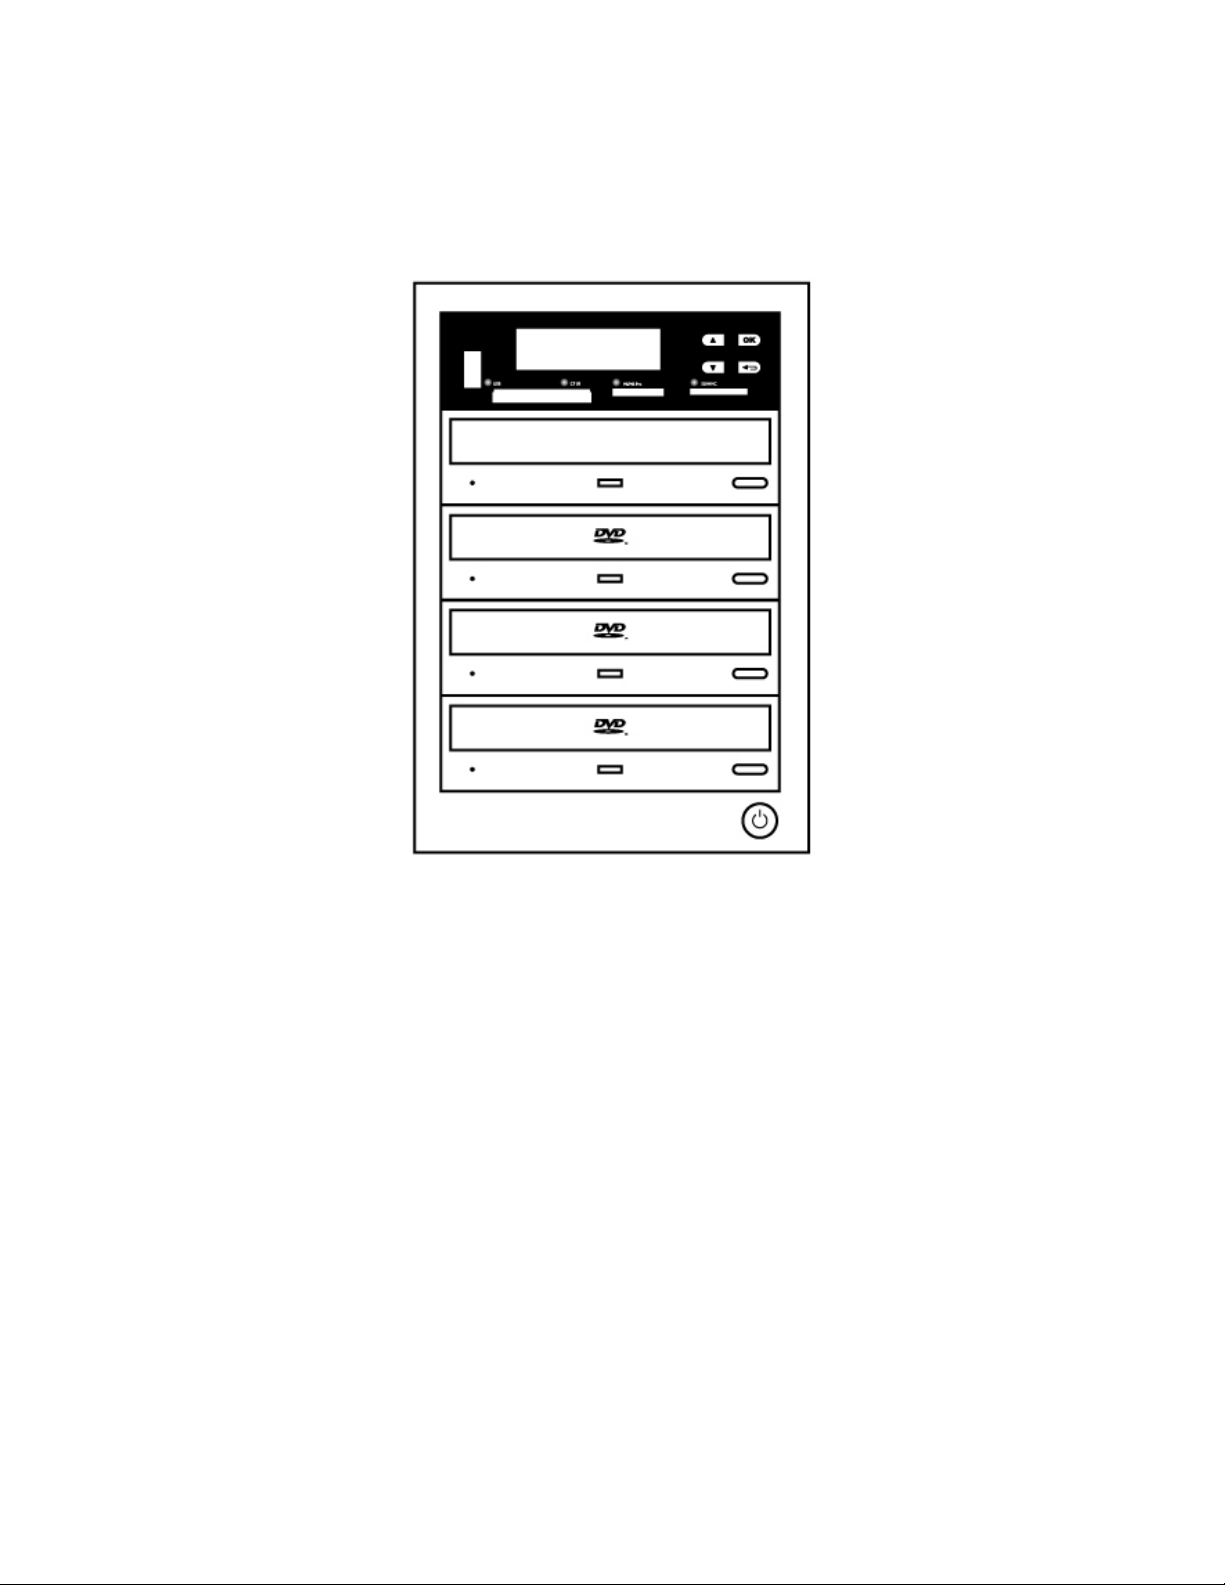
2-2. All-in-One Multimedia Duplicator
Control Button
Card Reader
CD/DVD Reader
CD/DVD Writer
Power Button
User’s Manual
3
I. Introduction
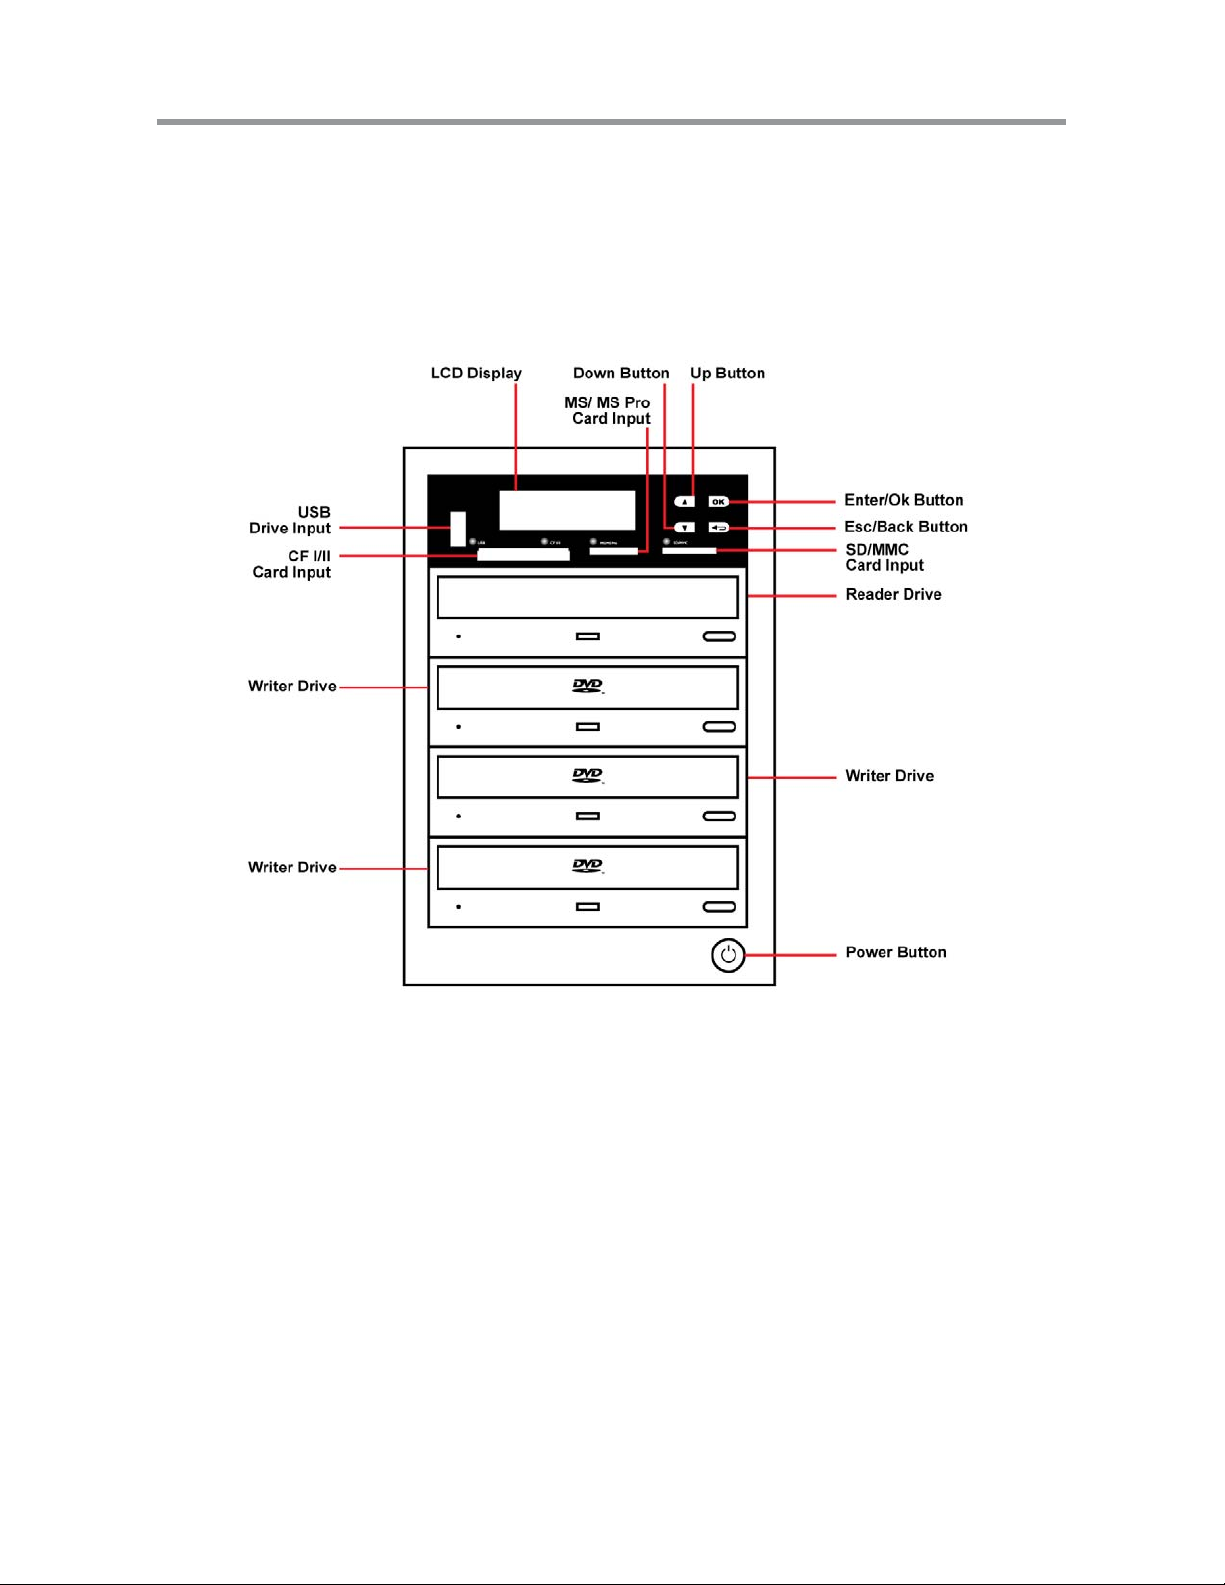
2-3. Display Interface
Display LCD
Backward
Confirm/Execute
Escape/Cancel
Forward
USB CF
MS/MS Pro SD/MMC
4
I. Introduction
2-3. All-in-One Multimedia Duplicator Controls
5
I. Introduction
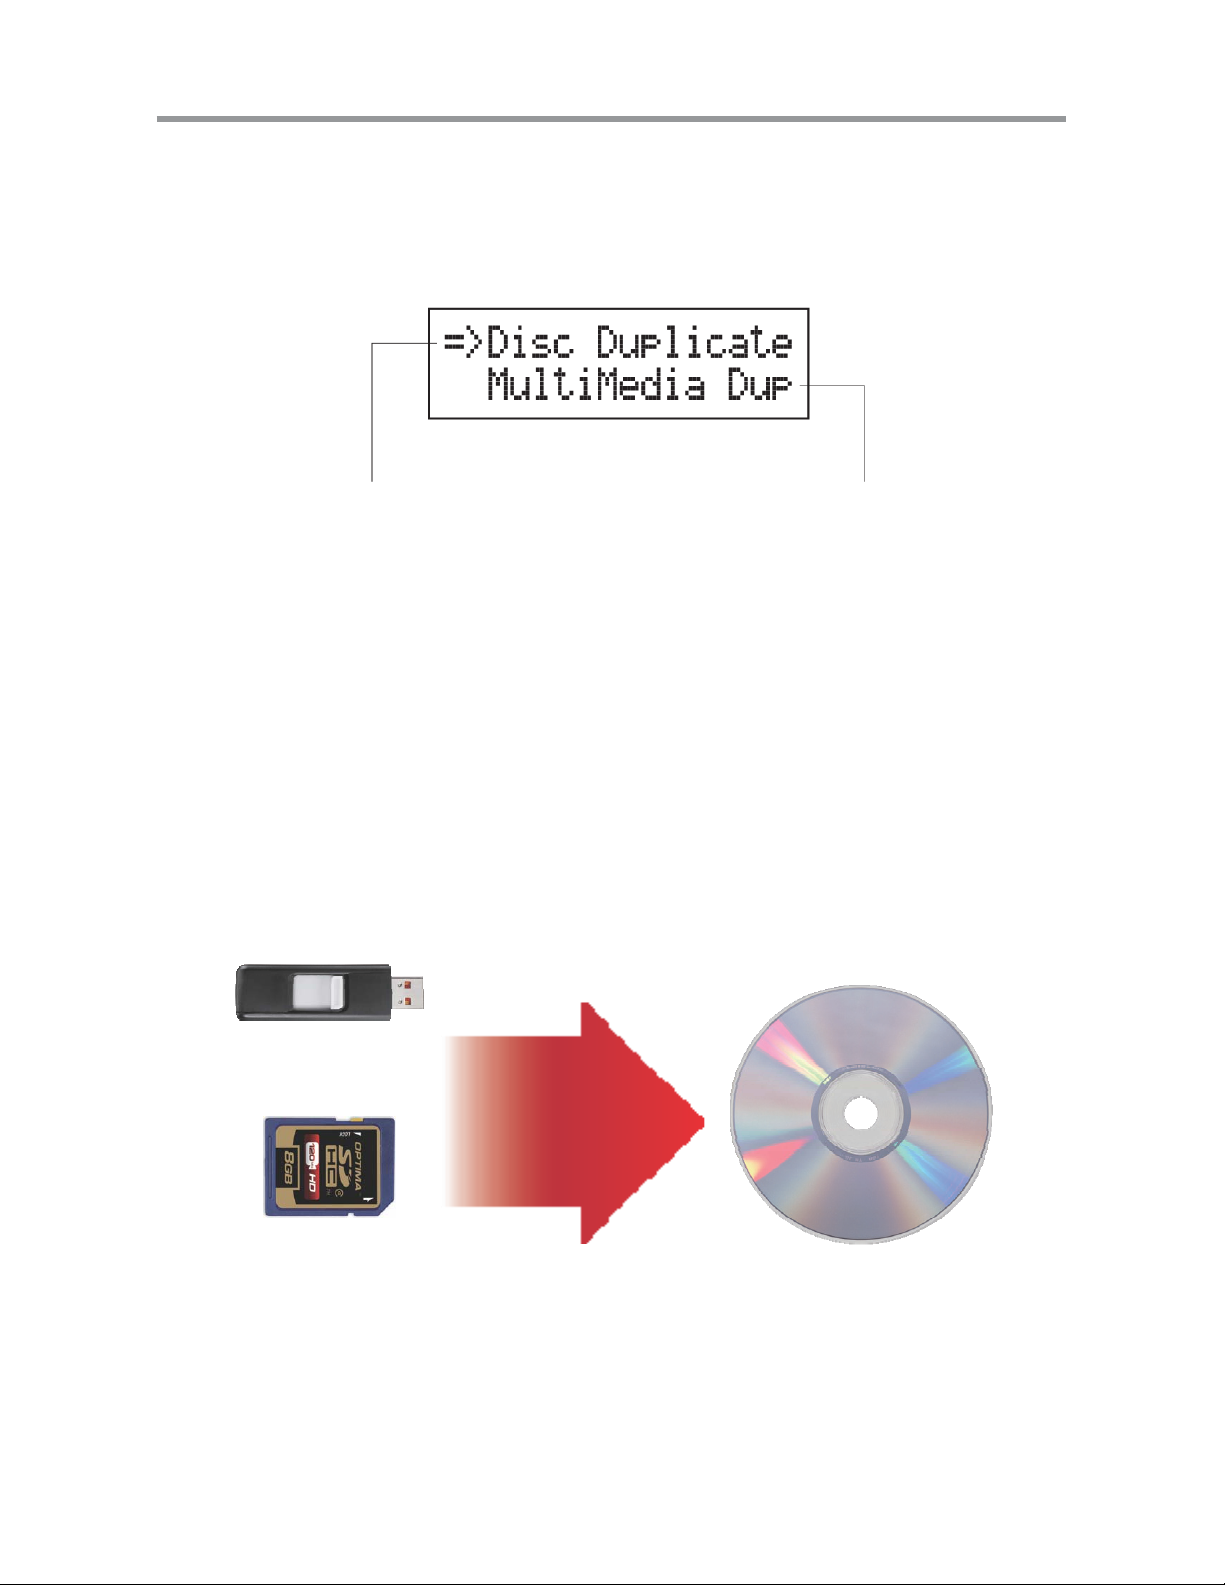
2-4. Main Function Structure
There are two main functions of All-in-One series, one is Disc
(CD/DVD/Blu-ray) Duplication, and anoth er one is Flash
(USB/SD/microSD/MMS..) to Disc
Duplication.
Disc to Disc Duplication
** Please refer to Chapter 2 for operation
guide
There ar e three main copy modes f or Memory card or USB co py to CD/
DVD disc:
Flash (USB/SD/CF/MMS...)to
Disc Duplicator
1. Multi- Session
2. Disc Spanning
3. MultiDisc
** Please refer to Chapter 1 for operation
guide
• Multi-Session: Allows all different types of memory cards with smal l
data
Ex:
to backup to one disc.
USB
100M data
Session 1 for Disc 1
SD
200M data
Session 2 for Disc 1
Disc 1
Note:
Only ONE Flash device can be applied per time.
6
I. Introduction
• Disc Spanning: A big capacity memory card with large data can copy
to
several discs.
Ex:
Disc 1/4
Disc 2/4
USB
4GB data
Disc 3/4
Note: Disc Spanning does not support copy the Flash dev ice with
only ONE
single big file.
Disc 4/4
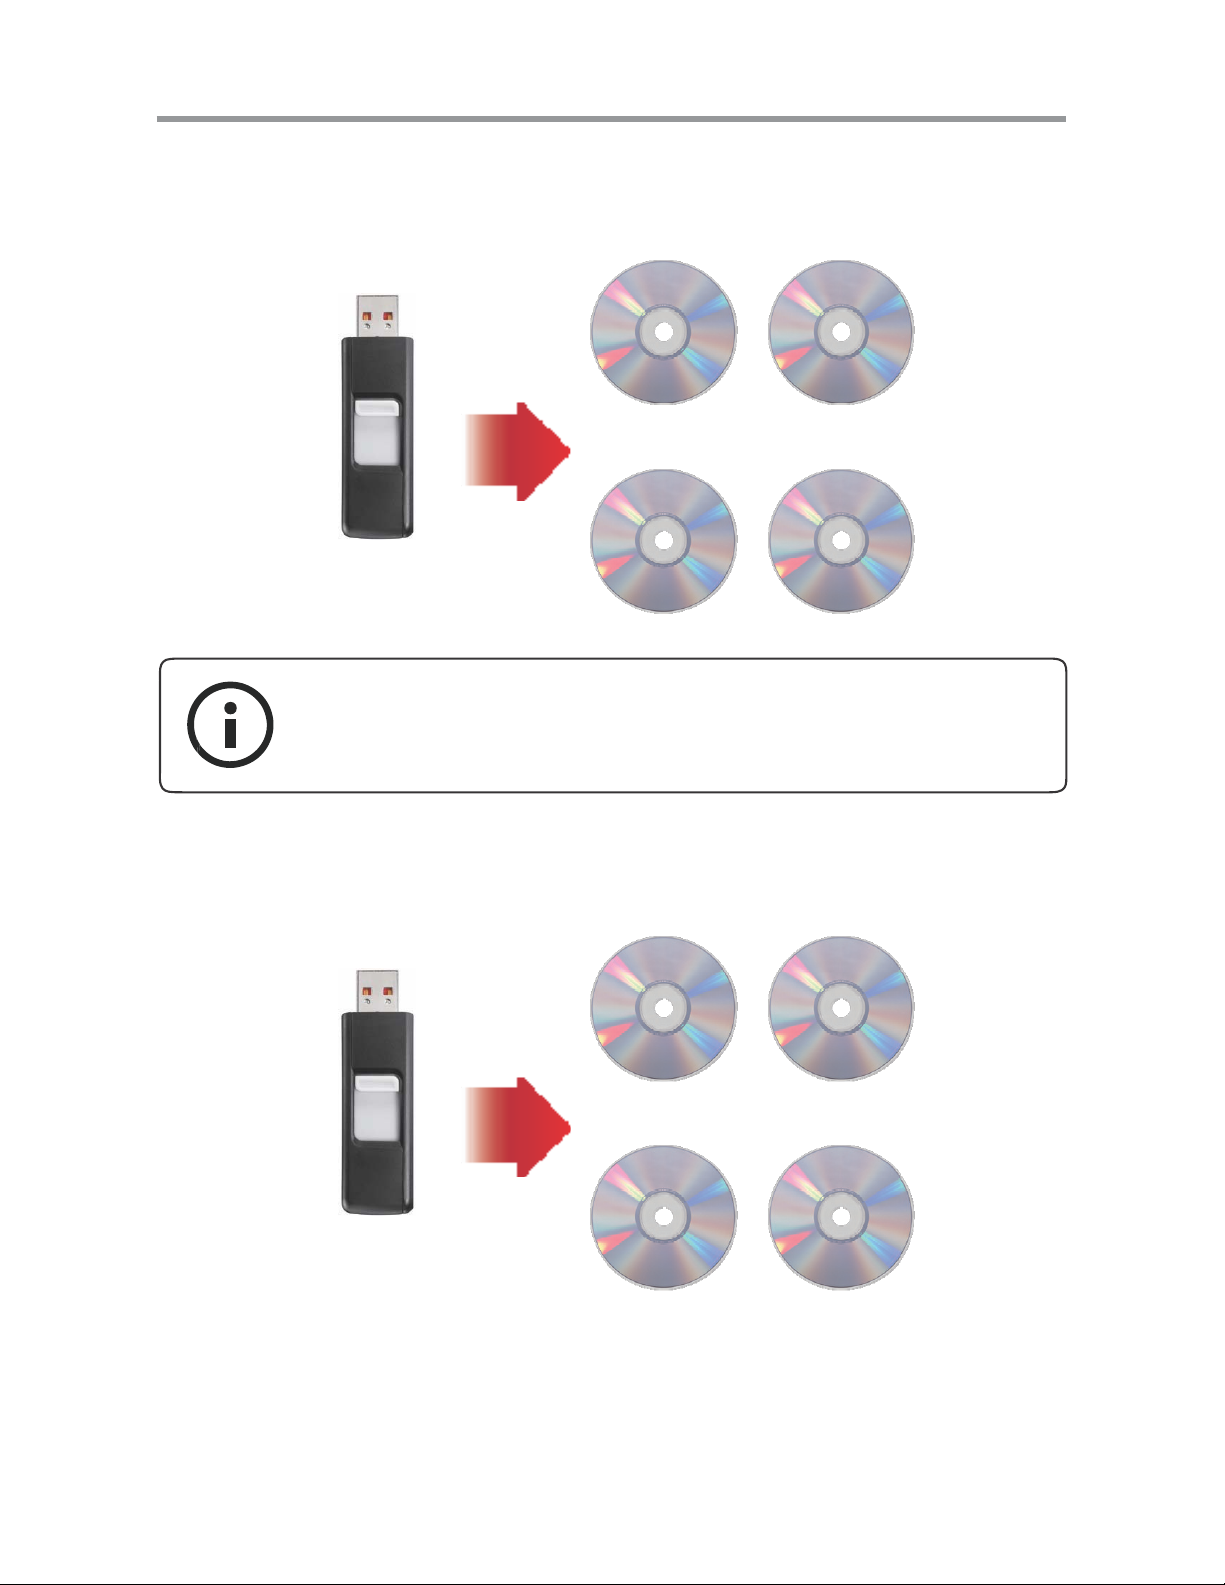
•
Ex:
MultiDisc: Allows you to duplicate discs from one Flash device.
Disc 1
Disc 2
USB
300M data
Disc 3
Disc 4
7
I. Introduction
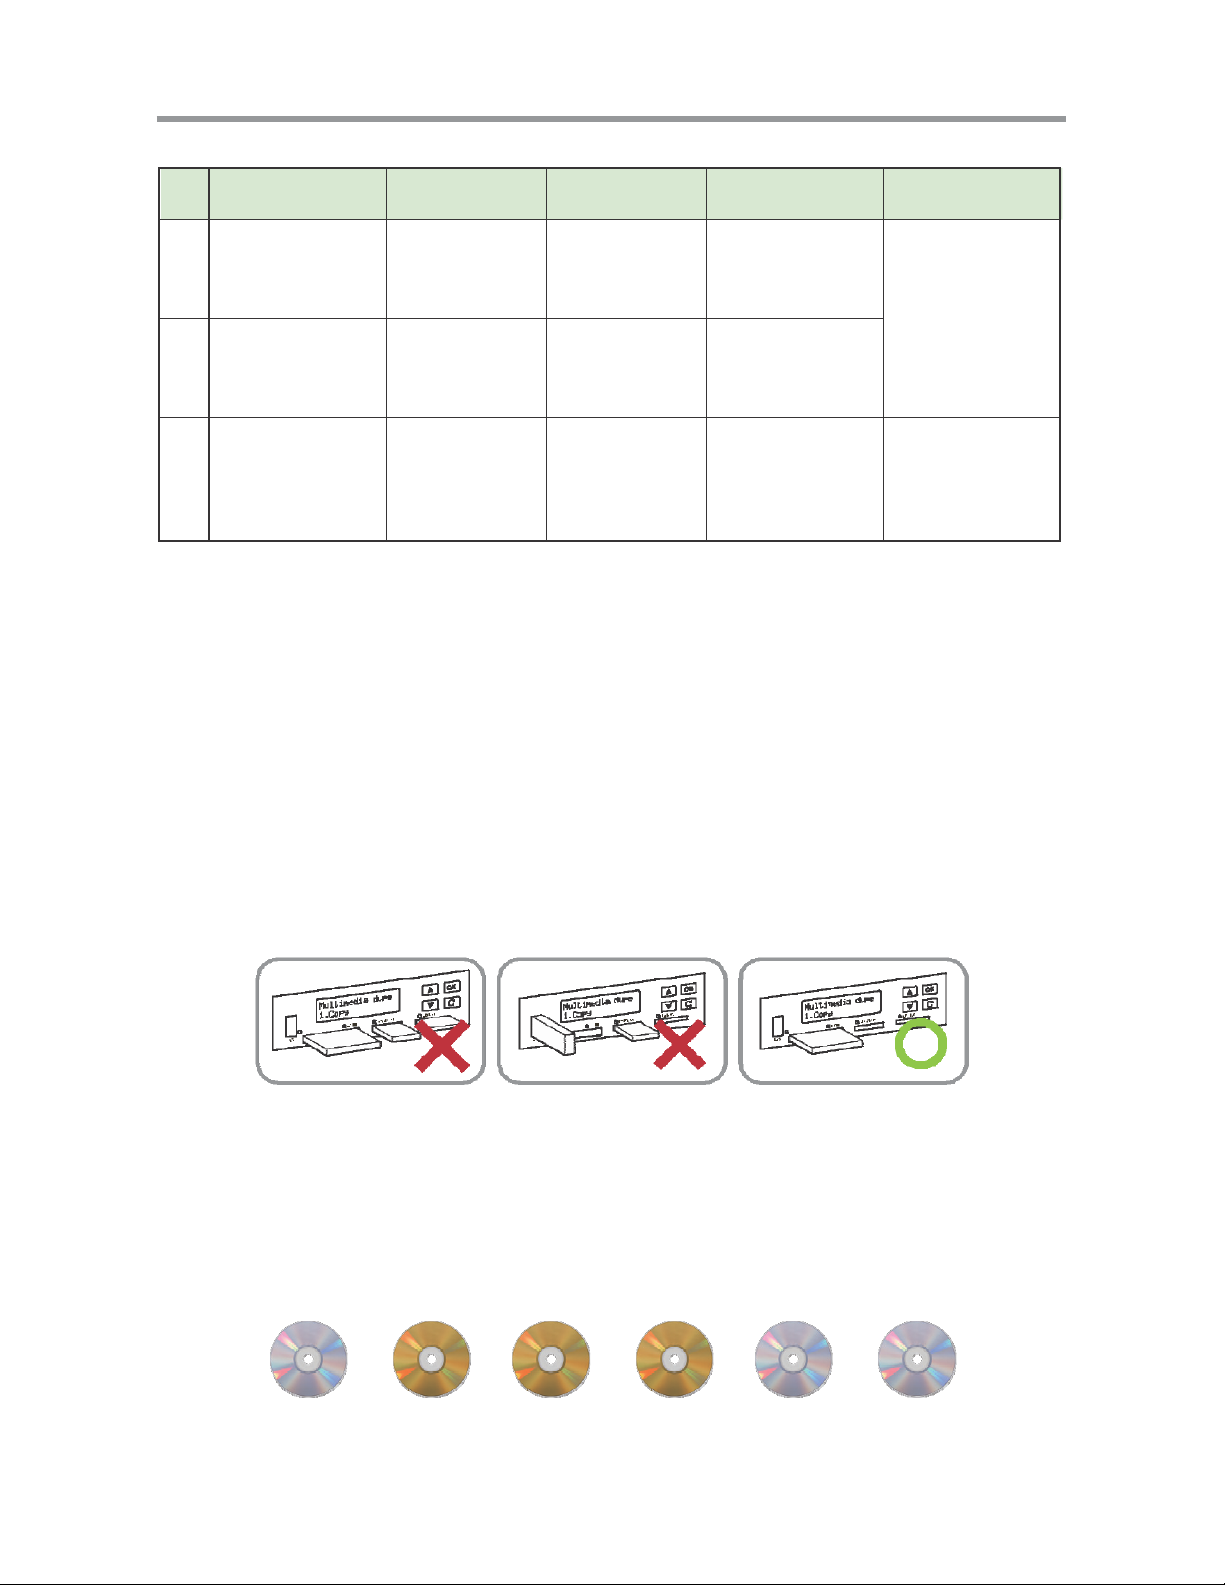
Example of Multi-Session, MultiDisc and Disc Spanning
Flash Source Multi-Session MultiDisc Disc Spanning Note
USB with 100MB
1
data copy to a CD
SD card with
2
200MB data
copy to a CD
USB with 8G
3
data copy to
CDs or DVDs
First session
of CD1
Second session
of CD1
Yes, as many
blank discs
as you can
Yes, as many
blank discs
as you can
No
No
No
No
2 DVDs or 11 CDs
Flash device
with small data
can make multisession copy
Flash device with
only ONE single
big file can not do
disc spanning.
2-5. Reminding:
1. Disc Spanning does not support copy the Flash device with only ONE
single big file.
2. Disc spanning can not execute with Multi disc mode at the same time,
when both modes are enable, the system will primary execute di sc
spanning.
3. Each disc will keep some blank space between each session and also
remain some blank space for the end of copy.
4. ONLY ONE Flash device can be applied per time.
5. This duplicator can copy all kinds of Flash Media (Memory Card and
USB) which support FAT12, 16, 32 file format. It is unable to do Non FAT
Flash media copy.
6. When the system is in process, DO NOT pull out the card.
7. CD can only copy to CD, DVD copy to DVD.
CD DVD DVD DVD CD CD
8
II. Function Introduction
Multimedia Dupe
Function
1. Copy
2. Compare
3.
Copy+Compare
4. Information
5. Utility
6. Setup
Function Table-Multimedia Duplication
Sub-function Description
USB/Card Info. To show Flash device’s used space, total capacity and file quantity.
Disc Info. To show disc’s burning speed, format and capacity.
System Info. To show the duplicator’s model No., firmware version.
Burn Speed To show the burning speed of disc.
Update BIOS To update the system firmware
Multi Session To enable or disable multi-session mode
Disc Spanning To enable or disable disc spanning mode
MultiDisc To enable or disable multidisc mode
When you select Disc duplicate, you will enter the
disc to disc menu; if you choose Multimedia Dupe,
you will only access the Flash to disc menu.
To copy Flash to disc
To compare Flash source and copied discs
for ensuring data correctness.
To copy first and then compare Flash source and copied discs.
1. CD Spare Size
2. DVD Spare
Size
3. BD Spare Size
To set spare size to preserve the outside
space of discs not to be written.
Advanced setup
4. Time Zone
To setup the proper time
zone of working place.
5. Language
6. Factory Default
To set the language you prefer
to use during operation.
To reset all the setting to
manufacturer default setting
9
II. Function Introduction
Chapter 1. MultiMedia Duplication
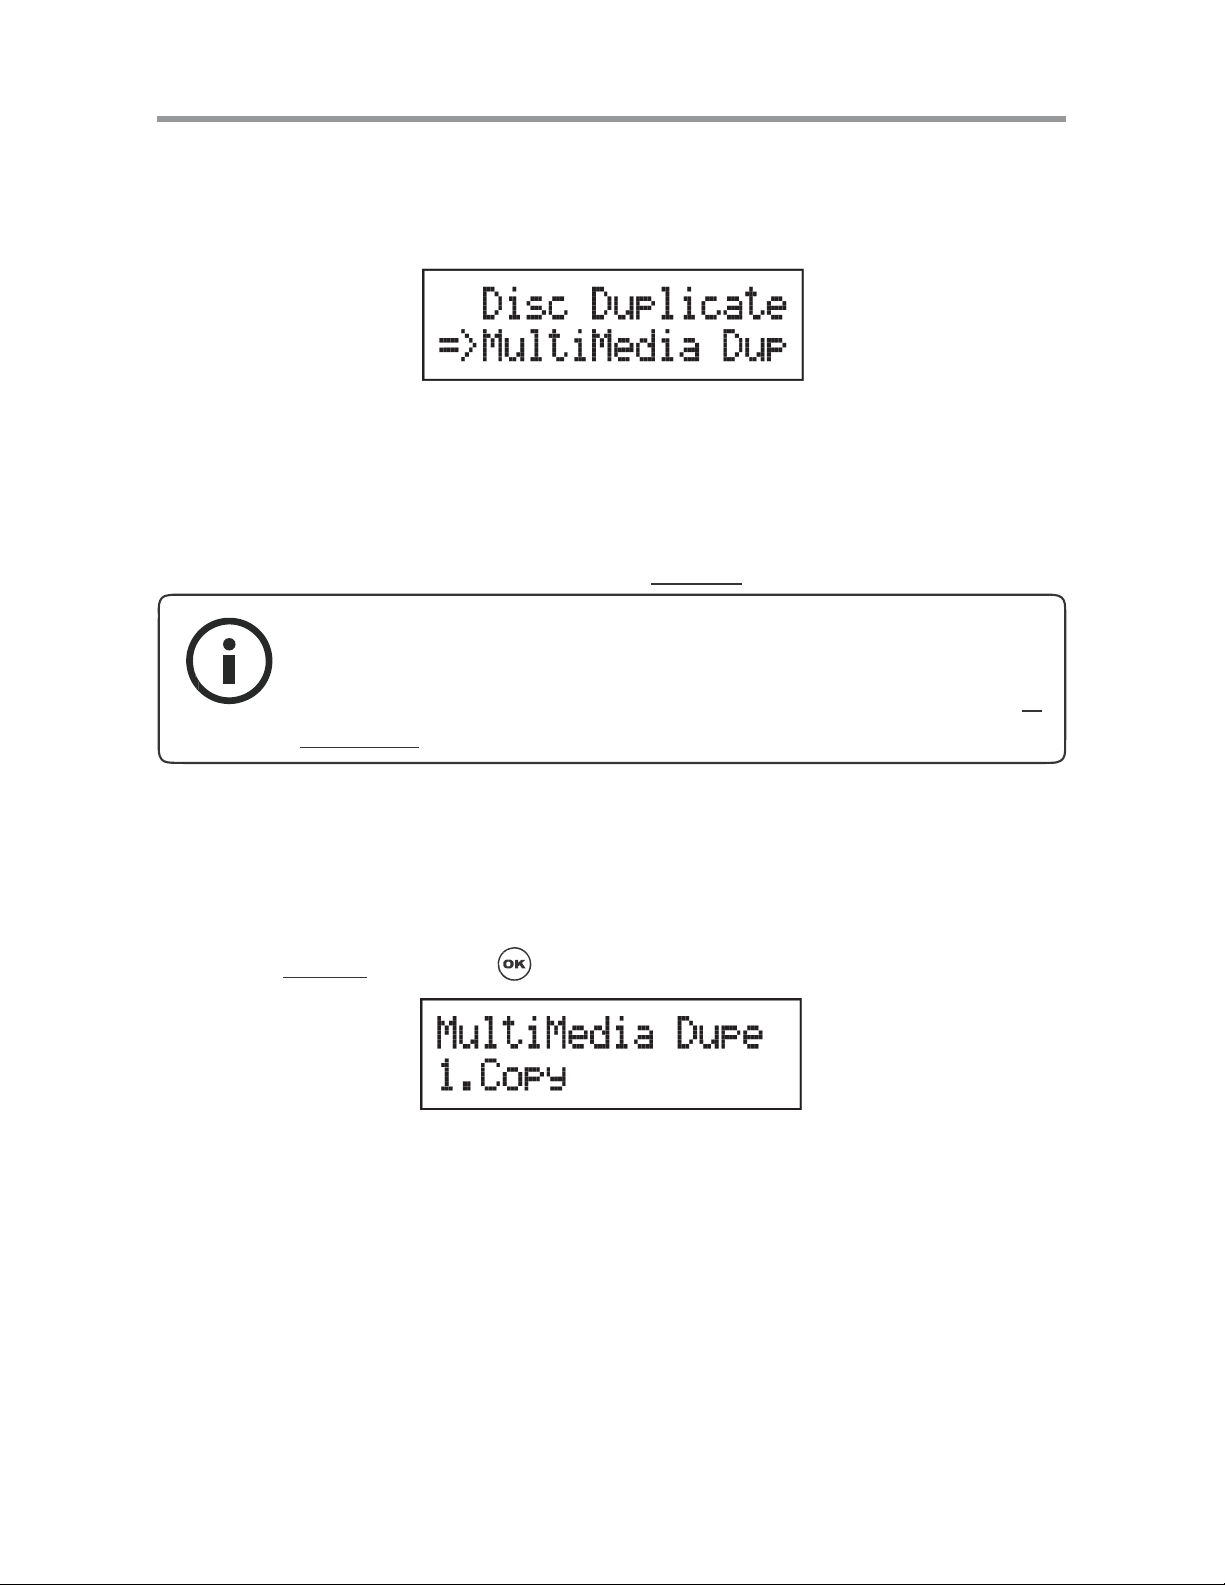
Select Multimedia Dupe from the main menu and press to start Flash to
disc copy operation.
1. Copy
The copy function in Multimedia duplication part has three main options:
Multi-Session, Disc Spanning and MultiDisc. Each mode can be enable or
disable in Setup function. (pleas e refer to 6.Setup
**Note:
Before copying, it is recommended to check each memory card, USB
or CD/DVD’s content information. The check function please refer to 4.
Information
.
, page 17)
1. Plug a Flash devic e (ex: USB, SD, MM S…) into the proper slot as so urce
and place a disc into burner as target for duplication. If you like to copy
many discs at the same time, you can place more than one blank disc
into the writer drives.
2. Select 1.Copy
and press to start copying.
3. The system will detect the source and the target disc automatically.
Total capacity Data size Data size
Copy process% Copied data size
10
II. Function Introduction
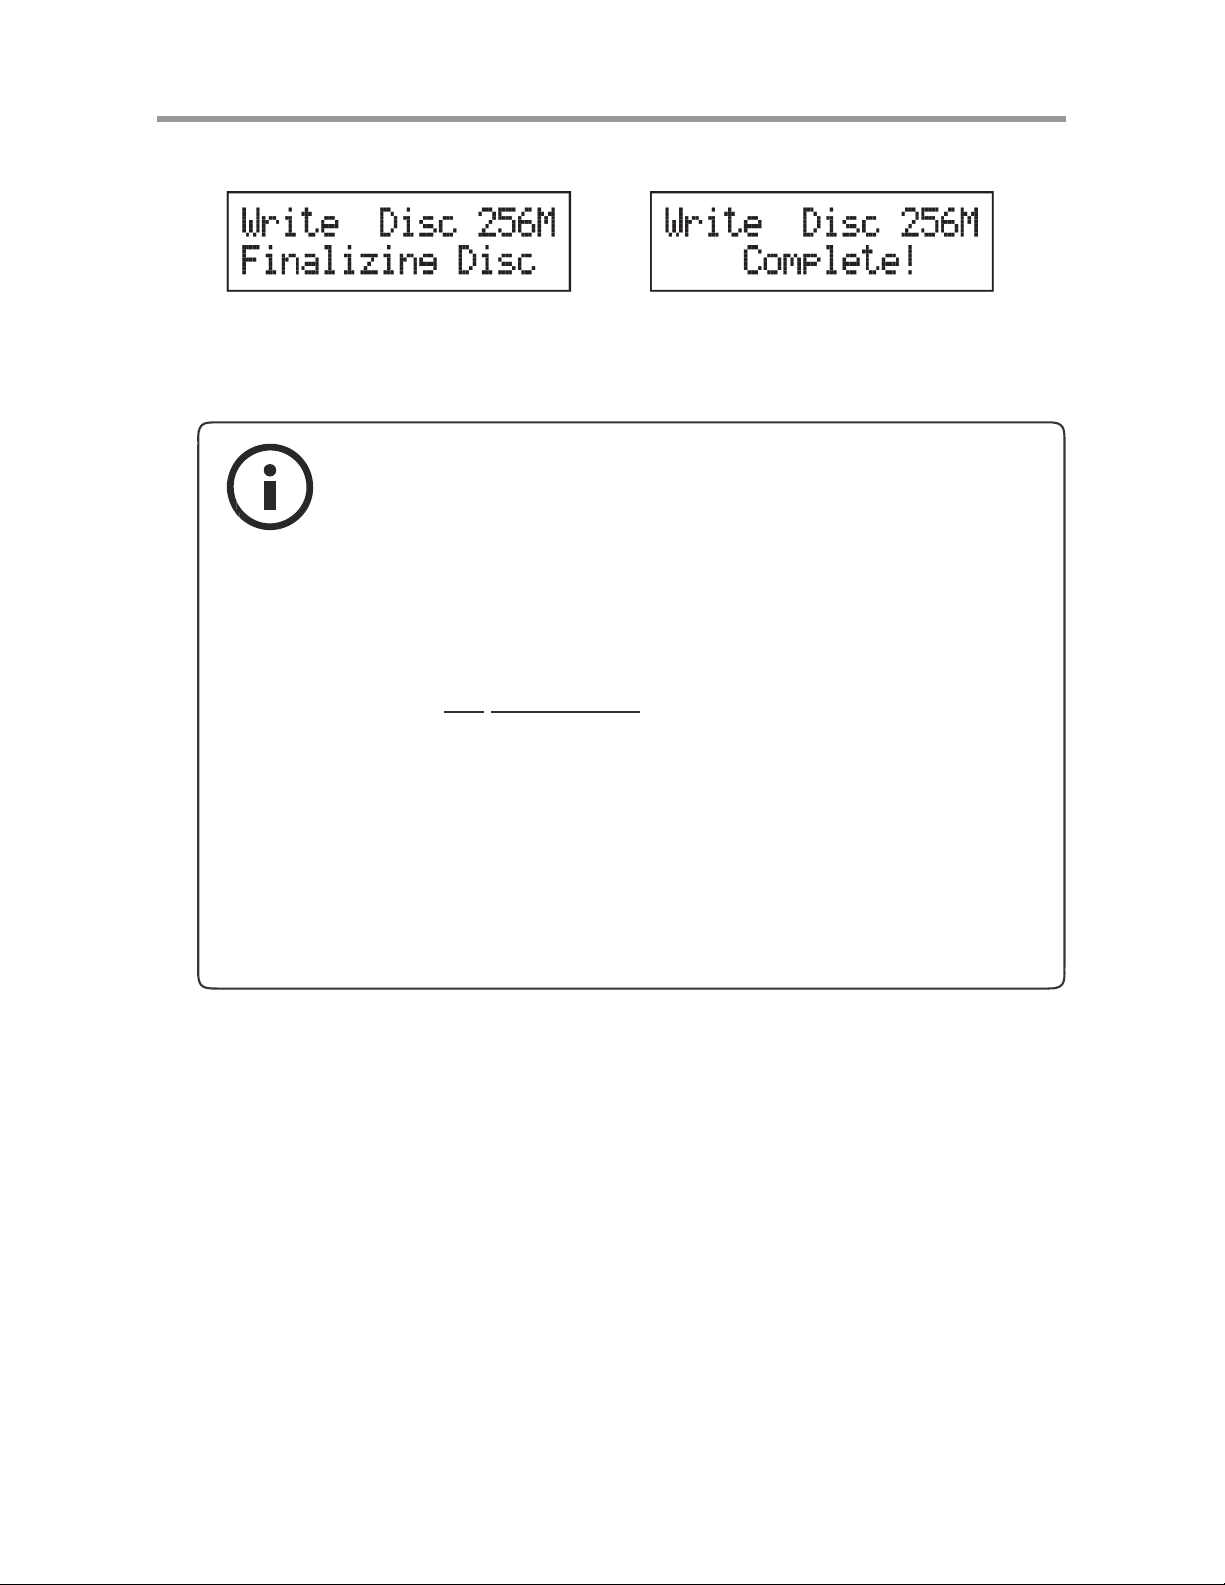
4. When the copy task has finished, the syst em will close the session.
5. The disc will be ejected, and you can continue to copy another memory
card or USB, or you can keep it for next copy task.
**Note:
1
As long as the disc was a multi-session disc, it will not s upport
disc spanning copy.
2
If the data size is larger than the disc’s capacity, the
system will require you to put more than one disc. Please
make sure the disc s panning function is enabled, you can set it
up in 6-2.
Disc spanning, page 17.
3
Rewritable disc does not support multi-session
the feature of CD±RW and DVD±RW rewritable format, the
first session can be copied successfully, but when you want to
build up the second one, the system will erase the first session
of +RW format disc, and an error message “Not Blank Disc”
for –RW format disc.
copy. Due to
In Disc Spanning Mode:
1. Plug a Flash device (ex: USB, SD, MMS…) i nt o the proper s lot as source
and place a disc into burner as target for duplication.
2. Select 1. Copy and press to start copying.
11
II. Function Introduction
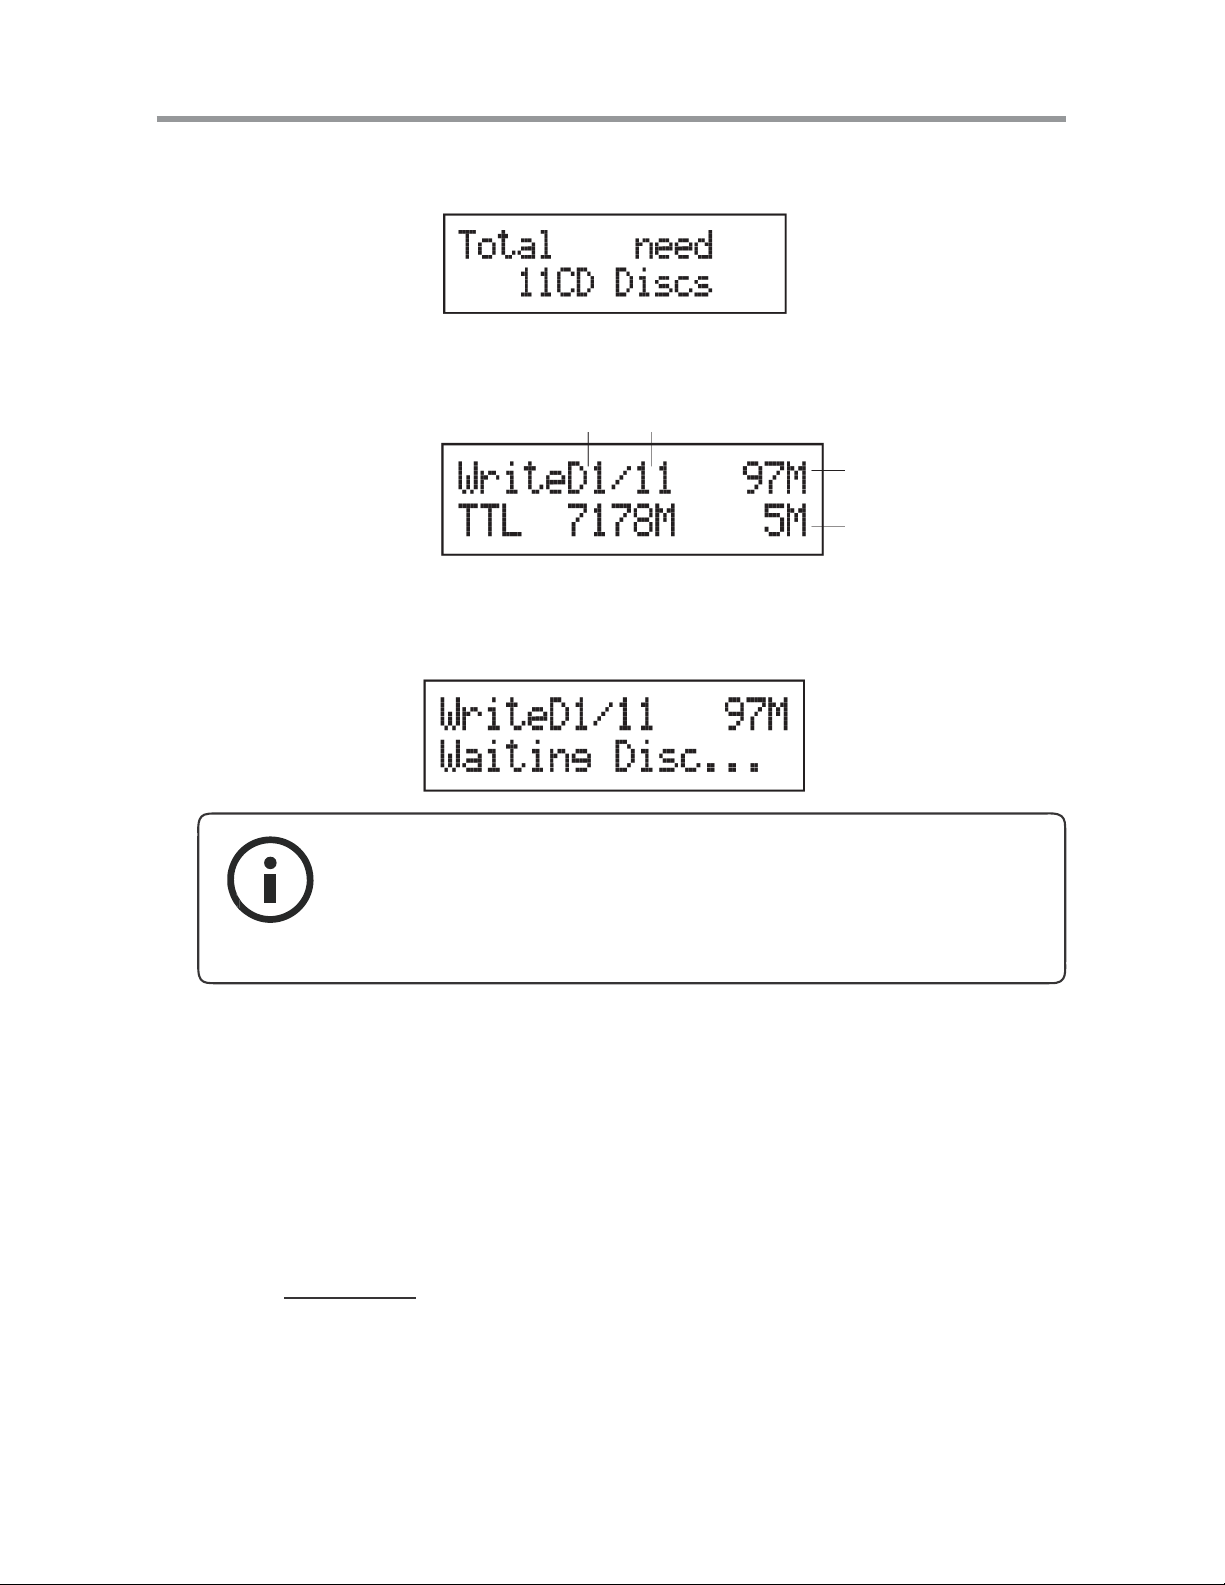
3. The system will detect the source and calculate how many discs will
need.
4. After detecting, the system will start to copy.
Disc 1 Total discs needed
The data size
for disc 1
Copied data size
5. When the first disc has finished copy, the disc will be ejected, and wait for
next disc.
** Note:
1
Disc spanning can not be executed with Multidisc mode
at the same time. When both modes are enabled, the
system will
execute disc spanning first.
2. Compare
The compare functi on has two different di splays for the disc copied by M ultiSession and Disc Spanning.
1. Plug a Flash device (ex: USB , SD, MMS…) into the pro per sl ot as sourc e
and place a disc into burner as target for duplication.
2. Select 2.Compare
and press to start comparison.
12
II. Function Introduction
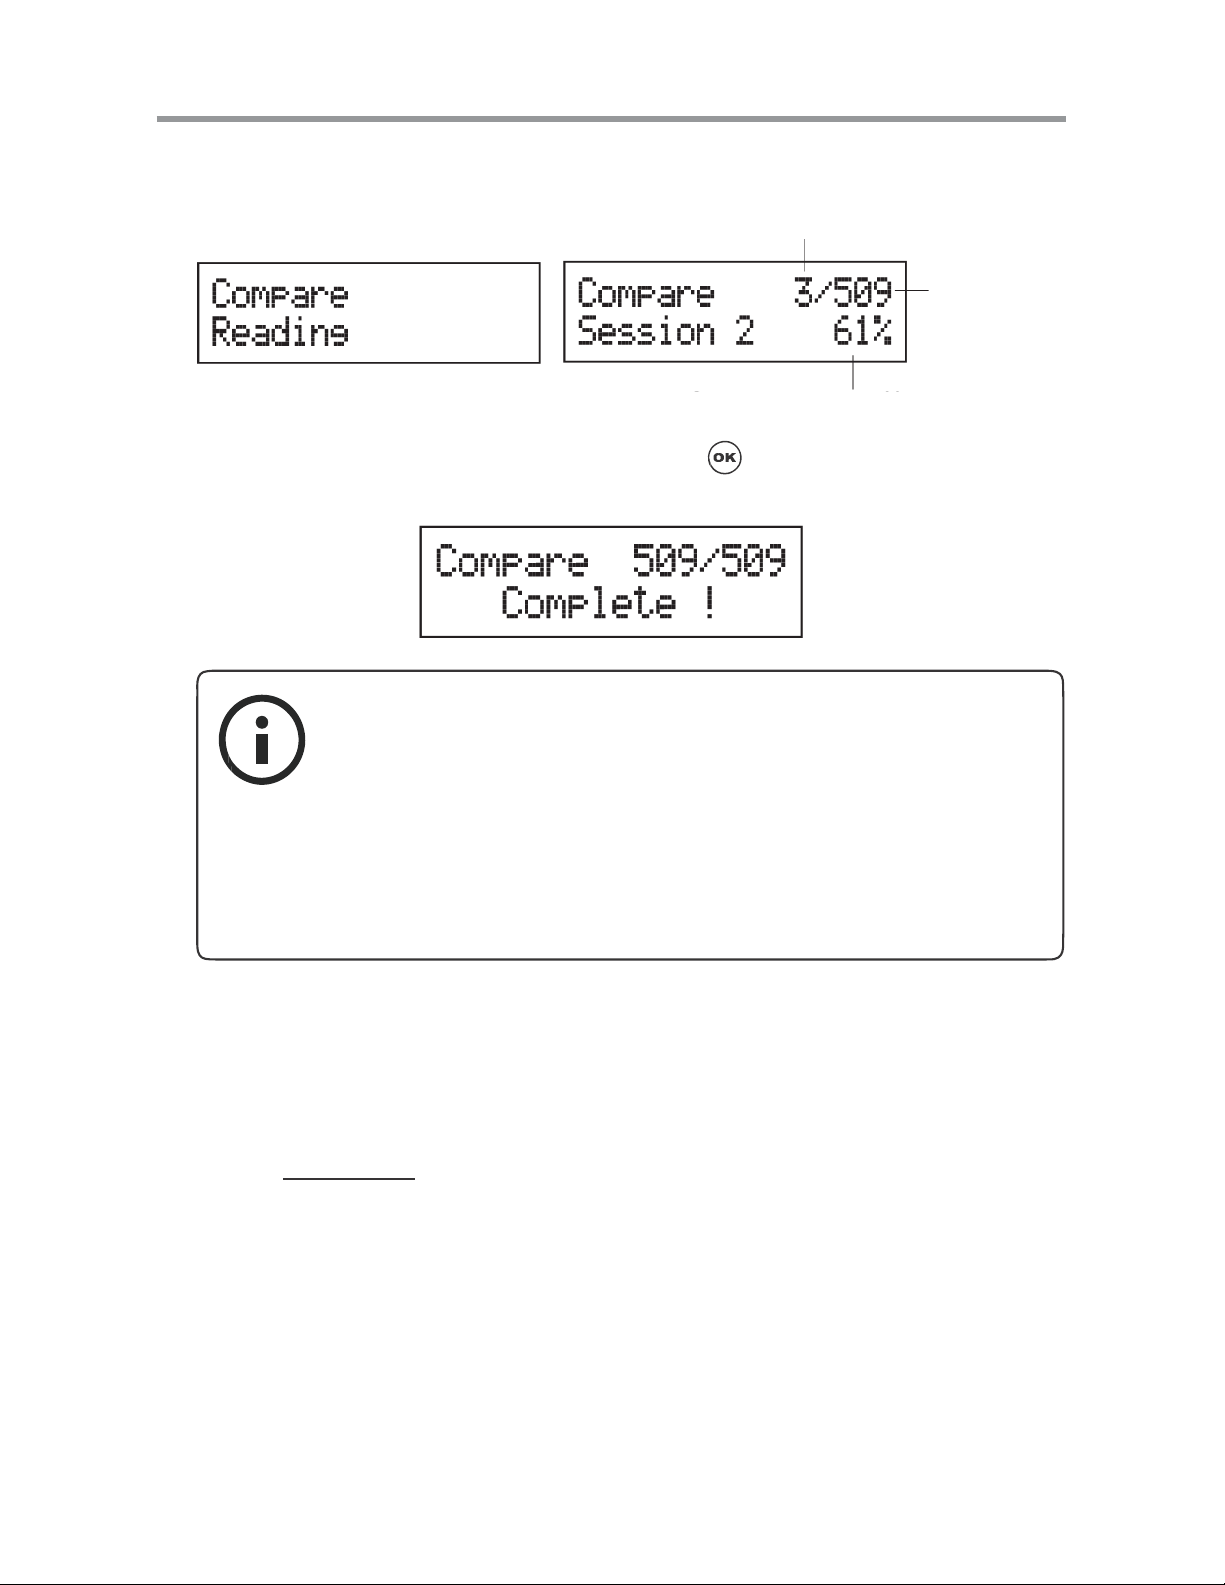
3. The system will detect the source and the target disc autom atically.
4. After detecting, the system will start to compare.
The file compared
Total file wait
for compare
Compare process %
5. When the comparison has finished, press to go back to the previous
menu.
**Note:
1
The compare function is to do file by file and bit by
bi t comparison. Therefore, compare speed will be affected by
file quantity, total content size and Flash device’s reading
speed.
2
While doing multi-sessi on disc comparison, it is allowed only
one disc to compare with the source.
Disc Spanning Compare
1. Plug a Flash device (ex: USB, SD, MMS…) into the proper sl ot as s our ce
and place a disc into burner as target for comparison.
2. Select 2. Compare
3. The system will detect the source and the target disc autom atically.
4. After detecting, the system will start to compare.
and press to start comparison.
13

II. Function Introduction
5. When the comparison has finished, press to go back to the previ ous
menu.
3. Copy + Compare
This function is to make a copy first and then compare the c opied discs with
source immediately once the copy task has fini shed.
4. Information
Before copying, it is recommended to use this function to check
each memory card, USB or CD/DVD’s content information. You can check
Flash device’s information (ex: used space, file quantity..) and disc’s
information (ex: burn speed supported, total capacity and content size..) in
this function.
4-1. Flash Device Information
1. Plug a Flash device (ex: USB, SD, MMS…) into the proper slot.
2. Select 4.Information
and press .
3. Select 1.USB/ Card Info. and press to check the device’s information.
4. The system will detect the device automatically.
14

II. Function Introduction
5. After detecting, the information of the device will show up.
The information includes used space, total capacity and file quantity.
Content size
4-2. Disc Information
1. Place a disc into a drive.
File Q'ty
Total capacity
2. Select 4.Information
and press .
3. Select 2.Disc Info. and press to check the disc's information.
4. The system will detect the disc automatically.
5. After detecting, the information of the disc will show up. The informati on
includes the burning speed supported, disc format and content size.
Content size
4-3. System Information
This function show the system’s information which includes the model No.,
and firmware version.
15

II. Function Introduction
1. Select 4.Information and press .
2. Select 3.System Info. and press to check the system’s information.
3. The system informati on will show on the LCD.
5. Utility
This f unc tion wi ll update t he f i rmware of t hi s sys tem by using certified update
firmware which released by manufacturer.
1. Apply for the firmware from your local distributor.
2. Unzip the firmware and save it in a USB drive.
**Note
DO NOT save the firmware in a folder. The system can not detect
the firmware if you save it in a folder.
3. Select 5.Utility and press .
4. The system will start to execute updating task.
16

II. Function Introduction
5. When updating has finished, the system will ask you to reboot it.
6. Setup
This s ection allows you to setup the multi- session, disc spanning, multidi sc,
disc burning speed and advanced setup.
6-1. Multi-Session
1. Select 6.Setup and press .
2. Select 1.Multi-session an d press
3. Use / to enable or disable the copy function.
6-2. Disc Spanning
1. Select 6.Setup and press .
17

II. Function Introduction
2. Select 2.Disc Spanning and press .
3. Use / to enable or disable the copy function.
** Note:
Disc spanning can not be executed with Multidisc mode at the
same time. When both modes ar e enabled, the system will primary
execute disc spanning.
6-3. MultiDisc
The MultiDisc copy mode allows you t o duplic ate multipl e discs f rom
one Flash device. You can enable or disable this mode here.
1. Select 6.Setup
and press .
2. Select 3.MultiDisc and press .
3 Use / to enable or disable the copy function.
18

II. Function Introduction
6-4. Burn Speed
In this section, you can adjust CD, DVD and Blu-ray proper burning speed
for duplication.
1. Select 6.Setup
and press .
2. Select 4.Burn Speed and press .
3. Select 1.CD Disc and press .
4. Use / to adjust the proper speed of the disc duplication. The
burning speed of CD is from 1 to MAX. The default setting of burning
speed of CD is 40X, DVD is 8X and Blu-ray is 4X.
6-5. Advanced Setup
CD/DVD/BD Spare Size
Due to the outside space of disc i s not as easy to write as t he inside spac e.
Therefore, to keep a good quality of duplication, you can set spare size to
preserve the outside space of disc not to be written.
19

II. Function Introduction
Time Zone
This setting allows you to setup the proper time zone of working place.
Language
You can set the language you prefer to use during operation.
Factory Default
You can reset all the setting to manufacturer default setting by this function.
20

II. Function Introduction
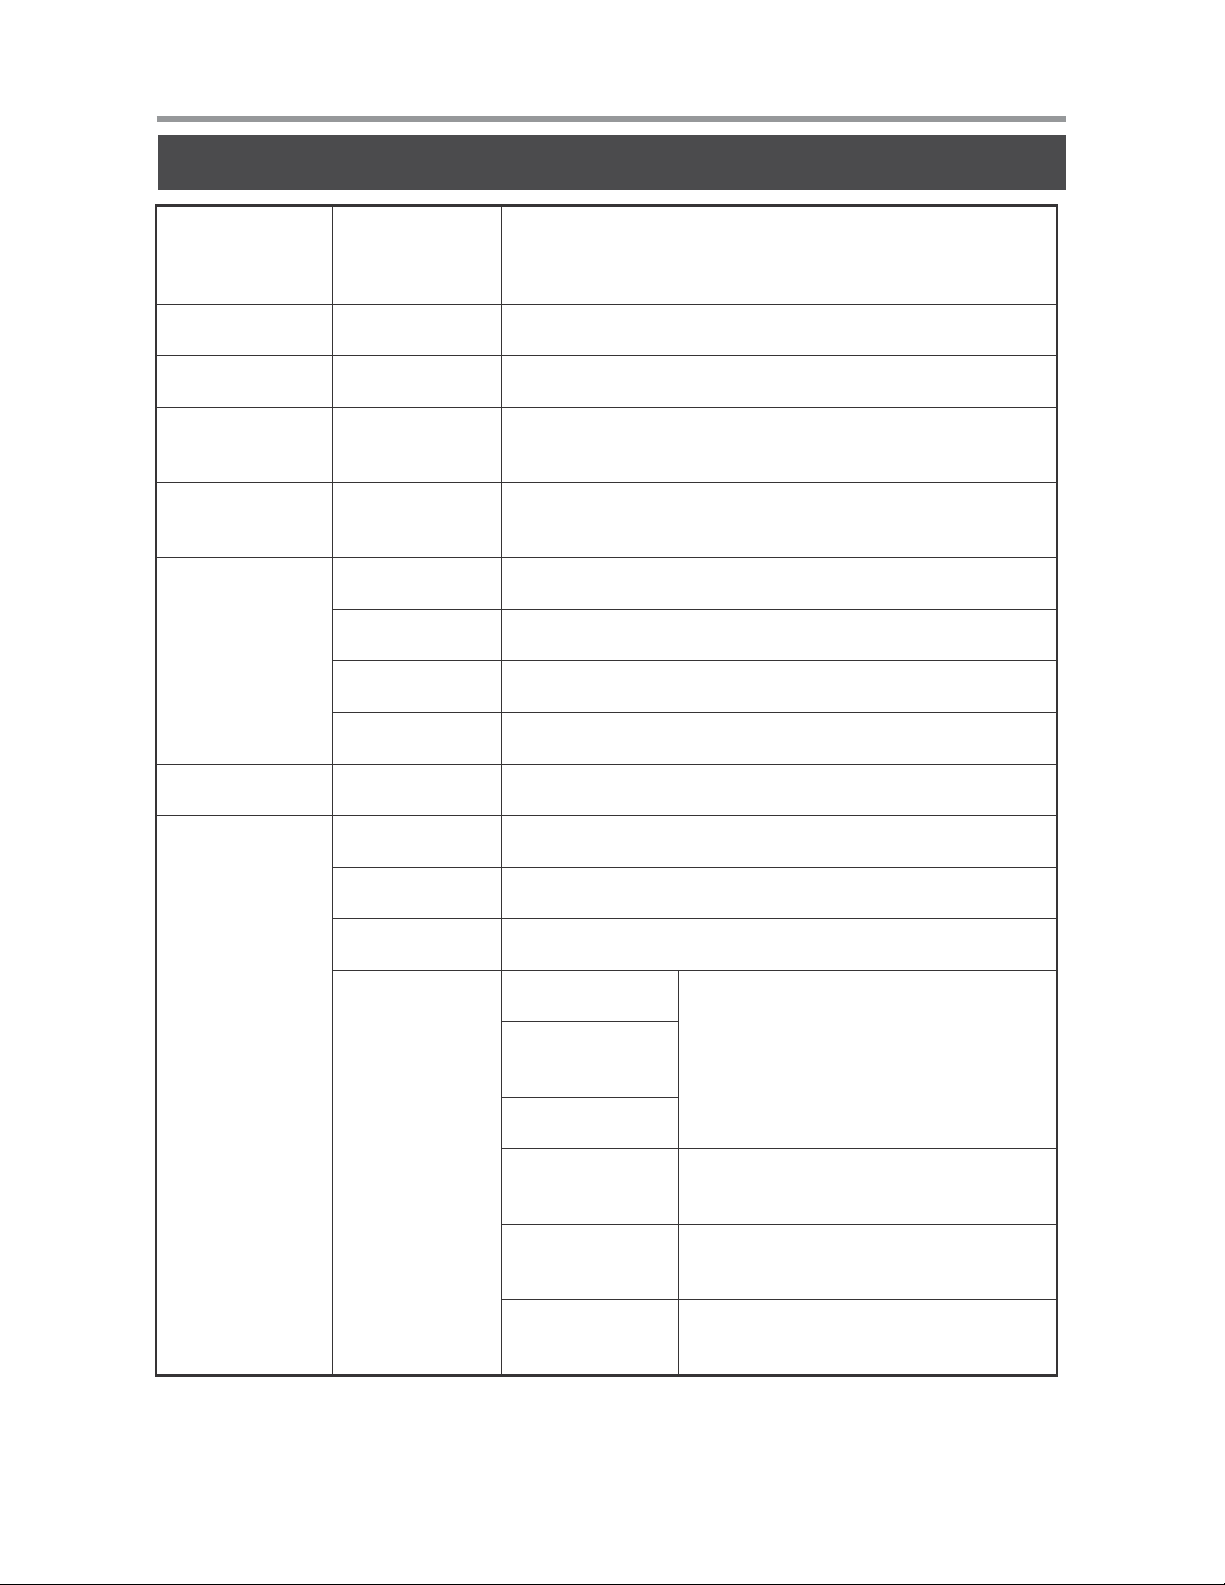
Function Table-Disc to Disc Duplication
When y ou select Disc duplicate, you
will enter the disc to disc menu; if you
choose Multimedia Dupe, you will only
access the Flash to disc menu.
To copy disc to disc or copy disc from
HDD.
To simulate copy process
To bit by bit compare between
source disc and copied discs
To copy first and compare the
copie d discs later.
To set burning speed for duplication.
To select source fro m any optical drive
or hard disk drive.
To check the format of disc,
burning speed supported and total
capa city or data size.
To check the version, model No.
and brand name
To check the model No. and
firmware version
To select and combine audio tracks from
various CDs i nto a single customized
audio CD.
To close the disc after track copying to
make the CD playable on CD player.
1. Information
1. Disc Info.
2. Drive Info.
Disc Dupe
Function Sub-function Description
1. Copy
2. Test
3. Compare
4. Copy & Compare
5. Set Burn Speed
6. Select Source
3. System Info.
7. Utility
2. Erase Disc
3. PreScan Source To check source disc's re adability.
1. Quick Erase To erase data from rewritable disc.
2. Full Erase To erase data from rewritable disc.
1. Copy Track
4. Track Edit
2. Close Disc
3. Disc Info. To check the audio CD’s status of us ag e.
5. Eject All Disc To eject all trays.
1. Show Count
6. Copy Counter
7. Update BIOS To update the system ’s firmware.
2. Enable Counter To enable or disable counter setting.
3. Clear Counter To delete the record.
To c h e c k h o w m a n y d i s c s were
c o p ied successfully and failed.
21

II. Function Introduction
8. Setup
1. Auto Start Time
2. Display Mode
3. Button Beep
4. Eject On Start
5. Reader Speed
6. Compare Speed
7. Language
8. Clear Setup
9. Advanced Setup
1. Basic
2. Show Speed
3. Show Timer
1. Eject All Discs
2. Do Not Eject
3. Eject Target Only
4. Eject Source Only
5. Eject All Trays
1. Power On Time
2. Startup Menu
3. Skip Reader Error
4. Change Bad Master
5. CD Overburn Set to copy overburn CD.
A l l o w t h e s y s t e m t o d o t h e
Copy,Test, Compare and Copy +
Comp are functions automatically
To eject all trays with disc inside when
the system is booted up.
Do not eject any tray or disc
when the system is booted up.
Only eject target trays with disc inside
when the system is booted up
Only eject source disc when the
system is booted up.
To eject all trays when the system
is booted up.
To adjust the reading speed of source
drive.
To adjust the speed of drives
whi le comparing.
To r e s e t a l l t h e f u n c t i o n b a c k
to manufacturer’s default setting.
To set a warm-up t ime from 5 seconds
to 99 seconds.
To select which function you would like
to show up in the beginning.
To set skip the read error and
keep copying.
To make the system eject bad source
disc and ask for another one while the
source disc is unreadable for system.
22
6. Show HDD Image
Name
7. Keep Buffer
8. Boot Password
9. Setup Password To set up the login password.
To show HDD image name or capacity
on Copy, Test, Copy + Compare and
Compare function
To set enable or disable load source to
the buffer.
To e n a b l e o r d i s a b l e t h e u s er
administrative password.

9. HDD Manager
II. Function Introduction
1. Select Image
2. Disc=> Image
3. Set Reader Speed
4. Show Image Info.
5. Rename Image To change the name of image file.
6. Delete Image
To select image file from HDD as your
source for copy.
To load your source disc to the built-in
HDD.
To adjust the speed of source reader
while you load data from the reader to
HDD.
To check the disc format and data size
of image file.
To delete image file from the builtin HDD.
7. Show HDD Info.
8. Format HDD To format the built-in HDD
To check the information of the
built- in HDD includes how many
discs are stored and the free space
23

II. Function Introduction
Chapter 2. Disc Duplication
Select Disc Dupe from the main menu and press to start disc to disc copy
operation.
1. Copy
It is import ant to make sure that your sourc e disc is placed in t he right drive.
You can check or select your source reader by function 6.Select Source
(Please refer to 6.Select Source
, page 28)
1. Select 1.Copy and place source disc and blank discs into the proper
trays. Then the system will detect the source disc and show the
information.
Q'ty of target disc
Data size
2. Press to start copy
Q'ty of target
Speed of burning
Copy process %
Data size
Copied data size
.
3. Once the copy task is finished, the c opied discs will be ejected and the
result of copy task will show on the LCD:
Elapsed time
24

II. Function Introduction
**Note:
Due to default setting of auto start time, the duplicator will start
to copy automatically within a few seconds. You can set “OFF”
to close the auto start function or set a longer waiting time. The
default setting is 5 seconds. (About this setting please refer to 8-1.
Auto Start Time
, page 33)
If HDD is selected to be the source reader, you have to upload the source
to the built-in HDD and then follow the copy process to do your copy task.
How to upload data from disc to HDD please r efer to 9-2. Disc to Image
page 37.
**Note:
The default setting of source reader is the first drive.
2. T est
This functi on will simulate the copy process to ensure error free duplication.
During the simulation, there will be nothing written in the recorda ble discs.
,
1. Using / to select 2.Test and press .
2. Press to start test
3. Once the test task is finished, the di scs will be ejected and the result of
the pass and fail discs for the test task will show on the LCD:
25

II. Function Introduction
**Note:
1
This function is unable to support DVD+R blank disc.
2
If you use CD/DVD rewritable discs as your blank media
in the simulation, all the content inside the discs will be
erased
permanently during test simulation.
3. Compare
This function will perform bit-by-bit comparison between source disc and
copied discs to ensure the copied discs are identical to source di sc.
1. Place source disc and blank discs int o Reader and Writer separately.
2. Using / to select 2. Compare and press to start compare.
3. The system will detect the source and target discs automatically.
4. After detecting, the system will start to compare.
5. When the comparison has finished, the system will show the compare
result.
4. Copy + Compare
This function will do copy task fi rst and execute comparison automati cally
when copy process is finished.
26

II. Function Introduction
**Note:
In Copy, Test, Compare and Copy+Compare functions
1
If there is no source and target discs inside the
duplicator , there will be nothing show on LCD.
2
If the built-in HDD is selected as source, the
information presents different:
Image file name
3
The information display of these 4 functions will be
different based on the display mode you selected.
(Please refer to 8-2.Display mode
, page 34)
5. Set Burn Speed
You can adj ust the burning speed of CD/Audio CD/DVD/DV D DL/Blu-ray by
this setting. The default setting of CD is 40X, Audio CD 24X, DVD 8X, DVD
DL 2X and Blu-ray 2X.
1. Using / to select 5.Set Burn Speed and press .
2. Pressing / to adjust the burning speed of CD and press to
confirm it, or press to select Audio CD,DVD, DVD DL or Blu-ray to
adjust the burning speed.
27

II. Function Introduction
6. Select Source
You can set any drive or built-in HDD in the duplicator to be your source
reader.
1. Using / to select 6.Select Source
2. Press to check the current source reader, or select the proper drive
to be the source reader by pressing / , once the source reader is
selected, press to confirm the setting and back to the menu list.
**Note:
The default setting of source reader is the first drive.
7. Utility
7-1. Information
You can chec k the information of di sc, drive and system by t his function. By
pressing / , each disc or drive’s information will show on the LCD.
1. Using / to select 7.Utility, press to enter the sub menu. Then,
select 1.Information
and press .
2. Using / to select 1.Disc Info. or 2.Dri v e Info. or 3.System Info., and
press to see the rel a ted information.
28

II. Function Introduction
3. The information will show on the LCD as below:
• Disc Info.: You can check the format of disc, burning speed
supported and total capacity. If the disc has data inside, you also
can check the size of data.
Disc Format
• Drive Info.: The version, model No. and brand name can be checked
Burning Speed
Capacity/Data size
here.
Drive version
Brand name
• System Info.: The model No. and firmware version can be
checked here.
7-2. Erase Disc
This function will erase the rewritable discs in WRITER tray, there are two
erase modes available:
• Quick Erase: It will er ase the INDEX of the rewritabl e disc.
• Full Erase: It will erase ALL DATA in the rewritable disc, which
takes longer time than Quick Erase.
1. Place discs into writers.
2. Using / to select 7.Utility
Then, select 2.Erase
and press .
and press to enter the sub menu.
29

II. Function Introduction
3. Using / to select 1.Quick Erase. or 2.Full Erase.
OR
4. Pressing to execute the erasing task. When the system is detecting
the discs, you will see the colon fl ashing.
The Second Drive
5. When the erase job is in process, you should see the O and o
are blinking by turns.
6. Once the erase task has finished, the O stop blinking, the disc will be
ejected automatically.
**Note:
1
If you place a whole new DVD+RW to do whatever quick
erace or full erace, the system will execute format
automatically and you will see F and f blinking by turns on
LCD.
2
Erase function only support rewritable discs.
7-3. PreScan Source
This function will scan and detect any bad sectors existing in the source disc,
which helps you to ensure the readability of source disc.
30

II. Function Introduction
1. Place a source disc into reader.
2. Using / to select 7.Utility
Then, select 3.Prescan Source
and press to enter the sub menu.
and press to start scan task.
3. When prescan task is in process, you can see the process on the display:
Elapsed time
Scan process %
4. When the prescan task has finished, the result of prescan will be shown
on the LCD.
Data size
Scanned data size
7-4. T rack Edit
This funct ion enables you to combine audio tracks from various CDs into a
single customize audio CD.
• Copy Track: You can select and com bine audio track s from different
CDs in this section.
• Close Disc: You have to perform this function after copy track to make
the CD playa b le on CD player.
• Disc Info.: You can check the audio CD’s status of usage.
7-5. Eject All Disc
You can ej ect all di scs incl uding source and target discs at the same time by
this function.
31

II. Function Introduction
7-6. Copy Counter
This function will record the result of duplication.
Show Count: You can check how m any discs copy successful and failed.
Enable Counter: You can set the counter enable or di sable to record the
copy result.
Clear Counter: You can delete the record by this function.
1. Using / to select 7.Utility and press to enter the sub menu.
Then, select 6.Copy Counter
and press .
2. Using / to select 1.Show Count.
3. Pressing to check the calculation of successful and f ailed duplication
for CD and DVD.
Q'ty of passed CD
Q'ty of failed CD
7-7. Update BIOS
You can updat e the sy stem’s firmware by this function.
1. Place manufacturer certified update file CD into any drive
2. Pressing / to select 7.Utility
then press
to start the process.
32
and sub menu 7.Update BIOS and

II. Function Introduction
3. The system will detect the update file and execute update task
automatically.
4. Once th e update job has done, the system will require you to reboot the
system.
**Note:
DO NOT save the firmware in a folder. The system can not detect
the firmware if you save it in a folder.
8. Setup
8-1. Auto Start Time
This setti ng will allow the system to do the Copy, Test, Compare and Copy
+ Compare functions automatically in a few seconds once the source and
blank discs are placed in the trays and detected by the system. The default
setting is 5 seconds. You can set a longer/shorter time from 1 to 99 seconds
or set OFF to disable this function and execute copy task manually.
1. Pressing / to select 8.Setup and sub menu 1.Auto Start Time.
33

II. Function Introduction
2. Pressing / to set the time.
8-2. Display Mode
You can select the prefered display mode in Copy, Test,
Compare, Copy+Compare.
• Basic: It will only s how the copy process (%) on LCD.
Q'ty of target
Copy process %
Data size
Copied size
•
Show Timer: It will show the time for copy.
Elapsed time
•
Show Speed: It will show the speed of burning during copy process.
Speed of burning
8-3. Button Beep
This s etting will allow you to set up a beep s o u n d when a bu tton is pressed
or not.
8-4. Eject On Start
You can set the trays or discs eject once the system is booted up.
• Eject All Discs: To eject all trays with disc inside once the
system is booted up.
•
Do Not Eject: Not eject any tray or disc once the system is booted up.
34

II. Function Introduction
• Eject Target Only: Only eject target trays with disc inside once the
system is booted up.
• Eject Source Only: Only eject source disc onc e the sy stem is
booted up.
• Eject All Trays: To eject all trays once the system is
booted up.
8-5. Reader Speed
This setting allows you to adjust the reading speed of source drive. The
default setting of reader speed of CD is 40X; DVD is 24X.
8-6. Compare Speed
The reading speed of drive and disc are the reasons that affect the quality of
comparison. This setting allows you to adjust the reading speed of target
drives to match up the reading speed of discs. The default setting of CD’s
compare speed is 40X, DVD is 8X.
8-7. Language
You can set a proper language for interface during operation.
8-8. Clear Setup
This setting will reset all the function bac k to manufacturer’s default setting.
8-9. Advanced Setup
• Power On Time: You can set a warm-up time from 5 to 99
seconds for warming up the duplic ator when it is turned on. The
default setting is 10 seconds.
• Start-up Menu: You can select which function you would like to
show up in the beginning.
• Skip Read Error: You can set this function enable to skip disc
errors in order to avoid bad quality of copy. If you are confident of
your source disc has only a small and insignificant error due to
physical damages and can
disable this function.
be overlooked, you can set NO to
35

II. Function Introduction
**Note:
Skip Read Error can not fix the error in the source disc, all it does
is skipping the errors and keeps copying the rest of readable data.
• Change Bad Master: This setting will make the syst em eject bad
so urc e disc and ask for another one while the source disc is
unreadable by the system.
• CD Overburn: The majority of discs have a small m argin of extra
groove at the outer edge. This setting allows you to copy data
over the normal size limit.
• Show HDD Image Name: You can select to show HDD image
name or capacity on Copy, Tes t, Copy + Compare and Compare
function
Show HDD Image Name: Show capacity:
**Note:
When you change the source from drive to HDD, the LCD
will show the HDD information. To change your source reader
please refer to 6. Select Source.
• Keep Buffer: You can set Yes to load source disc to buffer in first
round of Copy, Test, Compare or Copy+Compare and do it again
without th e source disc. Or set No to keep buffer not be used.
**Note:
The source will be only temporary saved in buffer, there will be nothing
left when you exit the task (Copy, Test, Compare and Copy+Compare)
or reboot the system.
36
• Boot Password: This setting allows you to enable or disable the
user administrative password. Users have to login when the
system is booted on.
• Setup Password: You can set up password by pressi ng to
select
the number you l i ke and press to set next number.

II. Function Introduction
9. HDD Manager (For HDD-installed duplicator)
9-1. Select Image
You can select image file from HDD as your source for copy. When this
function is selected, the system will set the HDD to be the source reader
automatically.
1. Pressing / to select 9.HDD Manager and sub menu 1.Select
Image
.
2. Pressing / to select the image you need and press to confirm.
Data size
9-2. Disc to Image
This function will load your source disc to the built-in HDD and save the
source as an image file.
1. Placing the sourc e disc to any one of the drives
2. Pressing / to select 9.HDD Manager
Image
.
3. Pressing to start loading.
and sub menu 2.Disc to
37

II. Function Introduction
4. When loading has finished, the disc will be ejected automatically.
**Note:
The source disc can be placed in any drive, it will not affect the
loading process.
9-3. Set Reader Speed
You can adj ust the reading speed of t he drive which you pu t the source disc.
This function is ONLY available when you loading the source disc to HDD.
The default setting of both CD and DVD speed are MAX.
9-4. Show Image Info.
You can check the disc format and data size of i m age file in this function.
1. Pressing / to select 9.HDD Manager and sub menu 4.Show Image
.
Info
2. Press check the disc format and data size of the image f ile. And you
can press / to check other image file’s information.
9-5. Rename Image
This function allows you to change the name of image file. You can set
maximum up to 8 characters for a new name, and NO blank is
allowe d between the characters.
38

II. Function Introduction
1. Pressing / to select 9.HDD Manager and sub menu 5.Rename
Image
.
2. Pressing
pressing / , and then press to start edit a new name for the
selected file.
and select which image file you would like to rename by
You can selec t characters or number by pr essing / , and press
to the next space to edit. The maximum is 8 characters without blank
space. When it has done, press to confirm the new name.
9-6. Delete Image
You can delete image file fr om the built-in HDD, but the source image file i s
unable to delete if the file is selected as source. Therefore, before you delet e
an image file, please check if it is selected as a source and change a new
one as source by 9-1.Select Image
**Note:
If there is an image file is deleted, the file name will be held for next
new image file, the existing file will not to fill the vacancy. For example,
there are 5 image files (A001~A005) in the HDD, when you delete
A003, A004 will not change to be A003, once a new file has loaded, its
default name will be A003.
, page 37.
9-7. Show HDD Info.
You can check the informati on of the built-in HDD includes how many discs
with image file are stored and the free space i s available in the HDD.
39

II. Function Introduction
9-8. Format HDD
This function allows you to format the built-in HDD while the HDD is NOT
selected as reading source. You can change the source from HDD to ot her
drive in 6. Select Source.
Due to the capacity for discs loading is hard to predict precisely and more
and more different discs are coming out . The traditional method of format is
not ideal for using on this duplicator. Our HDD management technology is
able to detect di sc capacity and assign a proper partition for the disc’s data
automatically. You do not have to predict and select CD or DVD partition
in the beginning and you can check how many discs you can upload from
7. Show HDD Info. This intelligent HDD management technology is much
easier for HDD management than the old way.
40

III. Specification
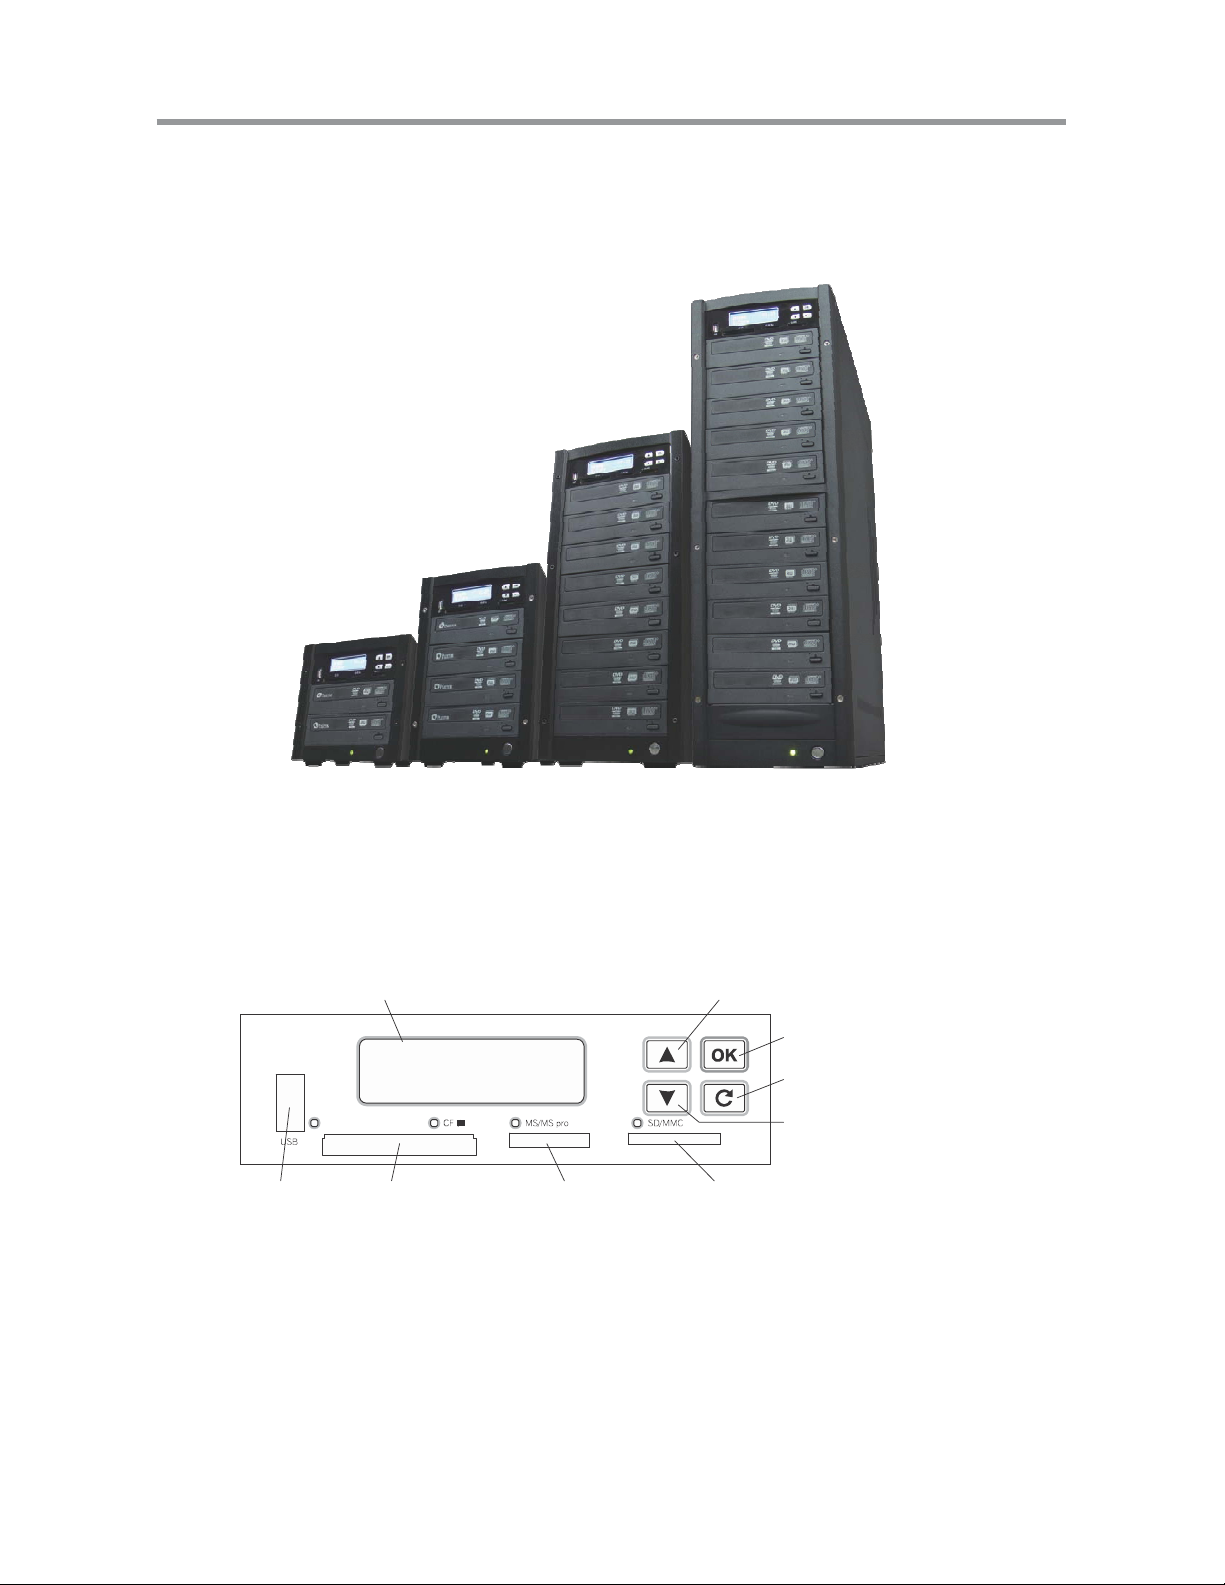
Model All-in-One 1T All-in-One 3T All-in-One 7T All-in-One 10T
Operation Standalone
Target 1:1 1:3 1:7 1:10
Function
Buffer (DDR2) 128MB
CD Speed 52X
DVD Speed 24X
Blu-ray Speed 12X 12X 8X 8X
Memory card or USB Backup
to Disc technology
Memory Card Compatibility
USB Flash Drive Support CF, SD/SDHC, Memory Stick/Pro/Du o, USB
File Format Support FAT12, FAT16, FAT32
Disc Format Support
Flash to Disc Duplicati on
Disc to Disc Duplication
Multi-session
Disc Spanning
MultiDisc
CompactFlashTM, MemoryStick/Pro/Duo, SD
BD-ROM, BD-R, BD-RE
DVD-ROM, DVD-Video, DVD-Audio, DVD+R, DVD+RW, DVD-R, DVD-RW,
Dual Layer DVD±R,
CD-ROM, CD-RW, CD-I, Audio CD, Video CD, CD+G, CDTEXT, Bootable CD, Mixed-mode CD, Multi-session CD, CDExtra, Business Card CD, 3” Mini CD-R
TM
Card, miniSD, microSD
Display 2X16 B lueBack-lit Monochrome LCD
Control Button 4 buttons ( Forward, Backward, OK, Esc)
LED LED for each Memory card and USB device slots
Temperature
Humidity
Controller Power
Consumption
Safety FCC, CE, RoHS
*The above information is for reference only. The actual specifications may be subject to change without
notice.
Working 5°C ~ 45°C
Storage -20°C ~ 85°C
Working 20% ~ 80%
Storage 5% ~ 95%
Voltage Max 5V
Current Max 1 A
41

IV. FAQ
Q1: Will ALL-IN-ONE800 transfor m my memory card data to DVD video or
MP3 CD? A: ALL-IN-ONE800 will back up whatever you have in your
original media devic es; ALL-IN-ONE800 won’t transform your data’s
format. You can trust their simple
and straightforward copy capability.
Q2: Can ALL-IN-ONE800 play M P3 or J PE G photo?
A: No. ALL-IN-ONE800 is designed as a simple and easy to use backup
machine.
Q3: Can ALL-IN-ONE800 link to PC?
A: Yes. ALL-IN-ONE800 has an optional USB module. Please ask your
supplier for this option. When hook up with PC to ALL-IN-ONE800
will become an external CD/DVD burner.
Q4: How long does it take to do a Memory Card or USB to disc copy?
A: The speed of copy wi ll depend on your Memory Card or USB’s speed
and the data size.
Q5: Can ALL-IN-ONE800 erase source disc?
A: ALL-IN-ONE800 only can erase the informat ion of rewritable disc.
Q6: What file Format the ALL-IN-ONE800 can support?
A: ALL-IN-ONE800 support FAT format, such as FAT12, 16 and 32.
Q7: Why is the capacity of my flash memory card (as reported by many
operating systems) different from the capacity that is listed on its label?
A: Some Disk Drive Companies define 1 MEGABYTE as 1,000,000
BYTES. But the Operating Systems define 1 MEGABYTE as 1,048,576
BYTES (1024K X 1024K or 2 to the 20th power). This is the reason
why our systems calculate the capacity differently.
42

 Loading...