

Page 1

Operating Manual
& Recipe Book
Page 2
Although we encourage you to dive right in, as the owner of a brand new ILVE oven we’d also
like t o invite y ou to atten d a compli mentary 2 hour masterclass. As part of the class you’ll
learn ho w to prepare and cook a numbe r of delicious signature ILVE dishes, not to mention
our top tips for getting the most out of your ILVE oven. From improving cooking results to
general maintenance information, we know you’ll enjoy this comprehensive, fun masterclass.
Simply call you r local showroom to organise a b ooking.
NSW
48-50 Moore Street
Leichhardt
02 8569 4600
VIC
1211 Toorak Road
Camberwell
03 9809 2122
QLD
1/42 Cavendish Road
Cooparoo
07 3397 0900
WA
Unit 10/55 Howe Street
Osborne Park
08 9201 9299
YOUR FREE MASTERCLASS
ilve.com.au
Page 3
OPEN 24/7
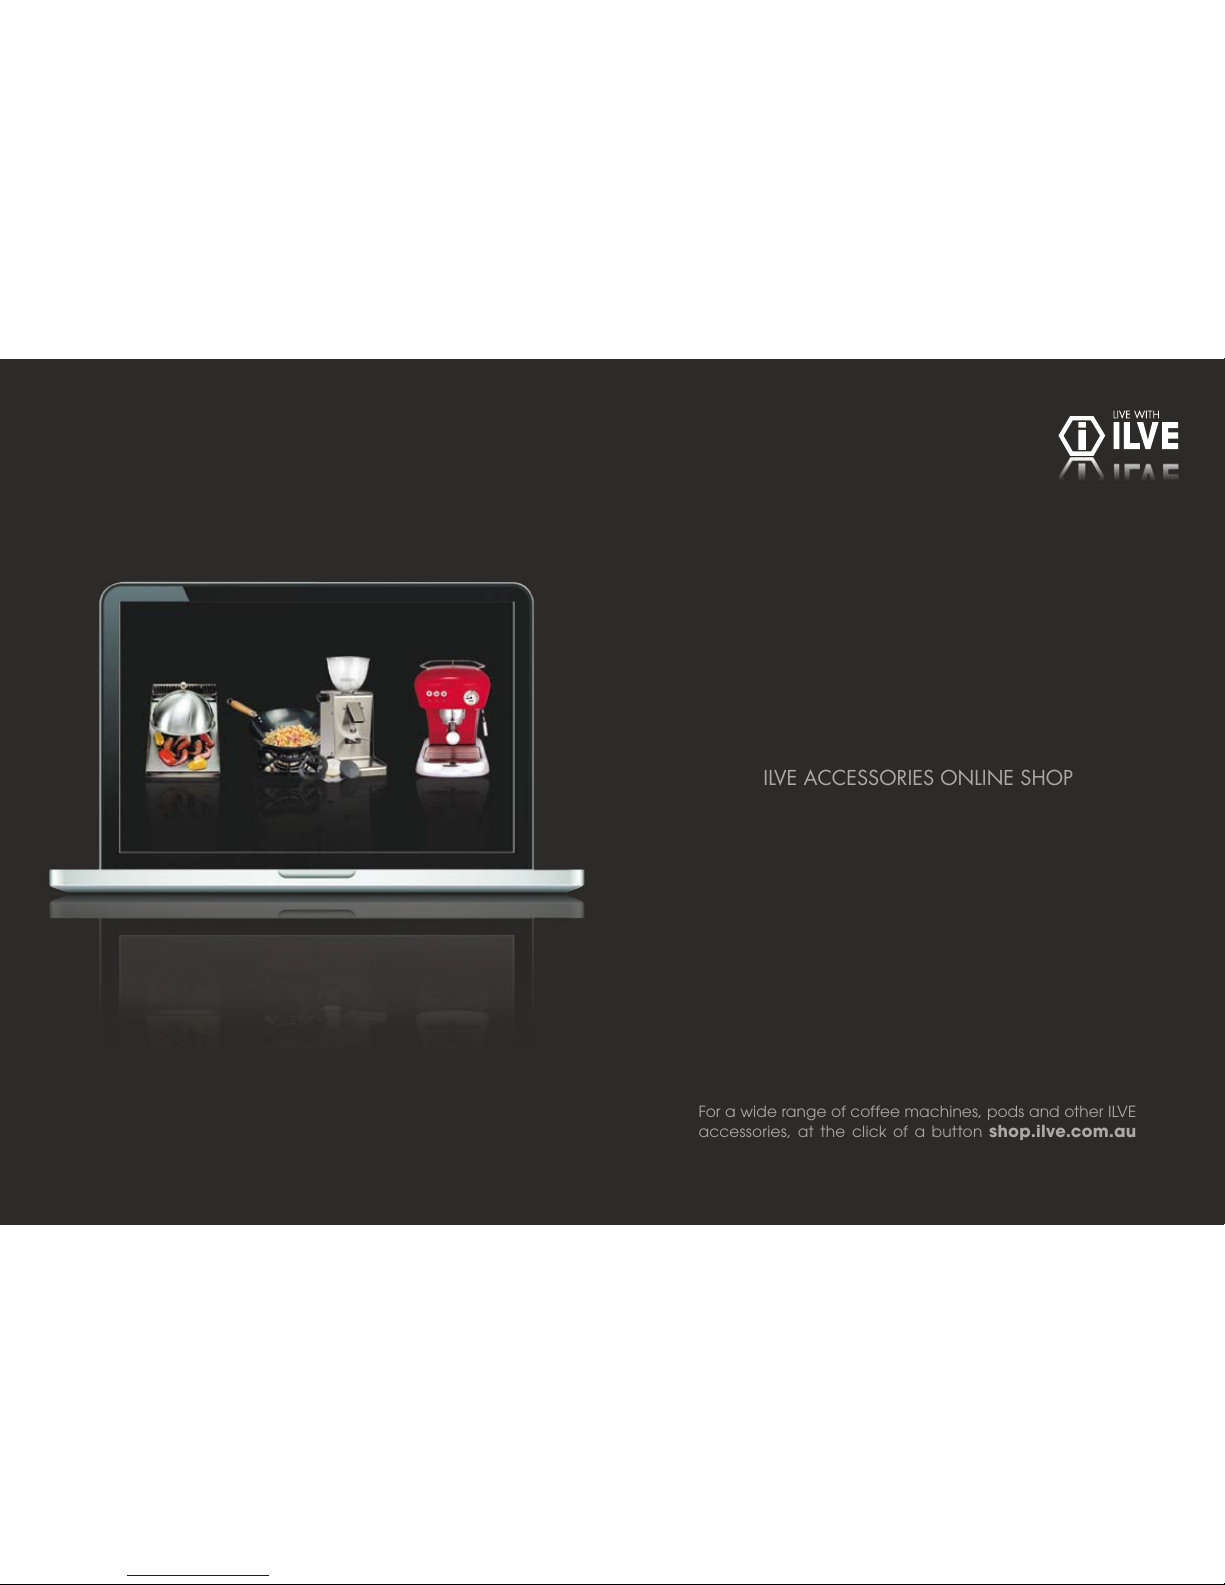
ILVE ACCESSORIES ONLINE SHOP
For a wide range of coffee machines, pods and other ILVE
accessories, at the click of a button shop.ilve.com.au
Page 4
you are now the proud owner of an ILVE cooking appliance.
Thank you for purchasing ILVE and welcome to the exciting
world of cooking the ILVE way.
This recipe book and instruction manual has been specially
created to inform you of the full range of features your ILVE
appliance has to offer and serves as an introduction to the
wonderful benefits of ILVE’s dynamic cooking systems.
In section one, we present detailed information on each of
the advanced cooking systems built into ILVE appliances.
Once you have read this section you will be able to choose
the most appropriate settings for your oven or cooktop
when cooking different types of food. Also, if you’re stuck
for ideas, section two has many delicious recipes that show
you how to get the most out of your ILVE appliance.
Congratulations,
Page 5
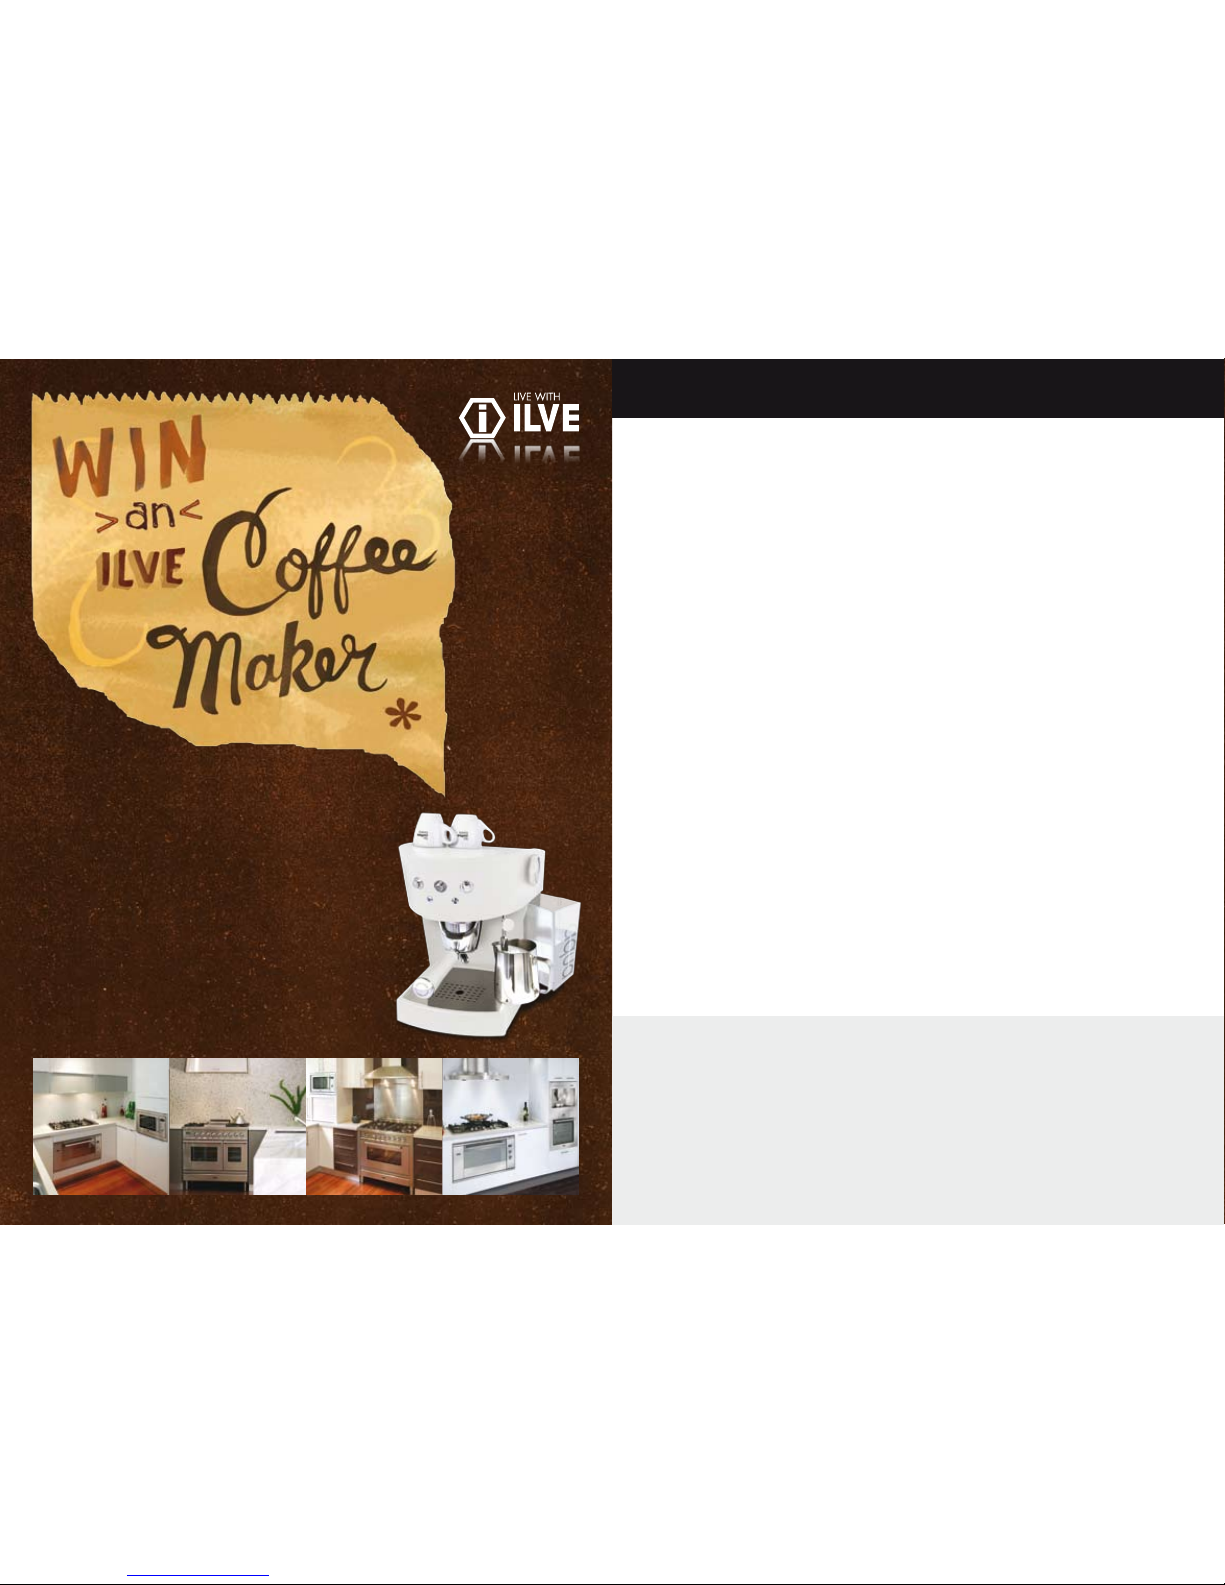
If you think your kitchen might look good in the pages of
a magazine or catalogue, this is your chance to make it
famous. To enter into the draw, simply take four photos of
your kitchen, tell us in 60 words or less why it deserves to
win, then send everything to [email protected].
The best entry will even win a beautiful ILVE by Ascaso
coffee machine in the process. Good luck!
Installation Check 10
Rack positions 10
Burning in elements 10
ILVE Features 10
Cavity cooling fan 10
Cooktop 10
Hob burners 11
Low simmer 11
Trivets 11
Volcanic rock barbecue grill 11
Rangehoods 11
Griddle plate 11
Pizza stone 11
Safety flame failure device 11
Grilling Systems 12
Traditional grilling 12
Fan grilling 12
Controlling splatter and smoke 13
Rotisserie mode 13
Shelf positions 13
Grilling guide 13
Electric Oven Systems 14
Setting the clock 14
Using the oven 14
Temperature 14
Preheating 15
Roasting probe 15
Oven function selection 15
Oven Cooking Modes 16
Gas Oven Systems 17
Cooking in your gas oven 17
Electric grill 17
Rotisserie 17
Selecting the ventilated gas or electric function 17
Gas oven function selection 17
Clocks & Timers 18
Digital clock (24 hour clock) 18
Digital clock (Non programmable) 18
Analogue clock/Nostalgie series (12 hour clock) 19
Care & Maintenance 20
Before you start 20
Catalytic self cleaning liners 20
Oven door removal 21
Cooktops 22
Oven light replacement 22
Ignition trouble shooting 22
Rangehoods 23
Recommended cleaning products 23
Cooking With ILVE 24
Wok cooking 24
Pan frying 24
Steaming 25
Braising 25
Rotisserie 25
Deep frying 25
Pizza stone 25
Induction cooktops 26
Simmering 27
Griddle plate 27
Teppanyaki 27
Batch cooking 27
Volcanic rock barbecue grill 27
Roasting 28
Cooking In Your Gas Oven 28
Cakes 28
Biscuits 28
Muffins 28
Roasting 28
Grilling 28
ILVE Coffee Machine 29
Warranty Card 53
Troubleshooting 55
ILVE Recipes 30
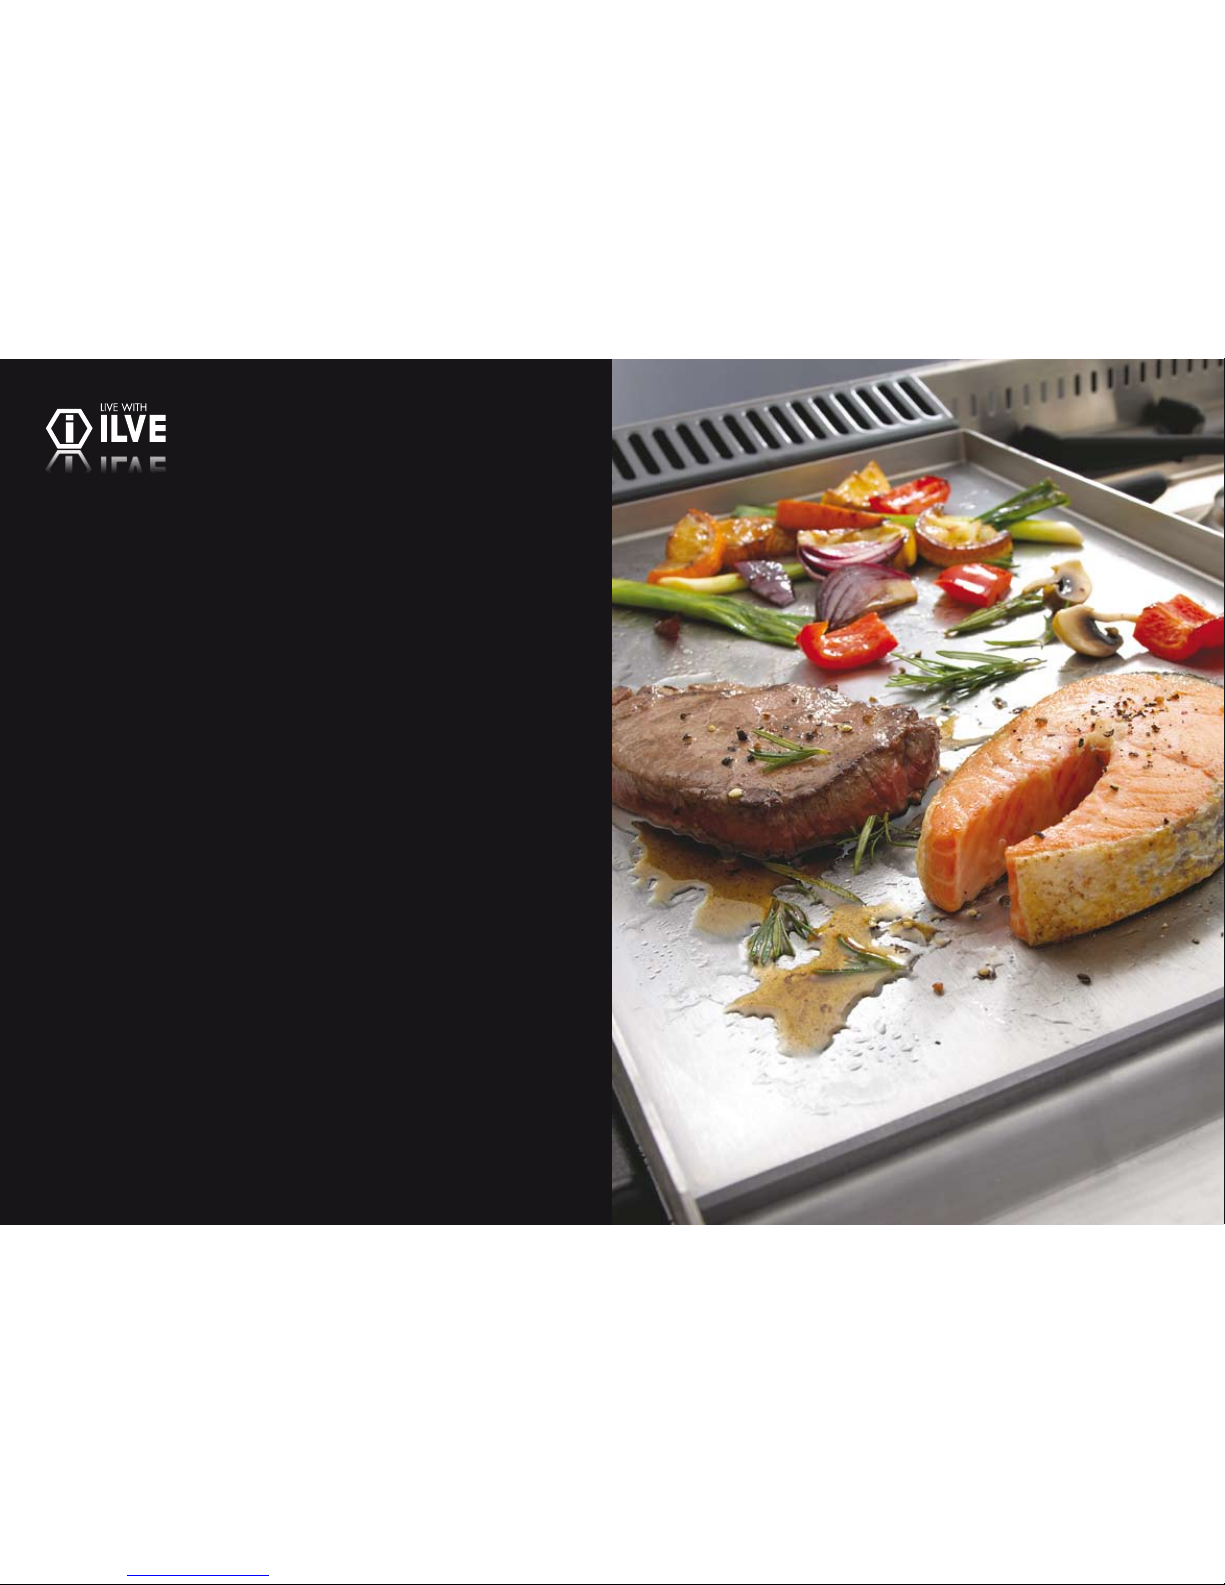
• Teppanyaki
• Australian Breakfast
• Vegetable Soup with Vermicelli
• Fettuccine with Chilli & Garlic
• Layered Vegetable Frittata
• Gourmet Pizza
• Tasmanian Scallops Creole Style
• Scampi with Lime & Orange Butter Sauce
• Marinated Seafood Skewers
• Chilli Salt Calamari
• Steamed Trout with Dill & Lemon
• Grilled Lamb Cutlet & Vegetables
• Rack Of Lamb with Cheese and Semi-dried Tomato
• Mustard Crusted Roast Leg of Lamb
• Chicken Casserole with Moroccan Spices & Cous Cous
• Thai Style Chicken
• Panna Cotta
• Mini Christmas Cakes
• Lemon Curd Tart
• Hazelnut Torte with Chocolate Ganache
• Almond Shortbread Hearts
• Rosemary Damper
Contents
Page 6
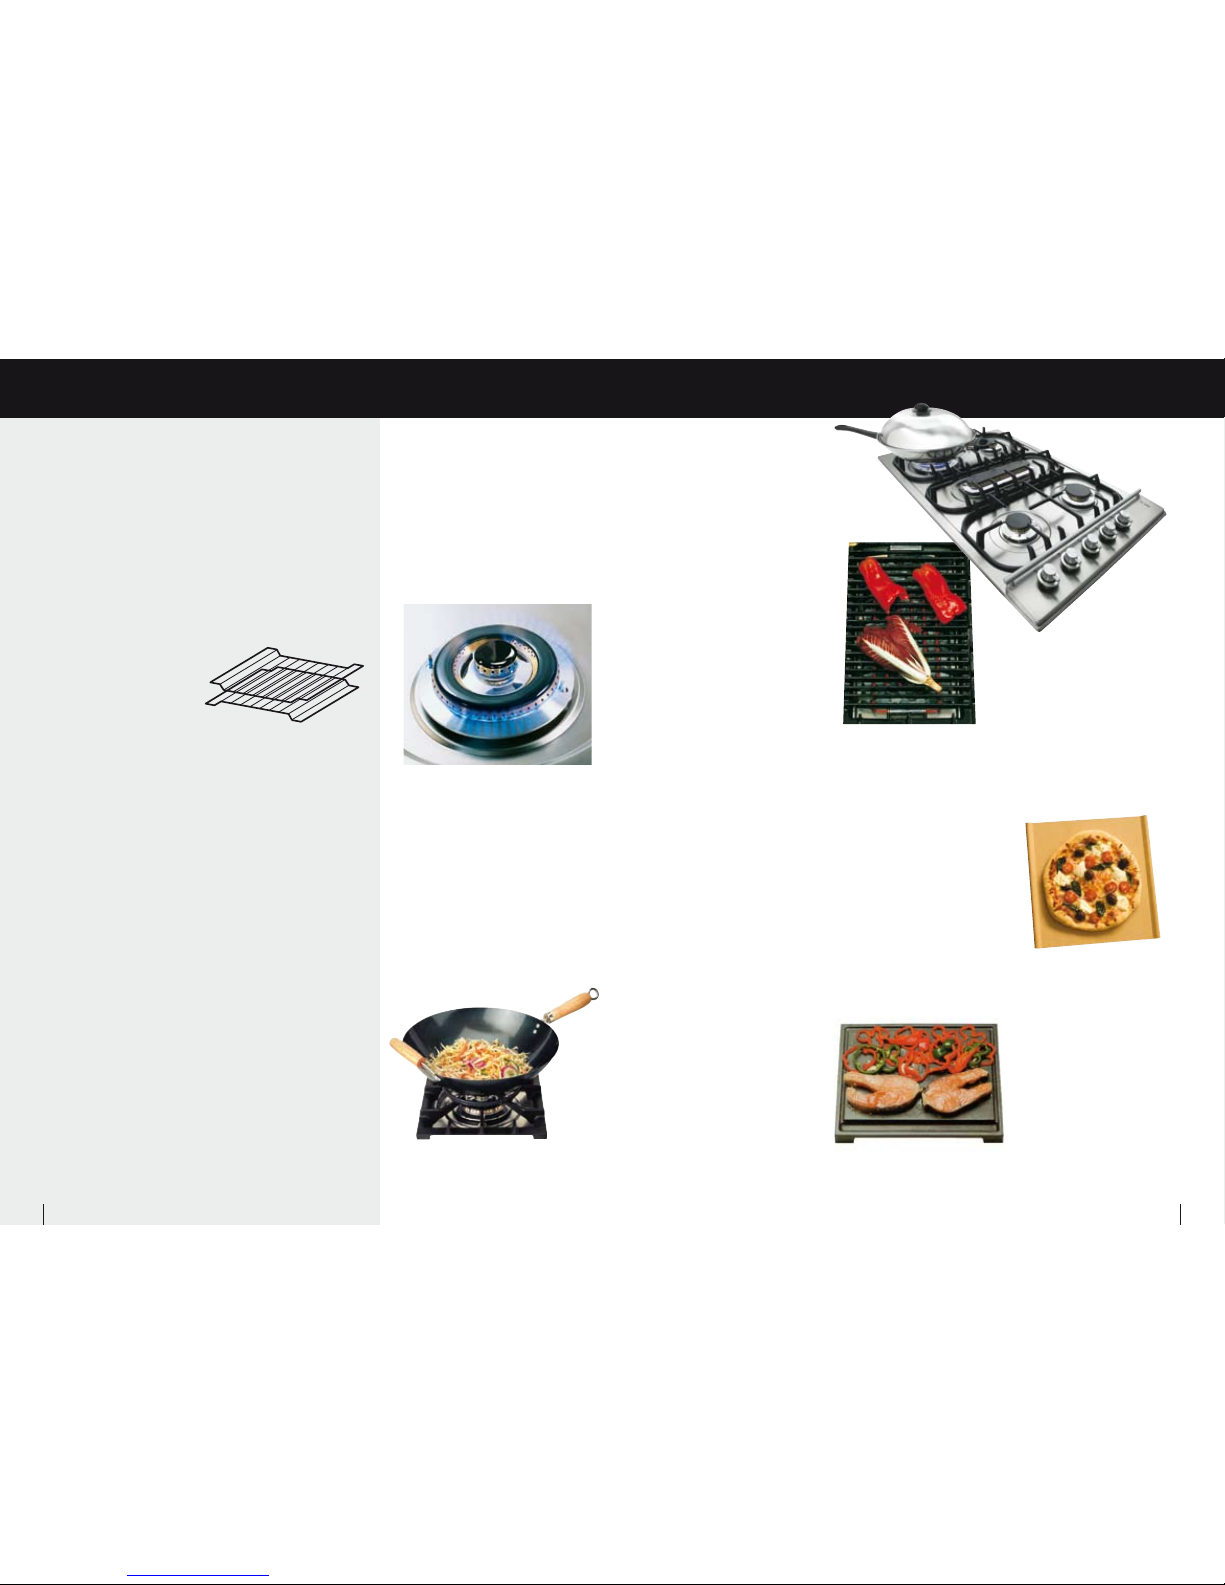
Hob burners
ILVE’s triple ring high intensity burner
is a high speed, high tempera ture
burner rat ed at 19.4 Mjh. I t has a
broad diameter to provide even h eat
across a ma ximum surface area of a
wok or fr ying pan allowing fo r cooking
efficiency and elimination of loc alised
hot spots which can cause bur ning
and sticking.
ILVE’s conventional high efficiency
medium bur ners are rated at 1 0 Mjh,
while the small burners are rated at
5 Mjh and have a range of precision
temperature settings from low simmer
to medium and high. ILVE’s elongated/
fish burne r trivet is rated at 15 Mjh
and is grea t for steaming or grilling
on ILVE’s griddle plate . ILVE’s multi
fuel hobs are equipped with the usual
combination of conventional gas
burners wi th gas wok burner but can
also be e quipped with a varie ty of
specialised hotplates.
Low simmer
A low simmer can be achieved by
selecting a temperature between the
off position and the high flame position
on the selector knob. This feature
is available on all ILVE models. This
feature allows an accurate and safe
simmer and complete control over the
height of the flame.
Trivets
ILVE’s cooktop trivets are designed to
provide exceptional stability for even
the largest woks, frying pans and pots.
The trivets are easily removable for
cleaning (See page 20).
Volcanic rock
barbecue grill
ILVE’s volcanic rock electric barbecue
grill is a low profile, 3cm deep, large
dimension barbecue which features 12
temperature settings. Meat, poultry and
seafood chargrilled on the barbecue
grill remain succulent and moist while
developing subtle smoky flavours. The
volcanic rock barbecue grill is easily
disassembled for ease of cleaning.
Rangehoods
A complete range of designer
rangehoods are available for all ILVE
stoves and cooktops, please consult
your ILVE dealer for further details.
Griddle plate
Optional cast iron griddle plates are
available for ILVE cooktops. The griddle
plates fit over the centre fish burner on
80, 90, 120 and 150cm cooktops. For
all other models the griddle plates fit
on the wok burner. Please consult your
ILVE dealer for further details.
Pizza stone
This is a flat clay pizza stone and is
available from ILVE for those cooks
who like to make cakes and pastries,
bake bread and make home made
pizzas. This pizza stone fits onto any
shelf in the oven and comes with its
own ideas booklet.
Safety flame
failure device
All burners on ILVE cooktop and
freestanding upright models, excluding
the Maxi and the Compact series of
gas cooktops, have a unique safety
flame failure device. This feature
instantly stops the flow of gas to a
burner, if that burner is extinguished
for any reason. You will need to hold
the gas control knob in firmly once it
lights for 10-15 seconds to override the
thermocouple.
ILVE stoves, wall ovens and cooktops feature many advanced
cooking components and safety refinements. However before
using your oven for the first time the following installation
check must be carefully carried out and oven elements must
be burnt in.
• Check that your ILVE installer has screwed the oven into its
cavity and that all packaging is removed from inside oven.
• Check that all oven racks are in place.
Rack positions
ILVE ovens are equipped with
various racks depending on the
model and size; all ILVE wire
racks are reversible. They have
angled offset ends to allow
for height variation between
shelves; this is a particularly useful feature when cooking with
deep dishes, for large roasts or when batch cooking.
Burning in elements
It is necessary to burn the protective oils that are used in
manufacturing and shipping from the elements.
1 Set the clock to the correct time. Refer to page 18.
2 Set oven temperature control knob to 250º C and select
cooking function mode 2 by turning function control knob.
3 Allow to burn in for 10 to 15 minutes.
4 Repeat process for all seven cooking modes (2 through 8)
in sequence and allow to burn in each mode for 10 to
15 minutes.
5 Clean the oven thoroughly when you have completed the
burn in process so that the oven and grill/rotisserie will be
ready for use. Refer to page 20.
• There may be a slight unpleasant odour during the initial
burn off procedure. As a result we advise you open doors
and windows in the kitchen during this procedure.
Cavity cooling fan
ILVE ovens are equipped with a cavity
cooling fan. The fan is thermostatically
controlled and will switch on
automatically when the oven cavity
reaches a temperature of 60º C. Air
will gently be blown out through the
front louvre, just above the oven door
handle. This keeps the interior of the
cavity housing cool.
Cooktop
ILVE’s gas burners feature high
thermal efficiency, economical
energy consumption and precision
temperature settings, allowing you
to not only have total control over
cooking temperatures but instant
response in temperature changes
and automatic ignition. All ILVE
cooktops meet the highest standards
of operational efficiency required
for approval by the Australian and
European Gas Association.
Normal Position
Reversed Position
Installation Features
10 ILVE Operating Manual
11ILVE Operating Manual
Page 7
be placed on grill grid inside a grill tray
alternatively; meat can be placed on a
wire oven rack positioned over an oven
pan to make sure any drips are caught.
Controlling smoke
and splatter while
grilling
When grilling items such as sausages
or fatty meats it is advisable to add
1 cup of water to the grill pan to
control, drips, splatter and smoke.
Rotisserie mode
1. Insert rotisserie skewer into small
opening on right side of oven wall
cavity.
2. Leave oven door closed.
3. Turn grill function knob to
temperature variance of your choice
(1 – 12).
• Refer to page 28 for cooking
methods in your gas oven.
MODE 5 Full roof area conventional
grilling mode
In this mode the inner roof element
heats up creating direct infra-red heat.
This mode allows you to grill with the door
closed. Grilling with the door open ajar may
lead to the control knob heating up slightly.
MODE 6 Hot air grilling system
This mode utilises the fan combined with the
infra-red grill to ensure hot air is circulated
evenly around the oven. This is the ideal
mode to use when multitasking, grilling chops
and sausages on the top level whilst baking
a potato bake on the lower level. The door
must be closed during this grilling mode.
There are two ways to grill food in an ILVE electric oven;
by using radiant heat to cook the food or by using thermal
grilling, a combination of radiant heat with thermal air flow.
The full roof area conventional grill system uses
automatically controlled direct infra-red heat radiated
from above for traditional grilling applications. ILVE ovens
combine the advantages of infra-red heat with fan forced
air assistance, allowing grilling on three levels at the
same time.
Both cooking techniques give exceptional results for a
wide range of meat cuts such as chicken breasts, beef
steaks, lamb and pork. It is also ideal for grilling fish and
fish fillets.
Traditional grill
1. Select the grill mode (Mode 5) on the
function control knob.
2. Turn the temperature control knob to
250º C.
The oven heating indicator light at the
front control panel comes on when
the thermostat is energised and turns
off once it has reached the selected
temperature setting.
Fan grilling
1. Position racks at heights according
to food types and thickness (See hot
air grill cooking guide)
2. Select the fan grill mode (Mode 5) on
the function control knob.
3. Turn the temperature control knob to
175º C.
4. Allow oven to preheat for a minimum
of four minutes depending on food
types (See hot air grill cooking
guide).
When fan grilling on multiple shelves
the oven door must be closed. The
grill element at the top of the oven
produces intense heat to sear the
surface of the meat while the fan
moves this heat around the oven.
Fan grilling eliminates the need to turn
food over during the grilling process;
however, turning is optional depending
on the degree of browning desired.
When using this function make sure
that food is elevated to allow the hot air
to circulate around the food. Food can
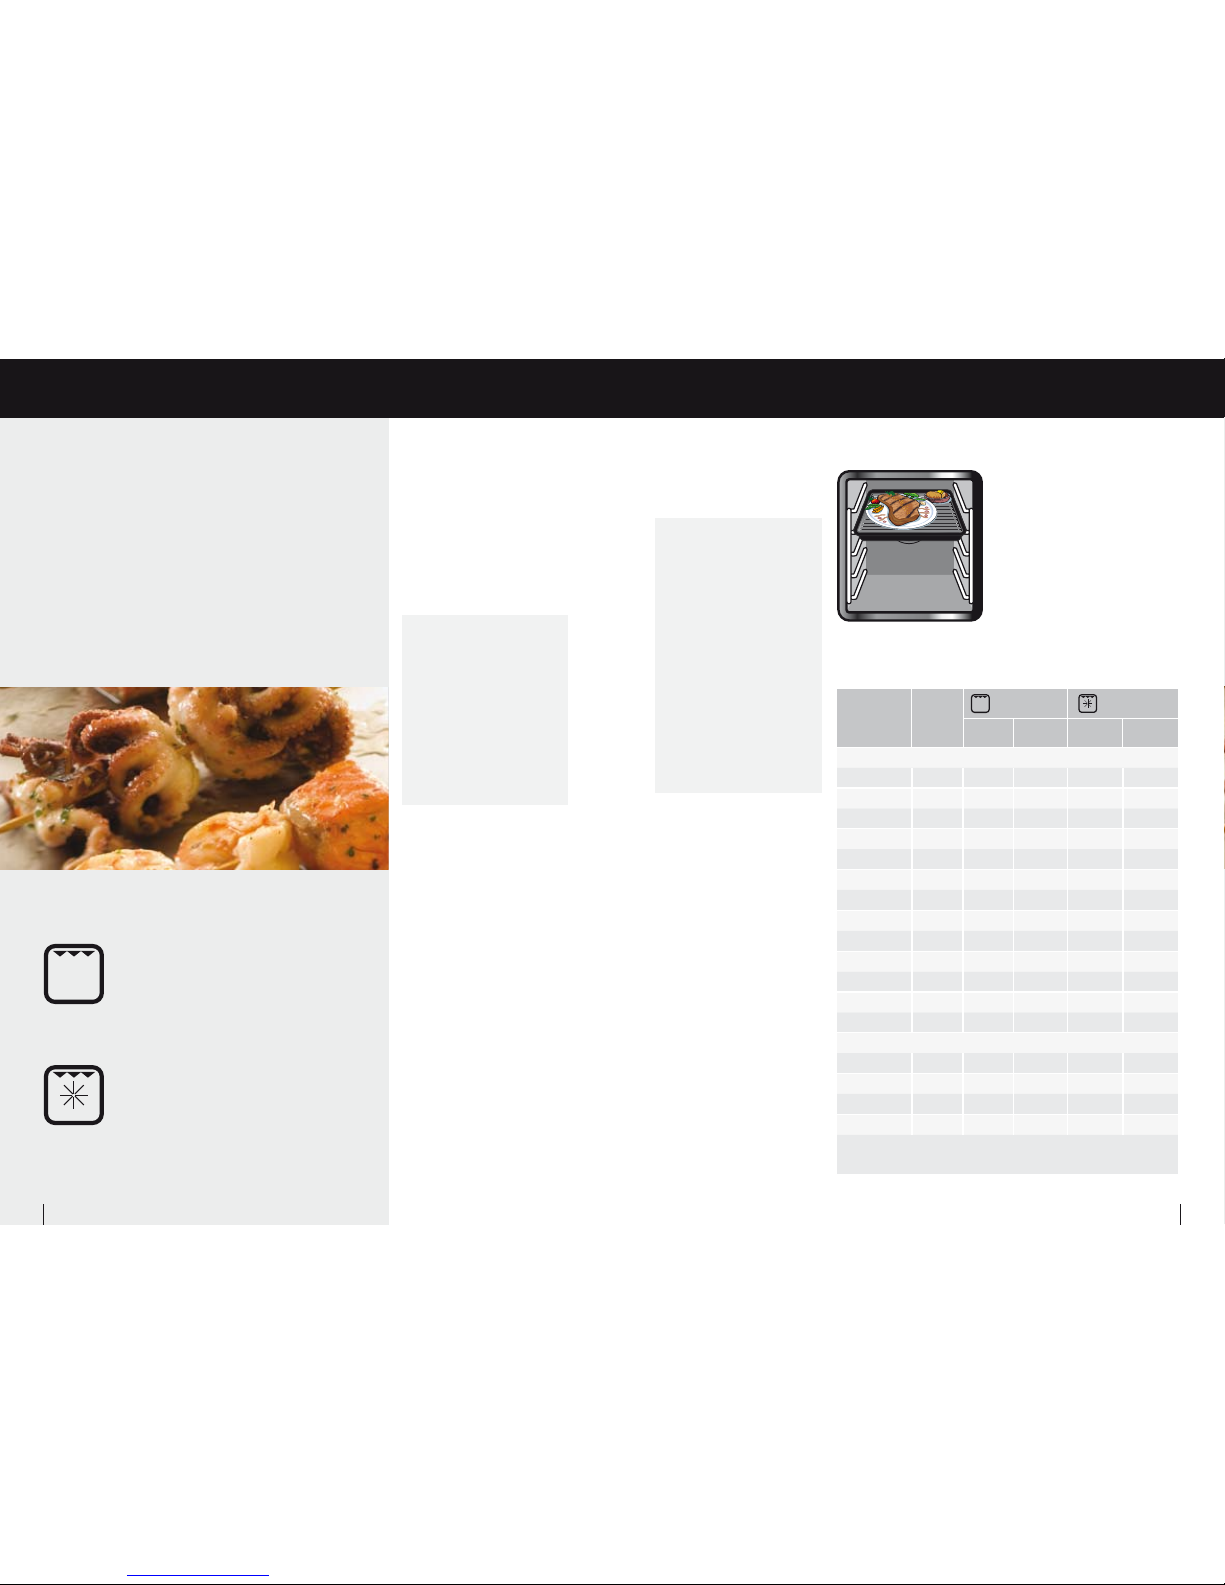
Grilling guide
FOOD TO BE
GRILLED
RECOMMENDED
SHELF
POSITION
TRADITIONAL
GRILLING
FAN GRILLING
OVEN
TEMP
GRILLING
TIME 2
OVEN
TEMP
GRILLING
TIME 2
THIN CUTS
Steaks 3 - 4 180ºC 10 - 16 mins 180ºC 10 - 16 mins
Kebabs 3 180ºC 25 - 30 mins 180ºC 25 - 30 mins
Chicken Kebabs 3 180ºC 20 - 25 mins 170ºC-180ºC 20 - 25 mins
Cutlets / Schnitzel 3 - 4 180ºC 12 - 18 mins 180ºC 18 - 20 mins
Liver 3 - 4 180ºC 8 - 12 mins 180ºC 10 - 14 mins
Burgers 3 - 4 180ºC 14 - 20 mins 180ºC 16 - 20 mins
Sausages 3 - 4 180ºC 10 - 15 mins 180ºC 8 - 12 mins
Fish Fillets 3 - 4 180ºC 12 - 16 mins 180ºC 12 - 16 mins
Trout 3 - 4 180ºC 16 - 20 mins 180ºC 20 - 25 mins
Toast 3 - 4 180ºC 2 - 4 mins 180ºC 3 - 5 mins
Cheese Toast 3 - 4 180ºC 7 - 9 mins 180ºC 4 - 6 mins
Tomatoes 3 - 4 180ºC 6 - 8 mins 180ºC 6 - 8 mins
Peaches 3 180ºC 6 - 8 mins 180ºC 7 - 10 mins
THICKER CUTS
Chicken (1kg) 2 – – 170ºC-180ºC 50 - 60 mins
Rolled Meat (1kg) 1 – – 180ºC 75 - 85 mins
Pork (1kg) 1 – – 180ºC 100
-
120 mins
Sirloin (1kg) 1 – – 200ºC 25 - 35 mins
1) Select the appropriate shelf level for the thickness of the food.
2) Turn food over half way through the grilling time.
Note: The information given in this chart is intended as a guide only.
ILVE TIP
• The oven door should always be
closed during hot air grilling.
• The temperature should be set
from 175 – 180º, this range in
temperature helps prevent food
from burning and avoids splatter,
minimising the need for cleaning.
• The shelves are numbered 5 to
1 from top to bottom
(See diagram above right).
• ILVE’s fan grill system can be
used to cook on multiple shelves,
for example grilling meat on top
shelf, lasagna on middle shelf,
garlic bread on bottom shelf, while
warming plates on the bottom of
the oven.
ILVE TIP
• When conventional grilling
the oven door should always
be closed
• The best settings for conventional
grilling is between 175 – 190º C.
• Care must be taken to make sure
that there is at least 8cm between
the top of items being grilled
and the grill element to allow for
unimpeded circulation of hot air
(shelf 5).
Shelf positions
– 5
– 4
– 3
– 2
– 1
Grilling Systems Electric
12 ILVE Operating Manual
13ILVE Operating Manual
Page 8
Preheating
Always preheat your ILVE oven to at
least 175ºC before placing food in it.
To do this use the Quick Start mode
(Mode 9) on your control knob. Set
your oven to 250ºC, after the oven has
reached temperature, indicated by the
temperature light turning off, you may
then switch the oven to your required
mode.
Tip: Set the oven timer to 8 minutes to
alert you when the oven has reached
temperature.
Roasting probe
ILVE’s premium models are equipped
with a microprocessor controlled
roasting probe which can be used to
cook roasts to a precise finish. The
probe is thermostatic and is inserted
into the thickest part of the roast away
from the bone. When the probe is
fitted to the connection point, the
thermometer activates.
By pressing the + or –
buttons you can program
the probe to the desired
temperature for the roast
(to reset remove the
probe from oven).
Roasting guide:
• Rare 55 degrees
• Medium 65 degrees
• Well-Done 75 degrees
If the meat is left in the oven an alarm
will sound and the oven will turn off
when the desired temperature
is reached.
All ILVE electric ovens are multifunctional and feature up to
eleven cooking modes. This enables you to choose from
a variety of pre-set functions depending on your cooking
needs. Selection of the correct mode and oven temperature
are important to obtain the best possible cooking results.
All modes are pictured on your control knob and are
numbered clockwise.
ILVE electric ovens are equipped with both top and bottom
elements, which can be used individually or together;
radiating heat from above and below simultaneously or
individually for specialist tasks such as au gratin style
cooking, crisping pork crackling or to brown off a roast.
By recessing the upper roof element and extending the
cooking shelves to the rear of the oven, ILVE has created
an oven interior which on average is 30% larger than ovens
of similar style. These design features mean that more
cooking space is available, so large roasts or four to five
racks of food can be cooked easily.
The ILVE electric oven also has a quick start or preheat
mode which allows the oven to heat from 0 –180ºC in just
6 to 8 minutes.
Preparing your
electric oven for use:
Setting the clock
To enable use of your ILVE oven you
must first set the clock to the correct
time. If the clock is not set correctly the
oven will not operate (See page 18)
Using the oven
When using your ILVE oven you must
select, using separate knobs, both a
mode of cooking and a temperature
at which to cook. The only exception
to this rule is when using the defrost
mode, where no temperature setting
is required.
Temperature is indicated by an
ORANGE light. This light will tur n
on and off during cooking as the
thermostat readjusts itself.
Cooking mode selection is indicated by
a GREEN light. This light should stay
on throughout the cooking process.
All ILVE ovens are fitted with a cavity
cooling fan. This fan is thermostatically
controlled and automatically switches
on when the oven cavity reaches 60ºC.
This gently blows air out through the
front louvre just above the oven door
handle, reducing outside heat.
Temperature
ILVE ovens are well insulated and
therefore highly efficient; as a result we
recommend you may have to adjust
cooking temperatures. In an ILVE
oven a moderate to hot temperature is
175ºC. You will find this temperature
will not need to be exceeded, except
for specific cooking requirements
which call for high heat over a short
period of time. Exceeding 175ºC when
cooking may result in food cooking too
quickly on the outside while remaining
undercooked inside.
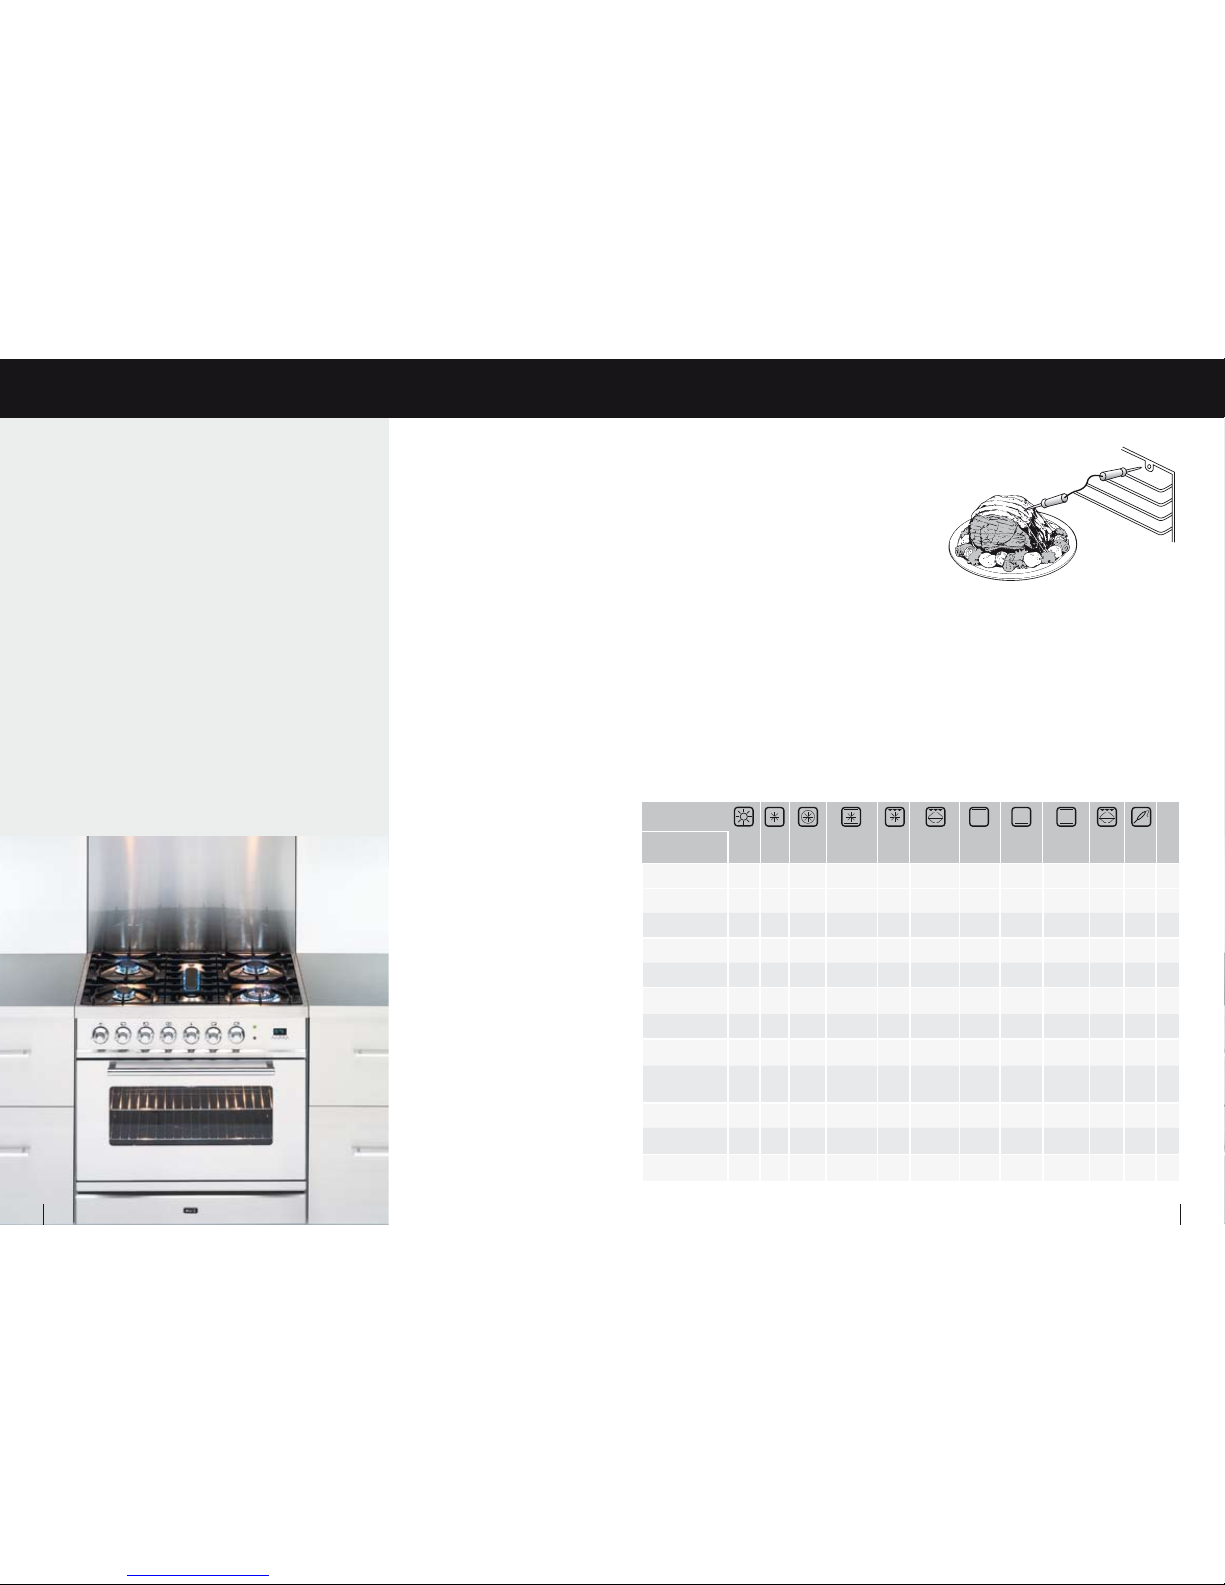
FUNCTION
TYPE OF FOOD
PIZZA DEFROST ADVANCED
HOT AIR
CONVECTION
HEATING
SYSTEM
HOT AIR
GRILL
SYSTEM
CONVENTIONAL
GRILL SYSTEM
UPPER ROOF
ELEMENT
LOWER
FLOOR
ELEMENT
CONVENTIONAL
HEATING
ROTISSERIE ROASTING
PROBE
SHELF
Pizza • 3
Meat Roasts • • • • • • • 1-2
Small Cuts • • • • • 3-4
Steak/Sausages • • 3
Whole Fish Fillets • • • • • • 3
Poultry Whole
Pieces
• • • • • • 2
Combined Meats • • • 3-4
Pastry Dishes Pies, Quiche etc.
• • • 2
Egg Dishes Souffle, Pavlova,
etc.
• • 2-3
Bread • • • 2
AuGratin/Crumb
Cheese
• • 3-4
Toasted
Sandwiches
• 4
Electric oven function selection
Oven Systems Electric
14 ILVE Operating Manual
15ILVE Operating Manual
Page 9
There are a four
cooking options
available with
ILVE gas ovens:
1. Static Gas Oven
2. Fan Forced Gas Oven
3. Rotisserie
4. Electric Grill
Cooking in your
gas oven
To use the gas oven open the door
fully and select your mode of cooking,
either static or fan forced. To do this
you must turn the knob numbered
1 - 12 clockwise. By tur ning the knob
clockwise and clicking it past 12, the
fan-forced function is turned on. You
can re-adjust the intensity of the grill
element between 1 and 12. If the knob
is not clicked past the 12 the oven will
stay in static mode. Once you have
selected a mode of cooking, the light
will go on in the oven.
Now press the thermostat knob gently
and turn it anticlockwise towards
maximum temperature position
(250°C.). Press the thermostat knob
right in to prime the electric ignition
and keep pressing it for 10 - 15
seconds to allow the thermocouple to
heat up and let the gas through. Make
sure that the gas has lit and, after three
minutes, close the door, then select the
temperature (from 100°C to 250°C)*.
Electric grill
To use the electric grill in the gas oven
turn knob numbered 1 – 12 clockwise
to the grilling icon (A) then adjust
the thermostat knob to the required
temperature.
Rotisserie
Still using the grill function, this
function is also used as a rotisserie in
all ovens (except 60cm). For example
chicken, duck, beef and lamb can
be spit roasted at temperatures up
to 225°C. Vegetables can be also be
placed in the baking tray whilst using
the rotisserie to add flavour to them.
Selecting the ventilated
gas or electric function
(For models with a VENTILATED GAS
oven) Turn the knob (pictured top
right) to position 12 and then turn it
past position 12 as far as it will go in a
clockwise direction. This starts up the
radial fan which is located inside the
oven and provides forced ventilation
during cooking. To start the fan electric
grill apply the same steps as above.
*NOTE: the electric grill will not work
whilst the gas oven is in use.
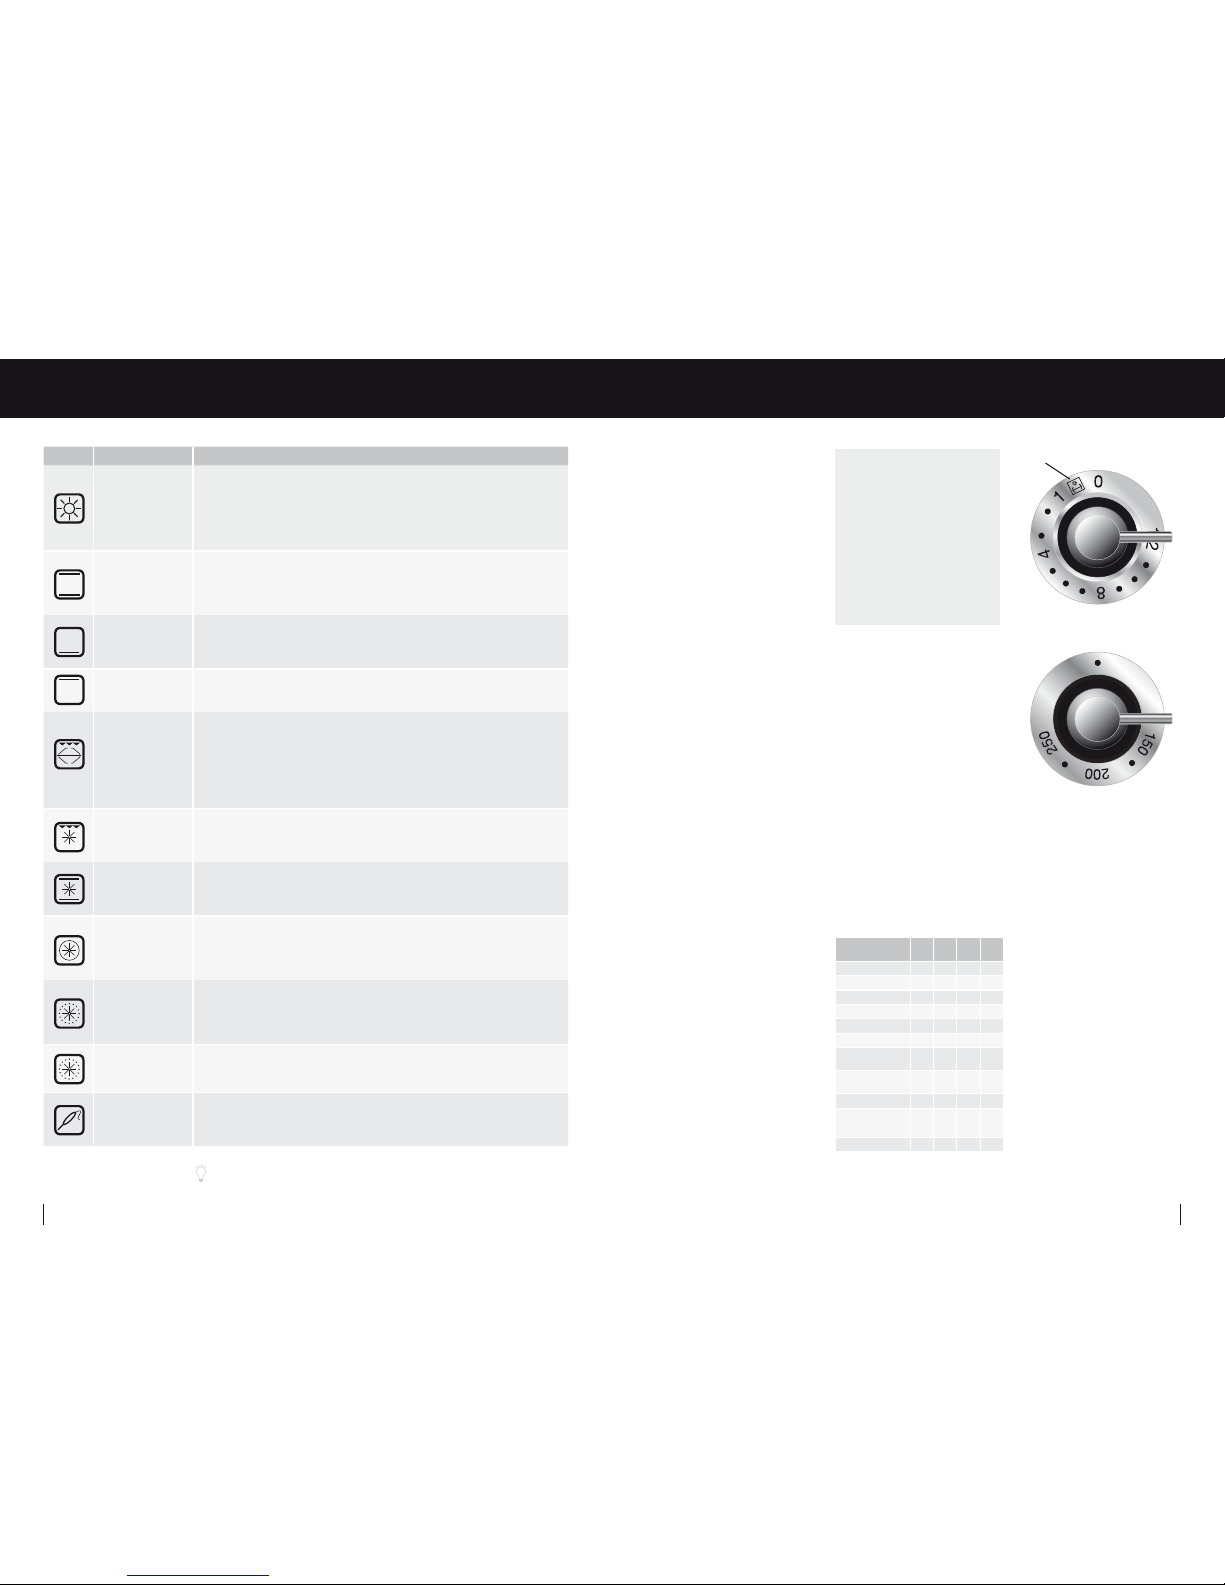
ICON MODE FUNCTION
MODE 1
Pizza mode
ILVE’s unique Pizza mode has been specifically designed for you to cook the perfect Pizza
To achieve perfect results; turn the oven thermostat up to 250 degrees (best temperature
for pizza cooking) ILVE’s pizza mode will do the rest by turning on all elements in the oven
at 30% and the bottom element on at 100% of their capacity. This ensures you get a
nice crispy base with the assistance of the other elements at lower heat to cook the top
of your pizza. For best results it is recommended that ILVE’s pizza stone be used on the
middle shelf when using this function.
MODE 2
Conventional oven
mode
This is the traditional static oven mode with no fan allowing heat from both above and
below to convect simultaneously. This is the ideal function for cooking heavy cakes such
as mud cakes or banana cakes, breads and large roasts. Such items need to be placed
in a central position in the oven. Mode 2 is also the self-cleaning mode in models, which
have self cleaning liners.
MODE 3
Lower floor heating
mode
This mode allows heat from the base of the oven. It is suitable for long, slow
cooking such as stews and casseroles or for blind baking and finishing pastries. This
mode is also perfect when using the ILVE Pizza Stone, for perfect pizzas cooked directly
on the stone in a wood fired fashion.
MODE 4
Upper element
mode
In this mode the upper element is in use. This is ideal for finishing omelettes, browning
dishes such as cauliflower au gratin or finishing off lemon meringue pies or flans whose
base has been previously baked using another mode.
MODE 5
Conventional Grilling
mode
In this mode the complete inner roof element heats up simultaneously creating direct
infra-red heat from above. With this mode you should grill with the door closed.
Rotisserie mode
(All models except 600mm
and P70 Series ovens)
The rotisserie mode works in a similar way as traditional grilling and is one of the best
ways to cook meat and poultry. With a right hand side motor drive in the oven, or in the
rear of the 300mm & 400mm ovens. The ILVE rotisserie can accommodate up to two
joints of meat or portions of poultry at once.
MODE 6
Hot Air Grilling
mode
This mode utilises the fan combined with the infra-red grill to ensure hot air is circulated
evenly around the oven. This is the ideal mode to use when multitasking, grilling chops
and sausages on the top level whilst baking a potato bake on the lower level. For best
results the door should be closed during this grilling mode.
MODE 7
Convection
heating mode
With both the top and bottom elements in use and the fan circulating hot air,
this cooking mode is best suited for bread, cakes and sponges, where very even
temperatures are required, even in the corners of the oven.
This mode also creates less splatter when roasting.
MODE 8
Advanced
hot air mode
The fan in all ILVE ovens is surrounded by a triple ring heating element that
evenly distributes heated air throughout the oven. This mode is perfect for batch baking
biscuits or muffins or for that large Christmas cake which requires low temperature
cooking over a long time period. Mode 8 is also the self-cleaning mode in models, which
have self cleaning liners.
MODE 9
Quick Start
or Pre-heat mode
To obtain the best result from your oven it is recommended that you preheat it prior to
use. Combining an advanced hot air function and conventional heating mode ILVE ovens
can reach a temperature of 180°C in just 6 – 8 minutes.
Once preheated the required cooking mode should be selected before proceeding with
cooking.
MODE 10
Defrost mode
This function allows you to fan defrost at an ambient temperature.
Unlike defrosting using your microwave this mode does not dry or par-cook food.
Roasting probe
(For models 948 Series,
600SSXMP & Majestic
Series only)
These ILVE models are equipped with a microprocessor controlled roasting probe which
can be used to cook roasts to a precise finish either rare, medium or well-done, taking the
guess work out of cooking.
(A)
TYPE OF FOOD GRILL OVEN
ROTIS-
SERIE
SHELF
Meat Roasts • • 1-2
Small Cuts • 4
Steak/Sausages • 3-4
Whole Fish Fillets • • 3
Poultry Whole Pieces • • • 3
Combined Meats • 3-4
Pastry Dishes Pies, etc.
• 2
Egg Dishes - Quiche,
Souffle, Pavlova, etc.
• 2-3
Bread Pizzas • 2
AuGratin/Crumb
Cheese
• 3-4
Toasted Sandwiches • 3-4
ILVE TIP
• Cooking with the electric grill must
be carried out with the door of the
oven closed.
• The grill does not operate when the
gas function of the oven is on.
• It is advisable to preheat the grill for
5 minutes before putting food in.
• Do not grill on the top level of the
oven - for even grilling cook on the
second level from the top.
Gas oven function
selection
Thermostat knob
Function knob
Please note: To turn the oven light on or off during cooking, simply push in the oven control knob.
Electric Oven Cooking Modes Gas Ovens
16 ILVE Operating Manual
17ILVE Operating Manual
Page 10
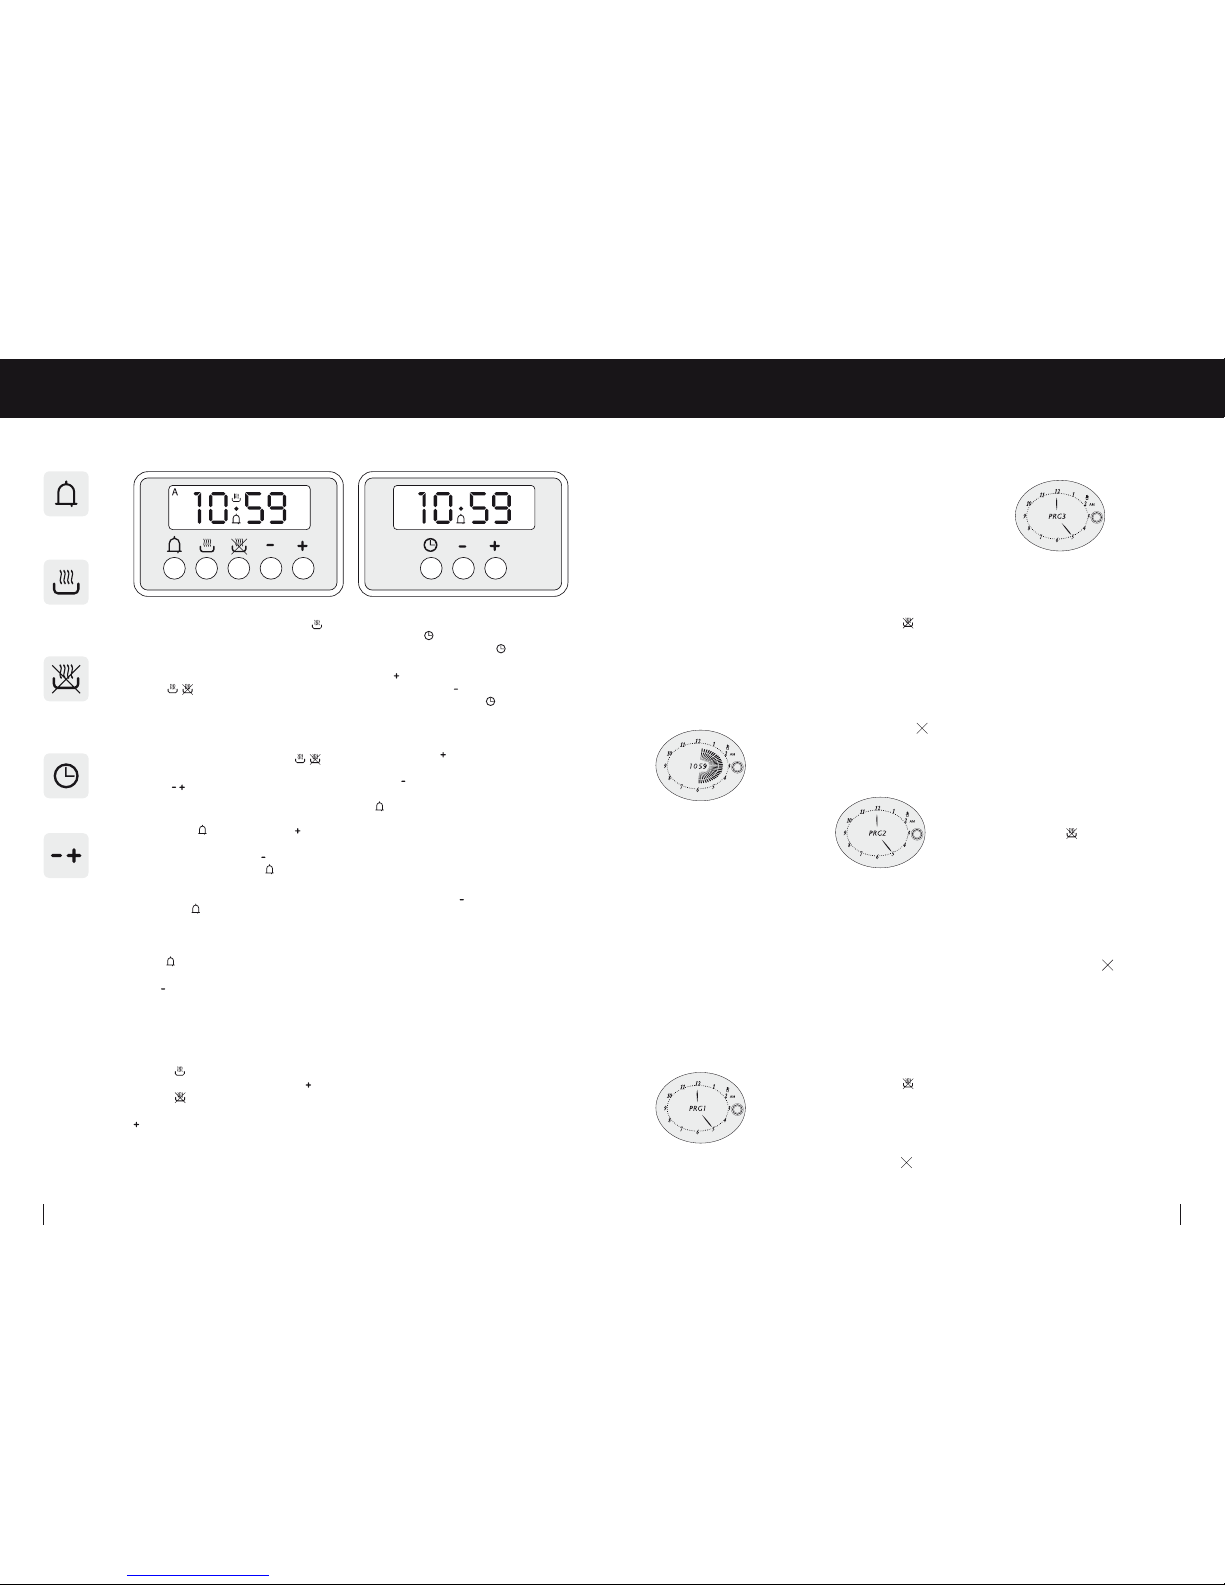
Clocks & Timer Controls
Always ensure the oven is in manual mode .
The pot symbol with the steam coming from
it should be displayed. If there is an [A] on the
display it means that the oven is in auto mode,
to cancel this you must press both pot symbol
buttons
simultaneously. The oven will
not operate if it is pre-programmed; it has to
be brought back to manual mode.
1. To set or adjust the time:
Press both pot buttons simultaneously
and then to adjust the timer press either the plus
or minus
button accordingly.
2. To set the alarm:
Hold in the bell
button then the plus
button
until you reach the required time. If you go over the
required time, press the minus
button to bring it
back. You will now notice a bell
symbol on the
display, this highlights that the alarm is on. If you
need to check how much time is left on the alarm,
press the bell
button again as this will return
to the time display. When the alarm goes off the
oven will remain on and will ring for seven minutes
unless turned off, which can be done by pressing
the bell
button. You can adjust the tone of the
alarm-only when the alarm is ringing press the
minus
button and it will scroll through three
available tones. Select the tone that you require,
this tone will then sound the next time
you set the alarm.
3. Pre-programming the oven:
Press the
button. Put in the duration that you
want to cook the item for by pressing the
button.
Press the
button. Select the time that you
want the item to finish cooking (by pressing the
button). You then need to select the mode
and temperature.
1. To set or adjust the time:
Press the clock
button once and then release.
After you have pressed the clock
button once,
you can then immediately set the minutes by using
the plus
button. If you enter an incorrect time
you can use the minus
button to correct the
time. Press and hold the clock
button until the
LED display flashes to set the hours.
2. To set the alarm:
Only press the plus
button, until you reach the
set time required. If you go over the time, press
the minus
button to bring it back. A maximum
of 99 minutes can be set. You will now notice a
bell
symbol on the display, this highlights that
the alarm is on. The display will only show the
countdown of the timer while it is set, it will not
show the time. When the alarm rings, the oven will
remain on and the alarm will continue to ring for
seven minutes unless turned off. You can adjust
the tone of the alarm - only when the alarm is
ringing, press the minus
button and it will scroll
through the available tones. Select the tone that
you require, this tone will then sound the next time
you set the alarm.
Digital clock (24 hour clock) Digital clock (Non programmable) Digital analogue clock
To Set the Clock
To set the time on your new ILVE
Nostalgie oven, simply push and hold
in the dial on the clock until you see the
word MAN appear on the screen, this
will indicate that your clock is in manual
operation. Once the MAN appears on
the screen press in and hold the Dial on
the clock for approximately 10 seconds
until the word TIME appears. Release
the button then turn the dial clock wise
to set the Hour time then press the Dial
again once and turn the dial clockwise
to set the Minute time. Press the dial
one final time and the clock is now set.
The word MAN will appear again in the
main screen.
Timer reminder
You can program your oven to beep
at you after a certain amount of time.
To do this press the dial once then
turn the knob clockwise to the desired
amount of minutes you would like
before the oven beeps at you. Press
the dial again; you will now see the
time in the middle of the clock and the
countdown timer counting backwards
on the digital display. The timer is now
set, (the maximum countdown time is
60 minutes). If you would like to cancel
the countdown timer simply press the
dial again. This will bring you back to
the main screen where the word MAN
will appear.
PRG1 Automatic ‘Oven on’
mode
You can program the oven to
automatically turn on without you
being there. To do this press and hold
the dial in until the oven beeps at you
(approximately 5 seconds) turn the
dial until PRG1 appears then press the
dial and push the dial to confirm. Turn
the dial to the hour start time. Press
the dial again then dial up the minute
time. Press the button to once more
to complete the process. The oven is
now set to start and will flash at you
displaying ‘ON’ and ‘the start time’ you
have selected. You will now need to set
a cooking function and temperature.
There will be an
symbol over a bowl
of steam in the digital display. This is
indicating to you that the oven is in a
program mode. The oven will now be
non operational until the ‘oven on’ time
you have set begins. To cancel out your
program press the clock dial once and
the MAN symbol will appear again on
the display and the
symbol over the
bowl of steam will disappear.
PRG2 Automatic ‘Turn off’
mode
This program allows you to shut the
oven off automatically while you are
cooking and not at the oven. To do this,
press in and hold the clock dial until it
beeps at you (approximately 5 seconds)
turn the dial until PRG2 appears and
push the dial to confirm. Press the
button again and then turn the dial to
the hour you wish the oven to turn off.
Press the dial again and turn the minute
hand to your desired time. Press the
button to once more to complete the
process. The oven is now set to turn off
and will flash at you displaying ‘OFF’
and ‘the stop time’ you have selected.
There will be an
symbol over a bowl
of steam in the digital display. This is
indicating to you that the oven is in
a program mode. To cancel out your
program press the clock dial once and
the MAN symbol will appear on the
display and the
over the bowl of
steam will disappear.
PRG3 Automatic ‘Turn on and
off’ mode
This program combines PRG1 and
PRG2 and allows you to program the
oven to turn on and off automatically
without you being in the room. To do
this, simply press in and hold the clock
dial until it beeps at you (approximately
5 seconds) turn the dial until PRG3
appears and push the dial to confirm
and the word ‘on’ will appear. First
turn the dial to the hour time you wish
for the oven to start, then press the
dial again and select the minute time.
Second, press the dial and the word
‘off’ should appear then turn to the
hour of finishing time you would like,
then press the dial again and turn the
dial to the minute finishing time. Last,
press the dial more time and the oven
is set to start and finish. The clock will
now flash the starting time and finishing
time and an
will appear over the
bowl of steam on the screen. This is
telling you the oven cannot be operated
yet because it is in a program mode.
All that there is left to do is select a
cooking mode and a temperature you
would like the oven to cook at when
the oven starts. To cancel out your
program continually press the clock dial
until the MAN symbol appears again
on the clock and the
over the bowl
of steam has disappeared. Note: you
cannot preheat the oven when using
these programs.
Dimmer
The ILVE digital Nostalgie clock has a
dimmer function. The dimmer mode
works automatically once you set the
time. How it works: the dimmer will
periodically dim to a softer brightness
every hour from 9pm at night until 7am
the next morning where it will return to
full brightness.
Key
Minute
minder
Automatic
cooking
time
End of
cooking
time
Clock
Timer
settings
18 ILVE Operating Manual
19ILVE Operating Manual
Page 11
may also need to wipe the door and
inner glass if they have a lot of splatter
on them.
Leave the oven with the door closed
and in this time the fat absorbed in the
catalytic liners will burn off the liners
and the elements.
Once the oven is cool you may need
to wipe the base of the oven with a
damp sponge to remove the product
of the burn off. Every six months you
must wash the side liners to ensure
longevity.The side liners can be washed
in hot soapy water and are to be dried
before placing them back in the oven.
If you clean the enamel in your oven it
is essential that you use a non caustic
cleaner and spray that cleaner onto
a soft cloth rather than spraying the
cleaner directly into the oven.
The fat filter at the rear of your oven
has to be cleaned on a regular basis;
the filter can be cleaned by hot soapy
water, or in the dishwasher
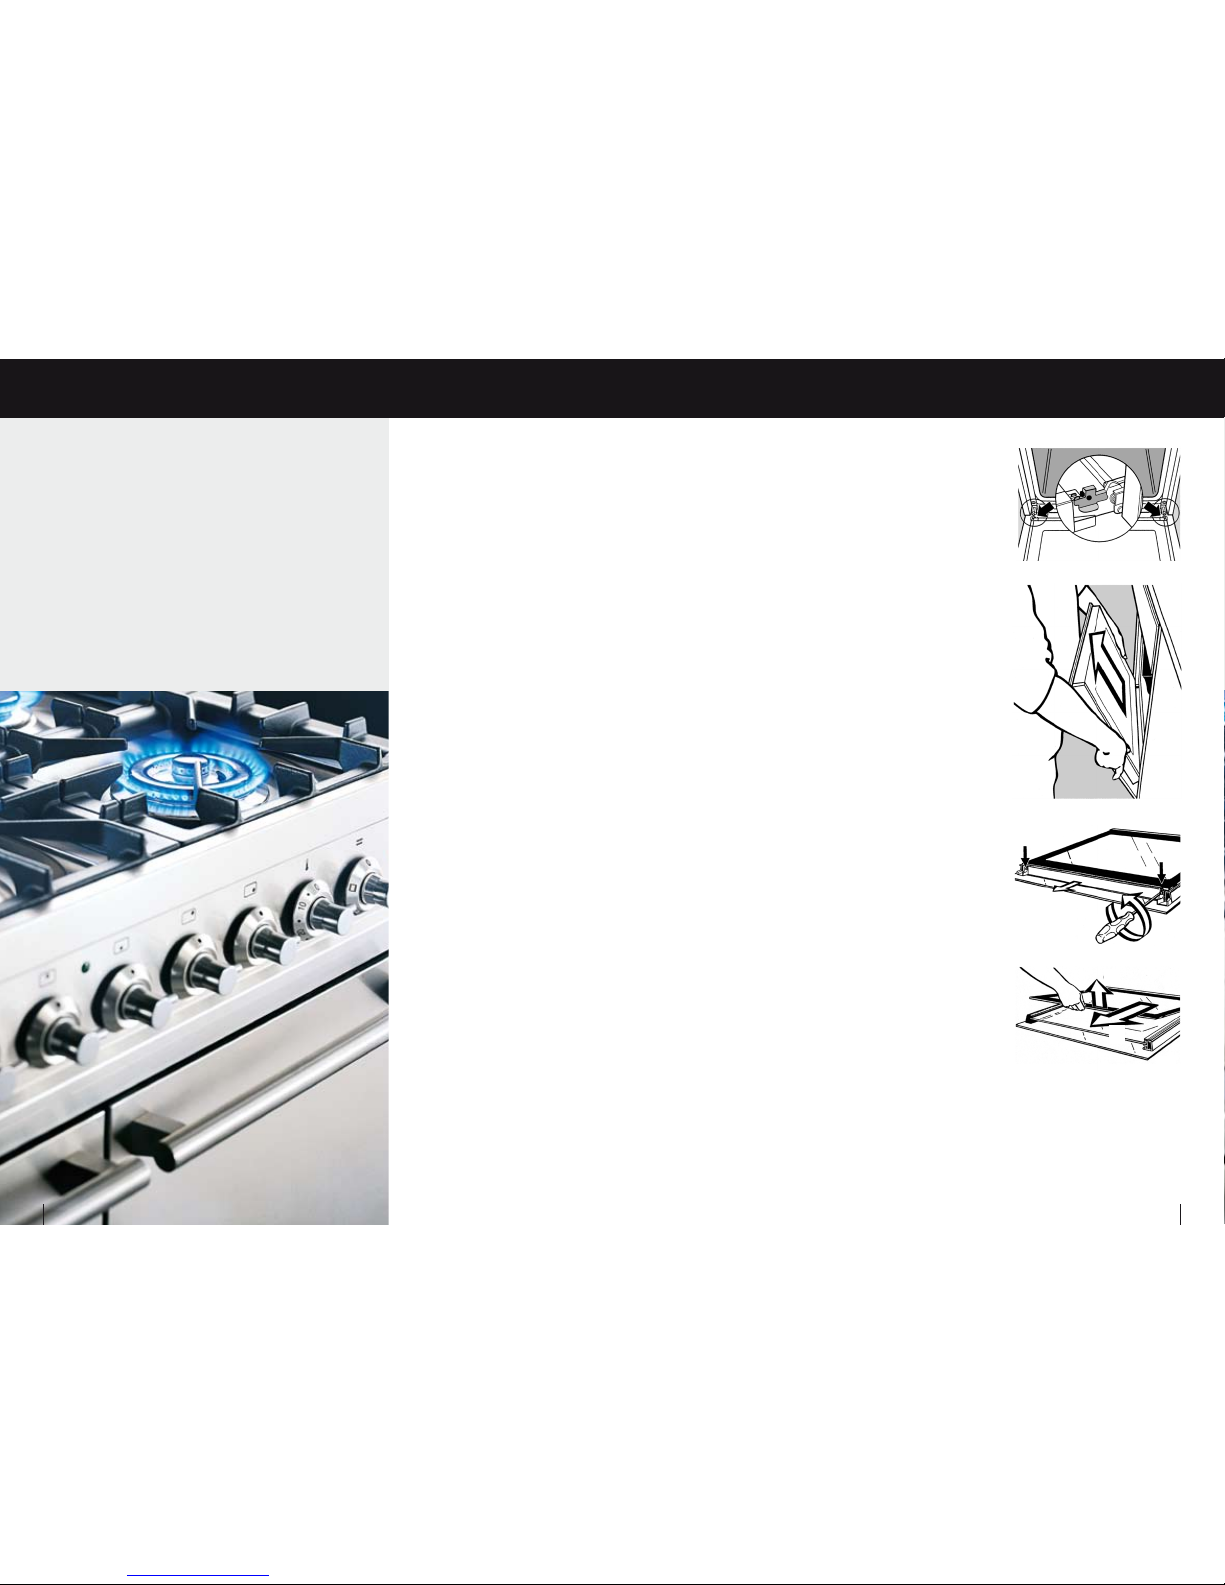
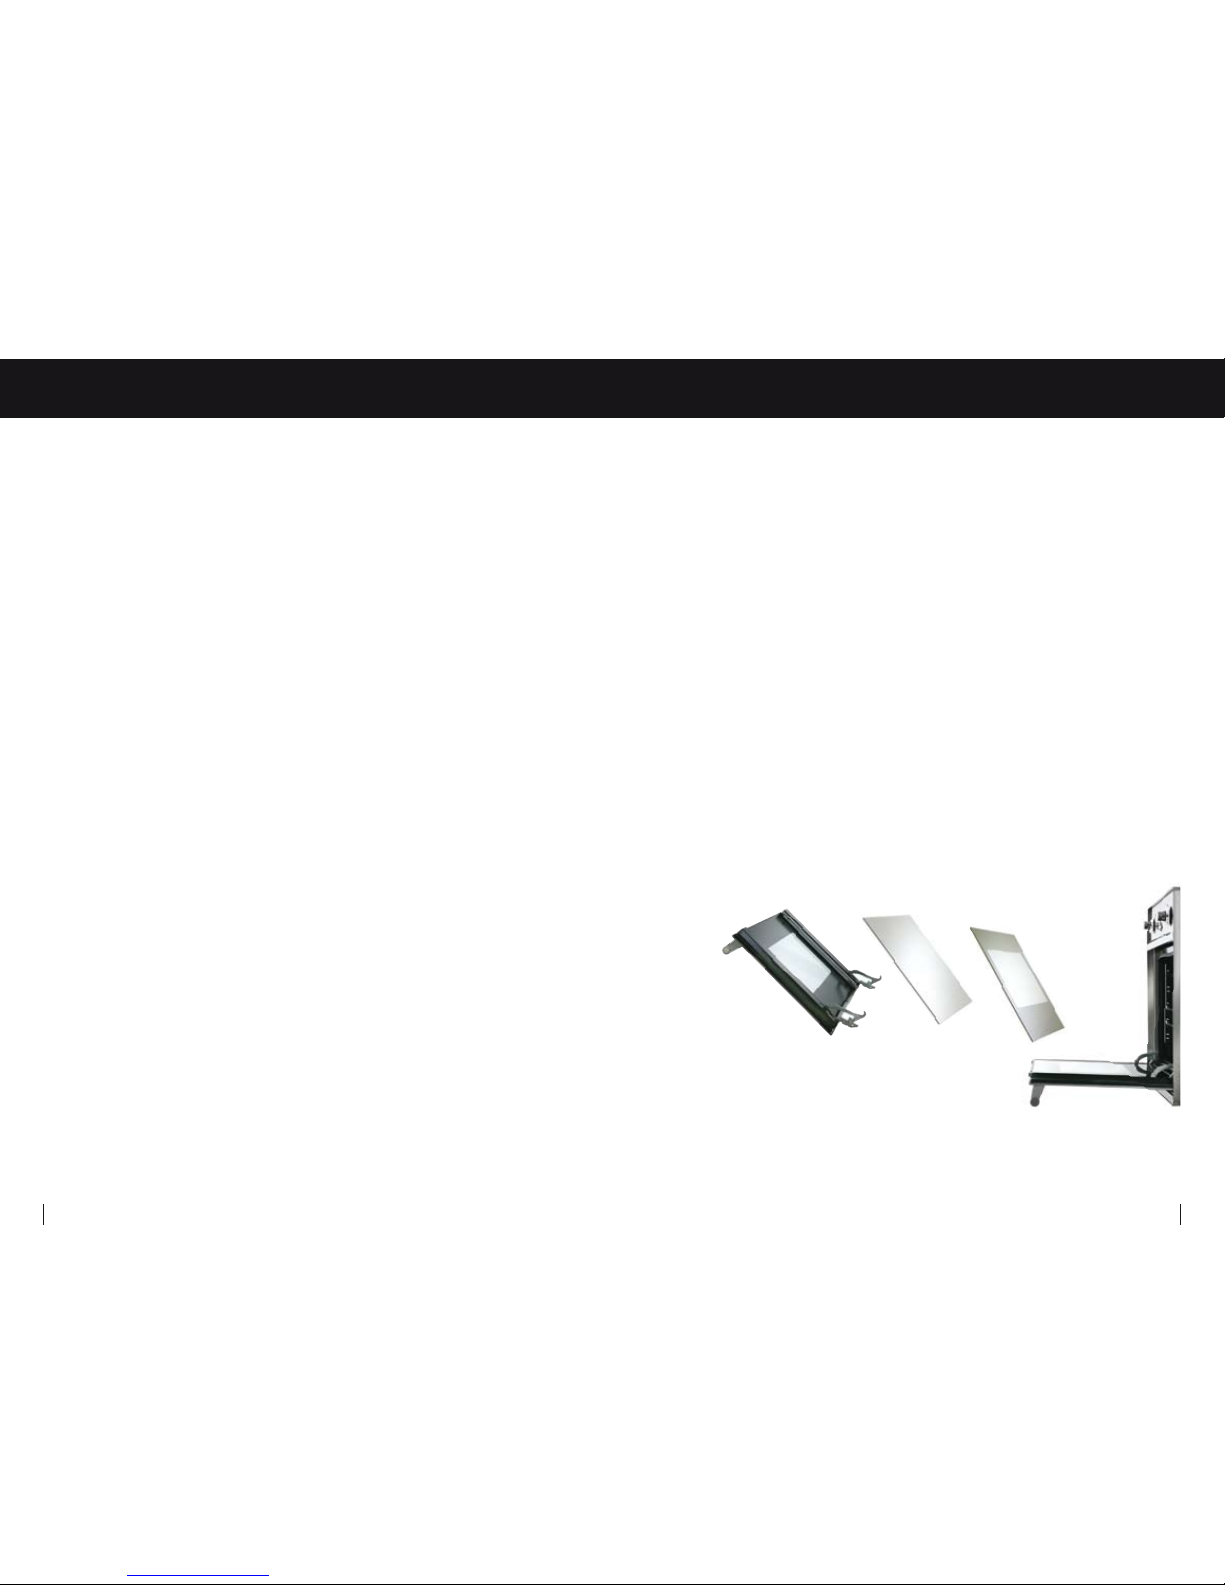
3. Removal of door &
inner glass
For ease of cleaning ILVE have made
their oven doors removable so that
the interior oven glass can be removed
and cleaned.
All ILVE ovens use easy clean vitreous
enamel interiors giving a smooth black
non staining appearance.
A. Removal of door
Open the door and lift catches (A) and
hook into arm (B) on both sides. Lift
door gently upwards (C), as if closing,
using both hands placed either side of
the outer glass edge and door should
loosen. Gently pull the door up towards
you, if force is needed the door is not
in the correct position and you will
need to repeat the procedure. To refit
the door reverse the procedure.
B. Removal of inner glass
ILVE oven doors are fitted with
athermic door glass panels, the inner
panels are removable. To remove
glass open the door and unscrew the
thumb screws (D&E) located on the top
of door, remove top strip and gently
remove glass (F&G) before washing in
hot soapy water. The interior glass can
also be cleaned with a damp cloth.
When replacing the glass it is important
that the silver coated surface faces in
towards the interior of the oven and
that the top strip is replaced before
screwing the glass back in place.
Please note: The oven door glass
must be replaced the same way it was
moved with the tint facing the inside of
the oven.
1. Before you start
As a safety precaution always
switch off the power to the oven
before commencing any cleaning or
maintenance. Never use abrasive
scourers or spray any chemical
oven cleaners or caustic solution on
the catalytic oven liners as this may
cause damage, wash instead with
soapy water.
When removing oven shelves you must
slide shelf out to the stopper using
both hands before lifting front of the
shelf up and sliding out. To replace
shelves do the reverse of the above. It
is advised that you wear oven mitts or
heat protective gloves if oven has been
turned on.
2. Catalytic self
cleaning liners
Every ILVE oven (with the exception of
the 200LM, 600LM and 800LM models)
has catalytic liners. These have been
pre-installed in your ILVE oven to
make your life easier. As you cook the
liners will absorb any fat that splatters
keeping your oven cleaner. There can
be four liners in your oven; one on
either side, one on the rear and one
on the roof of your oven. Only the side
liners are removable.
To maintain your oven you must
regularly do a self clean to remove
the fat absorbed in the liners during
the cooking process. This may be
weekly, monthly or yearly depending
on oven usage. Fat build up is
easily distinguishable by a slight
discolouration of the liners.
To do a self clean; you must at the end
of the cooking process turn the oven
thermostat to 250 °C on fan forced
heating system for 10 - 20 minutes.
Always ensure that you remove excess
trays (be aware as oven racks & trays
will be hot), side racks and the fat filter
as any fat will burn on these items
making cleaning extremely difficult. You
A
B
C
D
E
F
G
ILVE’s exclusive turbowave cooking system means lower
and more accurate cooking temperatures and a reduction in
cooking time and food splattering. These advances in oven
design and technology means that ILVE ovens require less
cleaning when compared to other ovens.
The introduction of the catalytic oven cleaning system
and removable racks and door glass means that the once
torturous task of cleaning your oven has become simplified. It
is important to note that regular cleaning will keep your oven
looking good and operate better for an extended time.
To maintain your oven you must do a self clean on a
regular basis, approximately every three to four months
of normal usage.
Cleaning, Care & Maintenance
20 ILVE Operating Manual
21ILVE Operating Manual
Page 12
Rangehoods
Rangehood filters need to be washed
regularly by using warm soapy water
and drying using a soft dry cloth.
There are various commercial products
available, which also may be used,
following manufacturers’ directions
for use.
Cleaning filters in the dishwasher
The heavy alkaline of dishwashing
detergents could damage filters. If
you choose to wash the filters in the
dishwasher we recommend you use a
hot rinse mode with no detergent.
Recommended
cleaning products
Burner Skirts and Brass
Burners:
• Autosol metal polish, available at
automotive shops
• Autosol shine, available at
supermarkets
Trivets:
• Hot soapy water only
• To remove surface staining use
any cooking oil and a fine brush or
scourer, lightly oiling trivets will also
help in keeping their new appearance
Solid Plates:
• Hillmark solid hotplate protector,
available at supermarkets
Ceramic Plates:
• Hillmark Cera-clean, available at
electrical stores
• Hillmark CeraPol, available at
Supermarkets
Enamel Interior of Ovens:
• Non Caustic enamel cleaner. Spray
the cleaner onto a soft cloth rather
than spraying directly into oven to
prevent the spray getting onto the
catalytic liners, which can cause
damage.
Stainless Steel:
• ILVE Stainless Steel Cloth, available
from ILVE
• Cut back stainless steel solution for
initial use only, available from ILVE
• Fresh and Clean, available at
supermarkets
• 3M Stainless Steel Cleaner and
Polisher, available at supermarkets
• Gumption, available at supermarkets
• Watered down Windex (1/3 Windex to
2/3 water) available at supermarkets
• Hammersley Foaming Crème
Cleanser, available at supermarkets
• Hammersley Steel, Chrome and
Furniture Polish, available at
supermarkets
IMPORTANT: Always
use non-caustic
cleaners on ILVE
products
The above products are
recommendations only. ILVE will
not be held responsible for any non
ILVE product.
Cooktops
Clean the stainless steel cooktop
surface after each use with a clean
cloth and normal detergent. Make
sure the detergent does not contain
chloride or any chloride compound. For
persistent stains use warm vinegar or
a non-abrasive cleaner. If you need to
polish a cooktop surface use a metal
polish such as Auto Sol.
To make cleaning easier always
wipe spills when they occur, do not
leave them to dry as this makes
cleaning harder.
Trivets
Trivets should only be cleaned once
they have cooled, to stop grazing from
occurring. To clean trivets wash in
sink with warm soapy water then dry
immediately using a clean dry cloth.
Do not use anything too abrasive such
as a chrome detergent as this may
cause damage.
Enameled trivets may over a period of
time discolour, this is due to exposure
to a naked flame which may burn the
enamel edge off the tips of trivets.
This will not affect the performance of
the cooktop
Important information
There are three components to a
burner; a cap, brass bur ner and
aluminium skirt. The cap is a cosmetic
piece and is not necessary during the
operation of the cooktop. It is advised
that you remove the cap during usage
then replace after usage.
Burner caps
The burner caps sit on the brass
burners to clean remove and wash in
warm water. Burner caps should not be
put into cold water immediately after
use, as grazing will occur, always allow
caps to cool before cleaning.
Brass burners
The brass burners will tar nish to a
brown colour with use. To clean simply
wash in warm soapy water or soak
in white vinegar overnight to remove
food splatter.
Aluminium skirts
The aluminium skirt from the base of
the burner may be washed in warm
soapy water using a gentle scouring
pad to remove any burnt on food
splatter. A commercial product such as
Autosol, which is designed for cleaning
aluminium, can be used following
makers’ instructions. Do not put skirts
in the dishwasher as this may cause
the aluminium to discolour.
Stainless steel
Stainless steel can be cleaned using
the ILVE cleaning cloth available from
ILVE or a range of commercial products
and stainless steel cleaners. Follow
makers’ instructions, taking care when
cleaning around the graphics.
Never use abrasive products on the
stainless steel as it will scratch the
stainless steel.
Teppanyaki plate
Allow the teppanyaki plate to cool
slightly and apply a commercial
product such as Mr. Muscle Orange
Energy. Allow to sit for five minutes
then scrape plate with a flat spatula.
For heavy build up a scourer may
be required.
Ceran cooktops
When using a ceran cooktop it is
advised to only use stainless steel pots
with stainless steel bases. The bottom
of the pan must be thick and fat and as
close in diameter to the cooking zone
as is possible. The surface of the hob
and the bottom of the pan must be
kept clean.
The flat surface of the ceran makes
it easy to maintain. All cleaning must
occur when the cooktop is cold. When
cold use a soft damp cloth to wipe
over the cooktop and then dry gently.
For a more precise clean a specialty
cleaning product may be purchased
from an outlet, never use abrasive
products.
Take care not to drop substances
containing sugar on the hob, if this
does happen clean with warm water
immediately before the glass cools.
Oven light replacement
Replacement globes are available from
the ILVE service department. When
changing over the lamp always switch
off the power first. Unscrew the glass
cover over the globe by twisting it
anticlockwise. If glass cover is hard
to unscrew, heat oven slightly, as
this will heat any fat that might be
congealed around the glass, and
unscrew using a cloth.
Remove existing globe and fit new
bulb, refit the glass cover and switch
on the power.
Ignition troubleshooting
All ILVE burners have automatic
ignition. To ignite a gas burner simply
push the knob in and tur n to the left.
Ensure that the aluminium skirt and
brass burner are sitting flush and that
they are locked into each other.
Check that the gas has been lit. If
the burner fails to ignite or stay alight
repeat process. If the burner still fails
to ignite a match may be used with
caution. If your cooktop has flame
failure it will take 8 to 10 seconds for
the flame to stay alight. If the problem
persists call ILVE in your capital city for
service. (Contact numbers are located
on the back cover of this booklet)
Cleaning, Care & Maintenance
22 ILVE Operating Manual
23ILVE Operating Manual
Page 13
Steaming
Steaming is the ideal way of cooking
vegetables, particularly green leaf
vegetables.
Place a small quantity of water, usually
no more than one cup, into a saucepan
with a tight fitting lid. Place on a burner,
on high heat and bring to the boil, then
add well rinsed vegetables and cover
with the lid. Do not allow the pan to
dry burn.
If you use a steaming rack which holds
vegetables above the boiling water you
can steam two or more vegetables at
once in the same pan.
Braising
Braising is done in the lower part of
the oven (Mode 8) and is great for
tenderising cuts of meat and
creating dishes such as braised
steak and onions.
Rotisserie
The rotisserie is one of the best ways
to cook meat. The rotisserie can
accommodate up to three joints of
meat or portions of poultry at once.
Meat cooked this way will need
approximately 40 to 50 minutes per kilo
at a temperature of 180 to 200°C. This
is a guide only; it is recommended that
meat is checked every 30 minutes.
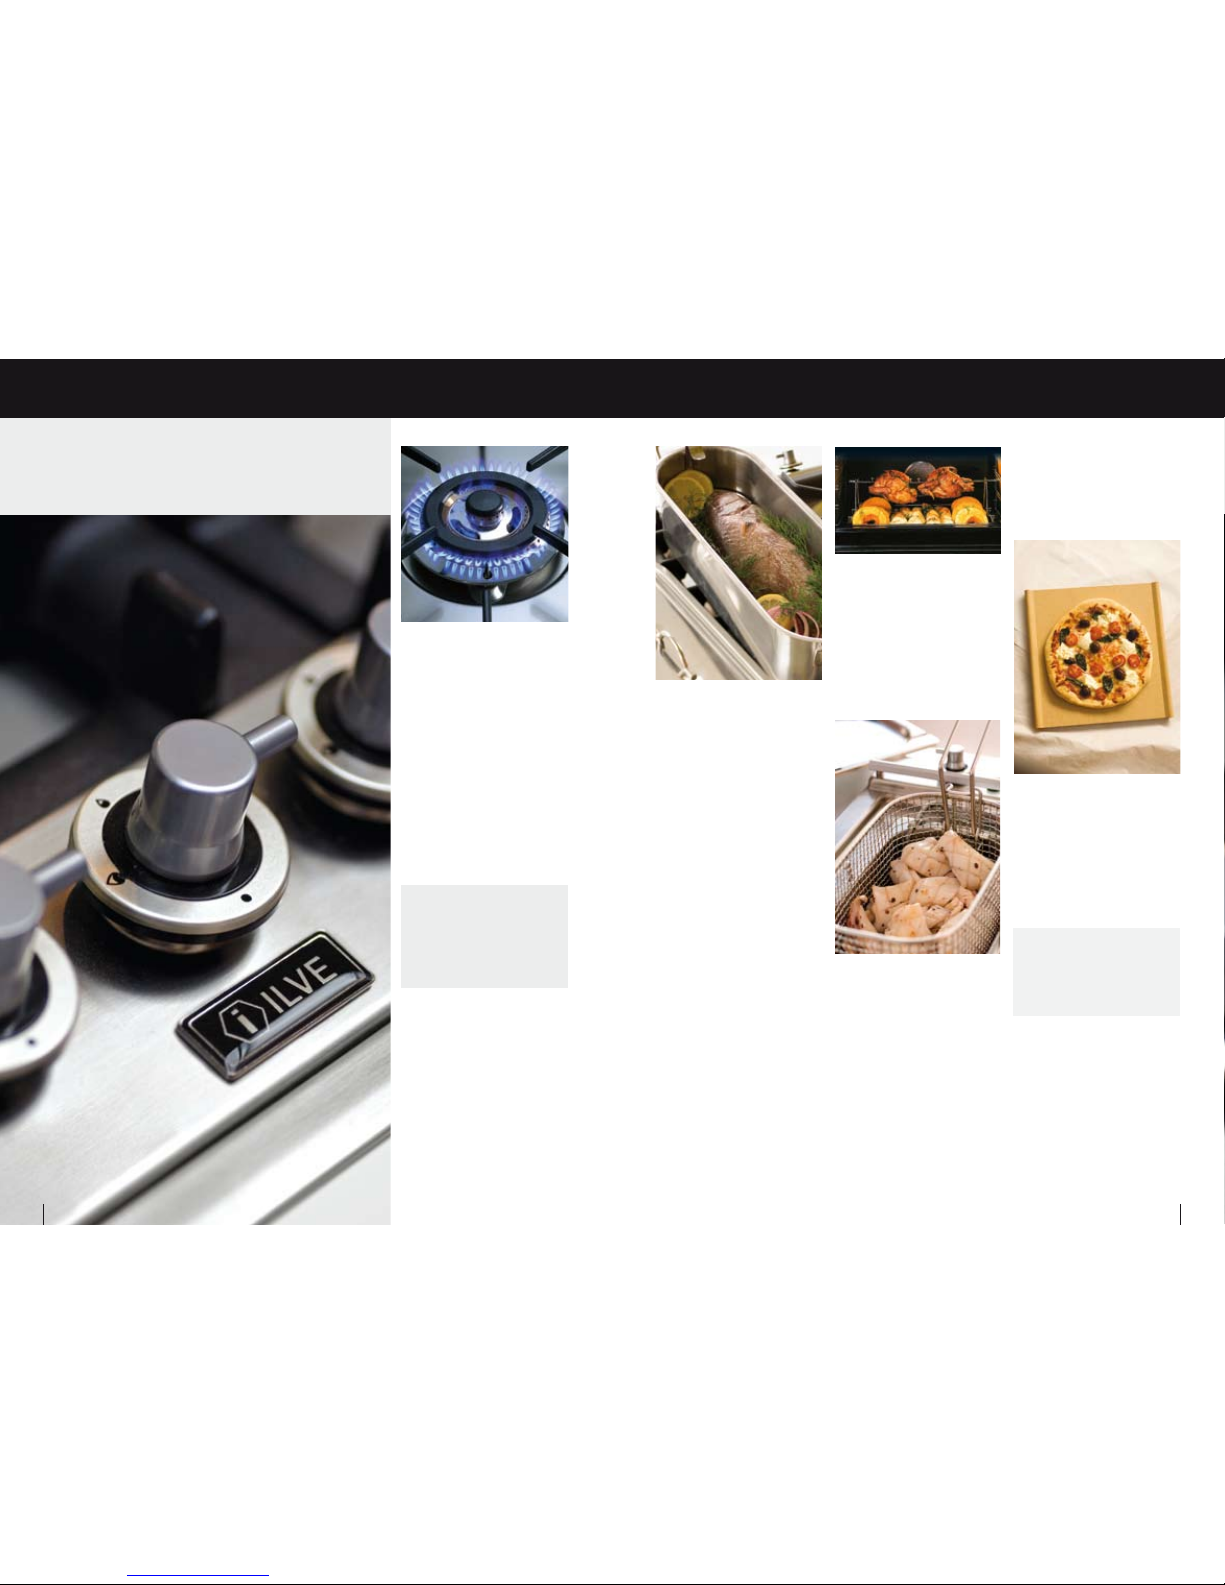
Deep frying
For deep frying use the triple ring wok
burner on the cooktop or ILVE’s Domino
deep fryer. Remember to bring the
cooking oil to the correct temperature
before adding the food to be cooked.
Oil will begin to give off smoke when it
is hot enough to commence cooking.
To check the oil temperature put
in a single item. If the test item is
immediately surrounded by a ring of
bubbles the oil is hot enough to start
cooking. Extreme care must be taken
when frying on cooktops.
Pizza stone
You can use the pizza stone for both
pizzas and sweet pastries.
The pizza stone can also be used for
keeping your bread warm and crusty,
just buy a good loaf of bread, warm in
the oven and serve on the pizza stone.
This section serves as a guide to choosing the most appropriate
cooking method for all categories of food preparation. Get to
know the full range of features your ILVE appliance has to offer.
Wok cooking
Stir-frying is the technique most
associated with wok cooking. The
idea behind traditional wok cooking
is to cook thin strips of meat quickly
over a high heat which sears and seals
the meat, rather than stewing it. This
technique retains the meat juices,
flavour and tenderness. Vegetables and
sauces are added to finish the dish.
The specially designed trivets on
the ILVE wok burner are designed to
accommodate curved bottomed woks,
while the triple ring burner provides the
high heat needed to quickly sear meat
and achieve the best results.
Pan frying
Pan frying is a popular and quick
way of frying thin cuts of meat and
vegetables in butter or oil. This should
be done over a high heat so that food is
seared and browned.
ILVE TIP
Always pat dry wet food with
paper towel before putting into hot
oil as hot oil will spit and spatter
when it comes into contact with
droplets of water.
ILVE TIP
After cooking wipe the pizza stone
with wet cloth, the blacker it gets the
tastier the food will be, just like with
wok cooking and barbequing.
Cooking with ILVE
24 ILVE Operating Manual
25ILVE Operating Manual
Page 14
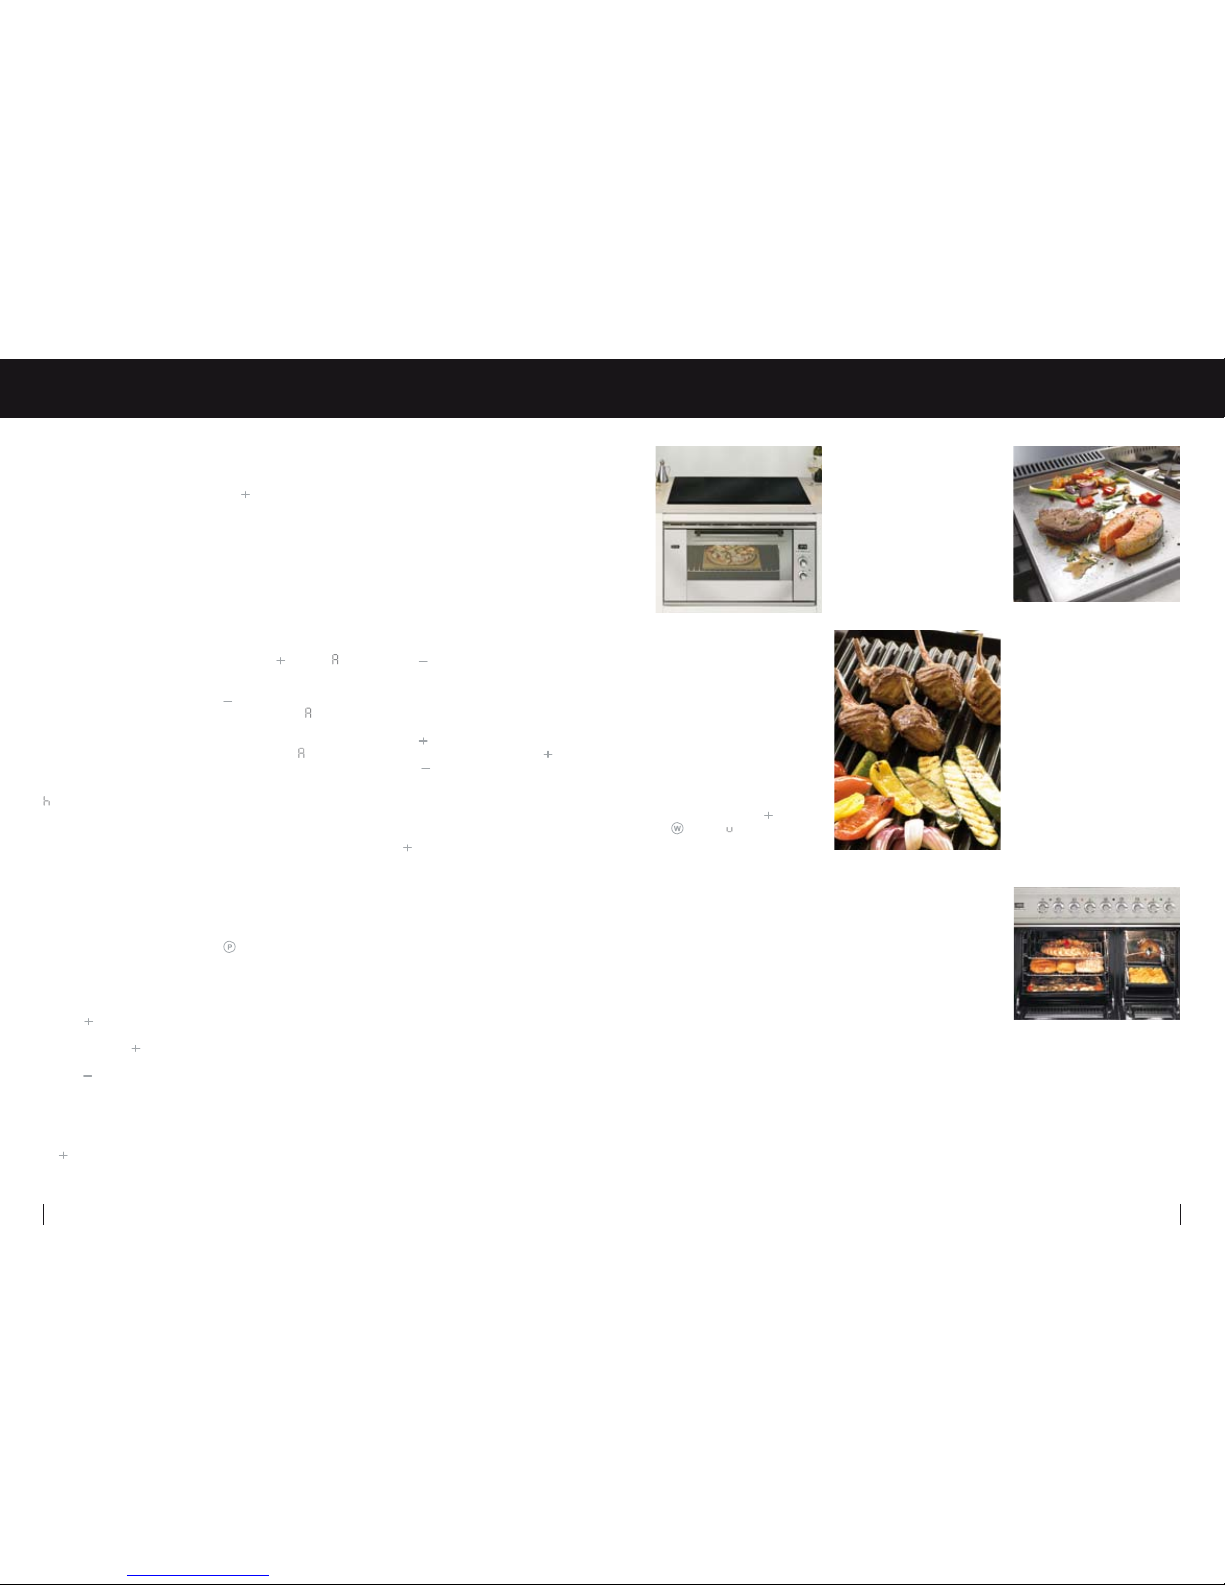
The ILVE induction cooktops have been
designed to make your cooking quick,
easy and fun. When using an Induction
cooktop you will need to use specific
cookware, this is due to induction
technology using magnetic fields which
transfer the cooking energy to the base
of your cookware. You need to make
sure that the cookware you are using
has a magnetic base.
Due to the cooktop needing a magnetic
base to work, the cooktop will not
start to generate heat until it comes
into contact with the magnetic field
the cookware will create. Once the
saucepan is removed the cooktop will
automatically shut down until magnetic
contact is reintroduced.
Even though the cooktop uses the
base of your cookware as the heating
element and not the cooktop you
should still be aware that the cooktop
surface may still be hot from residual
heat. The cooktop display will have a
appear to indicate to you the surface
may be hot and you should not touch it.
Cookware bases that will work on
induction surface: Enamel, Cast Iron,
Stainless Steel.
Cookware bases that will not work
on induction: Copper, Glass, Ceramic,
Aluminum.
Turning on the cooktop
To operate your induction cooktop
switch the cooktop on by touching the
power button, choose which cooking
zone you wish to cook on, to do this
touch the
button of the zone you
desire, to adjust the temperature
continue to press the
through 1 to
9 you can reduce the heat level by
using the
button. Five seconds after
you have selected your temperature
the cooktop will go into lock mode to
prevent you accidentally changing the
temperature. To adjust the temperature
or to activate another zone simply touch
the
button on the desired zone then
adjust accordingly. A red dot will appear
next to the zone that is being used or
adjusted, to activate another zone touch
the
button and another red dot will
then appear next to that zone.
Automatic boil &
reduce function
Your ILVE induction cooktop has
been designed to automatically boil
then reduce to a simmer without you
being there.
To do this, bring the desired cooking
zone up to maximum temperature ‘9’ by
touching the
button. An will start to
flash followed by the number ‘9’ simply
reduce the temperature by touching the
button (e.g. to number 4) the cooktop
will now flash 4 and
. The cooktop will
come to a boil and then reduce to the
desired simmering temperature you have
chosen. The letter
will stop flashing
when the cooktop has reduced to your
selected temperature.
Power boost function
Your ILVE induction cooktop also
includes a rapid power boost mode on
each zone. This will enable you to bring
large liquid quantities such as water to a
boil in a much quicker time by supplying
more power to an individual zone.
To do this simply activate the zone in
which you choose to use and press the
symbol on your cooktop (P stands
for Power Boost). This will deliver a
much higher magnetic current to the
selected cooking zone and will bring
large amounts of liquid to a boil in a
much shorter time (e.g. 2 litres or water
will be boiled in approximately 3.5
minutes). A maximum of 2 zones can
be activated on Power Boost at any
one time, once a 3rd zone is activated
to power boost all zones will power
share. Once your liquid has come to
a boil, reduce the temperature to 9
or lower to continue cooking. (Note:
Power boost is only to be used to get
large amounts of liquid to a boil quickly
and not to be used as a cooking zone
as power boost is two extreme for
normal cooking).
Shut down timer
Your ILVE induction cooktop has been
equipped with a shut down timer so you
can set your cooktop to shut itself down
automatically after the desired time.
To do this, activate your cooking zone
and simply touch the timer button, ‘00’
will appear by touching and holding
down the timer button. The countdown
timer will rise, to reduce the time press
the
button, after the selected time
has expired the individual cooking zone
will automatically shut down and beep.
If you wish to adjust the cooking time
after it has been set, simply activate the
cooking zone you are using by pressing
the
button closest to the zone, press
the timer button and then use the
and
Button to readjust the new shut
down time Each cooking zone can be
set at its own individual shut down
time. If you wish to check on individual
shut down time simply activate the
zone you wish to check by touching the
button. The maximum time you can
set each zone is 60 minutes.
Safety devices
Your ILVE induction cooktop has been
installed with some safety devices.
If you happen to boil dry a saucepan
or pot, or if the cooktop reaches a
dangerous temperature the cooktop
will shut down automatically to prevent
any harm on itself or your kitchen. The
cooktop will also beep at you to alert
you of a problem.
The cooktop is also fitted with a spill
detection device, this means that if you
have left something unattended and
there happens to be a boil over, once
the cooktop control panels senses a
spill it will automatically shut down and
beep at you to come and check what
has happened.
Keep warm function
Your ILVE induction cooktop also has
a keep warm function. This function
makes it possible to reach and maintain
a very low simmer for very delicate
simmering or to place something
you are cooking on hold until you
are ready to come back to cooking.
This temperature is also the lowest
temperature you can cook with to
prevent food spoilage or contamination.
To do this, activate the cooking zone
you are using by pressing
then press
the
button. A shape will appear
and maintain that temperature of 70 °C
for a maximum of 2 hours.
Simmering
Low temperature cooking is a
wonderful way of tenderising various
cuts of meat, melding flavours together
in sauces and curries and obtaining
clear stocks and consommés. A low
simmer can be achieved by selecting
a temperature between the off position
and the high flame position on the
selector knob, when using large pots it
is recommended that the large burner
or wok burner is used.
Griddle plate
The griddle plate is ideal for preparing
succulent meals using a minimum of fat
or oil. When frying fatty meats such as
chops, sausages and bacon, much of
the meat’s fats will drip into the griddle
plate’s reservoir. This is a very healthy
way of cooking meat while retaining
tenderness and succulence. As an
added bonus the griddle can be used
as a food or plate warmer.
Teppanyaki
The teppanyaki plate is an ideal way
of cooking delicate cuts of meat that
require quick cooking methods. The
heat in the plate will seal the meat
trapping the natural juices and flavour
without damaging the delicate texture.
Ideal food for cooking this way include
bacon, eggs, pikelets, pancakes, steaks,
sausages, fish, prawns and poultry.
Batch cooking
ILVE’s advanced hot air systems are
perfectly suited to batch cooking. The
large oven capacity enables you to
bake two standard family roasts side by
side. You can also cook two chickens
on the rotisserie simultaneously, bake
racks of multilayered cakes, trays of
biscuits, a variety of pies, loaves of
bread and fancy pastries with perfect
temperature control and without
having to wait for one batch to finish
before starting the next. ILVE’s built-in
three stage element and fan together
with its self-cleaning feature and
efficient fat filter enables a variety of
foods to be cooked together without
flavour transference.
Volcanic rock
barbecue grill
When meat, poultry and seafood
is chargrilled on the volcanic rock
barbecue the food remains succulent
and naturally moist whilst developing
subtle smoky flavours which enhance
both taste and appearance.
Cooking with ILVE Induction Cooktop Cooking with ILVE
26 ILVE Operating Manual
27ILVE Operating Manual
Page 15
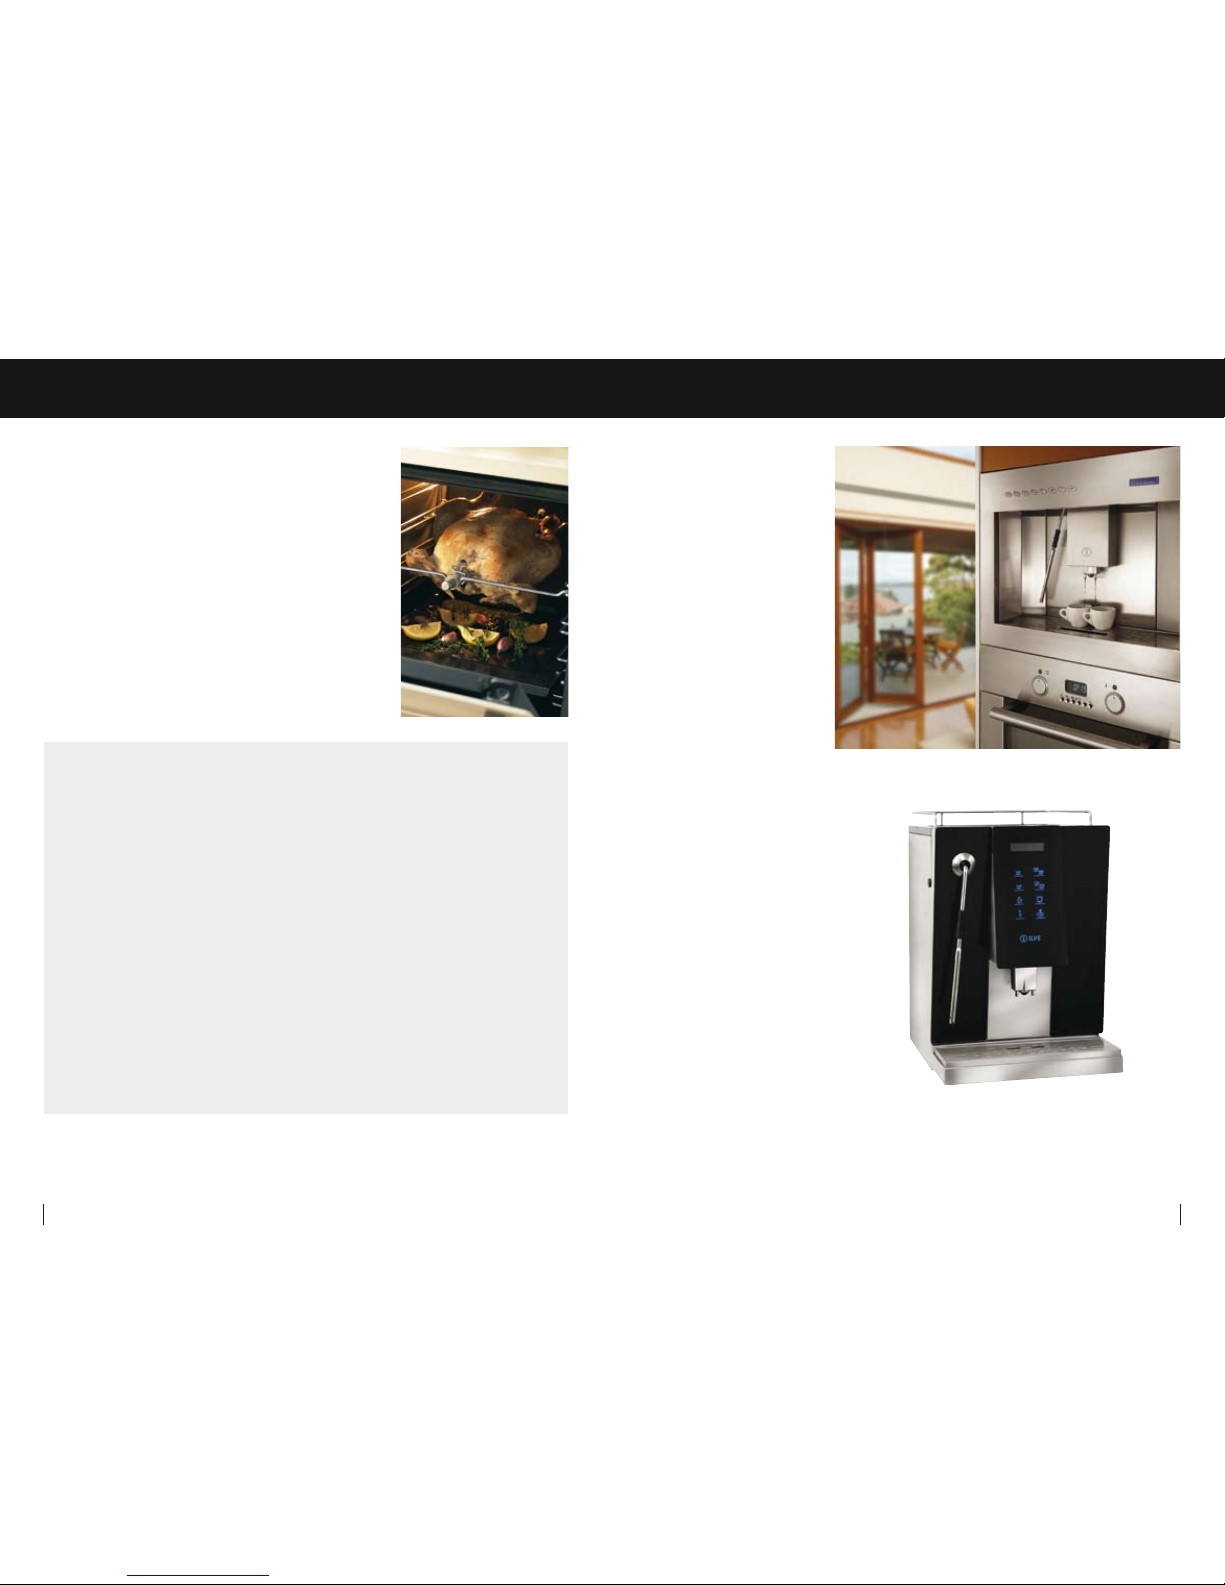
Roasting
The roasting method is one of the
simplest ways to cook a large piece
of meat. Roasting is often the method
of choice because it yields a tender
interior and browned exterior through
prolonged oven cooking. One of the
most attractive aspects of roasting to
a busy cook is that while the roast is
cooking, the cook is freed to perform
any other tasks that need attention
before dinner is served. Before
beginning the oven cooking segment of
the roasting process, the meat should
be trimmed, seasoned and seared.
The standard temperature for cooking
roasts is 175ºC.
Technically, the lower the heat of
the oven, the better the final roasted
product will be. At a lower temperature,
the meat will take longer to cook but
will produce more flavour and moisture.
Never roast meat at a temperature
below 93°C). Once the temperature to
cook the roast at has been decided
upon, and the oven preheated, place
the trimmed, tied, seasoned, and
seared meat onto a baking dish and
into the oven. Roast the meat until its
ideal internal temperature is reached.
The ideal interior temperature will
depend wholly on what type of meat
is being roasted. For example, a roast
pork loin’s final interior temperature
should be around 70°C. Gauge the
interior temperature of meat by using
a meat thermometer or by using the
ILVE Roasting Probe (available on some
models only).
An ILVE fan forced gas oven has the
base burner situated under the oven
floor. The advantage of ILVE’s fan
forced gas oven is that the heat is
distributed evenly throughout, which
makes it ideal for batch baking.
However, the lower shelf is the
hottest when baking so experiment
with different shelf positions to obtain
the best results.
The thermostat in ILVE gas ovens is
mechanical; it operates on a different
system than electric ovens. There
is no indicator light on the front of
the panel of the upright to show
you when the oven has reached the
correct temperature, however the
gas oven heats up fairly quickly due
to the powerful gas burner at the
base of the oven. A moderate to hot
temperature in gas ovens is 175°C.
You cannot switch between the mode
of cooking in the gas oven like you
can in the electric - if you are cooking
on the fan forced and then wish to
use the grill then you must start again
and ignite the grill.
Cakes
Cook cakes on the third shelf
from the top on fan forced at
approximately 150°C. This will give
the cake a great colour and texture.
Biscuits
If doing more than one tray of
biscuits at a time then use the top
three levels only. The bottom shelf in
oven is far to close to the burner and
biscuits will burn underneath. Cook
your biscuits at 140°C on fan forced
so they cook evenly.
Muffins
Cook at 175°C on the third shelf from
the top of the oven on fan forced.
Muffins cook very well in the gas
oven with a great colour and very
even texture.
Roasting
Cook at 175°C on fan forced for half
an hour per 500g. The gas oven is
fantastic for roasting - the meat tends
to be very moist and browns very
well. Best cooked on the ILVE
grilling dish.
Grilling
Grilling must be done on the second
level from the top of the oven; the top
level is too close to the grill. Position
food towards the back half of the
ILVE grilling dish so that the meat is
closer to the direct heat.
Cooking In Your ILVE Gas Oven
Both the free standing and built in
ILVE coffee machines are amongst
the most advanced fully automatic
and programmable coffee machines
on the market. They have been hand
built with commercial quality parts
and these attributes have adapted
to the domestic market. Not only will
you experience the aroma and taste
that you would normally only get from
your favourite coffee house, your ILVE
coffee machine comes with much more
advanced added extras to heighten
your coffee experience.
There are a number of different settings
on you ILVE coffee machine from a
short black, double shots and long
black settings. You also have the
option to introduce a different pre
ground coffee for one individual shot
(e.g. decaf ect). Simply activate the
designated single shot button and
add your unique grinded coffee in
the individual compartment. The ILVE
coffee machine will also prompt you to
clean, decal and to empty the puck bin
(coffee waste). With your ILVE coffee
machine you can brew coffee and froth
milk all at the same time. This is due to
the machine having a large solid brass
boiler with a heat exchanger. You can
also produce straight hot water for your
cup of tea or chai latte.
Being the most advanced machine on
the market you also have the ability to
adjust your grind, grind time, amount of
coffee per shot and much much more.
The machine has been designed for
you to adjust it to your individual taste.
Pictured: ILVE’s SCM5 Built-in coffee machine and 600 SSXMP Built-in oven
Pictured: ILVE’s SCM6 freestading coffee machine
Cooking with ILVE ILVE Coffee Machine
28 ILVE Operating Manual
29ILVE Operating Manual
Page 16
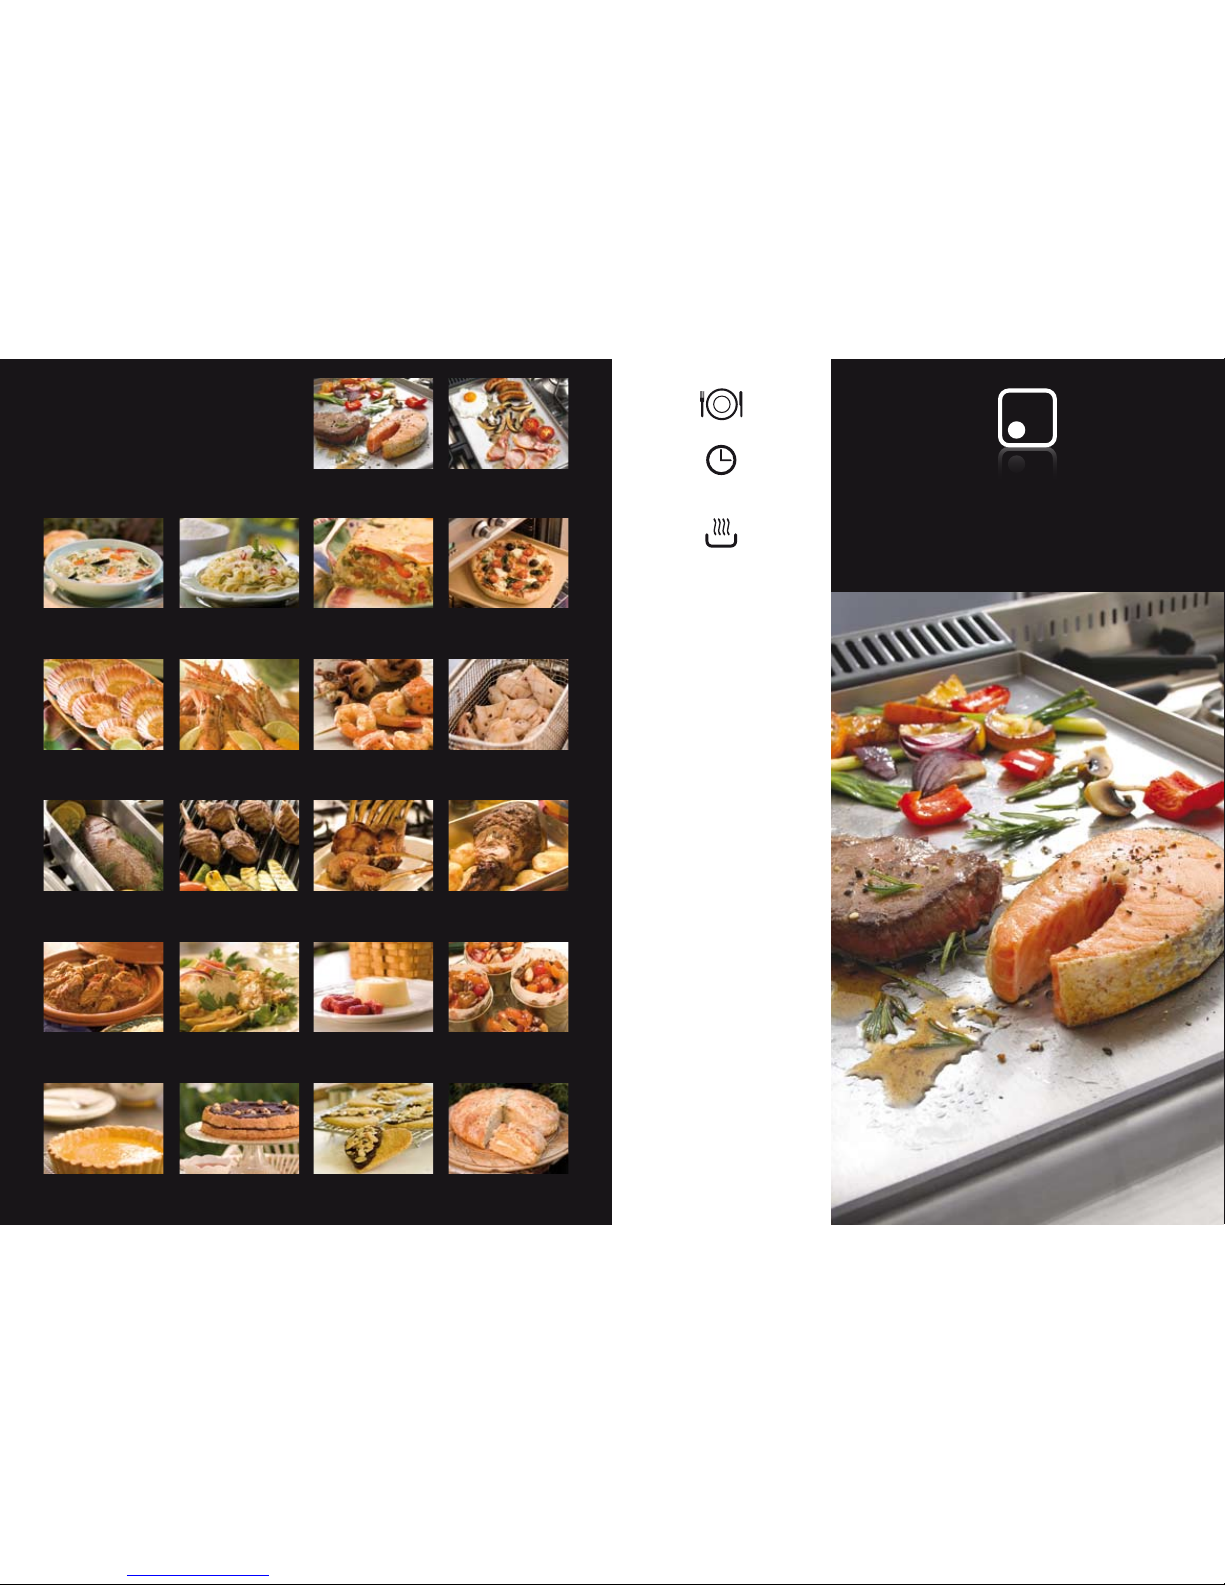
ILVE Recipes
Mustard Crusted Roast
Leg of Lamb
Rack of Lamb
with Cheese &
Semi-dried Tomato
Grilled Lamb Cutlets
& Vegetables
Steamed Trout with
Dill & Lemon
Chilli Salt CalamariMarinated Seafood
Skewers
Scampi with Lime &
Orange Butter Sauce
Tasmanian Scallops
Creole Style
Gourmet Pizza
Australian Breakfast
Layered Vegetable
Frittata
Teppanyaki
Fettuccine with
Chilli & Garlic
Mini Christmas CakesPanna CottaThai Style ChickenChicken Casserole
with Moroccan Spices
& Cous Cous
Rosemary DamperAlmond Shortbread
Hearts
Hazelnut Torte with
Chocolate Ganache
Lemon Curd Tart
Vegetable Soup
with Vermicelli
Teppanyaki
Serves 2
Preparation time:
10 minutes
Cooking time:
10 minutes
Ingredients:
2 piece of trimmed steak
(the cut of meat is up to you)
2 pieces of salmon steaks
(or any other fish steak)
½ a capsicum
4 mushrooms
½ a bunch of rosemary leaves
½ an onion chopped
1 bunch of shallot tails
1 garlic clove
Extra virgin olive oil
Salt and pepper
➊
Cut and trim vegetables place in
deep bowl and mix in rosemary
leaves garlic and extra virgin olive
oil and mix well.
➋
Pre heat teppanyaki plate on high for
10 minutes.
➌
Brush steak and chicken with extra
virgin olive oil and season to task
with salt and pepper then add to the
teppanyaki plate.
➍
Once the steak and salmon require
turning add the vegetables to the
teppanyaki plate and work the
vegetables until meat has finished
cooking then serve.
Page 17
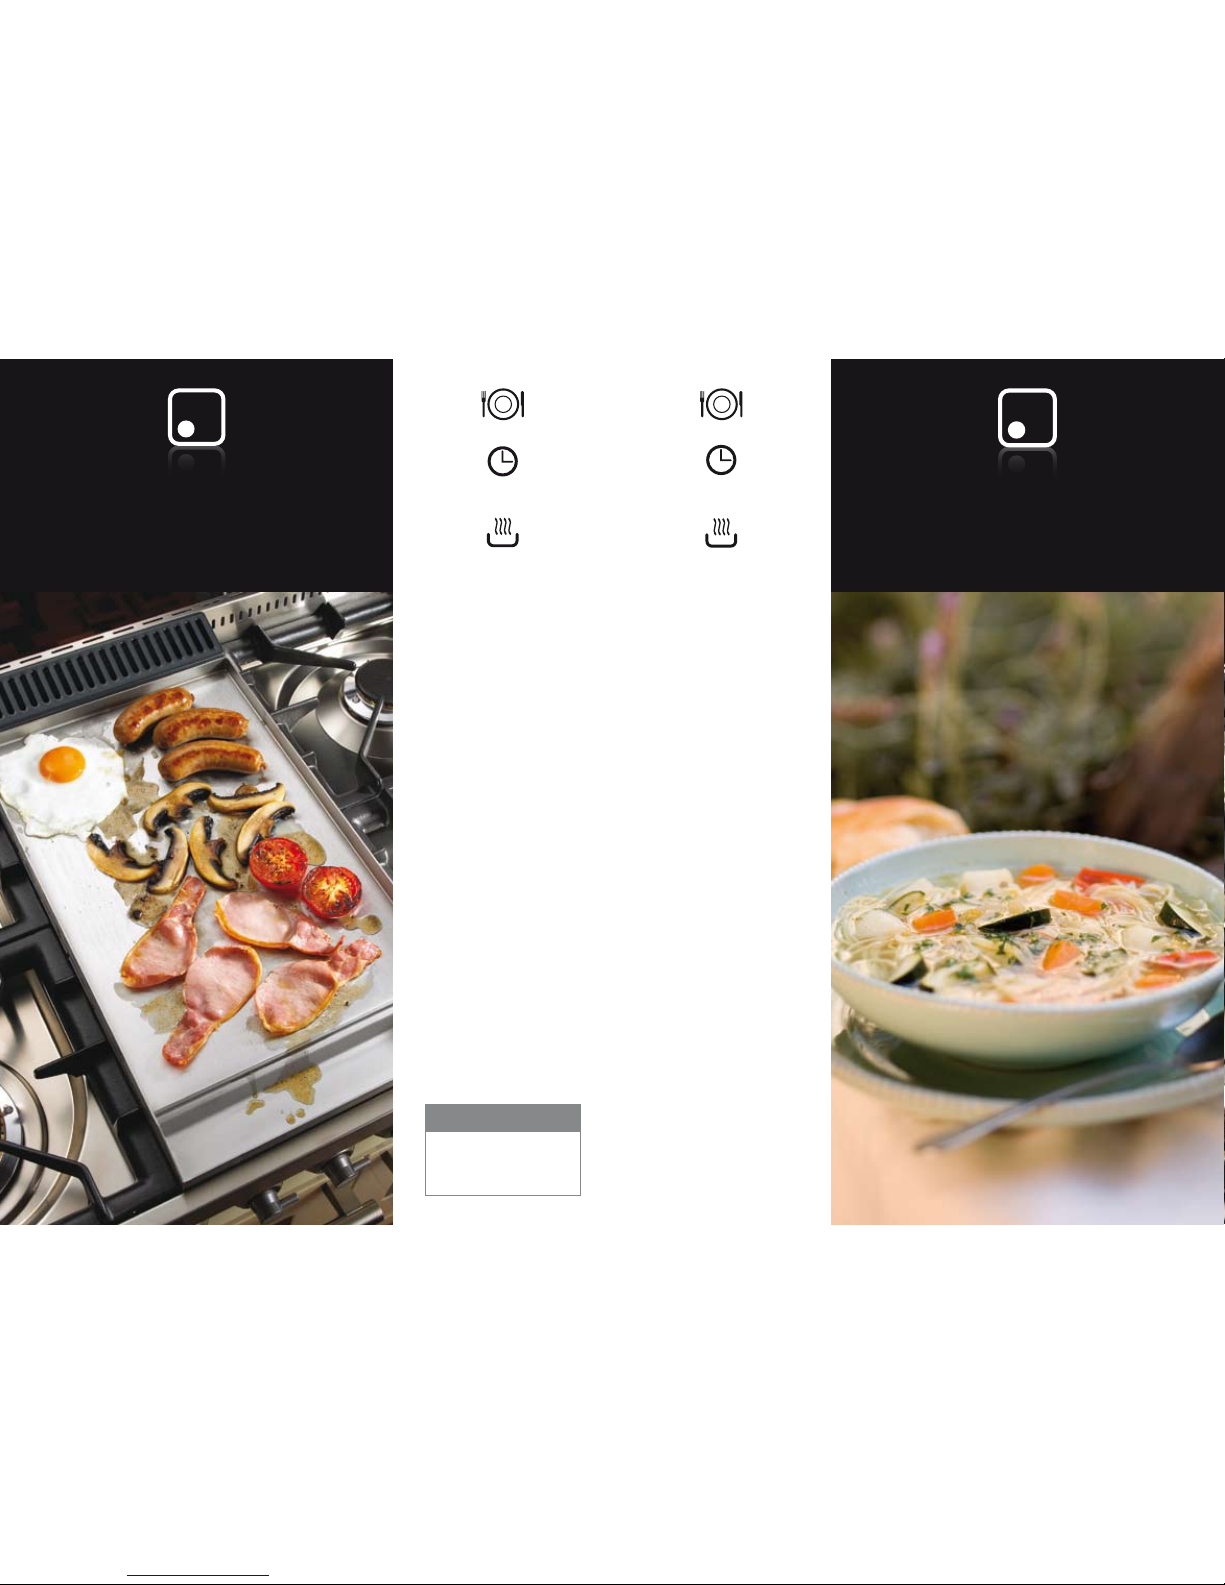
Vegetable Soup
with Vermicelli
Serves 4-6
Preparation time:
20 minutes
Cooking time:
25 minutes
Ingredients:
2 large onions, sliced thinly
½ cup (125ml) olive oil
2 cloves garlic, crushed
2 large capsicums, sliced thickly
2 cups carrots, sliced thinly
3 cups potatoes,
diced in 1cm cubes
7 cups (1.75L) vegetable
or chicken stock
2 cups beans, cut into
2.5cm pieces
2 zucchini, halved then
sliced thickly
250g vermicelli
½ cup coarsely chopped parsley
Salt and pepper to taste
➊
Sauté onion, in a heavy stockpot
until soft. Add garlic, capsicum and
carrots and cook for 5 minutes.
➋
Add potatoes and stock and
simmer for 10 minutes or until
potatoes are tender.
➌
Add green beans, zucchini
and vermicelli and cook until
vermicelli is tender.
➍
Divide soup among serving bowls
and season with salt, pepper and
chopped parsley to taste.
Australian Breakfast
Serves 2
Preparation time
10 minutes
Cooking time
10 minutes
Ingredients:
4 eggs
4 sausages
6 rashes or bacon
2 large mushrooms sliced
2 tomatoes halved
➊
Heat teppanyaki plate up for
10 minutes then spray plate with
extra virgin olive oil.
➋
Place sausages on teppanyaki
plate and cook for 5 minutes
turning as needed.
➌
Add bacon, mushroom, tomatoes
and cook for a further 5 minutes.
➍
Add eggs onto the plate and remove
all food from the teppanyaki plate
when the eggs have cooked.
ILVE COOKING TIP
To avoid splatter and trap
heat, use ILVE’s teppanyaki
dome cover accessory.
Page 18
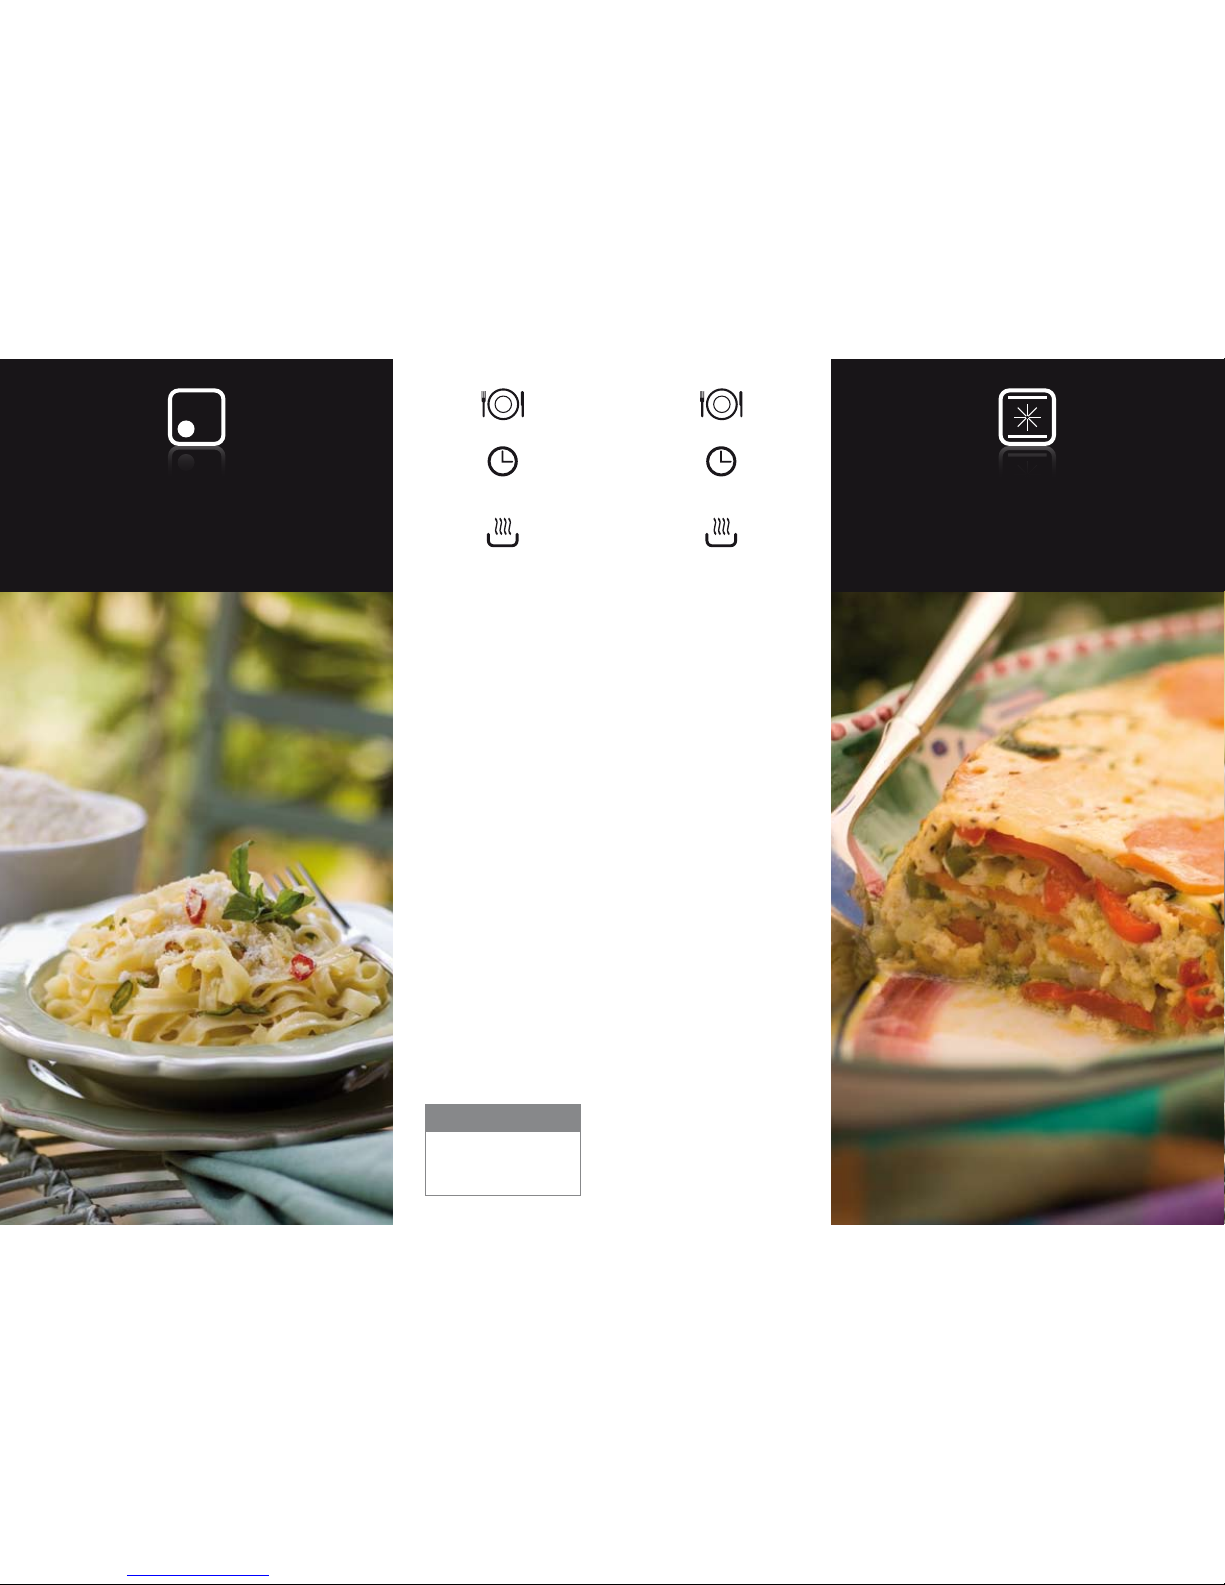
Fettuccine with
Chilli & Garlic
Serves 4
Preparation time
10 minutes
Cooking time
10 minutes
Ingredients:
500g fettuccine
Salt
1 chilli sliced thinly
2 cloves garlic crushed
3 tablespoons olive oil
Grated parmesan
➊
Bring large saucepan of
salted water to the boil.
➋
Cook fettuccine, uncovered,
until just tender then drain.
➌
Heat oil in a large frying pan,
add chilli and garlic,
frying gently for 2 minutes.
➍
Add drained pasta to chilli
and garlic mix, toss gently to
combine. Divide pasta among
serving bowls and top with
grated parmesan.
ILVE COOKING TIP
For variations of this dish add
seafood, meats, cream or
tomato sauces according to
your taste.
Layered
Vegetable Frittata
Serves 4-6
Preparation time
20 minutes
Cooking time
35-45 minutes
Ingredients:
2 potatoes peeled & sliced
1 red capsicum sliced
1 green capsicum sliced
1 zucchini sliced
1 spanish onion sliced
1 sweet potato peeled & sliced
2 small carrots peeled & sliced
1 cup (250ml) olive oil
3 tablespoons pesto
6 eggs
200ml cream
Salt and pepper to taste
➊
Preheat oven (Mode 9) to 170° C.
Once this temperature is reached
turn oven to (Mode 7).
➋
Place vegetables in a large bowl
and combine with oil and pesto.
➌
Heat teppanyaki plate or frypan to high.
➍
Add a small amount of vegetables
and cook for a few minutes. Put
each batch of vegetables to the side
until all vegetables are cooked.
➎
Grease and flour a large ovenproof
dish and layer vegetables into
the dish.
➏
In a bowl beat together eggs,
cream and season with salt and
pepper, slowly pour over vegetables
to completely cover. Tap dish to
remove air pockets.
➐
Bake in oven for approximately
35-40 minutes. Frittata is cooked
when a skewer inserted into it
comes out clean.
➑
Carefully invert frittata onto a
serving dish.
➒
Serve with salad.
Page 19
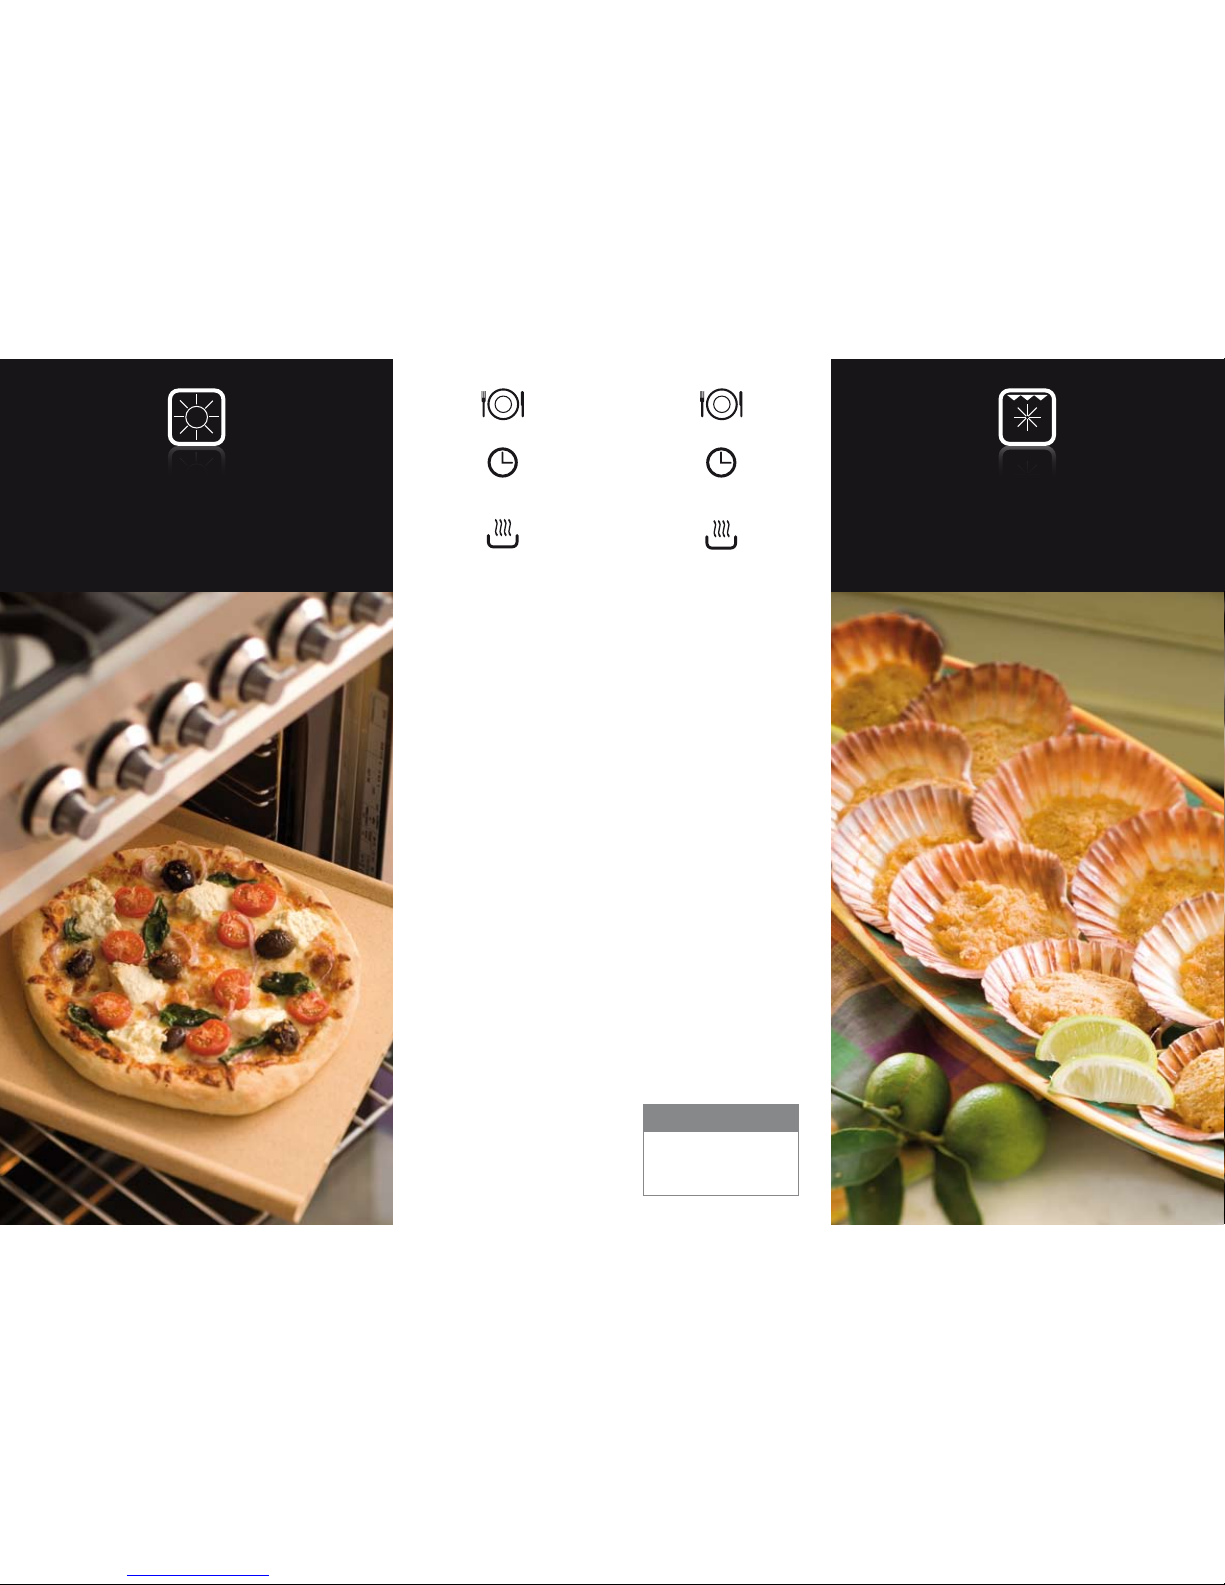
Serves 3-4
Preparation time
1 hour
Cooking time
15 minutes
Ingredients:
Pizza Dough
3 cups plain flour or
bakers flour
Salt
30g dried yeast
1 cup (250ml) warm water
3 tablespoons olive oil
Toppings
A selection of your
favourite pizza toppings
Tomato sauce
Mozzarella cheese
➊
Sift flour and salt into a large
mixing bowl and sprinkle dried yeast
over flour. Make a well in the centre
of the flour, salt and yeast mix then
pour in water and oil. Stir in flour,
combining to make soft dough.
Transfer dough onto a lightly floured
board and knead to a smooth ball.
Place dough back into a clean, oiled
bowl. Cover with plastic wrap and
leave to rise in a warm place until
the dough has doubled in size.
➋
Preheat oven (Mode 9) to hot 220ºC.
Once this temperature is reached
turn oven to (Mode 1).
➌
Remove dough from bowl and
return to lightly floured board.
Knead to form a ball. Cut ball in half
and flatten half into a large circle.
Transfer to a lightly greased baking
tray or pizza stone.
➍
Top with tomato sauce, mozzarella
cheese and a selection of your
favourite toppings.
➏
Bake in oven for 15 minutes or until
crisp and browned.
Gourmet Pizza
Tasmanian Scallops
Creole Style
Serves 4-6
Preparation time
10 minutes
Cooking time
5-8 minutes
Ingredients:
12 fresh scallops in half shell
1 lime or lemon
Crumb Mixture
100g butter, softened
1 cup dry fresh breadcrumbs
2 teaspoons cajun spice
1 teaspoon tomato paste
2 egg yolks
2 teaspoons sweet chilli sauce
Dash brandy, optional
➊
Preheat grill to high (Mode 6).
➋
Place scallops in shell on
baking tray.
➌
Combine all crumb mixture
ingredients to make a smooth paste.
Either pipe or spoon mixture onto
each shell, making sure scallop meat
is fully covered.
➍
Place baking tray under grill
and cook for 5-8 minutes, or until
golden brown.
➎
Serve with either lime or
lemon wedges.
ILVE COOKING TIP
If mixture looks too dry add
extra butter before topping on
scallops.
Page 20
Scampi with Lime
& Orange Butter Sauce
Marinated
Seafood Skewers
Serves 4
Preparation time
20 minutes
Cooking time
5 minutes
Ingredients:
1kg seafood, salmon,
green prawns and octopus
½ cup (125ml) olive oil
Juice 1 lemon
2 cloves garlic, crushed
1 tablespoon parsley or
dill, chopped
Freshly ground pepper, to taste
Bamboo skewers, soaked
in water
➊
Cut salmon into cubes, peel prawns
and cut tentacles off octopus,
leaving on tails.
➋
Mix together oil, lemon, parsley or
dill and pepper to taste in a bowl,
making marinade.
➌
Add seafood and marinate for about
15 minutes.
➍
Heat teppanyaki plate or grill
plate to hot.
➎
Place skewers on heated plate and
cook for approximately 5 minutes,
turning frequently.
➏
Serve immediately.
Serves 4
Preparation time
20 minutes
Cooking time
10 minutes
Ingredients:
8 scampi
1 clove garlic, crushed
50 ml olive oil
Cracked pepper to taste
Lime and Orange
Butter Sauce
Juice of 2 limes
Juice of 1 orange
½ teaspoon lime zest
1 tablespoon sugar
60g butter
1 orange segmented
➊
Combine garlic, oil and pepper in a
small bowl.
➋
Split scampi lengthwise on
underside and open slightly. Place on
a plate and pour over garlic, oil and
pepper marinade and leave for at
least 10 minutes.
➌
Meanwhile heat teppanyaki or
grill plate to hot. Once hot, place
marinated scampi cut side down and
cook for 5 minutes.
Turn scampi over and cook for
a further minute. Place on warm
serving dish.
➍
Lime and orange butter sauce. Place
lime juice, orange juice, zest, sugar
and butter in a small saucepan and
bring to the boil. After two minutes of
reducing add orange segments and
remove from heat. Pour over warm
scampi and serve immediately.
ILVE COOKING TIP
Do not overcook seafood,
generally once it has lost
its opaque appearance the
seafood is ready.
Page 21
Serves 4
Preparation time
15 minutes
Cooking time
2 minutes
Ingredients:
600g small whole calamari
or squid
1/3 cup plain flour
2 teaspoons chilli flour
1 tablespoon sea salt
Oil for frying
Spring onions, sliced
(To decorate)
Lemon wedges
➊
Clean calamari or squid by gently
pulling head and tentacles away
from body. Pull out the clear
backbone from inside of body and
stomach and discard.
Cut tentacles from head just
below the eyes, discard head.
Remove side wings and fine
membrane from body.
➋
Rinse body, tentacles and wings
thoroughly and dry with paper towel.
Cut calamari down the centre
and open flat, slice body and
wings into 5mm strips.
➌
Combine flour, chilli powder and salt.
➍
Add calamari and toss to coat,
shaking off excess flour mixture.
➏
Heat oil in deep fryer and when hot
add half the calamari and cook for
1 minute or until just tender and
beginning to colour.
➐
Remove from oil, lifting basket
and allow to drain on paper towel.
Repeat with remaining calamari.
➑
Serve with sliced spring onions and
lemon wedges.
Serves 6-8
Preparation time
10 minutes
Cooking time
15 minutes
Ingredients:
1 500g trout, cleaned
and scaled
6-8 cups (1.75-2L) fish stock
or water
Sprigs of dill
1 lemon, sliced
1 spanish onion, sliced
➊
Place trout, dill, lemon slices
and spanish onion slices onto a
perforated tray into fish kettle.
➋
Carefully pour in 1-2 cups of water
or stock in fish kettle and lower tray
with trout carefully into fish kettle,
cover with lid.
➌
Steam the fish with a gentle simmer
for approximately 10-15 minutes.
Test fish after 10 minutes by using a
fork to flake the thickest part of the
trout. It is ready when it flakes easily.
Steamed Trout
with Dill & Lemon
Chilli Salt Calamari
ILVE COOKING TIP
Check fish with point of knife
by lifting the flesh, fish will be
ready when the opaque
appearance of the flesh is gone.
Page 22
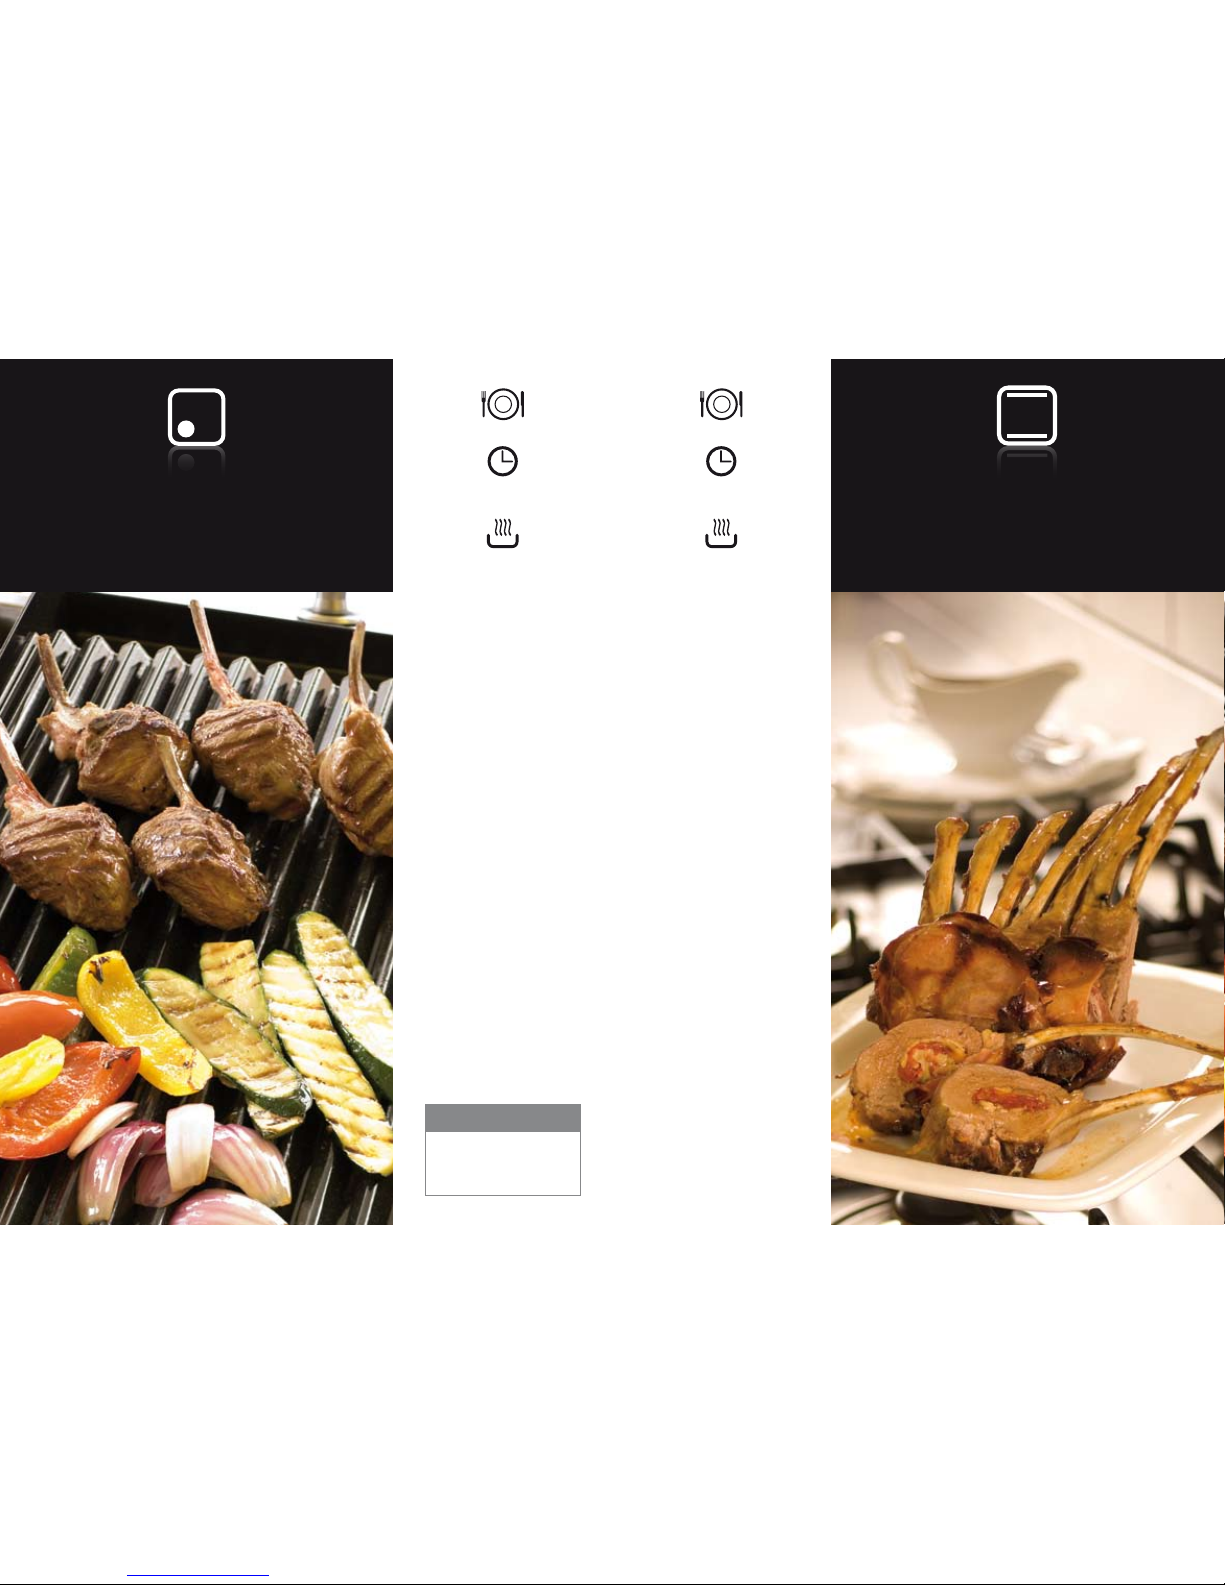
Grilled Lamb Cutlets
& Vegetables
Serves 2
Preparation time
10 minutes
Cooking time
5-8 minutes
Ingredients:
6 extra thick french trimmed
lamb cutlets
Selection of your favourite
vegetables, for example
capsicum, spanish onion
and zucchini
Extra virgin olive oil
Salt and pepper
➊
Season cutlets with salt and pepper.
➋
Slice vegetables, toss in oil and
season with salt and pepper.
➌
Heat grill plate or teppanyaki to hot.
➍
Place on seasoned cutlets and
cook for about 8 minutes, tur ning
occasionally.
➎
Remove to warmed serving plate
and cover with foil.
➏
Add vegetables to grill and cook for
3 minutes or until tender. Serve
cutlets with vegetables.
Serves 2
Preparation time
15 minutes
Cooking time
35 minutes
Ingredients:
1 rack lamb, french trim
6 sundried tomatoes
50g tasty cheese, small pieces
Sprigs of rosemary
4 thin slices pancetta ham
1½ (375ml) cups rich red wine sauce
or gravy
➊
Preheat oven (Mode 9) to 250ºC.
Once this temperature is reached
turn oven to (Mode 2).
➋
With knife or skewer make an
incision along the lamb fillet just
below the bone.
➌
Make the incision wider by
stretching cavity with your fingers.
➍
Finely chop rosemary and mix
with marinade oil of sundried
tomatoes, gently rub over the
outside of lamb rack and through the
cavity made in lamb.
➎
Insert sundried tomatoes and cheese
into cavity, plug ends with
a sundried tomato to stop the
cheese from melting out during
cooking process.
➏
Lay pancetta slices over meaty part
of lamb rack and place lamb into
preheated oven, middle shelf for
5 minutes.
➐
Reduce heat to 160° C and cook for
a further 30 minutes.
➑
Remove lamb from oven, allowing to
rest for at least 5 minutes. Cut the
meat between fingers and serve with
mashed potatoes, vegetables and
red wine sauce or gravy.
ILVE COOKING TIP
Try this dish using different herbs,
spices and marinades. Take care
with sugar based marinades as
they tend to burn quickly.
Rack of Lamb
with Cheese &
Semi-dried Tomato
Page 23
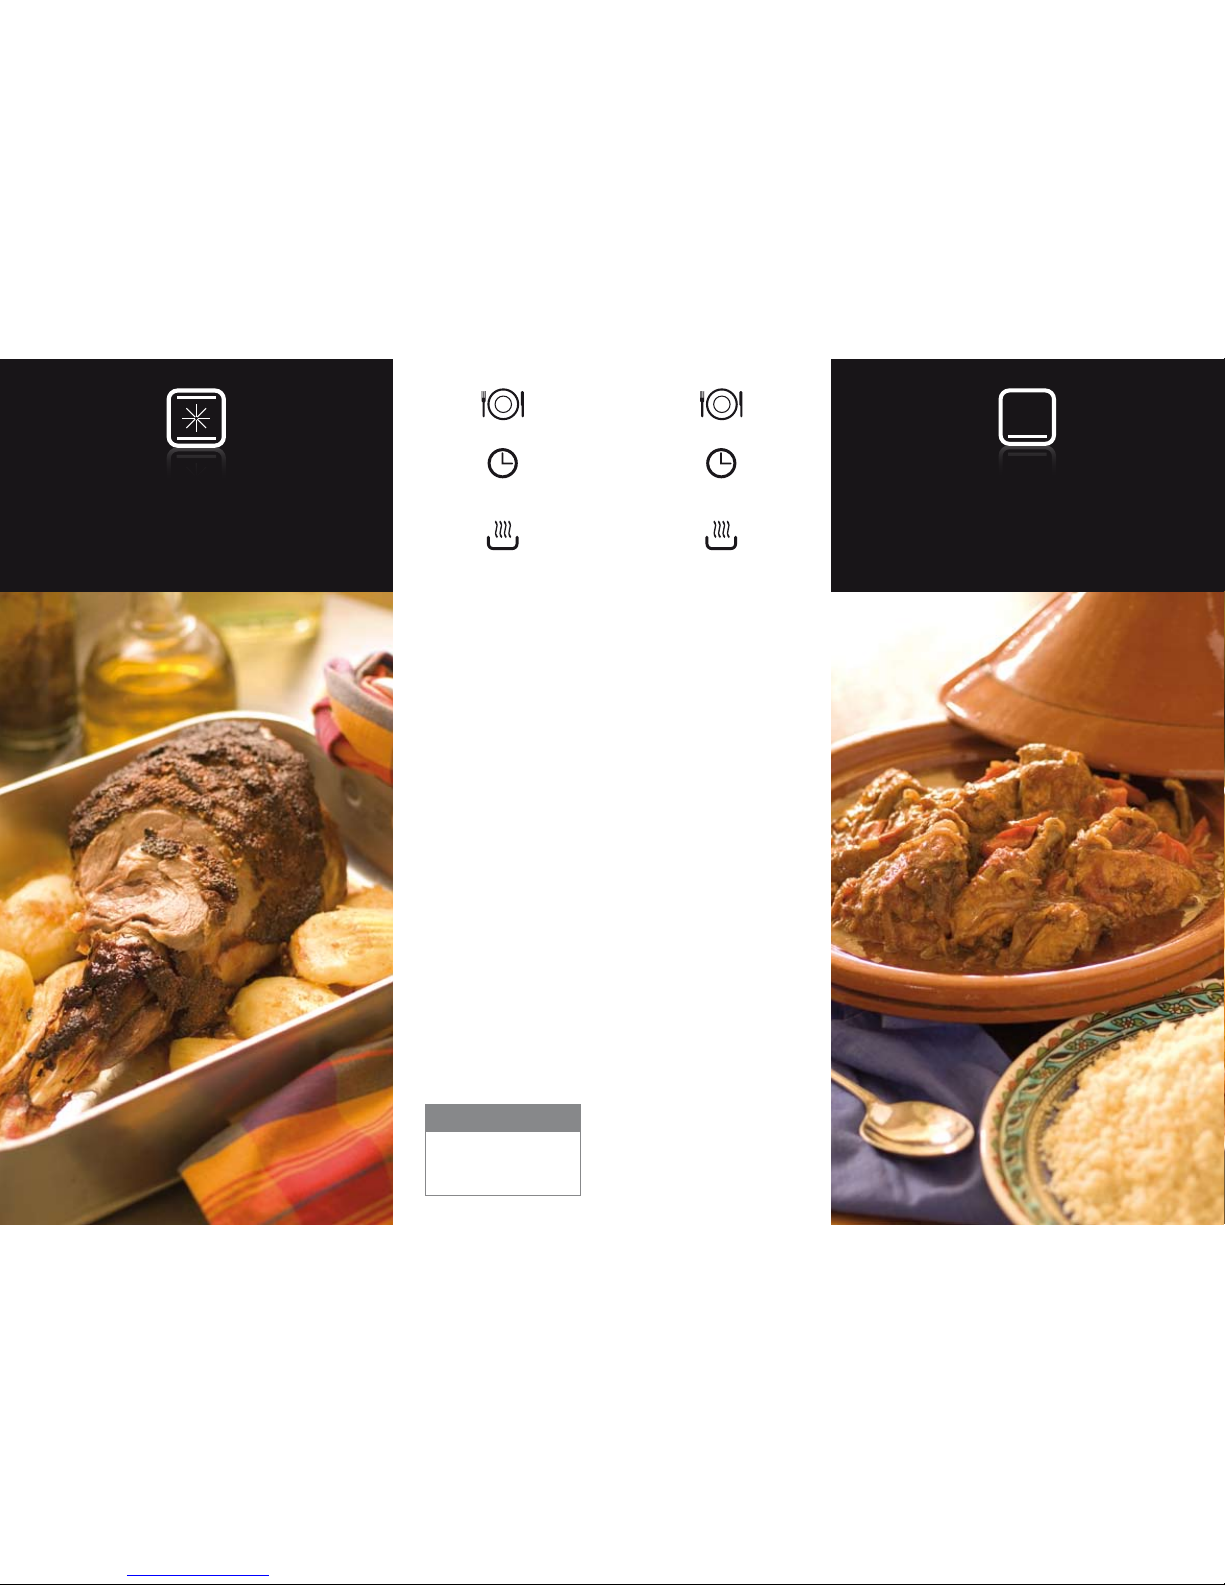
Serves 6-8
Preparation time
10 minutes
Cooking time
90 minutes
Ingredients:
1½ - 2kg leg of lamb
1 large clove of garlic, slivered
3 tablespoons seeded mustard
1 teaspoon sweet soy sauce
➊
Preheat oven (Mode 9) to 160° C.
Once this temperature is reached
turn oven to (Mode 7).
➋
Pierce lamb with a knife to make
slits. Place garlic slivers into slits.
➌
Mix together seeded mustard
and soy sauce, making a paste
and spread paste evenly over
the leg of lamb.
➍
Place lamb in a baking dish.
Pour a small amount of water into
bottom of baking dish.
(This helps to keep leg
of lamb moist).
➎
Place baking dish into centre of oven
and cook for 90 minutes.
➏
Serve with roast vegetables.
Serves 6-8
Preparation time
20 minutes
Cooking time
1 hour
Ingredients:
2 tablespoons olive oil
2kg chicken pieces
2 onions, sliced thinly
2 cloves garlic, crushed
3 tomatoes, chopped coarsely
2 tablespoons tomato paste
1 red capsicum, seeded and
chopped coarsely
1 teaspoon ground ginger
¾ teaspoon ground cloves
½ teaspoon freshly grated
1 teaspoon ground cinnamon
1 teaspoon ground turmeric
4 cups (1L) stock
½ cup raisins
Cous Cous
2 cups cous cous
2 cups (500ml) stock
2 tablespoon butter
➊
Heat oil in a large casserole dish.
Place chicken in dish and brown
until a golden colour. Remove
chicken from casserole dish and set
aside on a plate.
➋
Add onions, garlic, tomatoes and
capsicum to the casserole dish and
cook for 2 minutes.
➌
Add ginger, cloves, nutmeg, cinnamon
and turmeric and pour in stock.
➍
Return chicken pieces to casserole
dish and cook over a gentle heat for
about 40 minutes, this dish can also
be baked in a 180° C oven for
40 minutes using (Mode 3).
➎
Add raisins and cook for further
five minutes.
➏
Cous Cous. In a medium saucepan,
bring stock and butter to the boil. Stir
in cous cous and remove saucepan
from heat. Cover and allow to stand
for 5 minutes or until all stock is
absorbed. Fluff with a fork.
➐
Serve casserole with cous cous.
Mustard Crusted
Roast Leg of Lamb
Chicken Casserole
with Moroccan Spices
& Cous Cous
ILVE COOKING TIP
Place roast into centre of oven,
evenly spaced between the top
and bottom elements.
Page 24
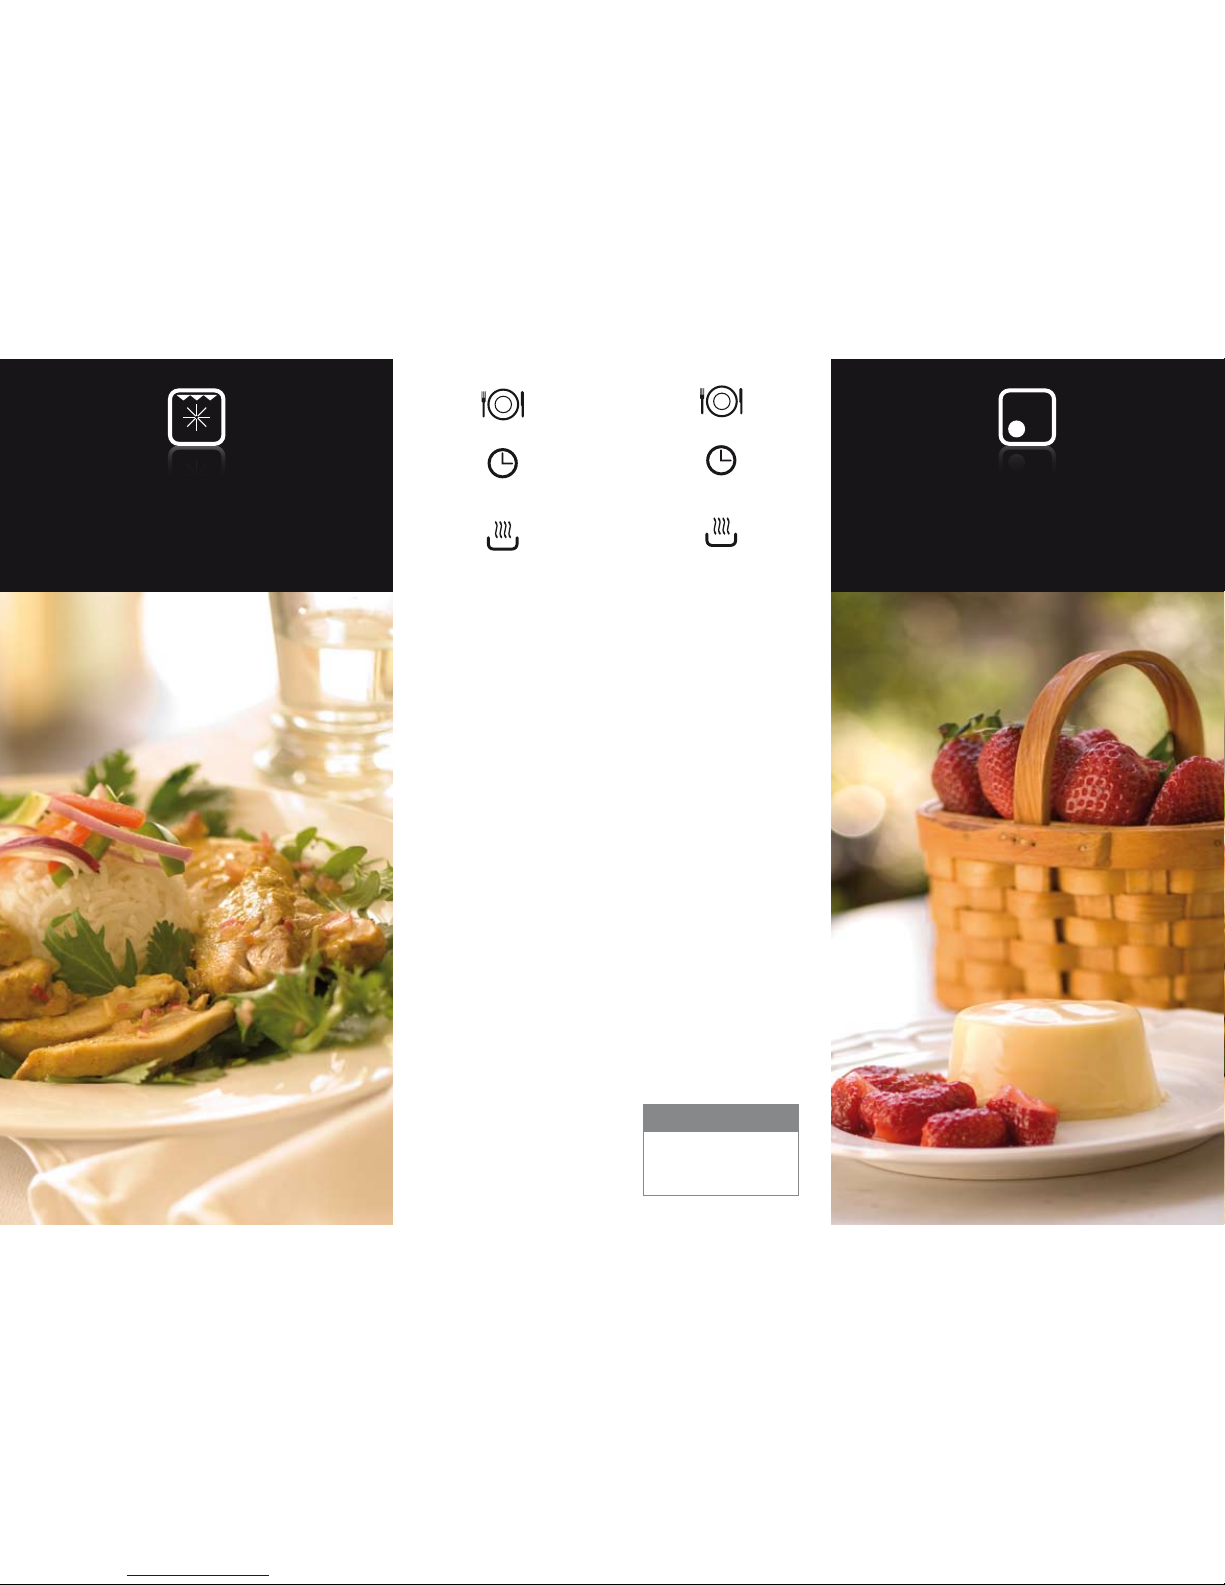
Serves 4
Preparation time
10 minutes
Cooking time
5 minutes
Ingredients:
1 ¾ cups double cream
4 tablespoons caster sugar
Vanilla
2 teaspoons gelatine
Fresh berries or your favourite fruit
for serving
➊
Put cream and sugar in a
saucepan, stirring until sugar
dissolves. Bring to the boil,
then turn down and simmer
for 3 minutes.
➋
Add a few drops of vanilla.
➌
Put a small amount of the cream
mixture into a bowl, add gelatine into
mixture to dissolve and then pour
in remaining cream mixture. Stir to
combine thoroughly.
➍
Pour mixture into 4 x ½ cup moulds,
cover and refrigerate until set.
➎
To unmould wrap each panna cotta
in a cloth dipped in hot water and
tip upside down onto a serving
plate. Shake gently to release from
mould. Repeat process if this does
not work.
➏
Serve with either berries or your
favourite fruit.
Panna CottaThai Style Chicken
Serves 4
Preparation time
25 minutes
Cooking time
15-20 minutes
Ingredients:
6 chicken fillets, skin on
1 carrot, julienned
1 stick celery, julienned
½ spanish onion, julienned
½ red capsicum, julienned
½ green capsicum, julienned
1 bunch coriander
1 bunch rocket lettuce
100g jasmine rice
Chicken Marinade
1 teaspoon palm sugar or sugar
1 clove fresh garlic
1 teaspoon dried coriander
1 teaspoon turmeric
1 teaspoon curry powder
3 small fresh chillies, whole
60ml fish sauce
½ cup (125ml) coconut milk
Chilli Vinaigrette
1 cup rice wine vinegar
60g chopped spanish onion
4 small fresh chillies, whole
20g fresh garlic
20g sugar, palm sugar if possible
20ml fish sauce
➊
Make marinade by combining all
ingredients and blending to a paste.
Coat chicken and allow to marinate
for a minimum of 2 hours.
➋
Preheat oven (Mode 9) to 175° C.
➌
Make vinaigrette by combining
red wine, vinegar, onion, chillies,
garlic, sugar and fish sauce and
liquidise in a blender.
➍
Place chicken on grill grid oven tray,
skin side up. Turn oven to fan-grill
(Mode 6) and place tray ¾ of way to
top in oven. Cook chicken skin side
up for approximately 10 minutes or
until golden brown, then turn over
and cook for a further 5-10 minutes.
➎
Serve with jasmine rice and a
salad of rocket, coriander and
julienned vegetables dressed
with chilli vinaigrette.
ILVE COOKING TIP
Strain mixture gently
before tipping into moulds to
remove all gelatin lumps.
Page 25
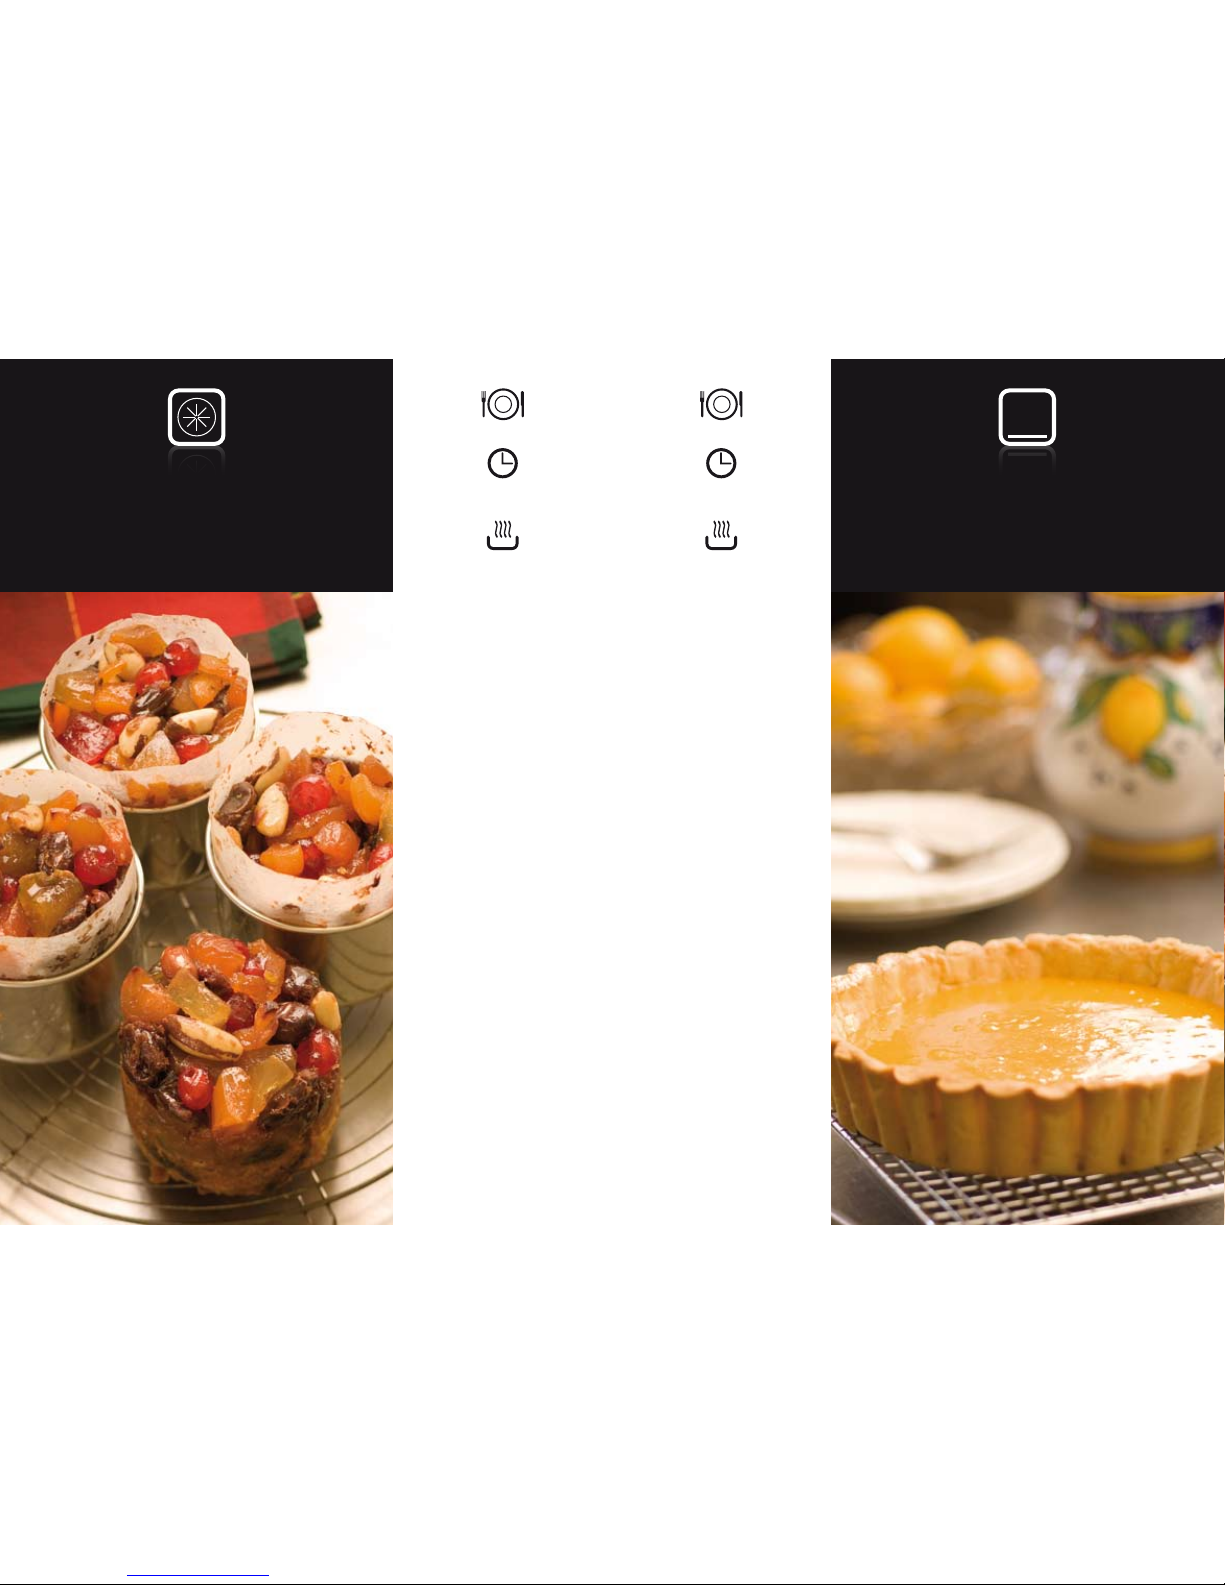
Makes 5
Preparation time
20 minutes
Cooking time
50 minutes
Ingredients:
500g glace pineapple,
250g glace apricots,
125g glace figs, 125g dried apricots,
500g pitted dates,
all chopped roughly
500g glace cherries
½ cup (125ml) rum or brandy
500g brazil nuts
200g unsalted butter
1 cup brown sugar
4 eggs
1¼ cup plain flour
½ cup self raising flour
3 tablespoons honey
Extra ½ cup rum or brandy
➊
Place all fruits into a large bowl and
pour over rum or brandy, cover and
leave overnight to soak. Next day
stir in brazil nuts.
➋
Preheat oven (Mode 9) to moderately
slow at 160° C. Once this
temperature is reached turn oven
to (Mode 8).
➌
Grease then line a 5x10cm round
cake tin with baking paper.
➍
Cream butter and sugar until the
mixture is pale in colour then add
eggs gradually, beating well after
each egg is added. Sift flours and
stir into creamed egg, sugar and
butter mixture with ¾ of the rum
soaked fruit. Divide mixture evenly
among the 5 tins and bake in
preheated oven for 35 minutes.
➎
Heat honey in a medium saucepan
with the remaining fruit.
➏
Remove cakes from the oven and
spoon fruit and honey mix evenly
over the cakes before returning to
the oven for a further 15 minutes.
➐
Pour over extra rum and leave to
cool in tins. Once cold remove cakes
carefully from tins and wrap in foil
until ready to serve.
Mini
Christmas Cakes
Serves 6
Preparation time
20 minutes
Cooking time
30 minutes
Ingredients:
Pastry
1½ cups plain flour
2 tablespoons caster sugar
90g butter
1 egg yolk
2 tablespoons cold water
Rice (For prebaking pastry)
Lemon Curd
6 egg yolks
1 cup sugar
½ cup (125ml) lemon juice
125g butter
1 tablespoon grated lemon rind
➊
Pastry. Cream together sugar, butter
and egg yolk. Gradually incorporate
flour and water to combine pastry
into a ball. Cover and place in
refrigerator for 15 minutes.
➋
Preheat oven (Mode 9) to 160º C.
Once this temperature is reached
turn oven to (Mode 3).
➌
Grease an 18-20cm pie plate or flan
ring. Roll out cooled pastry to fit
into pie plate or flan ring. Crimp or
decorate the edges. Place a sheet
of baking paper over pastry, pour
in some rice and bake in oven for
10 minutes. Remove from oven and
take out paper and rice.
➍
Return pastry and bake for a further
15 minutes or until golden brown,
allow to cool.
➎
Lemon Curd. Beat egg yolks and
strain through sieve into a medium
heavy saucepan over a low heat.
Add sugar and lemon juice and stir
to combine. Cook for 10-12 minutes
stirring continuously until the mixture
thickens and is able to coat the back
of a wooden spoon. Remove from
heat and stir until the mixture cools
slightly, stir in butter a piece at a
time until all is added. Add rind and
allow to cool slightly.
➏
Pour into the baked pastry shell and
chill in refrigerator until set.
Lemon
Curd Tart
Page 26
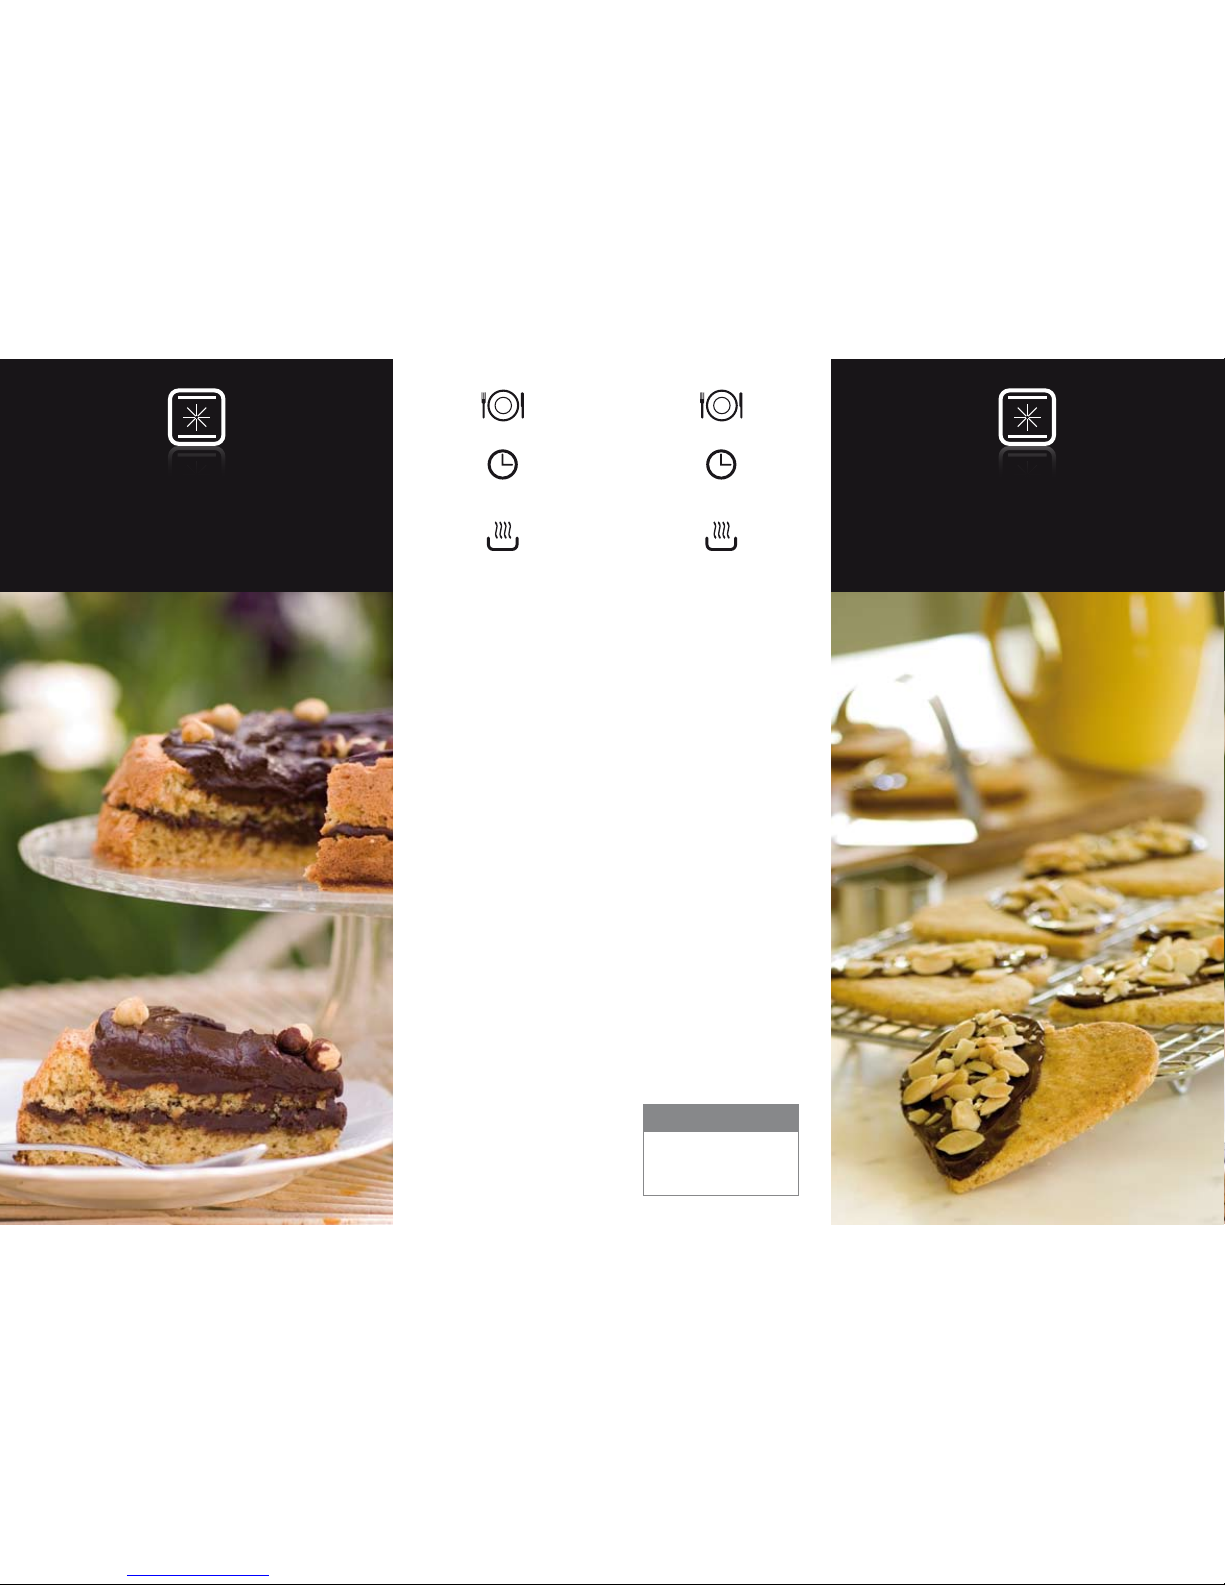
Makes approx. ½ dozen
Preparation time
25 minutes
Cooking time
18 minutes
Ingredients:
250g butter
¾ cup caster sugar
2 ½ cups flour
3 cups ground almonds
150g cooking chocolate
Slivered almonds
➊
Preheat oven (Mode 9) to 160° C.
Once this temperature is reached
turn oven to (Mode 2).
➋
Cream butter and sugar until light and
creamy. Sift in flour and add ground
almonds to make smooth dough.
➌
Wrap in plastic and place in the
refrigerator for 15 minutes.
➍
Divide dough in half and place
between two sheets of baking paper.
Roll out dough to about 4mm in
thickness. Using a heart shaped
cutter, cut out biscuits, repeat with
other half of the dough. If there is
any dough remaining roll into a ball
and repeat process.
➎
Place biscuits on to greased baking
trays, leaving a space between
each biscuit. Cook for 10-12 minutes
or until a pale golden colour.
Leave to cool for a few minutes on
trays before removing onto a rack
to cool completely.
➏
Carefully melt chocolate and
spread over half of each biscuit and
sprinkle with slivered almonds. Allow
chocolate to set.
Serves 6-8
Preparation time
20 minutes
Cooking time
35-45 minutes
Ingredients:
6 eggs
¾ cup caster sugar
1 cup ground hazelnuts
¾ cup white breadcrumbs
1 teaspoon plain flour
Chocolate Ganache
300g dark cooking chocolate
½ cup (125ml) fresh cream
Hazelnuts to decorate
➊
Preheat oven (Mode 9) to 150ºC.
Once this temperature is reached
turn oven to (Mode 7).
➋
Separate eggs, placing whites in
bowl to side. Beat egg yolks until
thick and pale. Gradually beat
in ½ cup sugar, then nuts and
breadcrumbs and continue beating
until ingredients are well combined.
➌
Whisk egg whites until they begin to
foam. Gradually add remaining sugar
and beat until mixture forms peaks.
➍
Add half the egg white mixture into
the hazelnut mixture and gently fold
in. Sprinkle mixture with flour and
fold in remaining egg white mixture.
➎
Line and butter a 25cm spring form
tin and pour cake mixture into tin.
Bake cake for 35-45 minutes, until
cake shrinks away from sides of tin.
Remove cake from oven and remove
sides of cake tin. Allow cake to cool.
➏
Chocolate Ganache.
Melt chocolate and cream in
a double saucepan stirring to
combine. Allow ganache to cool.
➐
Once cake is cooled carefully cut
horizontally to make two even
layers. Spread half cooled ganache
over one half of cold cake. Replace
the top of cake and cover with
remaining ganache. Decorate with
whole hazelnuts.
Almond
Shortbread Hearts
Hazelnut Torte
with Chocolate Ganache
ILVE COOKING TIP
If batch baking, mode 8 would
be better suited for more
than one shelf at a time.
Page 27
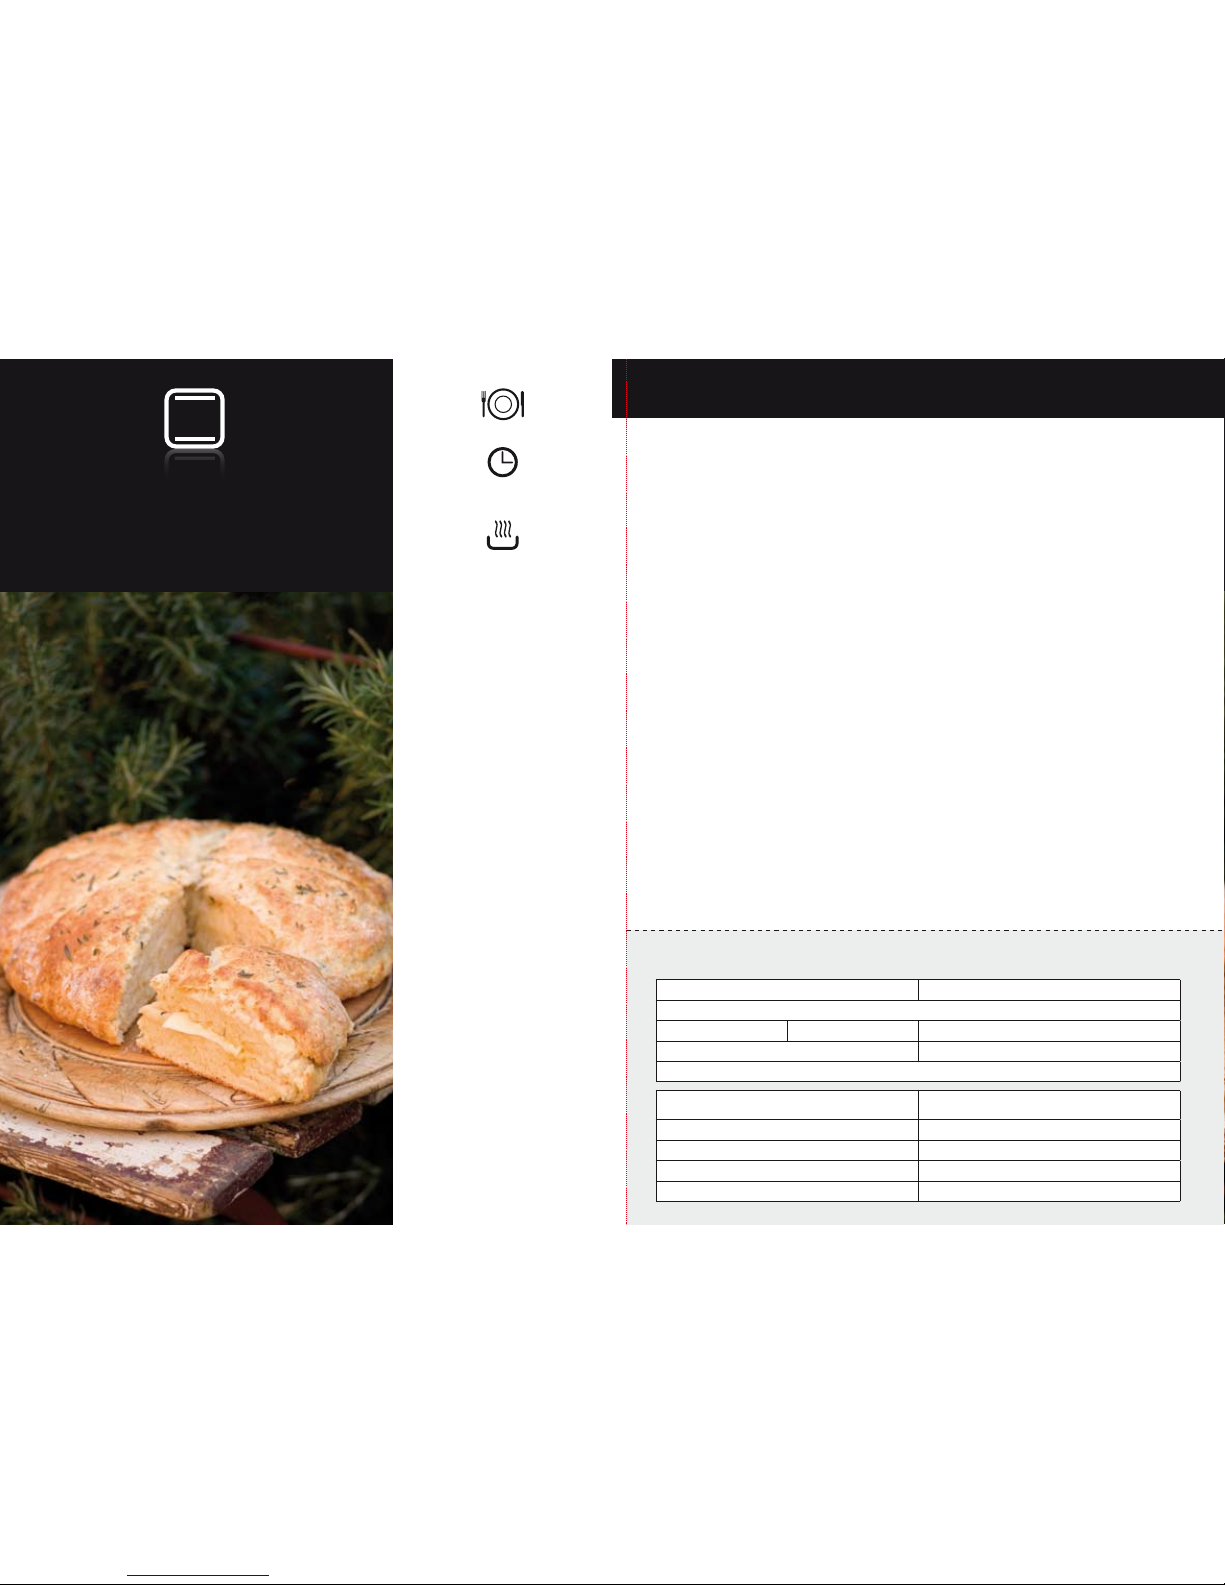
Warranty Card
Serves 8
Preparation time
15 minutes
Cooking time
35-45 minutes
Ingredients:
4 cups self-raising flour
2 teaspoons sugar
1 teaspoon salt
100g butter
2 teaspoons lemon rind,
finely grated
2 tablespoon fresh
rosemary, chopped
¾ cup parmesan cheese, grated
2-2 ½ cups (500-625ml) milk
Cracked pepper
Sea salt
➊
Preheat oven (Mode 9) to 170° C.
Once this temperature is reached
turn oven to (Mode 2).
➋
Sift flour, sugar and salt into
a large bowl. Rub butter into
sifted flour and salt then stir in lemon
rind and 1 tablespoon of
rosemary and parmesan cheese.
➌
Add enough milk to make a
soft dough and stir.
➍
Turn dough onto a floured board and
knead until smooth. Shape dough
into a round shape, about three cm
in thickness. Score with a knife to
make 8 portions.
➎
Carefully place on a greased baking
tray and brush with milk. Sprinkle
sea salt and remaining rosemary
over dough.
➏
Bake in oven for 35-45 minutes until
damper sounds hollow when tapped.
➐
Serve hot with butter.
Rosemary Damper
THIS WARRANTY IS VALID IN AUSTRALIA ONLY
NOTE
To activate this warranty please complete the details listed
below when you have unpacked the product, and send
the ‘tear off’ card with a copy of your proof of purchase
invoice or sales docket to:
REPLY PAID
83617
Leichhardt, N.S.W
2040
Warranty
These products are covered by a warranty in addition
to all rights available to you by statute. The warranty
is for a period of twenty four (24) months from the
date of purchase, subject to the following conditions.
The warranty covers repairs free of charge of any fault
arising from defective materials of components, or faulty
workmanship. The product will be repaired or replaced at
the recommendation and discretion of ILVE Australia.
The conditions above mentioned are:
1. That the purchaser carefully follows all
instructions packed with the product.
2. That the purchaser carefully follows the
installation instructions provided and complies
with the electrical wiring regulations, gas and/or
plumbing codes by having the product installed by
a Fully Licensed tradesperson.
3. That the purchaser carefully follows the
instructions provided in the owners manual
detailing the proper use and care of the product
and does not use the product for any purpose
other than the domestic use for which it has
been designed.
4. That the product was purchased by an approved
ILVE dealer in Australia and has been installed
in Australia.
5. That this warranty does not extend to:
a) Light globes (this includes rangehoods,
ovens and microwaves
b) Damage to ceramic glass caused by
liquid or spill overs, neglect, lack of
maintenance or impact.
For information on cleaning substances
containing sugar please refer to page 16
of your Operating Instructions manual.
c) Damage to the surface coatings caused by
cleaning or maintenance using products
not recommended by the owner’s
handbook.
d) Defects caused by normal wear and tear,
accident, negligence, alteration or misuse.
ilve.com.au
Please complete and send to ILVE at: REPLY PAID 83617
LEICHHARDT NSW 2040
Last Name: First Name:
Address:
State: Postcode: Email:
Home Phone: Mobile:
Purchase Date: / /
(Please attach proof of purchase to validate warranty)
MODEL NUMBER
SERIAL NUMBER
(if you cannot locate the serial number please call ILVE on 1300 85 64 11)
1
2
3
4
WARRANTY REGISTRATION CARD
Continued over…
Page 28
PROBLEM ANSWER
RANGEHOODS
Down lights not working Replace globe. Correct wattage globes must be used. 12V - 20W type g4.
How do I change the globes?
Model X39 = Remove inner chrome ring surrounding glass by prying off with small fine blade screw
driver, being careful not to drop glass. When inserting new globe, do not touch globe with your
hands. It is advisable to use a cloth instead. Replace ring and glass by pushing gently back into
place. Models X200 – X90 – B1-B2-T29-B9 C90 = Remove chrome ring by turning anti-clockwise,
glass is fixed to ring. Globe can now be replaced as above.
Indicator lights keep flashing
The flashing acts as a reminder for you to clean the mesh filters. It will occur in segments of
approximately 30 hours of usage. The rangehood will need to be reset, for ease with lighting, use a
match stick or tooth pick. Push down the hidden button located in the small hole to the right of the
speed control buttons. Refer to information sheet, included with rangehood.
Rangehood is noisy
This could be due to the installation. Please check that the rangehood is installed with the correct
sized ducting. Soft type flexible ducting can cause hood to be noisy. ILVE recommends ridged
ducting, maximum length 4 metres.
Both lights and fan don’t work
Before calling for service, try turning power to rangehood on then off. If the power point is not
accessible, this can be done at the meter box, this will reset the rangehood.
COOKTOPS
My burners will not ignite
Check to see if the brass burners are placed correctly into the aluminium base. This is very
important as it will ensure the flame holes line up with the ignition post. It will also ensure
correct combustion when alight.
Does your ILVE cooktop have
flame failure devices fitted?
Ensure burners are located correctly as above. When burner is lit, ensure knob is firmly depressed
for 5 to 10 seconds. If new, ensure knobs are firmly fitted, check by pushing knobs down firmly with
the palm of your hand.
My ignition continually sparks
This may be due to a liquid spill over, which can cause moisture to enter into ignition micro
switches under knobs. Spraying liquid type cleaners can also create a problem. If this does
occur, the cooktop should be turned off at power point and left to dry out. Removing all knobs and
using a hair dryer on the control panel, will assist the drying out process.
All the igniters spark at the same
time when lighting
This is normal and how they are designed to operate.
The knob is loose on shaft
Knob retaining spring clip has come out. This does not require a service technician and can be
replaced by customer. Please contact your ILVE state office, who will arrange for a clip to be sent
to you.
OVENS
How do I change the door seals?
Please note: the replacement of oven door seals does not require a service technician.
Door seals are easily replaced, please contact your ILVE state office, who will arrange for a
replacement to be sent. If out of warranty please contact the ILVE spare parts department.
My oven will not turn on but clock
is illuminated (digital type clock)
If an “A” is showing in display the clock needs to be reset, this can be done by pressing
buttons
simultaneously while pressing the +/- buttons and setting the correct time. The “A”
(automatic) symbol should now be gone and the oven should now turn on. The above problem can
occur after a power interruption, on when the power is first turned on to the appliance.
Oven will not turn on
(Analogue type clock)
For the oven to work manually the hand symbol must be displayed in the little window on clock.
My oven smokes when turned on
This is a natural occurrence and is caused by the self-clean burning off process. A good tip: leave
oven on at a high temperature for 10 minutes after removing cooked food. This will burn off any
splatter and prevent the oil from going cold. It will then start to burn off when oven is next turned
on. Please note: all ovens will occasionally require to be dismantled and cleaned internally, even if
self-clean liners are fitted. Do not use oven cleaner on self-clean liners.
My oven gets too hot externally
Check that the correct ventilation has been allowed. See illustrations of ventilation requirements in
installation book. Please note that being an oven, the external panels will warm up after the oven
has been on for over an hour, at high temperatures. This is normal heat transfer; the
panels can heat up to around 60ºC.
Troubleshooting
e) A product dismantled, repaired or
serviced by any service person other than
an authorised employee or agent of ILVE
appliances. To locate your closest
ILVE authorised service agent please
call 1300 85 64 11
f) Damage or defects caused by rangehood/s
being installed externally, incorrectly
or not in accordance to the manual/s
supplied with the product.
(ILVE RANGEHOODS ARE
DESIGNED FOR INDOOR USE
ONLY)
g) If the appliance IS NOT in the possession
of the original purchaser.
h) All components resulting in poor
workmanship subject to the above
conditions become property of ILVE
and upon request MUST be returned
to head ofce in Leichhardt, N.S.W
for assessment.
i) Damages or dents not affecting the
performance with items purchased off
display and as factory seconds
6. The provision of service under this warranty is
limited by the boundary of the nearest service
agent’s area.
Travelling cost incurred for service outside this
area is not covered by this warranty and will
incur commercial cost to be paid by the customer
regulated by the number of kilometres travelled
beyond the service area. This warranty covers a
50 kilometre round trip.
7. The cost associated with the hire of extension
ladders and scaffolding to service rangehoods
installed on ceilings greater than 3 metres will not
be covered by this warranty. Such costs will be
borne by the customer.
Please refer to the ILVE Operating manual for trouble
shooting before making a service call. Please note that
ALL SERVICE CALLS MUST BE BOOKED
THROUGH ILVE’S SERVICE AND WARRANTY
DEPARTMENT ON 1300 85 64 11
For all service enquiries, please contact ILVE service and
warranties hotline on 1300 85 64 11. If you are unable to
establish the date of purchase, or the fault is not covered
by this warranty, or if the product is found to be in working
order by an ILVE authorised service agent, you will be
required to bear all service call charges.
Warranty Card continued
ilve.com.au
55ILVE Operating Manual
Page 29

National Service 1300 856 411
ILVE showrooms are open daily from 9am-5pm and Saturdays 10am-4pm
(WA by appointment only on Saturdays)
ilve.com.au
NSW & ACT (Head Office)
48-50 Moore Street
Leichhardt
T 02 8569 4600
F 02 8569 4699
VIC, TAS & SA
1211 Toorak Road
Camberwell
T 03 9809 2122
F 03 9809 2155
QLD
1/42 Cavendish Road
Coorparoo
T 07 3397 0900
F 07 3397 0850
WA & NT
Unit 10/55 Howe Street
Osborne Park
T 08 9201 9299
F 08 9201 9188
New Zealand
PO Box 11.160
Sockburn Christchurch
T 0508 458 369
F 03 344 5906
 Loading...