

Page 1
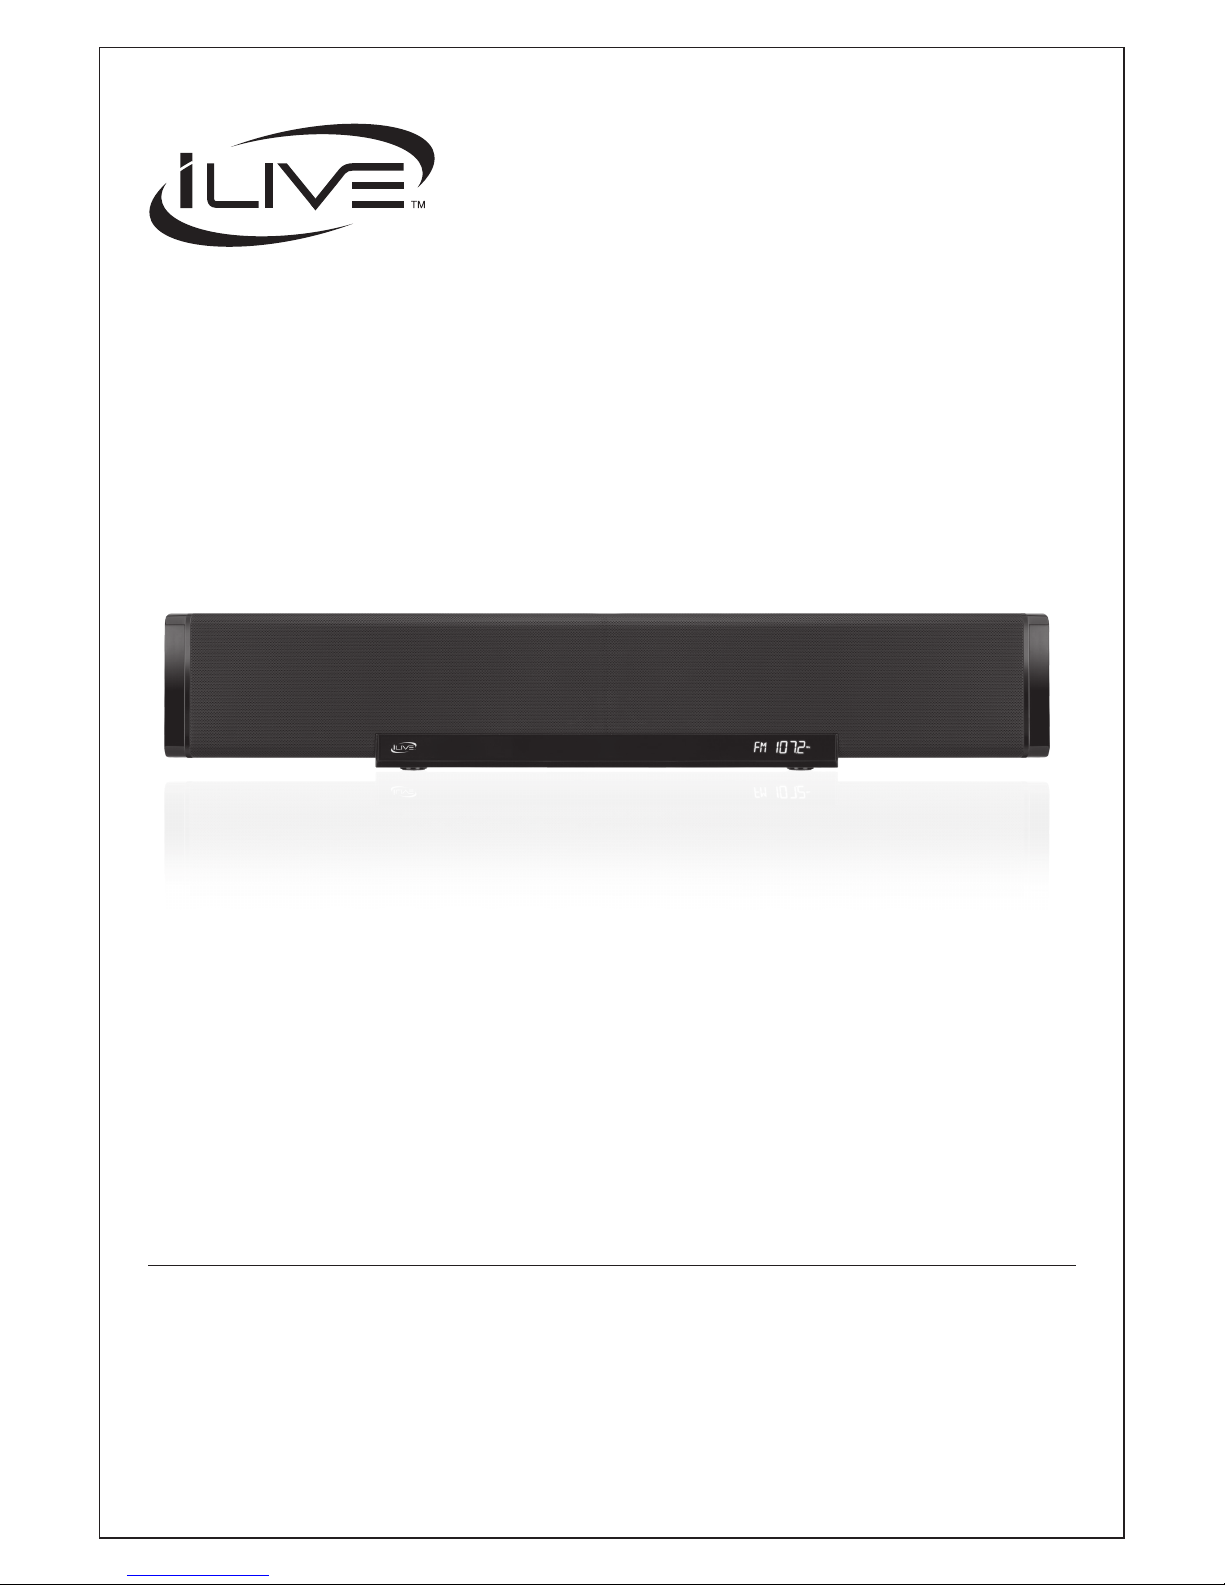
USER’S GUIDE
V:1618-0714-11
For the most up-to-date version of this User’s Guide, go to www.ilive.net
IT082B
Sound Bar
Page 2
2
• WARNING: Shock hazard - Do Not Open.
• AVIS: RISQUE DE CHOC ÉLECTRIQUE - NE PAS
OUVRIR
Mains Plug or Direct plug-in adapter is used as disconnect
device and it should remain readily operable during intended
use. In order to disconnect the apparatus from the mains
completely, the Mains Plug or Direct plug-in adapter should
be disconnected from the mains socket outlet completely.
La che d’alimentation ou adaptateur de courant est utilisé
comme dispositif de déconnexion et doit rester accessible
pendant l’utilisation. Pour mettre l’appareil hors tension, la
che ou adaptateur de courant doit être débranché de la prise
de courant.
Do not mix old and new batteries.
Do not mix alkaline, standard (carbon-zinc), or rechargeable
(ni-cad, ni-mh, etc) batteries.
No mezcle baterías viejas y nuevas.
No mezcle baterías alcalinas, estándar (carbono-zinc) o
recargables (ni-cad, ni-mh, etc.).
• CAUTION: TO PREVENT ELECTRIC SHOCK,
MATCH WIDE BLADE OF PLUG TO WIDE SLOT,
FULLY INSERT.
• WARNING:To reduce the risk of re or electric shock,
do not expose this apparatus to rain or moisture.
• AVERTISSEMENT: Pour réduire le risque d’incendie
ou de choc électrique, ne pas exposer cet appareil sous la
pluie et l’humidité.
• CAUTION: Use of any controls or adjustments or
performance of procedures other than those herein
specied may result in hazardous radiation exposure.
• WARNING: Changes or modications to this unit
not expressly approved by the party responsible for
compliance could void the user’s authority to operate the
equipment.
• WARNING: Do not place the unit on top of any soft,
porous, or sensitive surfaces to avoid damaging the
surface. Use a protective barrier between the unit and
surface to protect the surface.
• WARNING: Use of this unit near uorescent lighting
may cause interference regarding use of the remote. If
the unit is displaying erratic behavior move away from
any uorescent lighting, as it may be the cause.
• CAUTION:Danger of explosion if battery is incorrectly
replaced. Replace only with the same or equivalent type.
• PRÉCAUTION: Danger d’explosion si les piles sont
remplacées de façon incorrect. Remplacer les piles
seulement par le même type de pile ou l’équivalent.
• WARNING:The battery, batteries, and battery pack
shall not be exposed to excessive heat such as sunshine,
re, or the like.
• WARNING:Lithium batteries, like all rechargeable
batteries are recyclable and should be recycled or
disposed of in normal household waste. Contact your
local government for disposal or recycling practices in
your area. They should never be incinerated since they
might explode.
Warnings and Precautions
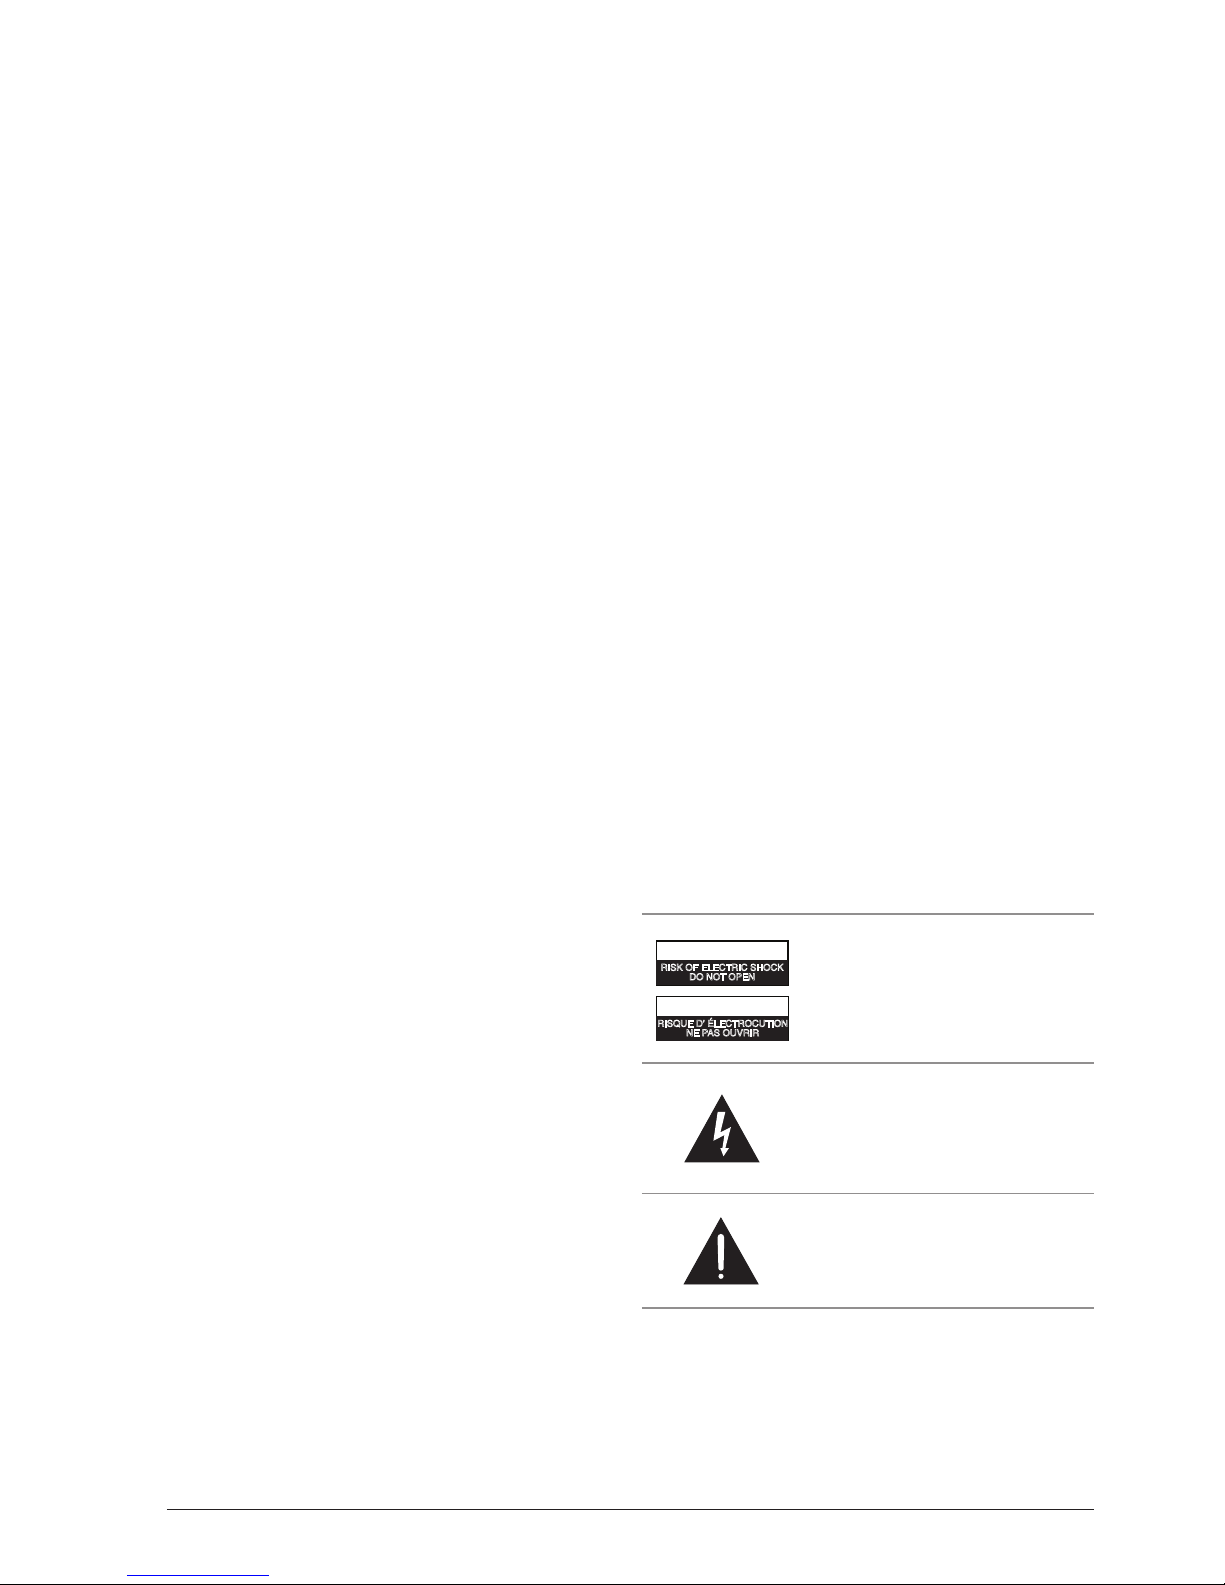
The lightning ash with arrowhead symbol,
within an equilateral triangle, is intended to
alert the user to the presence of uninsulated
"dangerous voltage" within the product's
enclosure that may be of sufcient magnitude to
constitute a risk of electric shock to persons.
WARNING: TO REDUCE THE RISK
OF ELECTRIC SHOCK, DO NOT
REMOVE COVER (OR BACK).
NO USER-SERVICEABLE PARTS
INSIDE. REFER SERVICING TO
QUALIFIED SERVICE PERSONNEL.
ATTENTION
RISQUE D' ÉLECTROCUTION
NE PAS OUVRIR
CAUTION
RISK OF ELECTRIC SHOCK
DO NOT OPEN
The exclamation point within an equilateral
triangle is intended to alert the user to
the presence of important operating and
maintenance (servicing) instructions in the
literature accompanying the appliance.
Page 3
Customer Support: 1-888-999-4215 3
13. Unplug this apparatus during lightning storms
or when unused for long periods of time.
14. Refer all servicing to qualied service personnel.
Servicing is required when the apparatus has
been damaged in any way, such as power-supply
cord or plug is damaged, liquid has been spilled
or objects have fallen into the apparatus, the
apparatus has been exposed to rain or moisture,
does not operate normally, or has been dropped.
WARNING: Changes or modications to this unit not
expressly approved by the party responsible for compliance
could void the user’s authority to operate the equipment.
NOTE: This equipment has been tested and found to comply with
the limits for a Class B digital device, pursuant to Part 15 of the FCC
Rules. These limits are designed to provide reasonable protection
against harmful interference in a residential installation. This
equipment generates, uses, and can radiate radio frequency energy
and, if not installed and used in accordance with the instructions,
may cause harmful interference to radio communications. However,
there is no guarantee that interference will not occur in a particular
installation. If this equipment does cause harmful interference to
radio or television reception, which can be determined by turning
the equipment off and on, the user is encouraged to try to correct
the interference by one or more of the following measures:
• Reorient or relocate the receiving antenna.
• Increase the separation between the equipment and receiver.
• Connect the equipment into an outlet on a circuit different
from that to which the receiver is connected.
• Consult the dealer or an experienced radio/TV technician for help.
• The apparatus shall not be exposed to dripping or
splashing and that no objects lled with liquids,
such as vases, shall be placed on apparatus.
L’appareil ne doit pas être exposé aux écoulements
ou aux éclaboussures et aucun objet ne contenant de
liquide, tel qu’un vase, ne doit être placé sur l’objet.
• Battery shall not be exposed to excessive heat
such as sunshine, re or the like.
Les piles ne doivent pas être exposées à de forte chaleur, tel qu’à
la lumière du soleil, au feu ou autres choses de semblable.
• Caution marking is located at the rear or bottom of the apparatus.
Attention marquage est situé sur le paneau
arrière ou inférieur de l’unité.
• The marking information is located at the
rear or bottom of apparatus.
Le marquage est situé sur le paneau arrière ou inférieur de l’unité.
FCC Warnings
Additional Warnings
1. Read these Instructions.
2. Keep these Instructions.
3. Heed all Warnings.
4. Follow all instructions.
5. Do not use this apparatus near water.
6. Clean only with a dry cloth.
7. Do not block any ventilation openings. Install in
accordance with the manufacturer’s instructions.
8. Do not install near any heat sources such as
radiators, heat registers, stoves, or other apparatus
(including ampliers) that produce heat.
9. Do not defeat the safety purpose of the polarized
or grounding - type plug. A polarized plug has two
blades with one wider than the other. A grounding
type plug has two blades and a third grounding
prong. The wide blade or the third prong are
provided for your safety. When the provided plug
does not t into your outlet, consult an electrician
for replacement of the obsolete outlet.
10. Protect the power cord from being walked on or
pinched particularly at plugs, convenience receptacles,
and the point where they exit from the apparatus.
11. Only use attachments/accessories
specied by the manufacturer.
12.
Important Safety Instructions
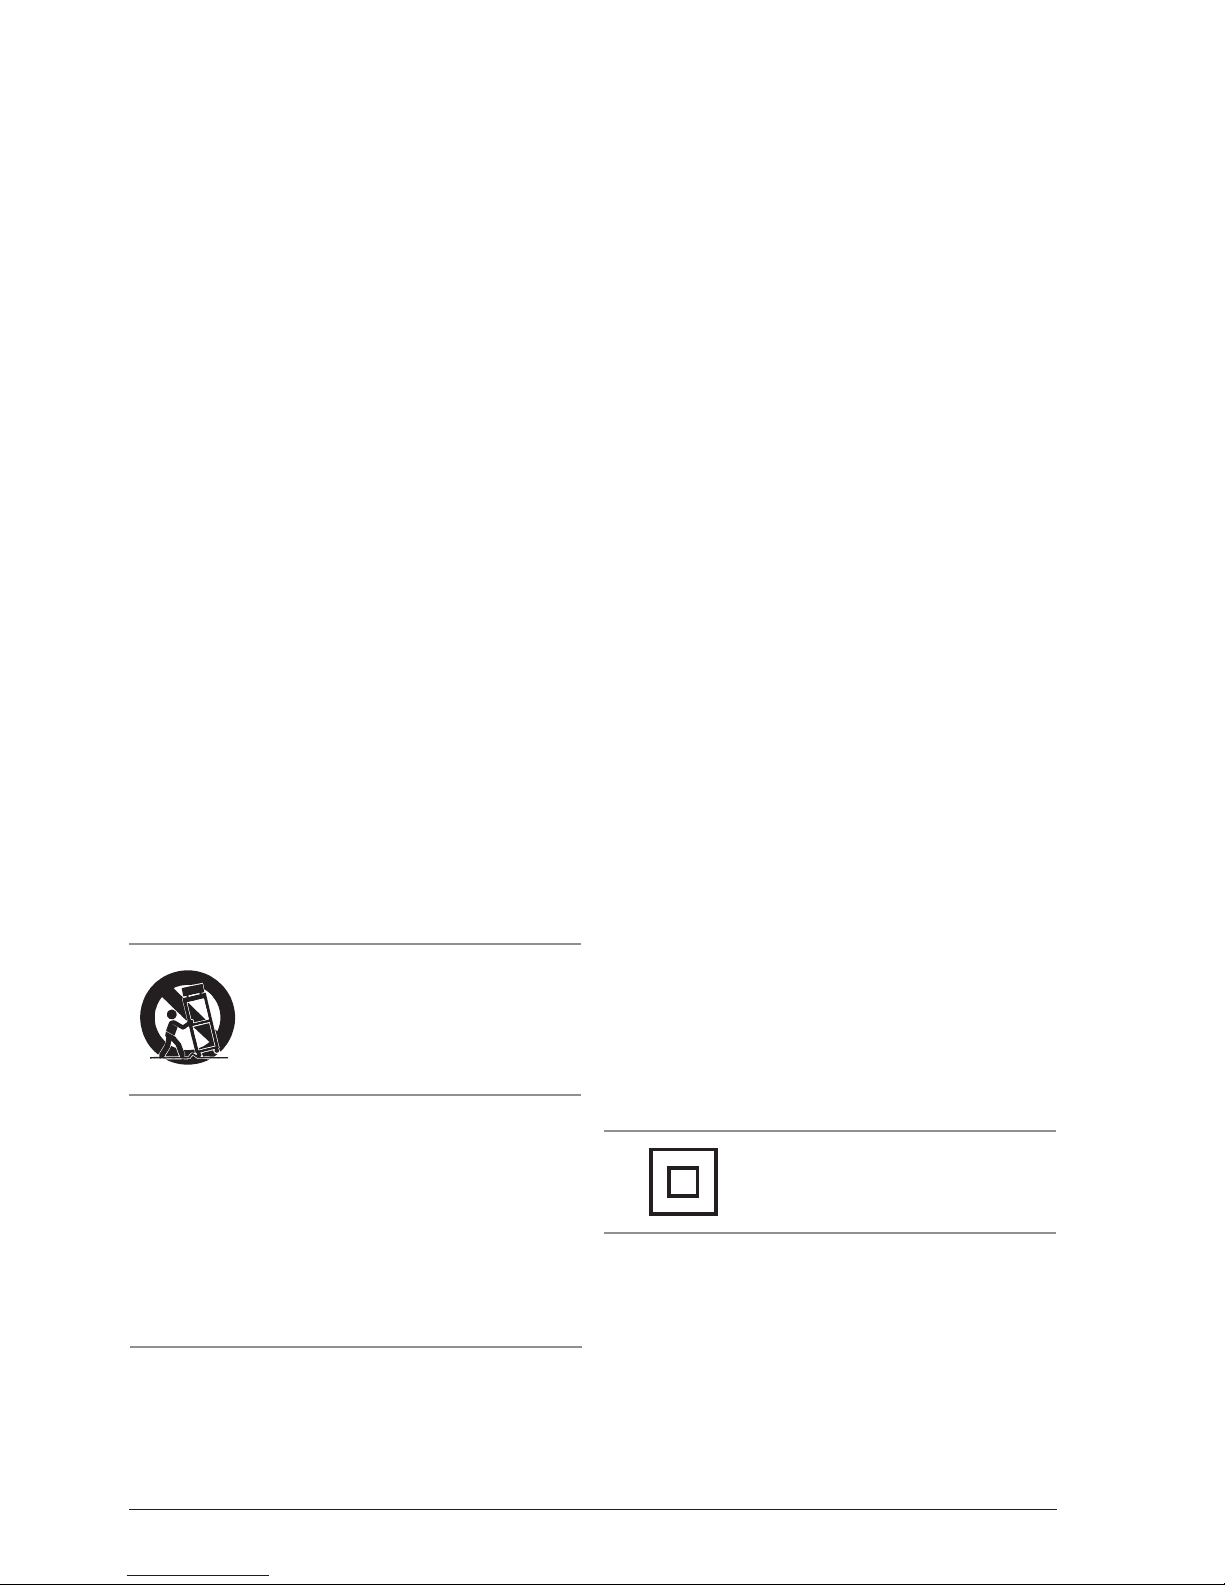
This symbol indicates that this
product incorporates double insulation
between hazardous mains voltage
and user accessible parts.
Use only with a cart, stand, tripod,
bracket, or table specied by the
manufacturer, or sold with the apparatus.
When a cart is used, use caution when
moving the cart/apparatus combination to
avoid injury from tip-over.
Special note: When placing your unit on a
lacquered or natural nish, protect your furniture
with a cloth or other protective material.
Page 4
4
• 2.1 channel stereo sound
• FM Radio (PLL)
• Station memory presets (10 FM)
• Built-in FM wire antenna
• Subwoofer output
• 2 pairs stereo RCA audio inputs
• 3.5mm audio input
• Bass controls
• Treble controls
• Digital volume control
• Built-in subwoofer
• Built-in stereo speakers
• Wall mountable
• Full-function remote
• Metal speaker grill
• Negative LCD display with
white backlight
• Digital clock
• Sleep timer
• AC power: built-in AC power cable
• Remote control: requires two
AAA batteries (included)
• RCA stereo audio cable
• Wall-mount hardware and instructions
• Warranty
• User’s guide
Sound Bar
Features
Included
Page 5
Customer Support: 1-888-999-4215 5
Table of Contents
Sound Bar . . . . . . . . . . . . . . . . . . . . . . . . . . . . . . . . . . . . . . . . . . . . . . . . . . . . . . . . . . . . . . . . . . . . . . . . 4
Features
Included
Table of Contents . . . . . . . . . . . . . . . . . . . . . . . . . . . . . . . . . . . . . . . . . . . . . . . . . . . . . . . . . . . . . . . . . . 5
Introduction . . . . . . . . . . . . . . . . . . . . . . . . . . . . . . . . . . . . . . . . . . . . . . . . . . . . . . . . . . . . . . . . . . . . . . 6
Setup . . . . . . . . . . . . . . . . . . . . . . . . . . . . . . . . . . . . . . . . . . . . . . . . . . . . . . . . . . . . . . . . . . . . . . . . . . . . . 8
Power
Remote
Setup . . . . . . . . . . . . . . . . . . . . . . . . . . . . . . . . . . . . . . . . . . . . . . . . . . . . . . . . . . . . . . . . . . . . . . . . . . . . . 9
Setting the Clock
Tuning the FM Radio
Saving a Radio Station as a Preset
Playing Saved Radio Stations
Operations . . . . . . . . . . . . . . . . . . . . . . . . . . . . . . . . . . . . . . . . . . . . . . . . . . . . . . . . . . . . . . . . . . . . . . . 10
Using the Stereo RCA Inputs
3.5mm Audio Input
Mounting . . . . . . . . . . . . . . . . . . . . . . . . . . . . . . . . . . . . . . . . . . . . . . . . . . . . . . . . . . . . . . . . . . . . . . . . 11
Mounting the Unit to the Wall
Company Information . . . . . . . . . . . . . . . . . . . . . . . . . . . . . . . . . . . . . . . . . . . . . . . . . . . . . . . . . . . . 12
International Support
Contact Information
Green Initiative
Page 6
6
Introduction
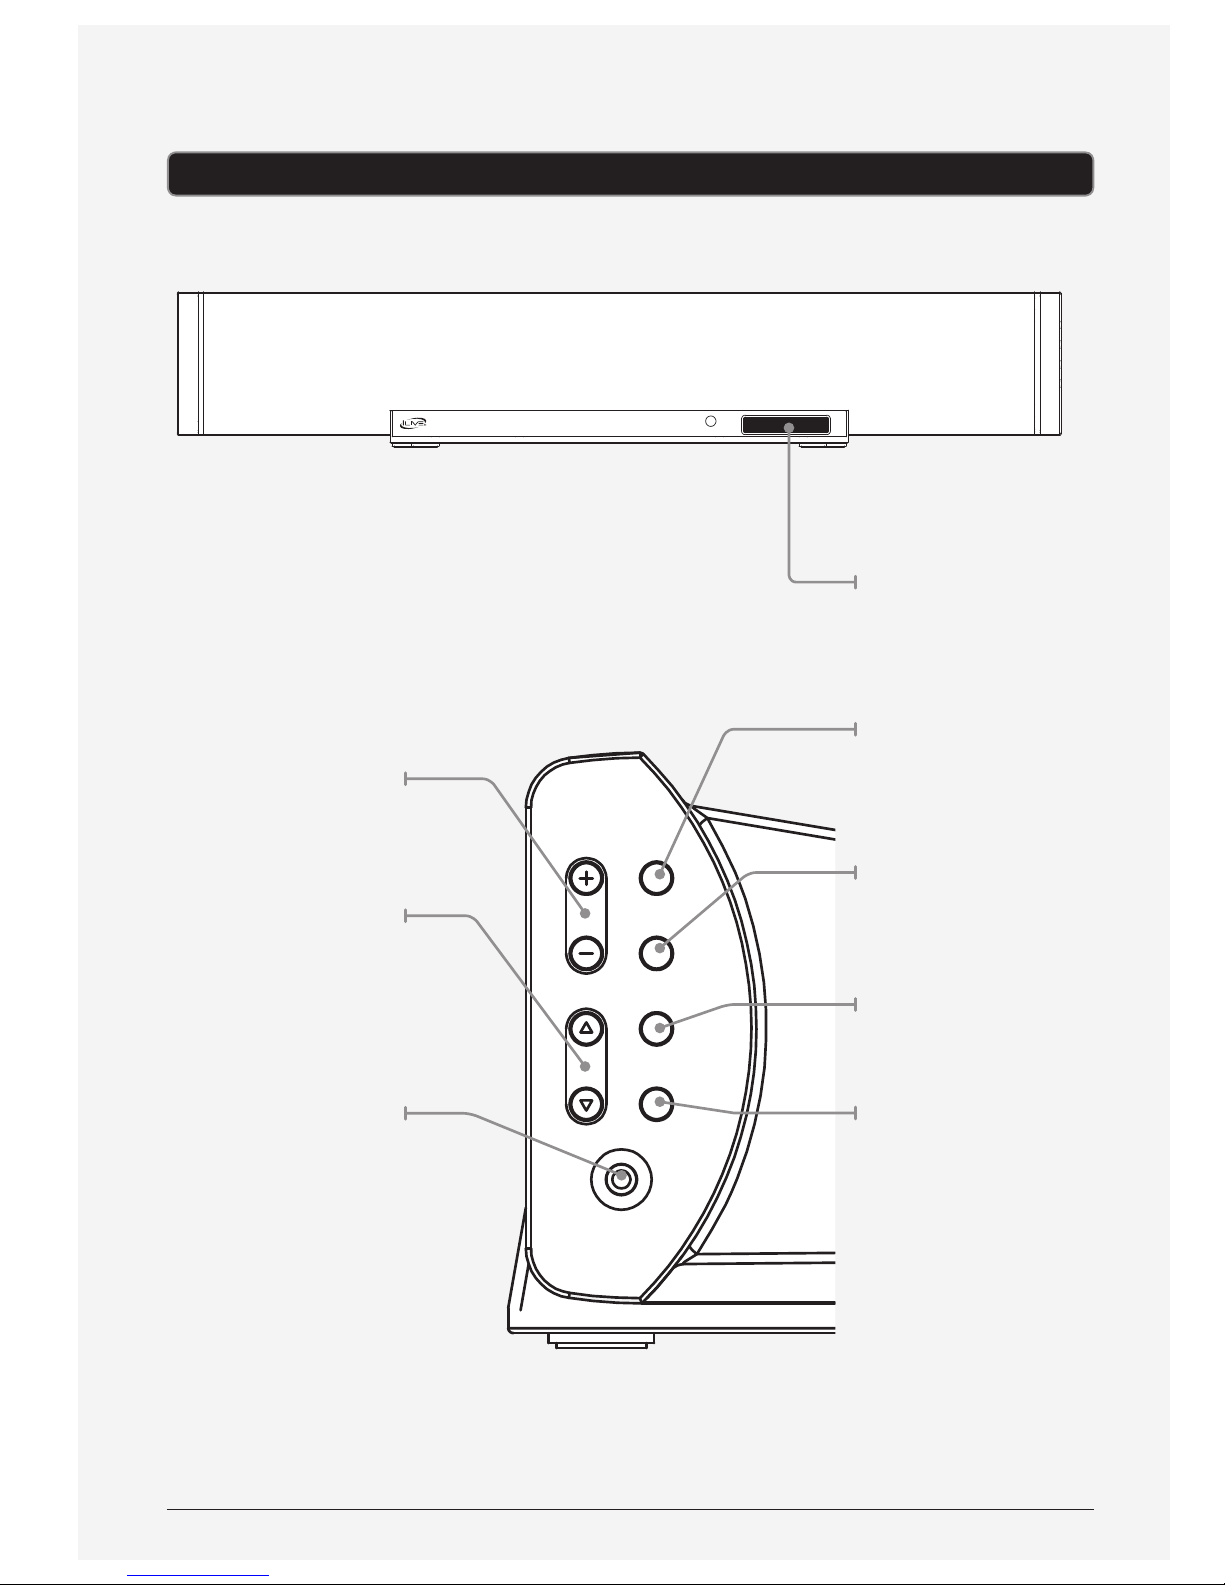
VOLUME POWER
SOURCE
MUTETUNING
DISPLAY
LINE-IN
Power
Press to turn the unit
on or o.
Source
Press repeatedly
to switch between
AUX 1, AUX 2, LINE
IN and FM Modes.
Mute
Press to turn o all
sound.
Display
Displays the clock.
Volume
Press to increase or
decrease the volume.
Tuning
Press to tune the FM
radio in FM Mode.
Press to adjust
the time when
setting the clock.
3.5mm Audio Input
Requires a 3.5mm
audio cable (not
included).
LCD Display
Page 7
Customer Support: 1-888-999-4215 7
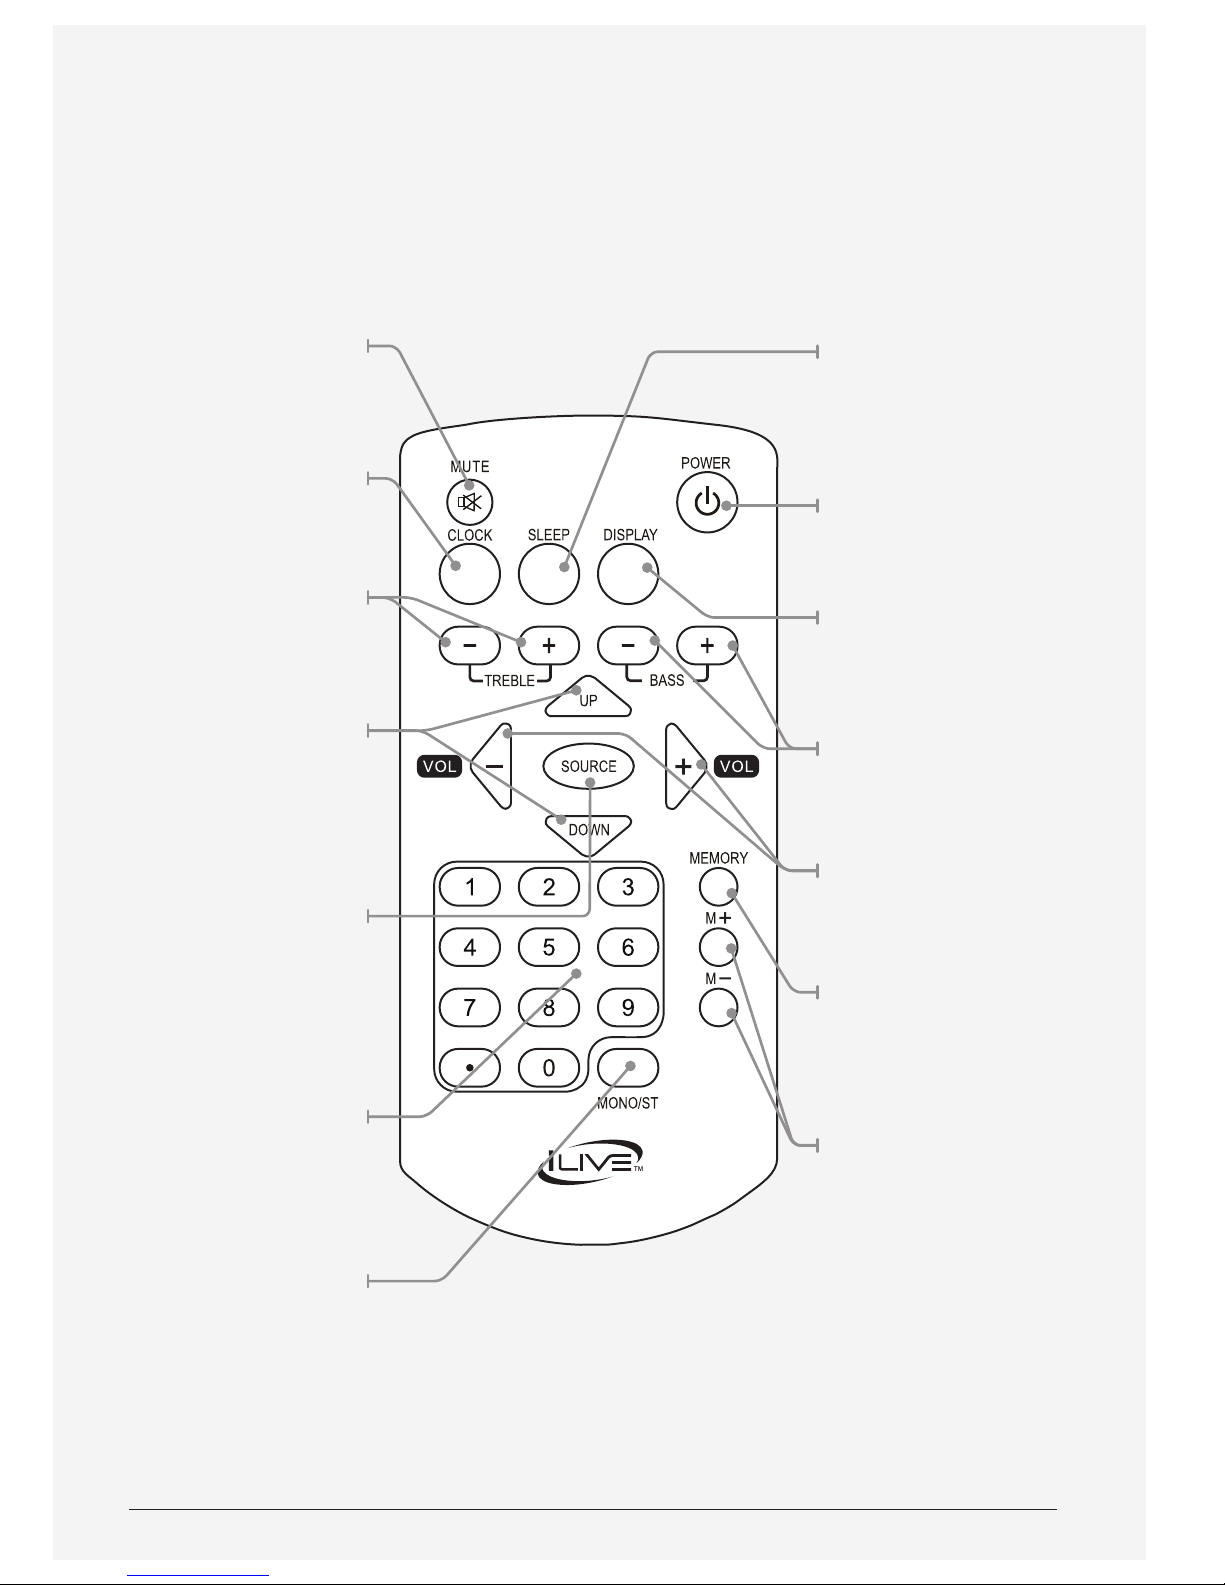
Sleep
With the unit
powered on, press
repeatedly to set
the sleep timer.
Power
Press to turn the
unit on or o.
Display
Press to display the
clock in FM, AUX,
or LINE IN Mode.
Bass
Press to adjust
the bass.
Volume
Press to increase or
decrease the volume.
Memory
Press to save an
FM radio station
as a preset.
M+/M-
Press to cycle
through preset FM
radio stations.
Mute
Press to turn
o all sound.
Clock
With the power
o, press to begin
setting the clock.
Treble
Press to adjust
the treble.
Up/Down
Press to tune the FM
radio in FM Mode.
Press to adjust
the time when
setting the clock.
Source
Press repeatedly
to switch between
AUX 1, AUX 2, LINE
IN and FM Modes.
Number Keypad
In FM Mode, use the
number keypad to
tune the FM radio
to a specic station.
Mono/ST
Press to switch
between Mono
and Stereo FM
radio modes.
Page 8
8
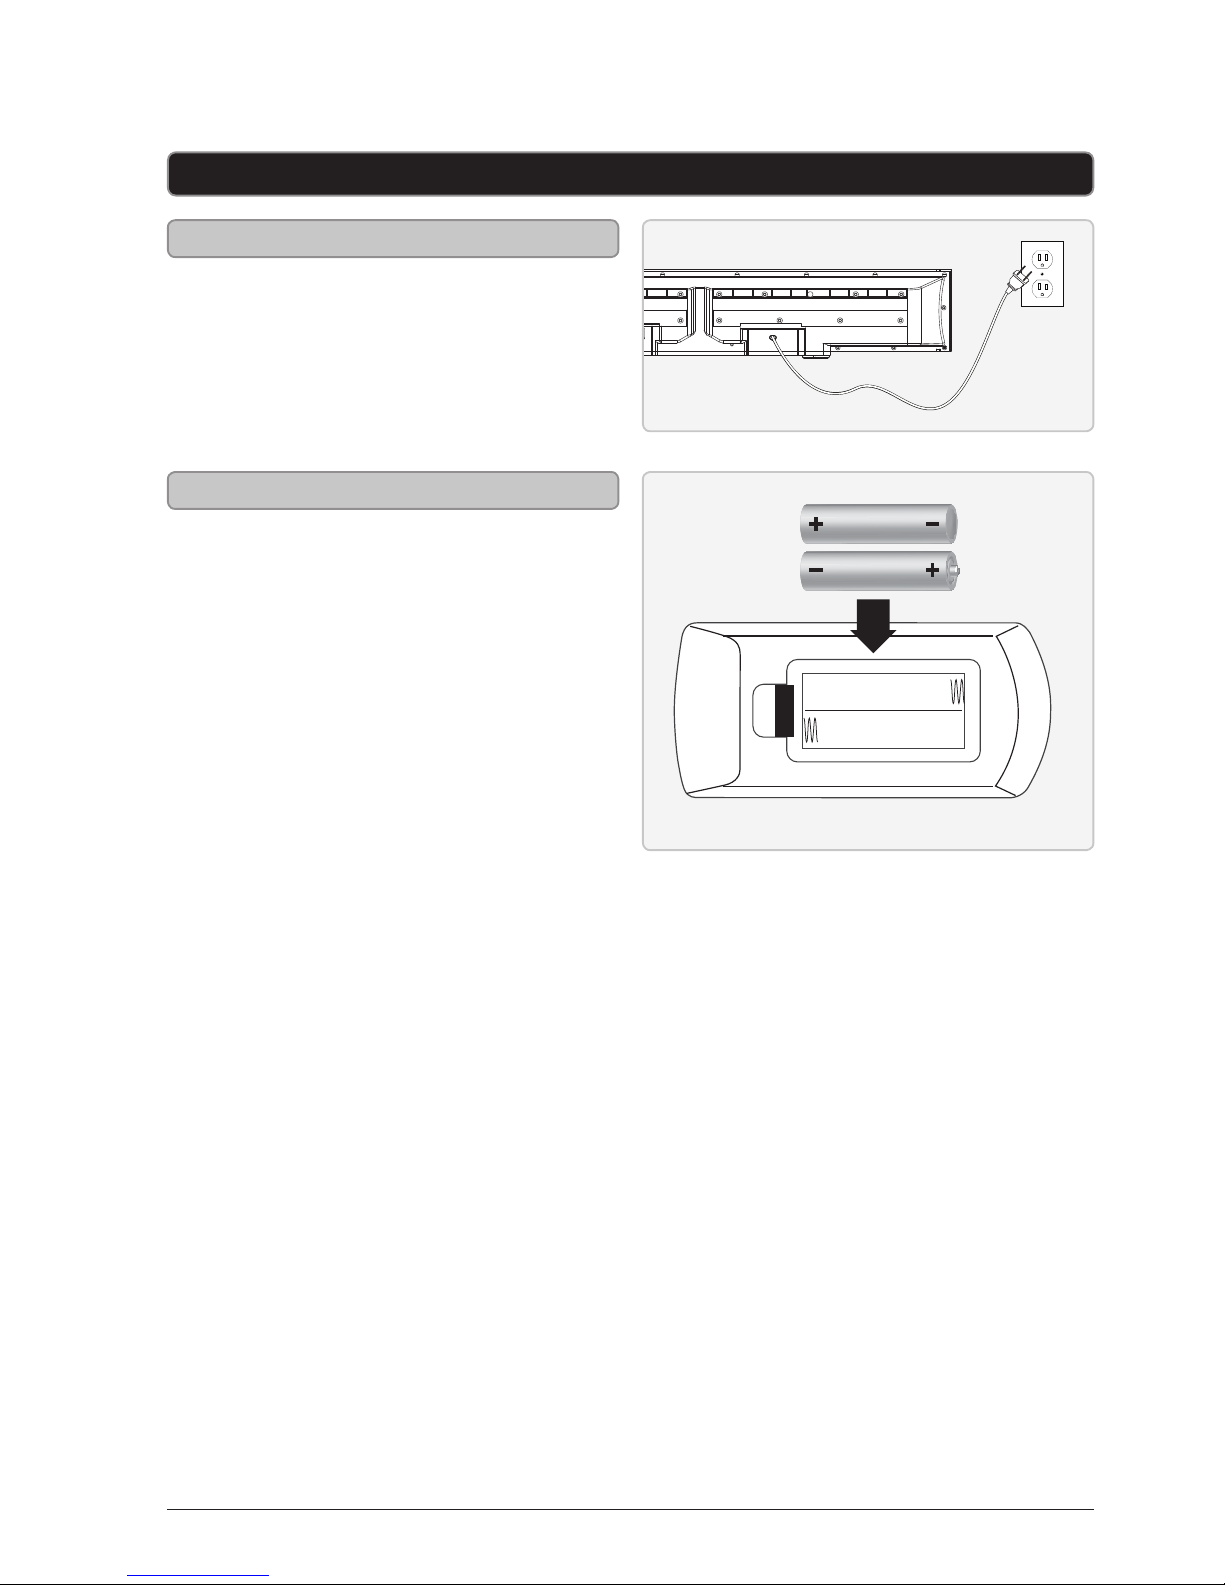
AC power: built-in AC power cable
Requires 2 AAA batteries (included)
Power
Remote
AC ~ / CA ~
AAA Battery
AAA Battery
Setup
Page 9
Customer Support: 1-888-999-4215 9
Setup
1. With the unit powered o,
press the Clock button.
The hour will begin to blink.
2. Press the Up/Down buttons on
the remote or the Tuning buttons
on the unit to adjust the hour.
3. Press the Clock button
to save the hour.
The minutes will begin blinking
4. Press the Up/Down buttons on the
remote or the Tuning buttons on
the unit to adjust the minutes.
5. Press the Clock button to save the
minutes and nish setting the clock.
Setting the Clock
1. Press the Power button
to turn the unit on.
2. Press the Source button repeatedly
to switch the unit to FM Mode.
FM Mode will be indicated by
the word FM and the current
frequency on the LCD display.
3. Hold the Up/Down buttons on
the remote or the Tuning buttons
on the unit to scan for the next
available station, or enter the desired
frequency on the Number Keypad.
Tuning the FM Radio
1. Follow the instructions for
Tuning the FM Radio.
2. Once the desried frequency is
reached, press the Memory button.
3. Press the M+ or M- buttons
to select a preset.
Up to 10 presets can be saved
at one time (M 01 - M 10).
4. Press the Memory button to
save the current radio station
to the selected preset.
Saving a Radio Station as a Preset
1. Follow the instructions for Saving
Radio Stations to Memory.
2. Press the M+ or M- buttons to
scroll through saved stations.
Playing Saved Radio Stations
Page 10
10
Operations
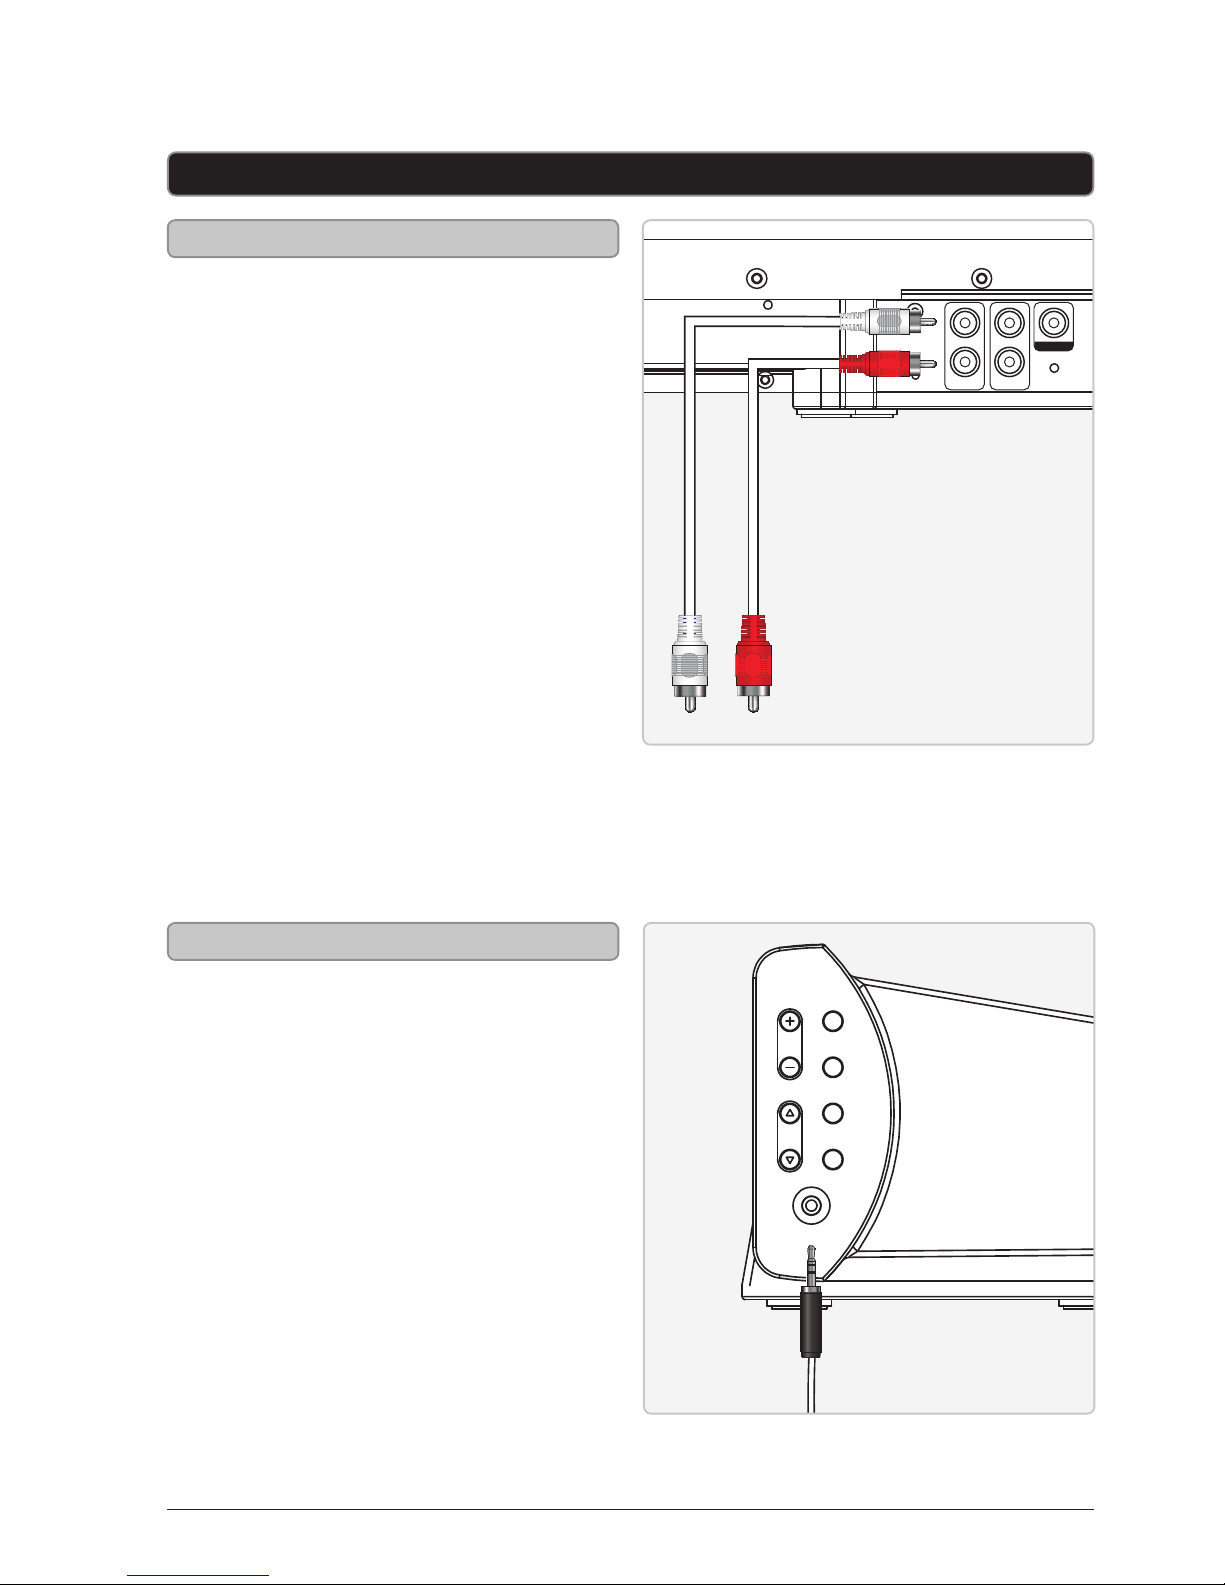
When connecting two products using
an RCA Cable, match the colored ports
with the same colored connection.
1. Connect the RCA Cable to the
Stereo RCA Inputs located on the
back of the unit, and to the audio
outputs on the television.
2. Press the Power button to
power on the unit.
3. Press the Source button and
select the input used.
Either AUX 1 or AUX 2.
4. Audio played through the
television will now be heard
through the speakers.
Additional devices such as a DVD
player or game system may also be
connected to the second set of audio
inputs using the steps above.
AC ~ / CA ~
RESET
SUB OUT
AUX IN 1
FM ANT
AUX IN 2
L
R
L
R
AUX IN 1 AUX IN 2
1. Plug one end of a 3.5 mm audio
input cable into the 3.5 mm
Audio Input on the unit.
3.5 mm audio input cable not included.
2. Plug the other end of the cable into the
audio output/headphone output on
an MP3 Player or other audio source.
3. Press the Power button to
power the unit on.
4. Press the Source button repeatedly
to switch the unit to LINE IN.
5. Audio played through the
connected device will now be
heard through the speakers.
3.5mm Audio Input
Using the Stereo RCA Inputs
VOLUME POWER
SOURCE
MUTETUNING
DISPLAY
LINE-IN
Page 11
Customer Support: 1-888-999-4215 11
Mounting
Mounting the Unit to the Wall
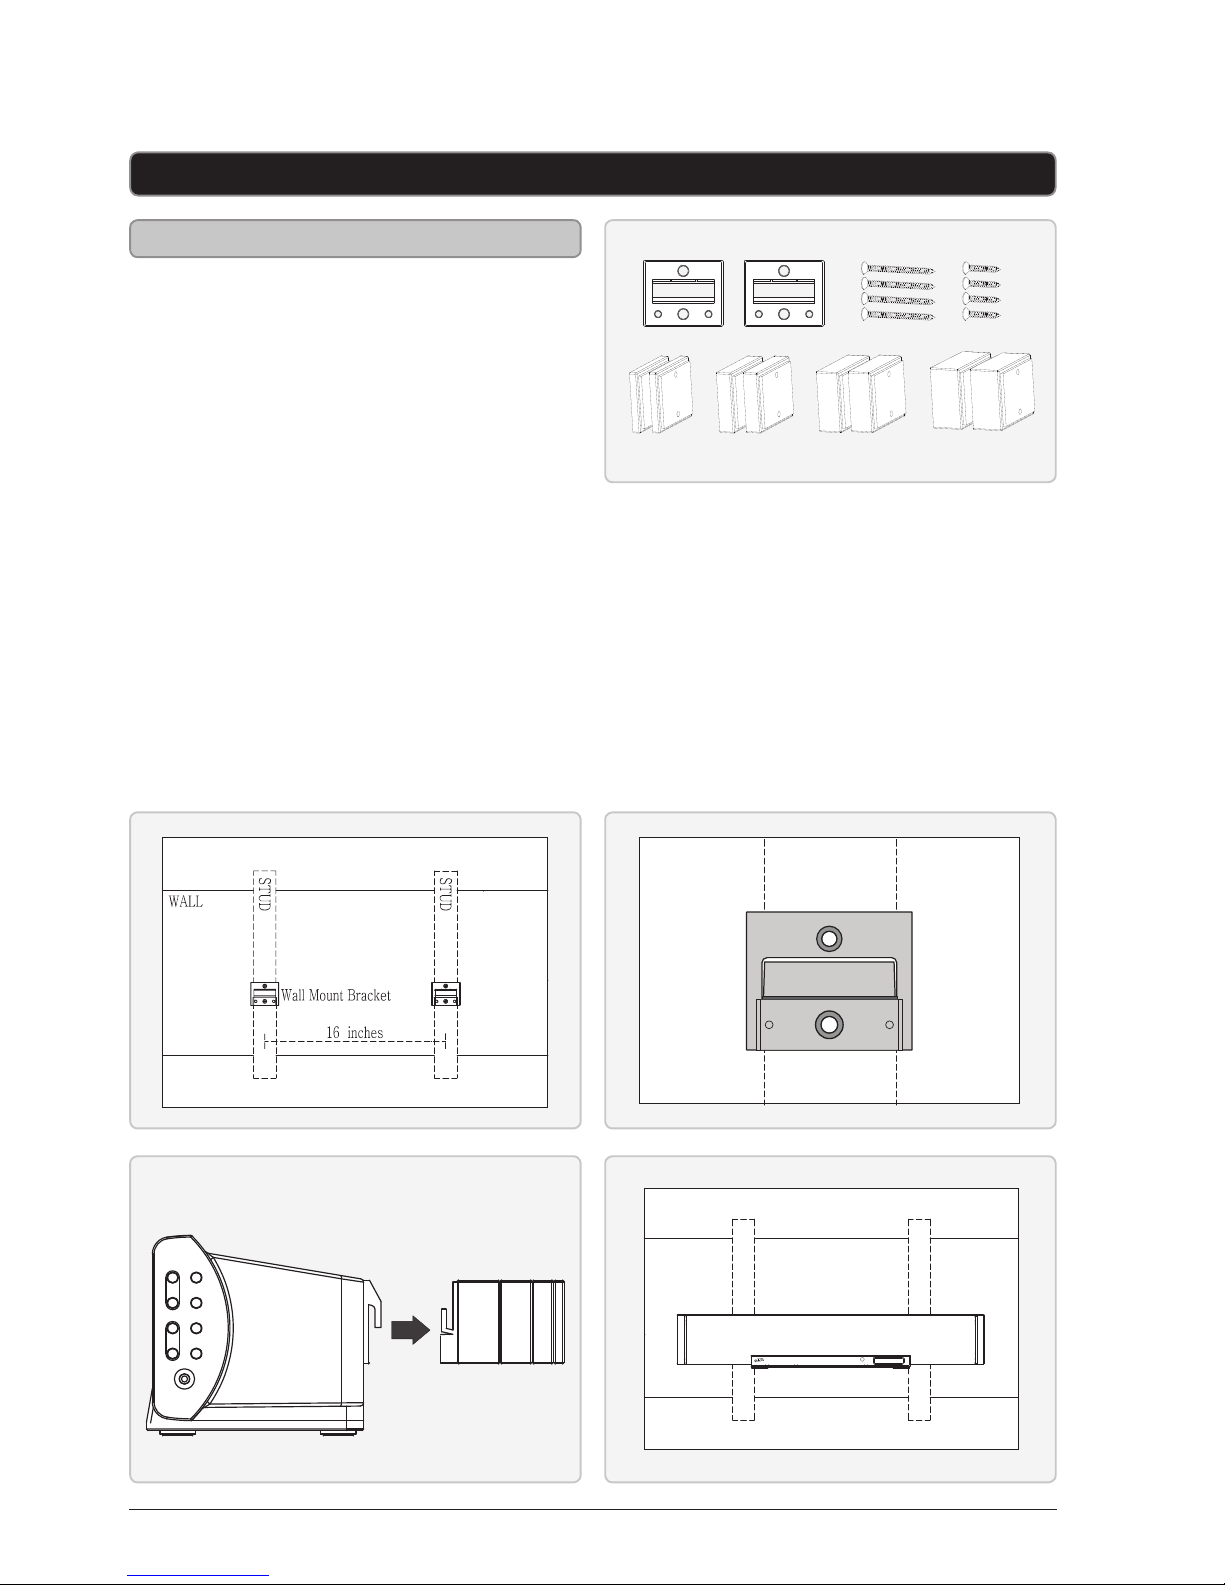
1. Decide whether or not to use spacers
behind the wall mount brackets.
2. Locate 2 studs in the wall.
Most houses have the studs
spaced on 16 inch centers.
3. Screw the wall mount brackets and any
spacers used into two parallel studs
using two screws in each bracket.
4. Be sure that the wall mount brackets
are level with each other.
5. Hang the unit onto the secured
wall mount brackets.
To ensure a reliable and sturdy
installation, please consult a professional
before mounting the unit to the wall.
The included spacers can be used in
combination to adjust unit’s distance from
the wall in order to match a mounted FlatPanel TV. The spacers are 1/4”, 1/2”, 3/4”, 1”.
If spacers are in place, use the long screws. If
spacers are not needed, use the short screws.
Page 12
Copyright © 2011 Digital Products International (DPI, Inc.) | All other trademarks appearing herein are
the property of their respective owners. Specications are subject to change without notice
Environmental Commitment to ‘Protect
for Today and Sustain for Tomorrow’
2009 marked the ocial launch of
DPI, Inc.’s corporate campaign for
a greener and cleaner world. DPI is
building upon environmental initiatives
introduced at all of their facilities to
help formulate and sustain signicant
and important conservation eorts
within its manufacturing and marketing
communities. In addition to targeting and
selecting energy ecient product features,
and structuring ‘green oce’ procedures,
other initial program eorts include:
• Reduction of all packaging sizes
• Recyclable plastics for clamshell
packages, with a plan to eventually
replace plastic with recyclable paper
• Recycled ber board in place of
the polyfoam in packing boxes
• Recycled plastics in place of the virgin
material in product construction
To download this User’s Guide in
English, Spanish, or French, visit the
support section at www.ilive.net.
Para transferir esta guía de usuario
en inglés, español, o francés, visite la
sección de la ayuda en www.ilive.net.
Pour télécharger ce guide de l’utilisateur
en anglais, espagnol, ou français, visitez
la section de soutien chez www.ilive.net.
Phone: 1-888-999-4215
Email: [email protected]
Parts Email: [email protected]
Website: www.ilive.net
Green InitiativeInternational Support
Contact Information
Company Information
 Loading...