How it Works
Log In / Sign Up
Buy Points
How it Works
FAQ
Contact Us
Questions and Suggestions
Users
Ik Multimedia
Loading...
I
iLoud Micro Monitor
4
iLoud Micro Monitor - White
iLoud MTM
3
iLoud MTM MK II
IPIRIGKEYS2I
iRig
2
iRig 2
3
iRig Acoustic
2
iRig Acoustic Stage
4
iRig Blue Board
3
iRig BlueTurn
3
IRIG HD
iRig HD 2
2
iRig HD-A
2
iRig HD X
iRig Keys
3
iRig Keys 2
iRig Keys 25
2
iRig Keys 2 Mini
iRig Keys 2 Pro
2
iRig Keys 37
2
iRig Keys 37 Pro
2
iRig Keys I/O
3
iRig Keys I/O 25
2
iRig Keys I/O 49
4
iRig Keys Mini
2
iRig Keys Pro
iRig MIC
3
iRig Mic Cast
iRig Mic Cast 2
3
iRig Mic Cast HD
3
iRig Mic Field
2
iRig Mic HD
iRig Mic HD2
iRig Mic HD-A
iRig Mic Lav
3
iRig Micro Amp
3
iRig Mic Studio
iRig Mic Studio XLR
iRig Mic Video
2
iRig MIDI 2
3
iRig MIX
2
IRIG-NANO-AMP
2
irig pads
2
iRig PowerBridge
2
iRig Pre
2
iRig Pre 2
2
iRig Pre HD
3
iRig PRO
iRig PRO Duo
2
iRig Pro Duo I/O
2
iRig Pro I/O
2
iRig Pro Quattro I/O
iRig Stomp
2
iRig Stomp I/O
2
iRig Stream
3
iRig Stream Mic Pro
iRig Stream Pro
2
iRig Stream Solo
2
iRig UA
2
iRig USB
iRig Voice
3
S
Stealth Pedal CS
Stealth Plug CS
T
ToneX One
2
ToneX Pedal
2
T-Racks 5
U
Uno Drum
2
UNO Synth
5
Uno Synth Pro
7
Uno Synth Pro Desktop
2
Uno Synth PRO X
4
Z
Z-TONE Buffer Boost
2
Z-TONE DI
Loading...
Loading...
Nothing found
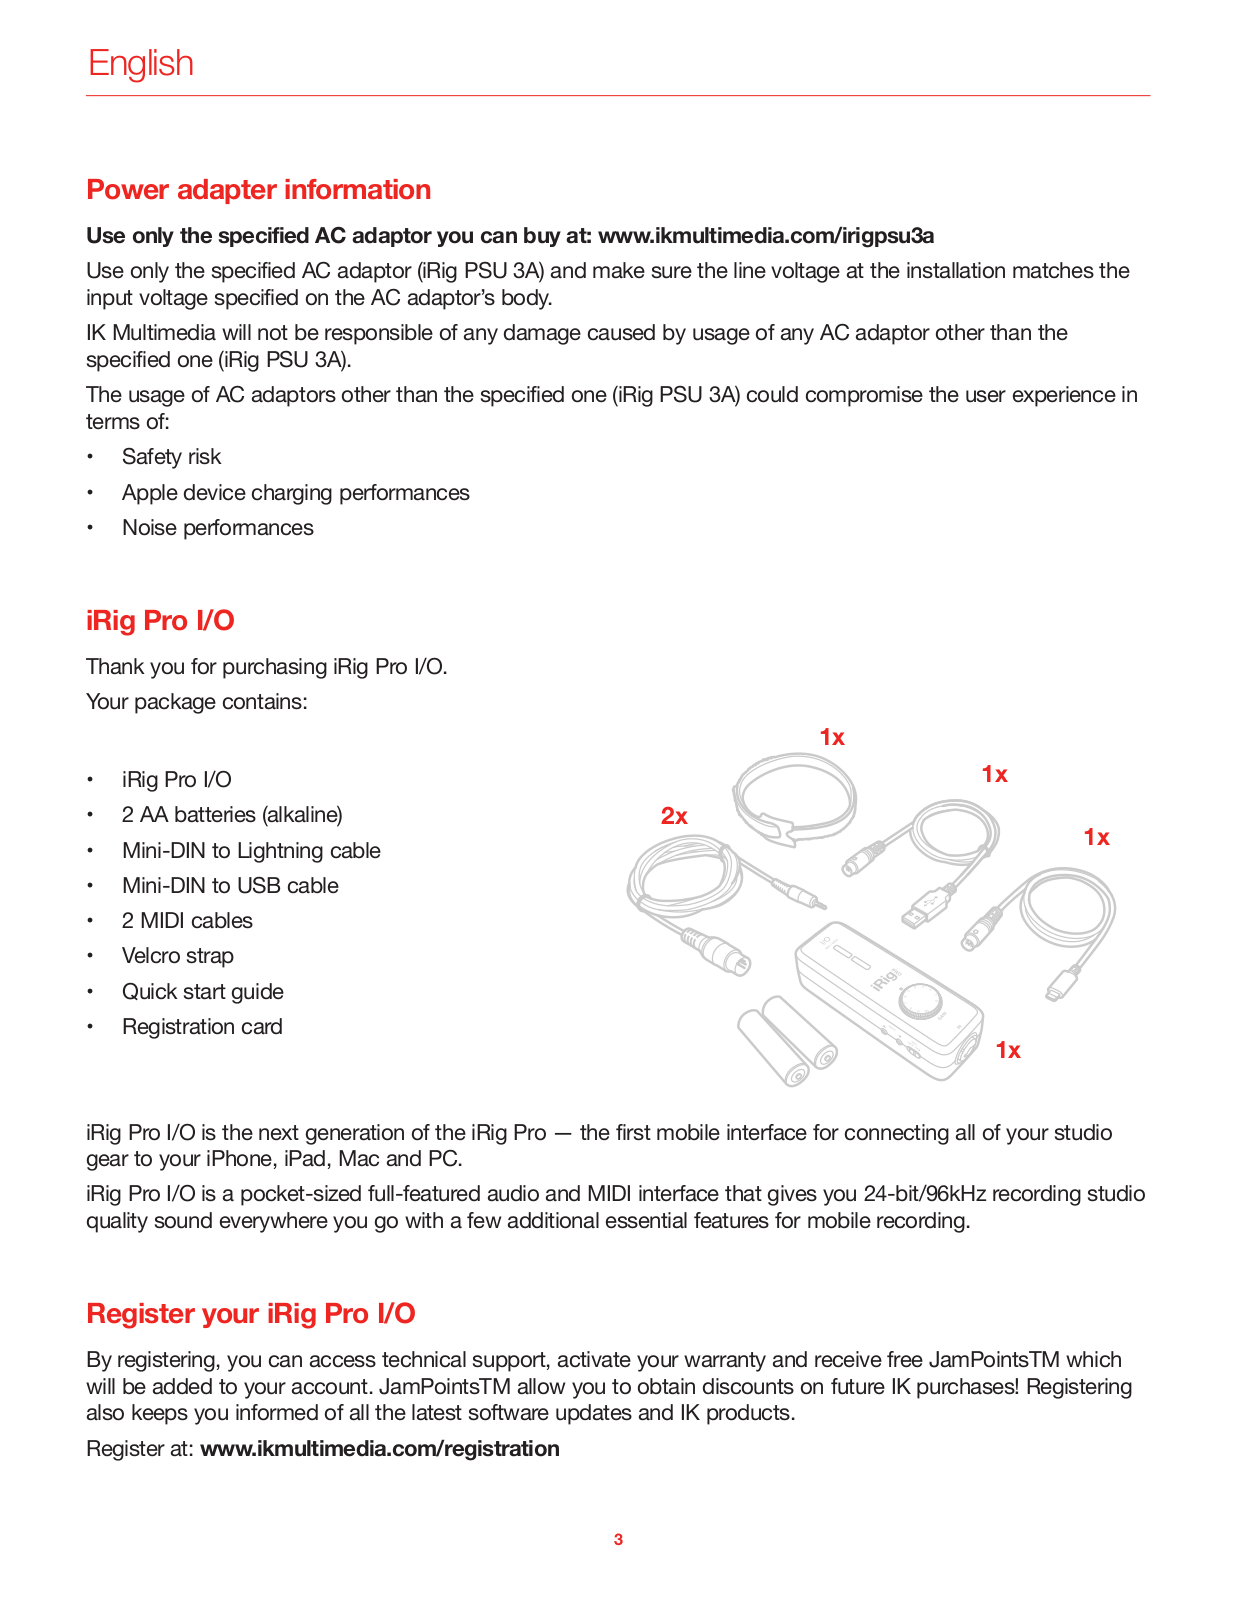
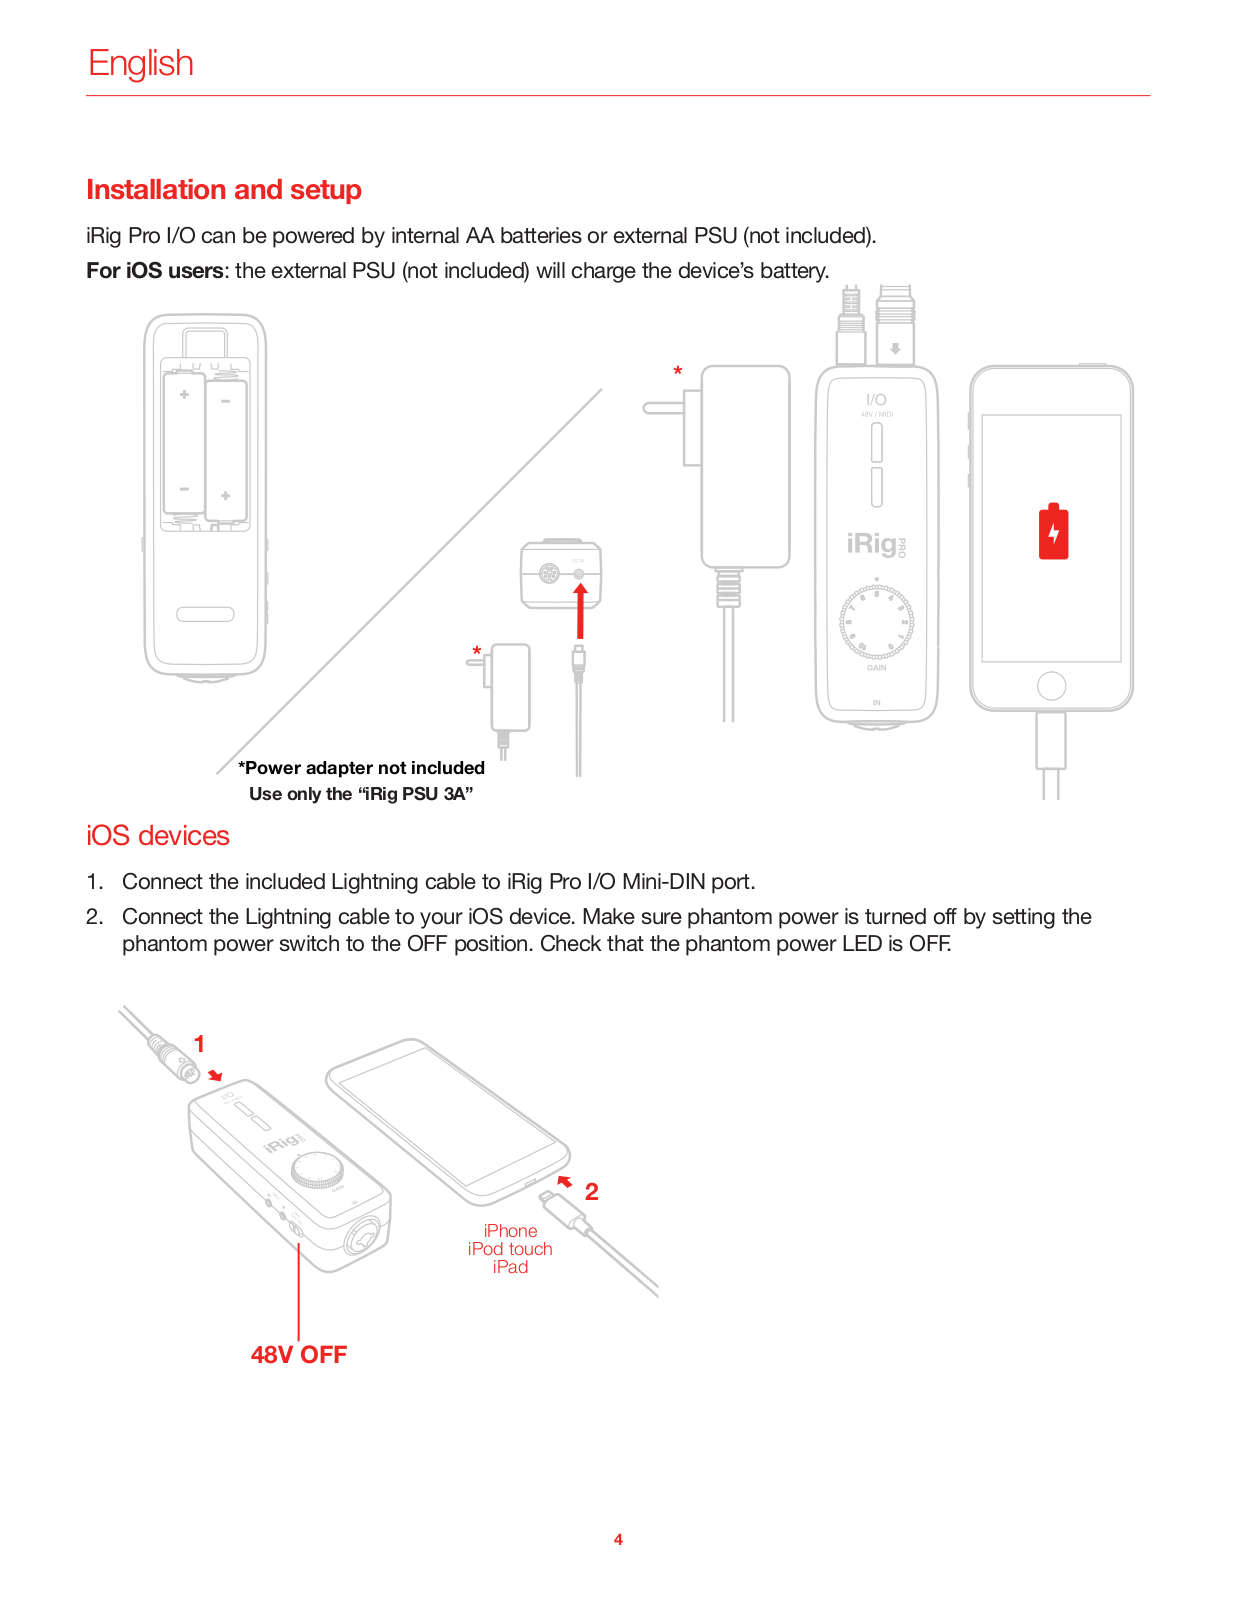
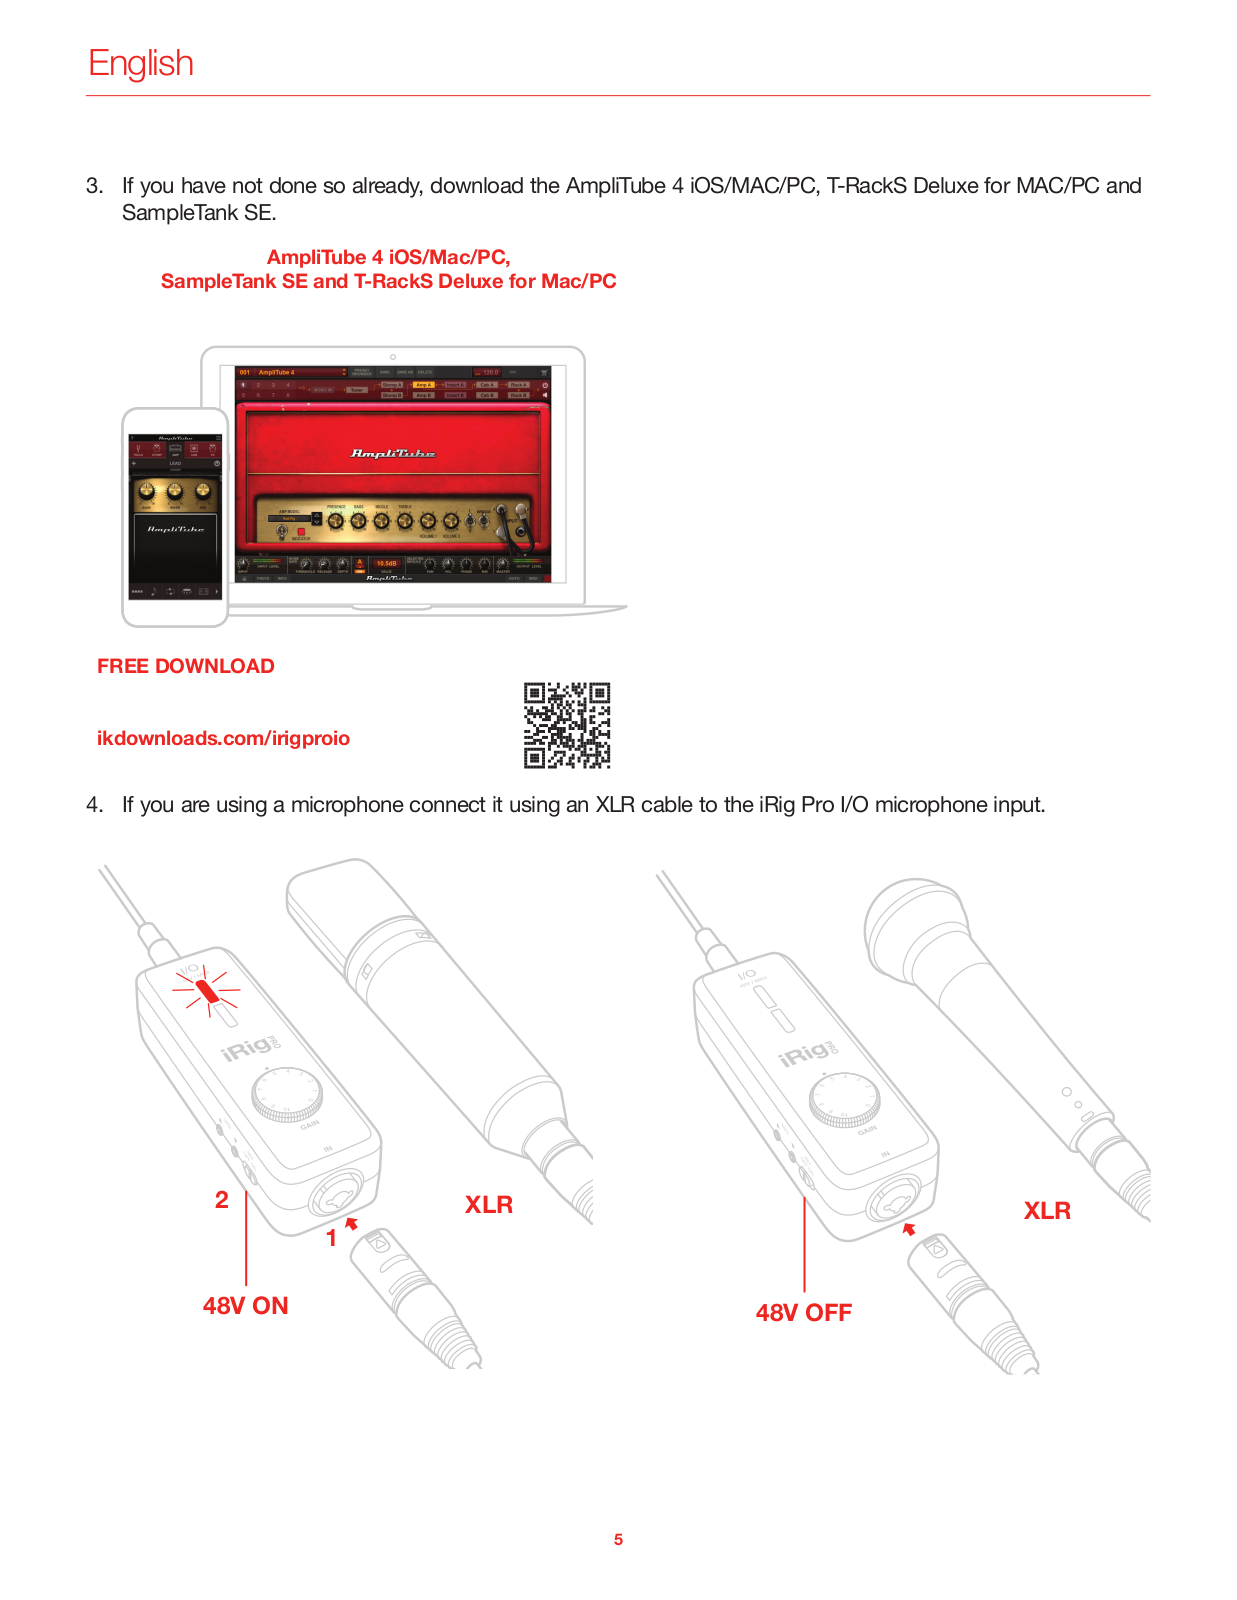
iRig Pro I/O
iRig_PRO_IO_Quick_Start_Guide.pdf
20 pgs
3.15 Mb
0
USER MANUAL
14 pgs
2.86 Mb
0
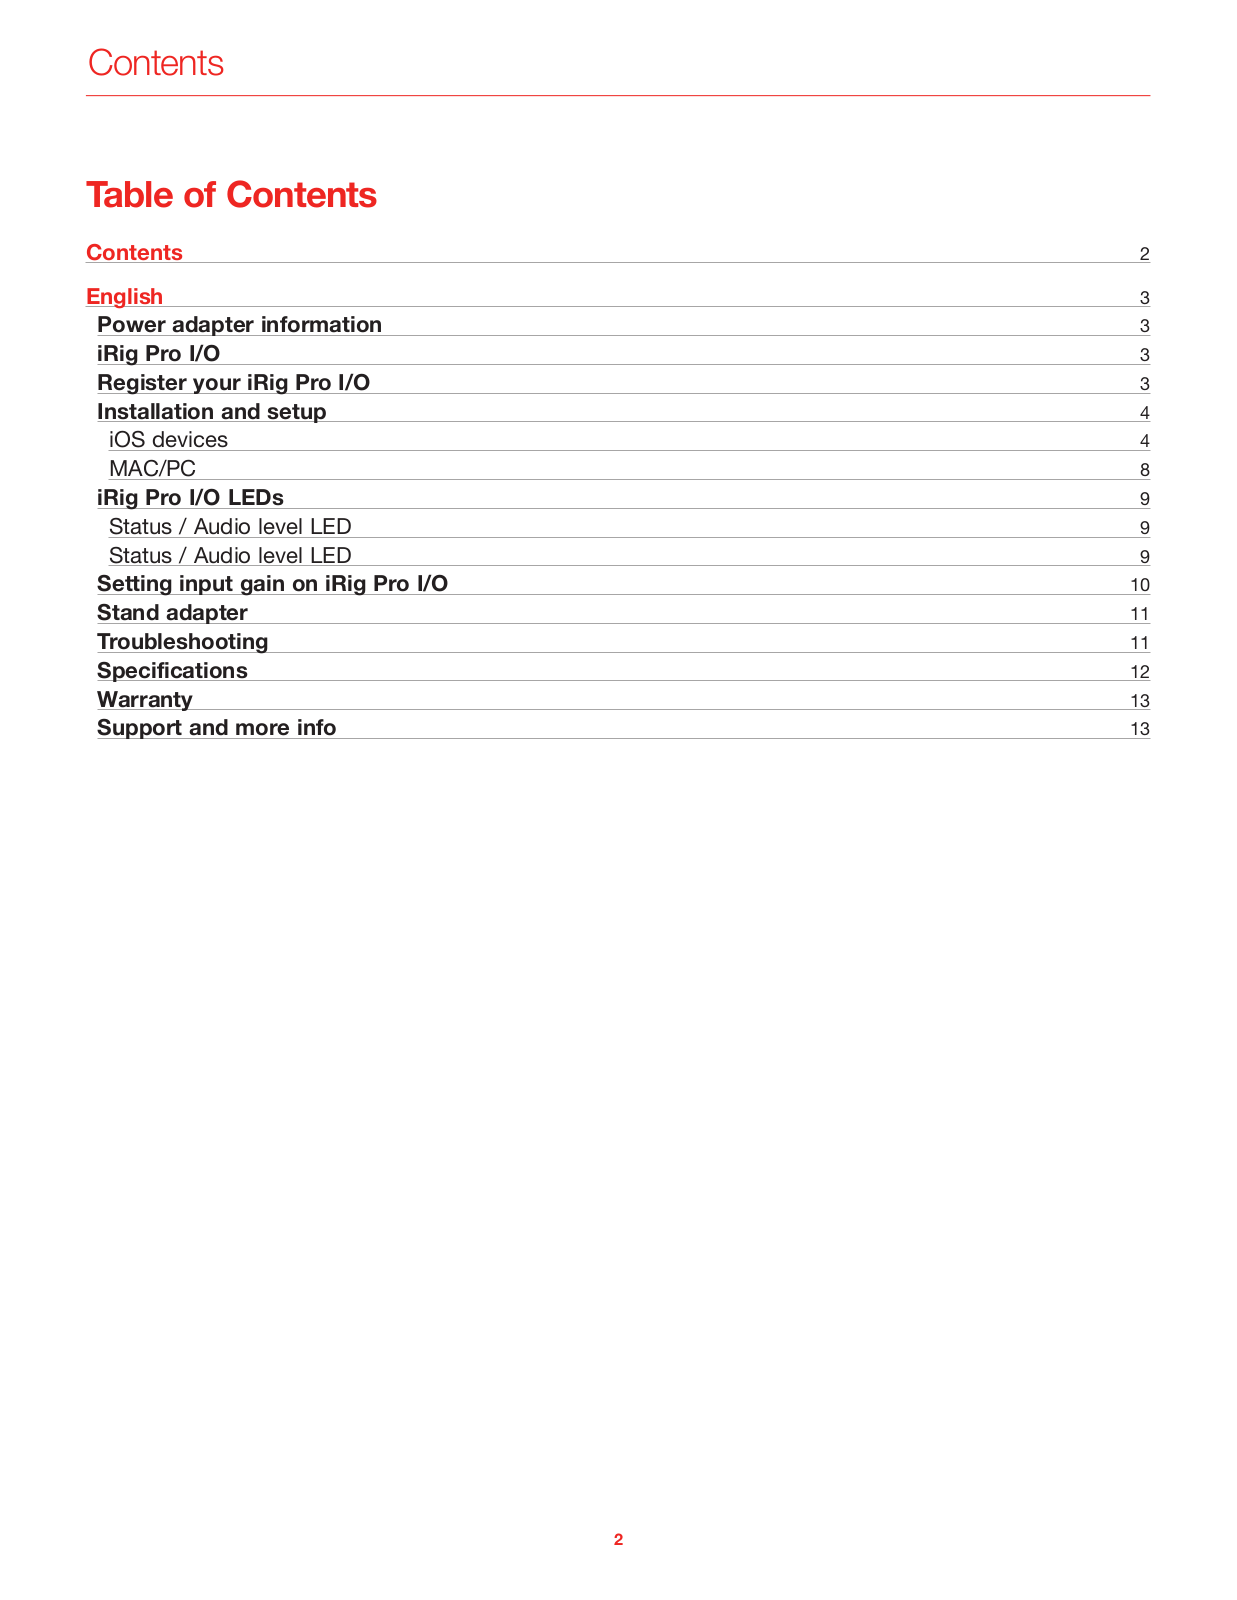
Table of contents
Loading...
Ik Multimedia iRig Pro I/O USER MANUAL
...
Ik Multimedia USER MANUAL
Download
Specifications and Main Features
Frequently Asked Questions
User Manual
Download
Page 1
Page 2
Page 3
Page 4
Page 5
Page 6
Page 7
Page 8
Page 9
Page 10
Page 11
Page 12
Page 13
Page 14
Loading...
+
hidden pages
Unhide
You need points to download manuals.
1 point = 1 manual.
You can buy points or you can get point for every manual you upload.
Buy points
Upload your manuals