

Universal MIDI Interface
USER MANUAL

Contents
Table of Contents
Contents 2
English 3
iRig MIDI 2 3
Register your iRig MIDI 2 3
Installation and setup 4
iOS devices 4
Mac 8
Using iRig MIDI 2 9
MIDI Thru 9
Specifications 10
Warranty 10
Support and more info 10
2

English
iRig MIDI 2
Thank you for purchasing iRig MIDI 2.
Your package contains
• iRig MIDI 2
• Lightning to Mini-DIN cable
• USB to Mini-DIN cable
• Quick Start Guide
• Registration Card
1x
1x
1x
iRig MIDI 2 is the sequel to iRig MIDI, IK’s popular MIDI interface for iOS. iRig MIDI 2 is equipped with
detachable cables and works with all generations of iOS devices via its included Lightning cable (or through an
optional 30-pin cable). It also comes with a USB cable for Mac and PC use. iRig MIDI 2 sports standard-sized
MIDI IN, OUT, and THRU jacks, and its pocket-sized form factor gives it maximum portability. Its cables are
bumper friendly, so they can be easily plugged into devices with their cases on. Its convenient THRU port allows
for simultaneous control of virtual instruments on your iOS device and external traditional hardware synthesizers,
all from the same controller and at the same time. Convenient MIDI IN and OUT activity LEDs allow for quick
MIDI setup and monitoring.
Register your iRig MIDI 2
By registering, you can access technical support, activate your warranty and receive free JamPoints™ which will
be added to your account. JamPoints™ allow you to obtain discounts on future IK purchases! Registering also
keeps you informed of all the latest software updates and IK products.
Register at: www.ikmultimedia.com/registration
3
English
Installation and setup
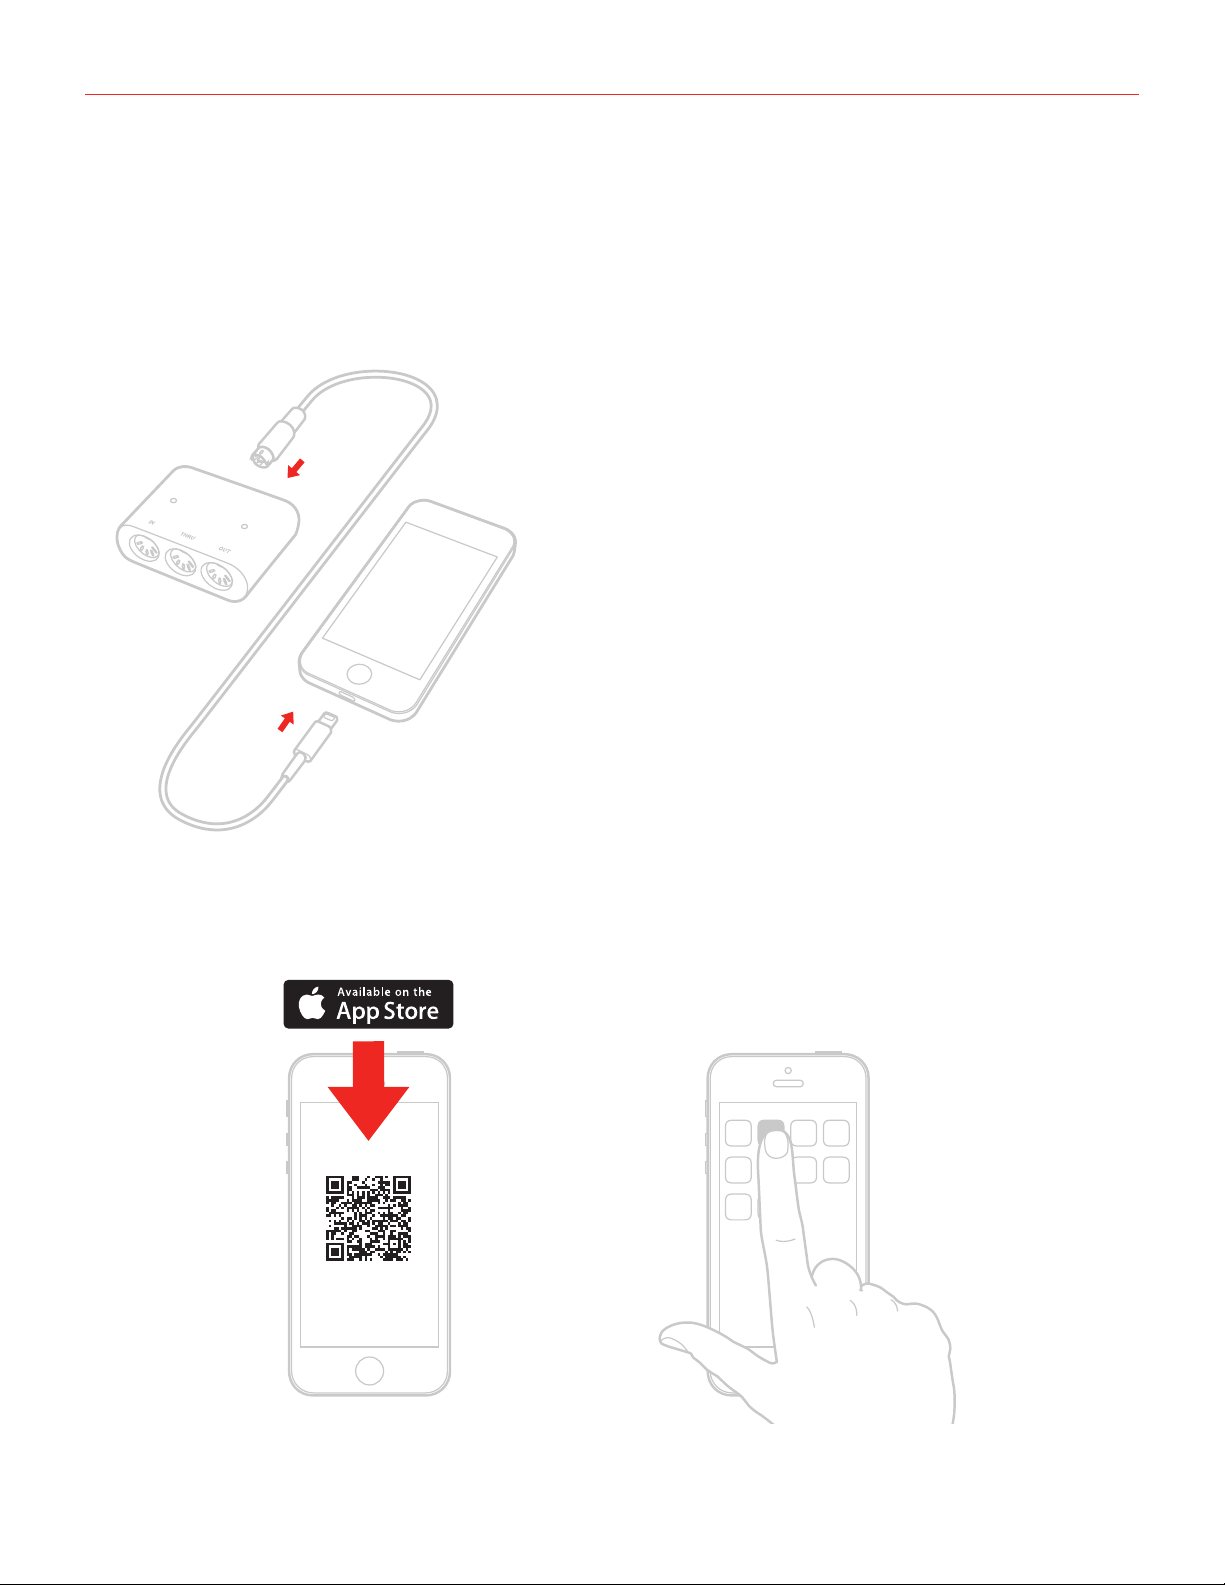
iOS devices
1. Connect the included Lightning cable to iRig MIDI 2
2. Connect the Lightning cable to the connector on your iOS device
1
2
3. If you have not done so already, download the SampleTank® FREE or iGrand Piano™ from the App Store.
SampleTank
iGrand Piano
ikdownloads.com/irigmidi2
4
English
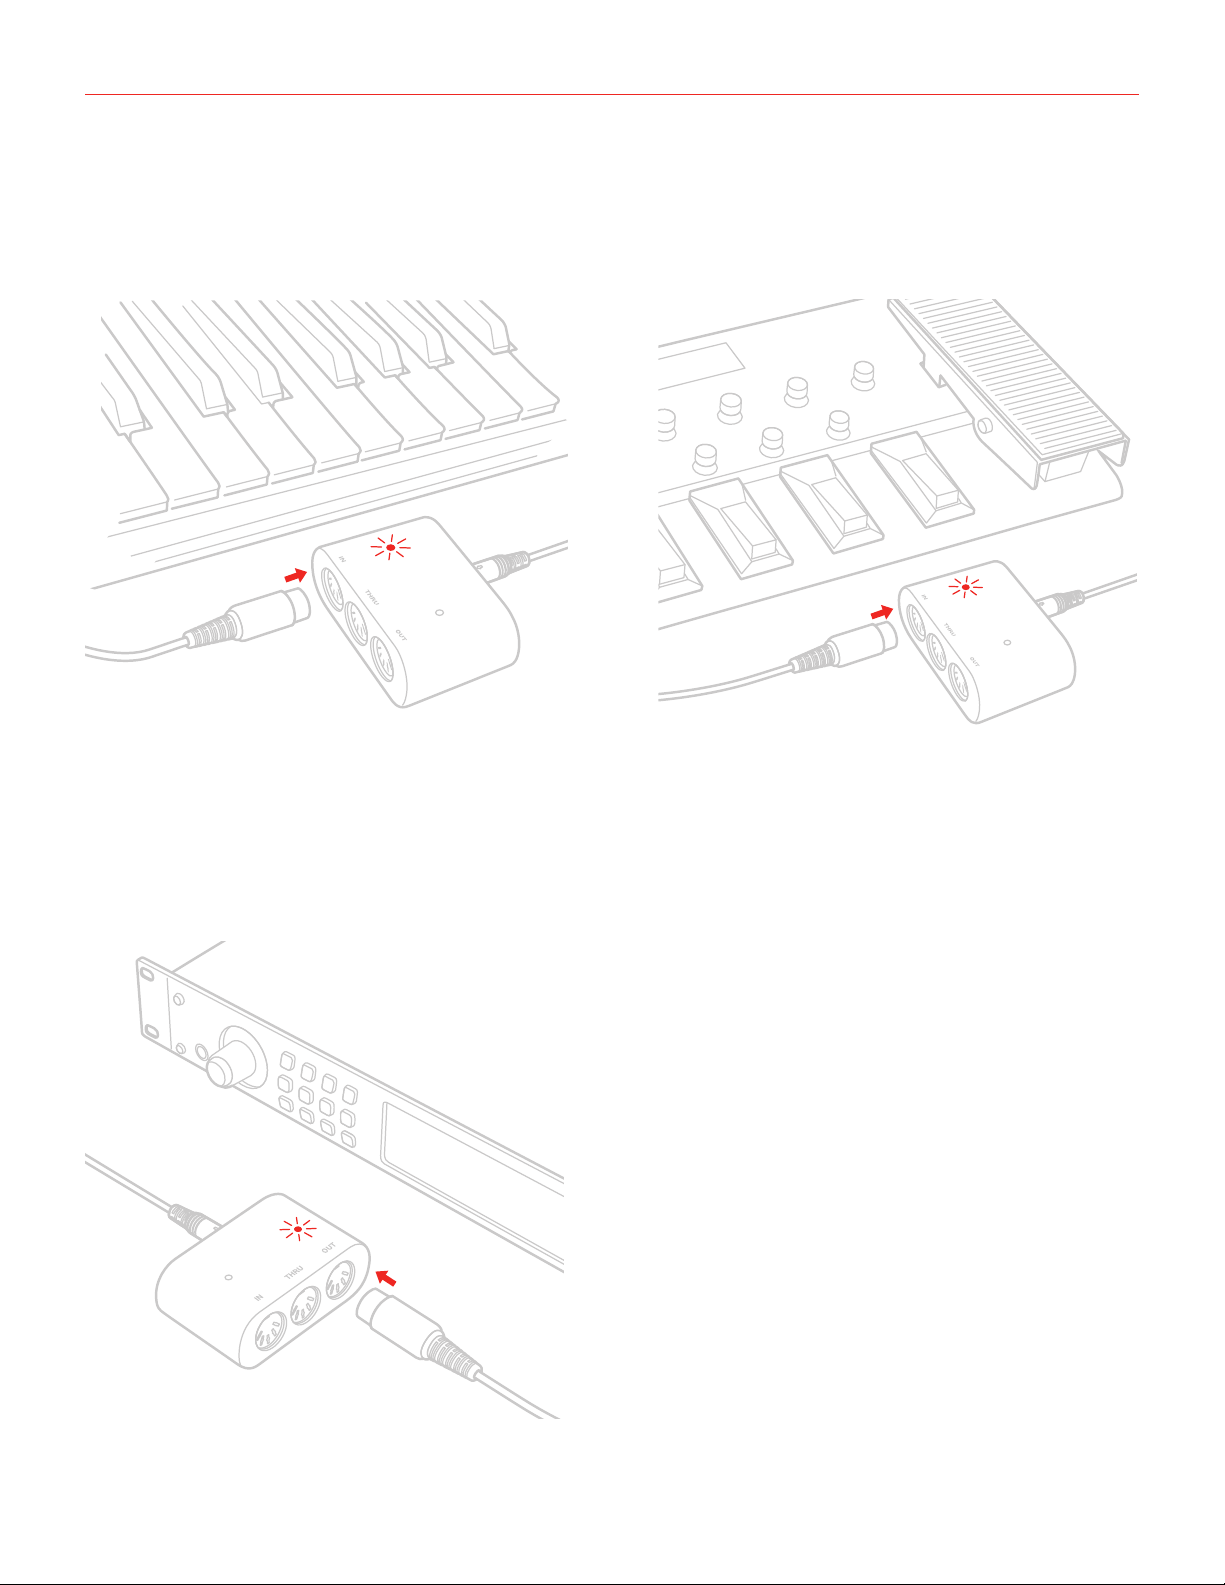
4. To play MIDI compatible apps from an external controller, use a standard MIDI cable to connect your
controller’s MIDI OUT port to iRig MIDI 2’s MIDI IN port. Always check the specific MIDI input settings in
your app to make sure that the app is ready to receive incoming MIDI data.
MIDI
IN
MIDI
IN
5. To control an external MIDI device from an app, use a standard MIDI cable to connect the MIDI OUT port of
the iRig MIDI 2 to the MIDI IN port of the external device. Always check for specific MIDI output settings in
your app to make sure they are set to transmit MIDI data.
MIDI
OUT
5

English
6. When controlling MIDI compatible apps with an external controller, you may want the MIDI signal to also go
to other external devices at the same time. In this case, connect the iRig MIDI 2 THRU port to the MIDI IN
port on the additional devices you’d like to control.
MIDI
THRU
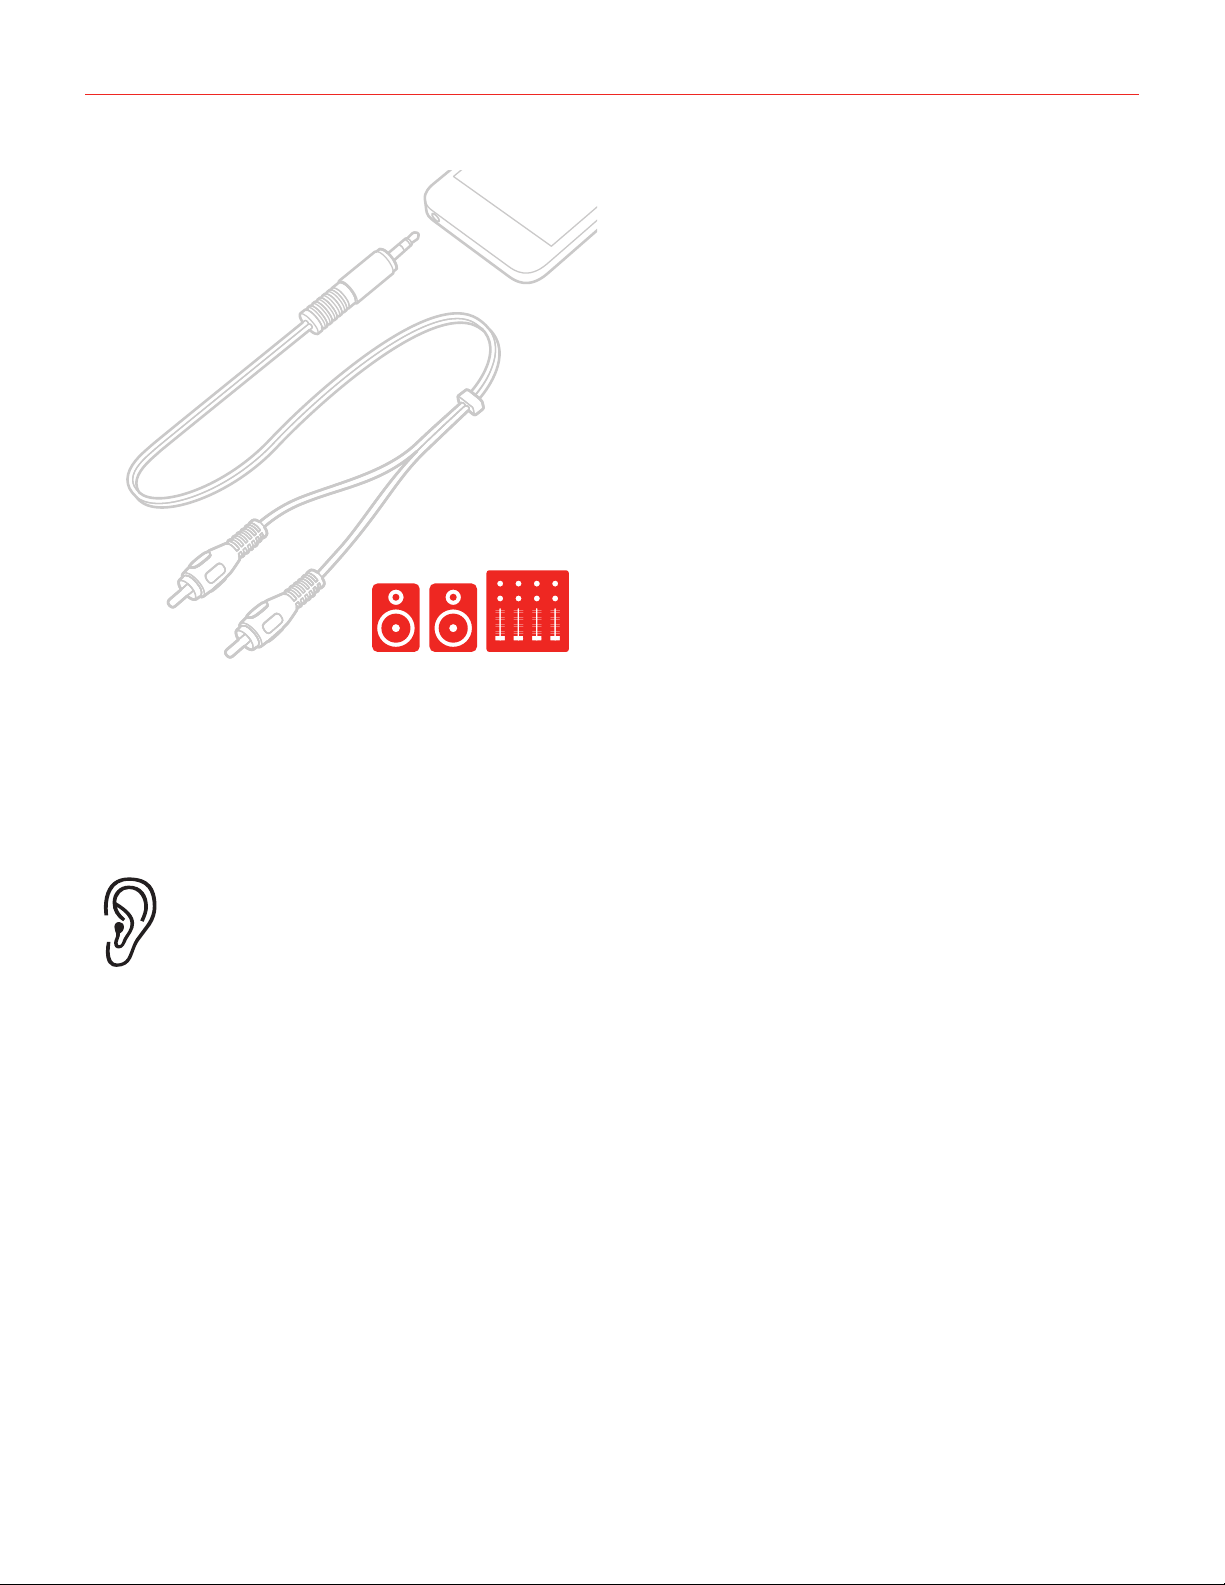
7. Connect your headphones, mixer or powered speakers to the iOS device headphone jack.
1/8"
1/8"
1/8"
6
English
1/8"
RCA
WARNING: Permanent hearing loss may occur if earbuds or headphones are used at high
volume. You can adapt over time to a higher volume of sound, which may sound normal but can
be damaging to your hearing. Set your device volume to a safe level before that happens. If you
experience ringing in your ears, reduce the volume or discontinue use of earbuds or headphones
with your device.
7
English
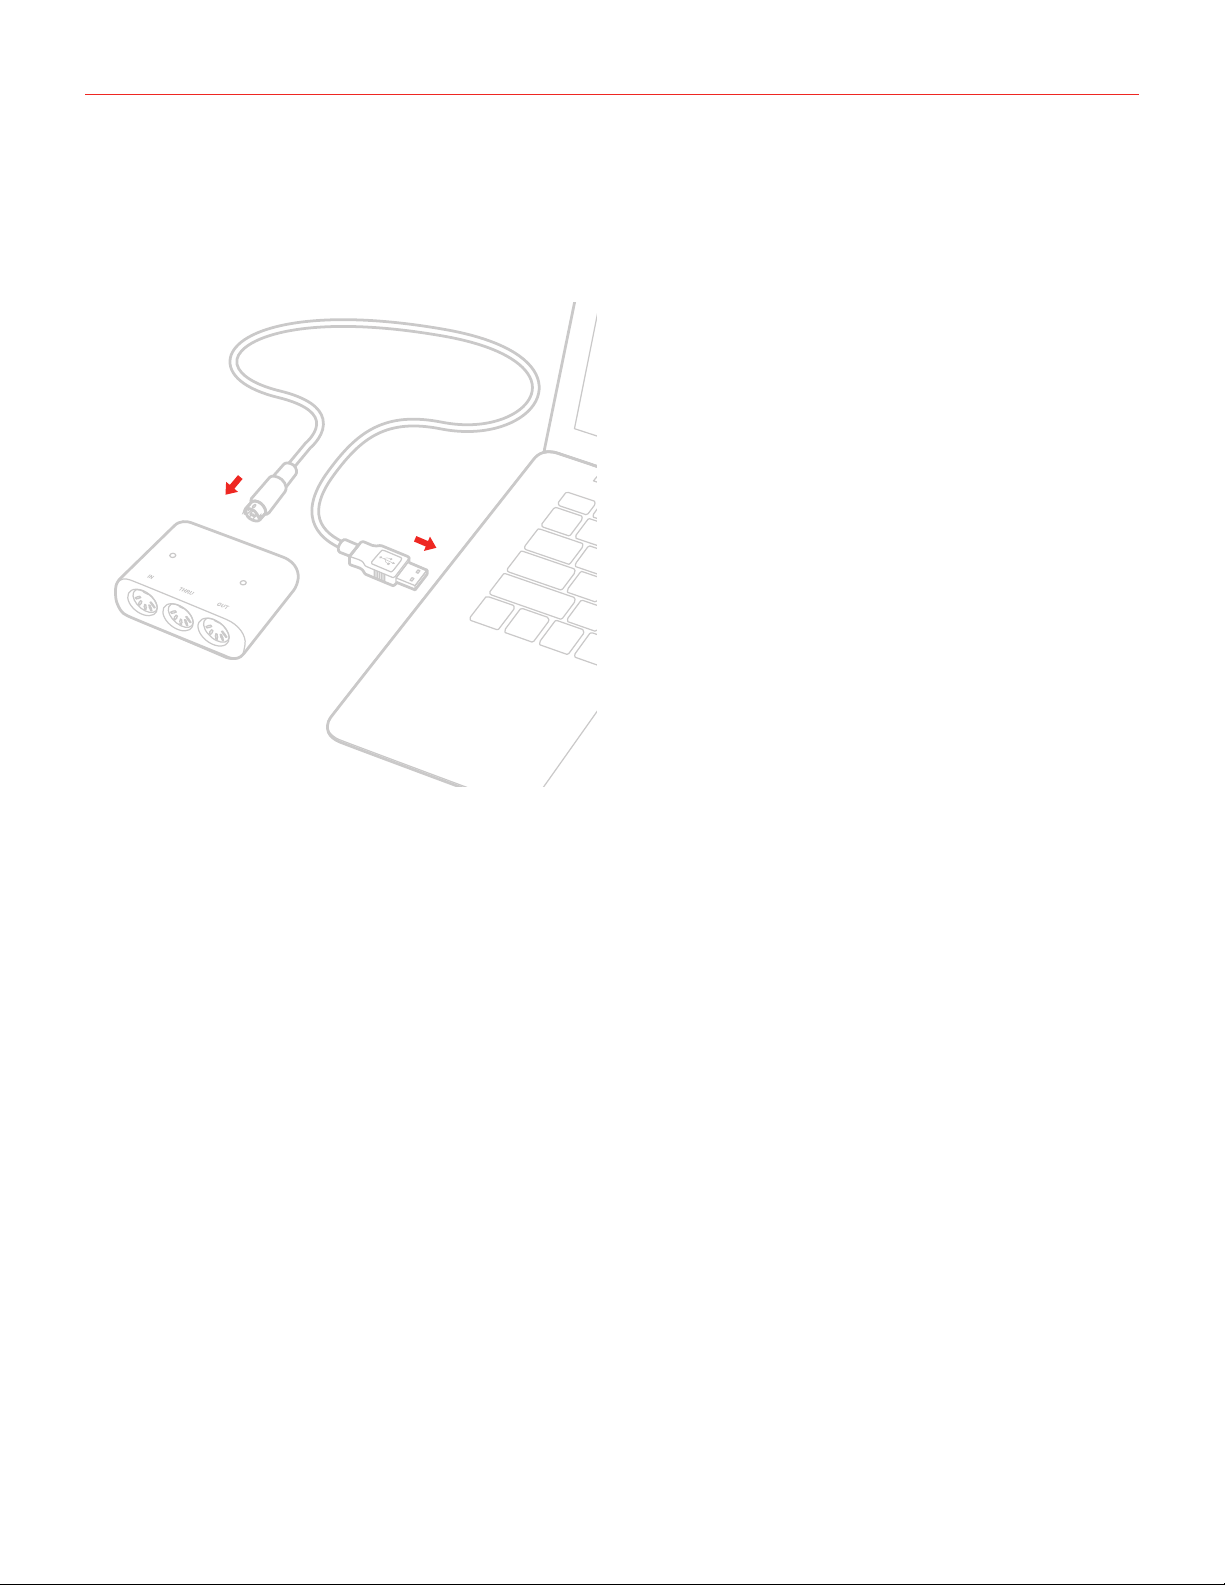
Mac
1. Connect the included USB cable to iRig MIDI 2
2. Connect the USB cable to a free USB port on your computer
1
2
3. If you have not done so already, download the SampleTank 3 SE for MAC/PC.
4. To play MIDI-compatible apps from an external controller, use a standard MIDI cable to connect the MIDI
OUT port on your controller to the MIDI IN port of iRig MIDI 2. Always check the specific MIDI input settings
in your app to make sure that the app is ready to receive incoming MIDI communication.
5. To control an external MIDI device from an app, use a standard MIDI cable to connect the MIDI OUT port of
the iRig MIDI 2 to the MIDI IN port of the external device. Always check for specific MIDI output settings in
your app to make sure they are set to transmit MIDI data.
6. When controlling MIDI compatible apps with external controllers, you may want the MIDI signal to also go to
other external devices at the same time. In this case, connect the iRig MIDI 2 THRU port to the MIDI IN port
on the additional devices you want to control.
7. Connect your headphones, mixer or powered speakers to the computer output jack.
8

English
Using iRig MIDI 2
iRig MIDI 2 will work with no setup on all iOS devices when MIDI compatible apps are used.
Remember to always setup matching MIDI channels on the transmitting and receiving devices, apps or controllers.
iRig MIDI 2 is equipped with two blue LEDs that monitor the incoming MIDI IN and the outcoming MIDI OUT signals.
IN LED
OUT LED
When a MIDI signal is arriving in the MIDI IN port on iRig MIDI 2 the LED above the MIDI IN port will blink.
When a MIDI signal is sent from the MIDI OUT port on iRig MIDI 2 the LED above the MIDI OUT port will blink.
When using iRig MIDI 2 with your computer, make sure iRig MIDI 2 is selected as the current MIDI interface in
the preferences or Audio MIDI settings of your preferred software.
MIDI Thru
The THRU port, emits a copy of everything received from the MIDI IN port, allowing data to be forwarded to
other instruments.
The THRU port is used to send MIDI signals to multiple devices simultaneously. For example, you can send MIDI
data from a keyboard controller to an app on your iPad and an external MIDI sound module at the same time.
To do this, connect the sound module to the MIDI THRU port. The signal coming from the keyboard controller
will be sent simultaneously to both the external MIDI sound module and the iPad.
MIDI
THRU
9

English
Specifications
• Universal MIDI interface for iOS, Mac and PC
• Ultra-portable, pocket-sized form factor
• Detachable (bumper-friendly) cables for universal connectivity and easy connection
• Lightning (for iOS) and USB (for Mac/PC) cables included (30-pin cable is optional)
• IN/OUT LED indicators
• Standard-sized MIDI IN, OUT and THRU jacks
• Comes with a selection of MIDI apps and software
• Elegant rubberized enclosure
• Powered by the host device
• Size: 49,5mm x 78mm x 30mm
Warranty
Please visit:
www.ikmultimedia.com/warranty
for the complete warranty policy.
Support and more info
www.ikmultimedia.com/support
Apple is not responsible for the operation of this device or its compliance with safety and regulatory standards.
10

“MadeforiPod”,“MadeforiPhone”and“MadeforiPad”meanthatanelectronicaccessoryhasbeendesignedtoconnectspecicallytoiPod,iPhone,oriPad,respectively,andhasbeencertiedby
the developer to meet Apple performance standards. Apple is not responsible for the operation of this device or its compliance with safety and regulatory standards. Please note that the use of this
accessory with iPod, iPhone or iPad may affect wireless performance.
iRig® MIDI 2, iGrand Piano™, and SampleTank® are trademarks property of IK Multimedia Production Srl. iPad, iPhone, iPod touch and Mac are trademarks of Apple Inc., registered in the U.S. and
other countries. Lightning is a trademark of Apple Inc.
All other trademarks are property of their respective owners.
11
2014/10/08
 Loading...