

Page 1

Do it yourself guide
to installing your kitchen
Page 2

7 simple steps
3
Hang the wall cabinets
In most kitchens, it’s easiest to install the wall
cabinets first. This way there won’t be any base
cabinets to work around and you can more easily
use a stepladder. If you don’t have wall cabinets to
install, go straight to Step 4.
If you haven’t already done so in Step 1, measure
and draw the position of the cabinets on the wall
to be sure everything will fit. It’s also important
to mark any uneven spots on the wall and smooth
them out with putty or shims.
Hang this poster on the wall
so you’ll have your hands free!
10. Hang the remaining cabinets
Hang the rest of cabinets in the same
way, aligning each with the previous
one. Use your G-clamps to temporarily
fasten the new cabinet with the previ-
ous one. To avoid marring the surface of
your cabinets, use a small scrap of wood
between the clamp and the cabinet.
9. Hang the next wall cabinet
Mark, drill, screw in screws, align the
cabinet and tighten screws – exactly as
you did with the corner cabinet.
8. Install the corner cabinet
Hang the adjusting bracket on the
screw, align the cabinet using a spirit
level and screw in both screws – but
don’t tighten them completely.
7. Use the right screws and fittings
Make sure that you use the right type of
screws and fittings for the wall material.
Drill the holes, insert plugs if necessary
and screw one of the screws half way.
6. Start with a corner cabinet
Lift the corner cabinet onto the wall
strip and mark where to drill through
the hole in the wall fittings. Lift the
cabinet down again.
4.
The right height for the wall strip
Mark the position of the wall strip
Draw a line on the wall 141 cm above the
highest point of the floor. This marks the
bottom edge of the wall cabinets and the
correct position for the wall strip.
5. Screw the wall strip to the wall
The upper edge of the wall strip should
be level with the line on the wall. Use
a spirit level to ensure the wall strip is
level when you fasten it to the wall. Lift
the cabinets and rest them against the
top edge of the wall strip.
2. Check the floor for uneven spots
Find out if the floor is uneven. This is
important to consider if you want to
be sure there will be room for legs or
plinths under all cabinets. Use a spirit
level to check the areas where you’ll
be installing base or high cabinets.
Find the floor’s highest and lowest
points and use a pen to mark them on
the wall.
3. Right-angled corners
Use a try square to check that the
corner is at a right angle. If the gap
between the the tool and the wall is
more than 6 mm, call for professional
help. In a U-shaped kitchen, measure
between opposite walls at a number of
spots to see if they are parallel.
13. Tighten all the screws
When all wall cabinets have been
mounted and aligned, tighten all screws
into the wall. Finally, remove the wall
strip – you’ll need it again when
mounting the base cabinets.
12. Fasten cabinets together
Place the connection screws enclosed
with the cabinet frames into the pre-
drilled holes and tighten. Remove the
G-clamps. Continue fastening the re-
maining cabinets together in the same
way.
11. Drill through cabinet wall
You’ll fi nd predrilled holes on the inside
of each cabinet. Using a 5 mm drill bit,
drill through the fourth holes from both
the top and bottom edges. The fi rst and
second holes are for door hinges. If you
have any of the following doors:
BÄCKEBO, KALSEBO or ULRIKSDAL,
the door hinges go in the second and
third holes.
Good to know:
If you will be
installing a high cabinet, don’t make
final adjustments or fully tighten
the screws until after the cabinet is
installed. It’s easier to see if every-
thing is level and fits correctly when
the cabinet is standing.
Good to know:
Before installing
the fan cabinet saw a hole for the
fan and fan duct. Instructions are
enclosed with the fan. If you’re
installing a fan over a gas hob, you
must follow special regulations.
These may be differ from country to
country. Before you start, find out
what regulations apply in
your country.
You’ve completed Step 3!
And the wall cabinets are in place.
Important before you begin installing
Begin installing the wall cabinets
1. Fill in irregularities
Use a spirit level to check the walls.
Mark any uneven spots. If major
problems need to be fixed, it’s best to
hire a professional. It may also be
necessary to use shims when mounting
wall cabinets. Shims are often used to
fill in gaps and correct the angle: Use
a piece of wood, fibre-board or plywood
– depending on the size of the gap.
4
Install base and high cabinets
Now it’s time for the base and high cabinets.
Before you begin, locate all plumbing, power
sources and other utilities. Mark around these and
using a keyhole saw, cut the appropriate openings
before you install the cabinets.
In the following steps, you’ll install the legs at the
front of the cabinets and secure a cabinet wall strip
to the wall. The wall strip is made of particleboard
and comes packed together with the plinths. If you
prefer, instead of the wall strip for support, you
can put legs on the back of the cabinets.
Hang this poster on the wall
so you’ll have your hands free!
3. Secure the wall strip
Align the top edge of the wall strip with
the level line you marked at 16 cm in
point 1, Step 4 . Secure it to the wall
studs. Should the end of the wall strip
fall between studs, secure it to the wall
with a mooring screw o
r expansion bolt.
2. Cut base cabinet wall strips
Measure the length of the base and high
cabinets to be installed. Do not include
the wall space behind appliances.
Cut the wall strips into corresponding
lengths. Cut the strip 3.5 cm shorter
where a side plinth is planned.
9. Drill through the cabinet walls
Using a 5 mm drill bit, drill through
the third holes from the top and bot-
tom edges. When installing a drawer
cabinet, drill through the fourth hole
from the top. For BÄCKEBO, KALSEBO
or ULRIKSDAL doors, drill through the
fourth holes from the top and bottom.
8. Install the next base cabinet
Mark, drill, and insert the screws for
the next cabinet. Lift the cabinet into
place, carefully aligning it with the
previous cabinet. Use a G-clamp to
fasten the cabinets together
temporarily.
7. Secure the cabinet to the wall
Tighten the screws, but not completely.
Be sure the cabinet is level, front-to-
back and side-to-side. Hint: If you plan
to install a corner carousel – do it now.
It’s much easier before the worktops
are in place.
6. Install the corner cabinet
Lift the corner cabinet back into place
and adjust the height of the legs so that
it stands level. Use a spirit level to be
sure. Screw in both screws, but don’t
tighten them completely.
5. Use the right screws and fittings
Drill holes at the spots you’ve marked.
Be sure to use drill bits, screws and
fi ttings that are appropriate for your
wall material. If you have a plaster wall
and there’s no wall stud where you’ve
drilled, insert a mooring screw before
the screw and tighten halfway.
11. Sawing holes for the plumbing
Before mounting the sink unit, saw
holes for the water pipes and drains
– either in the base of the cabinet (as
shown here) or through the back panel.
10. Fasten cabinets together
Place the connection screws enclosed
with the cabinet frames into the pre-
drilled holes and tighten. Remove the
G-clamp. Continue in this fashion with
the remaining cabinets.
18. Protect from dust
To produce an airtight seal between
the wall and the cabinet, you’ll need to
caulk around the filler pieces. Choose a
well-made latex/silicon brand (it doesn’t
need to be waterproof.) Tape alongside
the area to be caulked. Apply a bead of
caulk into the crevice.
Cut the template material so that it’s
the same height as the cabinet.
Hold it in place where the filler will be
installed. Open the compass a couple of
inches and place the point against the
wall. Holding the compass horizontal
and level, follow the line of the wall so
that the pencil traces a clear line on
the template. To cut the template to
the correct width, measure the distance
from the farthest point on the wall to
the cabinet. Find the same point on the
template and mark it. Draw a straight
line from this point to the top and
bottom of the template to form the flat
edge that will fit against the cabinet.
Cut the template and check that it fits,
then trace the shape onto the filler and
follow the cutting directions in
picture 15.
15. Cut filler pieces
With a handsaw:
draw a line connecting
the top and bottom marks on the front
side of the filler, and cut it with the face
side up.
With a keyhole-saw:
mark both
sides of the filler. Put masking tape over
the line on the front side to ensure an
even edge, without chipping. Cut it with
the back side up.
16. Install filler pieces
Put the filler piece in place with the cut
edge against the wall. Attach by drill-
ing a screw through the predrilled holes
from the inside of the cabinet. To be
sure the filler piece stays in place, first
fasten a strip to the wall. Install other
filler pieces in the same way. When all
filler pieces are in place, go to 18.
4. Start with the corner cabinet
Attach legs to the front edges of the cab-
inets according to the assembly instruc-
tions. If you are not using the wall strip
as support, attach back legs as well.
Always use a back leg at the end of the
run – it makes attaching the side plinth
easier. For more, see Good to know.
14. Measure filler pieces
Check the wall with your spirit level to
see if it is even and flat. If the wall is
uneven, skip to picture 17. If the wall
is even, measure the distance from the
wall to the cabinet and mark this
distance at the top and bottom of the
filler piece.
1. Mark the level lines
Using the high point of the floor that
you marked earlier, measure 16 cm up
the wall. Use a spirit level to draw a line
on the wall at this height.
13. Tighten all the screws
When all base and high cabinets are
in place and aligned, make any final
adjustments before tightening all
screws into the wall.
17. Uneven walls
If the wall is not level and flat, the filler
must be cut to conform to the wall’s
shape. To do this, you’ll need to make
a template for tracing the wall’s shape
onto the filler. A piece of thin plywood
or heavy cardboard makes a suitable
template. You’ll also need a measur-
ing tape, pencil and compass.
Good to know:
Legs can be shared
by two cabinets. See the assem-
bly instructions. Place the corner
cabinet against the wall so that its
back edge is resting on the wall
strip. Through the holes at the top
back corners of the cabinet, mark
where to drill for the fixing screw.
Set the cabinet aside.
Good to know: If there’s no corner
cabinet, install the cabinet that
will fit against the back and side
walls. Make sure there’s enough
room between the cabinet and the
side wall for the filler piece.
You’ve completed Step 4!
And the cabinet frames are in place.
12. Install the high cabinet
The high cabinet should be installed
the same way you installed the base
cabinets. If you’re using cover panels on
the sides , follow the enclosed assem-
bly instruction to mount them before
installing the cabinet.
5
Install the worktop
Now it’s time to install the worktops and sink.
When measuring and sawing the solid
wood tops throughout this step, we suggest
placing them on sawhorses for easiest
handling. Once you’ve finished Step 5, it’s
a good idea to hire professionals to connect
the water, gas or electricity, and to
install the hob, dishwasher and lighting.
Hang the poster on the wall
so you’ll get your hands free!
3. Saw the worktop
If you’re sawing by hand, we recommend
using a fine-toothed handsaw for control.
To avoid splintering the worktop, tape over
the area to be cut. If you’re using a circular
saw, turn the worktop face down and clamp
a straight-edge in place to guide the saw
along the cut line. Finish the cut edge with
your file. Treat the cut edge.
2. Exact measurement on the worktop
Measure the worktop from the end of the
base cabinet row out, allowing for the
cover panel plus a 2 cm overhang. Mark
with a pencil on the finished side if you’ll
be using a handsaw and on the underside
if using a circular saw.
9. Secure the worktop
Your worktop should be secured as shown
using the hardware provided. The slot-
ted brackets allow the worktop to expand
and contract normally. Set worktops in
place, allowing the same gaps as when
you measured. Locate attachment points at
regular intervals and drill pilot holes before
securing the top.
8. Install the sink
Lift off the worktop and turn it upside
down, placing it back on your sawhorses.
Install the sink according to the assembly
instruction enclosed with it.
7. Room for the sink?
Fit the worktop back into place on the
base cabinet. Check that the sink hole is
not obstructed by the top frame rails of the
base cabinet. If it is, you’ll need to trim the
rails so that the sink will fit properly.
6. Seal the sink cutout
To prevent moisture from penetrating the
worktop, apply a polyurethane silicone
along the cut edges with a paintbrush.
5. Saw the sink hole
Place the worktop on the sawhorses. Drill a
10 mm hole for the keyhole-saw blade at
all four corners of the cut line. Following
this same cut line, saw the hole for the sink
unit.
11. Sand and oil the worktop
Your solid wood worktop was pretreated at
the factory to condition and protect it until
installation. To prepare it for use, sand the
surface with a fine sandpaper and finish
it with an approved wood treatment oil, for
example BEHANDLA.
10. Install the kitchen mixer tap
If your sink is not pre-drilled for a mixer
tap, you’ll need to cut the necessary holes
in the sink. Put a piece of masking tape
where the mixer tap will sit and use a pen
to mark where to drill the hole. Drill the
hole and install the mixer tap, following the
assembly instructions enclosed with it.
You’ve completed Step 5!
And all the worktops and the sink are in
place.
1. Space between cabinets and walls
Lay the worktop on top of the base
cabinets, allowing 5 mm at the back walls,
and a smaller space against the side wall
or high cabinets. If you’re installing tops in
an “L” shape, the two sections must meet in
a butt join. (Do not make angle or mitre-
cut joins.) These steps allow the counter to
undergo normal expansion and contraction.
side and front to back. Trace around the
edge of the sink with a pencil. Use a pen-
cil and a straight edge, draw a “cut” line
inside this line. Read more in the assembly
instruction that came with your sink.
4. Mark a spot for the sink
With the worktop in place, trace the inside
of the base cabinet on the underside of
the worktop. This helps assure that the sink
cutout will be aligned correctly. Then, place
the sink upside down on the underside of
the worktop, positioning it correctly side to
Good to know:
If you have a kitchen
where two laminate worktops meet,
cover the join with a cover strip before
you screw the worktops into place.
Because of moisture and steam, it’s
important to have a moisture barrier
under the worktop where you have the
dishwasher. Use VARIABEL diffusion
barrier for extra protection.
Good to know!
Sand and oil your
worktop regularly for long-term beauty
and protection. Stains and minor dam-
age can be removed using fine sand-
paper. Wipe the sanded surface clean
and re-oil the affected area.
You only have you only have a few more things
left
to do! But they’re important, so be sure to take
your time. Remember to install child-safe catches
on the doors and drawers, hob guards and any
other devises you’ve chosen to make the kitchen
safer for your children. Your new kitchen will then
be a place for the whole family to enjoy!
6
Install drawers, shelves & lighting
The cabinets have predrilled holes for quick and
easy installation of shelving, drawers and interior
fittings. This also makes it simple to make adjust-
ments or add interior fittings later on.
If you need to attach cover panels to the cabinet
frames, put them on before you install interior fit-
tings, since they’re screwed on from the inside.
Hang the poster on the wall
so you’ll get your hands free!
1. Install cover panels
Temporarily secure the cover
panel into place using a G-
clamp. Drill pilot holes through
the cabinet frame from the
inside of the cabinets, being
careful not to drill through the
cover panel. Screw the cover
panel into place. Remember that
the cover panels must be short-
ened 6 cm if you are not going to
install decor strips underneath
the wall cabinets - saw the top
edge so that the sawn surface
is not visible from below.
2. Install lighting
Now it is time to install lighting
in your glass-door cabinets. Use
a qualified electrician for professional results.
3. Put the shelves in place
Insert four supports per shelf
into the predrilled holes inside each cabinet, then rest the
shelves on top of them. Think
about what you need to store,
and place the shelves to make
best use of the space. You can
move the supports and the
shelves anytime you wish.
4. Attach drawer fronts
Using the hardware provided,
mount each drawer front to the
drawer box through the
predrilled,prealigned holes.
5. Adjust drawer fronts
Use a screwdriver to adjust the
drawer fronts and assure they’re
perfectly aligned. Attach knobs
or handles to the drawer fronts
after you’ve installed the drawers in the cabinet frames. This
makes it easier to be sure they
are all even, and at the same
level.
You’ve completed Step 6!
And shelves, lighting and drawers
are in place.
7
The finishing touches makes all the difference
1. Saw plinths
Carefully measure and mark
plinths so that they cover the
open area below your base
cabinets. Cut the plinths to the
correct length using a finetoothed handsaw.
2. Finish the edges
Cover the cut edge of the plinths
with the enclosed edging strip.
Press it on with a warm iron,
then cut it to the right length.
3. Clip plinth into place
Follow the assembly instruction
for attaching the plinth clips. At
corners set one clip facing up
and the other down – this allows
them both to fit on the same leg.
Snap the plinth into place.
4. Attach decor strips
Measure, cut and fit the decor
strips beneath the wall cabinets.
Instructions for installation and
placement are included with
the decor strips. Remember to
attach the sealing strips.
5. Install mouldings/cornices
Follow the assembly instruction
included with the moulding/cor-
nice. Measure carefully so that
cornices will be the right length.
For best results, use a mitre box
saw to cut the corners of each
moulding/cornice at a 45° angle.
7. Snap the hinge to the door
Insert the hinge body into the pre-
drilled hole in the door and press
as shown. No screws are needed
�
8. Hang the doors
Snap the hinge body onto the base
plate and adjust the door to the
correct position in width, depth
and height, using the adjustment
screws. Instructions for doing this
are included with the hinges.
9. Attach door handles
A template makes it easy to place
handles in the same position on all
doors. Be sure to check on which
side the door opens before you
mark and drill the holes. Hold a
block of wood behind the door at
10. Attach door bumpers
Door bumpers allow you to close
the door quitely and softly. Screw
the bumpers on the upper inside of
the cabinet, on the opposite side
of the hinge. Follow the assem-
bly instruction. Or use the smaller
bumpers included with the hinges.
You’ve completed Step 7!
And your entire kitchen is in place and
ready to use. Consider complementing
with wall accessories that save space
on the worktop.
the place you are drilling so that the
surface doesn’t splinter when the
drill bit goes through.
6. Attach the hinge plate
Screw the door hinge base plate
into the first and second predrilled
holes located at the top and
bottom of each cabinet. If you choose
ULRIKSDAL, BÄCKEBO or KALSEBO
kitchen doors, you must screw the
hinge base plate into the second
and third predrilled holes.
to a brand new kitchen
We do a lot of groundwork to make it as simple as possible for you to
assemble and install your new kitchen yourself. We even design our
kitchens with this in mind from the very start. The Do it Yourself Guide
you have in your hand will give you tips and ideas about how to assemble and install your new kitchen – step-by-step.
Hire professionals
It’s a good idea to contact qualified specialists
early on to discuss the help you’ll need with
plumbing, gas, electricity and with installing the
dishwasher, hob and lighting.
Before you begin
This guide takes you through the preparation
and installation process step-by-step. We’ve also
included four corresponding posters with this
guide – hang them on the wall for a good overview of each step in the process. Read through
both the guide and posters carefully before
starting to install your kitchen.
Free installation film
You can also pick up a Kitchen Installation film
on video or DVD at your IKEA store. It demonstrates the various phases in the process, stepby-step. And if, at any point, you should decide
that you would like help installing your kitchen
– or parts of it – just ask at your IKEA store.
When you see an orange dot in this guide, it mean there’s a corresponding poster with the same number
that illustrates each step in the process. Hang the posters on the wall!
2
Page 3
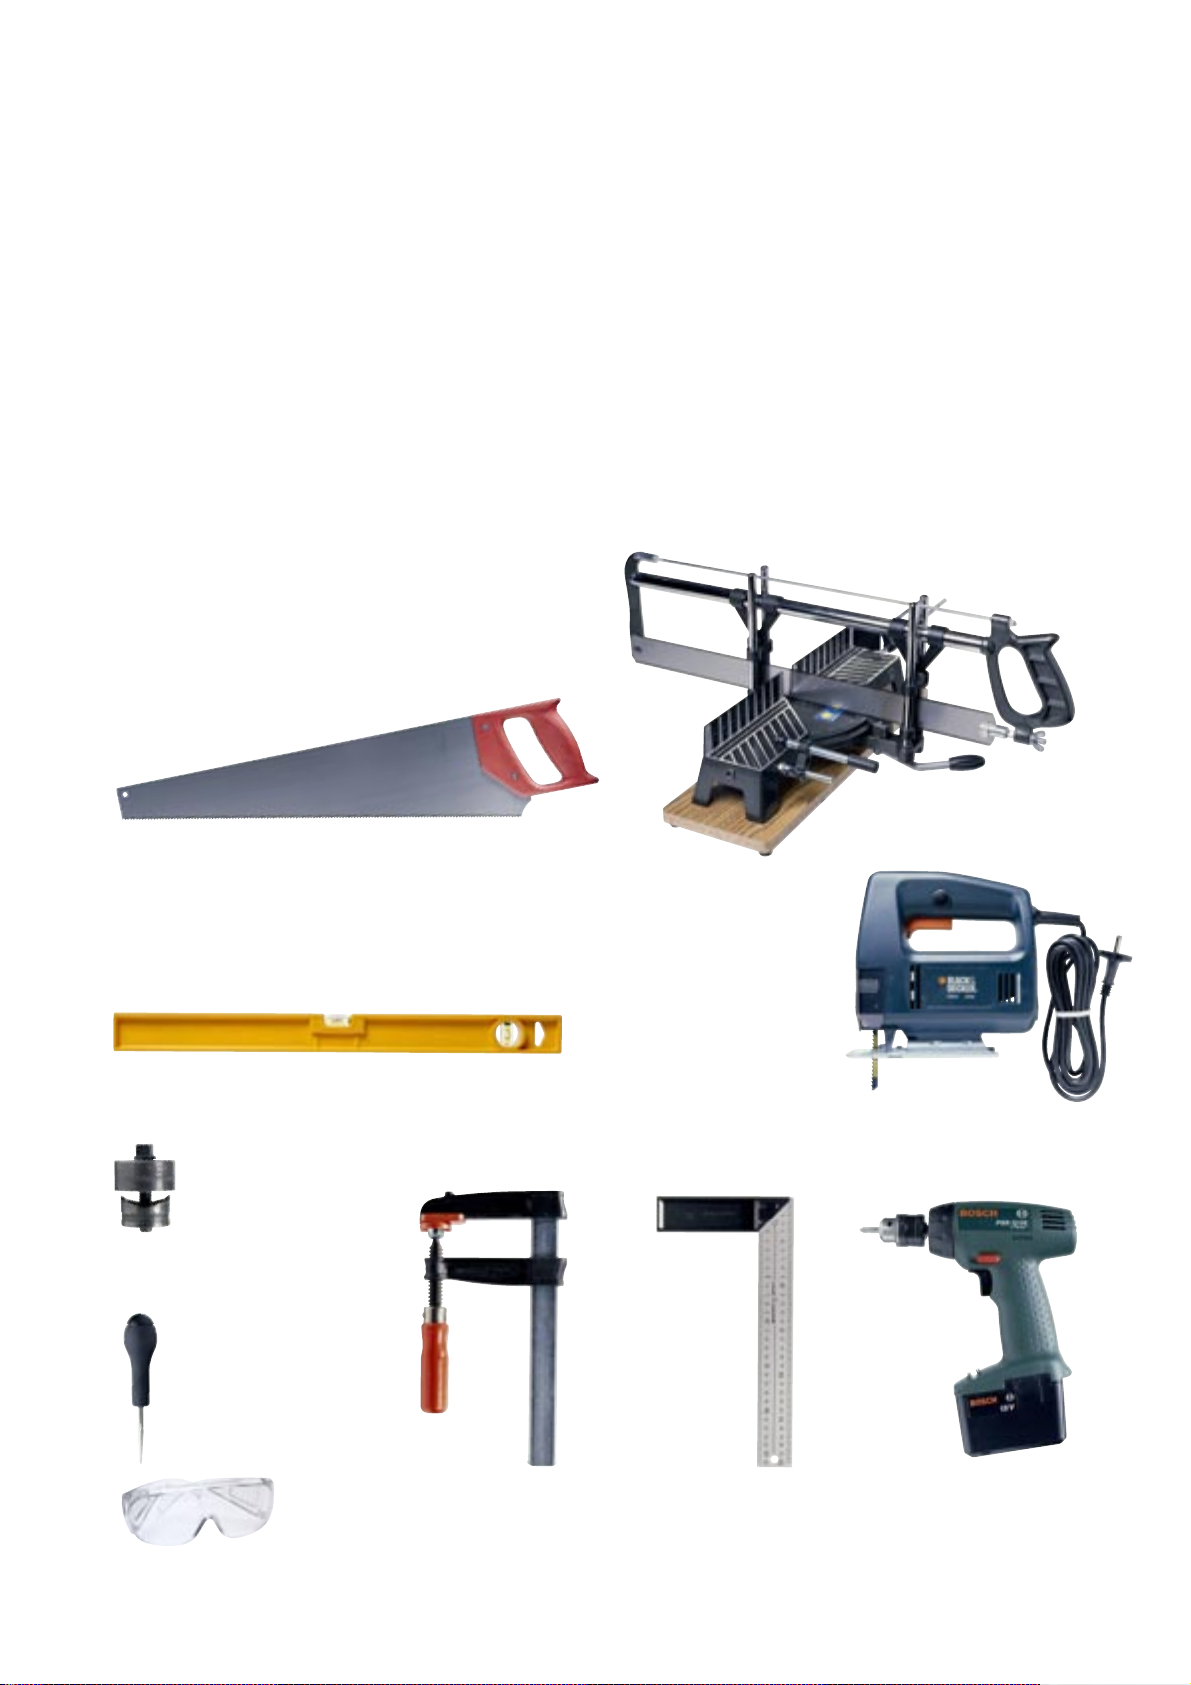
The tools you’ll need
The right tools are essential when assembling
and installing your new kitchen.
Here’s a checklist of the tools you’ll need:
• Carpenter’s rule/measuring tape
• Rasp/File
• Adjustable spanner – for working with
the hole cutter on the sink unit
• Screwdriver/Star screwdriver
• Pencil
• Hammer
Fine-toothed handsaw
– for sawing worktops, plinths, etc.
Spirit level
Mitre box with saw
- to ensure that you cut the cornices
at exactly the right angle
Keyhole-saw
– for sawing holes
for sink and fan.
Hole cutter - for
drilling the hole
for the mixer tap
in the sink
(35 mm).
Awl
Goggles – protective glasses recommended when using electric drill or keyhole-saw
Try square G-clamps
Electric screwdriver/drill
3
Page 4
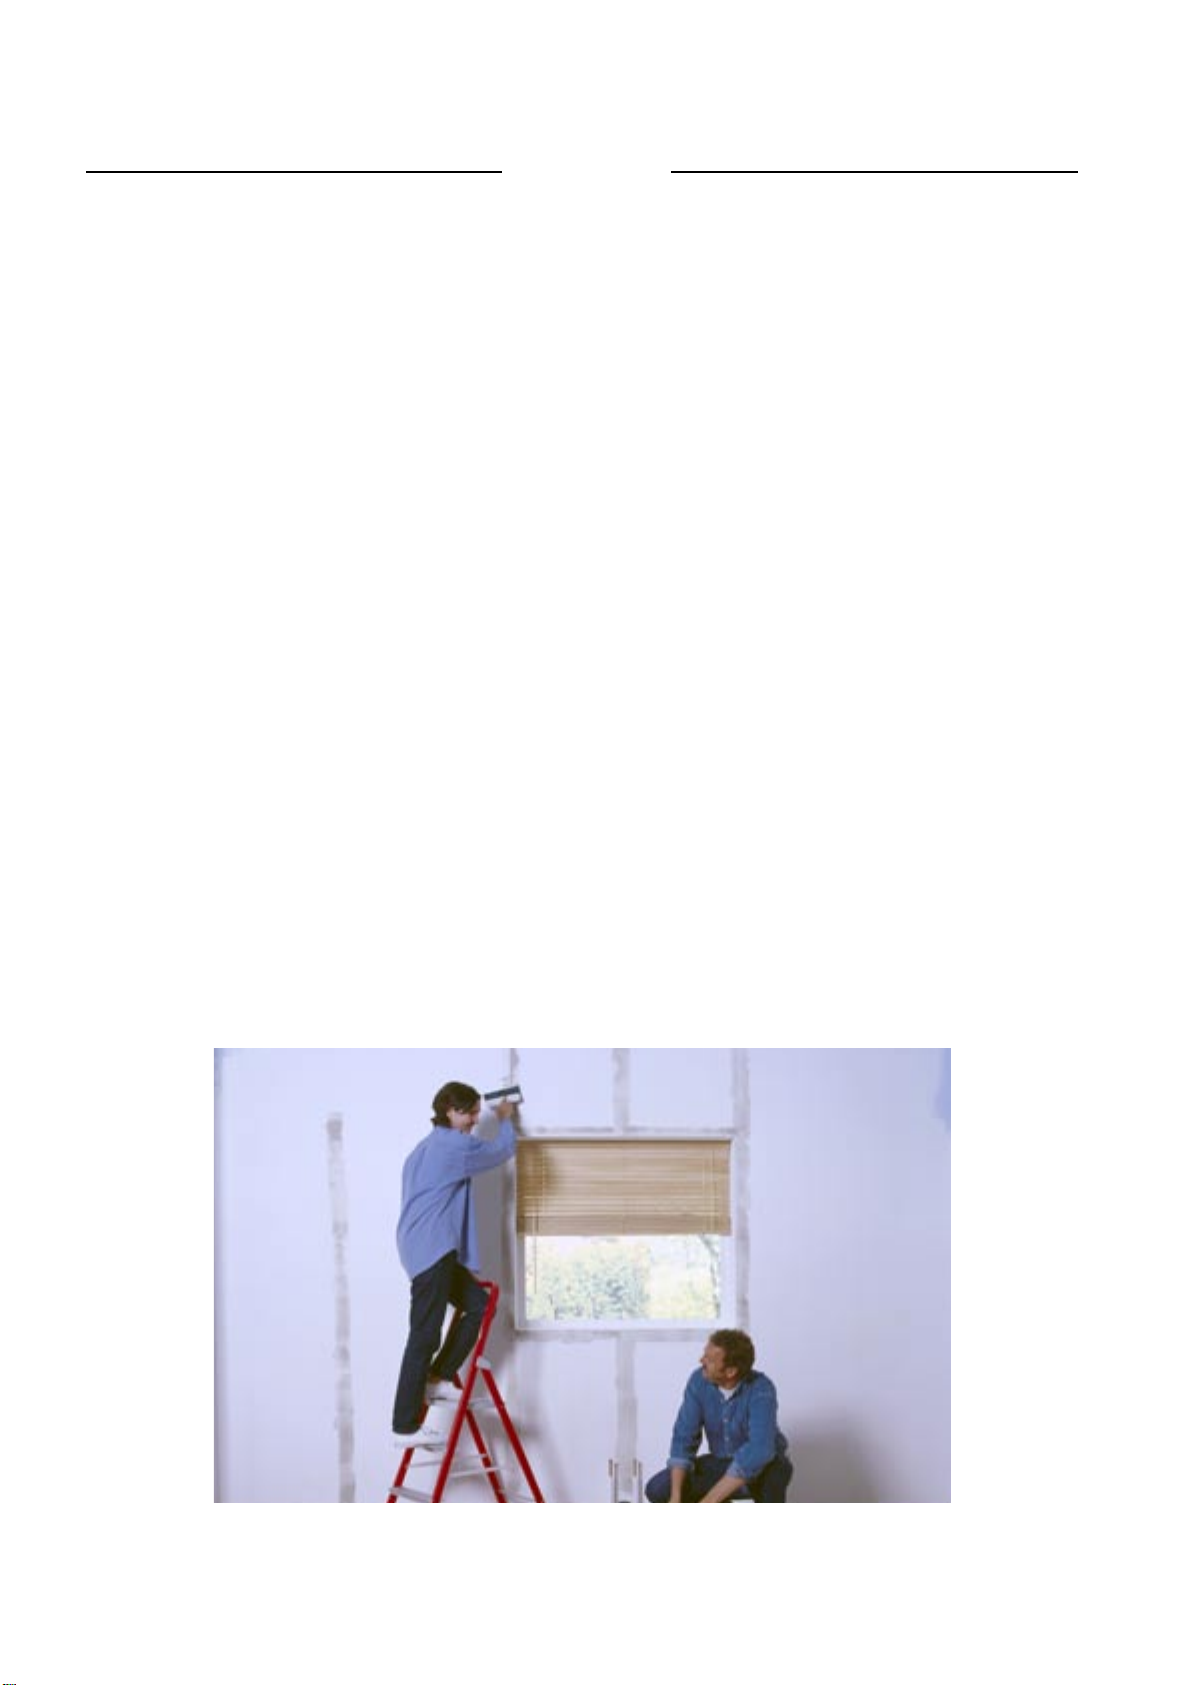
A little preparation
saves a lot of time
Removing the old kitchen
Switch off the electricity, gas and water before you
start. Remove the base cabinets first, so that you
can easily get to the wall cabinets.
Evening out walls and floor
Flat, level surfaces are important for a good
installation. The first three points on the Step 3
Poster show you what to do. If the walls or floor
are extremely uneven or there are other major
problems, we recommend you hire a professional
to fix them.
Marking cabinet positions
Measure the position of your cabinets and mark it
by drawing directly on the wall. This helps you to
be sure everything fits.
1
Hire a professional for gas, water and electricity
If you’re re-routing water or gas pipes or making
changes to electrical outlets, hire qualified specialists. They will do a safe and professional job and
you can be sure your home insurance will apply if
anything should go wrong, now or in the future.
Prime, paint, lay the floor
With the room empty, now is the time to prime
walls, put on a first coat of paint, and/or install
new flooring. Keep in mind, new flooring is easier
to install now, but be sure to protect the surface
until the kitchen is finished. The second coat of
paint and any wallpapering should be completed
after the cabinets are installed.
4
Page 5

2
Check everything
and start to assemble
Double check to be sure you have all the parts for
your kitchen. A good way is by checking the packages you have at home against the order list. Sort
the packages into groups – for example, place all
the wall cabinets together.
Use the right fixing hardware
Plaster, wood or concrete Because there are many
different types of wall, fixing hardware is not supplied with your cabinets. Most hardware stores or
home improvement stores stock appropriate fixing
and they can help you choose the right hardware
for your walls.
Keep the worktop indoors
Worktops should be stored indoors, in normal
room temperature and humidity. But be sure not
to lean them against warm radiators or lay them
on cold floors. They may absorb or discharge moisture, which can cause them to warp.
Assemble wall cabinets first…
It’s easiest to start with assembling and installing
the wall cabinets. Follow the assembly instructions
included in each package.
… then base and high cabinets and drawers
Follow the instructions for assembling base and
high cabinets and drawers. Screw the runners for
drawers or pull-out baskets on the inside walls of
the base and high cabinets before assembling the
cabinets themselves.
Place the cabinets in order
Arrange the cabinets into the order you will be
installing them so that you can quickly find the
right cabinet when you need it. Don’t put on the
doors, knobs, handles, shelves, wire baskets or
other pull-out interior fittings now. Wait till later.
5
Page 6

3
Hang the
wall cabinets
In most kitchens, the easiest place to begin is by
installing the wall cabinets. This way there won’t
be any base cabinets to work around and you
can more easily use a stepladder. One exception,
though, is if you’re installing a single-line kitchen
with a high cabinet at one end. Then you should
install the high cabinet first with the help of the
Step 4 Poster, before proceeding to the wall
cabinets. If you don’t have wall cabinets to
install, go straight to Step 4.
Step 3 includes:
• Finding wall studs
• Screw the wall strip to the wall
• Mounting wall cabinets
• Levelling wall cabinets
• Tightening all the screws
Get a friend and a ladder to help you
Hanging wall cabinets is easier if you have the
help of a friend and a good stepladder. Always
start with a corner cabinet and work your way
out.
Follow this process step-by-step in the Step 3 Poster.
6
Page 7

4
Install base
and high cabinets
Step 4 includes:
• Mounting the base cabinet wall strip
• Attaching cabinet legs
• Installing base cabinets
• Installing high cabinets
• Levelling cabinets
• Fastening cabinets together
• Tightening all the screws
• Installing filler pieces
• Fit with a corner carousel
IMPORTANT!
Before putting in any of these cabinets, be sure
to measure, mark and cut openings for plumbing,
power sources and other utilities.
Corner cabinets first
As with wall cabinets, start by installing corner
cabinets first. If your plan doesn’t include a corner
cabinet, start with the cabinet that fits at the start
of the run – in the corner where the back and side
walls meet.
7
Page 8

5
Install
the worktop
Now that the cabinet frames for your new
kitchen are in place, it’s time to install the
worktops and sink.
Step 5 includes:
• Measuring worktop lengths
• Making a corner seam
• Sawing the worktop
• Cutting a hole for the sink
• Sealing cut edges
• Installing the sink and the worktop
• Installing the kitchen mixer tap
You can read more about how to care for your solid
wood worktop in the Step 5 Poster.
8
Page 9

6
Install drawers,
shelves and lighting
The next step – after the cabinet frames, worktops
and sink are in place – is to add shelving, lighting, drawers and other accessories. All cabinet
frames have predrilled holes for quick and easy
installation of shelving, drawers and other interior
fittings. This also makes it simple to make adjustments or add interior fittings later on.
Step 6 includes:
• Installing cover panels
• Installing lighting
• Putting shelves in place
• Installing and adjusting drawers
For complete details, follow the assembly instructions included in each package.
9
Page 10

7
The finishing touches
makes all the difference
Just a few details and fine adjustments and your
kitchen will be complete. From attaching knobs
and handles to checking the alignment of doors
and drawers – small details make a big difference in how your kitchen looks and performs. It’s
important to take your time and get them right.
There are many different handles and knobs.
There are also different recommendations about
where to position them on the doors and drawer
fronts so they will look and work at their best.
Speak with a kitchen expert at your IKEA store
and they will tell you what’s recommended for just
the knobs and handles you’ve chosen.
Step 7 includes:
• Attaching plinths
• Concealing cables and worktop lighting
with deco strips
• Installing mouldings/cornices
• Hanging doors
• Attaching knobs and handles
• Attaching door bumpers to cabinet frames
10
Page 11

Enjoy your new kitchen today!
And tomorrow.
You're done!
Time to step back and admire your new kitchen
– and admire yourself for saving so much money
by assembling and installing it yourself! If you
follow our care and maintenance advice, your new
IKEA kitchen will keep looking its best for many
years to come.
Caring for your cabinets
Clean the doors, cabinet interiors and wood surfaces with a soft, damp cloth. Use only cleaning
products intended for these materials. Do not use
cleaning agents that contain ammonia, alcohol or
abrasives. After cleaning, wipe down with a clean
dry cloth.
Shinning clean sink
If you want your stainless steel sink to be bright,
shinny and scratch-free, clean it with a mild detergent and a sponge. Never use steel wool, steel
brushes, bleaching or scouring powders. Then
rinse it thoroughly and wipe with a dry cloth. Be
sure to clean in the direction of the metal’s grain.
Avoid cleaning silver on your stainless steel sink
top, since this may discolour it.
11
Page 12

Design and Quality
IKEA of Sweden
© In ter I KEA S yst ems B .V. 20 05
If you have questions - let us know!
If you need help or have questions about how to
install your kitchen - call us at 1-800-434-4532
 Loading...