

Page 1
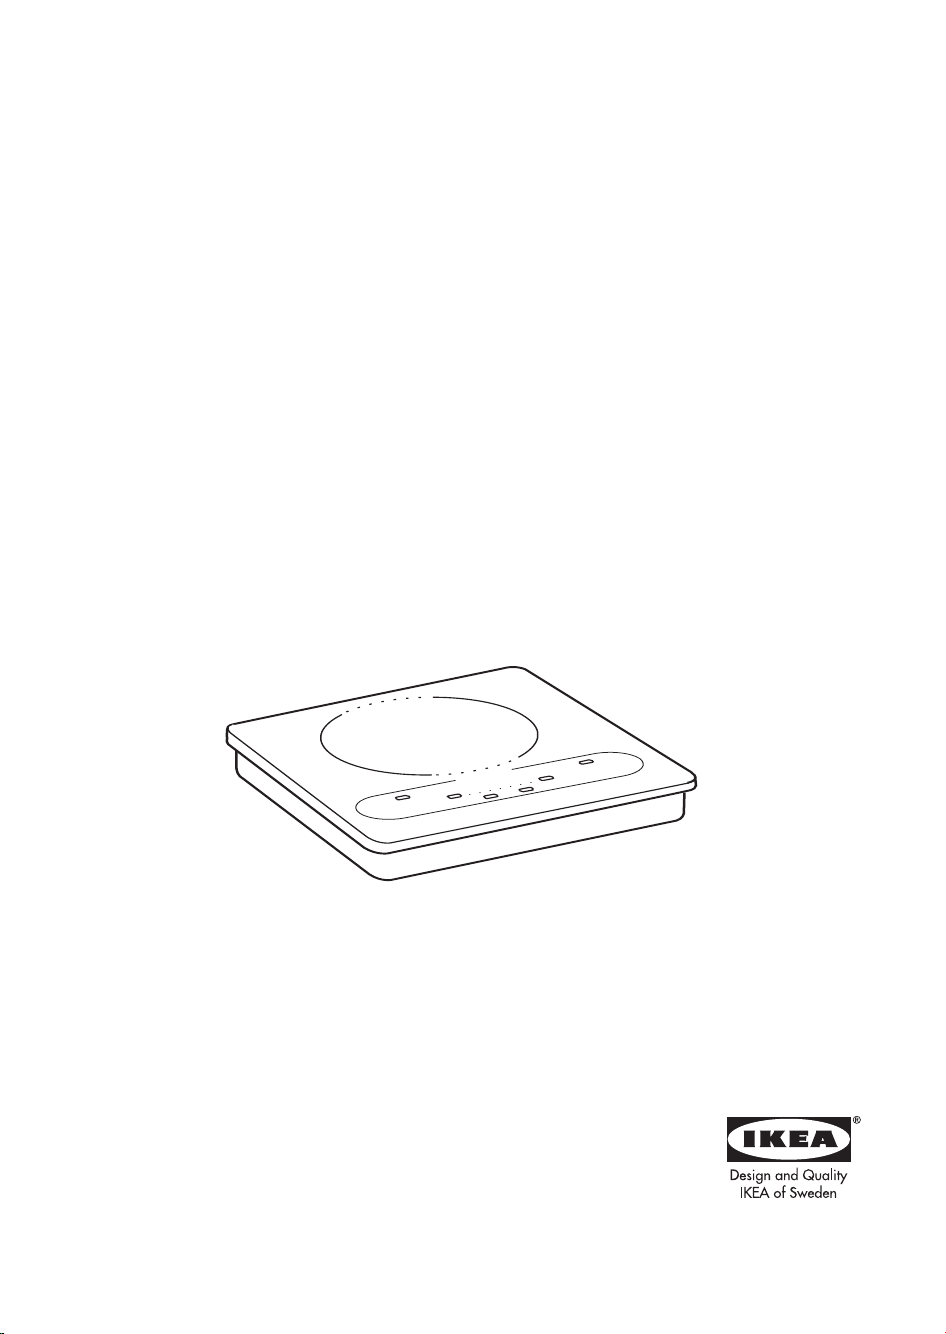
NUTID
HIN1T
Page 2

ENGLISH
2
WARNING - Installation and maintenance must
be carried out by a qualified technician, in
compliance with the manufacturer's instructions
and local safety regulations.
Do not repair or replace any part of the
appliance unless specifically stated in the user
manual.
DANSK
ADVARSEL - Installering og vedligeholdelse skal udføres af en kvalificeret tekniker i
overensstemmelse med producentens
instruktioner og lokale sikkerhedsregler.
Reparer eller udskift ikke nogen af apparatets dele, med mindre det specifikt er
angivet i brugervejledningen.
DEUTSCH
WARNUNG - Die Installation oder Wartung
muss von einer Fachkraft gemäß den
Herstellerangaben und gültigen örtlichen
Sicherheitsbestimmungen durchgeführt werden.
Reparieren Sie das Gerät nicht selbst und
tauschen Sie keine Teile aus, wenn dies vom
Bedienungshandbuch nicht ausdrücklich
vorgesehen ist.
FRANÇAIS
AVERTISSEMENT - Les opérations d'installation
et d'entretien sont du ressort exclusif d'un
technicien spécialisé. Celui-ci est tenu de se
conformer aux instructions du fabricant et aux
normes locales en vigueur en matière de
sécurité. Pour toute réparation ou tout remplacement de pièces, procédez uniquement aux
opérations spécifiées dans le manuel en utilisant les pièces expressément indiquées.
ITALIANO
AVVERTENZA - L'installazione o la manutenzione deve essere eseguita da un tecnico specializzato, in conformità alle istruzioni del fabbricante e nel rispetto delle norme locali vigenti
in materia di sicurezza. Non riparare o sostituire qualsiasi parte dell'apparecchio se non specificamente richiesto nel manuale d'uso.
NORSK
ADVARSEL - Installasjonen eller vedlikeholdet må utføres av en kvalifisert tekniker
i samsvar med produsentens instruksjoner,
og i samsvar med gjeldende sikkerhetsstandarder. Ikke reparer eller skift ut deler
av apparatet hvis det ikke er oppgitt i
bruksanvisningen.
SUOMI
VAROITUS - Asennuksen ja huollon saa suorittaa vain pätevä asiantuntija valmistajan ohjeiden ja voimassa olevien paikallisten turvallisuusmääräysten mukaisesti. Älä korjaa tai vaihda
mitään laitteen osia tai huolla sitä, ellei niin
erikseen mainita käyttöohjeessa.
SVENSKA
VARNING - Installation och underhåll skall utföras av en behörig fackman i enlighet med tillverkarens anvisningar och lokala säkerhetsbestämmelser. Reparera inte eller byt inte ut
några delar på apparaten om det inte rekommenderas i bruksanvisningen.
AA-400491-1
Page 3
4x 4x
5
AA-400491-1
Page 4
4x 4x
6
AA-400491-1
Page 5
5 mm
5 mm
7
Page 6
Min. 5 cm - MAX 13,5 cm
Min. 10 cm
Min. 3,8 cm
336 mm
336 mm
Max 8 mm
R = Min 6 mm
8
AA-400491-1
Page 7

9
Page 8

10
AA-400491-1
Page 9

11
4 x
Page 10

DEUTSCH Gebrauchsanweisung
Seite 13
ENGLISH
Instructions for use
Page 20
FRANÇAIS Mode d’emploi
Page 27
NEDERLANDS Gebruiksaanwijzing
Pagina 34
ESPAÑOL
Instrucciones para el uso Página 41
PORTUGUÊS Manual de utilização Página 48
ITALIANO Istruzioni per l’uso
Pagina 55
SVENSKA
Bruksanvisning Sidan 62
NORSK
Bruksanvisning Sidan 69
DANSK
Brugsanvisning Sidan 76
SUOMI
Käyttöohje Sivu 83
POLSKI
Instrukcje użytkowania Strona 90
ČESKY
Návod k použití Strana 97
SLOVENSKY
Návod na použitie
MAGYAR
Használati utasítás Oldal 111
РУССКИЙ
Инструкции по эксплуатации Страница 118
12
Strana 10
4
Page 11

INSTRUCTIONS FOR USE
BEFORE USING THE APPLIANCE
DECLARATION OF CONFORMITY
PRECAUTIONS AND GENERAL
RECOMMENDATIONS
HOW TO USE YOUR HOB
COOKING TIPS
ENERGY SAVING TIPS
MAINTENANCE AND CLEANING
TROUBLESHOOTING GUIDE
AFTER-SALES SERVICE
ELECTRICAL CONNECTION
20
Page 12

BEFORE USING THE APPLIANCE
Before use, remove:
- all stickers on the cooktop;
- protective cardboard packaging and protective
plastic film;
- Check whether the cooktop has been
damaged during transport. If you are
uncertain, contact the After-Sales Service.
•
Keep the packaging material (plastic bags,
polystyrene parts, etc.) out of the reach of
children, as they are potentially dangerous.
•
The packaging material is entirely recyclable, and
is marked with the recycling symbol .
•
This appliance is marked according to the
European directive
2002/96/EC on Waste Electrical and Electronic
Equipment (WEEE).
By ensuring this product is disposed of correctly,
you will help prevent potential negative
consequences for the environment and human
health, which could otherwise be caused by
inappropriate waste handling of this product.
•
The symbol on the product, or on the
documents accompanying the product, indicates
that this appliance may not be treated as
household waste. Instead it shall be handed over
to the applicable collection point for the recycling
of electrical and electronic equipment.
Disposal must be carried out in accordance with
local environmental regulations for waste
disposal.
For more detailed information about treatment,
recovery and recycling of this product, please
contact your local city office, your household
waste disposal service or the shop where you
purchased the product.
•
Ensure that the installation and electrical
connections are performed by a qualified
technician, following the manufacturer’s
instructions and in compliance with current local
safety regulations.
CAUTION:
This cooktop complies with all
applicable safety and electromagnetic compatibility
legislation.
However, persons with pacemaker should keep at
a safe distance from the appliance. This is because it
is not possible to guarantee that all pacemakers on
the market comply with the standards in
compliance with which this appliance was tested so
it is not possible to provide an absolute guarantee of
the absence of potentially harmful interference.
DECLARATION OF CONFORMITY
DECLARATION OF CONFORMITY
•
This cooktop is suitable for contact with
foodstuffs and complies with
EEC (CE) Regulation n. 1935/2004
•
This appliance has been designed to be used
exclusively for cooking food. Any other use (e.g.
for room heating) is to be considered improper
and consequently dangerous.
•
The appliance has been designed, constructed
and sold in compliance with:
- safety objectives of the “Low Voltage” Directive
2006/95/CE (which replaces 73/23/CEE and
subsequent amendments).
- protection requirements of
“EMC” Directive 89/336/EEC;
Requirements of Directive 93/68/EEC.
21
Page 13

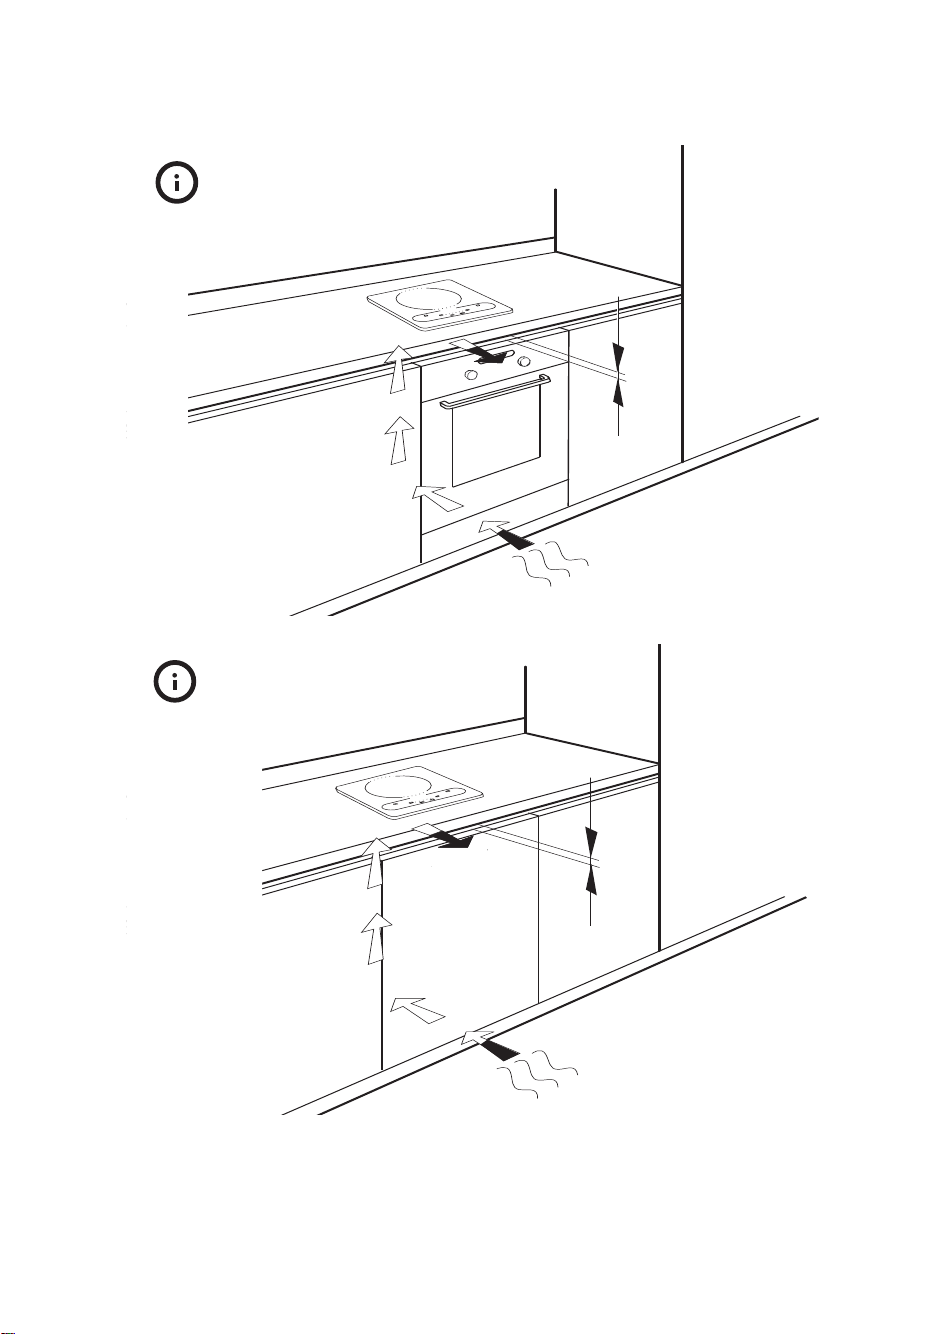
PRECAUTIONS AND GENERAL
RECOMMENDATIONS
Attention:
Before any maintenance on the appliance
disconnect it from the electrical power supply.
•
The distance between the lower face of the glass
ceramic hob and the cupboard or separating
panel must be at least 40 mm.
•
If the glass ceramic surface should break or crack,
do not use it, but call the After-sales Service
immediately.
•
This cooktop is designed solely for use as a
domestic appliance for cooking food. No other
type of use is permitted. The manufacturer
declines all liability for improper use or incorrect
use of the controls.
•
Avoid exposing the cooktop to atmospheric
agents.
•
Any repairs or maintenance work on the
appliance must be carried out exclusively by a
qualified technician.
•
Never touch the cooktop with any wet part of
the body and do not operate it with bare feet.
•
This appliance is not intended for use by persons
(including children) with reduced physical,
sensory or mental capabilities or lack of
experience and knowledge unless they have been
given initial supervision or instruction concerning
use of the appliance by a person responsible for
their safety.
•
Prevent children from coming into contact with:
- the cooktop in general in order to avoid injury.
- While it is on and after it has just been switched
off, the cooktop reaches very high
temperatures;
- packaging materials (plastic bags, polystyrene
parts, metal parts, etc.);
- an old cooktop to be scrapped.
•
Make sure that the electrical wires of other
electrical appliances near the cooktop do not
come into contact with hot parts.
•
Never leave the cooktop unattended if you are
using a lot of fat or oil: risk of oil or fat
overheating and catching fire!
•
Do not use the cooktop surface as a work surface.
•
Do not switch on the hotplates/cooking zones
without pots.
•
Do not place plastic, aluminium foil, cloths, paper
etc. on the hotplates/cooking zones while they
are still hot.
•
The cooktop features hotplates/cooking zones of
different sizes. Use pots and pans whose bottom
diameter is equal to, or slightly larger than, that of
the hotplates/cooking zones.
•
Do not place metal objects such as knives, forks,
spoons or lids on the surfaces of the hob as they
can become hot.
•
The glass ceramic induction hob has good
mechanical resistance and is designed to
withstand minor accidents and incorrect usage;
however, if an object falls on it and damages the
surface, do not use the hob. Disconnect it from
the electrical power supply and call the nearest
After Sales Service.
•
When the hob is in use, the surfaces of the cooking
zones may heat up due to transfer of heat from
foods being cooked to the pot and subsequently to
the glass.
•
To obtain the best cooking results, it is advisable
to use flat-bottomed metal pots and pans whose
bottom diameter corresponds to that of the
induction cooking zones, so that the magnetic
sensor detects them. To check that pots and
pans are made of ferrous metal, use a magnet.
The diameter of the pots and pans must
correspond to the diameter of the induction
cooking zone.
•
When using pots and pans with a non-stick surface
(such as Teflon) without any oil or grease, pre-heat
by setting to number 7 or 8.
Never heat canned foods without first
having opened the can: they can explode!
This warning also applies to all other types
of cooktops.
•
Do not use aluminium foil for cooking and do not
place food wrapped in aluminium foil on the glass
ceramic induction hob. Never place metal
utensils on the hob.
Note
: the cooking zones will not go on if the pots
and pans are not of the correct dimensions or
cannot be magnetically detected. If a pot or pan is
removed from the hotplate, it will go off.
•
The hotplate will remain switched off until
another pot or pan is placed on it.
TO OBTAIN THE BEST RESULTS:
•
Make sure you place the pot or pan in the centre
of the cooking zone outlined on the glass ceramic
induction hob.
22
Page 14

HOW TO USE YOUR HOB
Operation Instructions
1.
Put the pot on the hotplate.
•
Put the pot in the centre of the ceramic plate.
•
Make sure the air vent and the air entry are not
blocked and there are not metallic objects
around the hot plate.
2.
Plug in
After the power on, the buzzer sounds.
3.
Turn on
•
When the “on/off” button is pressed, the buzzer
sounds. The “ ” indicator lamp lights up, the
LED display “--”, indicating that the hotplate is in
the state of stand-by.
•
If you don’t press any key within 2 minutes, the
induction hotplate will shut down automatically.
4.
Heating
•
After the power supply is connected, press the
“ ” button, then press the “ ” button, the
buzzer sounds, the “ ” and the “ ” indicator
lamp light up, the default power level shall be
level 4, you can tune the power level to the max.
level by holding the “ ” key.
•
You can make a regulation by pressing the “ ”
or “ ” key.
5.
Childproof Lock
•
When the hotplate is in working state, to prevent
children from operation, you can activate the
childproof lock by pressing the childproof lock
button, the buzzer will sound at the same time.
In the childproof lock state, “Childproof Lock”
button and “ ” button can be operated, other
buttons are non effective.
•
You can deactivate the childproof lock by holding
the childproof button again. The buzzer will sound.
6.
Timer
•
In working state, after the “ ” key is pressed,
the buzzer gives out a sound, the maxi tube
flashes and displays “0”, indicating that the
induction hotplate enters timing setting state.
Each time the “ ” or “ ” key is pressed, the
time can increase or decrease by 1 minute. If it is
held, the time will increase or decrease quickly
with 10 minutes as an increment. When the timer
is max., then press the “ ” key, the time will
resume min. When the timer is min., then press
the “ ” key, the time will resume max.
•
After timing period is set, the time stabilizes after
the nixie tube flashes for 5 seconds to confirm
the period to be effective. If the time is 0, the
timer is non effective.
•
In the timing setting state, pressing the timer
button again will confirm the time.
•
In the timing setting state, if you hold the timer key,
the timer will be cancelled, the LED displays “--”.
•
When the working time reaches, the hotplate will
shut down automatically.
•
If the timer function isn’t selected, the hotplate
will shut down automatically when the default
shut down time of each level reaches. The default
shut down time of each level are as follow:
7.
Shut down
•
After using, please press the “ ” button, the
induction hotplate will stop heating.
•
The fan will run for a while to cool the induction
hotplate down.
8.
Residual heat indicator
•
If the pan has been removed or the hob has been
switched off, and the hotplate is still hot. The
indicator will display “H”, therefore, avoid touching
the hotplate when the indicator is shown.
E
D
C
1.
Induction cooking zone Ø180
2.
Display
1
2
A
B
C
F
A Childproof Lock D Heat setting increase
B Cooking zone activation button E Timer
C Heat setting decrease F ON/OFF
23
Page 15

COOKING TIPS
ENERGY SAVING TIPS
Power level (1-8) Table for using the cooking zones
1-2
Melting butter, chocolate, etc.
2
Keeping food warm and reheating small quantities of liquid
3-4
Heating larger quantities, making custards and sauces
4-5
Gentle simmering, for example: boiled vegetables, spaghetti, soups, pot roasts, stews
5
For all fried food, cutlets, steaks, cooking without use of lid, for example: risotto
6-7
Browning meats, roast potatoes, fried fish and to boil large quantities of water
8
Brisk frying, griddling steaks, etc.
•
Use pots and pans whose bottom diameter is equal to, or
slightly larger than, that of the cooking zones.
• Only use magnetic pots and pans with a flat bottom.
•
Induction cooktops only work when used with pans and pots
made of magnetic material. Suitable pans can be enamelled
and made of cast iron or special steel: cookware
manufacturers mark their products with the word
“INDUCTION” on the base to indicate that they are
compatible with induction cooktops.
•
Induction cooktops DO NOT WORK with cookware made of
normal stainless steel, glass, ceramics, copper or aluminium.
•
To check that pots and pans are made of ferrous (magnetic)
material, use a magnet.
•
The cooktop will provide optimal performance when used
with induction-cooking compatible pans of a size that is the
same as or slightly larger than the cooking area marked on the
glass-ceramic hob.
•
Make sure you place the pot or pan in the centre of the cooking
zone outlined on the glass-ceramic induction cooktop.
•
If possible, keep pot lids on when cooking.
•
Cook vegetables, potatoes, etc. with little water in order to
cut down cooking time.
•
A pressure cooker allows you to save even more energy and
time.
Safety
1.
After use, when a hotplate or the entire hob is turned off, a
residual heat indicator goes on displaying anH (hot),
indicating that the corresponding cooking zone is still
dangerously hot. The H stays on until the cooking zone has
reached a safe level (around 60 °C).
2.
An automatic switch off device activates if a cooking zone is
accidentally left on for a long time. It can be turned back on
immediately if necessary by using the controls.
3.
To prevent damage to the electronic circuits, the hob is
equipped with a sensor which constantly monitors the
temperature of these circuits. In cases of overheating, the hob
turns off automatically until a safe temperature is reached.
4.
To prevent children and others from improperly using the
appliance and to prevent it from being accidentally switched
on during cleaning operations, the hob is equipped with a
safety lock, the key button. By pressing this button the hob
is locked and the red LED turns on.
NO!
24
Page 16

ENERGY SAVING TIPS
MAINTENANCE AND CLEANING
TROUBLESHOOTING GUIDE
The glass ceramic induction hob does not work:
•
Have you pressed the control buttons following
the instructions in the section “using the hob”?
•
Is there perhaps a power failure?
•
Did you dry the hob carefully after cleaning it?
1.
If one of the following codes is displayed during
use:
E3 - E6
wait a few minutes until the temperature of the
appliance cools down. Than it will work as usual.
2.
If one of the following codes is displayed during
use:
E7 - E8
wait a few seconds than the induction hotplate
will operate as usual.
3.
If one of the following codes is displayed when
the hob ON button is pressed:
E1 - E2 - E4 - E5 - Eb - EC
contact the After Sales Service and give them
the code.
Important
!
If you are not able to turn the glass ceramic
induction hob off after using it, disconnect it
immediately from the power supply.
Attention!
if the surface is cracked, turn off the appliance to
prevent the risk of electrical shocks and call the After Sales
Service.
If the Timer function is not used, the cooking zone switches off
automatically after a fixed time that depends on the power level
selected (see table).
Important:
never clean the appliance with high pressure water
or steam cleaning equipment.
•
Clean the cooktop, when it is cool, after each use. This will
prevent the build-up of dirt and make cleaning easier.
•
Use a clean cloth, absorbent kitchen wipes and a mild washing up
liquid or a specific glass ceramic cleaner.
•
Remove baked-on dirt with the scraper tool (if supplied) and
specific cleaning products.
•
Food spills should be cleaned off before they bake onto the glassceramic surface.
•
Do not use abrasive products, corrosive chlorine-based cleaners,
oven-sprays or pan scourers.
•
The cooktop should be treated periodically with a proprietary
brand of protective cleaner, following the manufacturer's
instructions.
Important
Periodically check for dust under the appliance, near the cooling
air inlet or the outlet openings. This could hinder the ventilation
and cooling of the electronic module and decrease the
effectiveness of the hob.
Level
12345678
Time (hour)
66443322
25
Page 17

AFTER-SALES SERVICE
Before contacting After-Sales Service:
•
See if you can solve the problem yourself with the
help of the suggestions given in chapter
“Troubleshooting Guide“.
If after the above checks the fault persists,
contact the nearest After-sales Service.
Please give:
•
a brief description of the fault;
•
the type and exact model of the cooktop;
•
the service number (i.e., the number that follows
the word SERVICE on the rating plate, located
under the cooktop) The service number is also
indicated on the warranty booklet;
•
your full address;
•
your telephone number and area code.
If any repairs are required, please contact an
authorised After Sales Service
(to guarantee
that original spare parts will be used and repairs
carried out correctly).
Failure to comply with these instructions may
compromise the safety and quality of the
product.
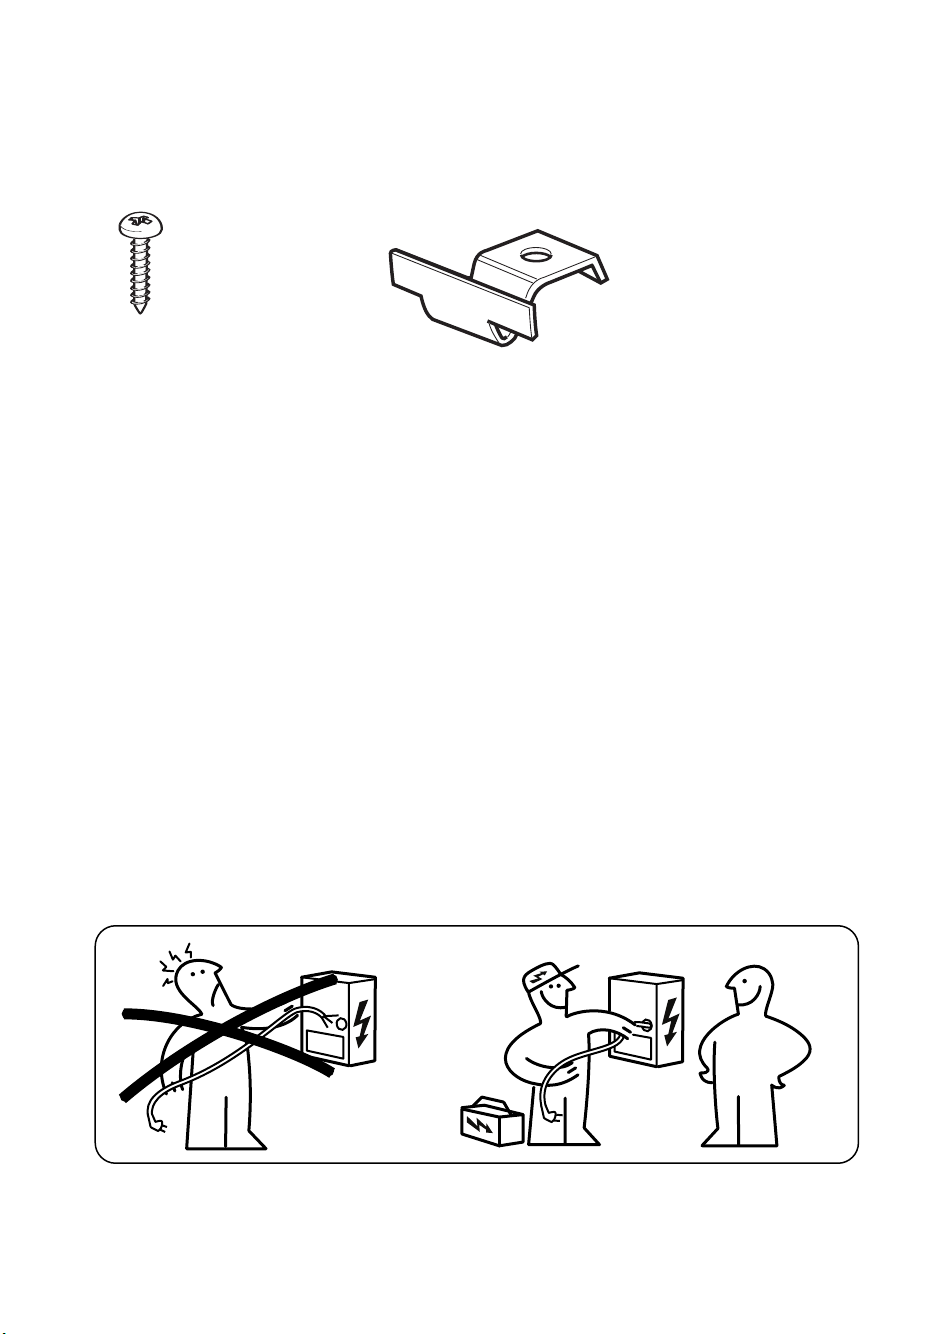
ELECTRICAL CONNECTION
Before connecting the appliance to the electricity supply:
The appliance must be installed by a qualified technician who is
fully aware of current safety and installation regulations, which
must be observed in their entirety.
Make sure that the voltage indicated on the rating plate
corresponds to the voltage in your home.
The manufacturer declines all liability for injury to persons and
animals or damage to property resulting from failure to observe
the above regulations.
For the electrical connection use a HO5VV-F or HO5V2V2-F
type cable as indicated in the table below:
An all-pole disconnect switch with minimum contact gap
equal to or greater than 3 mm must be used to install the
hob.
Attention
: the power supply cable must be long enough to
allow the hob to be removed from the worktop and must be
positioned so as to avoid damage or overheating caused by
contact with the base.
The power supply cable must not be bent or compressed.
The installer must ensure that the correct electrical connection
has been made and that it is compliant with safety regulations.
The power supply cable must be checked regularly. If it is
damaged or needs to be replaced, the operation must be carried
out by an After Sales technician with dedicated tools.
After initial electrical connection or whenever turning the hob
ON/OFF the buzzer sounds and the symbol “- -” will be
displayed for few seconds.
Power supply voltage Conductors
(number and size)
230 V
2 X 1.0 mm
2
min.
26
Page 18

5019 102 00512
© Inter IKEA System B.V. 2001
18535
AA-400491-1
 Loading...