

Page 1
Quick Start Guide
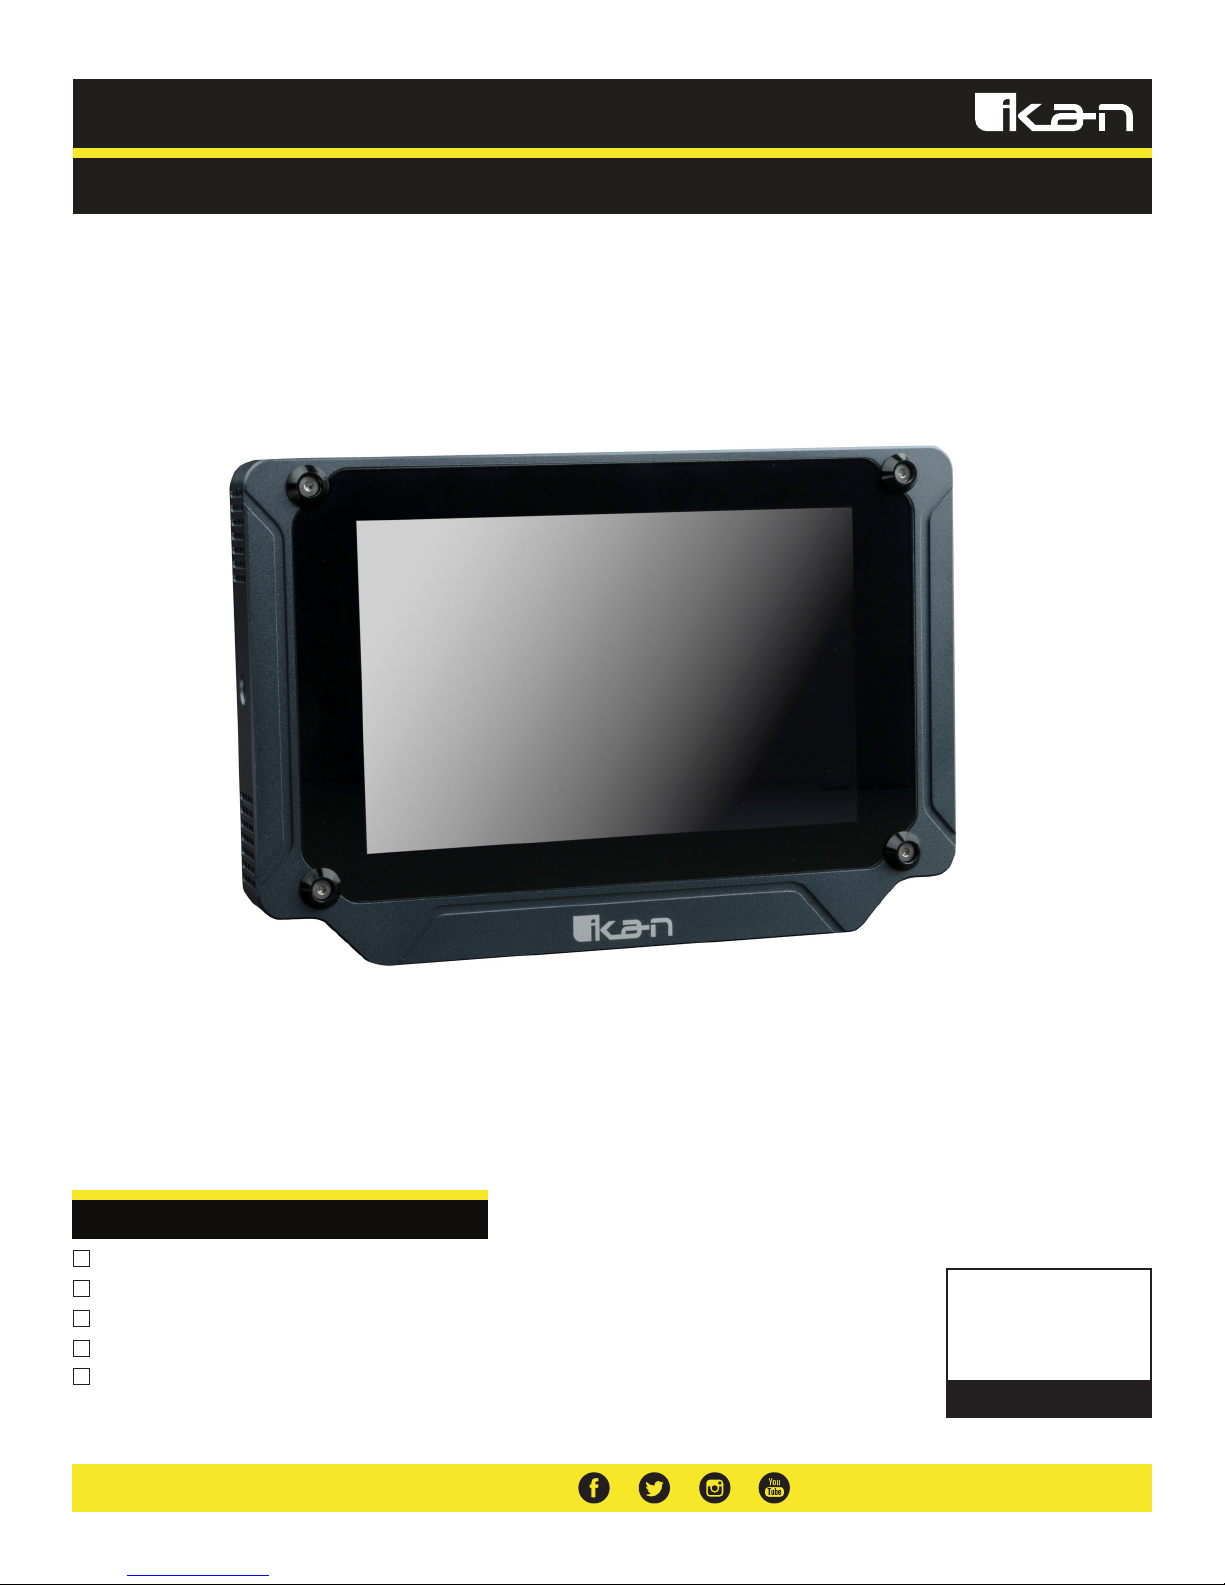
SX7
Saga 7" Super Bright HDMI/3G-SDI Field Monitor with 3D-LUTs
What’s Included
1 x Saga X7 Monitor
1 x V-Mount Plate (Attached)
1 x Mini-XLR to P-TAP Cable
1 x Dual Sony “L” Battery Adapter
1 x Hard Case
CHECKED BY
Page 2
1920 x 1200
FRONT
BACK
7 inch
2000 nits
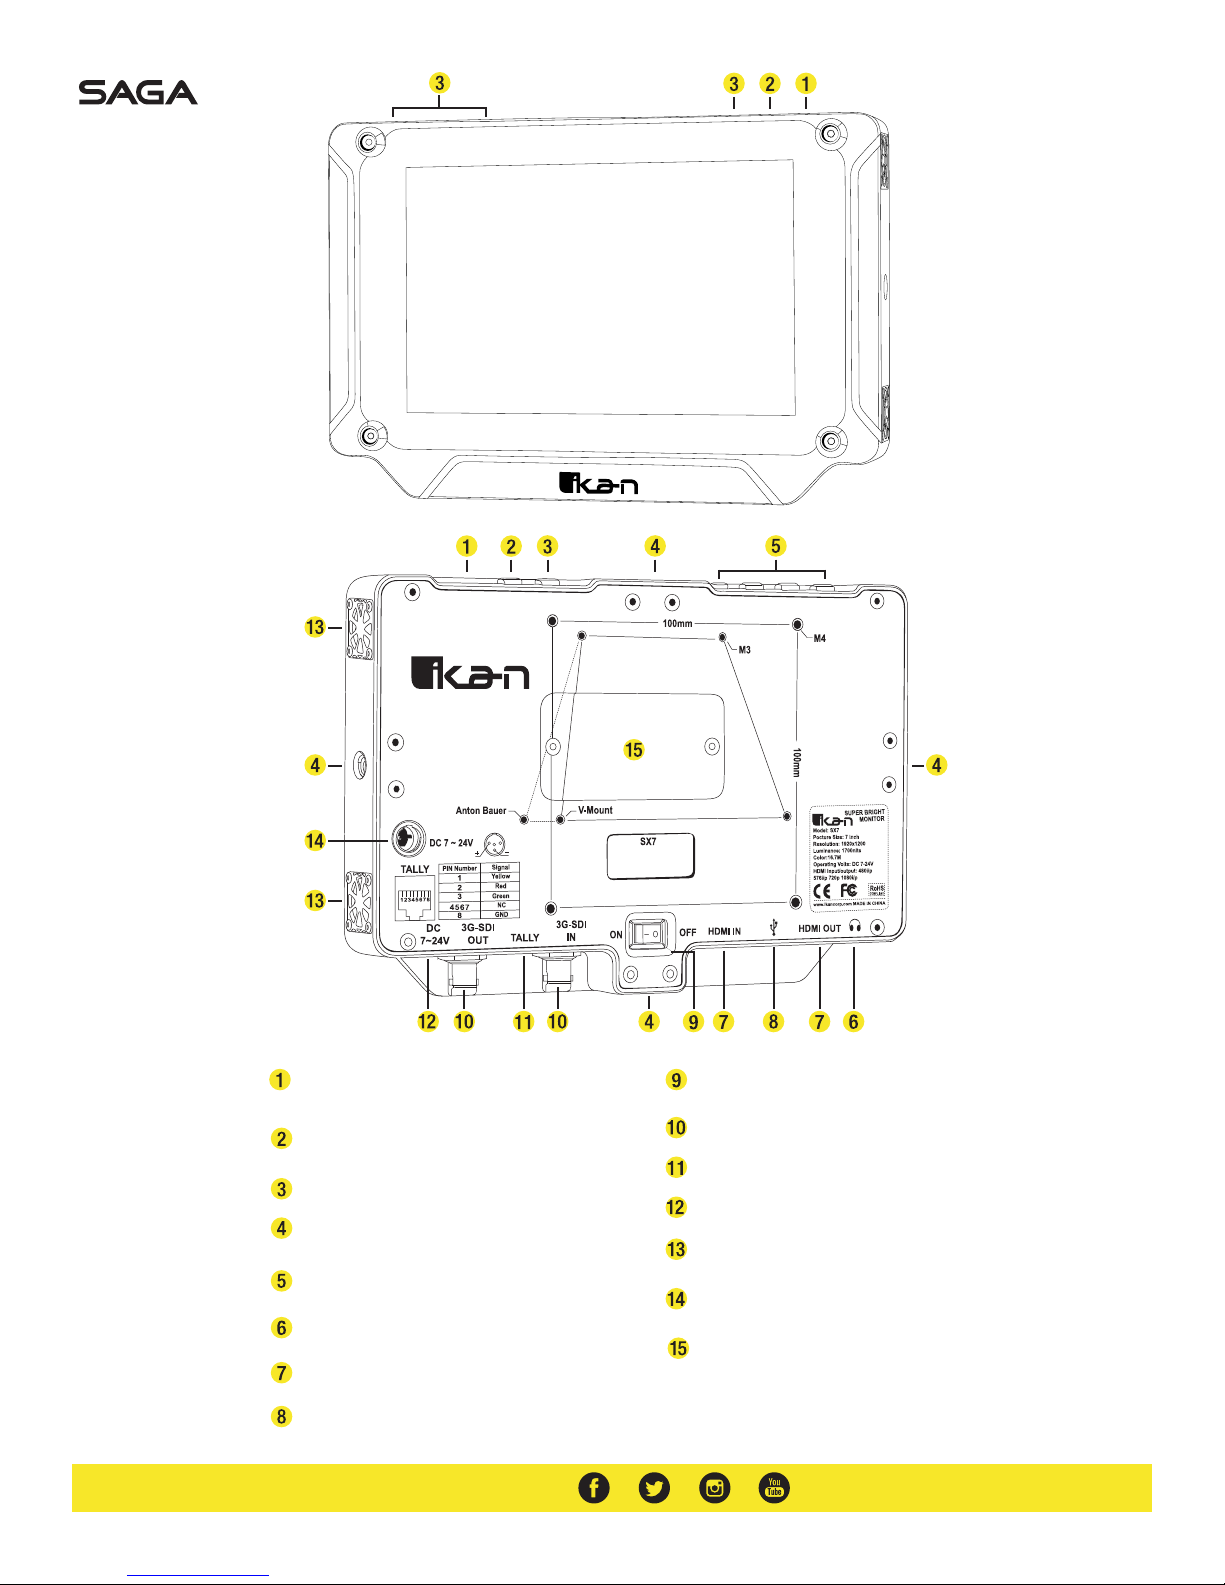
Menu Button - Scroll Wheel
Used to enter and navigate the menu.
Exit / Aspect
Used to exit the menu.
Input Select Button
1/4"-20 Threaded Insert
Function Buttons
Functions can be selected in the menu
3.5mm Headphone Output
HDMI Input/Output Terminal
USB Connector
Used for Software Updates
Power Button
Power ON/OFF
SDI Input/Output Terminal
Tally Terminal
2.1mm Coaxial Power Input
Cooling Fans
DC 7-24V Power Terminal
Mini-XLR Connection
2-Pin Power Connector Access Cover
Page 3
Configuration of Setting Menus
Guides
Guides Toggle between the following: 80%, 90%, 15:9, 4:3, 1.5:1, 2:1, 2.35:1, Custom
Guide Masks Enables or disables masking for the guides
Crosshair Activates crosshair on the center of the screen
Grids Displays grids on the screen to assist with framing
Back Return to previous menu
Video Configuration
Brightness 0-100
Contrast 0-100
Chroma 0-100
Sharpness 0-100
Tint 0-100
Color Temperature 5600K, 6500K, 7500K, 9300K, Custom
Backlight Low, Middle High
Aspect Full, 16:9, 15:9, 4:3, 1.5:1, 1.85:1, 2:1, 2.35:1, User
Back Return to Previous Menu
System Configuration
OSD-Language English, Chinese
OSD-Duration 5 Seconds, 10 Seconds, 15 Seconds, 20 Seconds, 30 Seconds, OFF
OSD-Transparancy Off, Low, Middle, High
Menu Setup Allows up to 5 users to save menu settings
DSLR Auto Scaling Automatically activates DSLR scaling when using a DSLR
System Reset Returns all settings back to default
Flip Control Flips the image horizontally, vertically, or both
Fan Controls the operation of the dual cooling fans. The fans should always be turned on when using the high setting
for the backlight.
SDI 1080p to i Scan Converts progressive SDI output signal to interlaced
Back Return to previous menu
LUT Configuration
Stored from USB List of LUT files that have been saved from the USB drive. This allows for quick access to your most used LUT’s
USB Looks Allows access to LUT files saved on a connected USB drive. Use scroll wheel to navigate file system. When you find
the LUT you want to load just simply press the scroll wheel down and the file will be loaded. Press the scroll wheel
a second time and the LUT will be stored on the monitor and accessible via the “Stored from USB” menu option
Back Return to previous menu
Firmware
Version Displays firmware version
Update USB Used to update the monitor firmware. Firmware should be saved in the root directory of a USB drive for the monitor
to recognize it. Check www.ikancorp.com for the latest firmware.
Back Return to previous menu
Page 4
Function Set Up 1-4
Guides Toggle between the following: 80%, 90%, 15:9, 4:3, 1.5:1, 2:1, 2.35:1
Submenu Options: Color - White, Red, Green, Blue, Black
Thickness - 1-10
Guide Masks - ON / OFF
Crosshair Displays a crosshair on the center of the screen
Submenu Options: Color - White, Red, Green, Blue, Black
X Offset - 0-100% (50% is dead center)
Y Offset - 0-100% (50% is dead center)
Peaking This monitor is equipped with a color peaking feature which highlights the desired focus area in a bright color.
The operator adjusts the focus until the subject is surrounded with the color outline. The color and thickness of
the line can be adjusted.
Submenu Options: Factor - (line thickness) 1-10
Color - White, Red, Green, Blue, Black
Underscan The image size is reduced. This allows the operator to be sure there is no unwanted items in the frame.
Submenu Options: Factor - (Image Size) 50-100
DSLR Scaling The DSLR Scaling function will aloow the user to extend the DSLR camera’s HDMI video output to: Full, 3:2, 16:9
Zooming This feature allows the operator to zoom into the image up to 3x
Submenu Options: Position - Middle, L+T (left top), R+T (right top), R+B (right bottom), L+B (left bottom), User
X Offset - Allows the operator to position the image on the X Axis
Y Offset - Allows the operator to position the image on the Y Axis
Ratio - X1.5, X2, X2.5, X3, User
H - Allows the operator to stretch the image horizontally up to 3x
V - Allows the operator to stretch the image vertically up to 3x
Check Field Toggles between blue only, red only, green only, & mono modes. This is used to help calibrate the monitor to color bars.
H / V This function displays the blanking portion of the incoming video signal
Grids Activates a grid on the screen to assist with framing. From 4-121 boxes can be displayed on the screen.
Submenu Options: Grids - 1-10
Color - White, Red, Green, Blue, Black
False Color This feature utilizes a full spectrum of assigned color indicators to show overall brightness of the image. This
helps achieve perfect exposure.
Submenu Options: Under Warn. - Allows the user to set the desired IRE level in which the image will show purple
for the under-exposed areas of the image.
Over Warn. - Allows the user to set the desired IRE level in which the image will show red for
the over-exposed areas of the image.
Tooltip - Enables or disables the color code key on the screen.
Zebra The monitor will display slanted lines where the image is over-exposed or under-exposed.
Submenu Options: High Area - ON / OFF
Factor - Adjust sensitivity of over-exposure lines
Color - White, Red, Green, Blue, Black
Low Area - ON/OFF
Factor - Adjust sensitivity of under-exposure lines
Color - White, Red, Green, Blue, Black
Audio Meters Allows the operator to monitor up to 8 channels of audio
Submenu Options: Audio Meters - ON / OFF
Audio Channel - 2 Channel, 8 Channel
Position - Top, Bottom, Division (2 Channels on top, 2 Channels on bottom)
Waveform Toggles between the different scopes available: Waveform, Vectorscope, RGB Parade, Histogram, Audio Meters
Submenu Options: Waveform - Full screen, Four screen, All types (all scopes on screen at once), User mode,
(custom position and scopes on screen at the same time).
Options - Allows the operator to enable individual scopes and choose options
Blending - 0-100 (Choose opacity of the scopes)
SDI WF Mode - On Screen, Output (choose to display the scopes on the monitor screen or
output them via SDI to a secondary monitor).
Page 5
Specifications
Aspect Ratio 16 x 10
Backlight LED
Brightness 2000 cd/m2
Build Material Aluminum
Color Depth 16.7 Million
Color System PAL / NTSC / SECAM (Auto-Detected)
Contrast Ratio 1200:1
Dimensions 8.5 x 5.7 x 0.9 in.
Input Voltage DC 7V - 24V
Inputs HDMI, 3G-SDI
Operating Temperature 0°C~50°C (32°F~122°F)
Outputs HDMI, 3G-SDI
Pixel Pitch 0.07875 x 0.07875 mm
Power Consumption TBD
Resolution 1920 x 1200
Response Time 20 ms
Screen Size 7 inch
Viewing Angle 178° Horizontal / 178° Vertical
Weight 2 lbs
Supported Video Signals
3G-SDI 2048x1080psf @ 23.98, 24, 25, 29.97, 30 Hz
1920x1080p @ 50, 59.94, 60 Hz (4:2:2 YCBCR)
HD-SDI 1280x720p @ 23.98, 24, 25, 29.97, 30, 50, 59.94, 60 Hz (4:4:4 YCBCR)
1920x1080i @ 50, 59.94, 60 Hz (4:4:4 YCBCR)
1920x1080psf @ 23.98, 24, 25, 29.97, 30 Hz (4:4:4 YCBCR)
1920x1080p @ 23.97, 24, 25, 29.97, 30 Hz (4:4:4 YCBCR)
SD-SDI 720x480i @ 60Hz (4:2:2)
720x576i @ 50Hz (4:2:2)
720x480i @ 60 Hz
720x576i @ 50 Hz
HDMI
1280x720p @ 23.97, 24, 25, 29.94, 30, 50, 59.94, 60 Hz
1920x1080i @ 50, 59.94, 60 Hz
1920x1080psf @ 24, 25, 29.97, 30 Hz
1920x1080p @ 23.98, 24, 25, 29.97, 30, 50, 59.94, 60Hz
Optional Accessories
Some other products that work well with the SX7 available from Ikan include:
C-1K
IB-L95
IBS-970
ICH-KDUAL-L
MA207
MA211
C-1K Battery Charger (BP-U, V-Mount & Anton Bauer)
IB-L95 / 95Wh Professional Battery
Sony L-Series NP-F970 Compatible Battery
Dual Charger for Sony L-Series Style Batteries
7 Inch Articulating Arm
11 Inch Articulating Arm
Page 6
Learn More
More dynamic information at official website: www.ikancorp.com
Support
Contact email: [email protected]
CONDITIONS OF WARRANTY SERVICE
• Free service for one year from the day of purchase if the problem is caused by manufacturing errors.
• The components and maintenance service fee will be charged if the warranty period is expired.
Free Service will not be Provided in the Following Situations:(*Even if the product is still within the warranty period.)
• Damage caused by abuse or misuse, dismantling, or changes to the product not made by the company.
• Damage caused by natural disaster, abnormal voltage, and environmental factors, etc.
©2017 ikan Corporation. All rights reserved
 Loading...