

Page 1
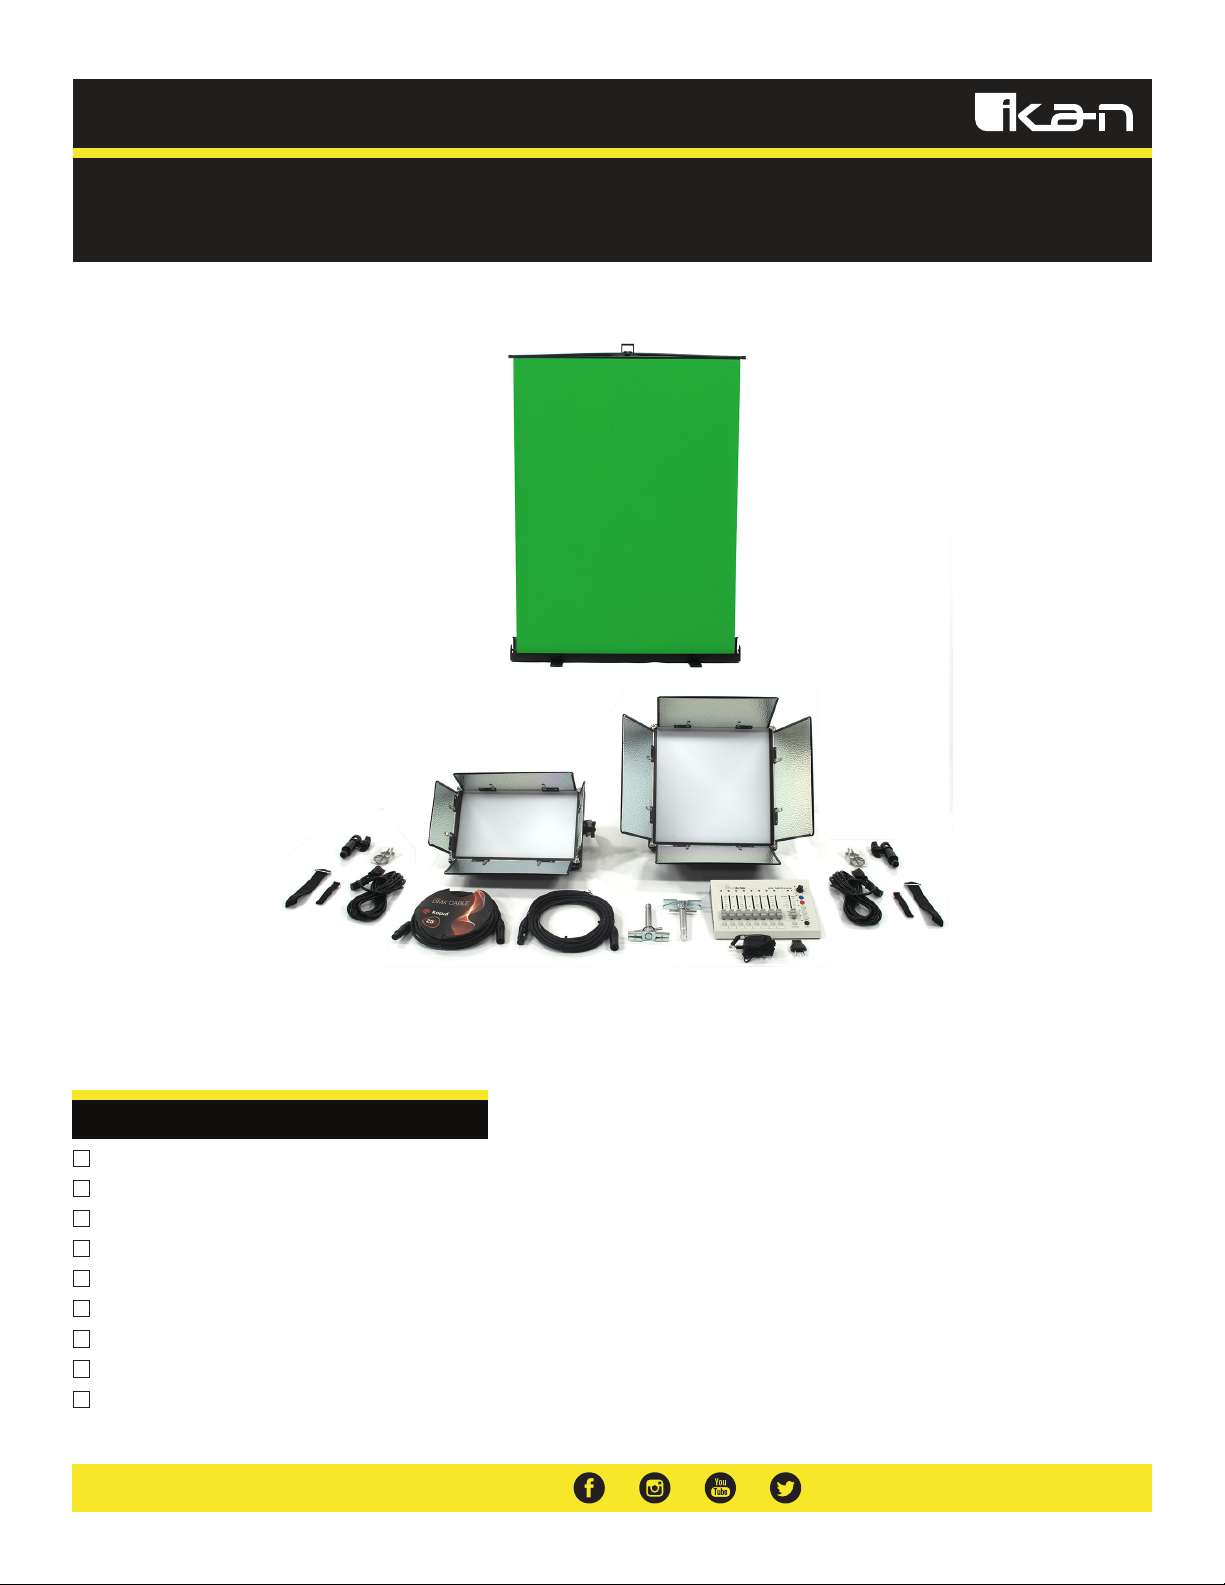
Quick Start Guide
CHROMA-1F1H
Ceiling Mount Studio Chromakey Light Kit with 1x1 Softlight Panel,
Half x 1 Softlight Panel, and DMX Controller
What’s Included
1 x LBX10
1 x LBX5
1 x 8 Channel Controller
1 x Portable Chromakey Green Screen
2 x 5-pin 25’ DMX Cables
2 x Drop Ceiling Scissor Mount
2 x Safety Cable (one included with each light)
2 x Light Power Supply w/ Cable
1 x DMX Controller Power Adapter
Page 2
LYRA DMX
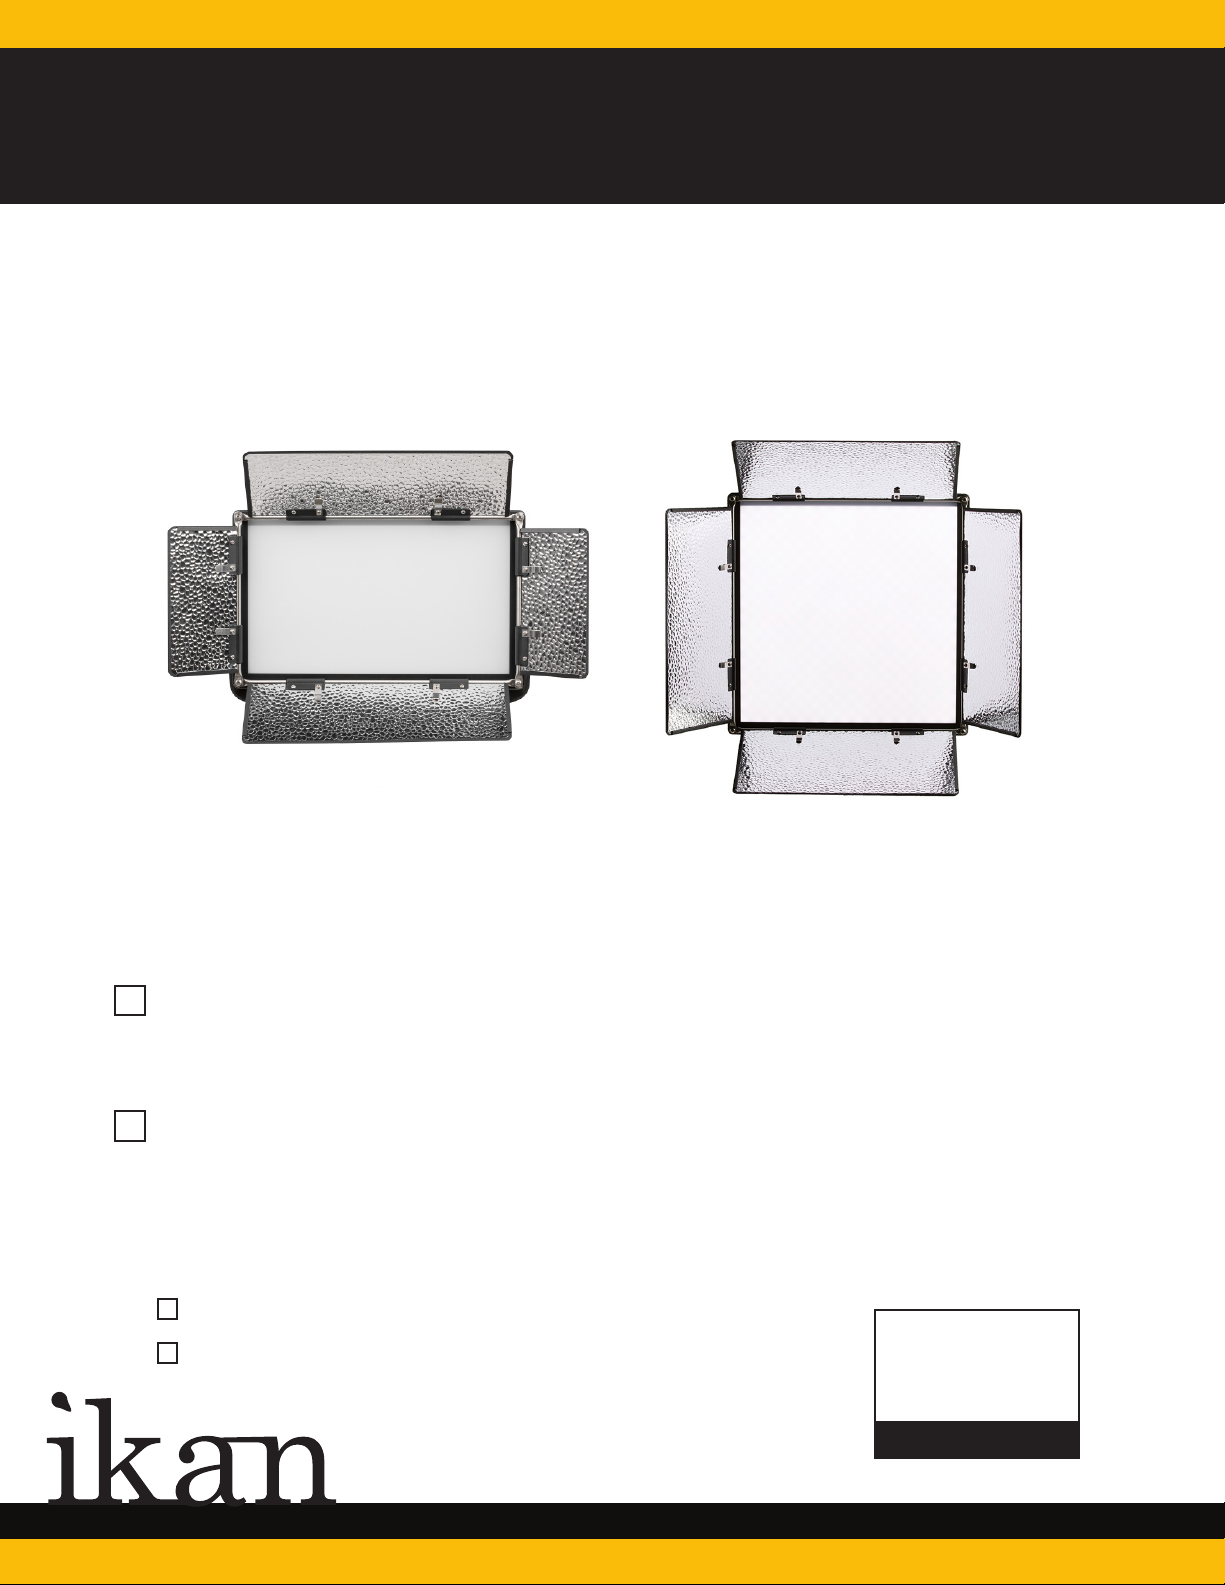
Lyra Bi-Color DMX Flat Panel Light
QUICKSTART GUIDE
LBX5
Lyra Bi-Color LED Half x 1 Soft Light with DMX
LBX10
Lyra Bi-Color LED 1 x 1 Soft Light with DMX
What’s Included
1 x 15V Power supply
1 x Yoke Mount
CHECKED BY
www.ikancorp.com
713.272.8822
Page 3

General Information
Thank you for buying the ikan Lyra Bi-Color DMX512 LED Lights. This fixture has been designed to perform reliably for years
when the guidelines in this booklet are followed. Please read and understand the instructions in this manual carefully and
thoroughly before attempting to operate this unit. These instructions contain important information regarding safety during use
and maintenance.
Every fixture has been thoroughly tested. Carefully check the shipping carton for damage that may have occurred during
shipping. If the carton appears to be damaged, carefully inspect your unit for damage and be sure all accessories necessary
to operate the unit have arrived intact. In the event damage has been found or parts are missing, please contact our customer
support team for further instructions. Please do not return this unit to your dealer without first contacting customer support at
the number listed below. Please do not discard the shipping carton in the trash. Please recycle whenever possible.
Safety Instructions:
This fixture is an extremely sophisticated piece of electronic equipment. To guarantee a smooth operation, it is important to
follow the guidelines in this manual. The manufacturer of this device will not accept responsibility for damages resulting from the
misuse of this fixture due to the disregard of the information printed in this manual.
This device falls under PROTECTION CLASS 1. It’s essential this device be grounded properly. Only qualified personnel should
perform all electrical connections.
INDOOR USE ONLY!
DO NOT EXPOSE FIXTURE TO RAIN AND/OR MOISTURE!!
DO NOT PLUG FIXTURE INTO A DIMMER PACK!
For proper operation, follow the Installation guidelines described in this manual. Only qualified and certified personnel should
perform installation of this fixture and only the original rigging parts (yoke) included with this fixture should be used for installation.
Any modifications will void the original manufacturer’s warranty and increase the risk of damage and/or personal injury.
Never look directly into the light source of this fixture to prevent risk of injury to your retina, which may induce blindness.
Always disconnect from main power source before performing any type of service and/or cleaning procedure. Only handle the
power supply by the plug end, never pull out the plug by tugging the wire portion of the cord.
Do not operate this fixture if the power cord has become frayed, crimped and/or damaged. If the power
cord is damaged, replace it immediately with a new one of similar power rating.
General Guidelines:
NEVER OPEN THIS FIXTURE WHILE IN USE!!
Please make sure there are NO FLAMMABLE MATERIALS close to the fixture while operating, to prevent any fire hazard.
The fixture must be installed in a location with adequate ventilation, at least 1.5 feet (.5m) from adjacent surfaces. Be sure no
air ventilation slots are blocked.
DO NOT attempt installation and/or operation without knowledge of how to do so.
DO NOT permit operation by persons who are not qualified to operate this type of fixture. Most damages are the result of
operations by nonprofessionals.
Consistent operational breaks may ensure the fixture will function properly for many years to come.
DO NOT shake fixture and avoid using brute force when installing and/or operating the fixture.
Always install the fixture with an appropriate safety cable. When installing the fixture in a suspended environment, always use
correct mounting hardware that can be inserted into the Baby 1/8" or Junior 1-1/8" combo pin adaptor.
Use the original packaging and materials to transport the fixture in for service.
Page 4
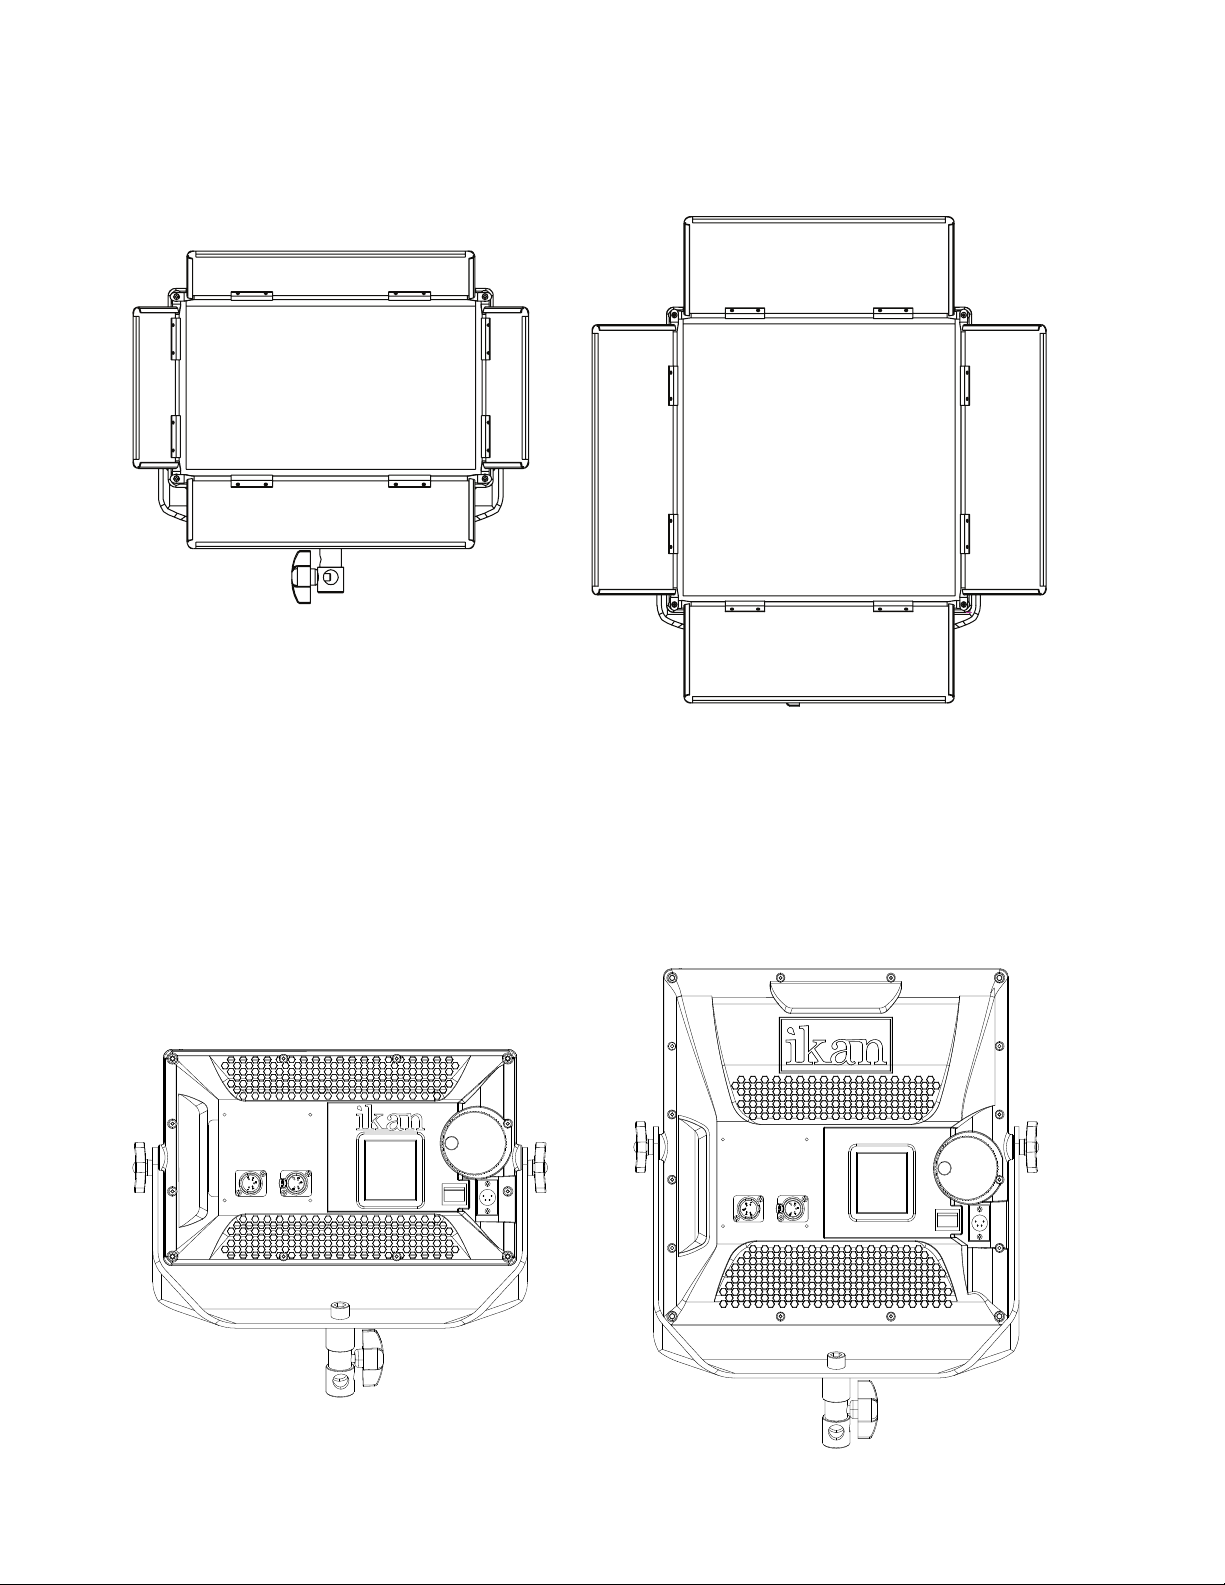
Fixture Overview (Front)
LBX5
LBX10
Fixture Overview (Back)
LBX5
LBX10
Page 5
Fixture Menu
ON-BOARD SYSTEM MENU
The fixture comes with an easy to navigate system menu. The next section will detail the functions of each command in the
system menu.
LCD MENU CONTROL KNOB
The control knob allows for local control as well as control from DMX board. The local control gives the user adjustment from
10%-100% in brightness. On Bi-Color fixtures, the local knob gives the user the ability to switch from 5600K -3200K just by
pressing down on the large yellow dial. The user can also adjust the DMX channels 1 thru 512 by pressing down again on the
large yellow dial.
DMX Channel
The DMX512 channel selection can be made from the back of the fixture using the large yellow knob to dial in the correct
DMX number. When a DMX signal is detected on the fixture, all other controls are closed down and only DMX channel control
can be selected on the rear of the fixture.
Depending on DMX channel selected a bi-color light will require two channels for use on the DMX board.
100% will be the 5600K color output. 0% will be the 3200K color output. The middle position will be 4600K color output.
Example:
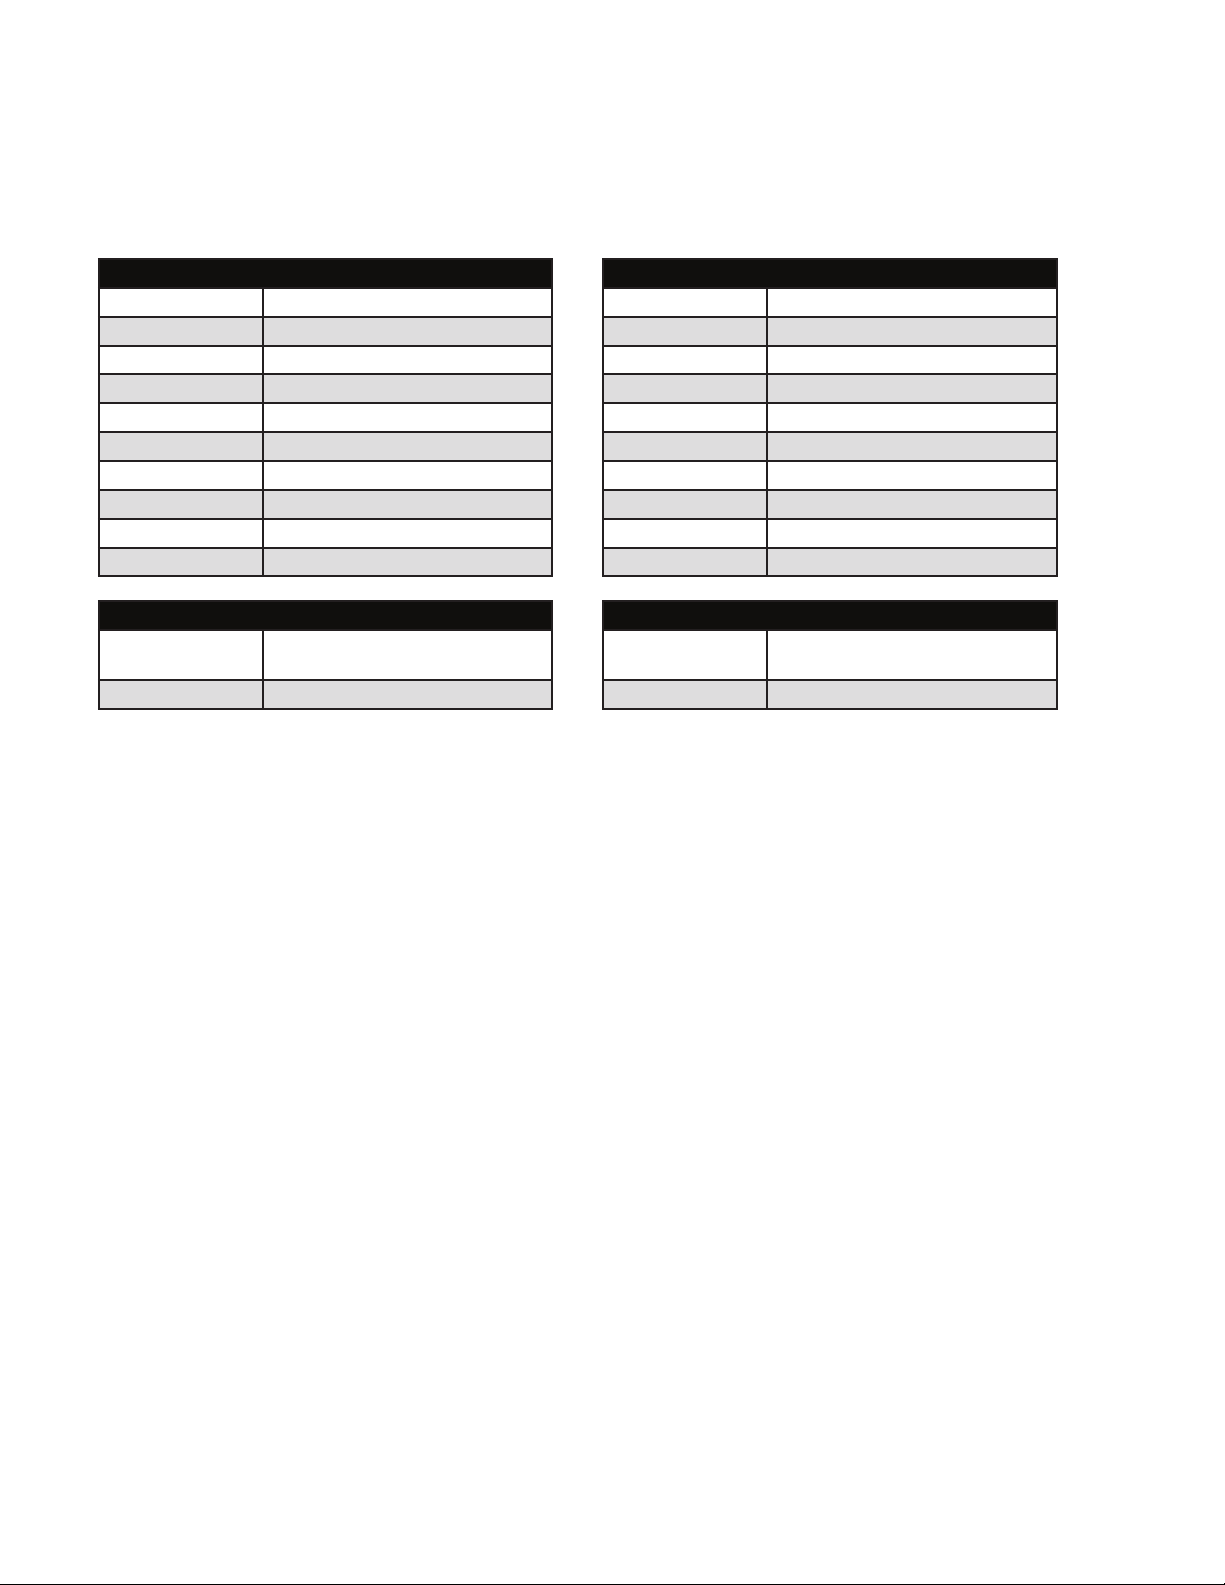
Channel Brightness Color
5 & 6 Channel 5 Channel 6
Cleaning & Maintenance
CAUTION!
DISCONNECT POWER BEFORE CLEANING OR MAINTENANCE!
CLEANING
Frequent cleaning is recommended to insure proper function, optimized light output, and an extended life. The frequency
of cleaning depends on the environment in which the fixture operates: damp, smoky, or particularly dirty environments can
cause greater accumulation of dirt on the fixture.
Never use alcohol, solvents, or ammonia- based cleaners
MAINTENANCE
Regular inspections are recommended to insure proper function and extended life. There are no user serviceable parts inside
this fixture. Please refer all other service issues to an authorized ikan service technician. Should you need any spare parts,
please order genuine parts from your local ikan dealer.
Please refer to the following points during routine inspections:
Be sure all screws and fasteners are securely tightened at all times. Lose screws may fall out during normal operation resulting
in damage or injury as larger parts could fall.
Check for any deformations on the housing, rigging hardware and rigging points (ceiling, suspension, trussing). Deformations
in the housing could allow for dust to enter into the fixture. Damaged rigging points or unsecured rigging could cause the
fixture to fall and seriously injure a person(s).
Electric power supplies and cables must not show any damage or fraying.
Never remove the ground prong from the power cable.
Page 6
Specifications
LBX5 Fixture Specifications
Light Source 510 0.2 watt LEDs
Head Type Bi-Color 5600K-3200K
Lens ½ Stop Soft Diffusion
Beam Angle 110°
Control / Dimming Knob Control
Build Material Heavy Duty Resin Plastic
Cooling System Passive Cooling
Yoke Baby 5/8" -- Junior 1 1/8" Combo Pin
Fixture Size 14 x 8 x 3 in.
Fixture Weight 4 lbs
LBX5 Electrical Specifications
Power Supply Input: 110-220VAC
Output: 15VDC
Power Consumption 51W; 14-18VDC
Optional Accessories
LBX10 Fixture Specifications
Light Source 900 0.2 watt LEDs
Head Type Bi-Color 5600K-3200K
Lens ½ Stop Soft Diffusion
Beam Angle 110°
Control / Dimming Knob Control
Build Material Heavy Duty Resin Plastic
Cooling System Passive Cooling
Yoke Baby 5/8" --Junior 1 1/8" Combo Pin
Fixture Size 14 x 14 x 3 in.
Fixture Weight 6 lbs
LBX10 Electrical Specifications
Power Supply Input: 110-220VAC
Output: 15VDC
Power Consumption 90W; 14-18VDC
Some other products that work well with the Lyra DMX Lights available from Ikan include:
CV600
CP-STND-V3
KCP-703
PWRGP-01
ROLLR-STND10
SW-04
IDX-096
Digital LED Light Meter with Exposure & Spectrometer
Compact Light Stand Version 3
Stage Clamp with 16mm Stud
Power Grip
2-Stage Roller Stand 10ft 6in
Safety Wire
96 Channel DMX Console
Page 7
ISO 9001 CERTIFIED
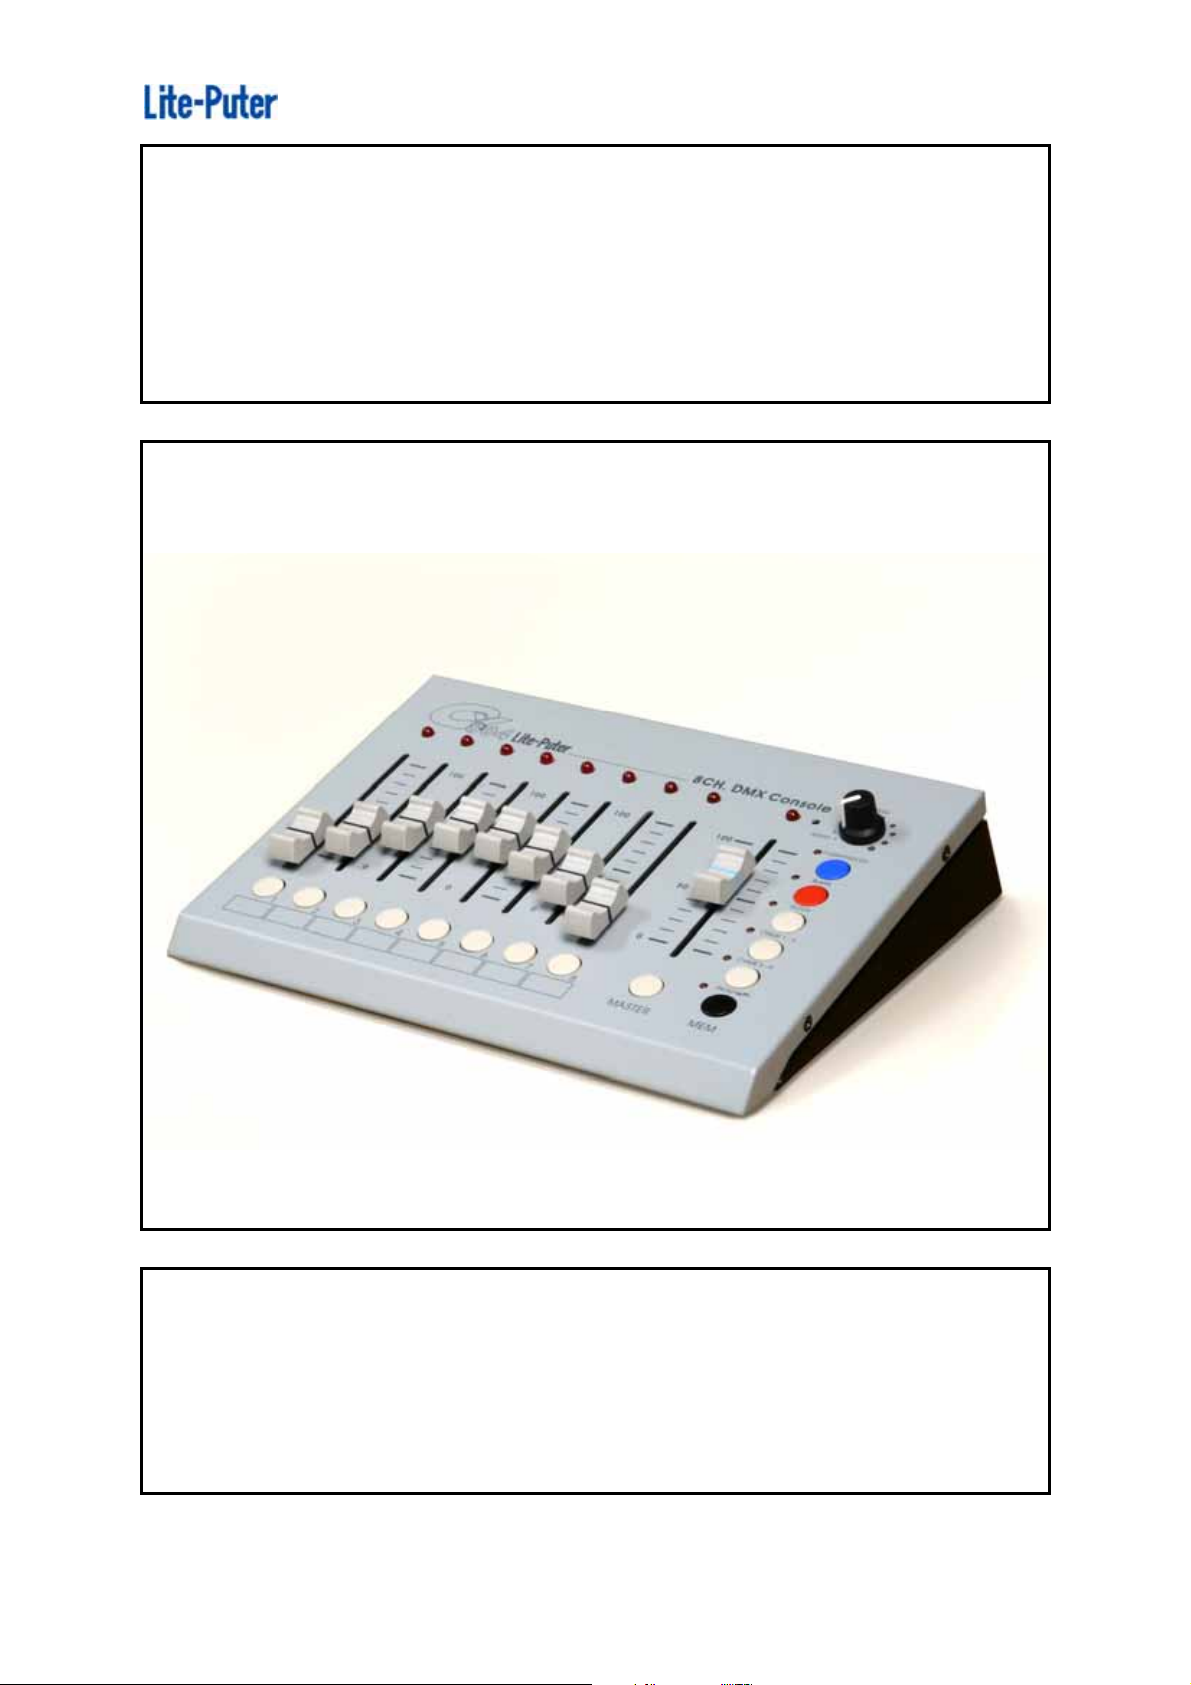
CX-804
8 Channel DMX Console
【User manual】
Lite-Puter Enterprise Co., Ltd.
website:www.liteputer.com.tw
E-mail: [email protected]
Page 8
ISO 9001 CERTIFIED
Chapter 1. CX-804 Instruction
1-1 Feature
Standard DMX 512 signal control
8 dimming control channel
8 control scene setting
Chaser function:
1.) Channel chase
2.) Scene chase
3.) Speeding control
4.) Chase Function
Flash
Audio input
1-2 Specification
Power supply DC 12V/ 1A
Control signal DMX512 / 1990
Control channel 8 channel
Connector XLR 3-pin(x1), XLR 5-pin(x1),phone jack RJ11(x2)
Audio input Max. input:-10 db 100mV
Weight 1.5 Kg
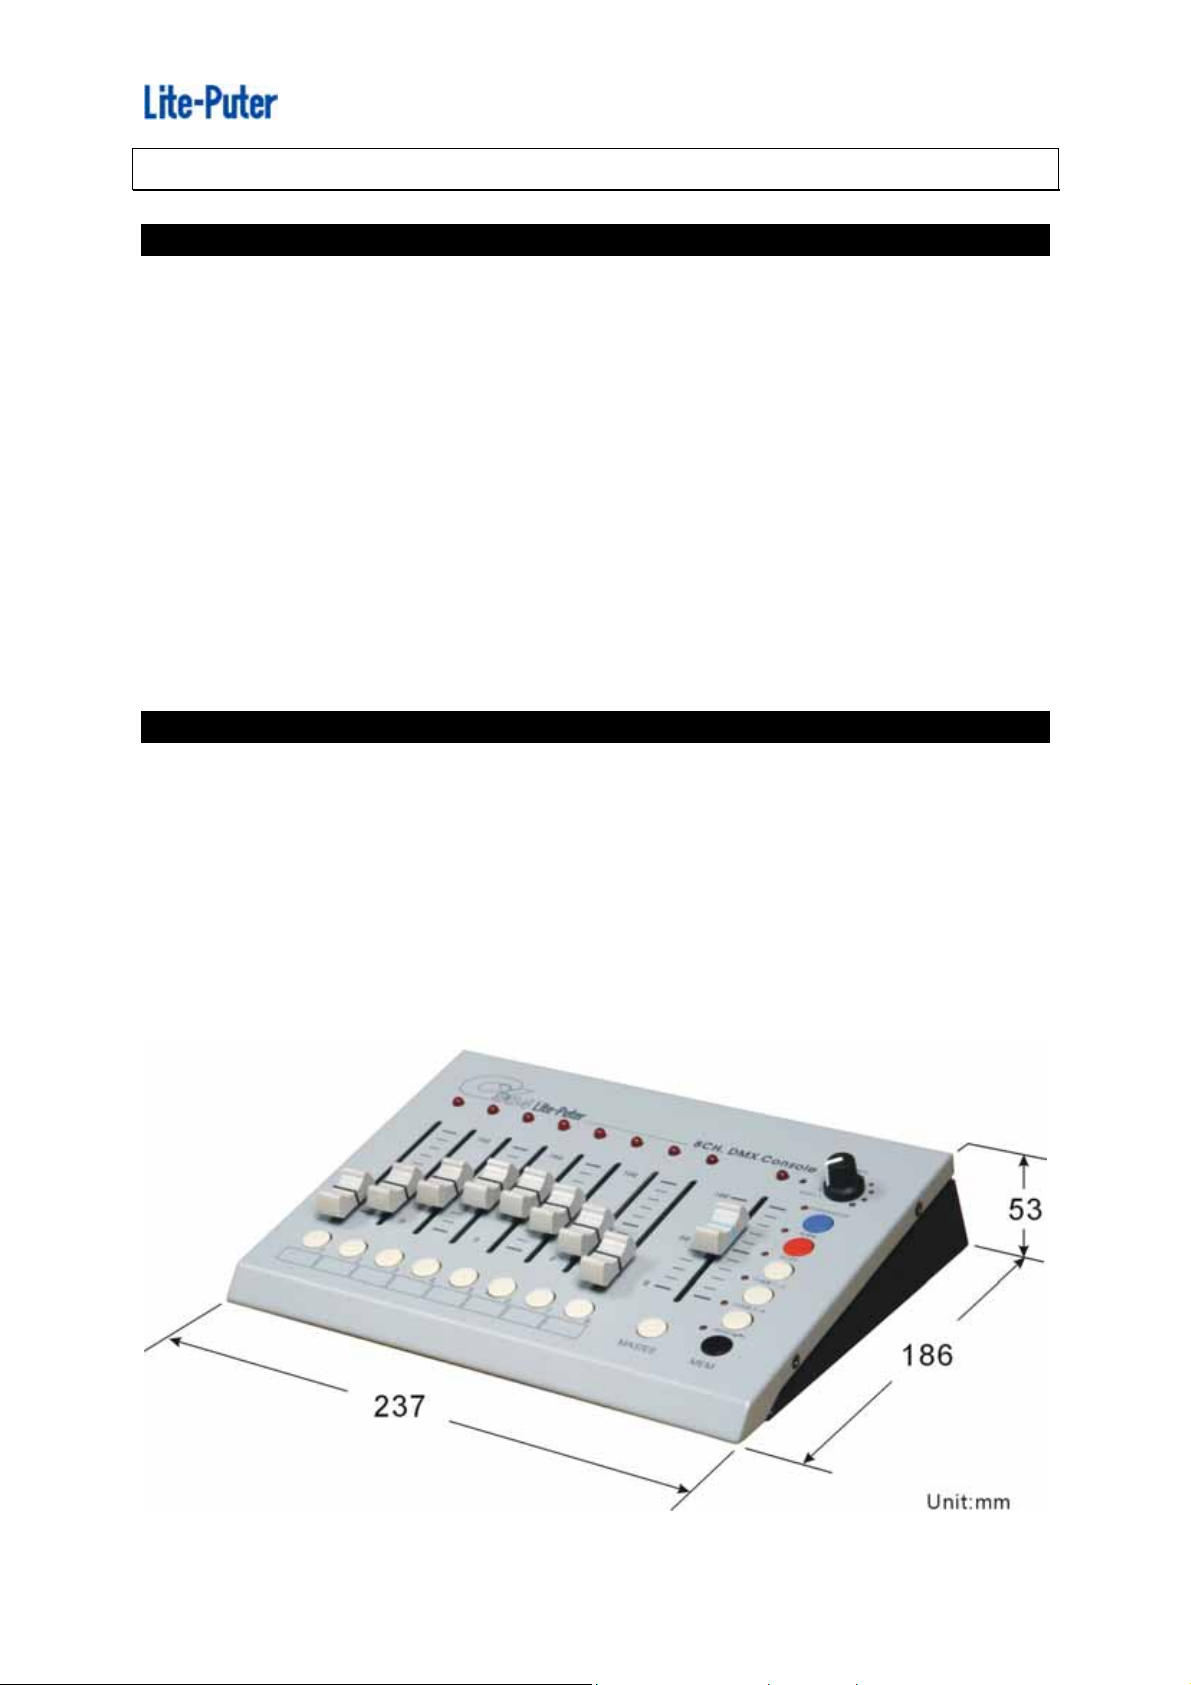
Dimension 237(W)*53(H)*186(D)mm
1
CX-804 [EUM-A]
Lite-Puter
Page 9
ISO 9001 CERTIFIED
1-3 CX-804 Function
10
11
9
1
2
3
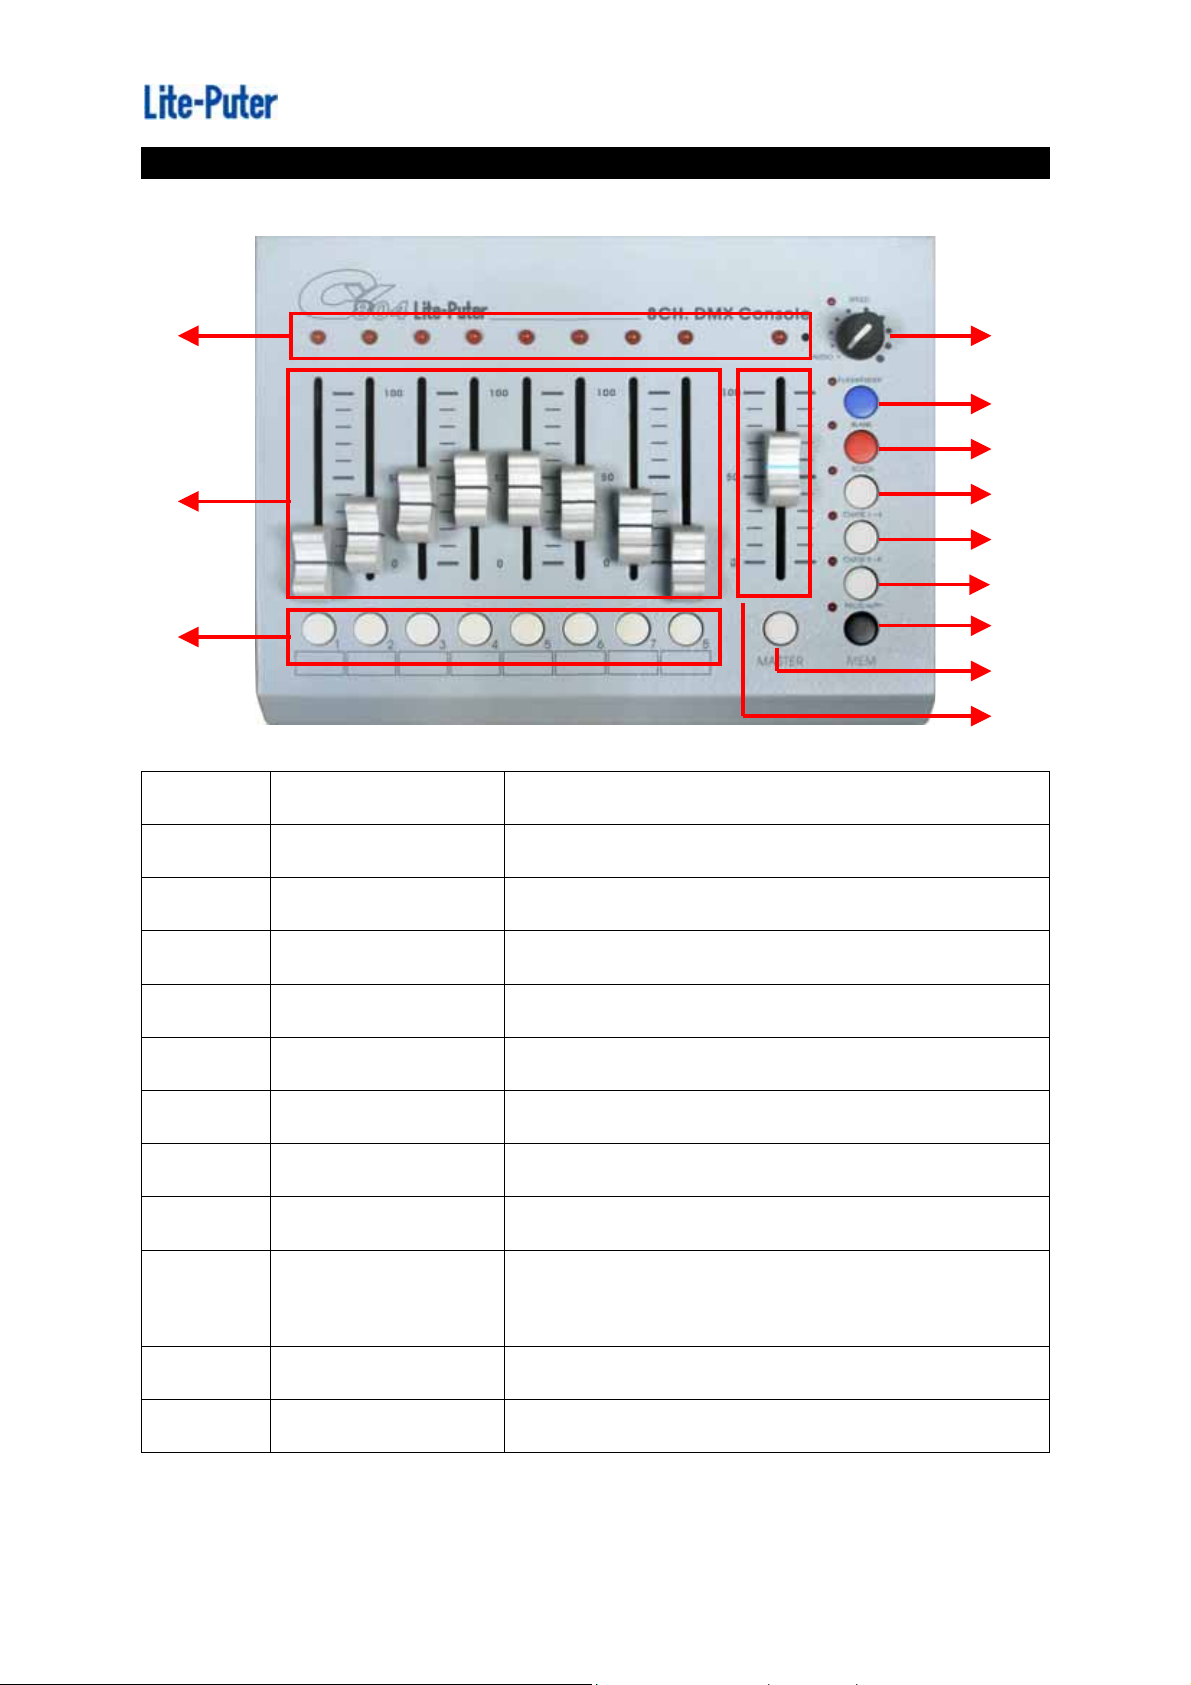
MASTER-VR
MASTER
SPEED/ AUDIO
Master dimming control
Master Flash control
Audio / speed chase control
3
12
4
5
6
7
8
2
1
4
5
6
7
8
9
10
11
12
BLANK
SC/CH
CHASE 1
CHASE 2
PROG
LED
VR-1…VR-8
1 ~ 8
FLASH/FADER
Pause
Scene / Channel control
Chase 1-4
Chase 5-8
Scene/ Chase direction control
Signal display
Setting 1…8 dimming channel
Recall 1…8 Scene
Channel / Scene setting / FLASH
Chase Mode FLASH / FADER setting
2
CX-804 [EUM-A]
Lite-Puter
Page 10
ISO 9001 CERTIFIED
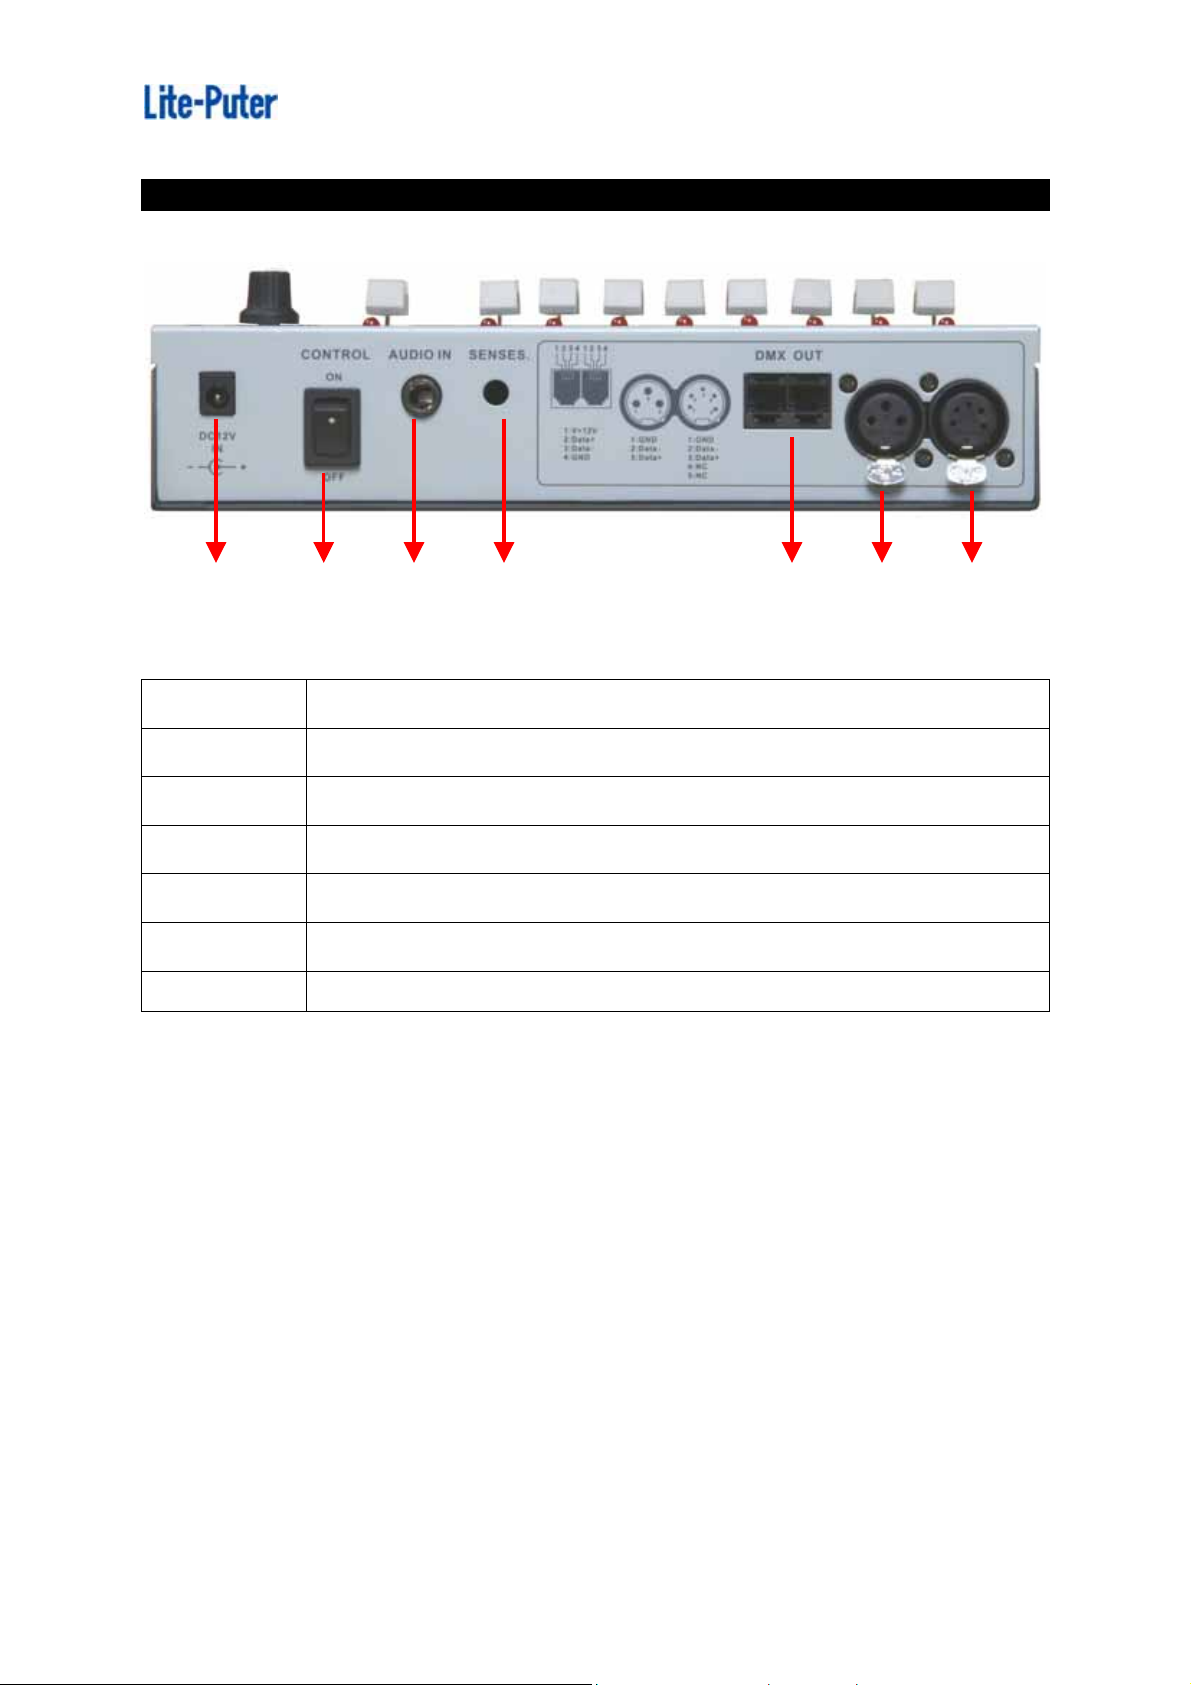
1-4 CX-804 Rear panel
13
14
15 19
18
17
16
13 Power supply: DC 12V / 1A
14 Power switch
15 Audio input: 100mV
16 DMX connector: XLR 5-PIN
17 DMX connector: XLR 3-PIN
18 DMX connector: PHONE JACK (RJ11)
19 Audio sensitivity control
3
CX-804 [EUM-A]
Lite-Puter
Page 11
ISO 9001 CERTIFIED
Chapter 2. CX-804 operation
2-1 SCENE setting
Select【CH】mode, and move the fader to set the dimming value
press【PROG】+【1~8】 to save control scene.
STEP-1 press【SC / CH】to select the control channel
LED : off in CH mode
LED : on in SC mode
STEP-2 move【MASTER-VR】to the top
STEP-3 move【VR-1 … VR-8】to dimming
STEP-4 press【PROG】+【1…8】to confirm and save the selection
1.) When MASTER-VR in 100%, and the VR-1…VR-8 in 50% of dimming value,
the SCENE total output dimming value will be 50%.
2.) When MASTER-VR in 50 %, and the VR-1…VR-8 in 50% of dimming value,
the SCENE total output dimming value will be 25%.
2-2 Scene recall
Refer to 2-1 to set up the dimming value of SC-1…SC-8, use the following
function to recall the scene.
A: 0%…100% VR control
STEP-1 press【SC / CH】key to select【SC】mode. (LED ”on”)
STEP-2 press【VR-1…VR-8】
Ex : to recall SC-2, adjust the【VR-2】, to recall scene 2 by dimming
B: FLASH
STEP-1 press【SC / CH】to select【SC】mode. (LED ”on”)
STEP-2 press【1…8】
EX : to recall SCENE 2, press【2】,and scene 2 switch to 100% full, and release the
key to off the function.
4
CX-804 [EUM-A]
Lite-Puter
Page 12
ISO 9001 CERTIFIED
2-3 CHASE
(1) Internal chase setting (SPEED CHASE)
(2) Audio input control (AUDIO)
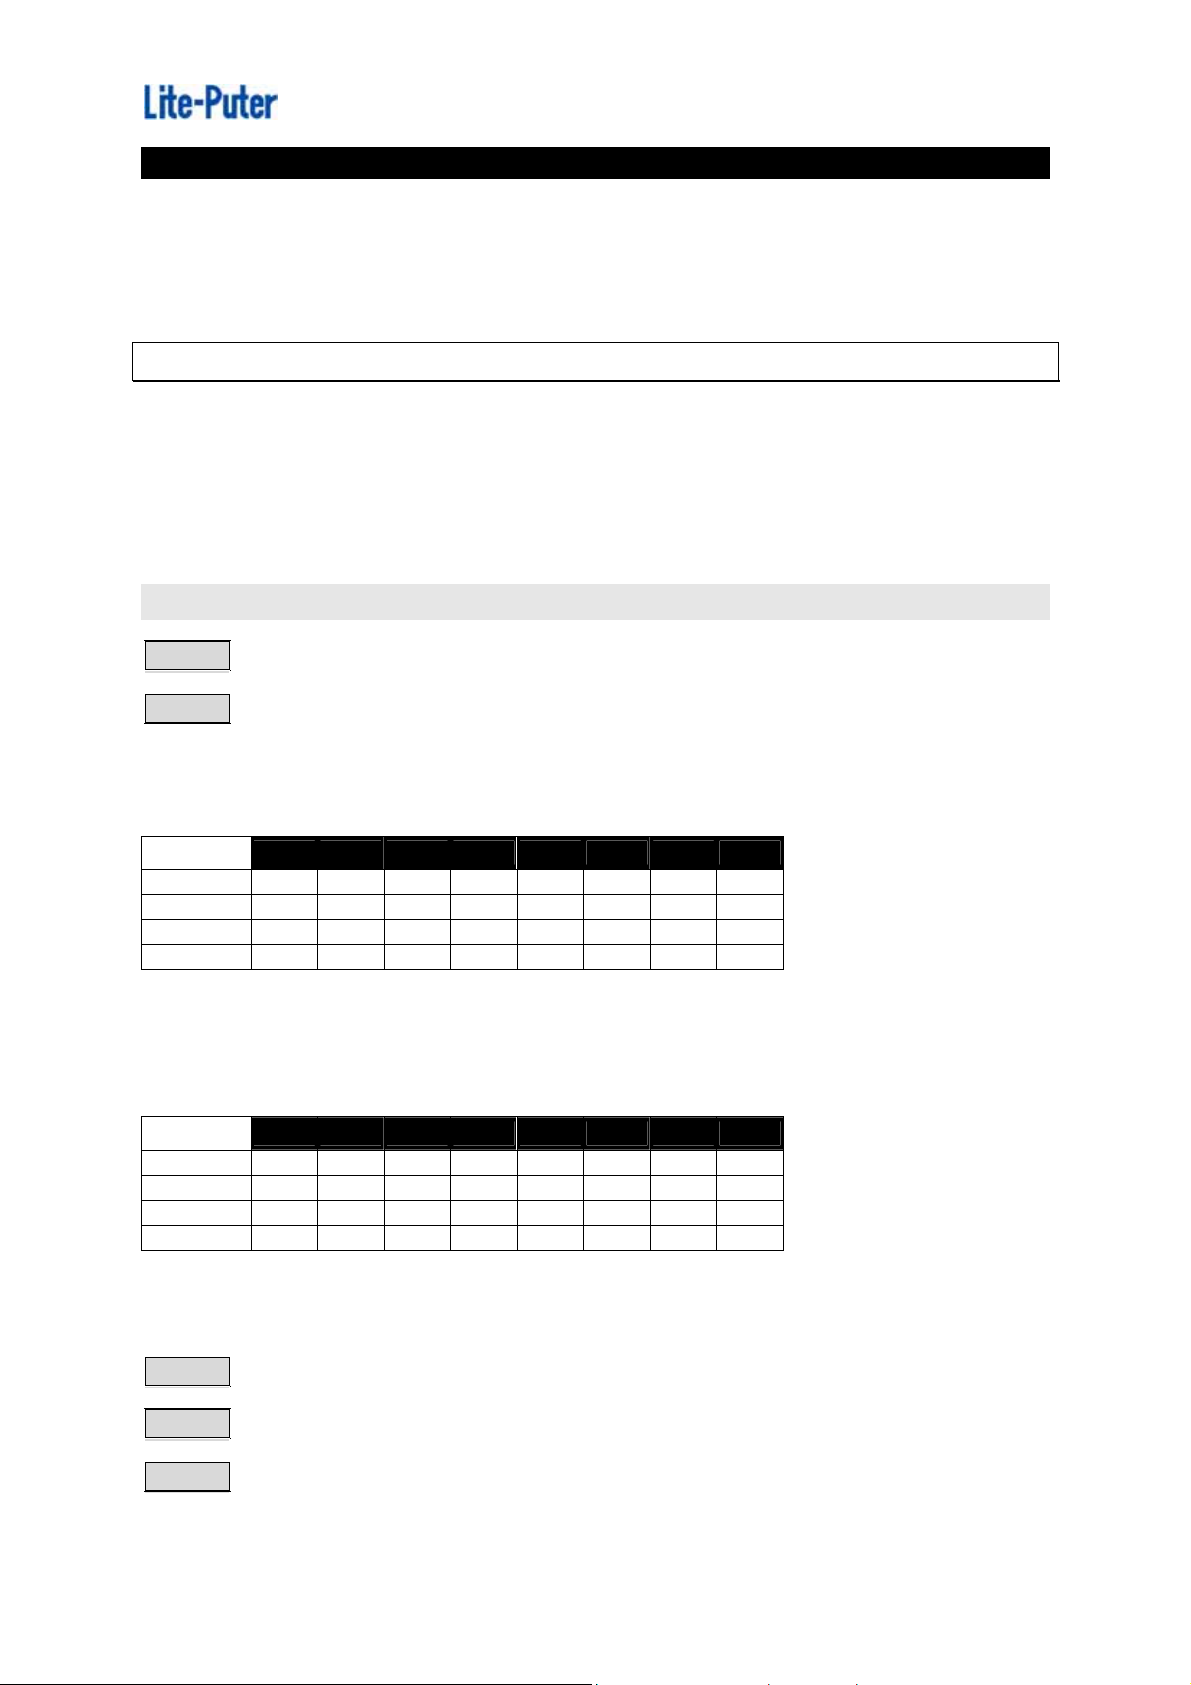
2-3-1 Internal chase setting ( SPEED CHASE )
2 mode of chase setting:
(1) in【CH】mode : Chase by CH mode
(2) in【SC】mode : Chase by SC mode
【CH】mode
STEP-1 press【SC/CH】, to select the channel. (LED ”off”)
STEP-2 to select the chase.
1. press【CHASE 1】:
CH. 1 2 3 4 5 6 7 8
STEP 1
STEP 2
STEP 3
STEP 4
● ○ ○ ○ ○ ○ ○ ○
○ ● ○ ○ ○ ○ ○ ○
○ ○ ● ○ ○ ○ ○ ○
○ ○ ○ ● ○ ○ ○ ○
Repeat…
2. press【CHASE 2】:
CH. 1 2 3 4 5 6 7 8
STEP 1
STEP 2
STEP 3
STEP 4
○ ○ ○ ○ ● ○ ○ ○
○ ○ ○ ○ ○ ● ○ ○
○ ○ ○ ○ ○ ○ ● ○
○ ○ ○ ○ ○ ○ ○ ●
Repeat…
Led : ● on ○ off
STEP-3 to adjust the speeding of chase, press【SPEED】to adjust.
STEP-4 press【PROG】to change the chase direction.
STEP-5 press【FLASH/FADER】to change the chase mode.
5
Lite-Puter
CX-804 [EUM-A]
Page 13
ISO 9001 CERTIFIED
【SC】mode
STEP-1 press【SC/CH】, to select the SC mode
STEP-2 to select
press【CHASE 1】:to execute the SC-1…SC-4 chase.
press【CHASE 2】:to execute the SC-5…SC-8 chase.
STEP-3 move【VR-1…VR-8】
Select【CHASE 1】:
move【VR-1…VR-4】, ”SC-1…SC-4” to execute ”Chase” mode
move【VR-5…VR-8】, ”SC-5…SC-8” to execute ”Dimming” mode
Select【CHASE 2】:
move【VR-1…VR-4】, ”SC-1…SC-4” to execute ”Dimming” mode
move【VR-5…VR-8】, ”SC-5…SC-8” to execute ”Chase” mode
The dimming value control by MASTER-VR for above chase setting,
(please refer 2-1 / STEP-2)
STEP-4 Chase speeding, select the【SPEED】to control
STEP-5 Press【PROG】to change the chase direction
STEP-6 press【FLASH/FADER】to change the chase mode.
2-3-2 AUDIO CHASE
STEP-1 turn【SPEED】key to the bottom and feel “ click “ which appointed to audio.
2-4 BLANK
press【BLANK】for pause, and press once again back to the normal mode.
6
CX-804 [EUM-A]
Lite-Puter
Page 14
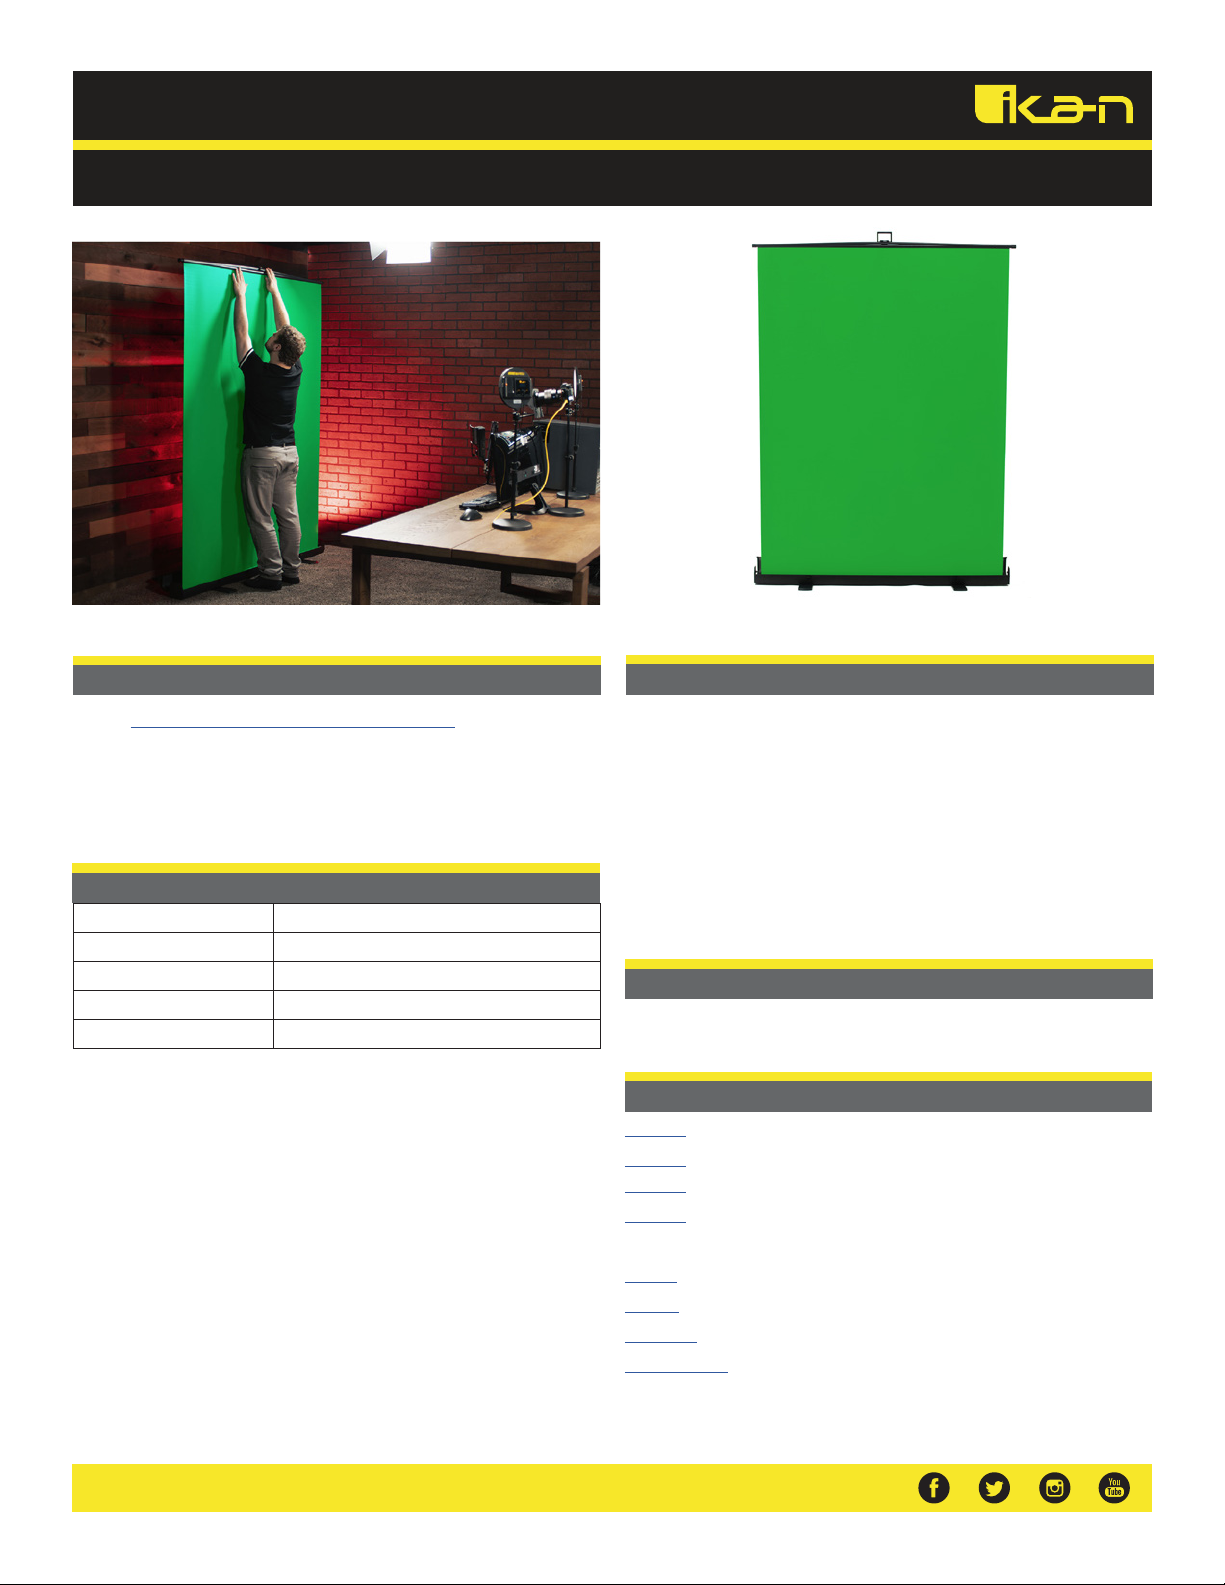
HS-GS76
HomeStream™ 76” Tall Portable Pull-Up Chroma Key Green Screen
Overview
The Ikan HomeStream™ 76” Portable Pull Up Green Screen is a highly durable
and ultra-convenient pull-up green screen for use with photography, livestreaming, SFX compositing, interviews, etc. This green screen ensures pro-level
chroma keying due to its wrinkle-free material, has an adjustable height reaching a
maximum of 76”, and is housed in an aluminum enclosure.
Specifications
Enclosure Build Material Aluminum
Fixture Size 61.1 x 4 x 4.75” (closed)
Fixture Weight 18.7 lbs
Screen Width 57.5”
Screen Max Height 76”
Features
• Portable Pro-Level Chroma Key Screen
• Aluminum Enclosure
• Fast Setup Time (3 to 7 Seconds)
• Wrinkle-Free Material
• Convenient Collapsible Design
• Screen Width: 57.5”
• Maximum Screen Height: 76”
• Use for Photography, SFX Compositing, Game Streaming, Blogging, Interviews,
etc.
What’s Included
1 x HomeStream 76” Portable Pull-Up Green Screen
Other HomeStreamTM Products
HS-KIT-1
HS-KIT-2
HS-KIT-3
HS-KIT-4
HS-LR6
HS-VCD
HS-LSTND
HS-PROMPTER
Kit #1: 2 Lights, Capture Device, Table Top Camera Stand
Kit #2: 2 Lights, Podcast Microphone & Adjustable Arm
Kit #3: 2 Lights, Capture Device, Stand, Podcast Mic & Arm
Kit #4: 2 Lights, Green Screen, Capture Device, Table Top
Camera Stand, Podcast Mic & Arm
6” Diameter Accent Light w/ Table Top Stand
HDMI Video Capture Device
21” Variable Height Table Top Camera Stand
Smartphone Teleprompter for DSLR, Mirrorless, &
Smartphones w/ Bluetooth Remote
www.ikancorp.com
Page 15

Learn More
More dynamic information at official website: www.ikancorp.com
Support
Contact email: [email protected]
Ikan: and all affiliated companies hereby disclaim any and all liabilities for property, equipment, building, and electrical damages, injuries to any persons, and direct or indirect
economic loss associated with the use or reliance of any information contained within this
document, and/or as a result of the improper, unsafe, insufficient and negligent assembly,
installation, rigging, and operation of this product.
CONDITIONS OF WARRANTY SERVICE
• Free service for one year from the day of purchase if the problem is caused by manufacturing errors.
• The components and maintenance service fee will be charged if the warranty period is expired.
Free Service will not be Provided in the Following Situations:(*Even if the product is still within the warranty period.)
• Damage caused by abuse or misuse, dismantling, or changes to the product not made by the company.
• Damage caused by natural disaster, abnormal voltage, and environmental factors, etc.
©2017 ikan Corporation. All rights reserved
 Loading...