


TABLE OF CONTENTS
FEATURES ----------------------------------------------------------------------------------------------------------------2
IMPORTANT SA FE TY INS TR UC TI ON ------ -- -- -- -- ------------------------------- -- -- -- -- -------------------------3
WAR NI NGS AND CAUTIONS --------------------- -- -- ------------------------- -- -- --------------------------- -- ------4
INSTALLATION AND HOOKUP-------------------- -- -- -- -- -- ----------------------------------------- -- -- -- -- ---------7
REMOTE CONTROL--------------------- -- -- -- -- ------------------------------------------ -- -- -- -- ---------------------11
MENU FUNCTIO NS- -- -- -- -- -- -- -- -- --------------------------------------------------------------------- -- -- -- -- -- -- --12
TV OPERATION -------------- -- -- -- -- -- -------------------------------------------- -- -- -- -- -- --------------------------15
TROUBLESHOOTING GUIDE----------------------------------------------------------------------------------------21
PERSONAL COMPUTER CONNECTION TROUBLE SHOOTING-------- -- -- ------------------------- -- -------22

FEATURE S
Thank you very much for your purchase of this product. To enjoy your set to the fullest ,read
this manual carefully and keep it handy for future reference.
FEATURES
42 inch TFT LCD display type, resolution up to 1366 x 768 / 16.7 million colours.
High brightness 400nits,high contrast radio 1200:1, wide viewing a ng le & w id er c ol ou r sp ac e.
Allows to modify the format of the screen:4:3 expanding,16:9, 4:3,Panorama.
Adaptive 2/4 line comb filter for reduce cross colour and cross luminance artifacts.
HDTV capability: accepts 720p and 1080P signals.
Support wide range of sources:
Support Video input format: NTSC/PAL/SECAM.
IR remote controller included.
Support On Screen Display (OSD) function.
Automatically turn off the set.
AV out
PIP/POP
TV /AV/S-VIDEO/VGA/HDMI/COMPONENT/ATS C.
ELECTRICAL CHARACTERISTICS
Color system: NTSC,PAL
Power Requirement: AC90-240V;50/60Hz
Power Consumption:300W
Standby Power Consumption: 3W
Speaker Out: 10W x 2
Weight:34kg
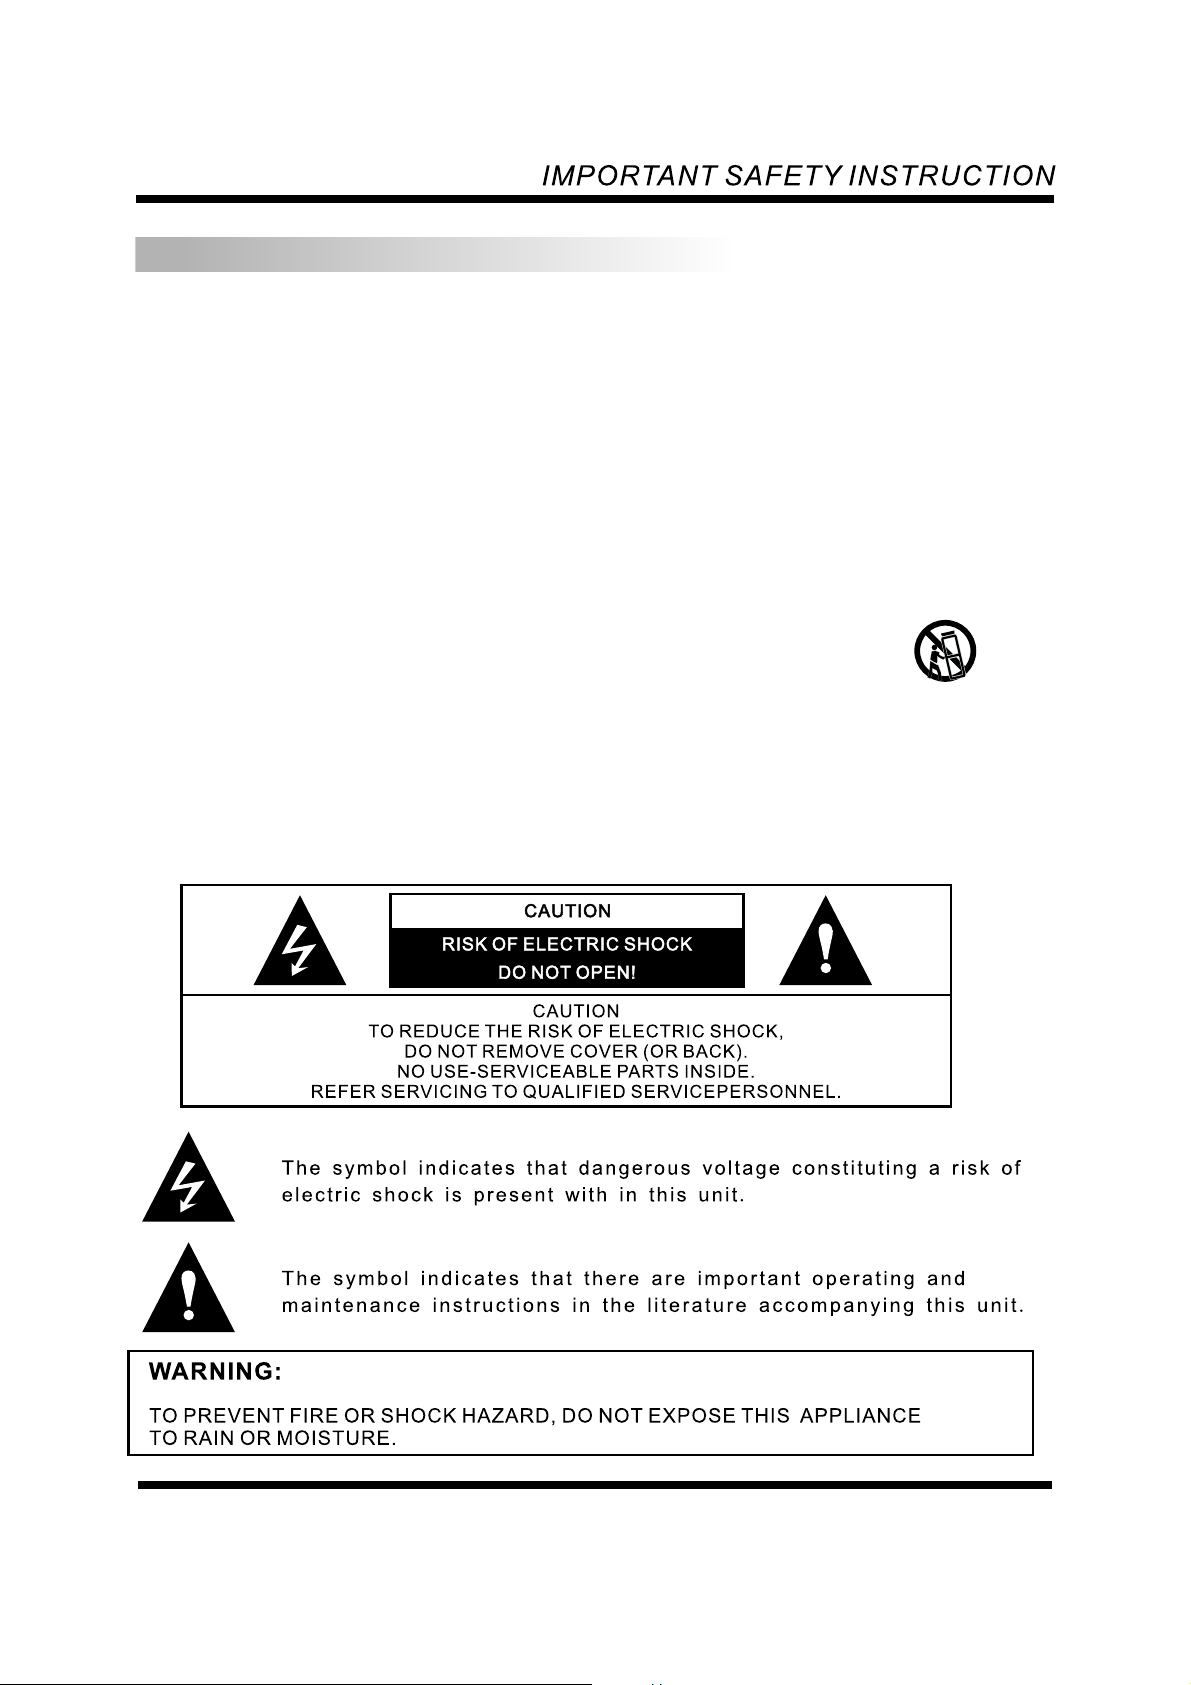
IMPORTANT SAFETY INSTRU C T ONI
1.Read these instructions.
2.Keep these instructions.
3.Heed all warnings.
4.Follow all instructions.
5.Do not use this product near water.
6.Clean only with dry cloth.
7.Do not block any ventilation openings. Install in accordance w it h th e ma nu fa ct ur er s in st ru ct io ns .
8.Keep away from any heat sources such as radiators, heat registers, stoves and othe r he at -g en er at in g
products (including amplifiers).
9.Do not defeat the safety purpose of the polarized or grounding type plug . A p ol ar iz ed p lu g ha s tw o bl ad es
with one wider than the other. A grounding type plug h as two b la de s an d a th ir d gr ou nd in g pr on g. The wide
blade or the third prong are provided for your safety.
10.Protect the power cord from being walked on or pinched particul ar ly a t pl ug s co nv en ie nc e re ce pt ac le s,
and the point where they exit from the apparatus.
11.Only use attachments/accessories specified by the manufacturer.
12.Unplug this product during lightning storms or when unu se d fo r lo ng p er io ds o f ti me .
13.Refer all servicing to qualified service personnel. Ser vi ci ng i s re qu ir ed w he n th e pr od uc t ha s be en
damaged in any way, such as power-supply cord or plug is damaged, liquid has been spilled or objects
have fallen into product, the product has been exposed to rain or moisture , do es n ot o pe ra te n or ma ll y,
or has been dropped.
14.This product shall not be exposed to dripping or splashing an d no o bj ec ts f il le d wi th l iq ui ds , su ch a s va se s.
15.Use care when moving the product on a rolling cart. Sudden stops exce ss iv e fo rc e an d un ev en f lo or s ur fa ce
may cause the product to fall from the cart.
-3-
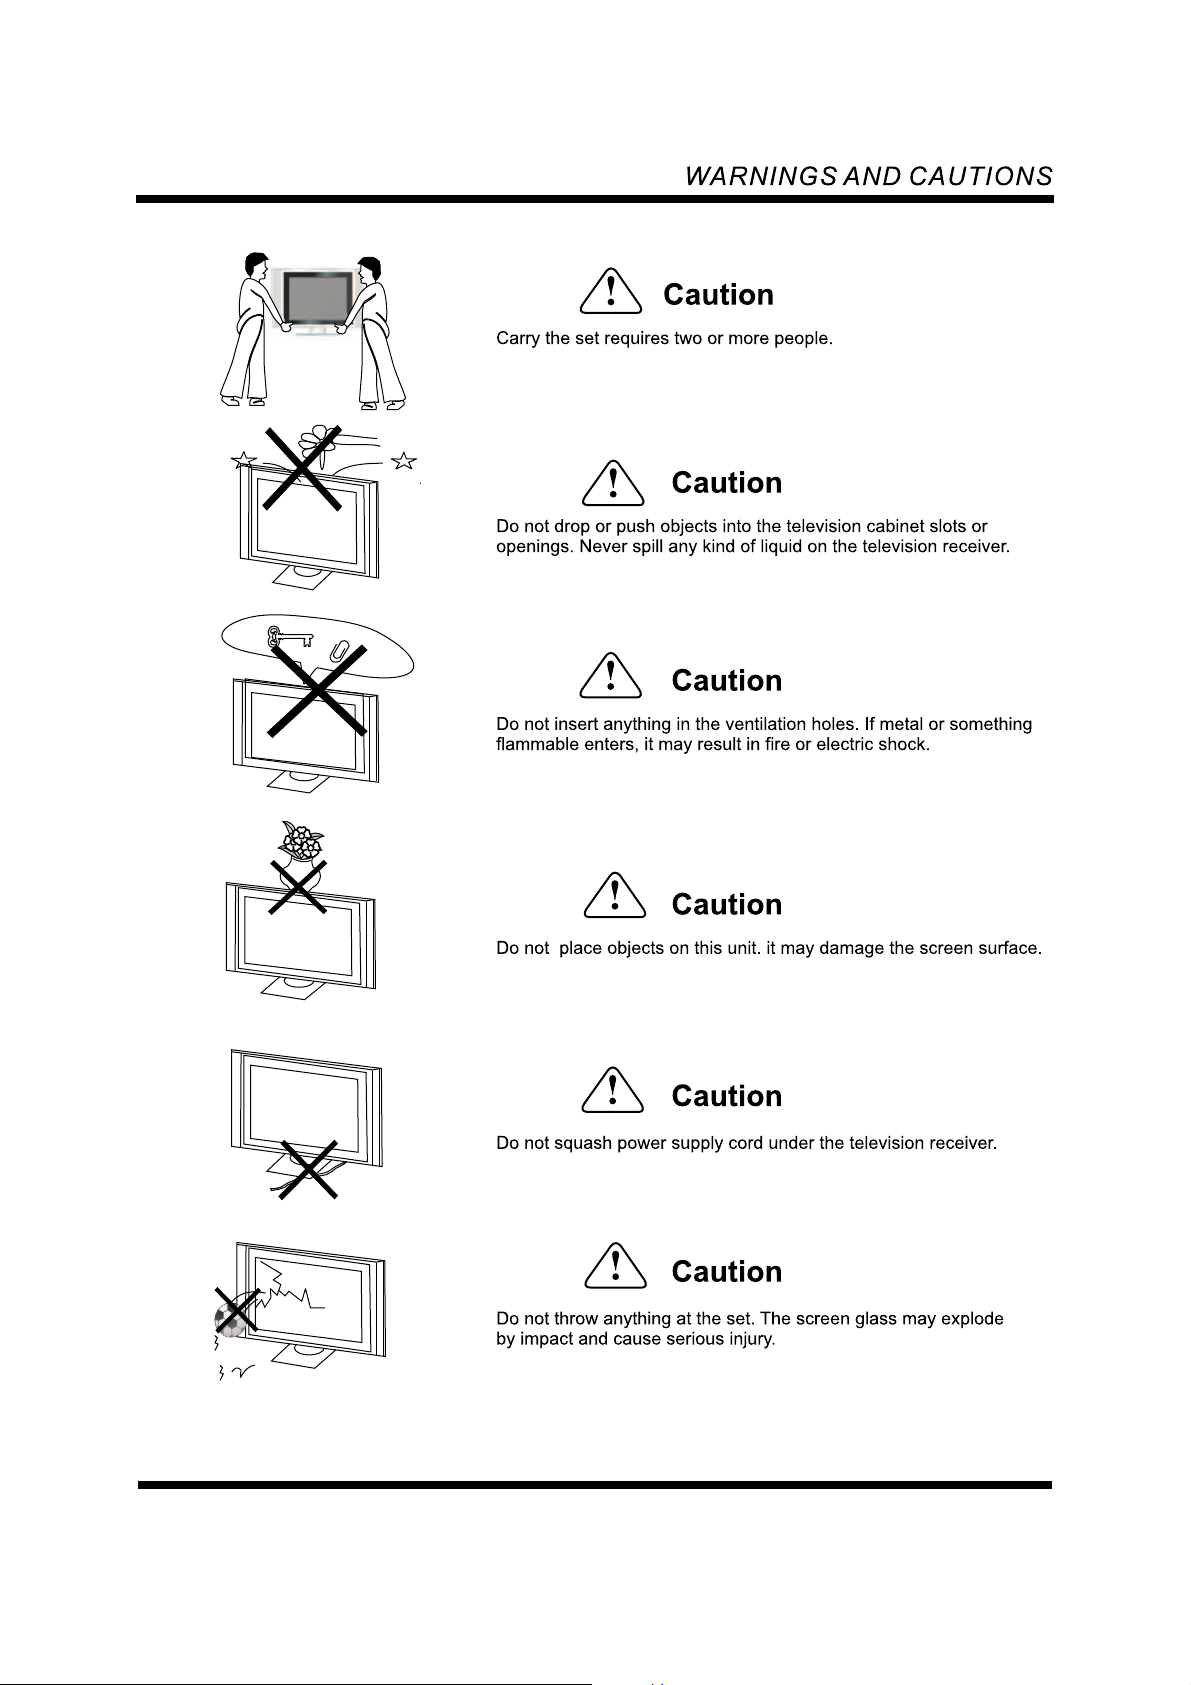
-4-
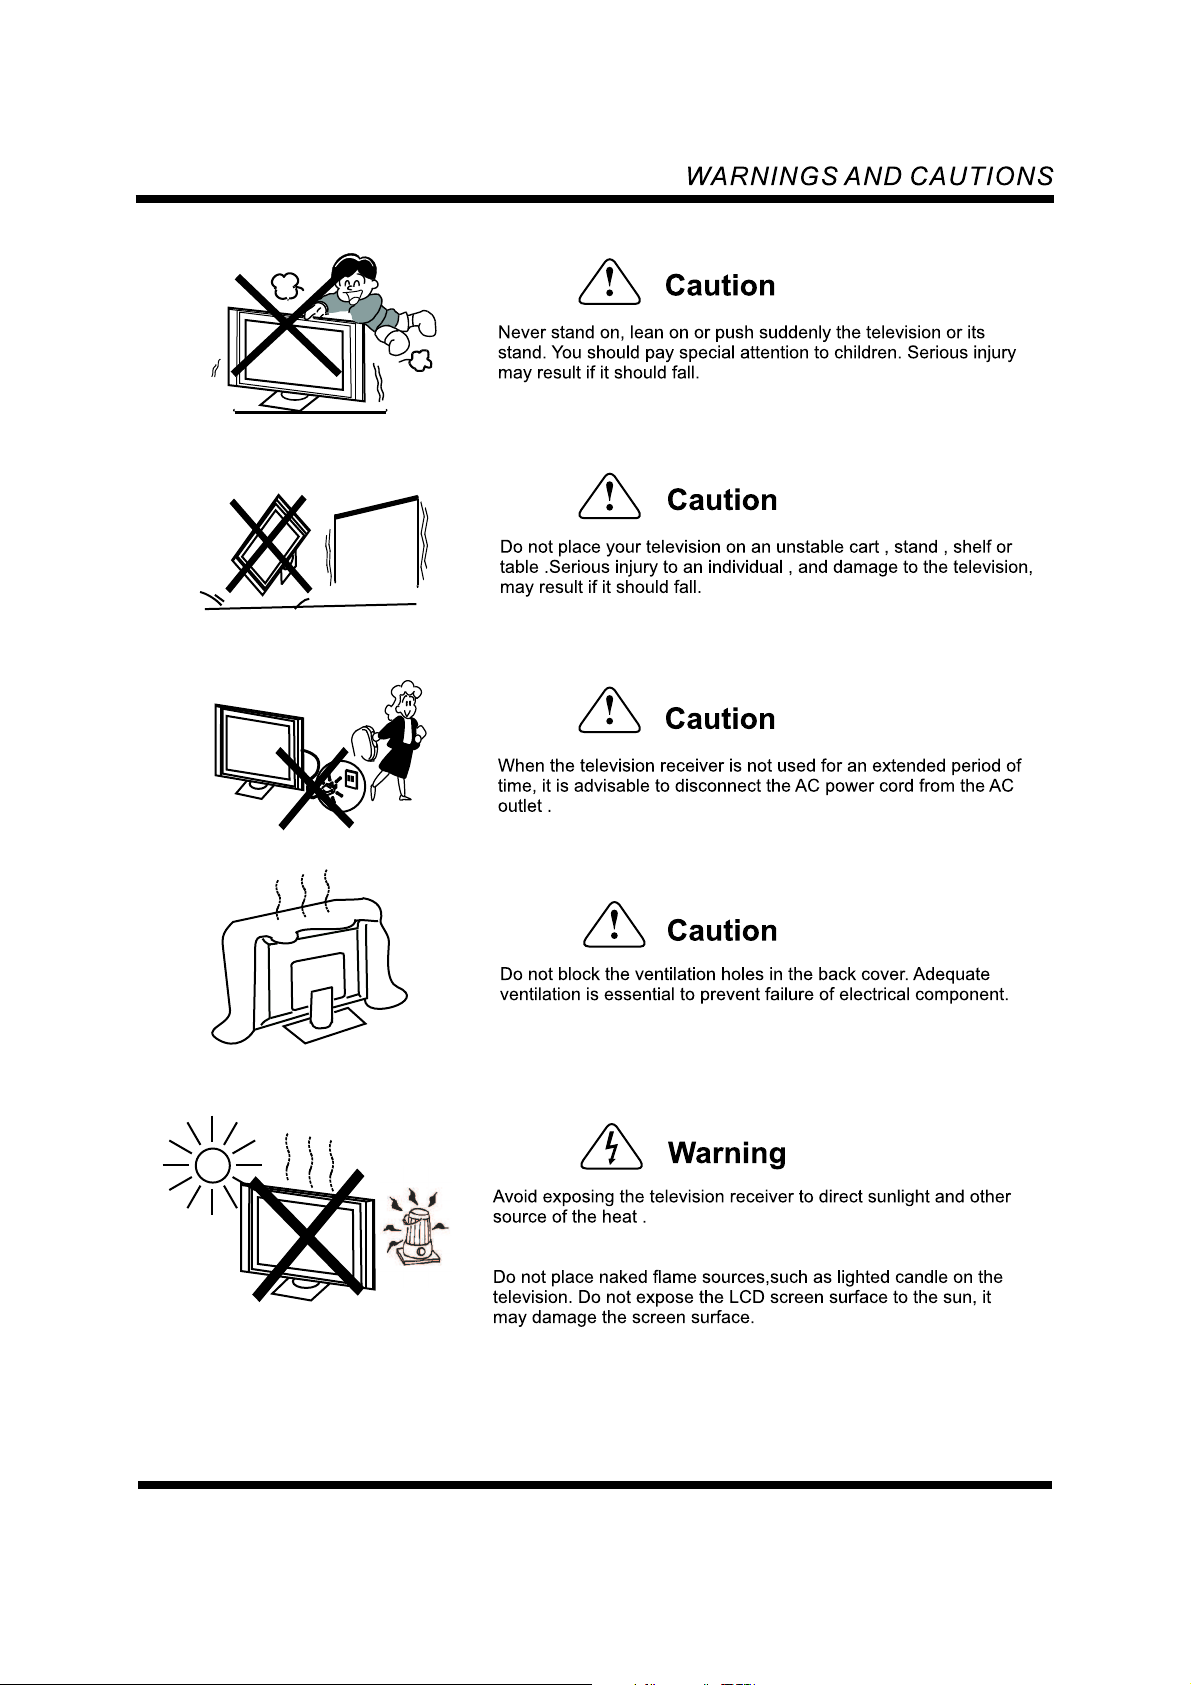
The TV set should not be located near any appliance or component
that generates hear (video cassette players,audio amplifiers,etc.)
-5-
power outlet
the antenna cable
-6-
the power cord
INSTALLATION
The power source for this set: AC90-240V ,50/60Hz.
INS TALL ATION AND H OOKU P
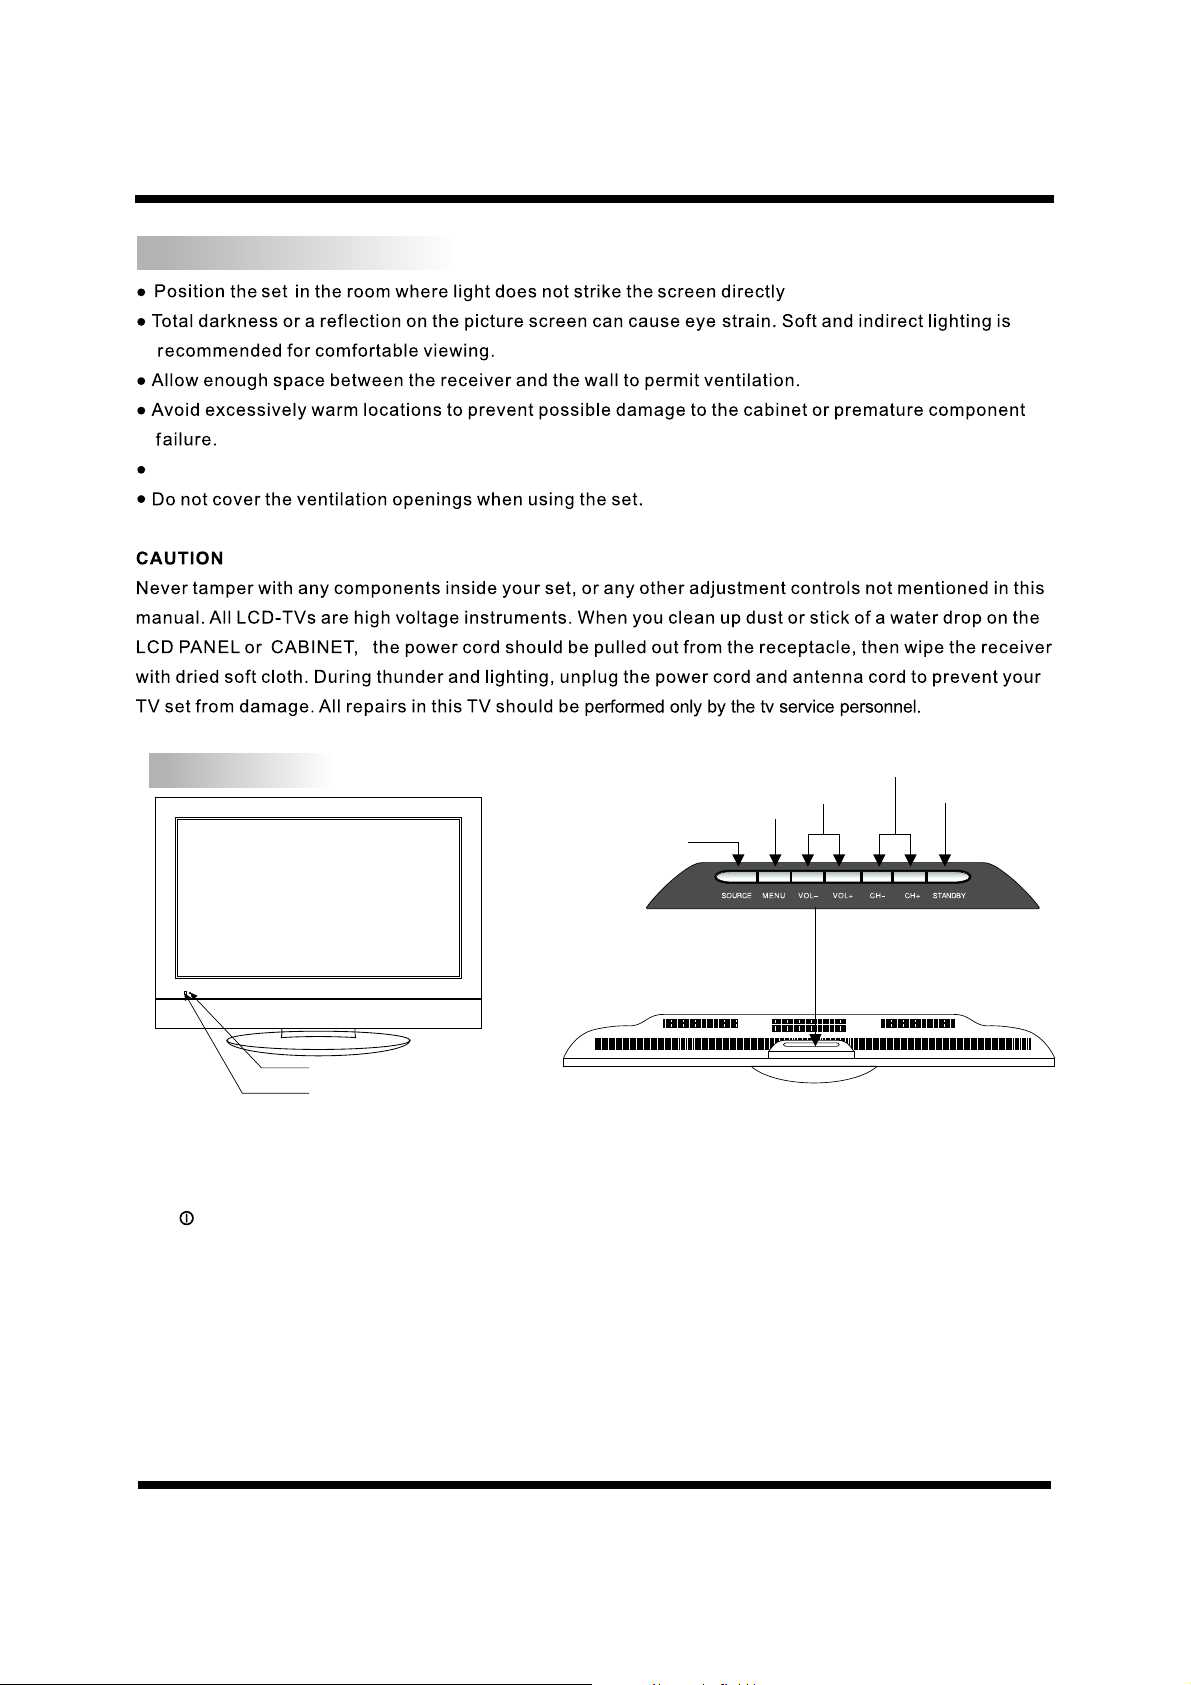
FRONT
5.Volume con trol
4.Menu butt on
3.Source bu tton
8.Power ind icator
7.Remote se nsor window
Control Location:
The top part of the model consists of the following functions buttons. Description for each of
function button is shown below. To use more advanced features, you must use the remote control.
1. : Turn TV set on/off.
2. : Press STANDBY button, the TV set will enter standby state, press the button again to restart the set.
Standby
3. :To select input video signal source.
Source
4. : To enter main menu or exit the current menu.
MENU
5. or : Adjust the item you select or adjust volume.
VOL+ VOL-
6. : Move cursor in main menu or change channel.
CH+ CH-
or
7. Remote sensor window: Aim the remote control towards this area on the TV.
8. (Power on / standby) indicator: Lights up in green when the set is working. When the standby mo de ,
the indicator lights up in red.
6.Channel c ontrol
2.Standby
-7-

BAC K
INS TALL ATION AND H OOKU P
NTSC
ANTENNA
ANTENNA
RJ45
ATSC
-8-
RF

INS TALL ATION AND H OOKU P
PC CONNECTION
STEPS:
1. Conn ect Video Cabl e
a. Make sure bot h the TV and com puter are powere d-OFF.
b. Conn ect Video Cabl e to the computer.
2. Conn ect the Audio Cable.
3. Conn ect Power cord
Connect Power Cord to the TV, then to a proper ly grounded AC outlet.
4. Powe r-ON Computer
Power-ON the TV first, then Power-ON the computer.
This se quence is very important!
5. If the TV still does not func tion properly, pleas e refer to the tro ublesho oting section to diagnose the problem.
Connector Plug
Vid eo Ca ble
Audio Cable
NTSC
RJ45
CAUT ION:
Ho ld the connector when you unplugging any one of the connectors. Don't pul l th e co rd , ot he rw ise
the cord may break.
ATSC
-9-

INS TALL ATION AND H OOKU P
INSERTING BATTERIES
1.Remove the battery cover.
2.Insert the 2 AAA 1.5V batteries making sure the polarity (+or-) of the batteries matches the polarity marks
inside the unit.
3.Replacing batteries.
Replace with new batteries when the TV SET begins to show the following symptoms:
Operation is unsteady or erratic. Sometimes the TV set does not function with Remote Control Unit.
1)Alkaline Batteries Recommended.
2)Remove batteries when they are exhausted or if the remote control is not to be used for a long time.
-10-

REMOT E C O N T ROL
16
15
14
4
3
12
5
13
11
10
9
8
17
Remote Control Function Descriptions:
Please aim the remote control at the remote sensor on the main unit.
1. MUTE( ):
2. POWER( )(Stand by):
3. SOURCE:
4. SLEEP:
5. DISPLAY:
6. /CH+,CH-/ :
7. MENU:
8. /V+,V-/ :
9. OK:
10. :
11. Exit :
12. :
13. FORMAT:
14. PICTURE:
15. SOUND:
16. 0~9 NUMBER key:
17.NTSC/ATSC:
Selects the currently high lighted menu item.
ST./MONO
NOTE:
Switches the sound on or off.
Switches the set on or off.
To choose the input signal source.
Sets the sleep timer.
Displays the current status information.
Increases or decreases the channel number when no menu display.
Moves the cursor up or down on the OSD.
To open the menu or return to the previous menu.
Press the volume key to decreases the sound volume when no menu display.
Decrease the current setting value or select the previous setting in menu displa y.
Return to the previous channel when in TV mode.
Exits from menu when in menu mode.
Exits from tuning when in auto program tuning mode, only for NTSC signal source.
To select BTSC mode.
To select the aspect ratio.
To select the picture mode.
In ATSC signal source ,enter ATSC sound menu to set sound mode.
In other signal source, to select the sound mode.
Selects stations in TV mode.
In NTSC mode, press to directly enter ATSC mode.
The buttons that are not described are not used with this mode..
6
7
12
-11-

MENU SYSTEM DESCRIPTION
MEN U FUNCTIONS
Main Menu
PICTURE
SOUND
Level 1
BRIGHTNESS
CONTRAST
SATURATION
SHARPNESS
TINT
COLOUR TEMP ER ATURE
FORMAT
VOLUME
TREBLE
BASS
BALANCE
LOUDNESS
AVC
SPEAKER O UT
AUDIO MODE
Level 2
Sub- Menu
Statement
Adjusts pictures br ig htness
Range: 0-100
Default: 50
Adjusts the black and w hi te
layer
Range: 0~100
Default: 50
Adjusts the color sat ur ation
Range: 0~100
Default: 50
Adjusts the sharpne ss o f the
pictures
Range: 0~4
Default: 2
Adjusts the tint of the N TS C
mode picture
Range: -50~50
Default: 0
To set the color temperat ur e:
"Standard","Col d" , "Warm "
Default: Standard
4 formats for selecti on : 4:3
expanding, 16:9, 4: 3, Panorama
ratio
Default: 16:9
Adjusts the TV vo lume
Range: 0~100
Default: 24
Adjusts the treble so un d
Range: 0~100
Default: 50
Adjusts the bass soun d
Range: 0~100
Default: 50
Adjusts the balance o f le ft and
right audio channel
Range: -50~50
Default: 0
Switch on/off l oudness function
Default: on
Switch on/off AVC (Audio
Volume Control) func ti on
Default: off
Switch on/off s peaker
out
default: on
Choose the mode while o n TV mode
Mono,Stereo,SAP
Default:stereo
Mode
Adjustable in
all signal
sources
Not available
in VGA/HDMI
mode
Active only in
AV,sourceTV,
Adjustable in
all signal
source
Not available
HDTV,V GA, signal
sources, in
COMPONENT
HDMI,ATSC si gn al
sources.the
formats are:16:9
4:3
All items are
available with
all signal
sources.
Available o nl y
in TV signal
source
-12-

MEN U FUNCTIONS
TUNING
SYSTEM
CLOSED CAPTION
(Only available in
TV,AV,S -Video
signal source.
AN/DIG
AIR / CABLE
PROGRAM
AUTO SE AR CH
ADD/ERASE
LANGUAGE
OSD TRANSPARENCY
SYSTEM
SUBMENU
TIMER
Closed caption
Close cation servic e
Close caption prefe re nce
STANDBY
COLOR
IMPROVEMENT
DCTI
NTSC STANDAR D
SELECT
NOISE REDUCTION
TIME
WAK E UP TIME
ACTIVE
TURN OFF TIME
ACTIVE
RESET
Select analog/digital signal
You ca n ch oo se air or cable
Enter the num be rs to select th e an alog
TV programm e in t he air mode,the
range is 1~69 i n th e cable mode,th e
range is 1~12 5 De fault: 02
Enter the num be rs to select th e di gital
TVprogram me i n the air mode,th e range
is 02-01~69 -0 9
Press the" /V+"ke y to a ut o
station search. In NT SC m ode, press
"EXIT"key to stop the s ta tion
searching(not ava il able in ATSC
mode)
To set programme be added o r er ased
Default:off
3 languages choice
Default: English
Adujst 0~8 level tran sp arency,
the minimum is maxima l
transparent, the ma xi mum is
the minimal transpa re nt
Range:0~8
Default: 4
To select switching to st an dby
mode or not when TV p oweron
Default: not
Switch on/off i mprovement of colour
Switch on/off d ynamic colour
improvement
To select NTSC standard : NT SC-M,
NTSC-J
Adjust 0-8 level nois e re duction
Range: 0-8 Default: 5
XX:XX, display/mo di fy the
current system time
Default: random val ue ( this
item can not be reset)
XX:XX, set the power- on t ime
Default: 00:00
To select if auto power on by
timer or not function
Default: not
XX:XX, set the power- off time
Default: 00:00
To select if auto power off by
timer or not function
Default: not
Reset all s et v alue by pre ss ing"OK"
or"V+"button.
Choose the mode of CC:O FF,C C1,
CC2,CC3,CC4,T1, T2 ,T3,T4
Selct off/D TV C C1/CC1/texti
Font size
Front color
Back color
Select Small/standard/large
Select black/white/red/
green/blue
Select black/white/red/
green/blue
Available
when TV is
signal source
Available i n
all signal source
Not available in
VGA,HDMI
signal sources.
Not available in
VGA,HDMI,
COMPONENT
ATSC signal
sources.
Noisereduction
is available only
in TV mode
Valid in analog TV
Valid in digital TV
-13-

MEN U FUNCTIONS
CALIBRATIO N
V-chip
PIP
POP TIL E
Password
Default:0000
H-POSITION
V-POSITION
PHASE
CLOCK
AUTO TU NE
ACTIVE
SOURCES
POSITION
PIP SIZE
SOUND
From PIP
ACTIVE
SOURCES
POSITION
SOUND
From POP
Reset
New
Password
Confirm
Password
Active
Country
TV rating
MPAA
Press the" /V+"ke y to
execute reset actio n
To set four-digit passw or d
with 0-9 number.
To confirm password, de fa ult
password: 0000.
To select active or not
To select USA/CANADA
Allowed rating
V
L
S
D
CE rating
CF rating
Allowed ratting
Select TV-14/TV-MA/
TV-Y/TV-Y7/TV-G/TV-PG
Select block/view
Select block/view
Select block/view
Select block/view
Select C8 /G/PG/14 /
18 /C
Select 18ans /G/
/13ans 16ans
+
+ +
+ +
/
Select X/G/PG/PG-B/R
/WC-17
Change the picture' s ho rizontal
position
Range: -16~16
Default: 0
Change the picture' s ve rtical
position
Range: -8~8
Default: 0
Adjusts the A/D sample phas e
Range: 0~32
Default: 16
Decrease or increas e th e size of picture.
Range:-10~10
Default:0
Auto-adjust the pic tu re display.
by pressing"OK" or" V+ "button.
To select whether activ at e PIP or not
Default: not
Selects PIP sig nal source
ANALOG TV/AV/S-Vide o
Default: ANALOG TV
Selects the positio ns f or PIP:
left top, right top,
right bottom, left bo tt om
Default: le ft t op
Selects 3 kinds of PIP size
SM LL/MEDIUM/LARGE
A
Default: SMALL
To select whe her activate the
t
sound from PIP or n ot
Default: not
To select whether activ ia te POP or
not
Default: not
Selects POP sig nal source
TV/AV/S-VI DE O
Default: TV
Selects the positio ns f or POP:
left,right
To select whether activ at e the
sound from POP or n ot
Default: not
Valid in USA TV
8ans
+
Valid in CANADA
TV
+
VGA format is
available
VGA/HDMI/
COMPONENT
/DTV
formats are
available
HDMI,
VGA formats
are available
-14-

BASIC OPERATION
TV OP ERATION
The instruction given in this ser g ui de a re b as ed o n th e re mo te c on tr ol .
The controls on the set itself have the same function as the keys
on the remote control. The comparison form is as below shown.
On Control Location On Remote Control
standby Standby
source Source
menu Menu
VOL+ or VOL- /V+ or V-/
CH+ or CH- /CH+ or CH-/
u
Power on/ Power off
1. Insert the power cable plug into the AC outlet
2. Press the power button on the top of the TV set.
If the power indicator light is RED, means that the TV is in standby mode, at this time you can
turn on the TV by pressing the power key on the remote control.
3. To turn off the TV set, press the "power" button on the top, then it can be power off completely.
4. If want to turn off the TV set temporarily, you can press the power key on the remote control ,
then the TV will be switched to standby mode and the power indicator light will be RED.
Signal source choice method
Mode supported
Mode can be supported by VGA and HDMI and COMPONENT signal source is shown below:
PC mode(VGA signa l so ur ce):
1280 x1 024@60Hz
1024 x7 68@60/70/75Hz
800x 60 0@56/60/75/85Hz
640x 48 0@60/70/75/85Hz
HDMI signal source:
480P/576P/720P/1080i/(50Hz/60Hz)
COMPONENT signal source:
480i /5 76i/480P/576P/720 P/(50 /60 )/1080i (50 /60 )/1080P(5 0 /60 )Hz Hz Hz Hz Hz Hz
Attention: If the input signal is not supported by the TV set, on the screen will display a blue
screen and "No signal".
Input signal source choice
Press the "SOURCE" key on the remote control or front-panel, then will POP-up display the signal
source choice menu on the left side of screen as the following shown.
-15-

TV OP ERATION
Source selection
TV
AV
S-VIDEO
VGA
HDMI
COMPONENT
Move: /
Select: OK
Press the " /CH+ "CH-/ to move the highlight cursor up and
down from the"TV/ AV/S-VIDEO/VGA/HDMI/COMPONENT items,
choose the one you desire, then press "OK" key on the remote control
or " /V+ "V-/ " key to confirm, then enter the selected signal
source display status.
Note:
(1) The highlight item means the current signal source in use.
(2) The input modes of the selected signal source need correspond to
(3) If there is not signal of the current source or exceeding display
"or
the output modes of the external device.
range, the screen will display a blue screen and "No signal" on the
top right corner.
"or " key
"
Watch TVAnalog
Select TV signal, refer to" signal source choice method".
Select Analog or DT V mo de , re fer to" MENU FUNCTIONS".
Auto channel turning
When you buy new TV set, and it is the first time to search the channels, you are recommended to
employ "Auto search".
In the second level menu "TUNING", press " /V+" key to start the channels search after the
choice "Auto Search item, when searching to a channel, the TV programme number will automatically
increase 1, after all search, the TV will return to station 1. To stop searching channel during the
channel search, please press "EXIT" key. The auto channel search frequency begins from
49.25MHz and end up 855.25MHz. When the channel search is over, all stations will be order
according to the nation setting and the channel name.
"
Attention: While searching the station, the output signal source will be automatically
switched to TV signal source output, it will return to the previous signal source setting
automatically when exiting from the channel search.
Choose channel operation
1.select NTSC/ATSC model with pressing NTSC/ATSC key.
2.In NTSC mode. You can press digital key to select channel for example if you want select 12 channel,
press"1" "2" key and you also can press" /P+" or" /P-"key to increase or decrease channel.
3.In ATSC mode, when you press digital key to select channel, you must select channel and program
number.
MENU OPERATION
The TV includes 6 root menus: PICTURE, SOUND, TUNING, SYSTEM, Close caption, CALIBRATION.
Attention: TUNING menu only can appear under TV mode, the item with high light is
selected item.
All menu items please refer to Men u fu nc ti on s" e xp la na ti on s."
Operation Method
After turning on the TV, when press "MENU" key at the first time, the screen will appear the
.
-16-

TV OP ERATION
main menu and the first sub-menu "PICTURE".
Press the key to move the cursor to select the sub-menu or menu items." /CH+ "or"CH-/ "
Press the " /V+ key to enter the second or third level sub-me nu , or e nt er t he e di t it em .
Press the " /V+ V-/ " key to select the item circularly from the list items menu.
In sub-menu, you may press " /V+ key t o se t( , ) c he ck bo x, i s on , is o ff.
When the menu screen is displayed, keep pressing "MENU" key to return to the pre vi ou s
level menu until close the main menu.
When the menu screen is displayed, exit from the menu by pressing "EXIT" key.
Reset Description
"
"or"
"
After entering the second level menu "SYSTEM , the last items "RESET", this option can
control reset function.
This function can reset the values which set by users to default value. please have a serious
consideration before you take the action.
In order to prevent the mistake operation by users, after selecting "RESET" item, it need press
"OK" or twice, then the function can be executed exactly. After the execution,
it will enter the sub menu "TUNING" automatically for prompting the user to search the
channels to program into the tuner's memory again.
" /V+"key
"
FUNCTION OPERATION
Picture status display
Press "DISPLAY" key on the remote control, the screen will display the
current picture's status
For example, the current display TV channel number is 001,TV system type
is AIR, current aspect ratio mode is 16:9,Audio type is stereo.
Under other modes, the screen will display current signal source name,
current mode and aspect ratio.
TV
AIR 001
STEREO
16:9
DTV
CH07-01
16:9
VGA
4:3
1024x768 75Hz
COMPONENT
480I
16:9
AV
PAL M
16:9
HDMI
720P 60Hz
S-VIDEO
Mute operation
Press the "MUTE" key on the remote control handset, the sound will disappear, and the mute icon
will appear on the screen. Press this key again or the key, it will return to the normal
sound. The mute icon on the screen will disappear.
While under mute mode, restart the TV, it also can return to the normal sound.
" /V+"
-17-
NTSC
16:9

TV OP ERATION
Sleep setting
Press the "SLEEP" key on the remote control handset, the sleep window will be displa ye d on
the bottom center of the screen:
SLEEP TIME 5 Min
The time sequence list is: OFF 5 Min 10 Min 30 Min 60 Min 90 Min 120Min OFF
You can choose the sleep time by pressing " SLEEP " key. The sleep timer automatically switches
the set to standby after the preset time elapses.
When turning on the TV from standby mode, the value of the SLEEP item will be "OFF" automatically,
the "SLEEP" is in OFF mode.
Note: when choosing a sleep time here, the turn-off time in "Timer" sub-menu will be
accordingly changed too.
Aspect ratio setting
Press the "FORMAT key on the remote control handset to change the current aspect ratio. It
can be repeatedly selected by pressing the "FORMAT key, the prompt message will be
displayed on the top right hand of the screen.
"
"
16: 9
In the sub-menu of "PICTURE", selec t "FORMAT item, it also can switch the aspect ratio by
pressing " /V+ or"V-/ " key.
When the signal source is TV or AV or S -v id eo , th er e ar e 4 ki nd s of t he a sp ec t ra ti o fo rm at :
4:3 expanding,16:9, 4:3,Panorama
aspect ratio format (4:3 or 16:9) will be set automatically according to the detected signal .
"
. While the signal is VGA,HDMI,component, the current video
"
Picture effective setting
Press the "PICTURE" key on the remote control handset, the following window will be di sp la ye d
on the bottom center of the screen:
PICTURE Standard
Where are these options in the menu,they are not esplained in the page 12.
Sound effective setting
Press the "SOUND" key on the remote control handset, the following window will be di sp la ye d on
the bottom center of the screen:
SOUND Music
Where are these options in the menu,they are not esplained in the page 12.
STEREO Setting
Press the " key on the remote control , the follow window will be displayed on the
bottom centre of the screen:
"ST./MONO
-18-

TV OP ERATION
MODE MONO
The items of MONO / STEREO / SAP can be selected..
If there's stereo signal in, then you may select "MONO, STEREO, SAP".
In the sub menu of "SOUND", select "MODE" item, it also may be switched by pressing V+ or"
V-/ " key.
Closed Caption
1.After enter the second menu"CLOSECAPTION",the first item is"closed caption",this option can control
closed caption function.
2.This option can set closed caption mode which have"CC1,CC2,CC3,CC4 ,T 1, T2 ,T3, T4 ,OFF",by
" /V+"or"V-/ "key.
Digital TV
1.After enter into the second menu" close caption", the first item is close caption set up, press " /V+" key
to enter into the sub menu.
2.In the submenu, press" /P+" key or " /P-" key to select close caption service item, press" /V+" key
to select off /CC1/digital Cc1//text1. also press" /V+" key to select close caption preference item. Here
you can adjust the font size front colour and back colour.
And you can execute reset action to reset these parameter.
" / "
AV out operation
Connect the AV out terminal of the main TV set to the AV input terminal of the sub one with video cable
and Audio cable .
PIP operation
First: Select
Secondly: Open the OSD by pressing the "MENU" key on the remote control .
Thirdly: Choose activating "PIP" function by press " /V+"or"V-/ " key and will enter the PIP mode.
1: Press " /V+"or"V-/ " key to choose if activating "PIP" function or not
2: When in PIP mode, select the PIP signal source with " /V+ " V-/ " k ey f ro m" SO UR CE " it em :
ANALOG TV/ AV/ S-VIDEO.
3: When in PIP mode, select the PIP display position with " /V+"or"V-/ " key from"POSITION" item.
4: When in PIP mode, select the PIP window size with " /V+"or"V-/ " key from"SIZE" item.
5: When in PIP mode, switch the sound between the main video sound and PIP sound with " /V+
key from "PIP SOUND" item.
Change PIP channel:
When in PIP mode, and the PIP signal source is TV program, after closed the menu, you may
press " /CH+ "or"CH-/ key or the NUMBER buttons to change channels.
"VGA" or "HDMI" or "COMPONENT or DTV" signal.
Move the cursor to select the "CALIBRATION" item by pressing " /CH+"or"CH-/ "key and
enter the sub menu by pressing " /V+ "or"V-/ " key.
Move the cursor to select the "PIP..." Item by pressing " /CH+"or"CH-/ " key and enter the
second sub menu by pressing " /V+"or"V-/ " key.
In PIP mode, you can operate.
"or
"
"
-19-

TV OP ERATION
POP operation
First: Select "VGA" or "HDMI" signal.
Secondly: Open the OSD by pressing the "MENU" key on the remote control .
Move the cursor to select the "CALIBRATION" item by pressing " /CH+"or"CH-/ " key and
enter the sub menu by pressing " /V+ "or"V-/ " key.
Move the cursor to select the "POP..." Item by pressing " /CH+"or"CH-/ " key and enter the
second sub menu by pressing " /V+"or"V-/ " key.
Thirdly: Choose activating "POP" function by press " /V+"or"V-/ " key and will enter the POP mode.
In POP mode, you can operate.
1: Press " /V+"or"V-/ " key to choose if activating "POP" function or not
2: When in POP mode, select the POP signal source with " /V+"or"V-/ " key from"SOURCE" item:
ANALOGTV/ AV/ S-VIDEO.
3: When in POP mode, select the POP display position with " /V+"or"V-/ " key from"POSITION" item.
4: When in POP mode, switch the sound between the main video sound and POP sound with " /V+"
key from " SOUND from POP" item.
Change POP channel:
When in POP mode, and the POP signal source is TV program, after closed the menu, you may
press " /CH+ "or"CH-/ " key or the NUMBER buttons to change channels.
-20-

TRO UBLESHOOT ING GUIDE
The FINE TUNE option does not appear in the MENU for
SYSTEM in page 13 - where is this option?
-21-

PER SONAL COMP UTER C ONNEC TION T ROUBL E SHOO TING
-22-
 Loading...