

Page 1
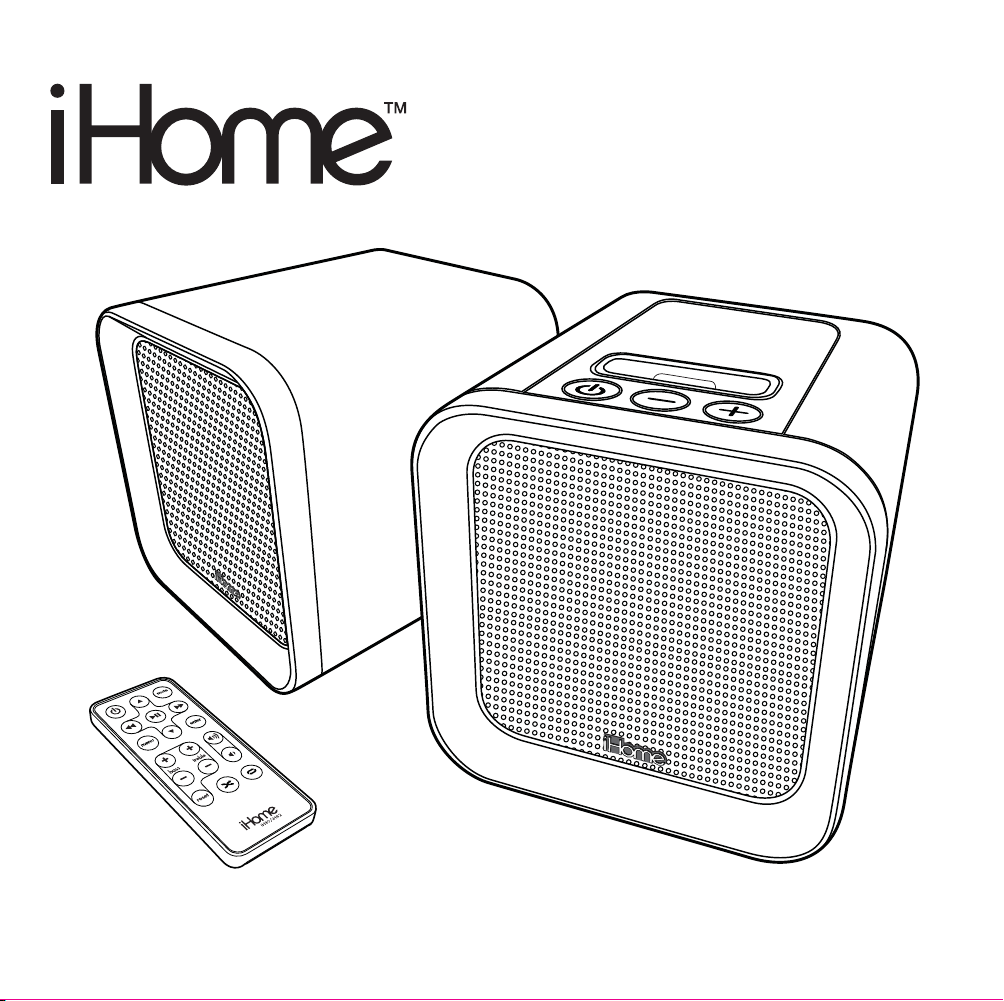
Model iH82
The Portable System
For Your iPod
®
Questions? Visit www.ihomeaudio.com
Page 2

Table of Contents
Caution Information ........................................................................................................................................................ 1
Quick Start ....................................................................................................................................................................... 2
Controls and Indicators .................................................................................................................................................. 3
Replacing iH82 Batteries ............................................................................................................................................. 4-5
Install/Replace Battery
Using the iH82 .............................................................................................................................................................. 5-7
Troubleshooting ........................................................................................................................................................... 8-9
Solucionando problemas ......................................................................................................................................... 10-11
A Consumer Guide to product Safety ......................................................................................................................... 13
Safety Instructions
Warranty Information .................................................................................................................................................... 14
Package Contents
Congratulations on your iH82 home sound system for the iPod. Before you set up your unit, please check to see that the
package contains the following items:
1 Main Unit
1 Extension Speaker
1 Speaker Cable
1 AC Adaptor
3 iPod inserts
1 audio patch cord
1 remote control with 1 CR2032 battery
Page 3
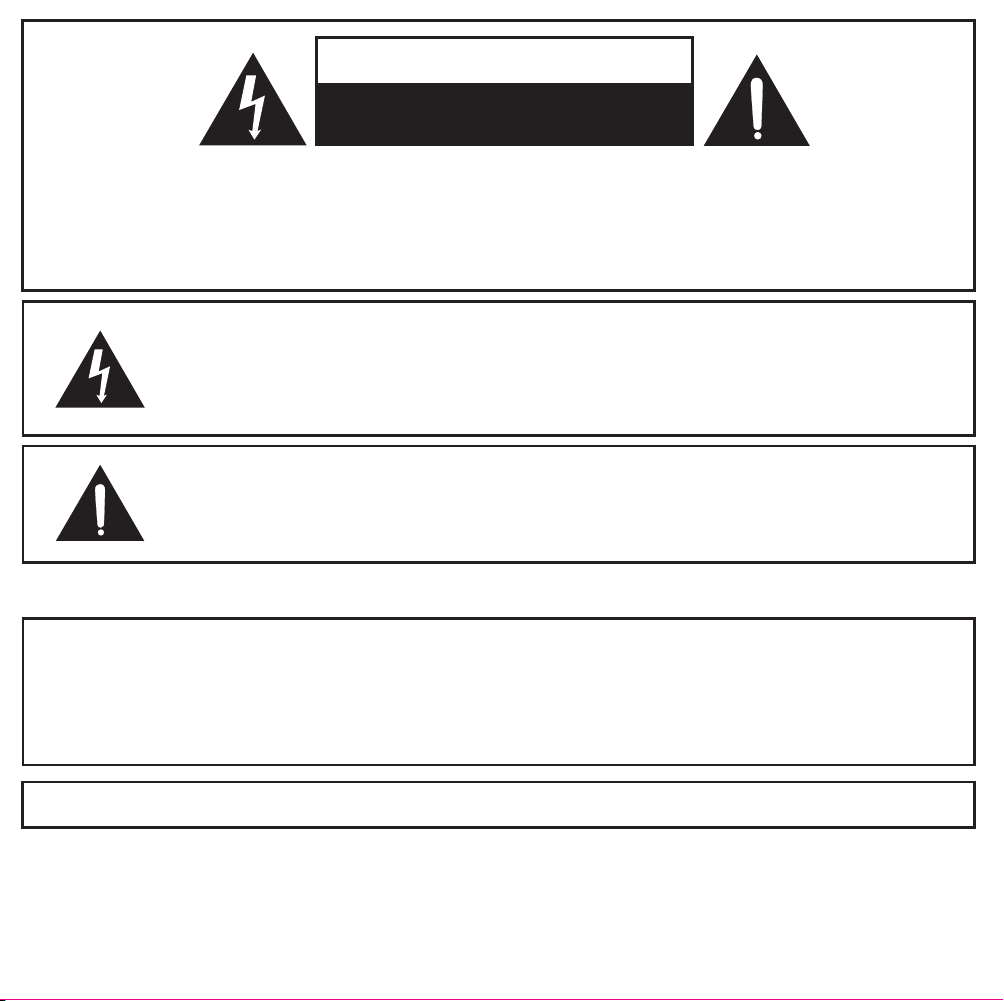
CAUTION
RISK OF ELECTRIC SHOCK
DO NOT OPEN
CAUTION: TO REDUCE THE RISK OF ELECTRIC SHOCK, DO NOT REMOVE COVER (OR BACK).
NO USER-SERVICEABLE PARTS INSIDE. REFER SERVICING TO QUALIFIED SERVICE PERSONNEL.
WARNING: TO REDUCE THE RISK OF FIRE OR ELECTRIC SHOCK, DO NOT EXPOSE THIS
APPLIANCE TO RAIN OR MOISTURE.
The lightning flash with arrowhead symbol, within an equilateral triangle, is
intended to alert the user of the presence of uninsulated “dangerous voltage”
within the product’s enclosure that may be of sufficient magnitude to constitute
a risk electric shock to persons.
The exclamation point within an equilateral triangle is intended to alert the
user of the presence of important operating and maintenance (servicing)
instructions in the literature accompanying the appliance.
The symbols above are located on the bottom of the unit.
WARNING: DANGER OF EXPLOSION IF BATTERY IS INCORRECTLY REPLACED.
REPLACE ONLY WITH THE SAME OR EQUIVALENT TYPE.
AVERTISSEMENT: DANGER D’EXPLOSION LORSQUE LA BATTERIE N’EST PAS
REMPLACÉE CORRECTEMENT.
REMPLACER UNIQUEMENT AVEC DES BATTERIES IDENTIQUES OU D’UN TYPE ÉQUIVALENT.
CAUTION: To prevent electric shock, match wide blade of plug to wide slot. Fully insert.
CAUTION: To reduce the risk of fire, do not place any heating or cooking product
beneath this unit
1
Page 4
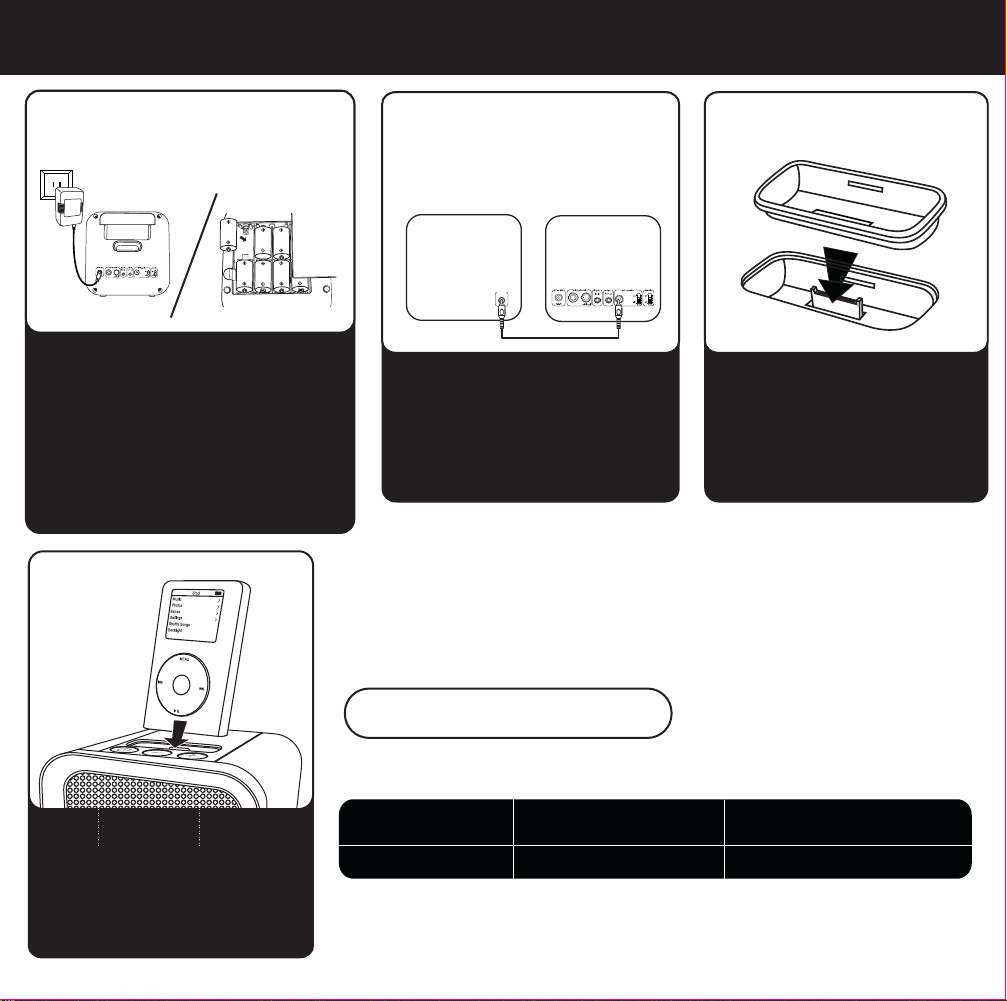
iH82 quick start
1: power: AC or
batteries
To charge and play iPod, attach AC
adaptor plug to jack on back of the
main unit and plug the other end
into a working AC outlet. For
portable play, open battery door
located on the bottom of the iH82.
Install 8 “C” batteries (match + and polarity in diagram).
4: iPod
2: Extension
Speaker
ext. speaker
Connect the main unit &
external speaker using included
speaker cable. Move Extension
Speaker switch on back of main
unit to ON
3: inserts
Select the dock insert for your
iPod® model from the table
below and place insert in
dock.
Never dock an iPod without a
correct insert in place.
Insert iPod into dock (iPod
must not be in a “skin” or case).
Press the Power On/Off (play)
Button on the main unit to
play your iPod.
Table 1: Selecting an Insert
ALWAYS USE CORRECT INSERT TO DOCK YOUR iPod
iPod nano
Insert 8
iPod 1G and 2G nano
iPod with video (30 GB)
Insert 9
thin (30 GB) iPod with video
THIS UNIT DOES NOT CHARGE OR CONTROL 3G iPod
2
iPod with video (60,80 GB)
Insert 10
thick (60,80 GB) iPod with video
Page 5
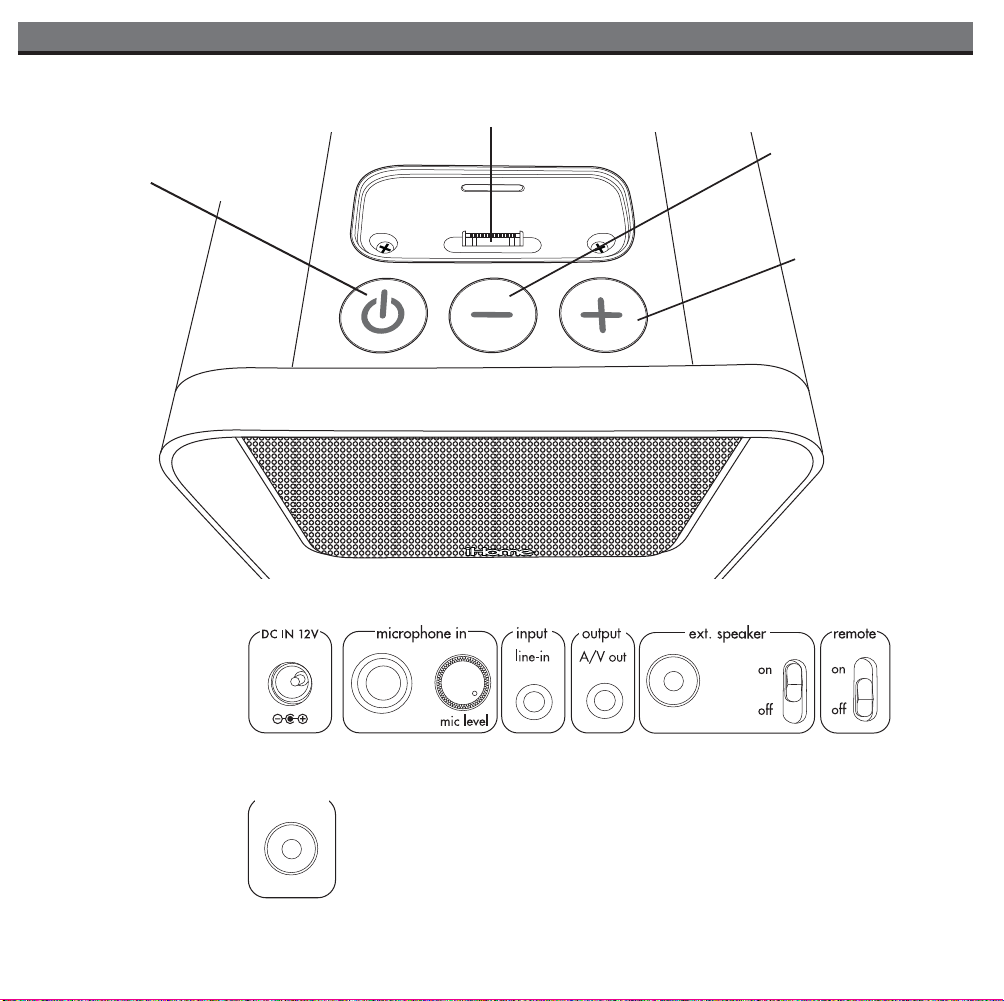
Main Unit Top Panel
Power On/Off (Play) Button
Controls and Indicators
Dock
Volume Down Button
Volume Up Button
Main Unit
Rear Panel
External
Speaker
Rear Panel
ext. speaker
3
Page 6
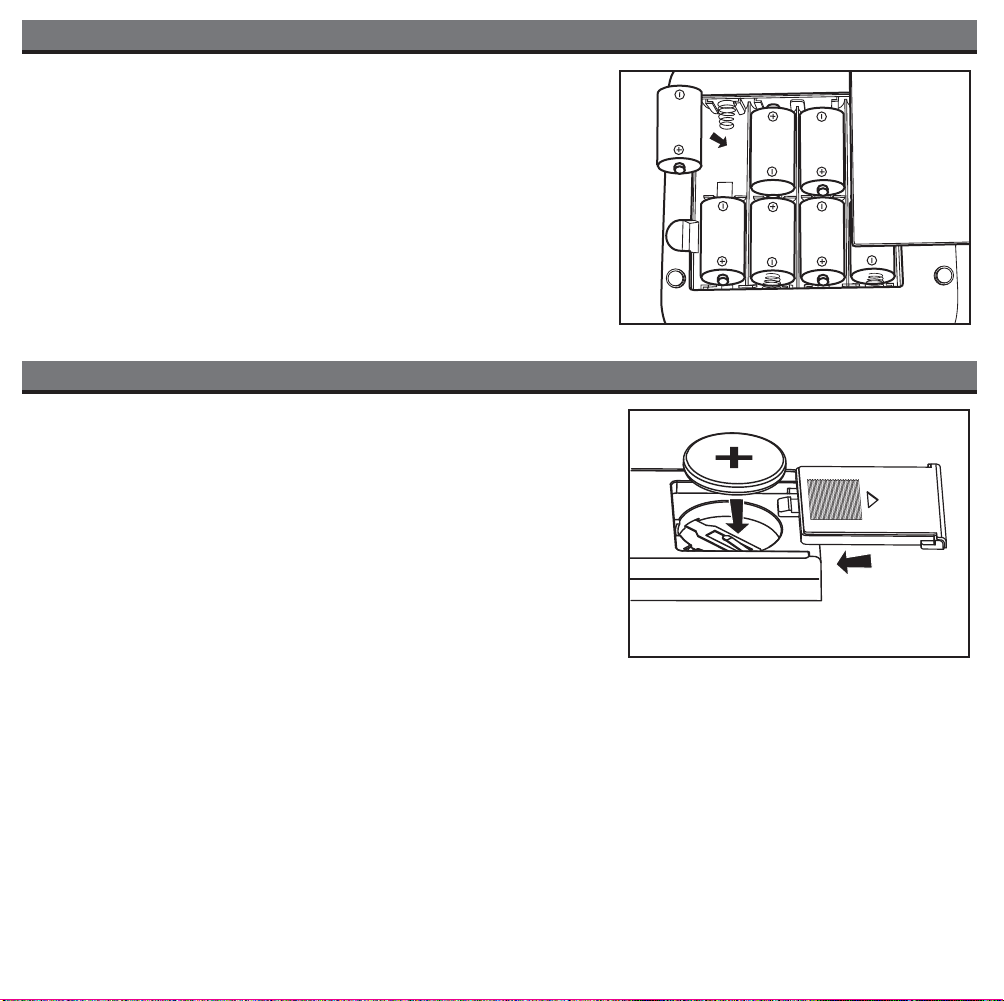
Installing/Replacing iH82 Batteries
Installing/Replacing Batteries
1. Open the battery compartment cover located on the bottom of the main unit.
2. Insert 8 “C” batteries, checking that the + and – ends of the batteries
match the drawing inside the battery compartment. We recommend
the use of alkaline batteries for longer life.
3. Close the compartment cover.
Batteries information:
• Do not mix old and new batteries.
• Do not mix alkaline, standard (carbon-zinc) or rechargeable batteries.
• Make sure you dispose of batteries properly (see your local regulations).
Using The Remote Control
Installing/Replacing the Remote Control Battery
The remote control battery is already installed at the factory. When the
remote control stops operating or its range seems reduced,
it is time to replace the battery with a new one.
1. The battery door is located on the back end of the remote.
2. Slide the battery door open and remove old battery.
3. Insert a CR2032 battery, checking that the + and – sides of the battery
match the drawing inside the battery compartment.
4. Replace the battery door.
Installing Batteries
Install Remote Control Battery
Note: Make sure you dispose of all batteries properly (see your local regulations).
OPERATING THE REMOTE CONTROL
The Remote Control controls basic functions on the main unit and certain iPod® functions when the iPod® is docked in the
main unit. For best results, aim remote control towards the main unit.
4
Page 7
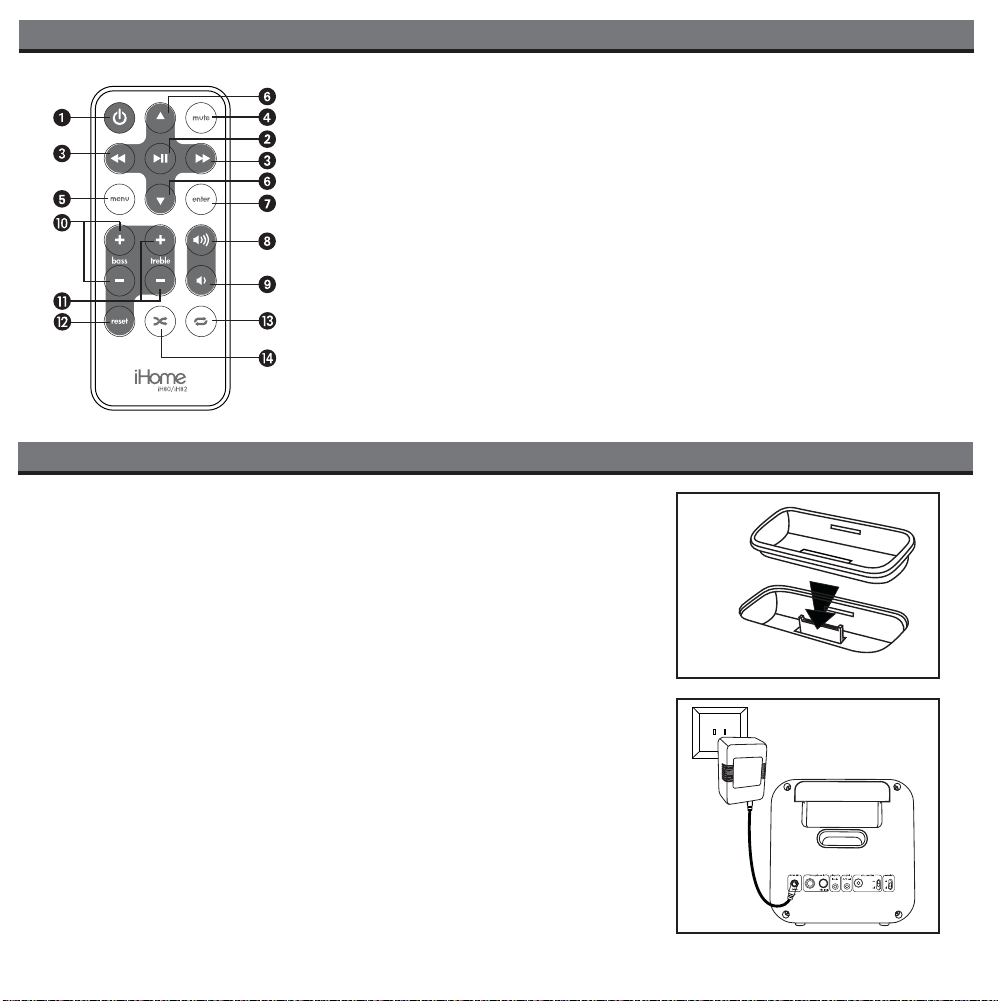
Using The Remote Control
Power On/Off Button:
Play/Pause Button : Plays track. In play mode, press to pause
Fwd/Rev Button: Skip to previous or next track, or HOLD to
scan current playing track
Mute Button: Toggles sound ON or OFF
Menu Button:
Up/Down Button: Press Up or Down to scroll iPod menu
Enter Button: Press to select iPod menu function
Volume + Button: Raises volume level
Volume – Button: Lowers volume level
Bass +/– Buttons: Press to increase/reduce Bass
Treble +/– Buttons: Press to increase/reduce Treble
Reset Button: Press to reset Bass and Treble to default setting
Repeat Button: Press for repeat play (press again to repeat all)
Random Button: Press for random play
Press to access iPod Menu functions
Turns iH82 ON or OFF
Using the iH82
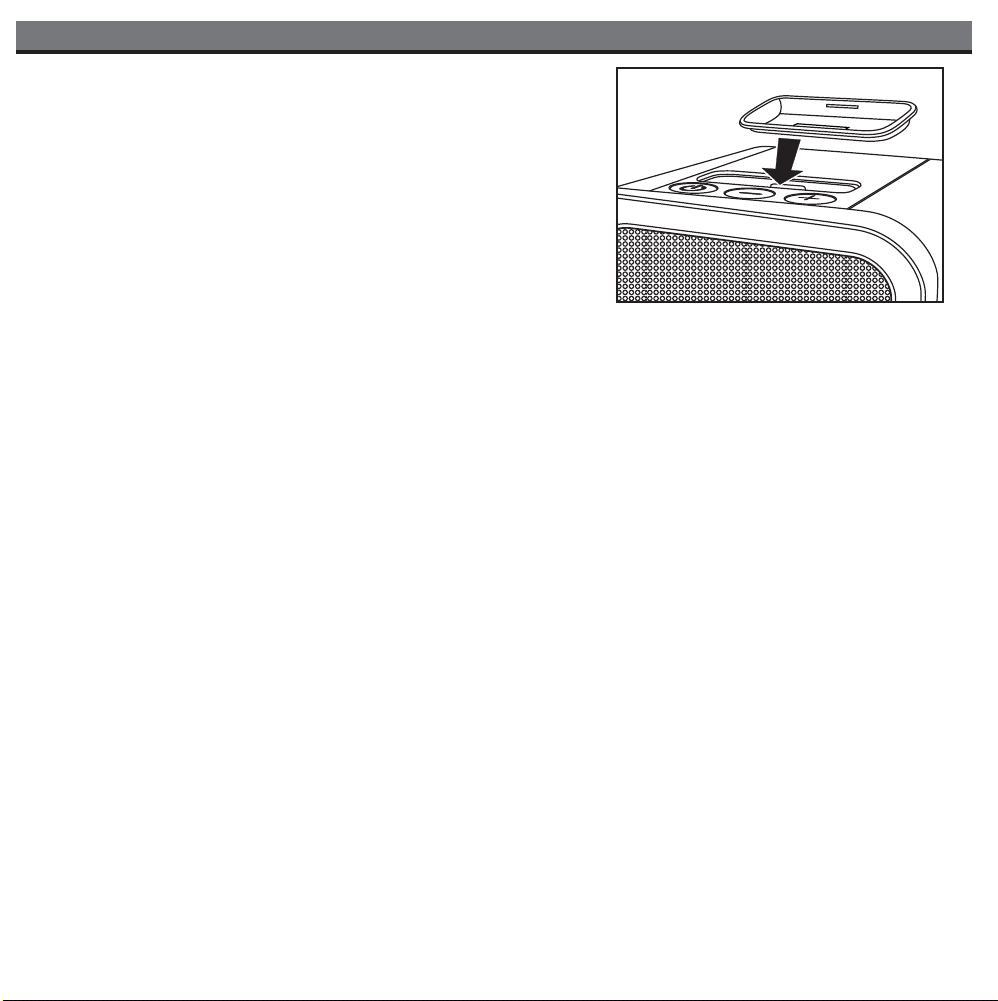
Placing iPod Insert and Docking Your iPod
Your iH82 comes with 3 inserts to ensure your iPod fits properly in the dock on
top of the unit.
To place an insert:
1. Select the insert for your iPod (see table on page 2). Using the correct insert
ensures the proper fit for your iPod for best performance.
2. Gently press the iPod insert into the dock.
3. With insert in place, carefully place your iPod into the dock. The iPod must not
be in a case or “skin”.
Place iPod Insert
Connect AC Adaptor
Connect the AC adaptor plug into the jack on the back of the system, then plug
the AC adaptor into the wall outlet.
To check for iPod compatibility
iH82 is an advanced system and supports most updated iPod features. To have
your iPod working properly with iH82, please update your iPod firmware with the
latest version at www.apple.com.
5
Connect AC Adaptor
Page 8
Using the iH82
Charging your iPod
Note: Please make sure you are using the correct insert for your iPod
(see Placing iPod Insert) and that it is properly docked into the main
unit. Failure to do so may damage your iPod.
1. While your iPod is docked in the unit and the unit is connected to
AC power, it recharges until fully charged. Your iPod will not charge
when operating on battery power. Note that other non-docking iPods
will NOT charge.
Listening to iPod
1. If you dock an already playing iPod, the iH82 will automatically turn on and you will hear the music playing from
your iPod. Note: If the playing song/music loudness is too low on the iPod itself, the iH82 may not detect the iPod
is in play mode.
2. When the iPod is docked and in standby mode, press the Power On/Off Button on the main unit or the remote
control to play the iPod.
3. Press the iPod Play/Pause Button on the remote control to pause play; press again to resume play.
4. Press the Volume+ and Volume– Buttons on the main unit or the remote control to adjust the system volume.
5. Press the Bass or Treble +/- Buttons on the remote control to adjust the tone to your liking. Press the EQ reset
button to reset Bass or Treble to default setting.
6. Press the Mute Button on the remote control to mute the main unit output. Press the Mute again or volume +/-
button to resume listening
7. Press the FWD or REV Buttons on the remote control to go to the next or previous track. Press and hold while a
track is playing for high speed forward or reverse music search of the current track.
8. Press the Random or Repeat Button on the remote control to set iPod play mode to play tracks randomly or to
repeat the current track
9. Press the Menu, Enter, Up or Down buttons on the remote control to control your iPod just like pressing the same
controls on your iPod.
10. To turn off the iH82, press the Power on/off Button on the main unit or remote control. Your iPod will
continue charging while in the dock (provided the iH80 is connected by AC adaptor to working outlet).
6
Page 9

Using the iH82
Listening to non-docking iPod or other portable audio devices
If you are using an iPod without a docking port or other MP3 player or audio device, you can play it through the iH82 via the
Line-in Jack.
1. Plug one end of the audio patch cord (included) into the headphone or line-out jack on your audio device and the other
end of the patch cord into the iH82 Line-in Jack located on the back of the main unit.
Using iH82 as a PA/Karaoke system
The iH82 includes a PA/Karaoke feature. To use it, connect a Microphone with a standard 1/4” phono plug (mic and cable
not included) to the MIC jack located on the back of the main unit then speak or sing into it. Use the Level knob to adjust the
MIC volume to get the right balance between your voice and iPod volume.
Operating the Remote On/Off Switch
To save battery power on the main unit, switch off the Remote Switch located on the back of the iH82 for longer battery life.
Doing so disables the remote.
A/V Output Jack Operation
To output iPod audio video signal from the iH82 to your TV, connect the iH82 to your TV system with an iPod AV cable (not
included). Plug one end into your TV video/audio-in jack(s) and the other end to the A/V output jack located on the back of
the main unit. Turn on your TV and select the input for the AV-in jack signal. Playing video from your iPod will output signal to
your TV.
7
Page 10
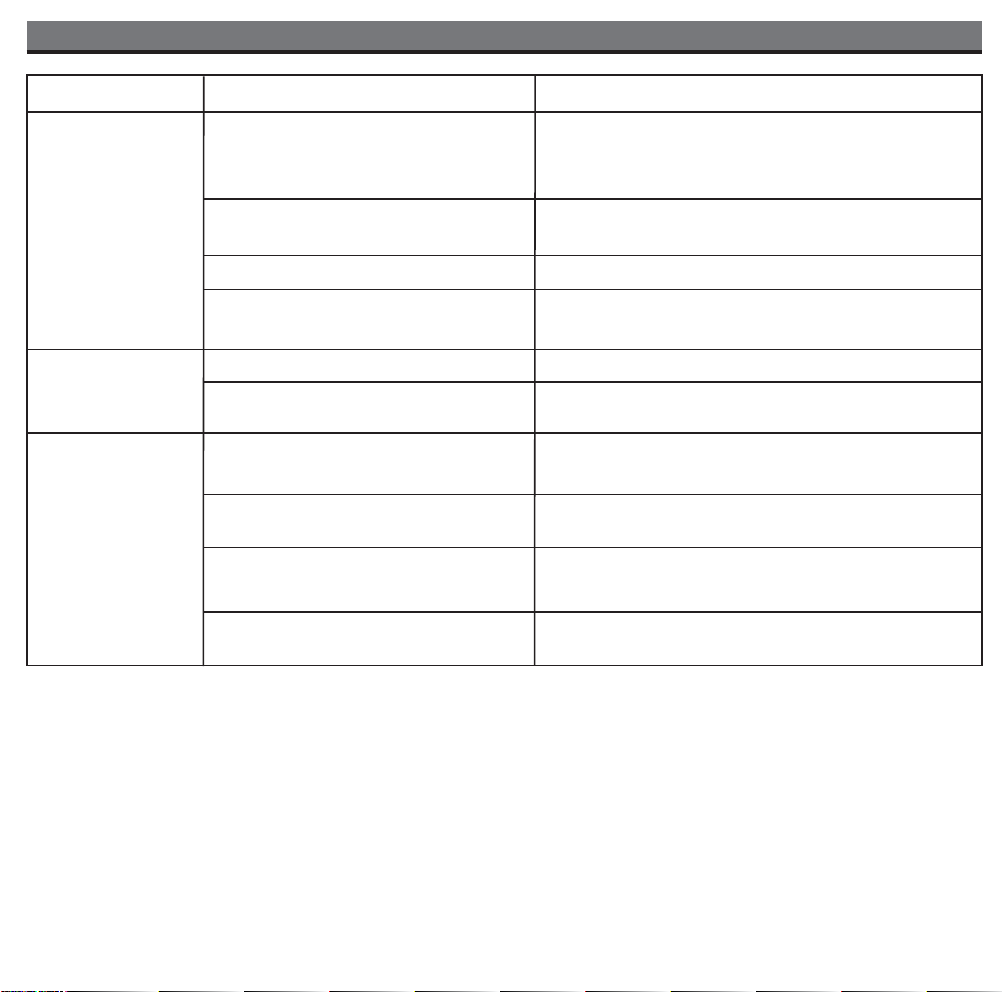
Troubleshooting
Symptom Possible Problem Solution
Unit not responding
(no power)
AC adaptor isn’t plugged to a wall outlet
or the connector is not plugged into the
power supply jack on the back of the unit
Make sure the AC adaptor is plugged into a
working AC outlet and connected properly to
the back of the iH80. If the outlet is controlled
by a switch, make sure the switch is on
iPod does not dock
properly
iPod does not
respond to the unit
Wall outlet is not functioning
Batteries are weak
Batteries were not installed properly
Using no insert or wrong iPod insert
iPod not docked properly
iPod is not installed properly Remove your iPod from the dock and check for
Your iPod software is too old Upgrade software on your iPod. For details visit
iPod is locked up Please make sure your iPod is working properly before
st
Using 1
devices.
or 2nd generation iPod or other
Plug another device into the same outlet to confirm the
outlet is working
Replace with new batteries
Check to make sure the polarity ( + and – ends) matches
the diagram in the battery compartment
Make sure the dock insert is the proper fit for your iPod
Remove your iPod from the dock and check for
obstruction on the connectors in the dock and on your
iPod. Then reseat it in the dock.
obstruction on the connectors in the dock and on your
iPod. Then reseat it in the dock.
http://www.apple.com/ipod/download
docking into the unit. Please refer to your iPod manual for
details.
iH82 cannot control those iPods or other devices.
8
Page 11
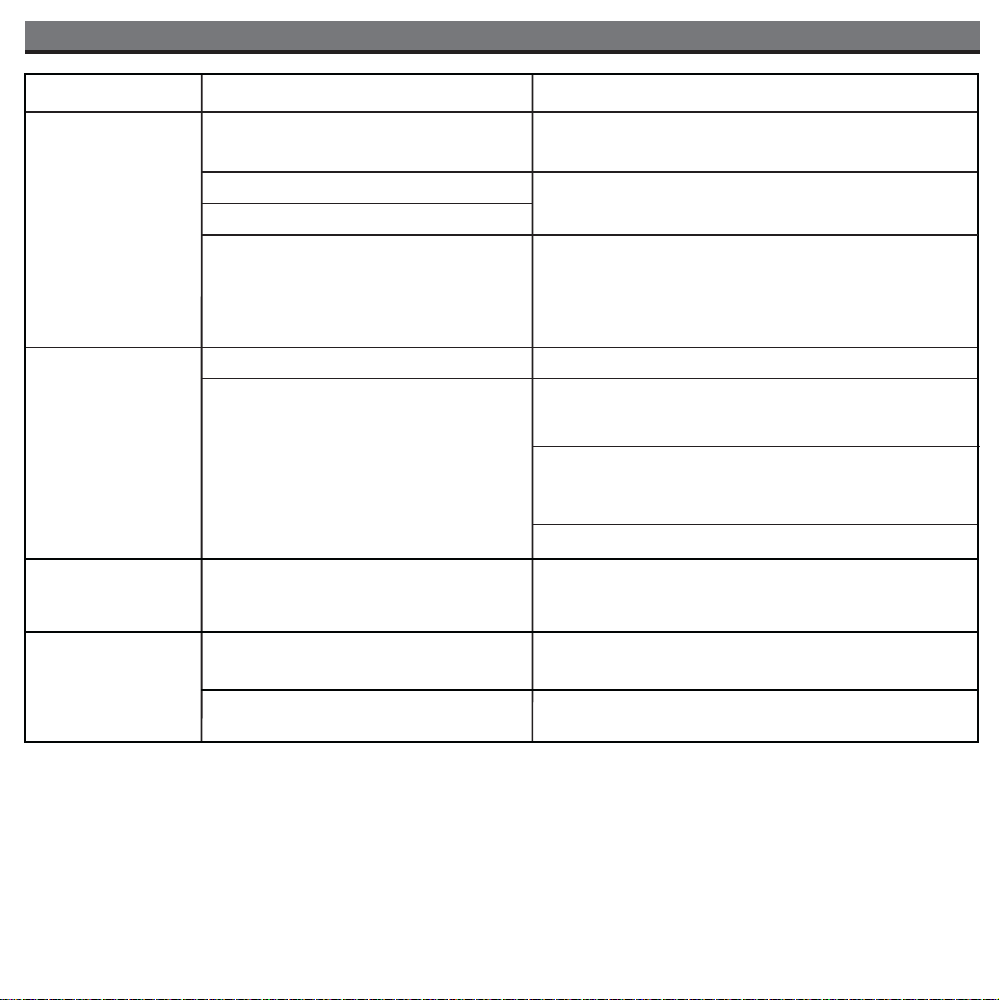
Troubleshooting
Symptom Possible Problem Solution
iPod didn’t charge up iPod is not docked properly Remove your iPod from the dock and check for
iPod is locked up/ frozen
iPod battery has problem
The iH80 only charges your iPod while
connected to the AC adaptor (not on
batteries). AC adaptor isn’t plugged into a
wall outlet or the connector is not plugged
into the power supply jack on the back of
the unit
Volume level is set too high
Sound is distorted
obstruction on the connectors in the dock and on your
iPod. Then reseat it in the dock.
Please make sure your iPod is working properly before
docking into the unit. Please refer to your iPod manual for
details.
Plug the AC adaptor into a working wall outlet and plug the
connector into the supply jack on the iH82. Check
that all connections are secure. If there is a power switch
for the outlet make sure it is on.
Decrease the volume on the iH82
If the iPod original sound source (MP3) is of poor quality,
distortion and noise are easily noticed with high-power
speakers. Try a different audio source such as a music CD.
Crackling/distorted
sound
Remote control
doesn’t work
Sound source is distorted
Low/not enough battery power may affect
amplifier
Remote control is out of range
Remote control battery is dead/weak
If you are using an external sound source like older
generation of iPod or other audio device, try reducing the
output volume on the device itself.
Try adjusting EQ settings on your iPod/iH80/sound source.
In order, try: lowering the volume/EQ, running on AC
adaptor rather than batteries, replacing the batteries
Move closer to iH82
Replace current battery in remote with new battery
9
Page 12
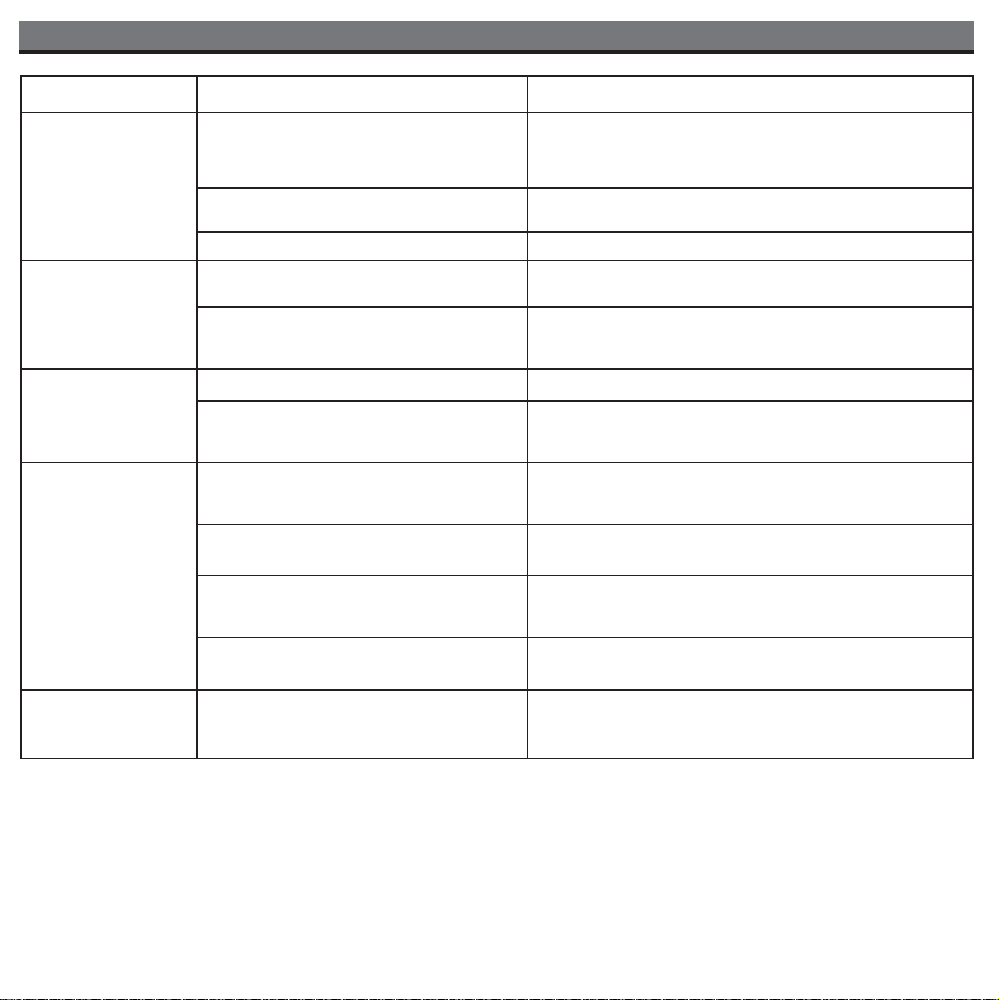
Solucionando problemas
Síntoma
La unidad no
funciona (no circula
corriente eléctrica)
El iPod no encastra
correctamente
El ícono de batería
baja está destellando
El iPod no se
comunica con la
unidad
Causa Solución
El adaptador de AC no está conectado al
tomacorriente o el conector no está
conectado a la ficha en la parte posterior de
la unidad
El tomacorriente no funciona
Las baterías están gastadas Reemplace las baterías
No ha colocado el encastre del iPod, o está
utilizando el encastre incorrecto.
El iPod no encastra correctamente Quite el iPod del encastre y retire la posible obstrucción
Las baterías están gastadas Reemplace las baterías
Las baterías no están instaladas
correctamente
El iPod no está instalado correctamente
Su software es obsoleto Renueve su software. Para mayor información, diríjase a
El iPod no responde
Usted tiene un iPod de primera o segunda
generación, un Shuffle u otro tipo de aparato
Conecte el adaptador de AC al tomacorriente y también
conecte el conector a la ficha en la parte posterior de la
unidad
Coloque otro aparato en ese mismo tomacorriente para
confirmar si el que no funciona es el tomacorriente
Verifique que el encastre sea el apropiado para su iPod
del encastre o de su iPod. Vuelva a colocar el iPod dentro
del encastre.
Verifique que la polaridad de las baterías (- y +) se
encuentren de acuerdo al diagrama del compartimiento
de baterías.
Quite el iPod del encastre y verifique posibles
obstrucciones del encastre o de su iPod. Vuelva a colocar
el iPod dentro del encastre.
http://www.apple.com/ipod/download
Verifique que su iPod funcione correctamente antes de
conectarlo a la unidad. Refiérase al manual de su iPod
para más detalles.
El iH82 no puede controlar estos otros aparatos
Los botones/controles
no funcionan
10
Page 13
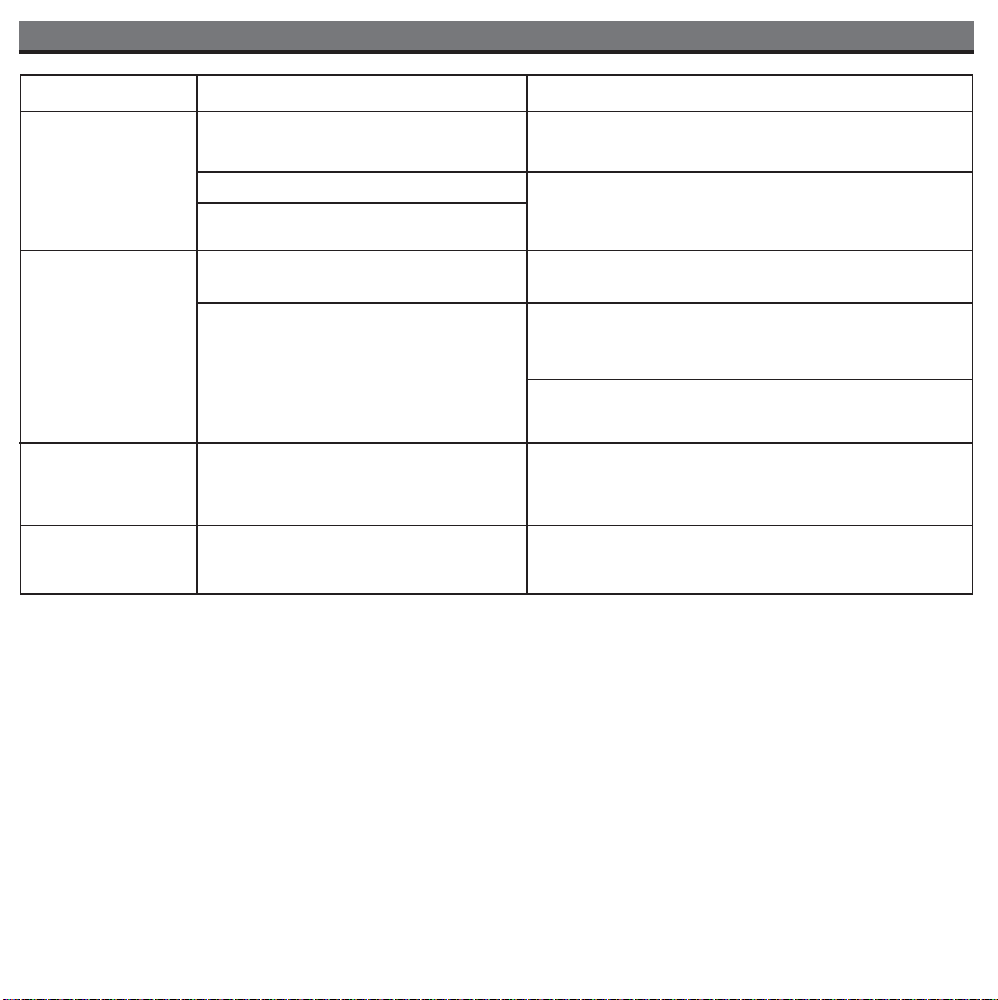
Solucionando problemas
Síntoma Causa Solución
El iPod no carga El iPod no está instalado correctamente Quite el iPod del encastre y retire la posible obstrucción
El iPod está trabado/no responde
La batería del iPod podría tener algún
inconveniente
del encastre o de su iPod. Vuelva a colocar el iPod dentro
del encastre.
Por favor asegúrese de que su iPod funcione
correctamente antes de colocarlo en el encastre.
Refiérase al manual de su iPod para mayor información.
El sonido sale
distorsionado
Interferencia/sonido
distorsionado
El control remoto no
funciona
El volumen se encuentra muy alto
El sonido sale distorsionado de la unidad
La batería gastada o baja puede afectar el
sonido del amplificador
Las baterías están gastadas
Baje el volumen
Si el sonido original de su iPod era de pobre calidad, las
distorsiones y ruidos se harán más notables con los
parlantes de alta potencia. Pruebe utilizar otra fuente de
audio como un CD.
Si está utilizando un iPod de primeras generaciones o un
Shuffle, intente bajar el volumen de su aparato. También
intente apagar el amplificador de bajos
En este orden, intente: bajar el volumen/EQ, utilizar la unidad
con un adpatador AC en vez de con batería, reemplace las
baterías.
Reemplace las baterías por nuevas
11
Page 14
A Consumer Guide to Product Safety
When used in the directed manner , this unit has been designed and manufactur ed to ensure your personal safety. However, improper use
can result in potential electrical shock or fire hazards. Please read all safety and operating instructions car efully before installation and use,
and keep these instructions handy for future reference. Take special note of all warnings listed in these instructions and on the unit.
1. Water and Moisture – The unit should not be used near water. For example: near a bathtub, washbowl, kitchen sink, laundry tub,
swimming pool or in a wet basement.
2. Ventilation – The unit should be situated so that its location or position does not interfere with its proper ventilation. For example, it
should not be situated on a bed, sofa, rug or similar surface that may block ventilation openings. Also, it should not be placed in a
built-in installation, such as a bookcase or cabinet, that may impede the flow of air through the ventilation openings.
3. Heat – The unit should be situated away from heat sources such as radiators, heat registers, stoves or other appliances (including
amplifiers) that produce heat.
4. Power Sources – The unit should be connected to a power AC adaptor of the type described in the operating instructions or as
marked on the appliance.
5. Power-Cord Protection – Power AC adaptor cords should be routed so that they ar e not likely to be walked on or pinched by items
placed upon or against them. It is always best to have a clear area from where the cord exits the unit to where it is plugged into an
AC outlet.
6. Cleaning – The unit should be cleaned only as recommended. See the Maintenance section of this manual for cleaning instructions.
7. Objects and Liquid Entry – Care should be taken so that objects do not fall and liquids are not spilled into any openings or vents
located on the product.
8. Attachments – Do not use attachments not recommended by the product manufacturer.
9. Lightning and Power Surge Protection – Unplug the unit from the wall outlet and disconnect the antenna or cable system during
a lightning storm or when it is left unattended and unused for long periods of time. This will prevent damage to the product due to
lightning and power-line surges.
10. Overloading – Do not overload wall outlets, extension cords, or integral convenience receptacles as this can result in a risk of fire
or electric shock.
11. Damage Requiring Service – The unit should be serviced by qualified service personnel when:
A. the power supply cord or plug has been damaged.
B. objects have fallen into or liquid has been spilled into the enclosure.
C. the unit has been exposed to rain.
D. the unit has been dropped or the enclosure damaged.
E. the unit exhibits a marked change in performance or does not operate normally.
12. Antenna – Do not connect an external antenna to the unit (other than that provided).
13. Periods of Nonuse – If the unit is to be left unused for an extended period of time, such as a month or longer, the power cord should
be unplugged from the unit to prevent damage or corrosion.
14. Servicing – The user should not attempt to service the unit beyond those methods described in the user’s operating instructions.
Service methods not covered in the operating instructions should be referred to qualified service personnel.
15. Replacement Parts – When replacement parts are required, be sur e the service technician has used r eplacement parts specified by
the manufacturer or have the same characteristics as the original part. Unauthorized substitutions may result in fire, electric shock, or
other hazards.
16. Safety Check – Upon completion of any service or repairs to this product, ask the service technician to perform safety checks to
determine that the product is in proper operating condition.
Questions? Visit www.ihomeaudio.com
For any other questions: 1-800-288-2792 Toll Free
Page 15

Limited 90-Day Warranty Information
iHome Products, a division of SDI Technologies Inc. (hereafter referred to as SDI Technologies), warrants this product to be free from
defects in workmanship and materials, under normal use and conditions, for a period of 90 days from the date of original purchase.
Should this product fail to function in a satisfactory manner, it is best to first return it to the store where it was originally purchased.
Should this fail to resolve the matter and service still be required by reason of any defect or malfunction during the warranty period, SDI
Technologies will repair or, at its discretion, replace this product without charge (except for a $15.00 charge for handling, packing,
return UPS/postage, and insurance). This decision is subject to verification of the defect or malfunction upon delivery of this product to
the Factory Service Center listed below. The product must include proof of purchase, including date of purchase. The fee for service
without proof of purchase is $30.00.
Before returning this product for service, please first replace the batteries (if applicable) with fresh ones, as exhausted or defective batteries
are the most common cause of problems encountered.
If service is still required:
1.
Remove the batteries (if applicable) and pack the unit in a well padded, heavy corrugated box.
2.
Enclose a photocopy of your sales receipt, credit card statement, or other proof of the date of purchase, if within the warranty period.
3.
Enclose a check or money order payable to the order of SDI Technologies, for the sum of $15.00 ($30.00 without proof of purchase).
Send the unit prepaid and insured, to the Factory Service Center listed below.
4.
Consumer Repair Department
SDI Technologies Inc.
1330 Goodyear Drive
Disclaimer of Warranty
NOTE: This warranty is valid only if the product is used for the purpose for which it was designed. It does not cover (i) products which
have been damaged by negligence or willful actions, misuse or accident, or which have been modified or repaired by unauthorized
persons; (ii) cracked or broken cabinets, or units damaged by excessive heat; (iii) damage to digital media players, CD’s or tape cassettes
(if applicable); (iv) the cost of shipping this product to the Factory Service Center and its return to the owner.
This warranty is valid only in the United States of America and does not extend to owners of the product other than to the original purchaser.
In no event will SDI Technologies or any of its affiliates, contractors, resellers, their officers, directors, shareholders, members or agents
be liable to you or any third party for any consequential or incidental damages, any lost profits, actual, exemplary or punitive damages.
(Some states do not allow limitations on implied warranties or exclusion of consequential damages, so these restrictions may not apply
to you.) This warranty gives you specific legal rights, and you may also have other rights which vary from state to state.
Your acknowledgment and agreement to fully and completely abide by the above mentioned disclaimer of warranty is contractually
binding to you upon your transfer of currency (money order, cashier's check, or credit card) for purchase of your SDI Technologies
product.
El Paso, TX 79936-6420
Questions? Visit www.ihomeaudio.com
© 2007 SDI Technologies, Inc. All rights reserved
or call 1-800-288-2792 Toll Free
IH82-041907-1 (USB) Printed in China
 Loading...