

IFM Electronic SLG Installation Instructions Manual
Installation Instructions
Airflow monitor
SLG
701064 / 04 05 / 2016
UK
2
1 Function and features
The airflow monitor monitors airflows. It senses whether there is a preset airflow
(= green LED lights, output relay energised for NO function, de-energised for NC
function).
If the flow is below the preset value, the red LED lights. The output relay is deenergised for NO function and energised for NC function.
• Setting range 1 m/s to 10 m/s.
• Start-up delay of 3 s ... 60 s (to suppress short-time fluctuations), depending on
the preset value
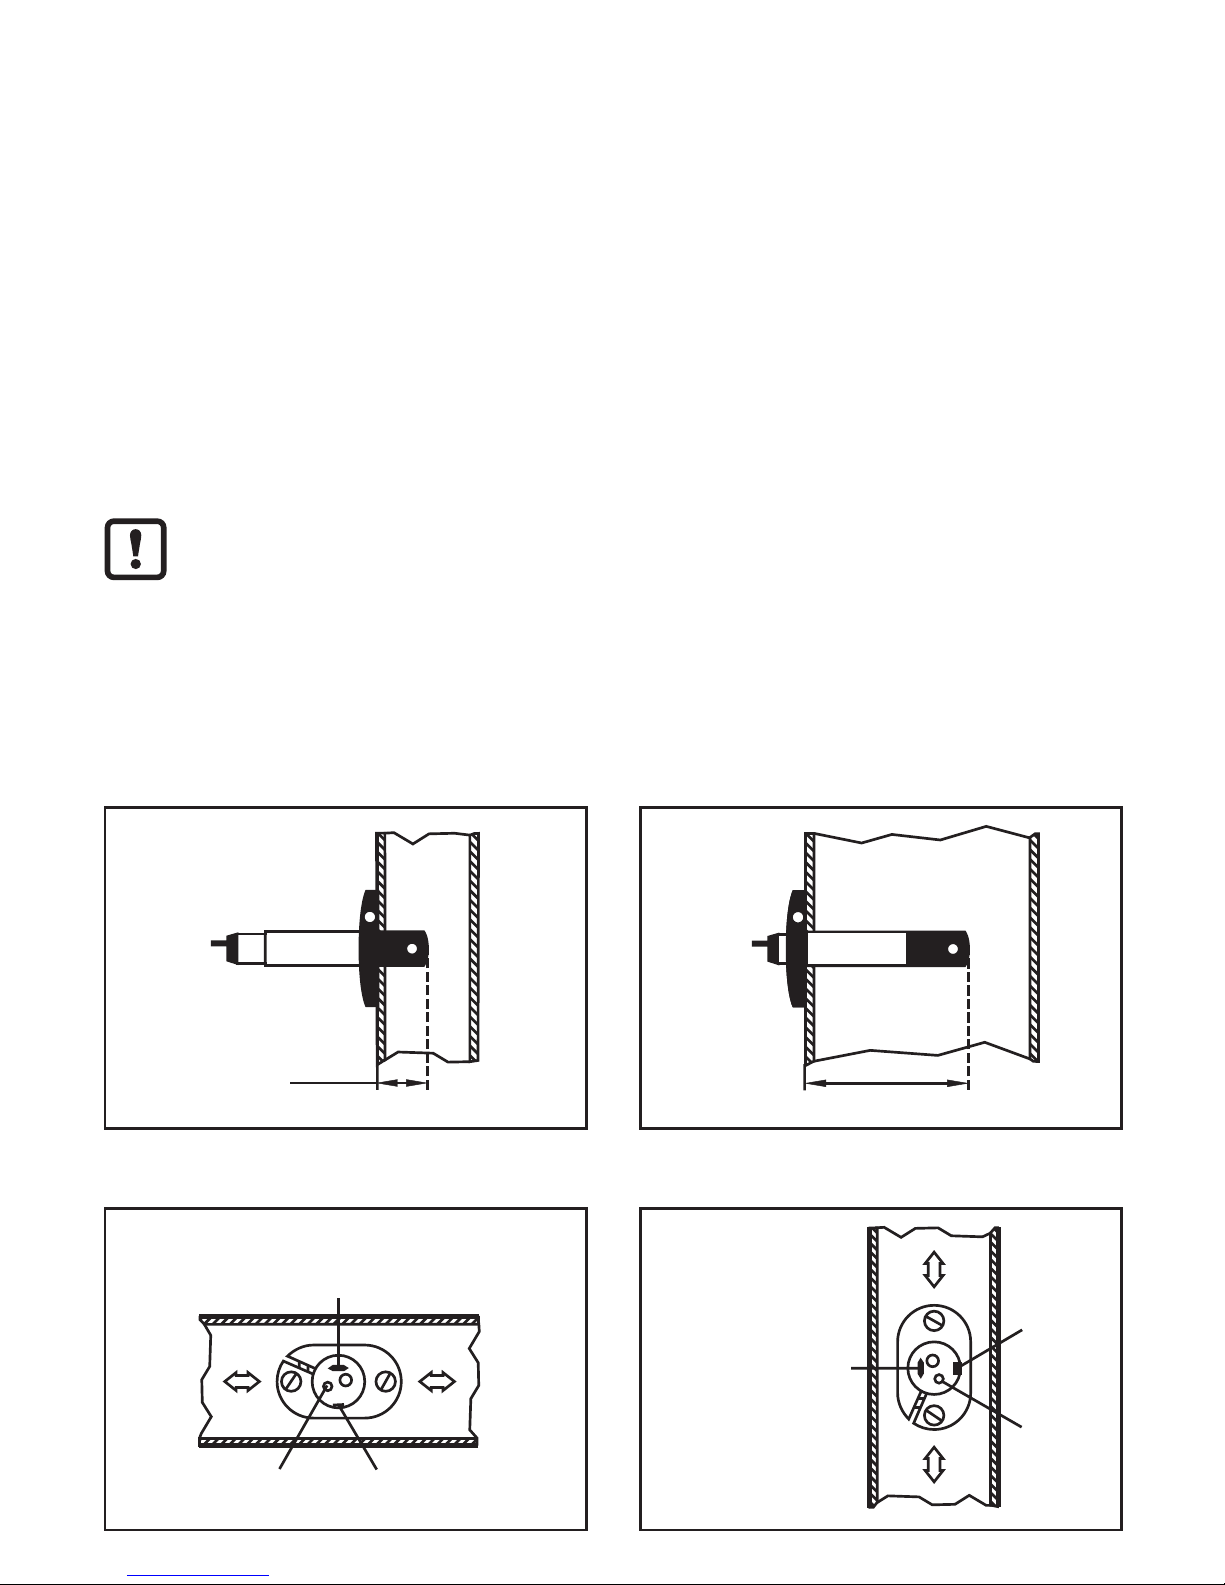
2 Mounting
Protect the units and the cables efficiently against damage.
Mount the airflow monitor by means of the mounting clamp provided. Diameter of
the mounting hole for the unit: 24 mm. If mounting is to be airtight, use the gasket
provided. The sensing head must be completely immersed into the airflow and
should be in the range of the highest flow velocity, if possible. Installation depth:
min. 32 mm, max. 120 mm.
min. 32 mm
max. 120 mm
Align the unit in the airflow; the arrow on the cap must point in the direction of flow.
arrow
(must be at the top)
Poti
Poti
LEDs
LEDs
arrow
 Loading...