

Page 1

Operating instructions
Through-beam sensor
OGS50x
OGE50x
UK
704071 / 01 02 / 2008
Page 2
1 Functions and features
The through-beam sensor detects objects and materials without contact and
indicates their presence by a switching signal.
For the range see the type label.
2 Installation
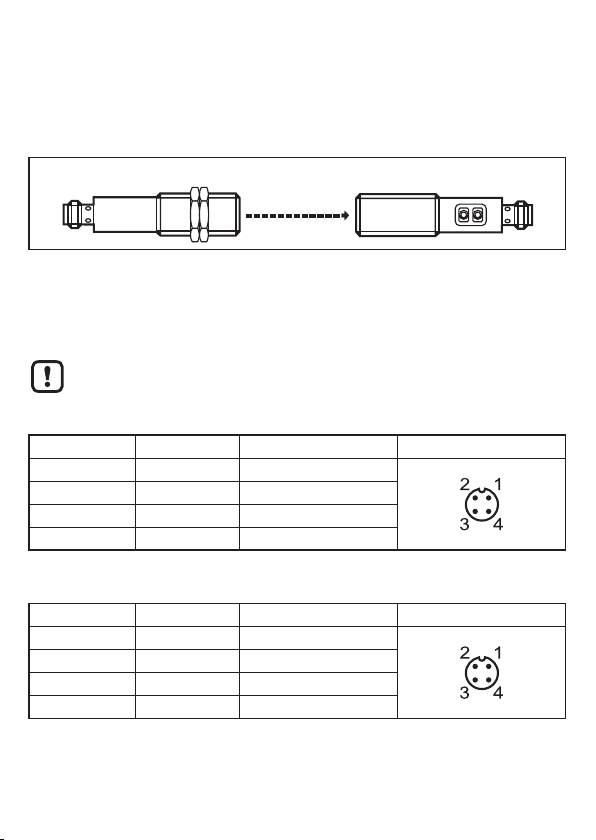
transmitter receiver
Install the receiver (OGE...) and secure it to a bracket. ►
Align the transmitter (OGS...) to the receiver and fix it. ►
3 Electrical connection
Disconnect power. ►
Connect the unit as follows. ►
Transmitter
Cable Connector Pin connection
L+ BN pin 1
L- BU pin 3
— — pin 4
— — pin 2
Core colours BN = brown, BU = blue, BK = black
Receiver
Cable Connector Pin connection
L+ BN pin 1
L- BU pin 3
load BK pin 4
— — pin 2
Core colours BN = brown, BU = blue, BK = black
2
Page 3
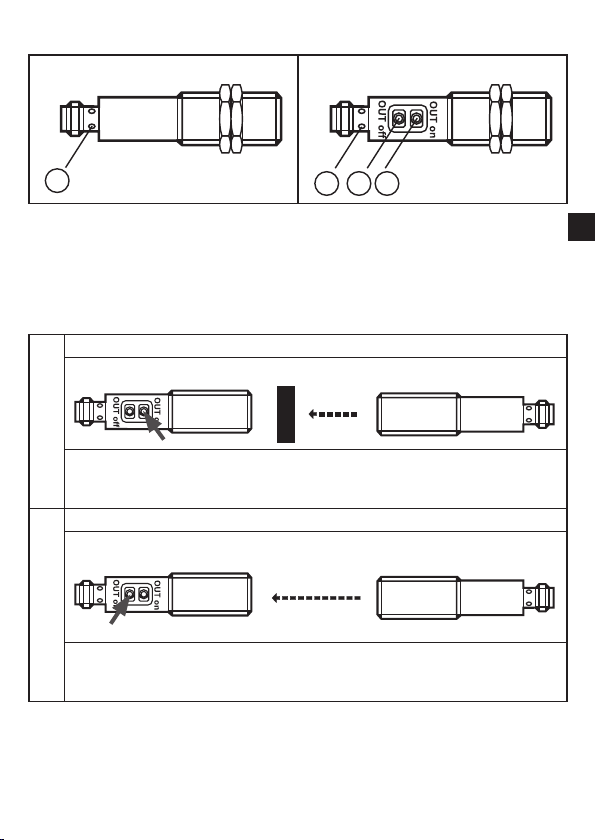
4 Operating and display elements
�
transmitter receiver
LED1:
[OUT off]2:
[OUT on]3:
4 Settings
4.1 The receiver is to switch when the object is detected
Position the object. ►
receiver transmitter
1
Press [OUT on] for 2 s. ►
The sensitivity is set to the object. >
The LED flashes. >
Remove the object. ►
receiver transmitter
2
Press [OUT off]. ►
The sensitivity is set without object. >
The LED goes out. The programming is finished. >
4.2
The receiver is not to switch when the object is detected
Position the object (see figure 1) and press [OUT off] for 2 ►
Remove the object (see figure 2) and press [OUT on]. ►
s.
UK
3
Page 4
The settings can also be carried out first without object (step 1) and then with
object (step 2).
4.3 Programming unsuccessful
LED flashes quickly, 8 Hz. >
Possible causes
Insufficient difference in measurements.•
Max. programming time of 15 min. exceeded.•
4.4 Setting of maximum sensitivity
Align the receiver so that no light is received. ►
The receiver is to switch when the object is detected.
First press [OUT on] and then [OUT off]. ►
The receiver is to switch when the object is not detected.
First press [OUT off], then [OUT on]. ►
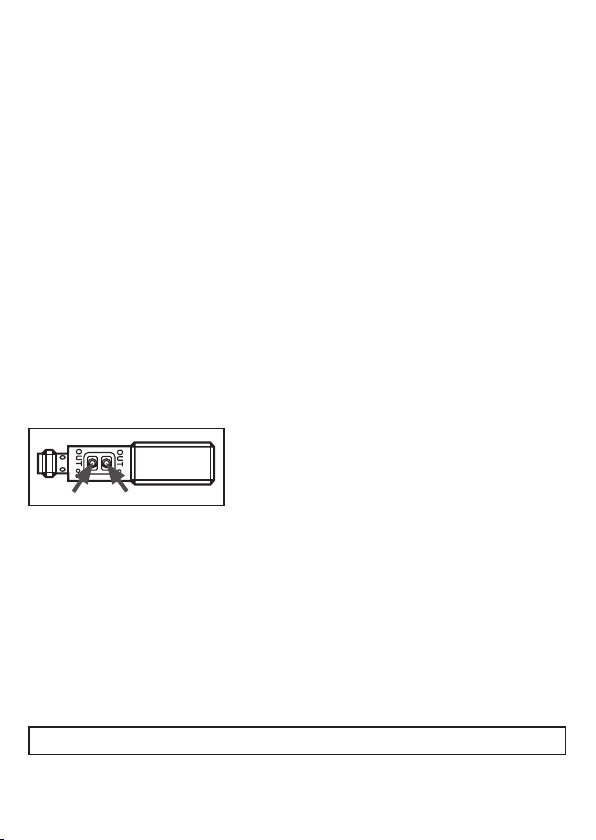
4.5 Locking or unlocking the buttons
The unit can be locked electronically to prevent unintentional settings.
Press [OUT on] and [OUT off] simultaneously for ►
10 s.
Acknowledgement is indicated by a change of the >
LED status.
5 Operation
Check whether the sensors operate correctly. ►
The receiver LED lights when the switching output is switched. >
6 Maintenance
Keep the lenses of the sensors free from soiling. ►
For cleaning do not use any solvents or cleaning agents which could damage ►
the plastic lenses.
Technical data and further information at www.ifm.com
4
 Loading...