

Page 1

Installing iPhone 4S Battery
Written By: Walter Galan
TOOLS:
Phillips #00 Screwdriver (1)
Plastic Opening Tools (1)
iPhone 4 5-Point Pentalobe Screwdriver
(1)
PARTS:
iPhone 4S Replacement Battery (1)
SUMMARY
Replacing the battery on the iPhone 4S requires minimal disassembly.
Installing iPhone 4S Battery
© iFixit — CC BY-NC-SA www.iFixit.com Page 1 of 6
Page 2
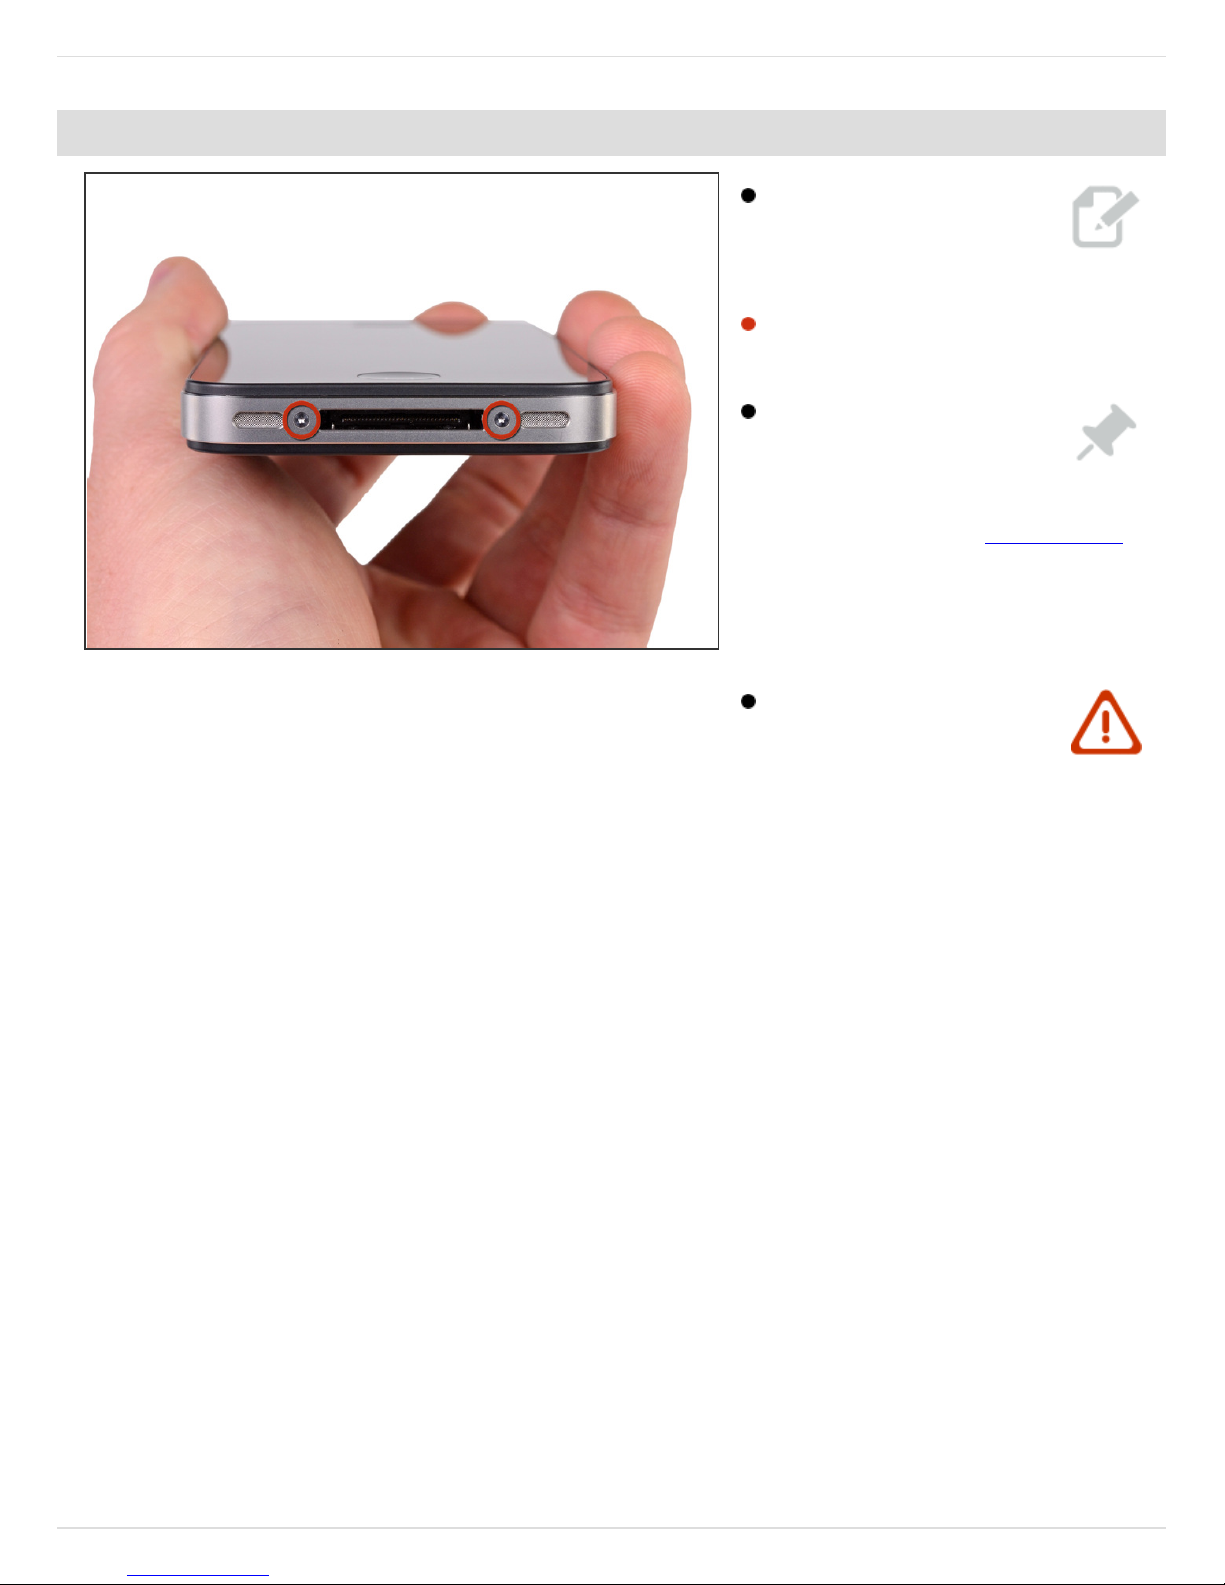
Step 1 — Rear Panel
Before disassembling your
iPhone, be sure it is
powered off.
Remove the two 3.6 mm Pentalobe
screws next to the dock connector.
During reassembly, we
recommend you replace the
5-point screws with equivalent
Phillips screws. Our Liberation Kit
provides the tools and screws
needed to replace the Pentalobe
screws with Phillips screws.
The 5-Point Screwdriver
should only be used once,
as it has the potential to strip the
screws.
Installing iPhone 4S Battery
© iFixit — CC BY-NC-SA www.iFixit.com Page 2 of 6
Page 3
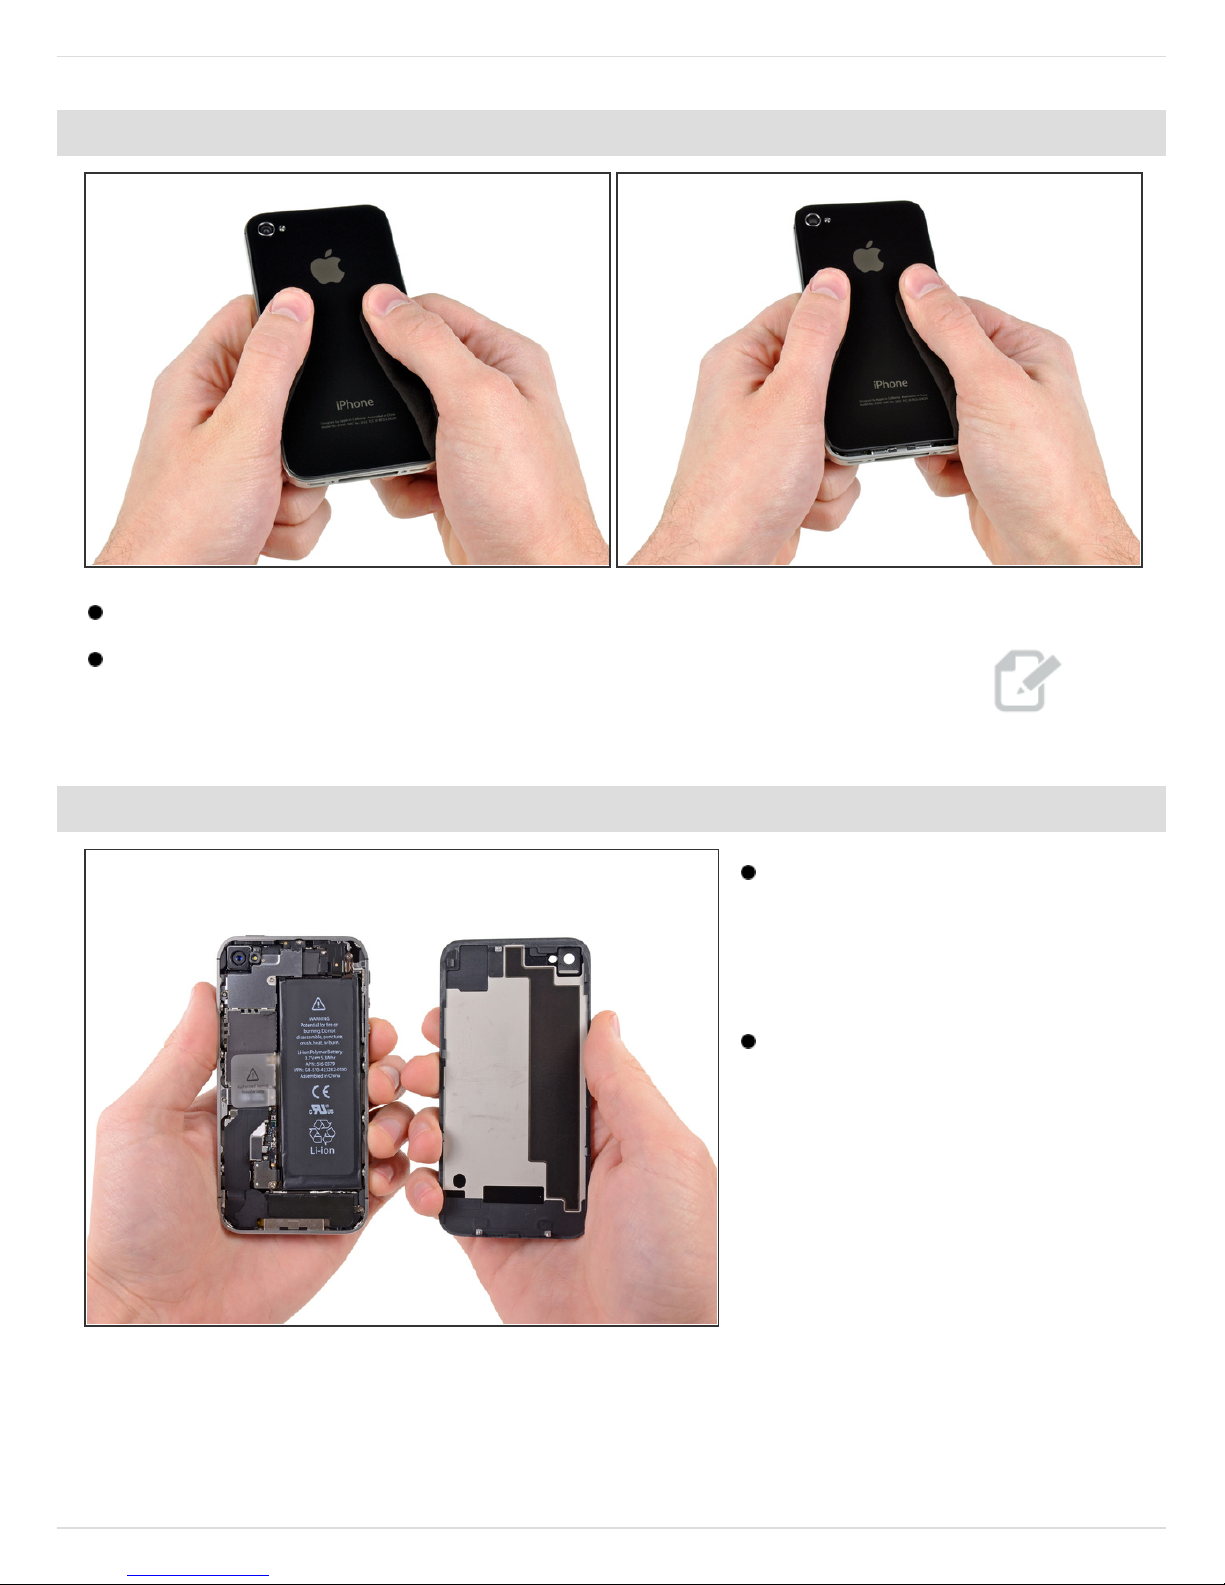
Step 2
Push the rear panel toward the top edge of the iPhone.
The panel will move about 2 mm.
Step 3
Pull the rear panel away from the
back of the iPhone, being careful
not to damage the plastic clips
attached to the rear panel.
Remove the rear panel from the
iPhone.
Installing iPhone 4S Battery
© iFixit — CC BY-NC-SA www.iFixit.com Page 3 of 6
Page 4
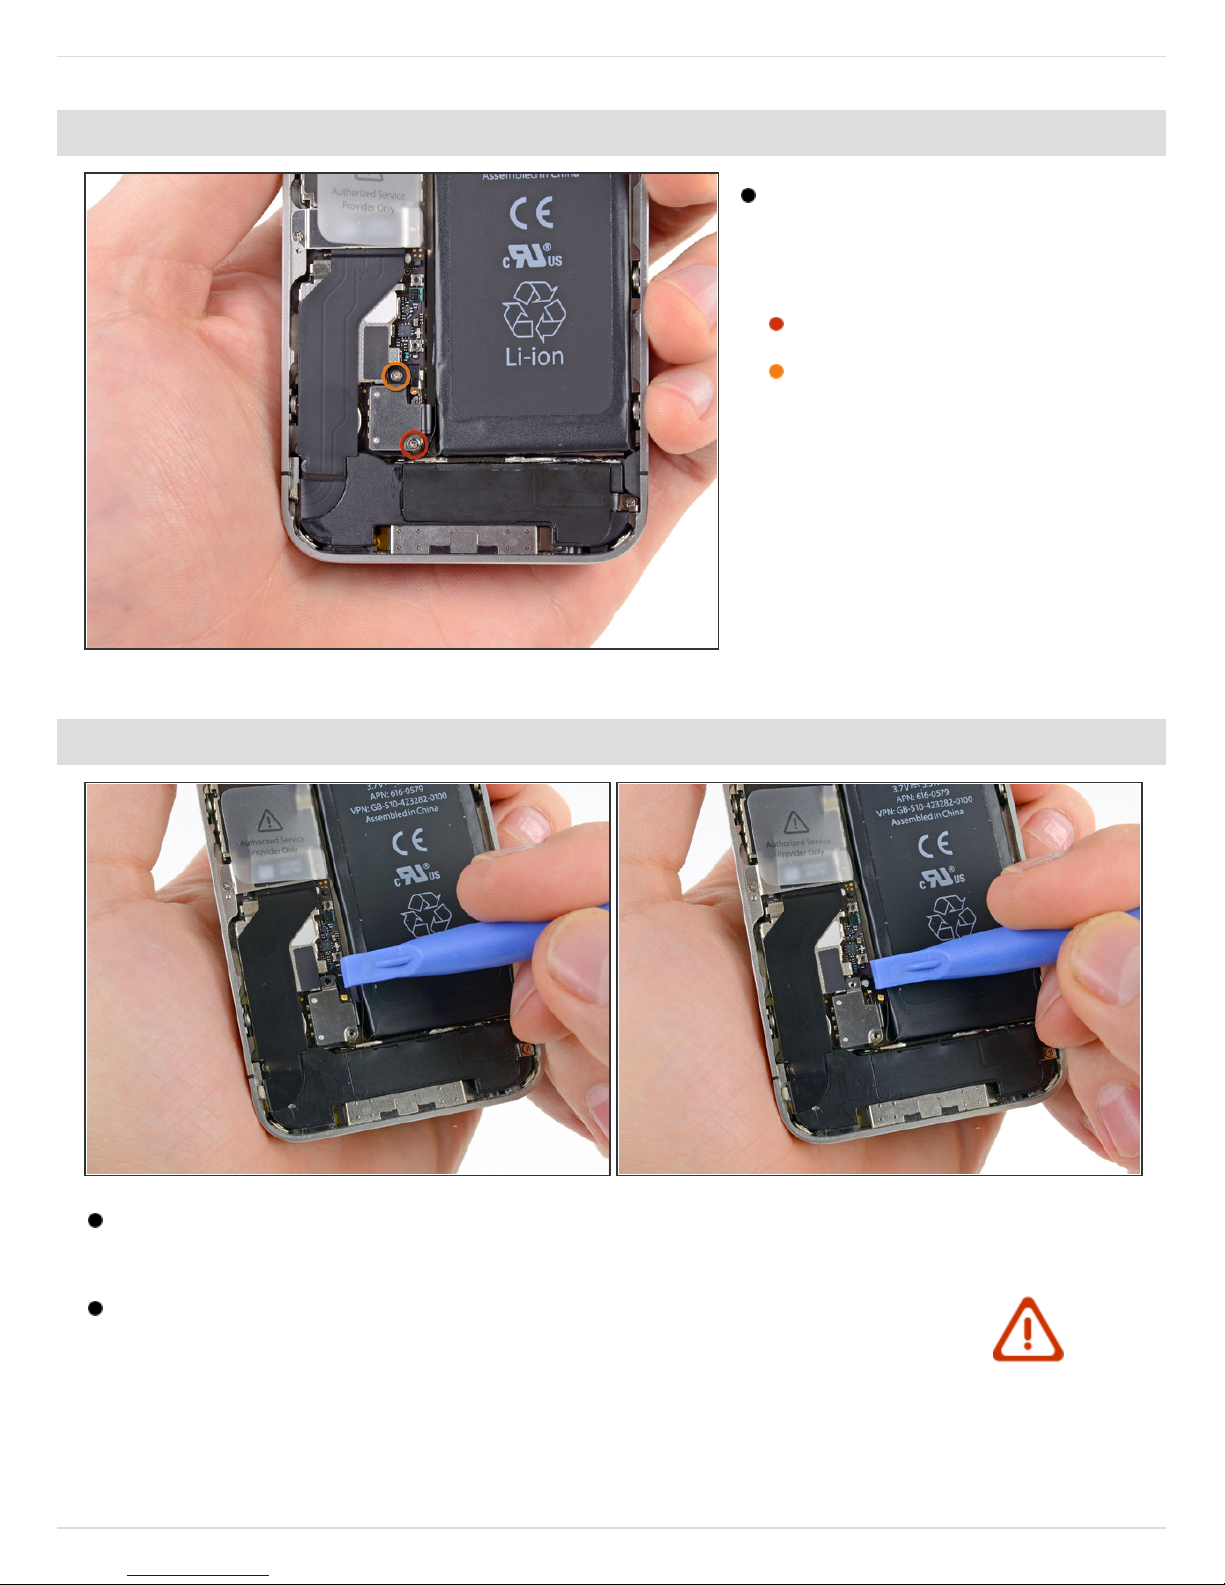
Step 4 — Battery
Remove the following screws
securing the battery connector to
the logic board:
One 1.7 mm Phillips screw
One 1.5 mm Phillips screw
Step 5
Use a plastic opening tool to pull the pressure contact from underneath the battery
connector.
When reinstalling the pressure contact, be sure to clean it with a degreaser such as
windex or isopropyl alcohol. The oils on your fingers have the potential to create
wireless interference.
Installing iPhone 4S Battery
© iFixit — CC BY-NC-SA www.iFixit.com Page 4 of 6
Page 5
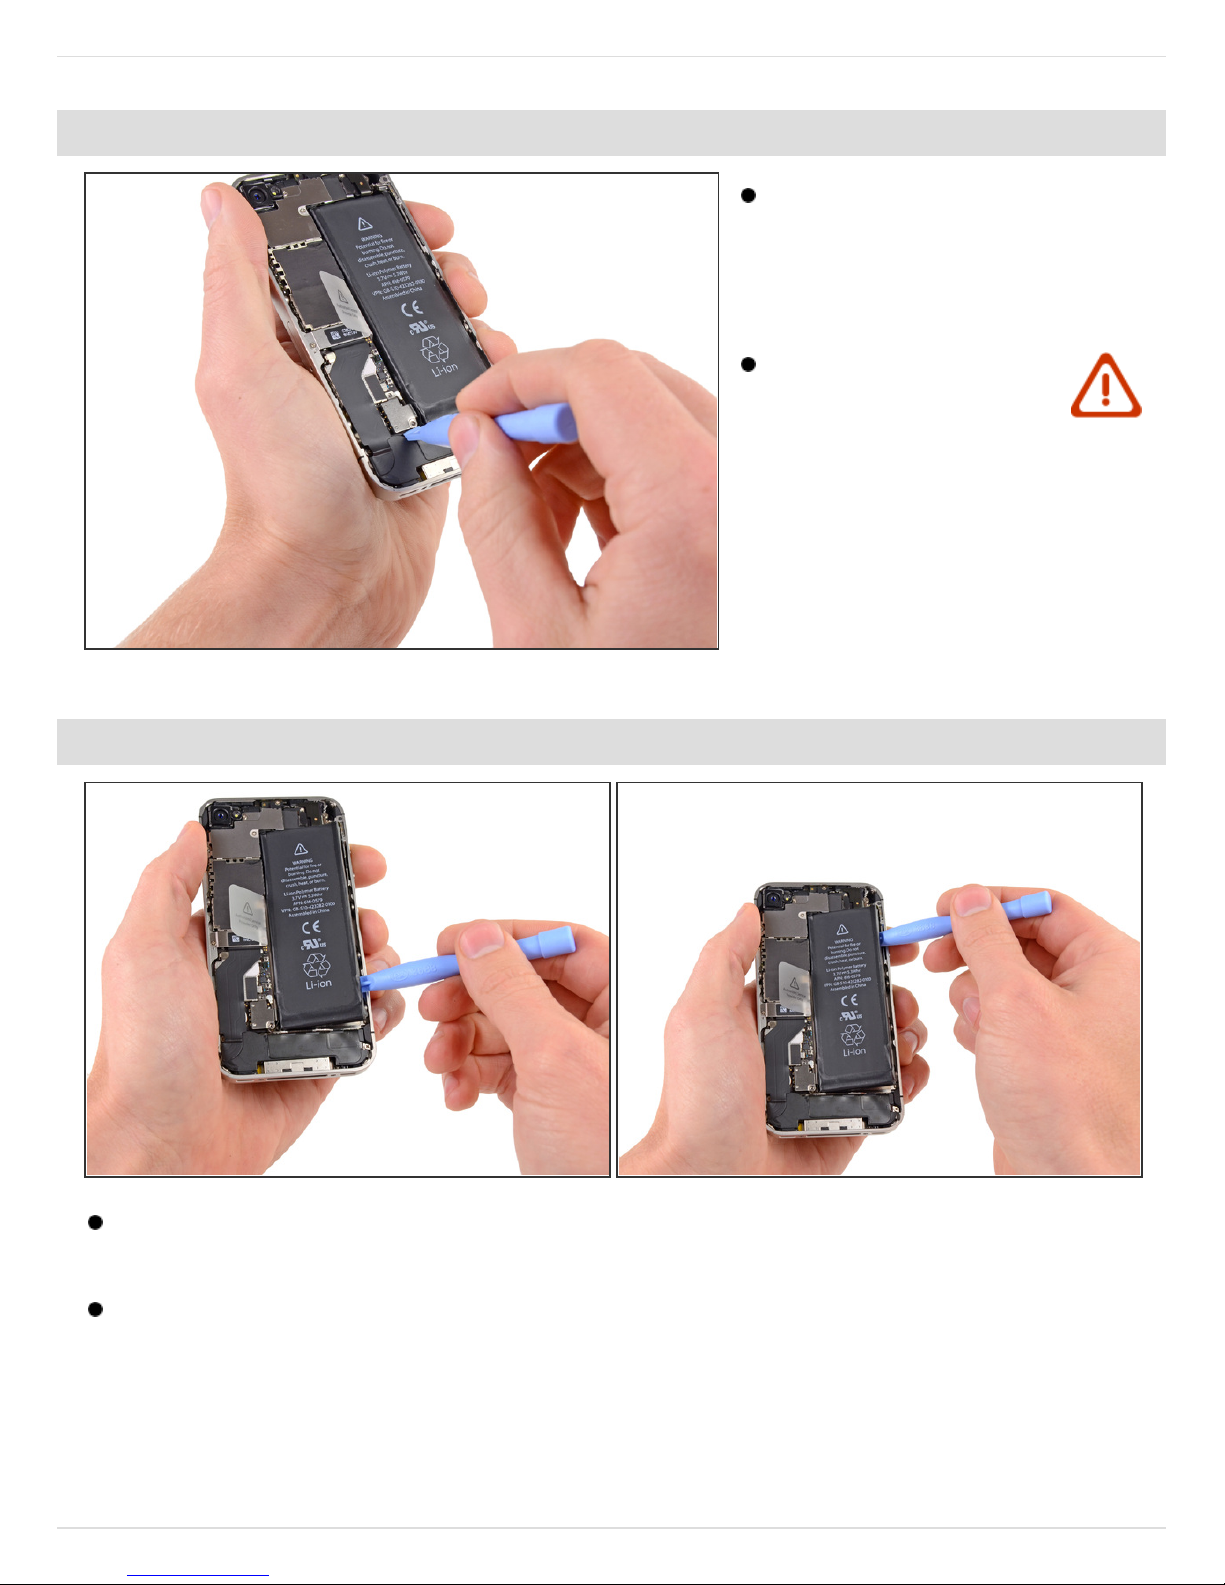
Step 6
Use the edge of a plastic opening
tool to gently pry the battery
connector up from its socket on the
logic board.
Be very careful to only pry
up on the battery connector
and not the connector on the logic
board. If you pry up on the logic
board connector, you may break
the connector entirely.
Step 7
Insert the edge of a plastic opening tool between the battery and the outer case near the
bottom left corner of the iPhone.
Run the plastic opening tool along the right edge of the battery and pry up at several points
to completely separate it from the adhesive securing it to the outer case.
Installing iPhone 4S Battery
© iFixit — CC BY-NC-SA www.iFixit.com Page 5 of 6
Page 6
To reassemble your device, follow these instructions in reverse order.
This document was last g enerate d on 2012-09-28 08:54:10 PM.
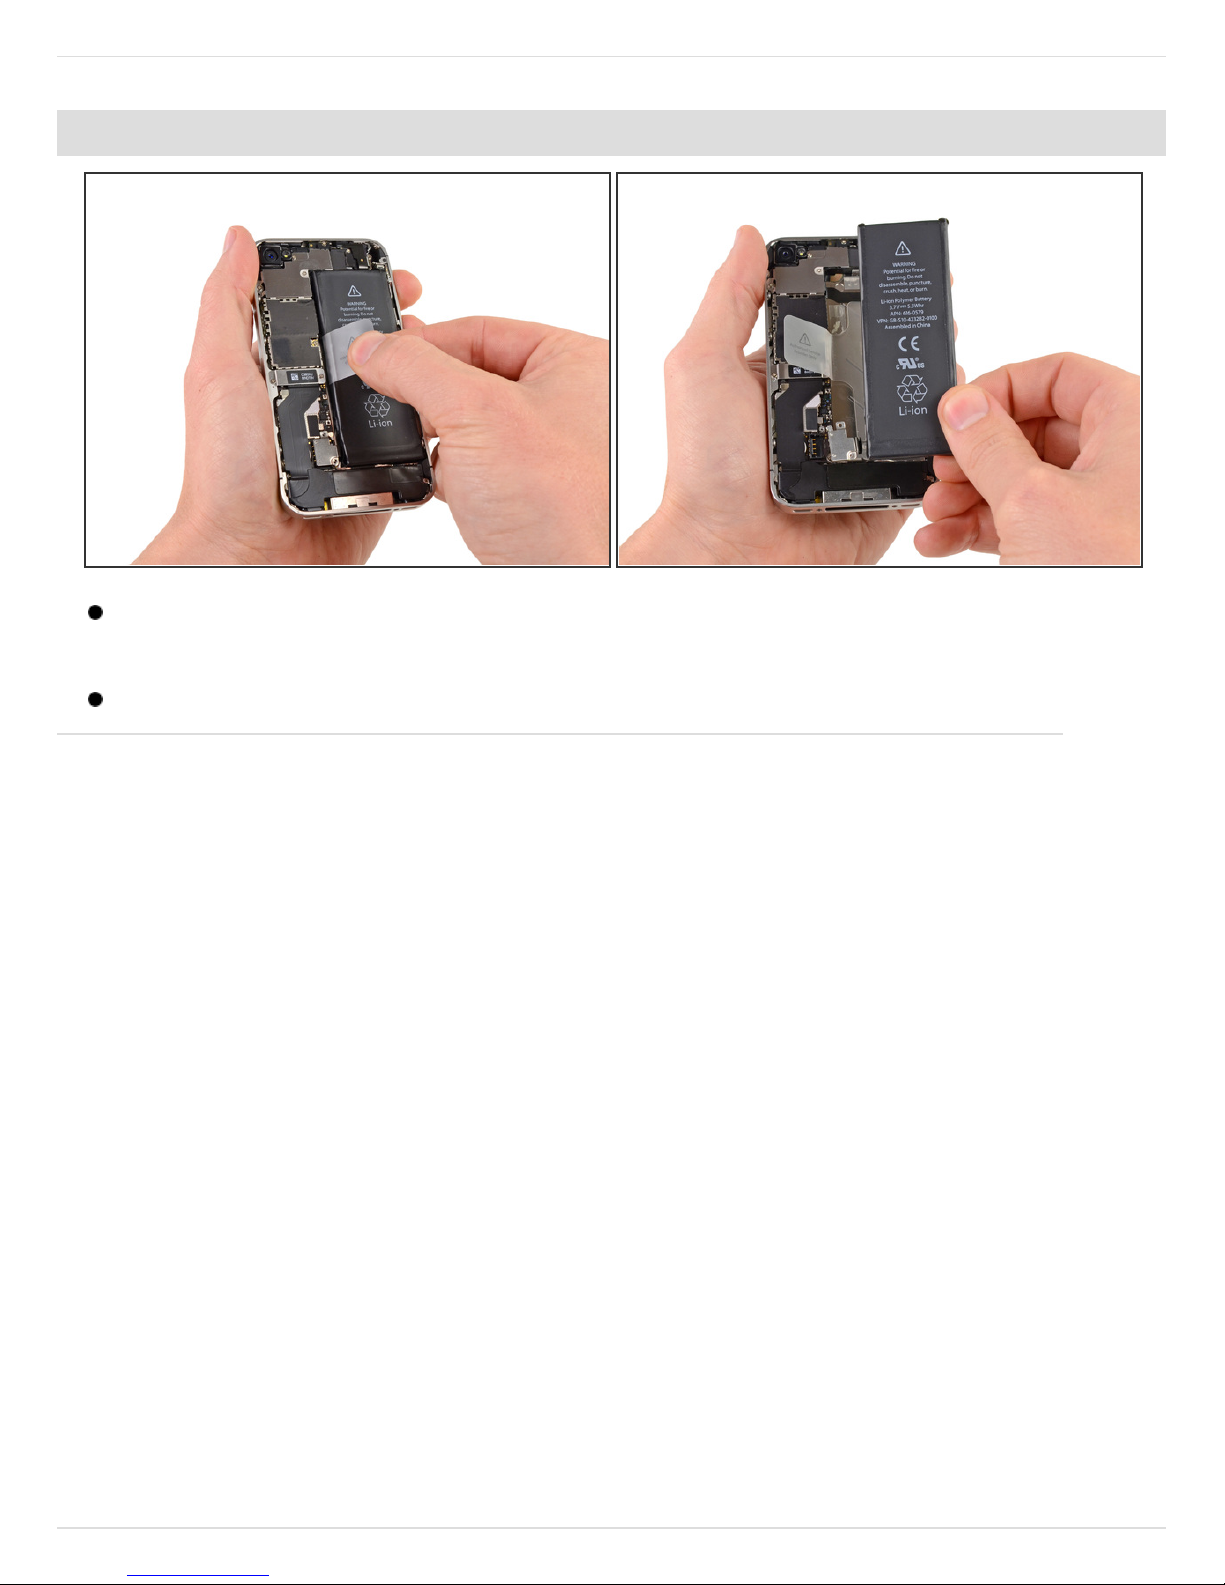
Step 8
Use the exposed clear plastic pull tab to peel the battery off the adhesive securing it to the
iPhone.
Remove the battery.
Installing iPhone 4S Battery
© iFixit — CC BY-NC-SA www.iFixit.com Page 6 of 6
 Loading...