

IFB EXECUTIVE PLUS WTEX+B Operating Manual
EXECUTIVE PLUS
USE ONLY GENUINE IFB SPARES & ACCESSORIES
* Company shall not be responsible for defects arising due to usage of spurious parts and accessories
OPERATING MANUAL
Advancing the science of washing
IFB Industries Limited, Plot No. IND - 5, Sector - 1, East Calcutta Township, Calcutta - 700 078
Visit us at www.ifbappliances.com
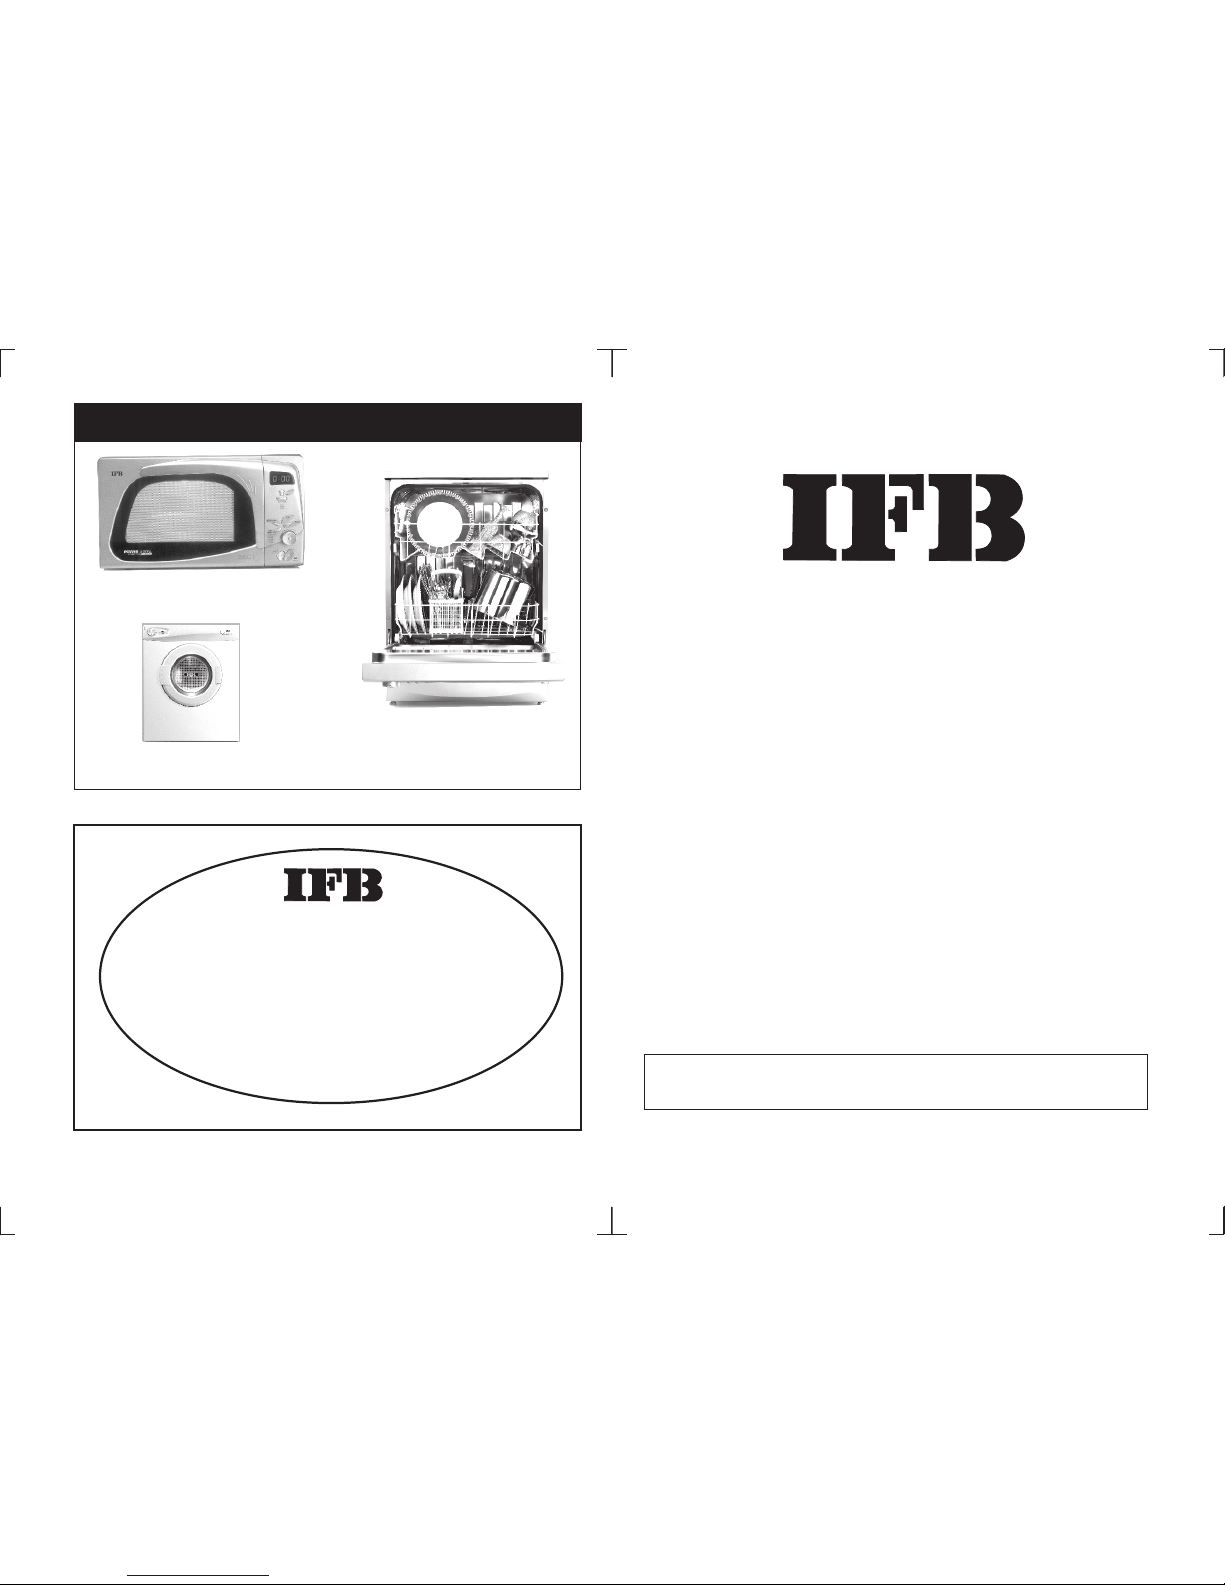
ALSO FROM IFB
CLOTHES DRYER
CAPACITY - 5.5KG
MICROWAVE OVEN
CAPACITY - 17 to 30 LITERS
DISHWASHER
CAPACITY - 12 PLACE SETTING
Customer Care
Dial
1860 425 5678 - BSNL & MTNL Callers
3900 4321 - Other Callers
or email
customerservice@ifbglobal.com

s
Dea
r
C
u
to
mer
m
he
i na i
o
A
wa
r
welco
me
to t
nt
er
t
onal
family
f
B t g a hi g
I
F
‘
umble
wa
sh’ technolo
y
b
sed
wa
s
n machin
e
owners.
ur
s
m is t y
Yo
wa hin
g
ac
hin
e,
ru
l goin
g
to
be
your
e
o n
r s e o
fre
d m
m
achi
e. It requ
i es
ju
t 30 s cond
s of y
ur
time in
l
i
ic
ti
m
.
oad
ng
the
fab
r s an
d set ng
the
pr
ogra me
o
to e
to
ple
s
T
hereafter
, y u are
tally
fr
e
do
wh
at yo
u
a e.
do n y
up
This
wa
shi
ng
m
achine es
ot need our
s
er
visio
n
o
s
o
e
n
qanym
re This
washing
m
achine
i
m
d
lle
d
o
the
un
i
ue
s
pt u e
o
d
s
‘tum
ble
wa
h’ co
nce
for s p
ri
r
fab
ric
ca
re
an
wa
h
performances.
A
o
l
i s
y
u read
thi
s
man
ua yo
u
w ll
understand
wh
at this
wa h
d
s
in
g
m
achine
ca
n o
for
yo
u.
fu
n, a
nt
a
t
r a tFor
an
y ther infor
m
atio
ple se
co
c
you
ne re
s
ede
lear or
I
F
B
sSer
vi
c
Cen
tre
.
3

KNOW YOUR MACHINE
INSTALLATION 7
qPre Installation
qUnpacking
qSetting Up
qWater Inlet
qWater Outlet
q Electrical Connection
USING YOUR MACHINE 11
q Control Panel
qEnviromental protection / conservation issues
qBefore using your machine for the first time
qAutomatic Detergent Dispenser Tray
qSelector Buttons
qOn/Off Switch with Temperature Selector Knob
qProgramme Selector Knob
qIndicator Lamp
qKinds of Wash Programmes
qProgramme Selection
qProgramme Selection Chart
OPERATION 22
qSorting of Garments
qLoading the Machine
qDetergent to be used and Quantity
qFabric Conditioner
qTreatment of Stains
qWash Load Guide
qInternational Washing Symbols
qProgramme Run
qSwitching Off the Machine
qCheck Points
MAINTENANCE 27
qFluff Filters
qDrum
qSieves
qFrost Protection
qDraining During Emergencies
FAULT DIAGNOSIS 29
qWhy does it happen?
SAFETY PRECAUTIONS 30
TECHNICAL DATA 32
6
CONTENTS
5
MODEL : EXECUTIVE PIUS
DEALER’S NAME :
CUSTOMER’S NAME :
ADDRESS :
PIN CODE :
TEL. NO. (Resi.) (Off.)
E-MAIL :
MOTOR SR. NO. :
DATE OF PURCHASE :
SR. NO. WTEX+B
SERVICE STATION COPY
INSTALL THE MACHINE ONLY IF EARTHING IS PROPER
ADVANTAGES OF TUMBLE WASH
MOST EFFECTIVE CLEANING AS THE CLOTHES PASS
THROUGH SOAPY WATER AND ALSO FALL ON SOAP
SOLUTION IMPROVING WETTING OF CLOTHES.
qRESEMBLES THE THUMPING AND RUBBING ACTION OF
GENTLE HAND WASH.
qUSES LESS WATER COMPARED TO TUB TYPE TOP LOADERS.
qLESS WATER MEANS LESS DETERGENT AND ELECTRICITY
CONSUMPTION.
qWASHING IS EFFECTIVE BY DETERGENCY, SOAKING,
HEATING, TUMBLING AND SQUEEZING.
qGIVES BETTER DRYING EFFECT BY SPINNING.
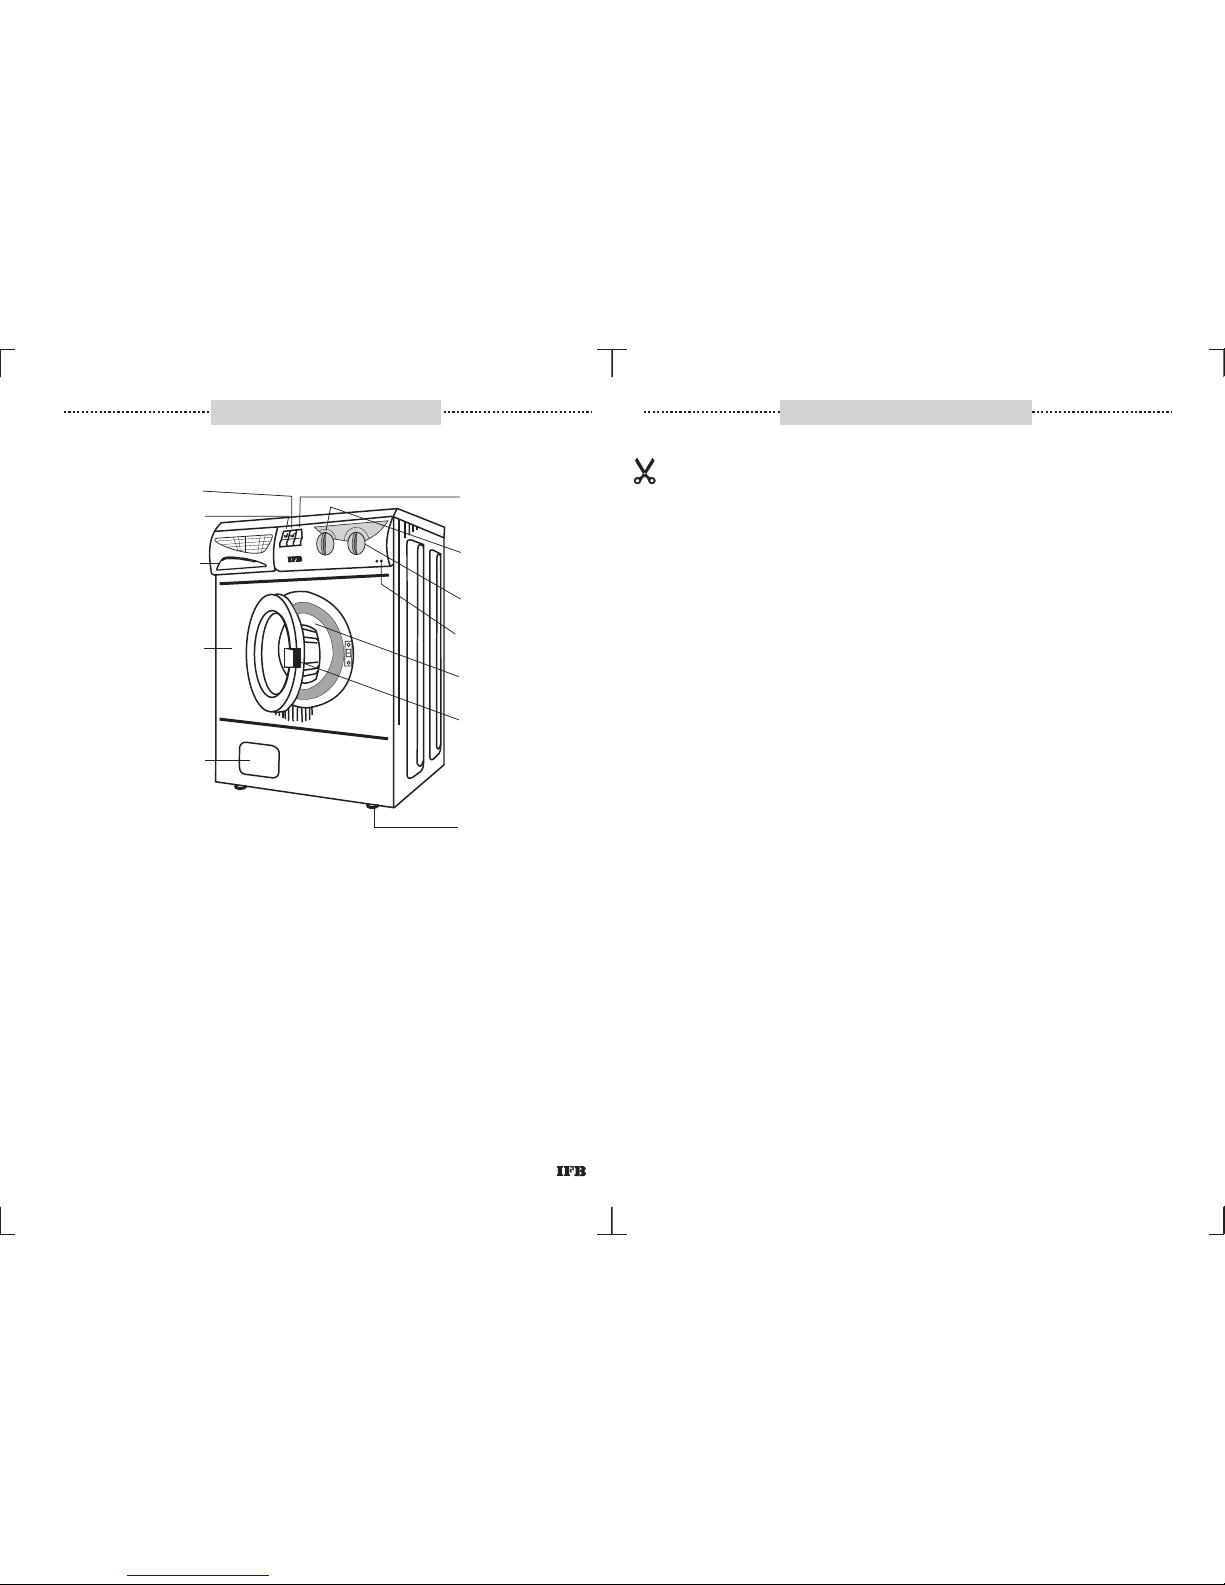
q
5
0
0
6
E
F
D
C
G
B
H
A
TE E
RA U
REM
P T
E
A U
RT M
PE
R T
E
50
60
EXECUTIVE Plus
As
a
1
2
a
a
a
a
5
a
Asa
2
a a
a
a
5
a
As
2
a
a
a
a
5
a
a
A
s
2a
a
5
a
a
a
5
a
Spin Speed
Selector Button
On/Off Switch
with Temperature
Selector Knob
Programme
Selector Knob
Indicator Lamps
Porthole Door
Spin Cancel Button
Water Plus Button
Detergent Tray
(with Programme
Selection Chart)
Special powder
coated Galvanised
steel Cabinet
Fluff Filter Door
Adjustable Feet
for Levelling
Interlocking Door
Lock Handle
KNOW YOUR MACHINE
6
..........................................................................................
INSTALLATION REPORT
IFB WASHING MACHINE
Model : __________________ Serial No. : ______________Customer’s Name : __________________
_________________________________________________Tel. No. ___________________________
Address :___________________________________________________________________________
__________________________________________________________________________________
Installation Check Points
Machine Delivered on : __________________ Machine Installed on :_______________
1. Any Major transit damage to the machine observed Yes No
2. Condition of Earthing/Plug Point (16 Amp.
230V AC with MCB or other automatic short circuit
protection devices. )good
If poor, customer has been advised, to correct the same Yes No
3. User Manual Delivered Yes No
4. Inform user of need to keep drain hose
straight & maximum height of draining. Yes No
5. Warranty term explained Yes No
6. Machine levelling procedure &
importance explained Yes No
7. Detergents and bleach recommendation
revelent DD tray chambers explained Yes No
8. Basic wash demo given Yes No
9. Trouble shooting explained Yes No
10.Check following for proper order :
a. Inlet Hose Yes No
b. DD Tray Yes No
c. Ratmesh fitted ( If applicable ) Yes No
d. Drain hose Yes No
11.Do’s and Don't’s explained Yes No
12.Display function explained ( If applicable ) Yes No
13.Procedure for cleaning rubber sleave / coin trap Yes No
14.Program selection, Programs & buttons options
( other knob ) explaind Yes No
15.Indicator lamp/Status LED function ( if Applicable ) Yes No
16.Buzzer function ( if Applicable ) Yes No
Installed by :_______________________ Signature : ________________________________
Customer’s response
1. The installation person was courteous & Helpful. Yes No
2. I would describe my experience
with installation as Unacceptable Satisfactory
Non Satisfactory Very Satisfactory
I certify that the above information & checks have been done to my satisfaction & I am fully satisfied with
the installation of the washing machine.
Customer’s Signature________________Date :__________________ Time : ____________
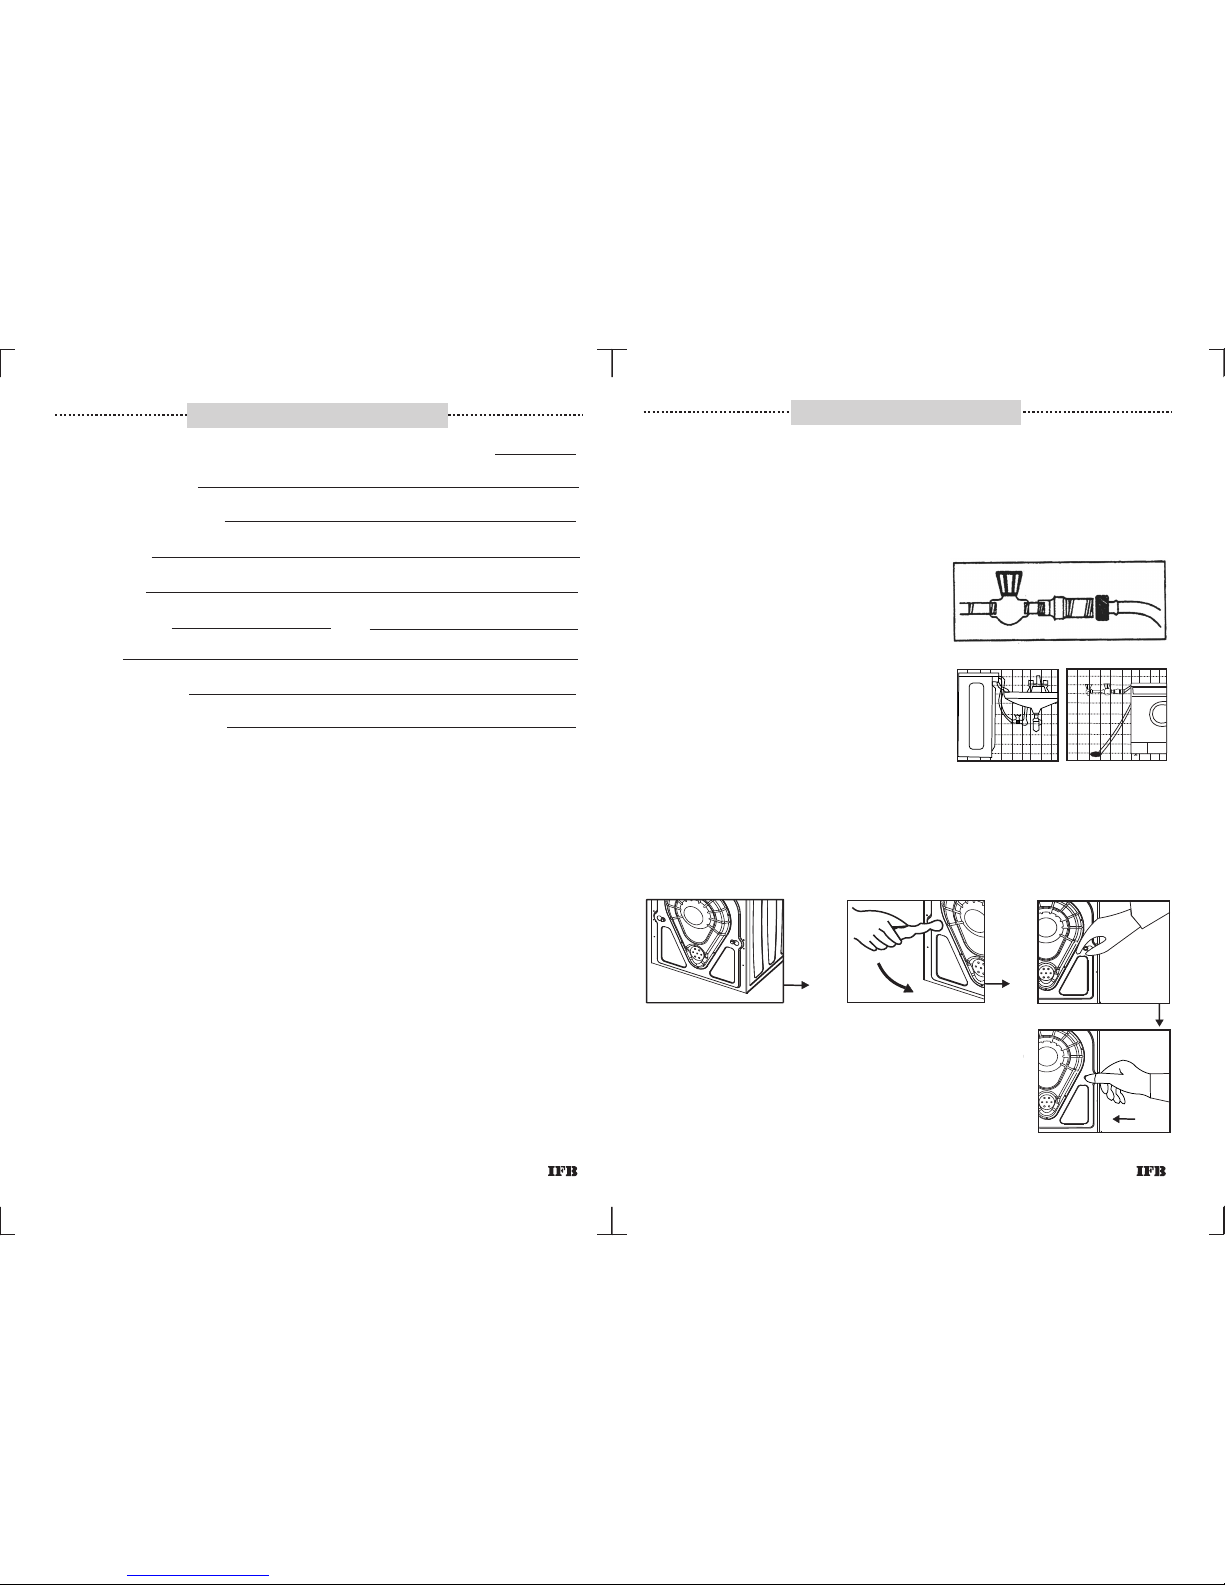
WATER INLET
DRAIN
PIPE
WATER INLET
DRAIN
PIPE
WATER
SUPPLY
STOP
LOCK
REDUCER
MACHINE
WATER
INLET
1/2
3/4
1. Remove Carton.
2. Remove top packing cover.
3. Remove side packing and plastic jacket.
4. Remove packing from the bottom of the
motor
5. Place the machine at the site at which it is to be
Installed, and put the rat mesh.
Unpacking
INSTALLATION
Pre Installation
1. It is mandatory to have a 16 amp. 3-pin 230V AC, 50Hz
electrical point with a 16 amp. MCB or Automatic short
circuit protection device within 1 meter of the machine.
Make sure it has proper earthing.
2. Fixed plumbing is recommended
for the machine. The water inlet
of th e machine h as a collar
with3/4”parallel internal threads.
The water supply point with an
ex t ernal 3/ 4 ” p aral l e l t hre a d
should be available within1 meter
of the machine’s location.
3. Two options on the water inlet and
drain pipe connection are shown.
In case these possibilities do not
exist for the drain pipe, please
arrange an additional length of
pipe.
4. Please inform our service centre for installation and demonstration
of the machine once the points mentioned above have been
completed.
7
MODEL : EXECUTIVE PIUS SR. NO. WTEX+B
DEALER’S NAME :
CUSTOMER’S NAME :
ADDRESS :
PIN CODE :
TEL. NO. (Resi.) (Off.)
E-MAIL :
MOTOR SR. NO. :
DATE OF PURCHASE :
CUSTOMER COPY
34
Setting Up
The machine should be levelled properly on the
floor. However, it can be installed on any suitable
platform or trolley, as desired.
Install machine in a room with adequate
ventilation. Avoid a room with no windows. The
back of the machine should be at least 4 inches
(100 mm) away from the wall.
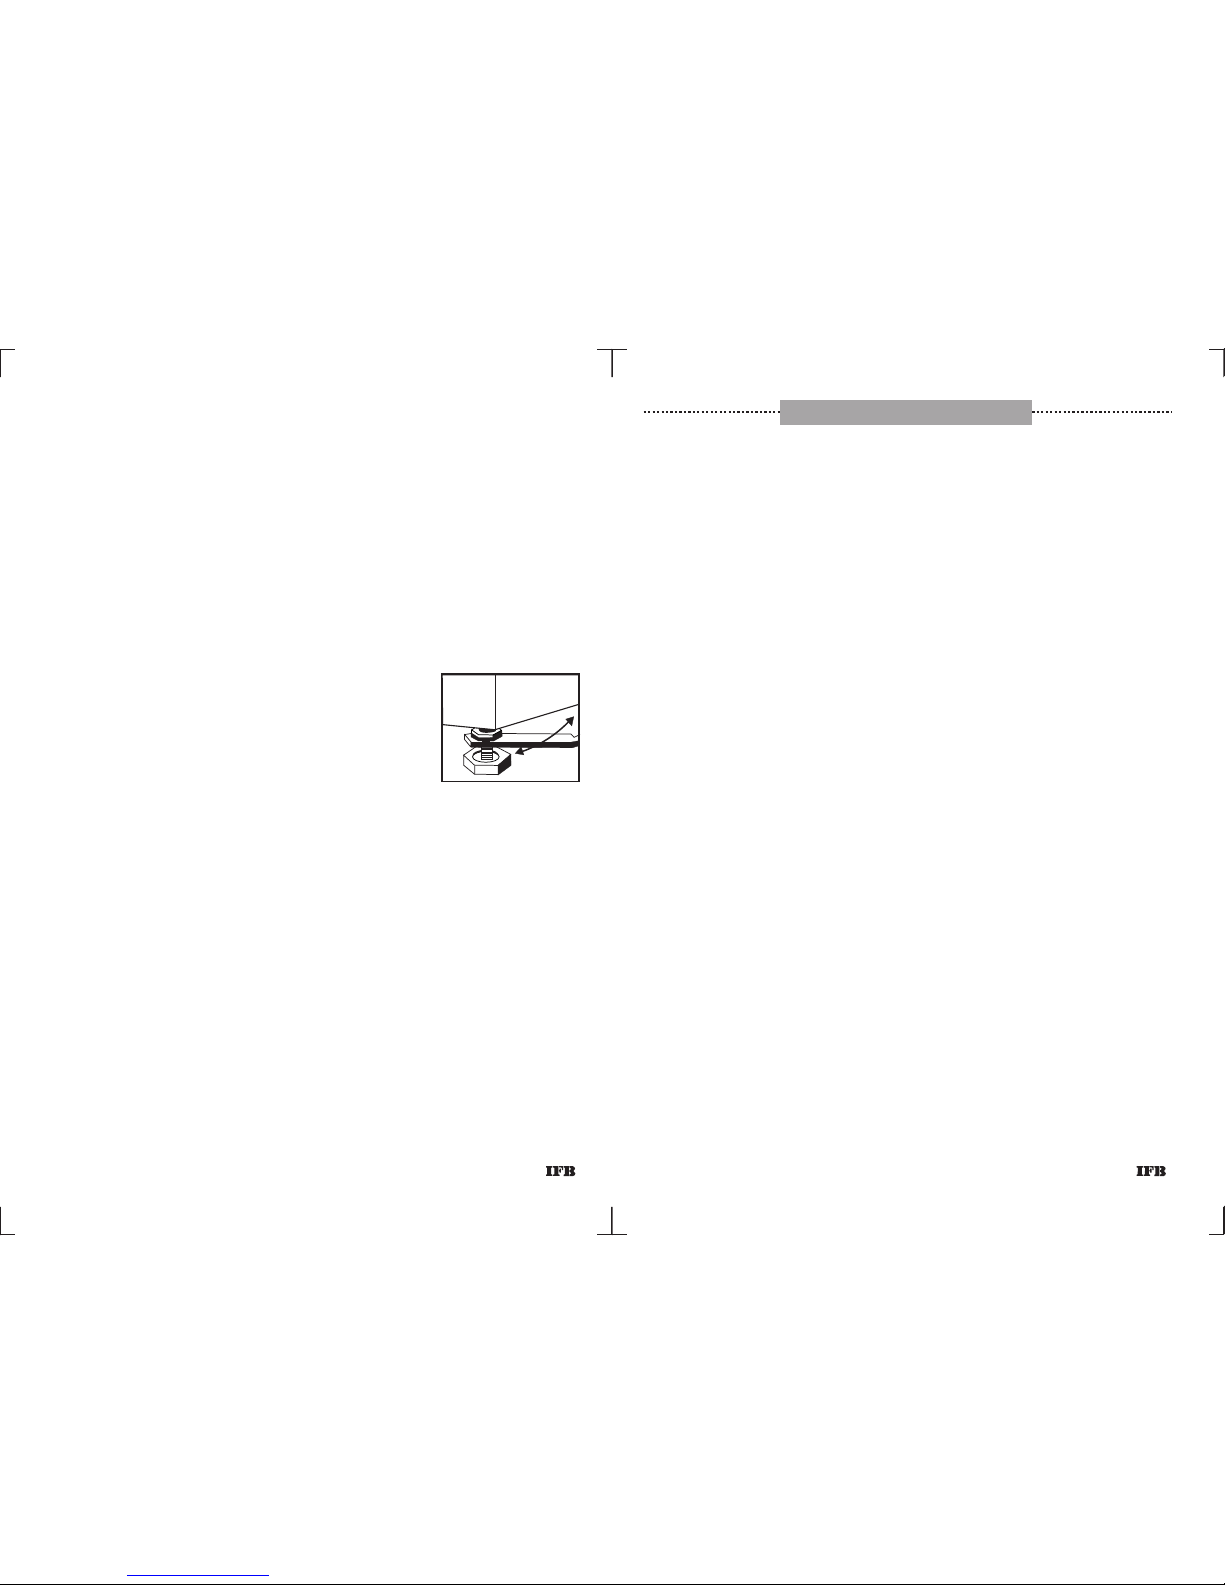
1. Do not place the machine on slanting, uneven,
unstable surface.
2. Level the machine by using the adjustable screws provided at the
bottom for levelling.
3. Loosen securing nut. Adjust the screw to change level. Tighten
securing nut to ensure that screw is locked into place.
4. Make sure that the machine rests on all four feet on a level
surface, at all times, to avoid vibrations during operation
5. Machine should be leveled again in case it is moved to a new site.
6. Machine is provided with ventilating openings on the base. Hence it
is always recommended to put the machine on the floor after
removing the carpet.
7. In countries where there are areas which may be subjected to
infestation by cockroaches or other insects etc, pay attention to
keep the appliance & surrounding in clean condition at at all times
any damage which be caused by cockroaches etc will not be
covered by the appliance guratantee.
6. Remove transit bolts.
7. Insert plastic caps provided into holes vacated and press till they
click into place.
8. Keep transit bolts carefully. They will be required in case you need to
shift the machine again.
9. For shifting and re-installation at a new site, please get in touch with
our ser vice personnel.
10. Keep packaging material carefully. It comes handy while shifting
residence.
11. PLEASE DO NOT OPERATE THE MACHINE TILL TRANSIT BOLTS
HAVE BEEN REMOVED.
8
Dimensions (DxWxH) : 56 cm x 60 cm x 85 cm
Weight : 57 kgs
Capacity : 5 Kg. of dry clothes (cotton)*
Programmes : 18 Wash Care Programmes
Selector Buttons : Water Plus, Spin Cancel, Spin
Speed Selector
Spin Speed : 600 to 800 rpm
Heater Rating : 1.9Kw
Drum : Stainless Steel
0
Temperature Selection : Cold to 90 C
Drain Pump Rating : 30 Watts
Water Consumption : 45 litres for standard wash.
Power Consumption : 0.25 unit for cold wash
0
Cotton Wash Programme : 1.2 - 1.5 unit hot wash at 60 C
Connected Load : 2.35 KW Max.
Programme Duration : 30 to 95 minutes
Power supply : 220 - 240 V, Single Phase, 50 Hz
2
Water Pressure : 1 bar ( 1.03 kg/cm ) - 10 bar ( 10.3
2
kg/cm )
Specifications are subject to change without Prior notice.
*Capacity depends on size, texture and combination of clothes
Depending on water pressur e, Water hardness, Water in let
Temperature, Quantity and type of textile, Detergents used, Degree of
soiling, Ambient condition, selected additional functions & power supply
fluctuations the actual values given on or with the machine can deviate
from the declared standard values, as they are tested according to the
laboratory conditions
TECHNICAL DATA
33
 Loading...