

Page 1
Quick start ADC1453D,
ADC1159D evaluation board
Rev. 01 — 14 Nov 2013
Quick start
Document information
Info
Content
Keywords
ADC1453D, ADC1159D, ADC1453DxxxW1-DB, evaluation board, ADC,
Converter, JESD204B, BSX0254.
Abstract
This document describes how to use the evaluation board for the dual
channel analog-to-digital converters ADC1453D and ADC1159D with
JESD204B output interface.
Overview
Revision history
Rev
Date
Description
1
14 November 2013
Initial version
Page 2

Integrated Device Technology
Quick start
Quick start ADC1453D, ADC1159D evaluation board
Quick start
2 of 15
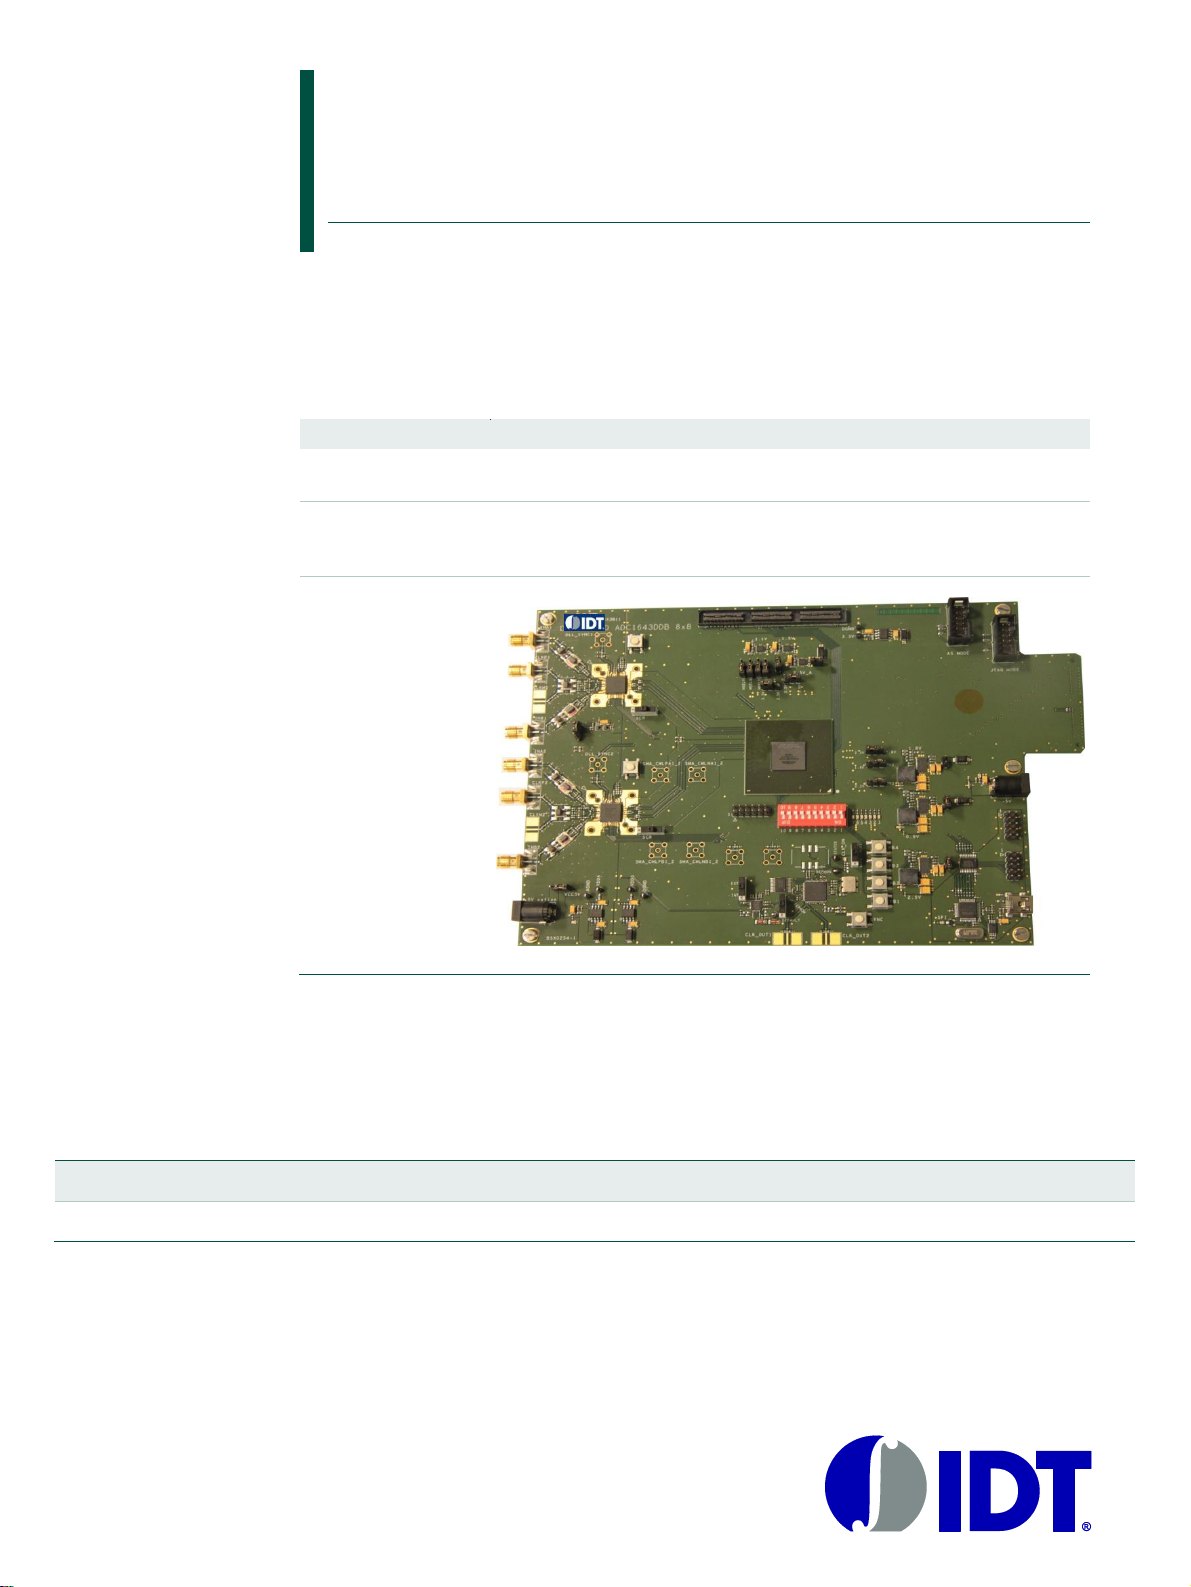
Fig 1. Evaluation board overall presentation
Analog inputs
Clock input
Main power supply
ALTERA Arria II GX
USB to SPI interface
Output
connectors
(bottom layer /
right)
ADC Power supply
On board clock
generator
1. Overview of the evaluation board:
Page 3
Integrated Device Technology
Quick start
Quick start ADC1453D, ADC1159D evaluation board
Quick start
3 of 15
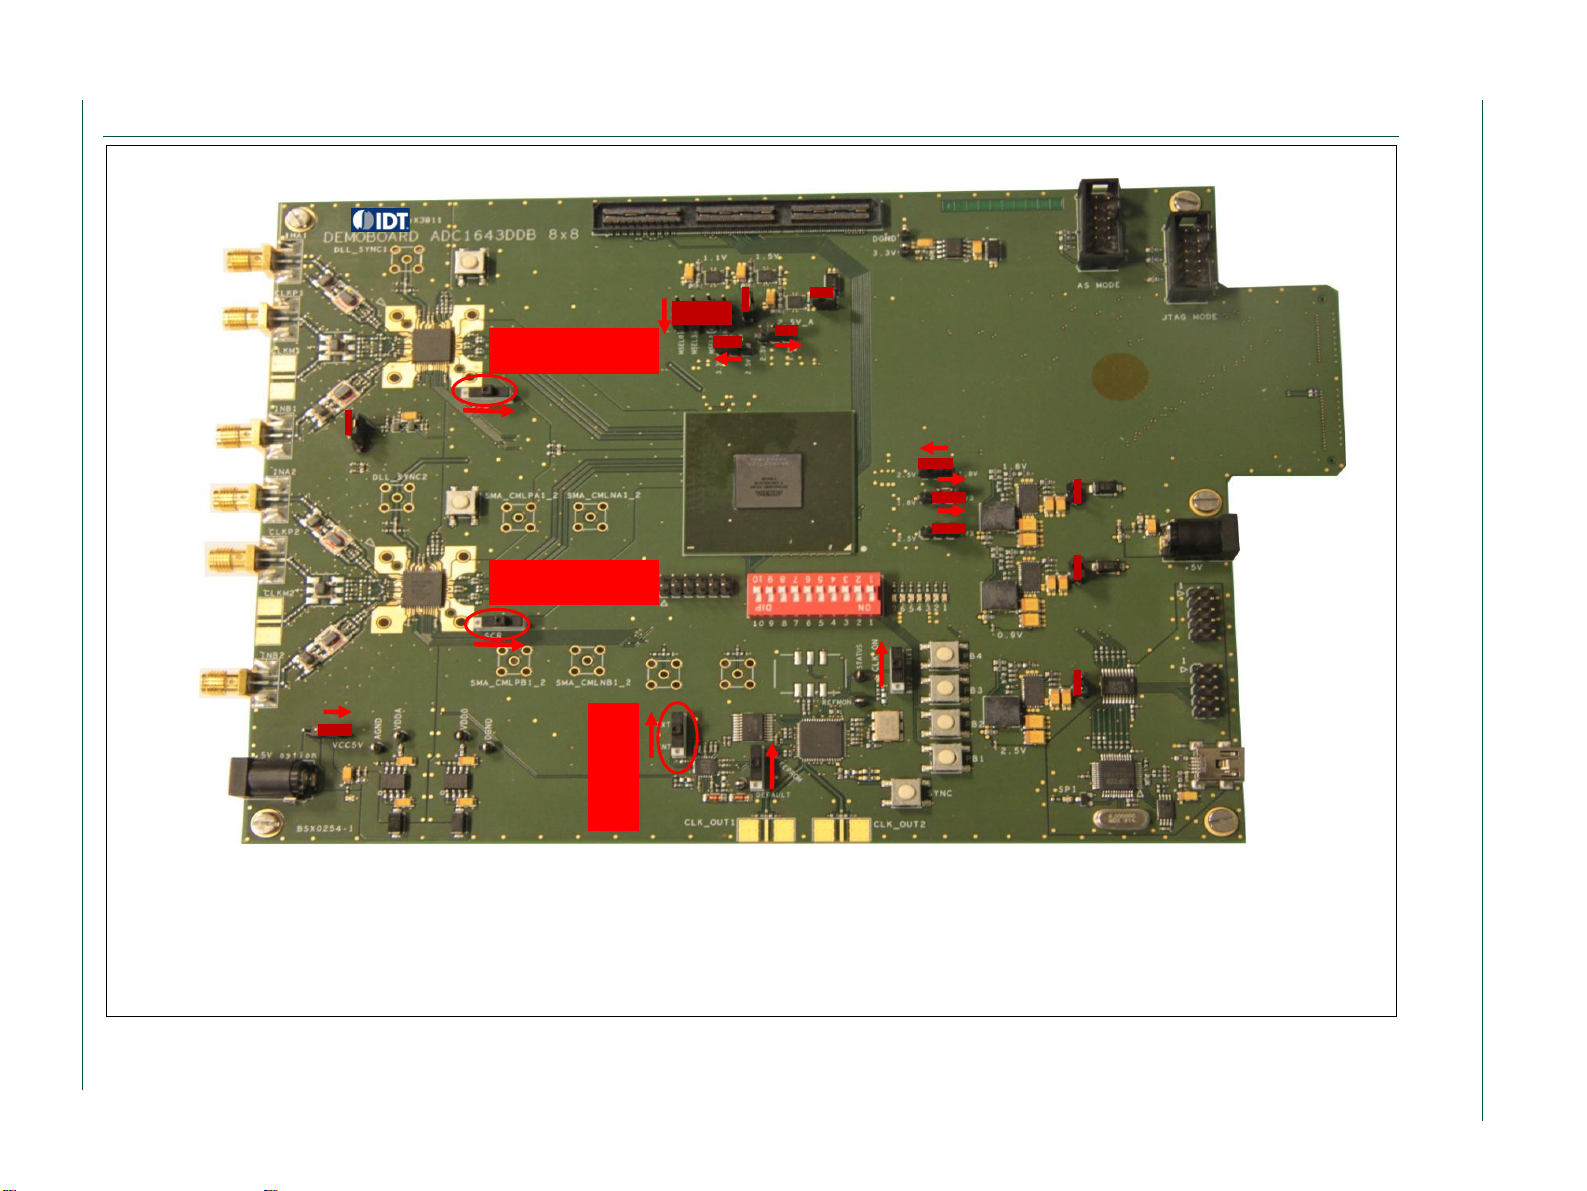
Fig 2. Overall presentation of default switchs and jumpers
Scrambler off
Scrambler off
Ext clcok
2. Switch and Jumpers default state
Page 4
Integrated Device Technology
Quick start
Quick start ADC1453D, ADC1159D evaluation board
Quick start
4 of 15
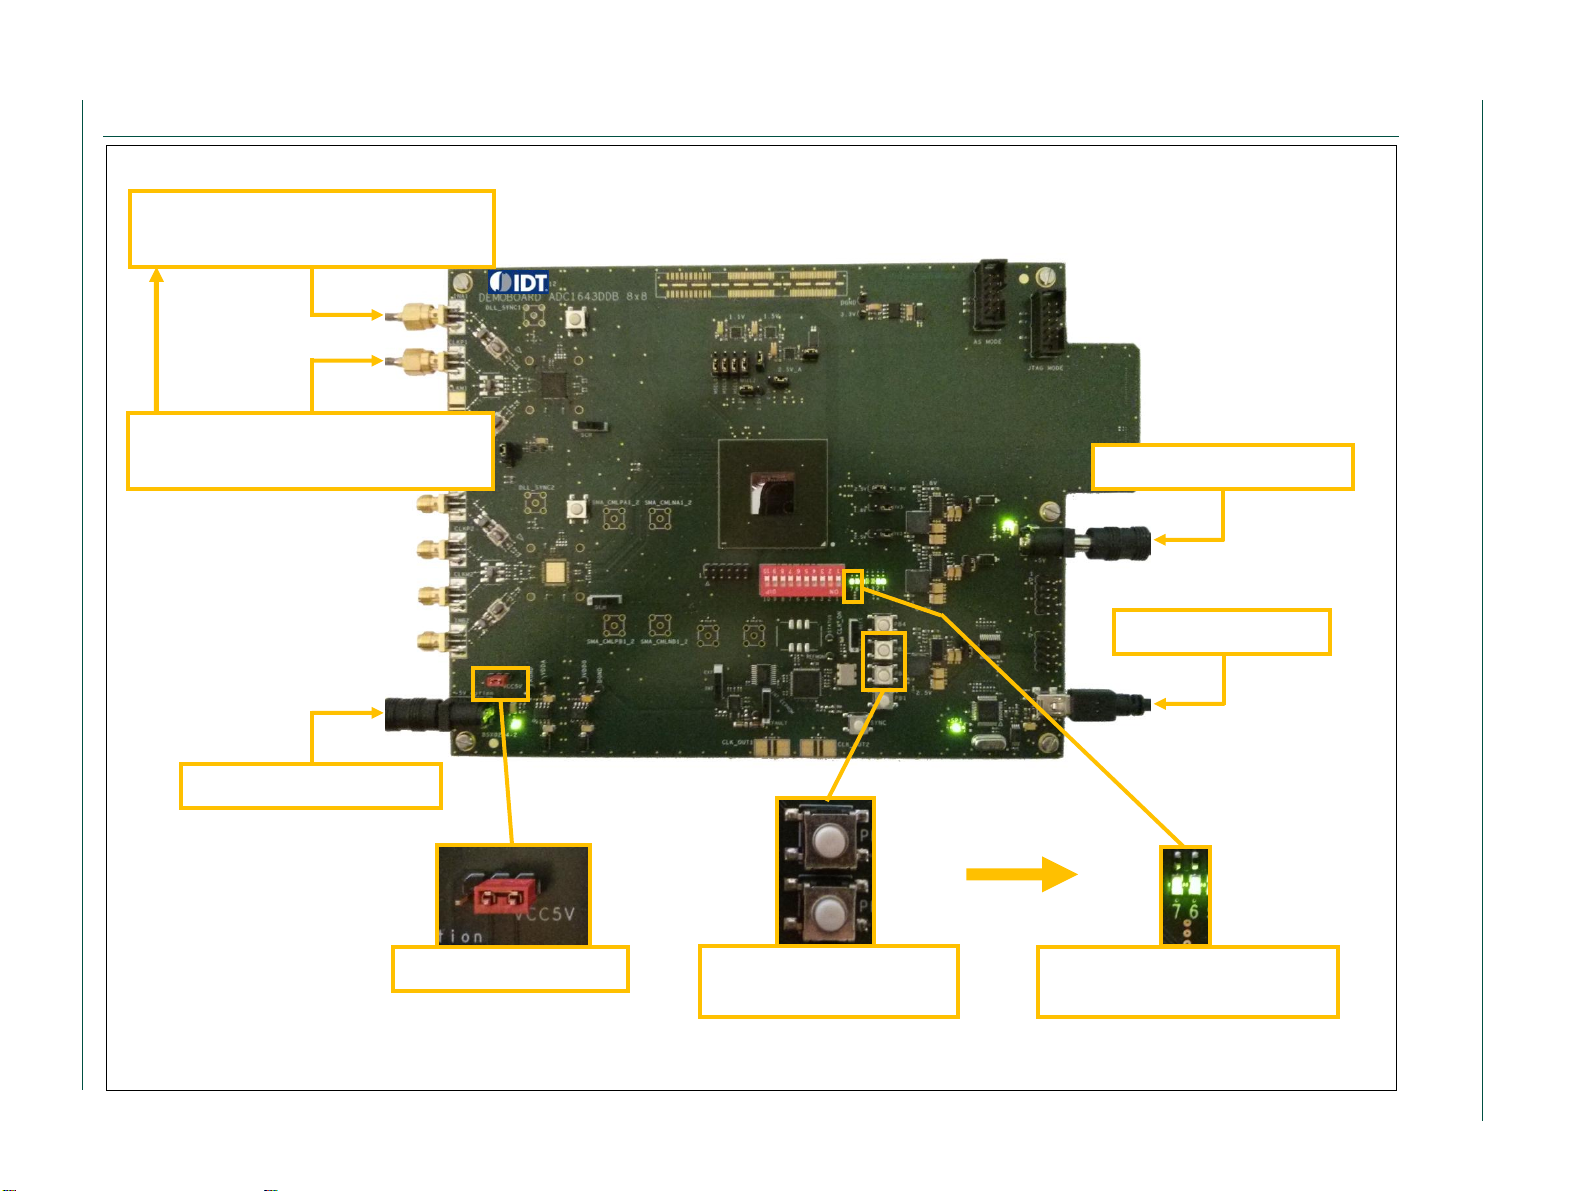
Fig 3. Typical test configuration
Signal generator (SMA100A) +
filter (1% bandpass)
Signal generator (SMA100A) +
filter (1% bandpass)
181WP05 / 5 V - 3 A
Computer (USB)
181WP05 / 5 V - 3 A
Synchronized
Switch on the right
Press PB2 and PB3
for FPGA reset
The leds 6 and 7 must
be synchronized
3. Typical test configuration:
Page 5
Integrated Device Technology
Quick start ADC1453D, ADC1159D evaluation board
Quick start
© IDT 2012. All rights reserved.
Quick start
V
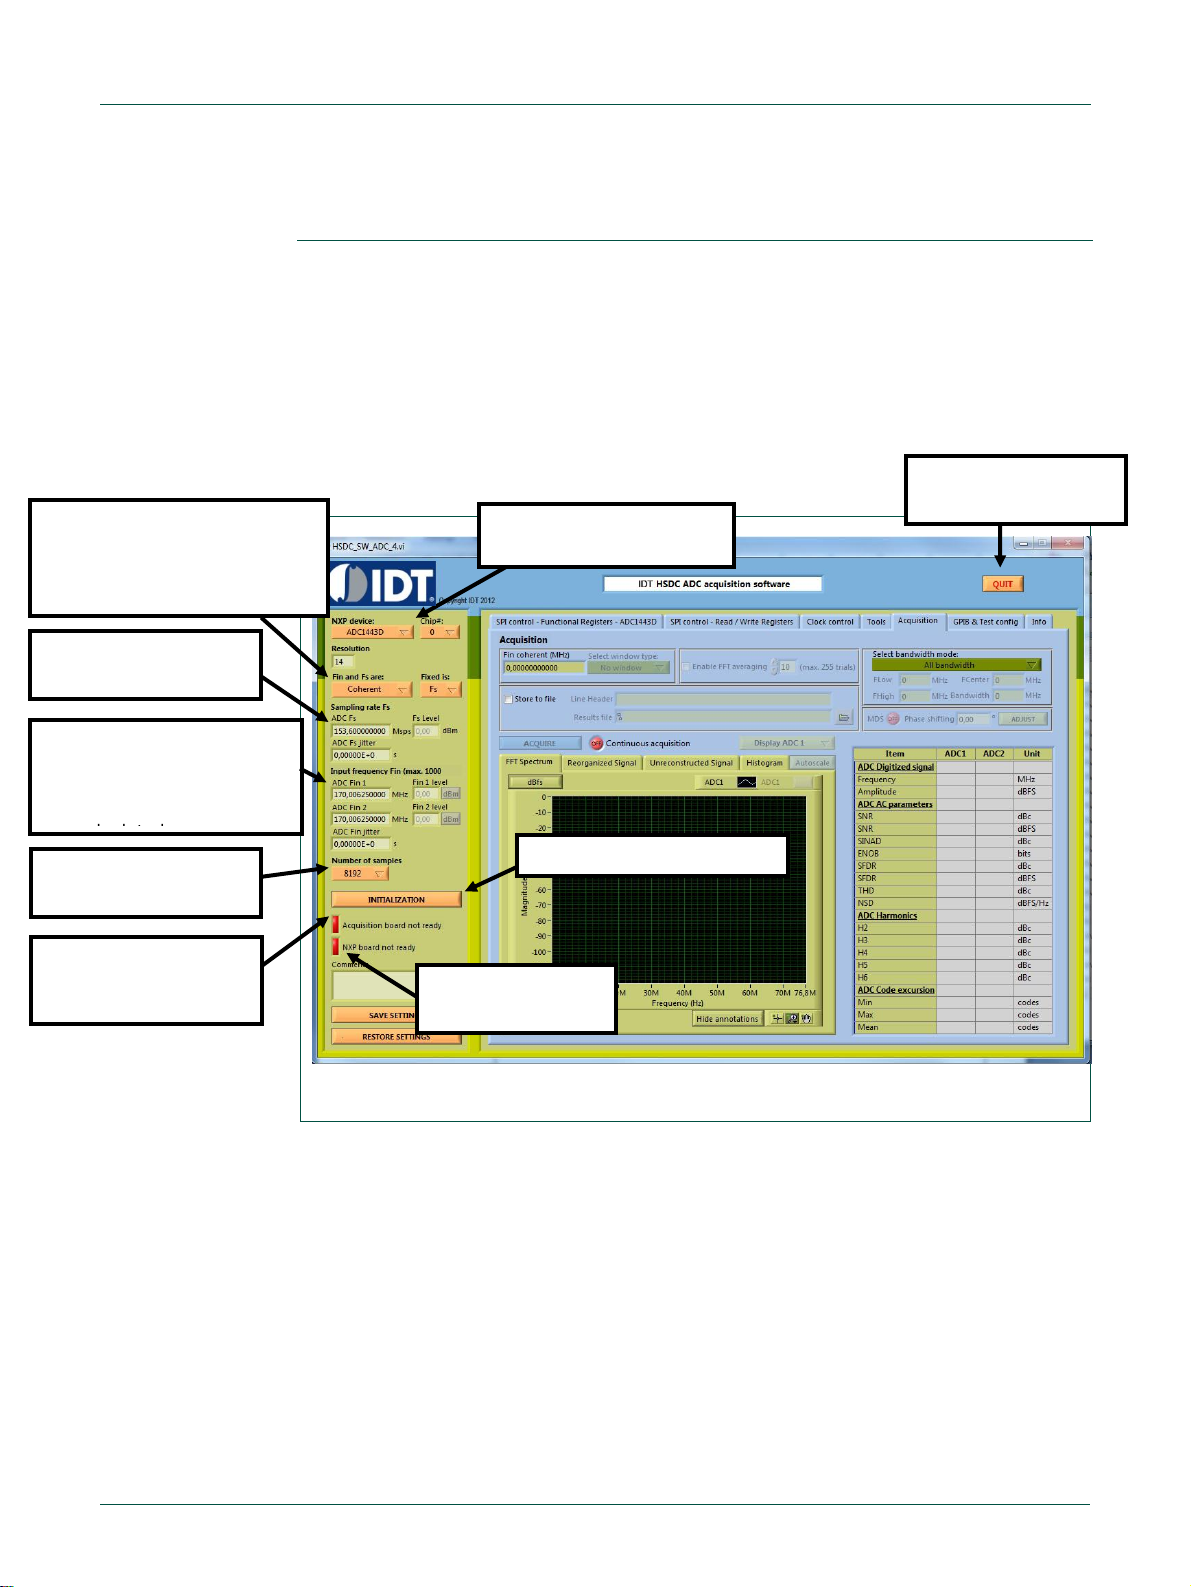
Fig 4. Start-up screen
1. Select the
ADC1443D product
To quit the interface,
please click ‘quit’
4. Select the number
of points for FFT
3. Enter the sampling
frequency
7. ‘GREEN’ when
USB is ready
8. ‘GREEN’ when
Acquisition is
ready
6. Click ‘INITIALIZATION’
5. Enter the input
frequency. The
coherent frequency will
be automatically
2. Select ‘Coherent’ for
optimized FFT processing.
Otherwise select ‘Not
coherent’
4. ADC acquisition tool
4.1 Software start-up
To install the software, please refer to appendix A ‘Software and drivers install’.
Run the application “HSDC_SW_ADC_4.exe”. This application will allow:
the user to control features through the SPI;
as well as performing any online data acquisition to evaluate the performances.
4.2 Start-up screen
Page 6

Integrated Device Technology
Quick start ADC1453D, ADC1159D evaluation board
Quick start
© IDT 2012. All rights reserved.
Quick start
VI
Fig 5. Read / Write Registers
2. Load the SPI registers settings file.
Please contact your IDT Sales/FAE representatives to get access to SPI settings files for ADC1443D
or ADC1453D or ADC1159D250devices. 3 SPI registers settings files are available:
ADC1453D160_SPI.txt
ADC1453D250_SPI.txt
ADC1159D250_SPI.txt
1. ‘READ ALL REGISTERS will
allow to get an overview of the
main analog registers
4.3 Read / Write Registers
Page 7
Integrated Device Technology
Quick start ADC1453D, ADC1159D evaluation board
Quick start
© IDT 2012. All rights reserved.
Quick start
VII
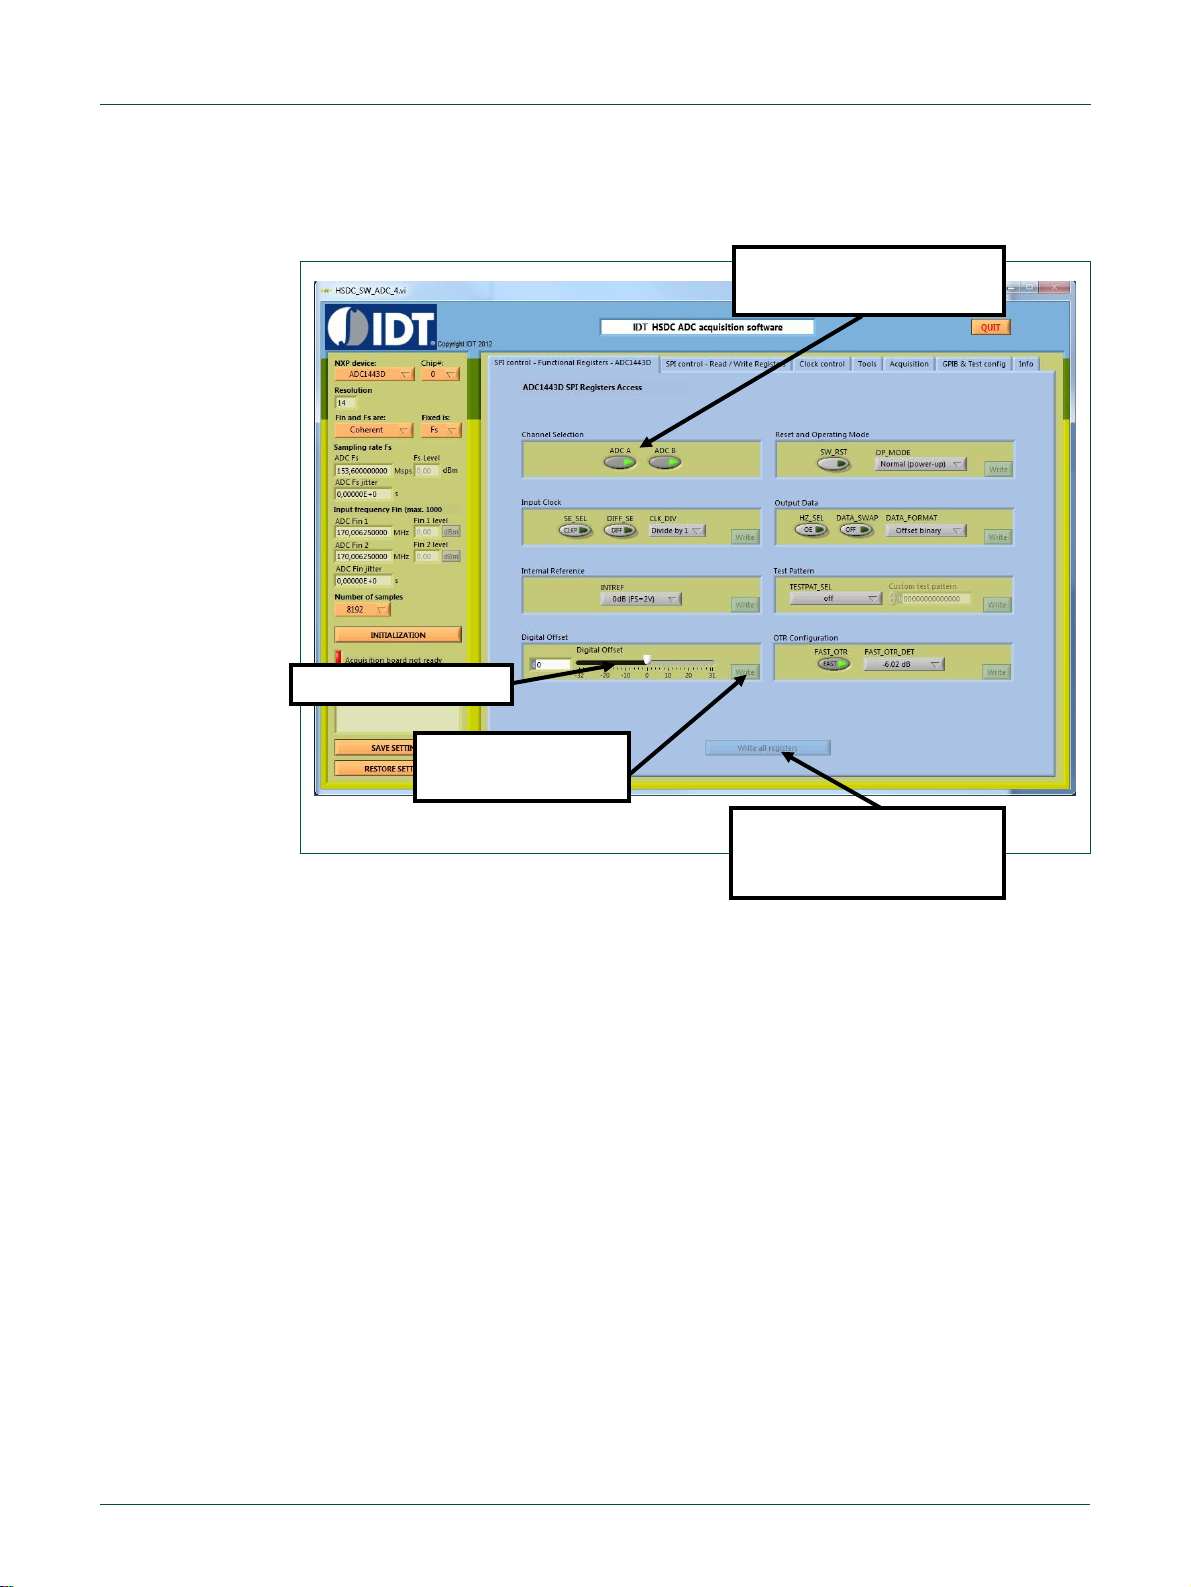
Fig 6. Functional Registers
1. Select the channels to
be modified
2. ‘Write all registers’
allow to send all the
values at the same time
3. Write the value
in the register
4. Modify the value
4.4 Functional Registers
Page 8

Integrated Device Technology
Quick start ADC1453D, ADC1159D evaluation board
Quick start
© IDT 2012. All rights reserved.
Quick start
VIII
Fig 7. Acquisition
2. If needed, the
performances can be
calculated over a
reduced bandwidth
6. Performances are
available in the table
5. Click acquire to process
data acquisition and
FFT processing
4. Select ‘Continuous
acquisition’ for real-time
processing
1. Select the channel to
display
1. If ‘Not coherent’, select
a window for procesing
4.5 Acquisition
In case of bad acquisition or when changing the sampling frequency, take care to reset
the FPGA by pushing on-board button PB3.
Page 9

Integrated Device Technology
Quick start ADC1453D, ADC1159D evaluation board
Quick start
© IDT 2012. All rights reserved.
Quick start
IX
1
Go to National Instruments web page http://joule.ni.com/nidu/cds/view/p/id/2087/lang/en
2
Download
‘LVRTE2010std.exe’
3
Save
4
Run the application ‘LVRTE2010std.exe’
5
OK
6
Unzip
5. Software and drivers install
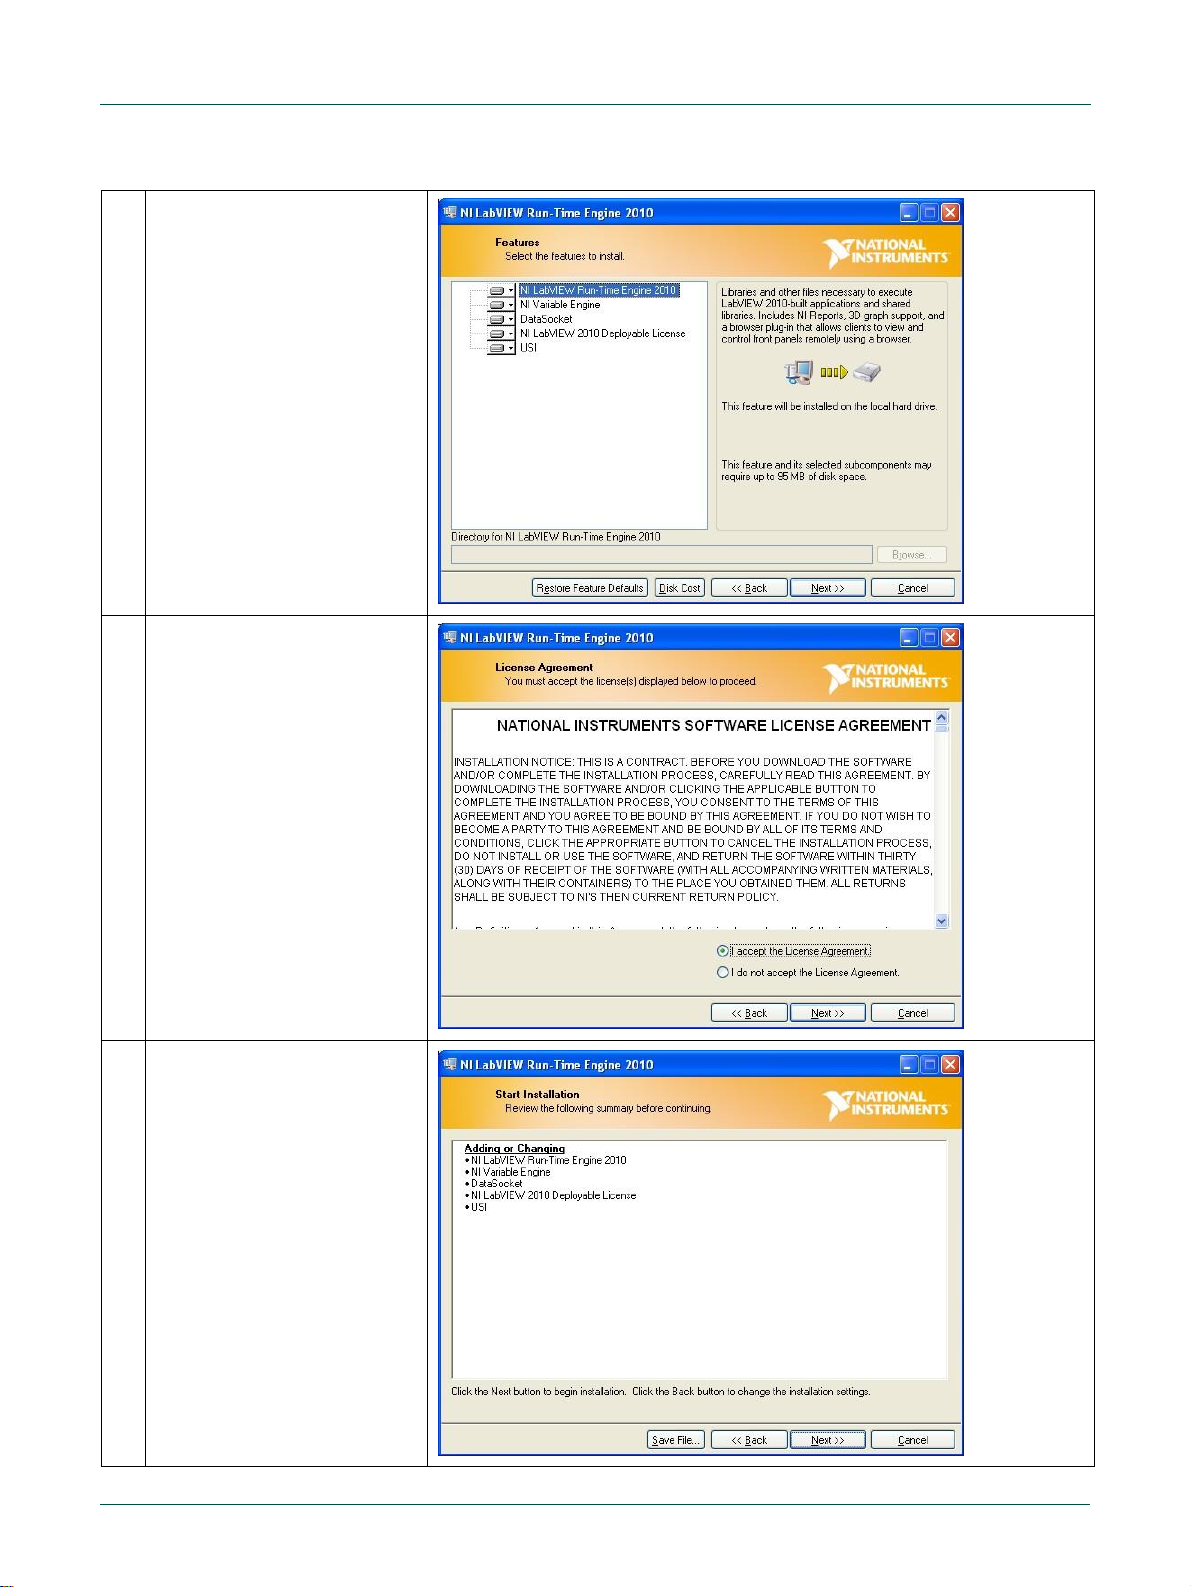
5.1 Labview Runtime 2010 install
Page 10

Integrated Device Technology
Quick start ADC1453D, ADC1159D evaluation board
Quick start
© IDT 2012. All rights reserved.
Quick start
X
7
OK
8
Next
9
Next
Page 11
Integrated Device Technology
Quick start ADC1453D, ADC1159D evaluation board
Quick start
© IDT 2012. All rights reserved.
Quick start
XI
10
Next
11
Select ‘I accept the License
Agreement’
Next
12
Next
Page 12

Integrated Device Technology
Quick start ADC1453D, ADC1159D evaluation board
Quick start
© IDT 2012. All rights reserved.
Quick start
XII
13
Finish
14
Restart
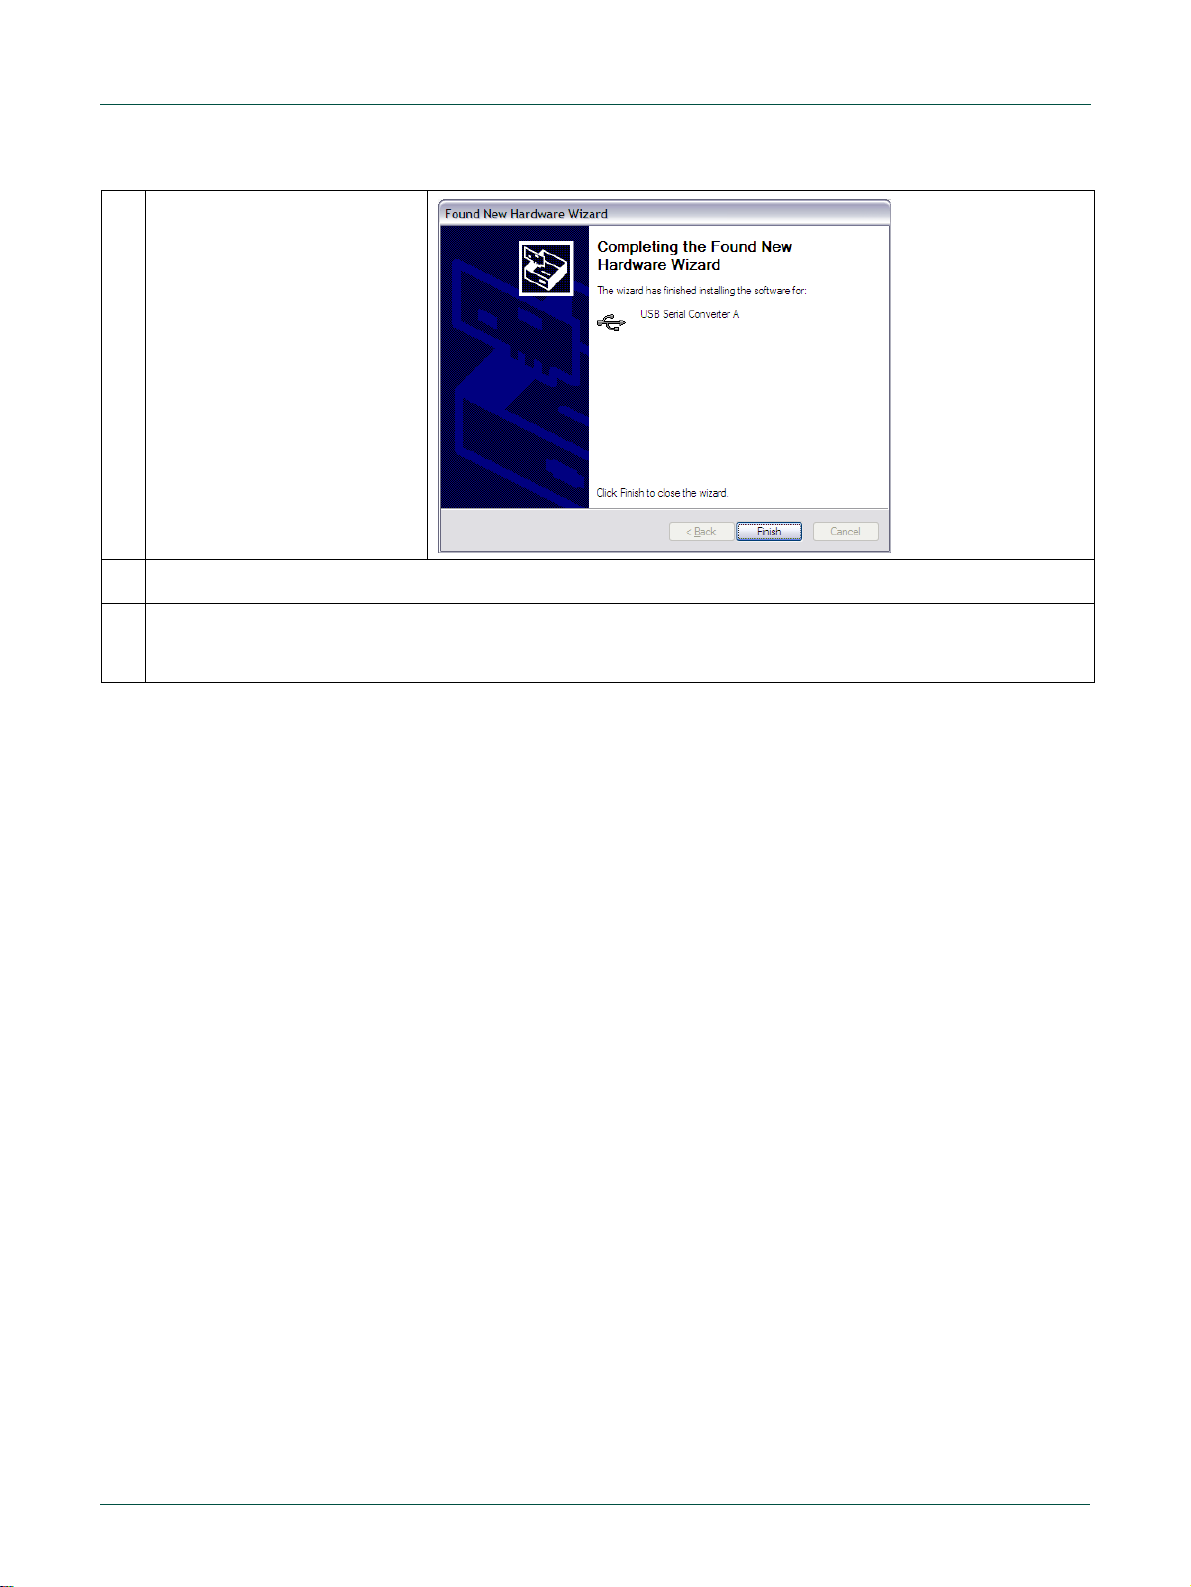
1
Plug the USB cable in the demoboard USB connector
2
The wizard will help to install the USB Serial Converter A
3
Select ‘Install from a list or
specific location’
Next
5.2 Demoboard - USB-SPI driver install
Page 13

Integrated Device Technology
Quick start ADC1453D, ADC1159D evaluation board
Quick start
© IDT 2012. All rights reserved.
Quick start
XIII
4
Select ‘Search for the best
driver in these locations’
Select ‘Include this location
in the search’
Browse
Select the folder
‘CDM2.08.12’
Next
5
Continue Anyway
(Windows XP only)
6
Browse
Select the file ‘ftdibus.sys’
in the folder
‘CDM2.08.12\i386’
OK
Page 14
Integrated Device Technology
Quick start ADC1453D, ADC1159D evaluation board
Quick start
© IDT 2012. All rights reserved.
Quick start
XIV
7
Finish
8
The wizard will help to install the USB Serial Converter B (same as USB Serial Converter A)
9
The wizard will help to install the USB serial port
The file ‘ftser2k.sys’ is in the folder ‘CDM2.08.12\i386’
Page 15

Integrated Device Technology
Quick start ADC1453D, ADC1159D evaluation board
Quick start
All rights reserved.
Date of release: Nov 14th 2013
Document identifier: QS_ADC1453D_ADC1159D_r01
 Loading...