

ididit Retrofit Steering Column 1967-69 Chrysler B-Body User Manual
Retrot Steering Column
INSTALLATION INSTRUCTIONS
for 1967-69 Chrysler B-Body
FOR PART NUMBER’S: 1300840010, 1300840020, 1300840051
www.ididitinc.com
610 S. Maumee St., Tecumseh, MI 49286
PH: (517) 424-0577 FAX: (517) 424-7293
Instruction # 8000000009 REV 10/12
(A)
(B)
(C)
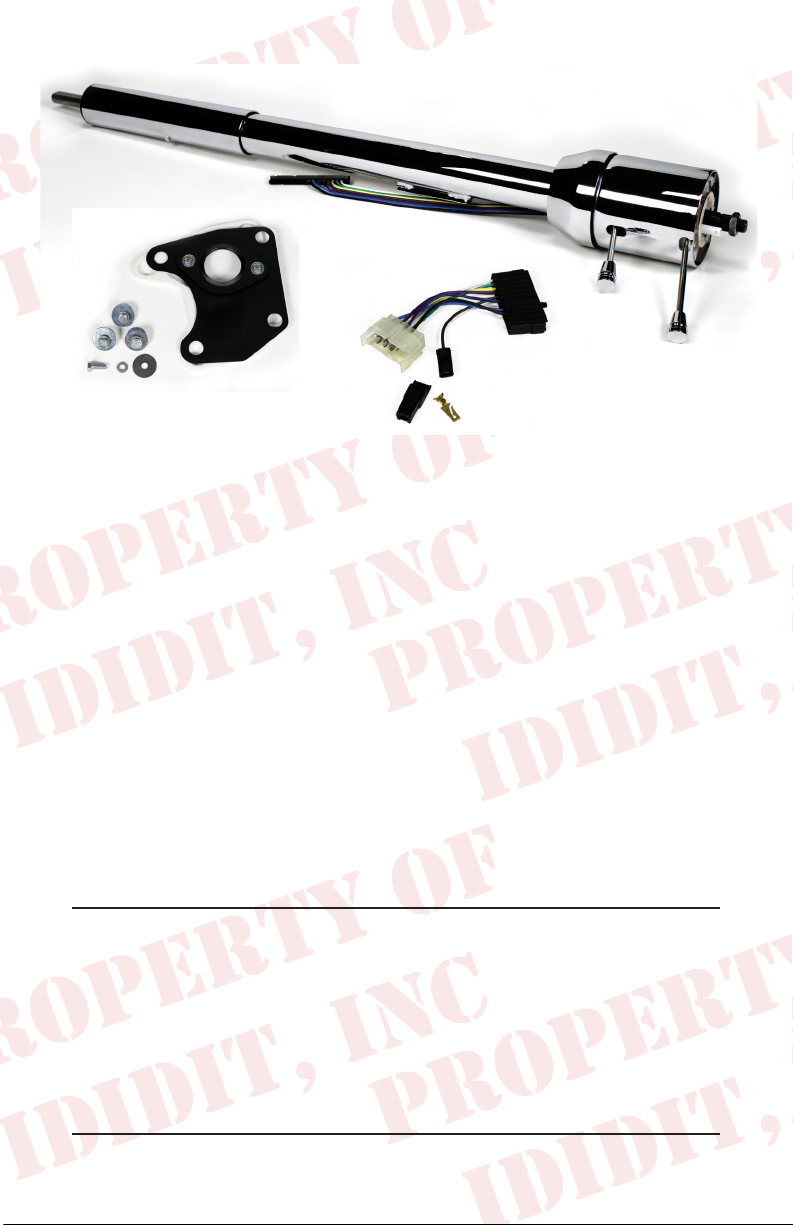
The ididit 1967-69 Chrysler B-Body Tilt Steering Column
comes complete with these components:
(A) Column (Chrome column pictured)
(B) Floor Mount & Hardware
(C) Wiring Adaptor
(D) Instructions & Dress Up Kit
We will work through this installation using all these parts. For
instruction purposes we will assume the vehicle is all original and
has a factory manual steering gear box and an OEM harness.
INDEX
OEM COLUMN REMOVAL ................................................... 1-2
INSTALLATION OF COLUMN .............................................. 2-4
ELECTRICAL INSTRUCTIONS ...............................................5
INSTALLATION OF KNOBS & LEVERS .............................. 5-6

OEM COLUMN REMOVAL:
Disconnect positive battery cable.
Drive out the roll pin in the coupler between
the steering column and the gear box. (Figure
1) These roll pins tend to be pretty stubborn,
to help loosen, try soaking them with a
penetrating oil. Be sure to use a punch that
is just a little under 5/16 of an inch. Using too
small of a punch will make this task very difcult.
Once the pin is removed, center the steering
wheel so the tires are pointing straight.
Next, take a Phillips head screw driver and
from inside the vehicle remove the two
screws that hold the lower cover under the
column. Once that is removed you will nd
the white or neutral colored plug that holds
the signal wires together. (Figure 2)
Carefully disconnect this plug. Use caution
as it may be brittle.
Figure 1
Figure 2
First, loosen the two bolts that keep the
oor mount held together (Figure 3,
Step 1). Then remove the four bolts that
hold the oor mount to the oor (Figure
3, Step 1). You will have to gently pry
the seal loose as these tend to stick to
the rewall. We won’t be reusing the
gasket so you don’t need to worry about
damaging it.
Figure 3
The next item that will need to be removed is the underdash mount. There
are three bolts that hold the mount to the dash. NOTE a ground wire is
attached to the bolt located on the left hand side. Disconnect this ground
wire at the dash side.
For the following, it may be benecial to have a helper give you a
hand under the hood while you are inside the vehicle. The joint that
is attached to the OEM column may need some persuasion in order to
detach it from the box. Make sure your helper has a hammer handy.
1
 Loading...